How to list a vehicle
Listing a vehicle on DealerClub requires completing several required sections, including VIN import, image uploads, vehicle condition details, reserve pricing, and auction scheduling. Accurate information and complete disclosures ensure your listing meets platform requirements and allows buyers to assess value and condition before bidding.
In this article, you’ll learn how to create a new auction listing, upload required images, complete vehicle details and condition sections, set a reserve price, and schedule your auction. You’ll also learn how to save your work and return to incomplete listings.
To get started
Go to the Cars.com Hub and then click on DealerClub.
1Create a new auction listing
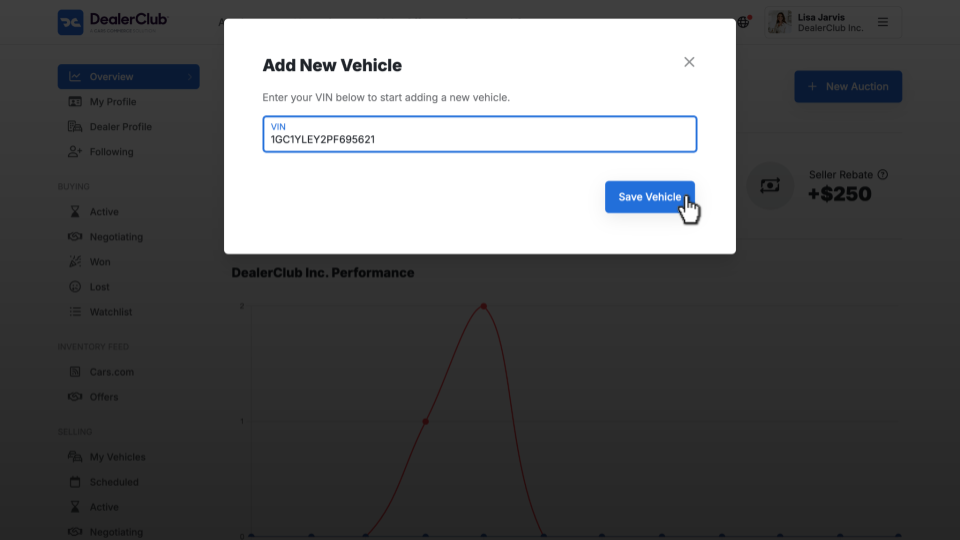
- Click + New Auction to begin.
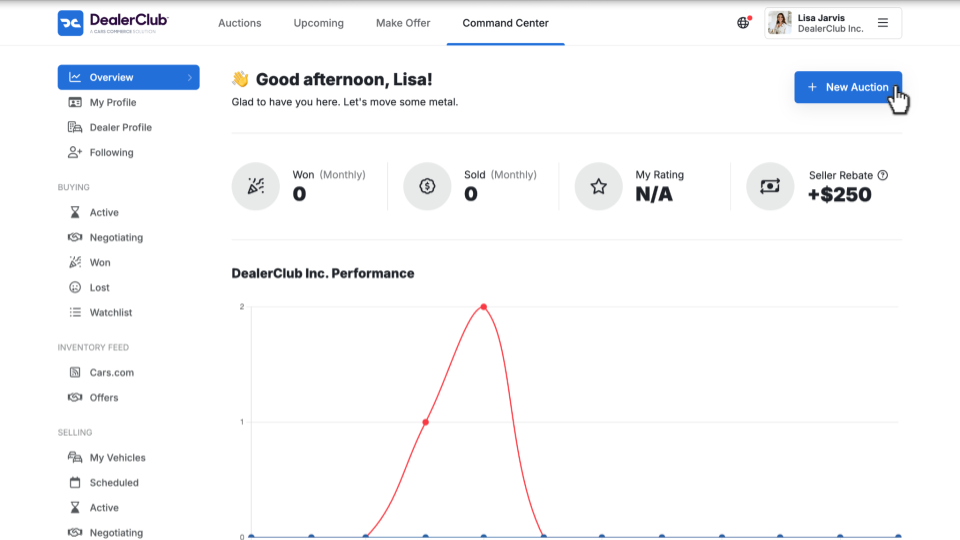
- Enter the vehicle’s VIN.
- Click Save Vehicle.
DealerClub may automatically populate vehicle information based on the VIN. Review all auto-filled details carefully and correct any inaccuracies before proceeding.
You will then be taken to the listing workflow screen.
2 Upload a photo of the VIN (required)
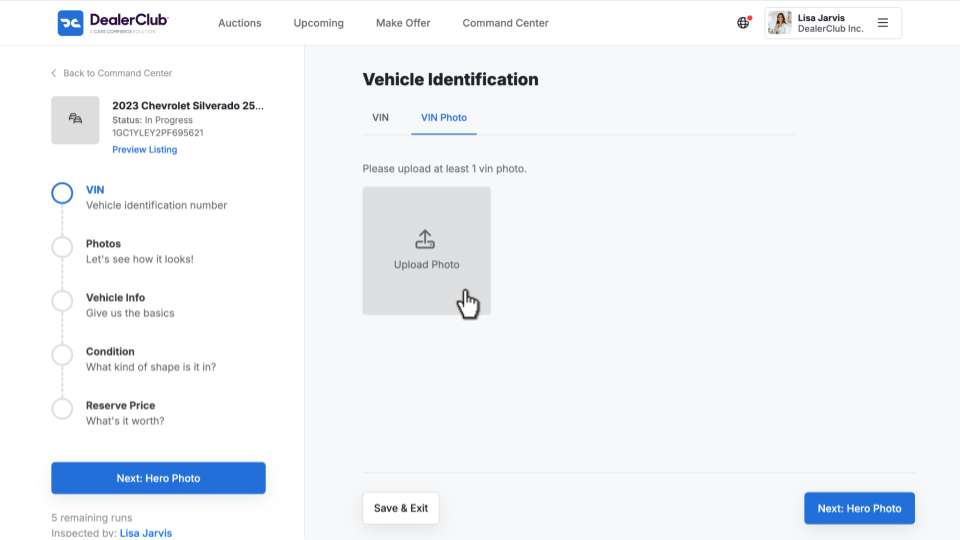
A photo of the vehicle’s VIN is required before proceeding.
- On the checklist panel, locate the VIN Photo section.
- Click Upload Photo.
- Ensure the VIN photo is clear, well-lit, and taken from the inside door jamb.
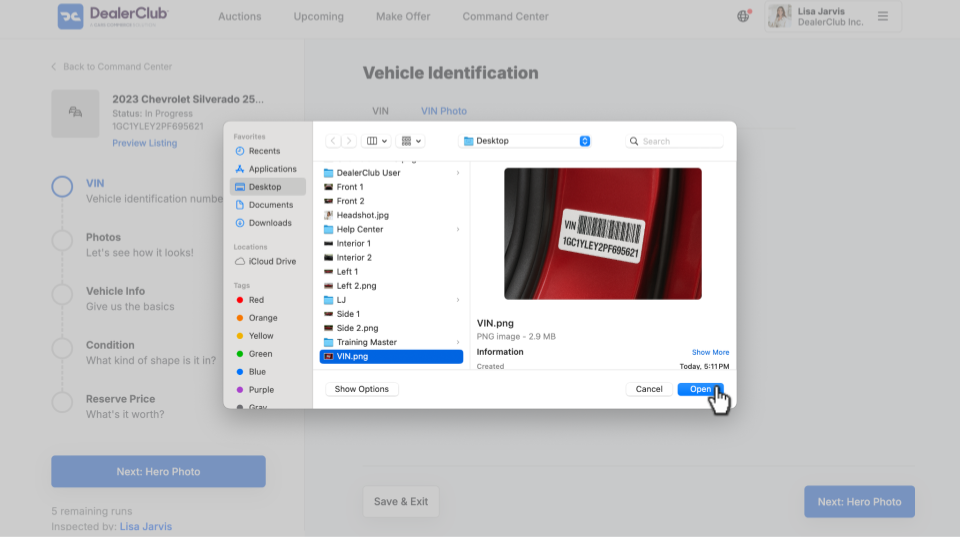
- Select the image file from your computer.
- Click Open.
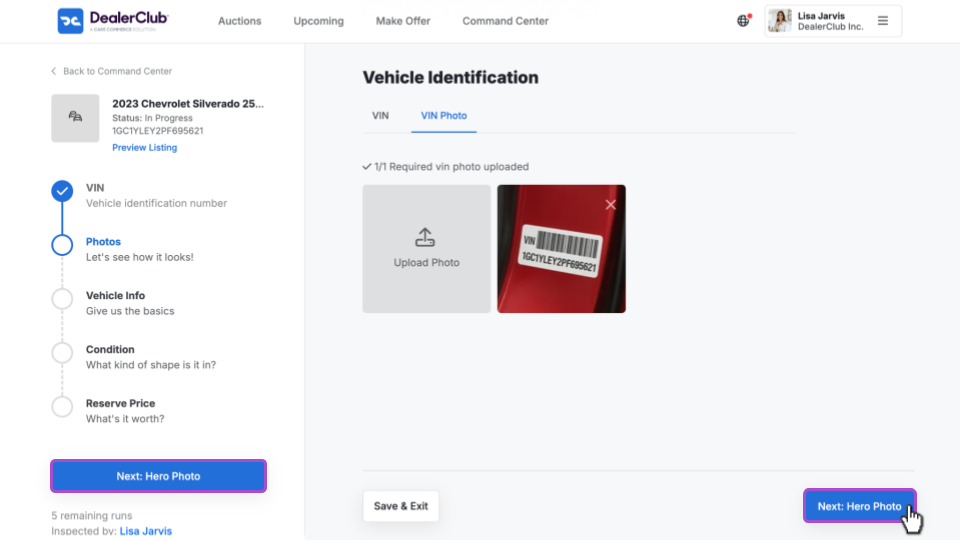
If the upload is successful, the image will appear on the screen.
Once complete, click the blue Next button to proceed to the Hero Photo section.
3 Upload vehicle images
DealerClub requires the following minimum images before you can complete your listing:
- 1 Hero Image
- 10 Exterior Photos
- 10 Interior Photos
You may upload additional photos beyond the minimum.
Upload the Hero Image (Required)
The first required image is the Hero Image.
Click Upload in the Hero Image section.
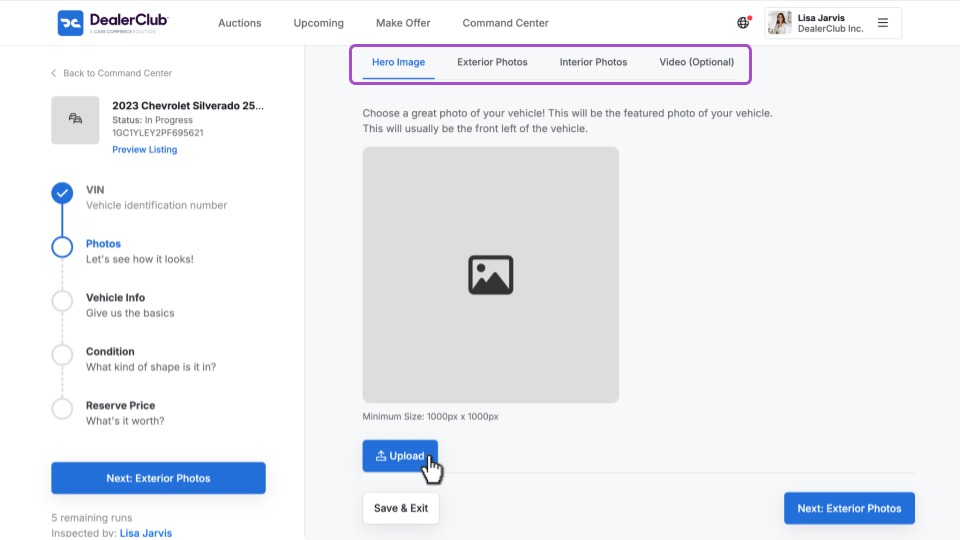
- Select your image file.
- Click Open.
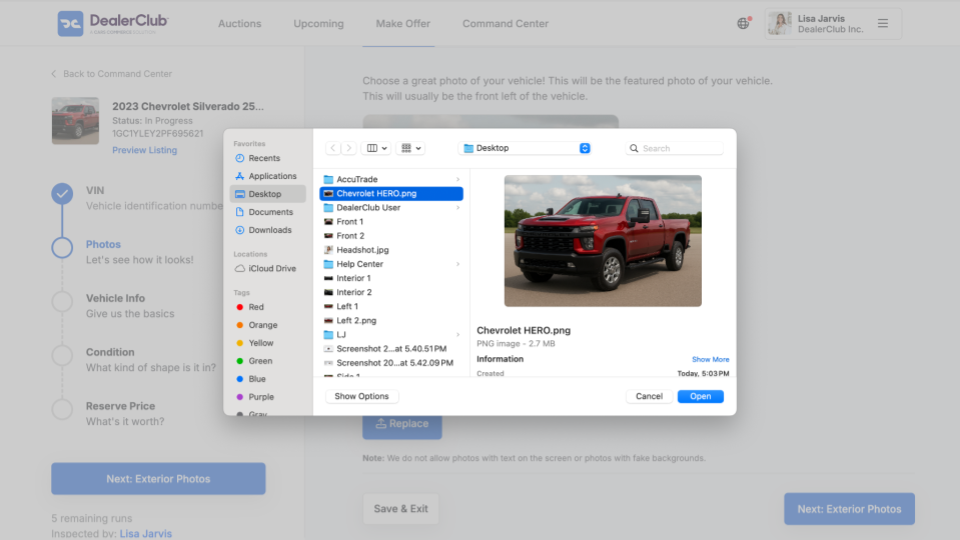
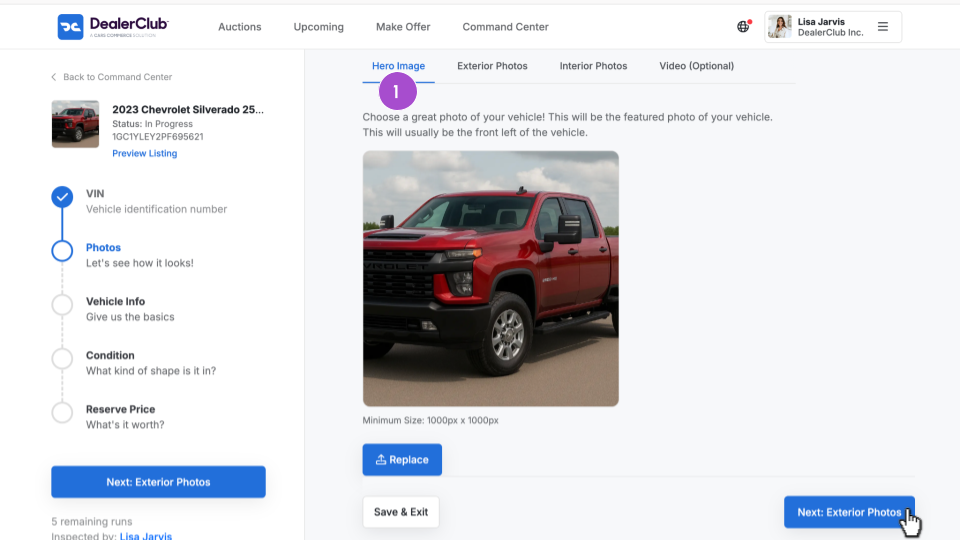
After uploading, you may replace the image if needed.
Click Next: Exterior Photos to continue.
Recommended: Use a high-resolution, well-lit three-quarter front or rear driver-side view.
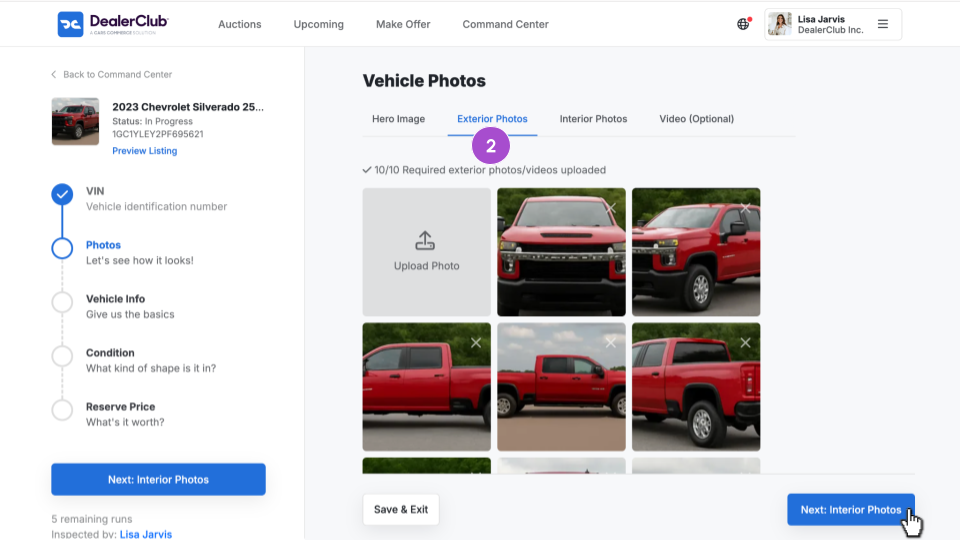
Upload Exterior Photos (Minimum: 10 Required)
- Click Upload in the Exterior Photos section.
- Select images from your computer.
- Repeat until at least 10 exterior images are added.
The system may prevent you from moving forward if the minimum image requirement is not met.
Note: Be sure to point out any damage to the vehicle or appealing features to create an honest and transparent listing.
Click Next: Interior Photos once complete.
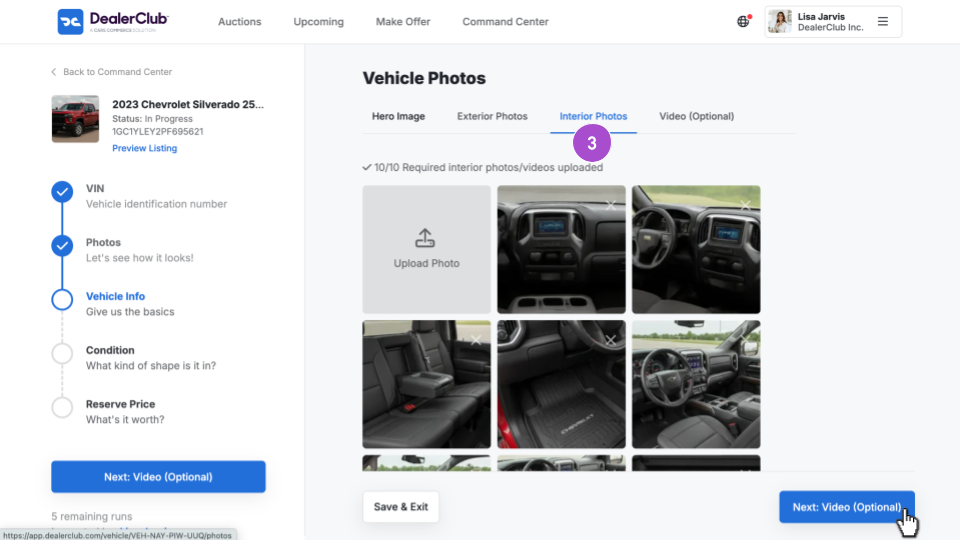
Upload Interior Photos (Minimum: 10 Required)
- Click Upload in the Interior Photos section.
- Add at least 10 interior images.
Include clear photos of:
- Dashboard
- Front seats
- Rear seats
- Gauges and odometer
- Infotainment screen
Click Next once the minimum is met.
Upload a Vehicle Video (Optional)
You may upload a walk-around video of the vehicle.
This step is optional. If you choose not to upload a video, click Next to continue.
4 Complete vehicle information
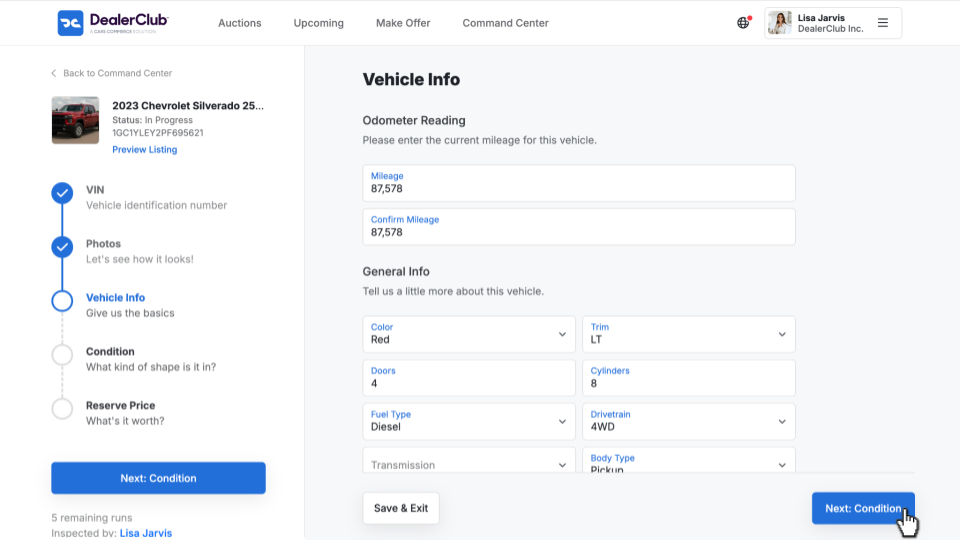
On the Vehicle Info page:
- Confirm or edit auto-populated vehicle details.
- Enter the mileage (odometer reading).
- Complete any required fields.
Required fields must be completed before proceeding. Review all information carefully for accuracy.
Click Next: Condition to continue.
5 Complete vehicle condition sections
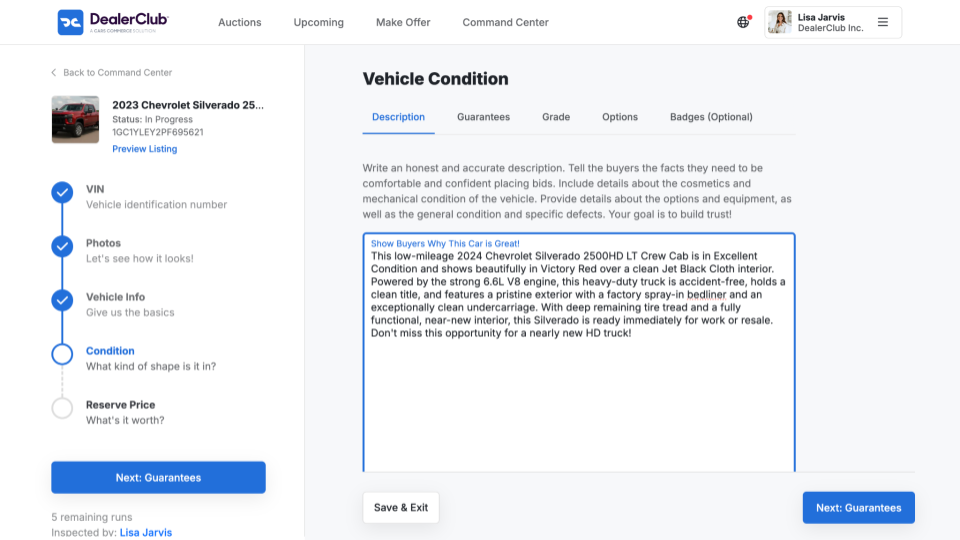
You will complete several condition-related sections. Some selections may require additional detail.
Sections may include:
- Description
- Guarantees
- Grade
- Options
- Badges (Optional)
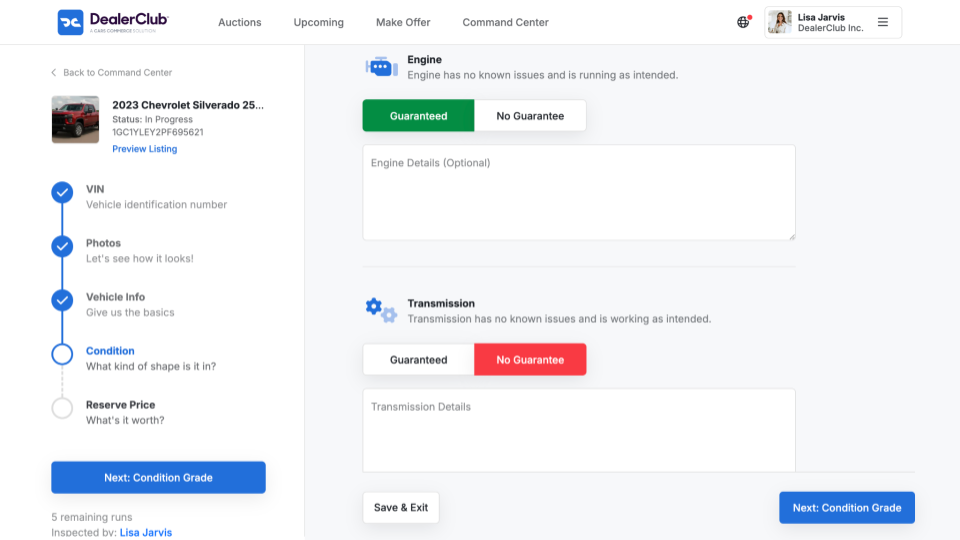
Guarantees
When marking a feature or condition as “Guaranteed,” you may be prompted to provide additional detail.
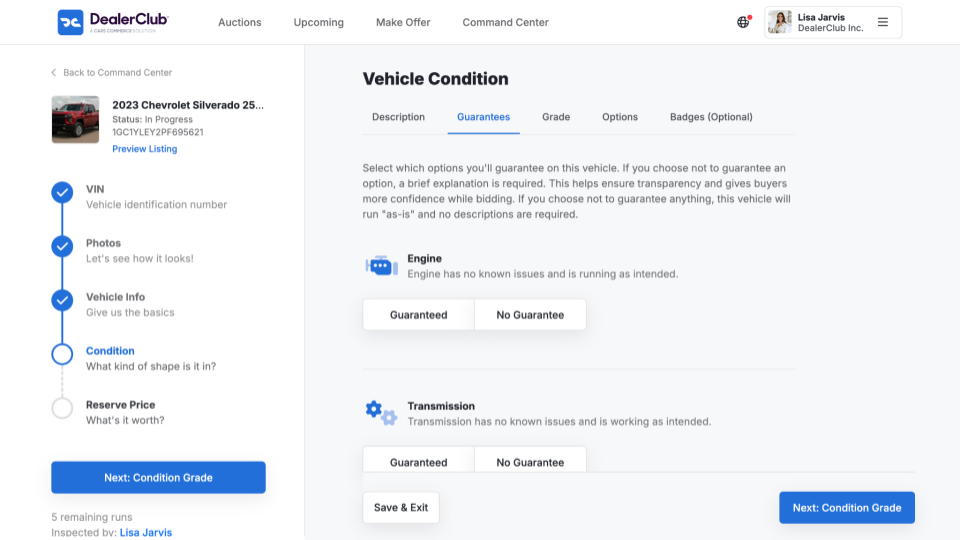
If you choose not to guarantee a feature, you will be required to explain why. Complete all required explanation fields before continuing.
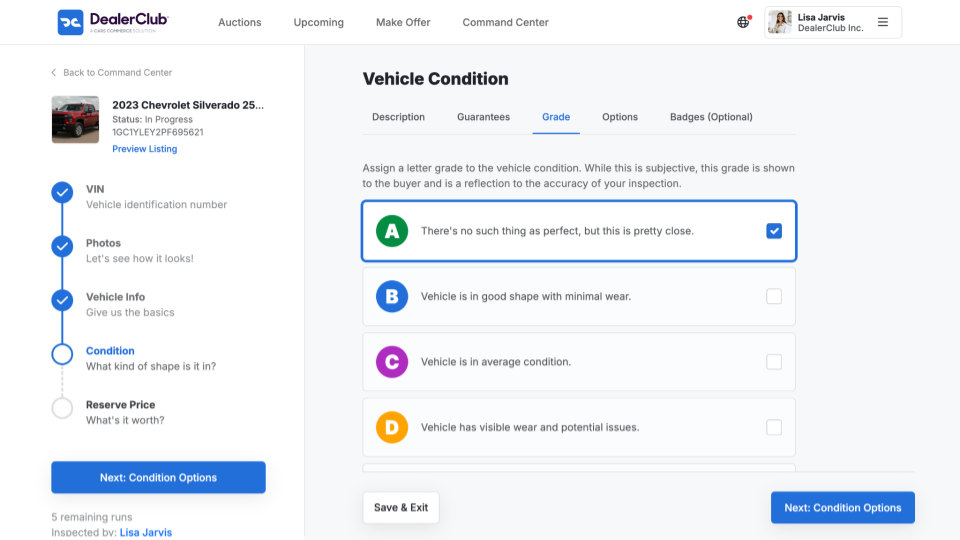
Grade
Select the overall grade score that reflects the vehicle’s condition according to platform grading guidelines.
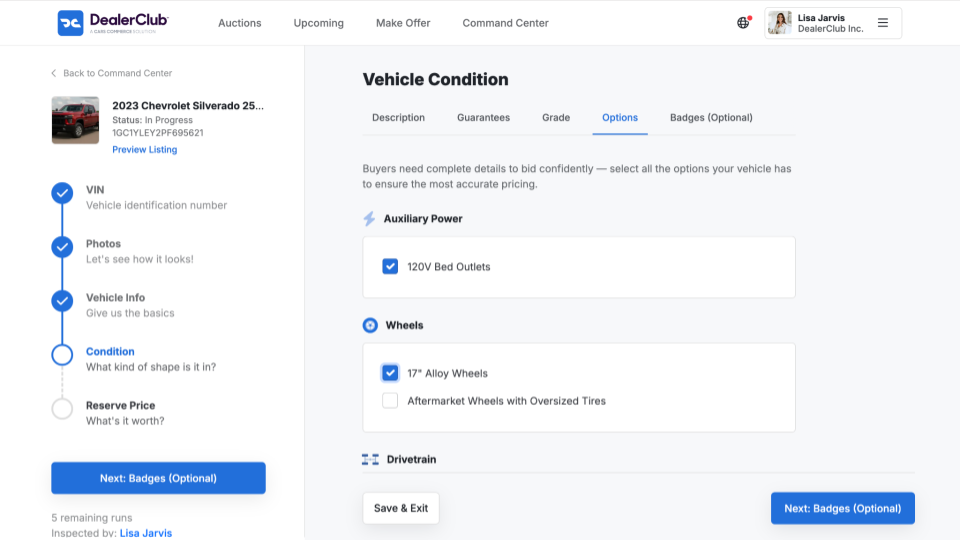
Options
Highlight relevant factory options or features.
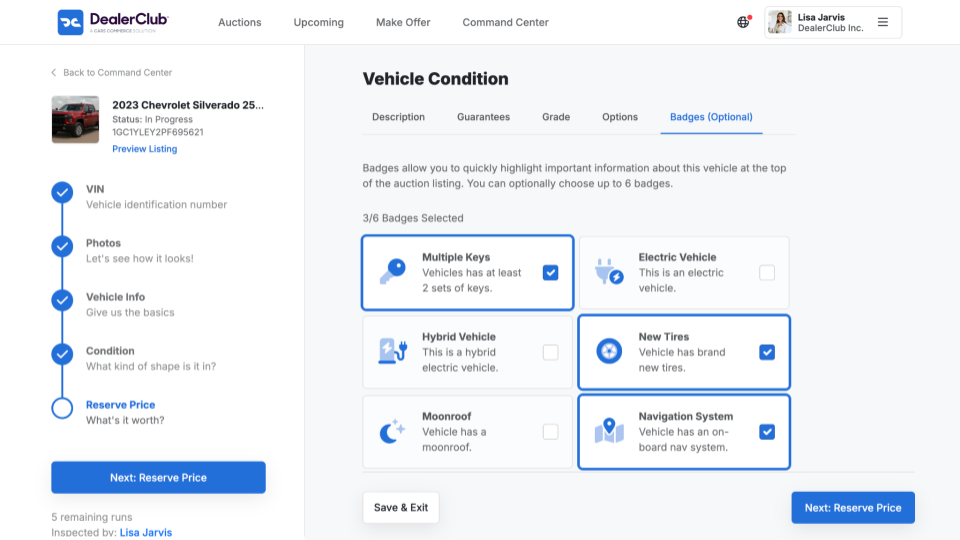
Badges (Optional)
You may add badges to call attention to notable features (for example, new tires or multiple keys). This section is optional unless otherwise required by the system.
Continue clicking Next until all required condition sections are complete.
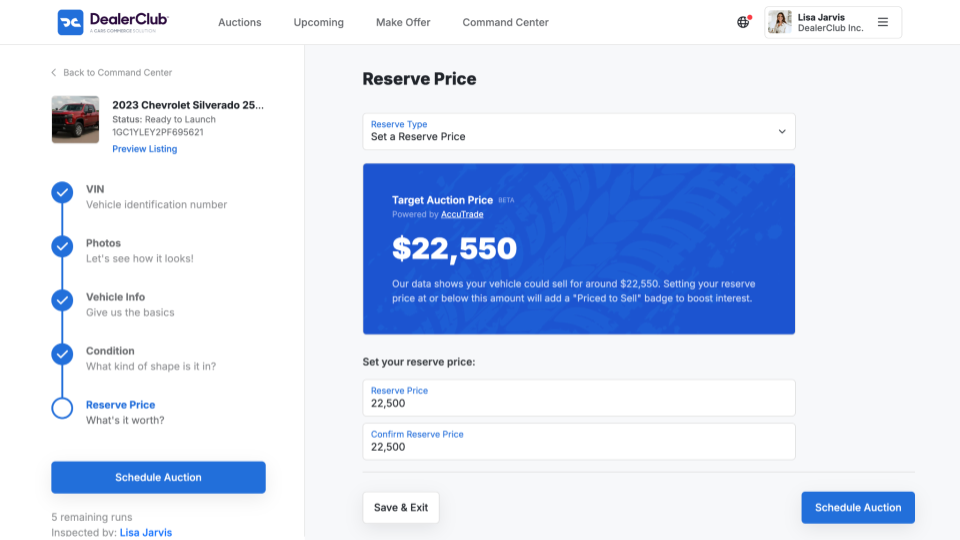
6 Set reserve and schedule the auction
Choose your Reserve Type.
If you select Set a Reserve Price, the system may display a target auction price powered by AccuTrade.
- Enter your Reserve Price.
- Confirm the amount.
- The system may display indicators based on how your reserve compares to the suggested target price.
Click Schedule Auction.
Confirm Listing Details
A confirmation window will appear.
- Review all listing details carefully.
- Toggle the confirmation switch indicating the information is accurate.
- Proceed to configure auction details.

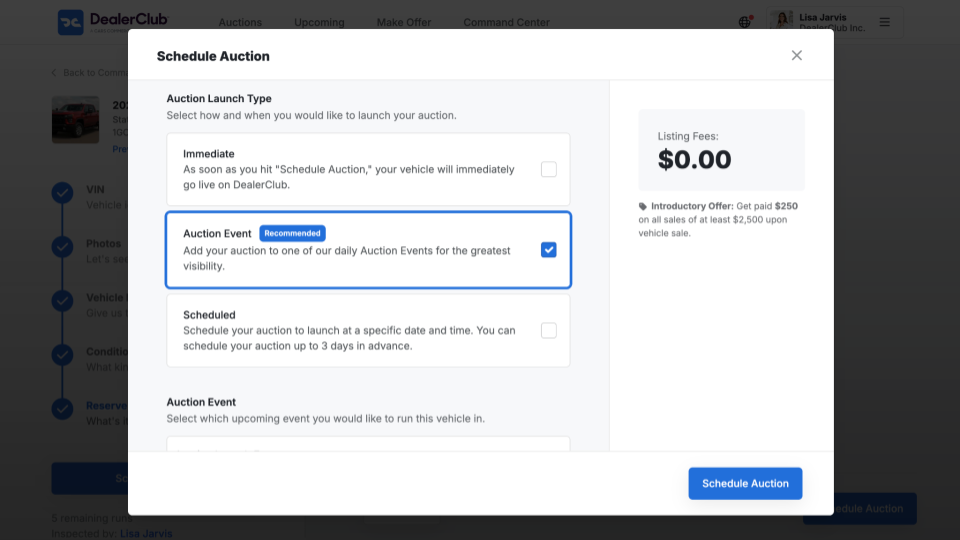
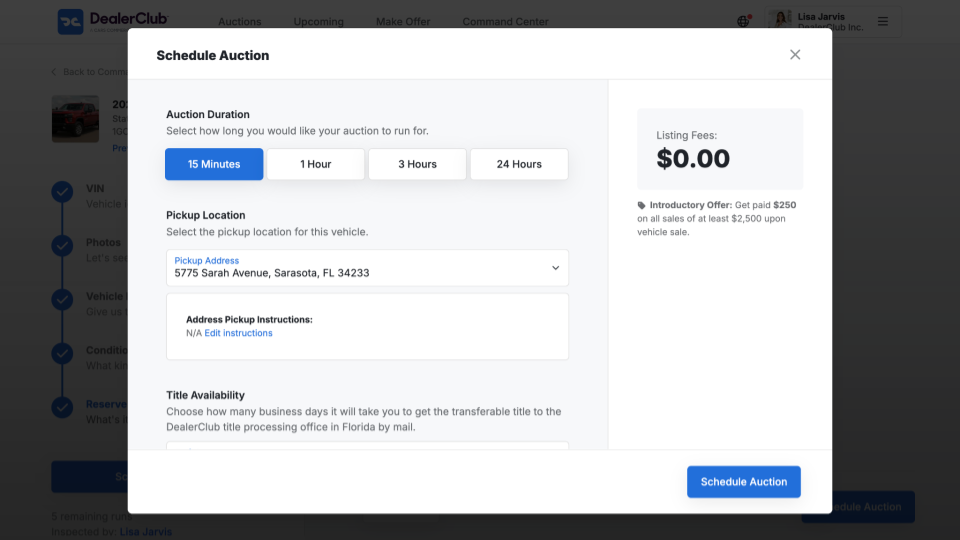
Configure Auction Settings
Complete the required auction setup fields, which may include:
Auction Event
Duration and Location
Title Availability, Brands, and Guarantees
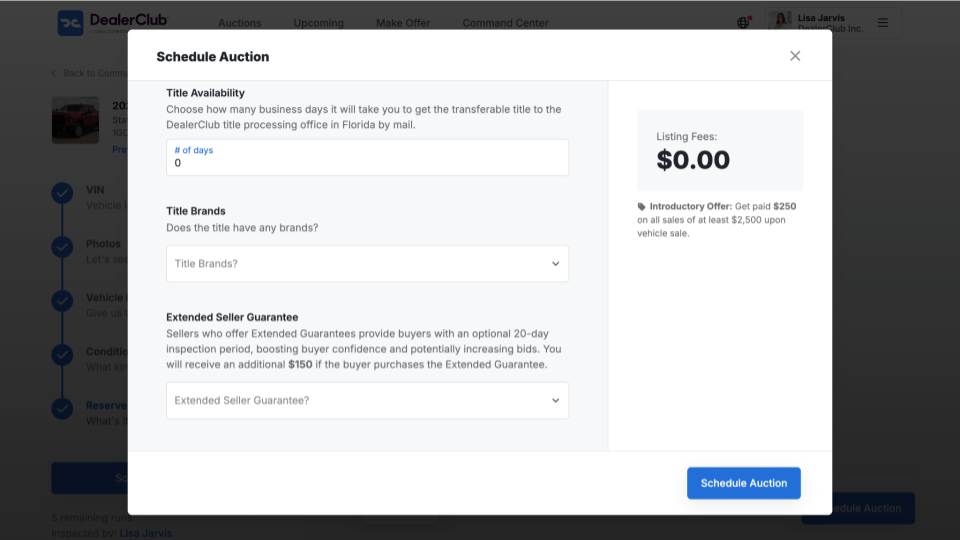
When ready, click Schedule Auction to publish the listing.
If required sections are incomplete, the system will prompt you to complete them before proceeding.
7 Save and return to your listing
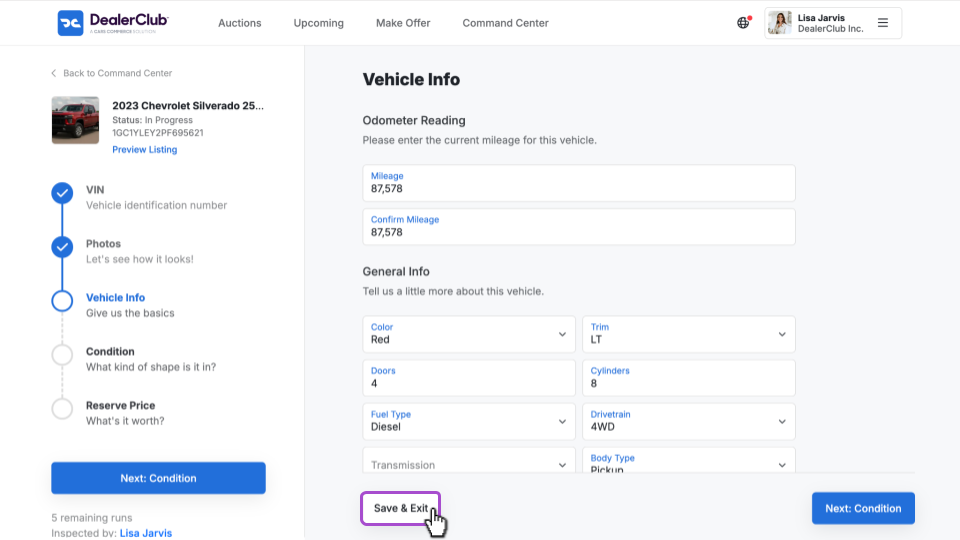
At any time during the listing process, click Save & Exit to save your progress.
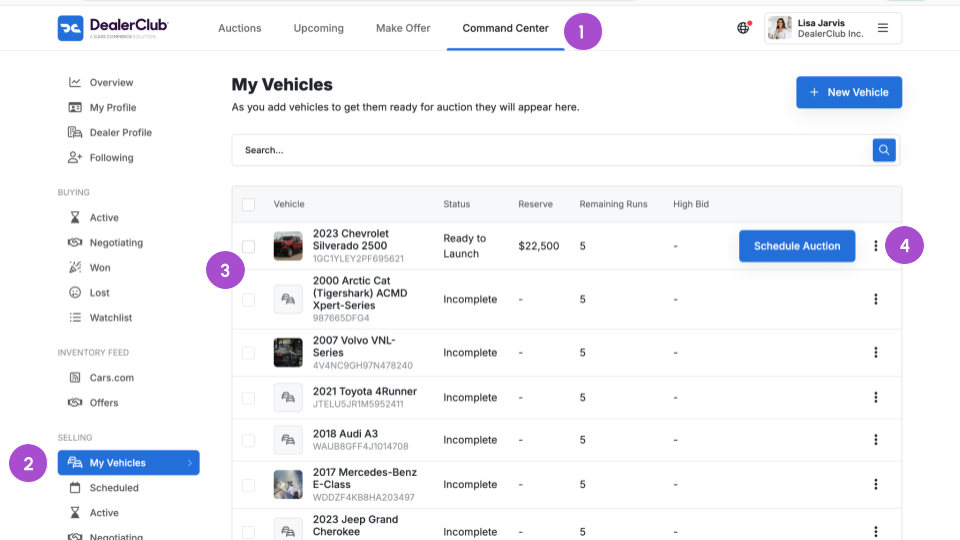
To return to your listings:
- Click Command Center.
- Select My Vehicles.
- Locate your listing under Active, Incomplete, or Ready to Launch.
- Click into the listing to continue editing or schedule the auction.
Listing Best Practices
The following guidelines are recommended to improve listing clarity and buyer confidence. These are best practices unless otherwise noted as required.
Vehicle Images
Minimum Requirements (Required to Publish)
- 1 Hero image
- 10 Exterior images
- 10 Interior images
Recommended Guidelines
Quantity and Variety
- Upload 20+ total images when possible.
- Capture all angles of the vehicle.
Exterior Must-Have Shots
- Driver-side front three-quarter (Hero)
- All four side profiles
- Straight-on front and rear
Interior Must-Have Shots
- Dashboard
- Front and rear seating
- Gauges and odometer
- Infotainment screen
Mechanical & Detail Shots
- VIN plate
- Engine bay
- Tires and tread depth
Photo Quality
- Use high-resolution images.
- Avoid harsh shadows and glare.
- Use a neutral background.
- Ensure the vehicle is clean before photographing.
Document All Imperfections
Photograph any visible damage, including:
- Paint chips
- Dents
- Interior wear
- Wheel damage
Transparency helps buyers assess risk accurately.
Vehicle Descriptions
Your description should be structured and easy to scan.
Include Essential Information
- Year, Make, Model, Trim
- Exterior and Interior Color
- Mileage
- Engine, Transmission, Drivetrain
- Title status
- Accident or damage history (if applicable)
Condition Details
Clearly list:
- Overall condition summary
- Mechanical notes
- Known imperfections
Ensure the written description matches:
- Photos
- Condition Report
- Guarantee selections