How to add Banners to VRPs
Banners are a great way to highlight featured vehicles, promotions, or seasonal events directly on your Vehicle Results Pages (VRPs). You can add full-width image sliders or HTML-based banners to enhance the browsing experience and guide shoppers toward high-value inventory or actions.
In this article, you’ll learn how to add and configure custom and slider banners to your Lightning VRP, including how to set their position, schedule display timing, manage multiple banners, and preview your changes.
Note: Before you continue, make sure you have the appropriate DI Slider set up. You’ll need it available in order to continue.
To get started
Go to the Cars.com Hub. Click Dealer Inspire, then Manage Website.
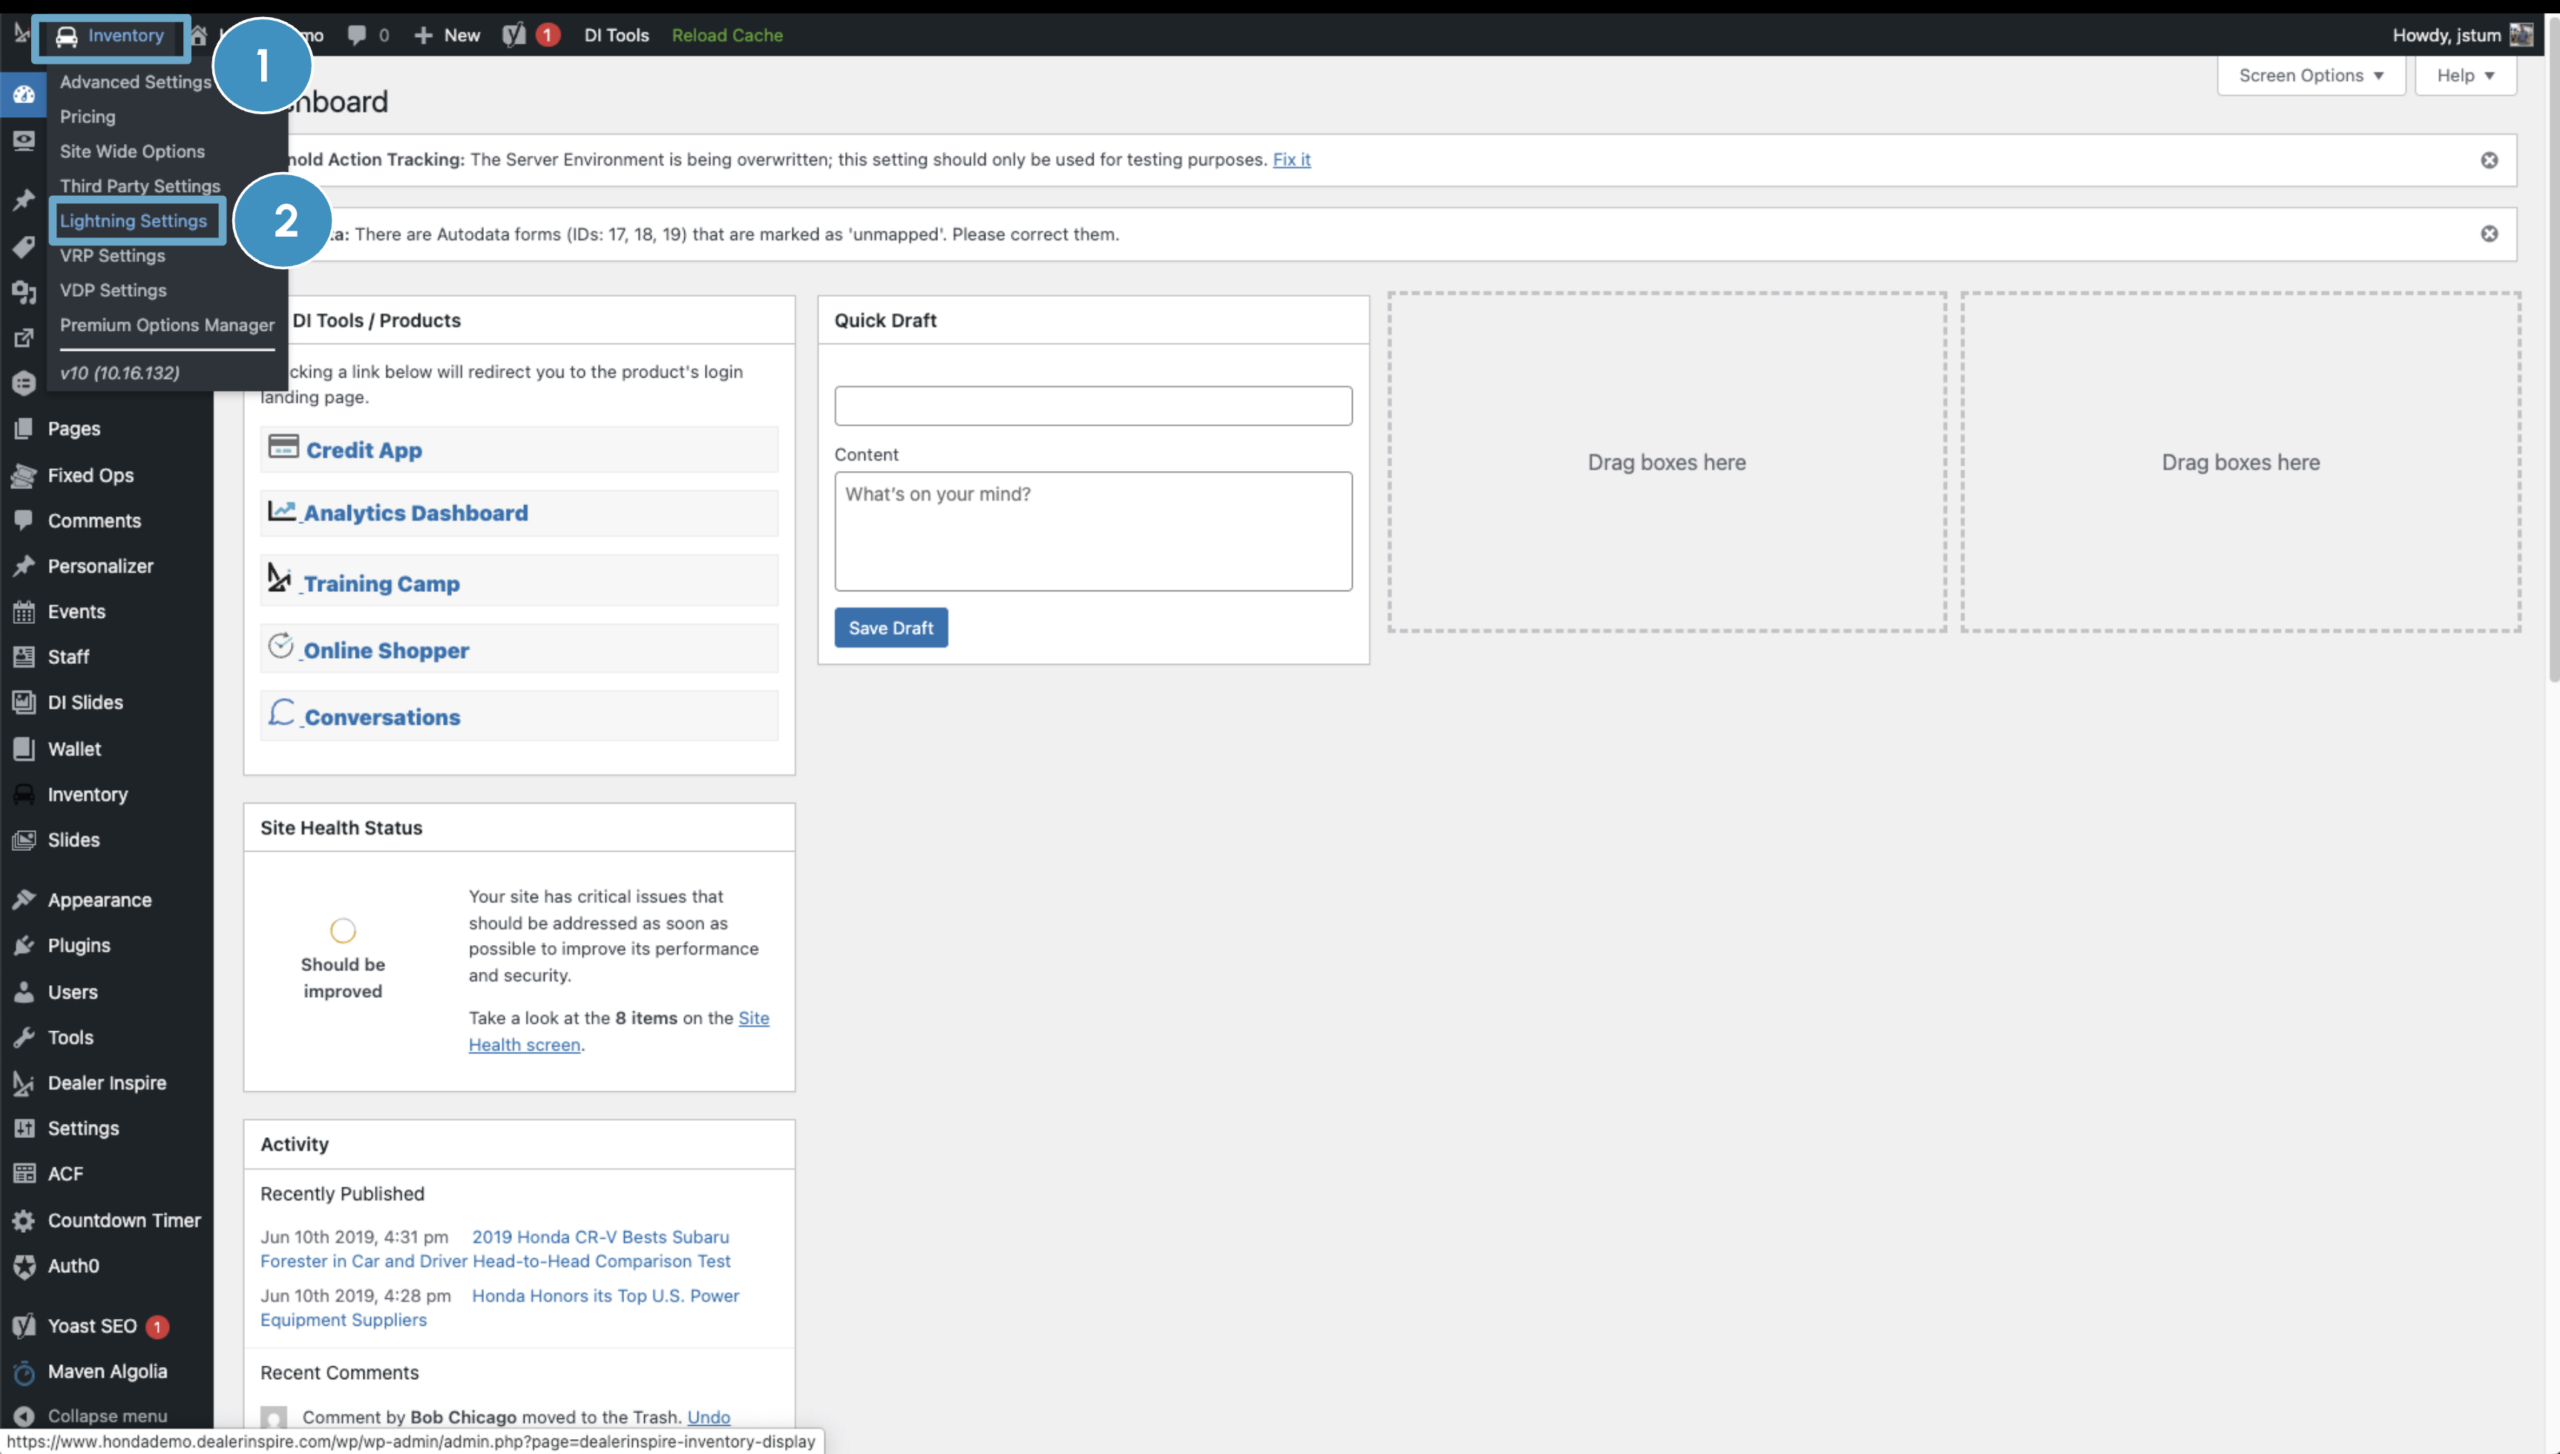
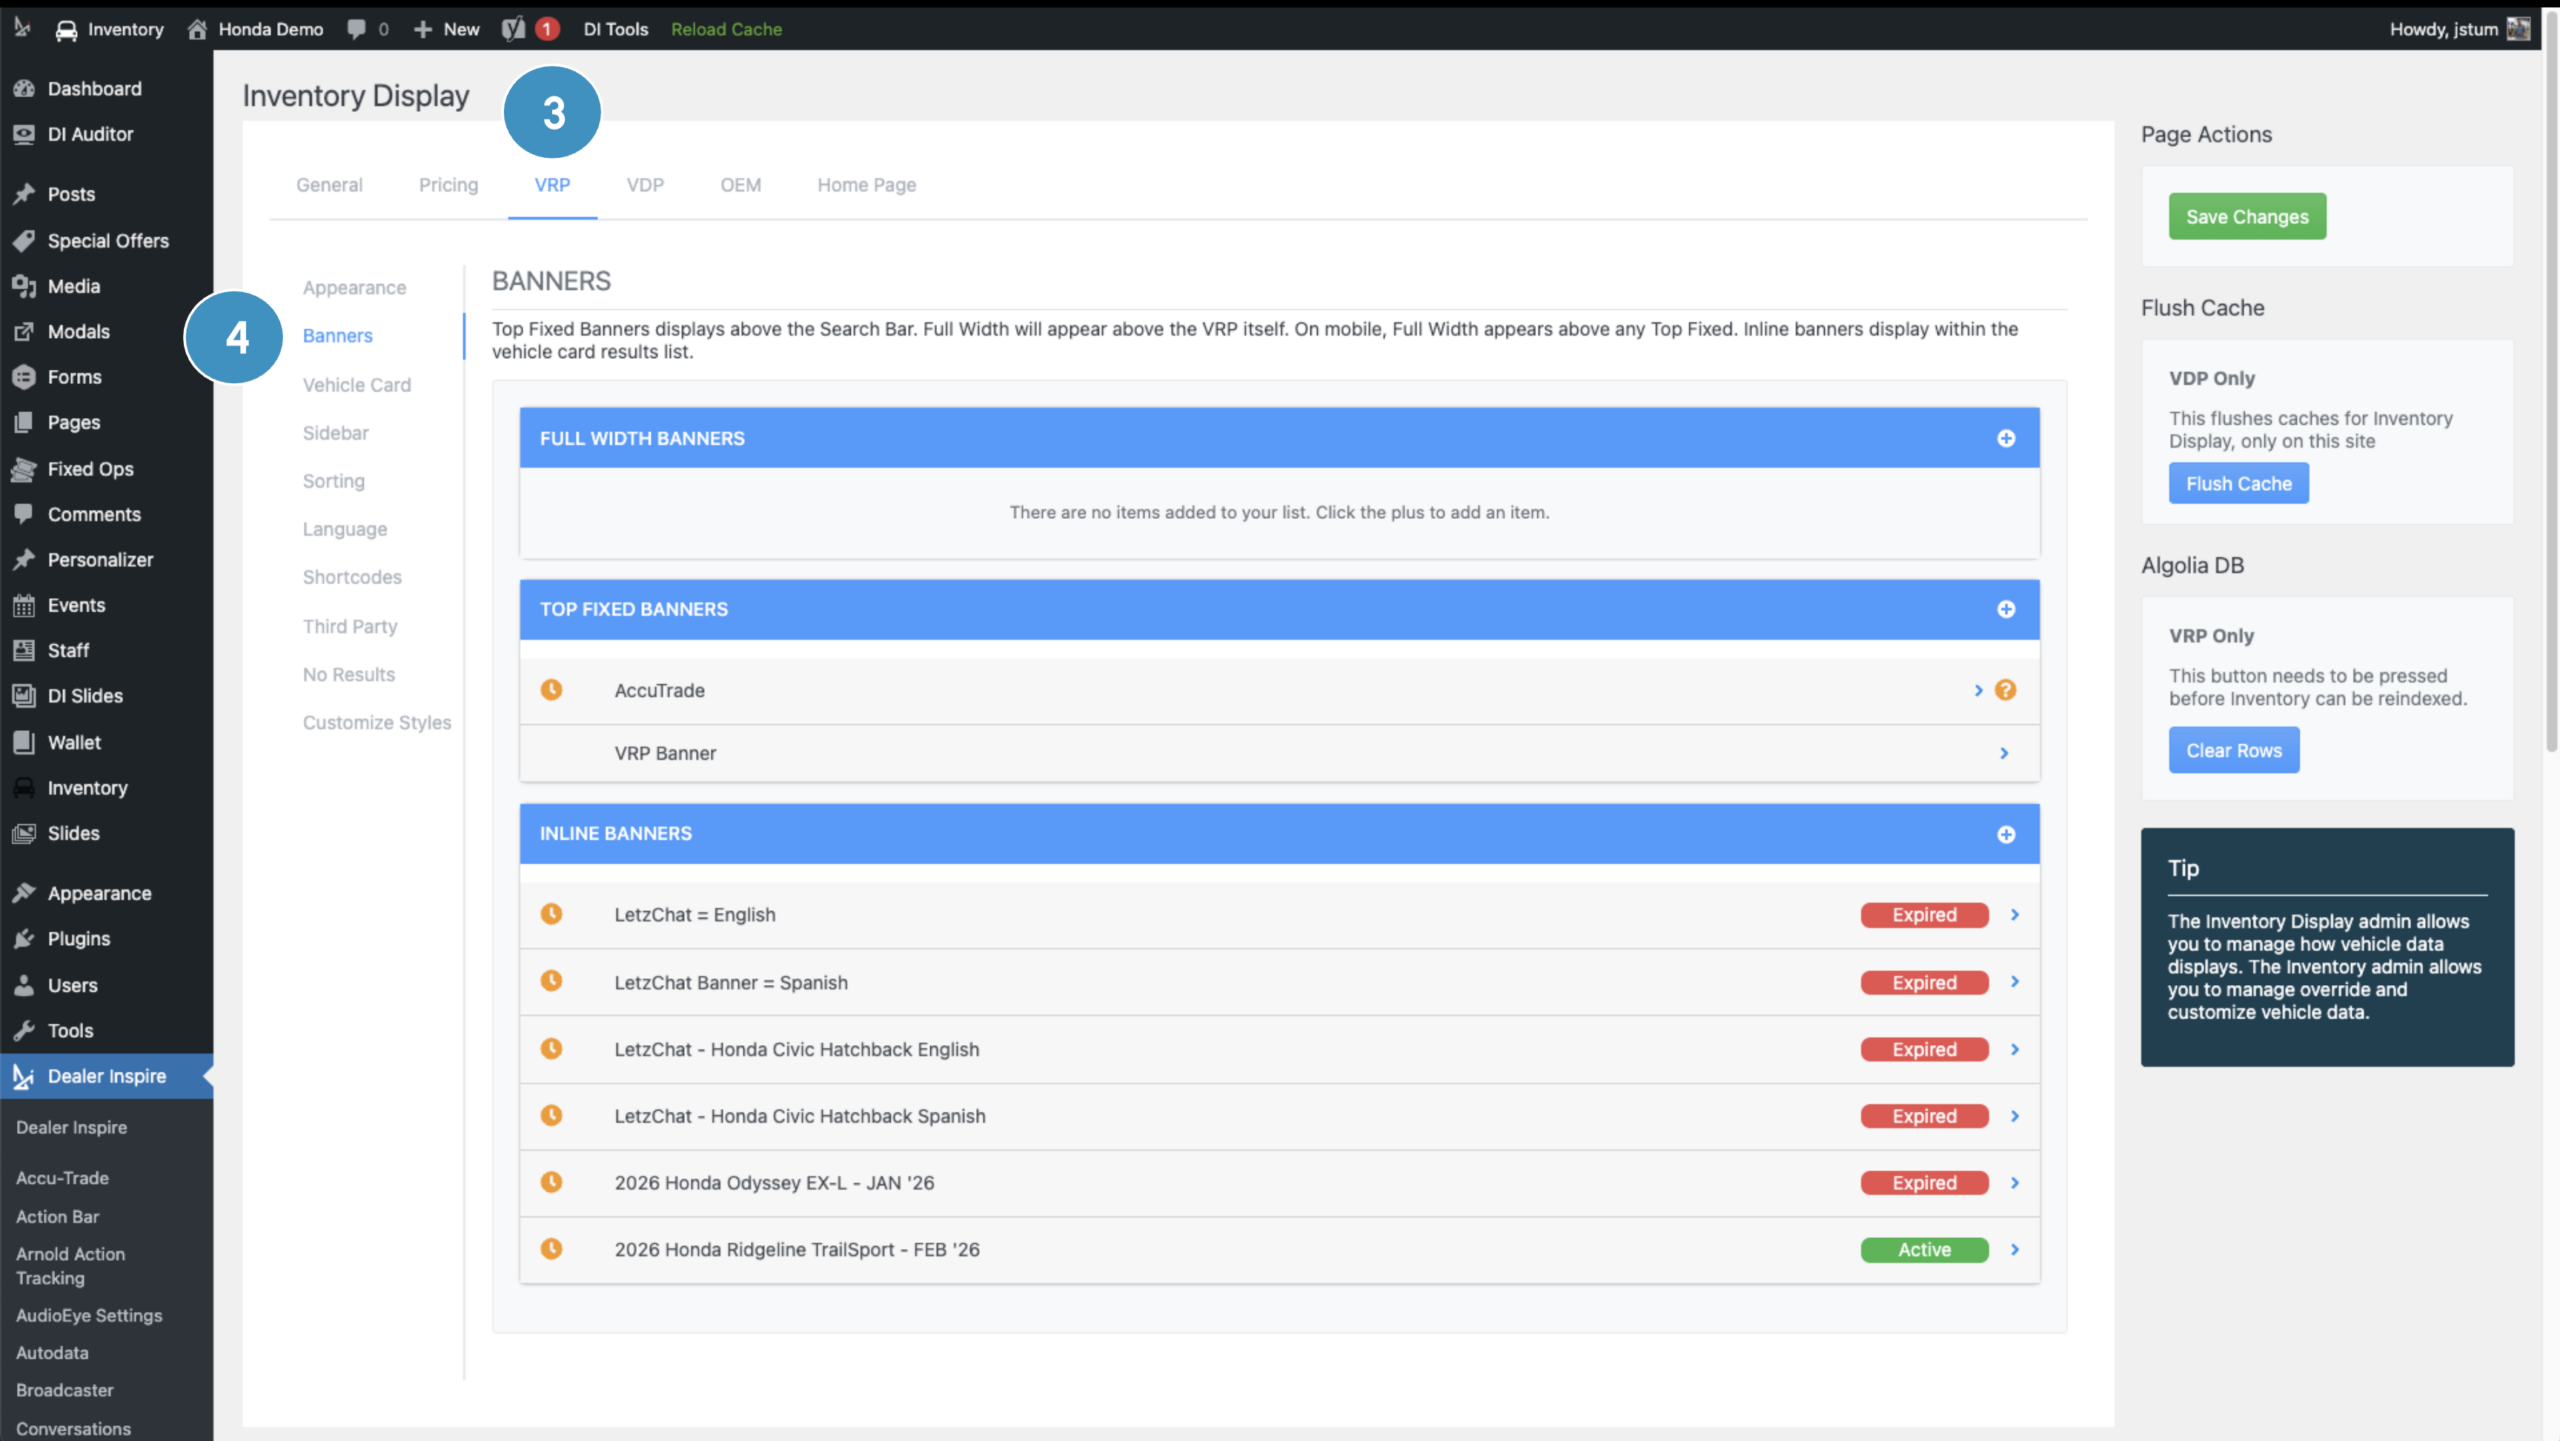
1 Navigate to the VRP Lightning Settings
- Hover over the Inventory tab in the main navigation.
- Click on Lightning Settings.
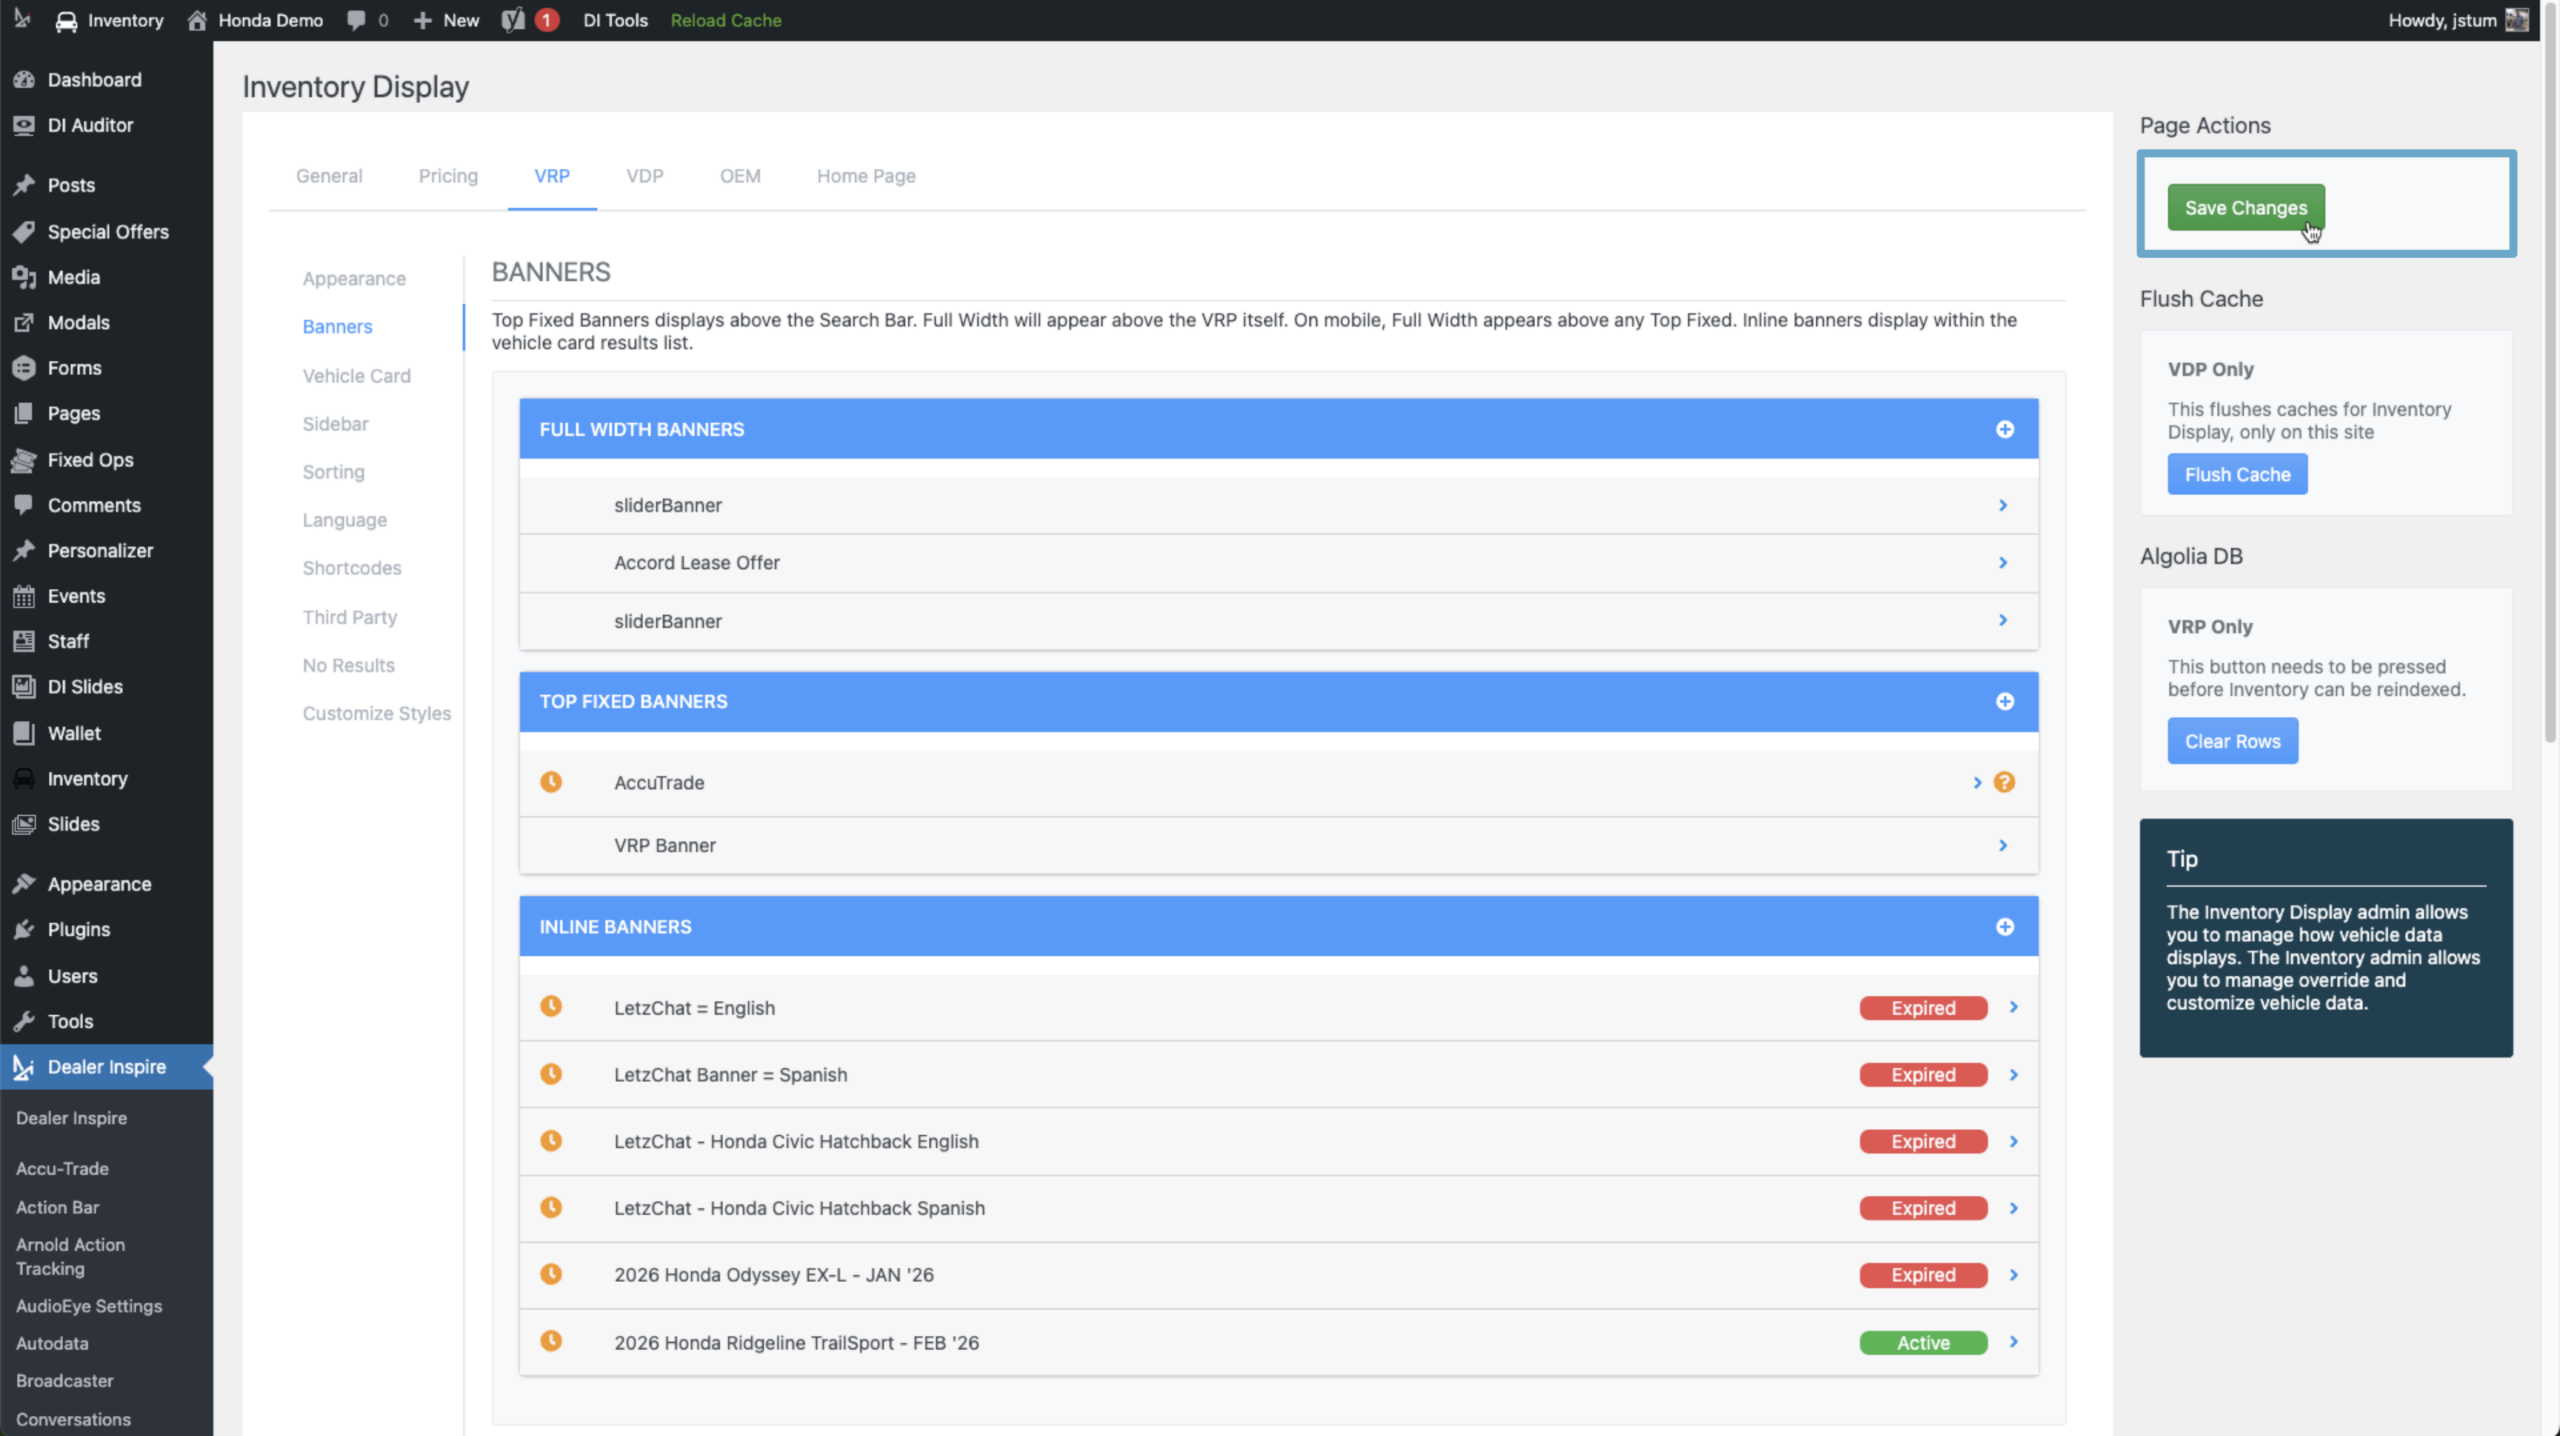
From the Inventory Display modal:
- Select the VRP tab
- Click Banners.
2 Add a new banner
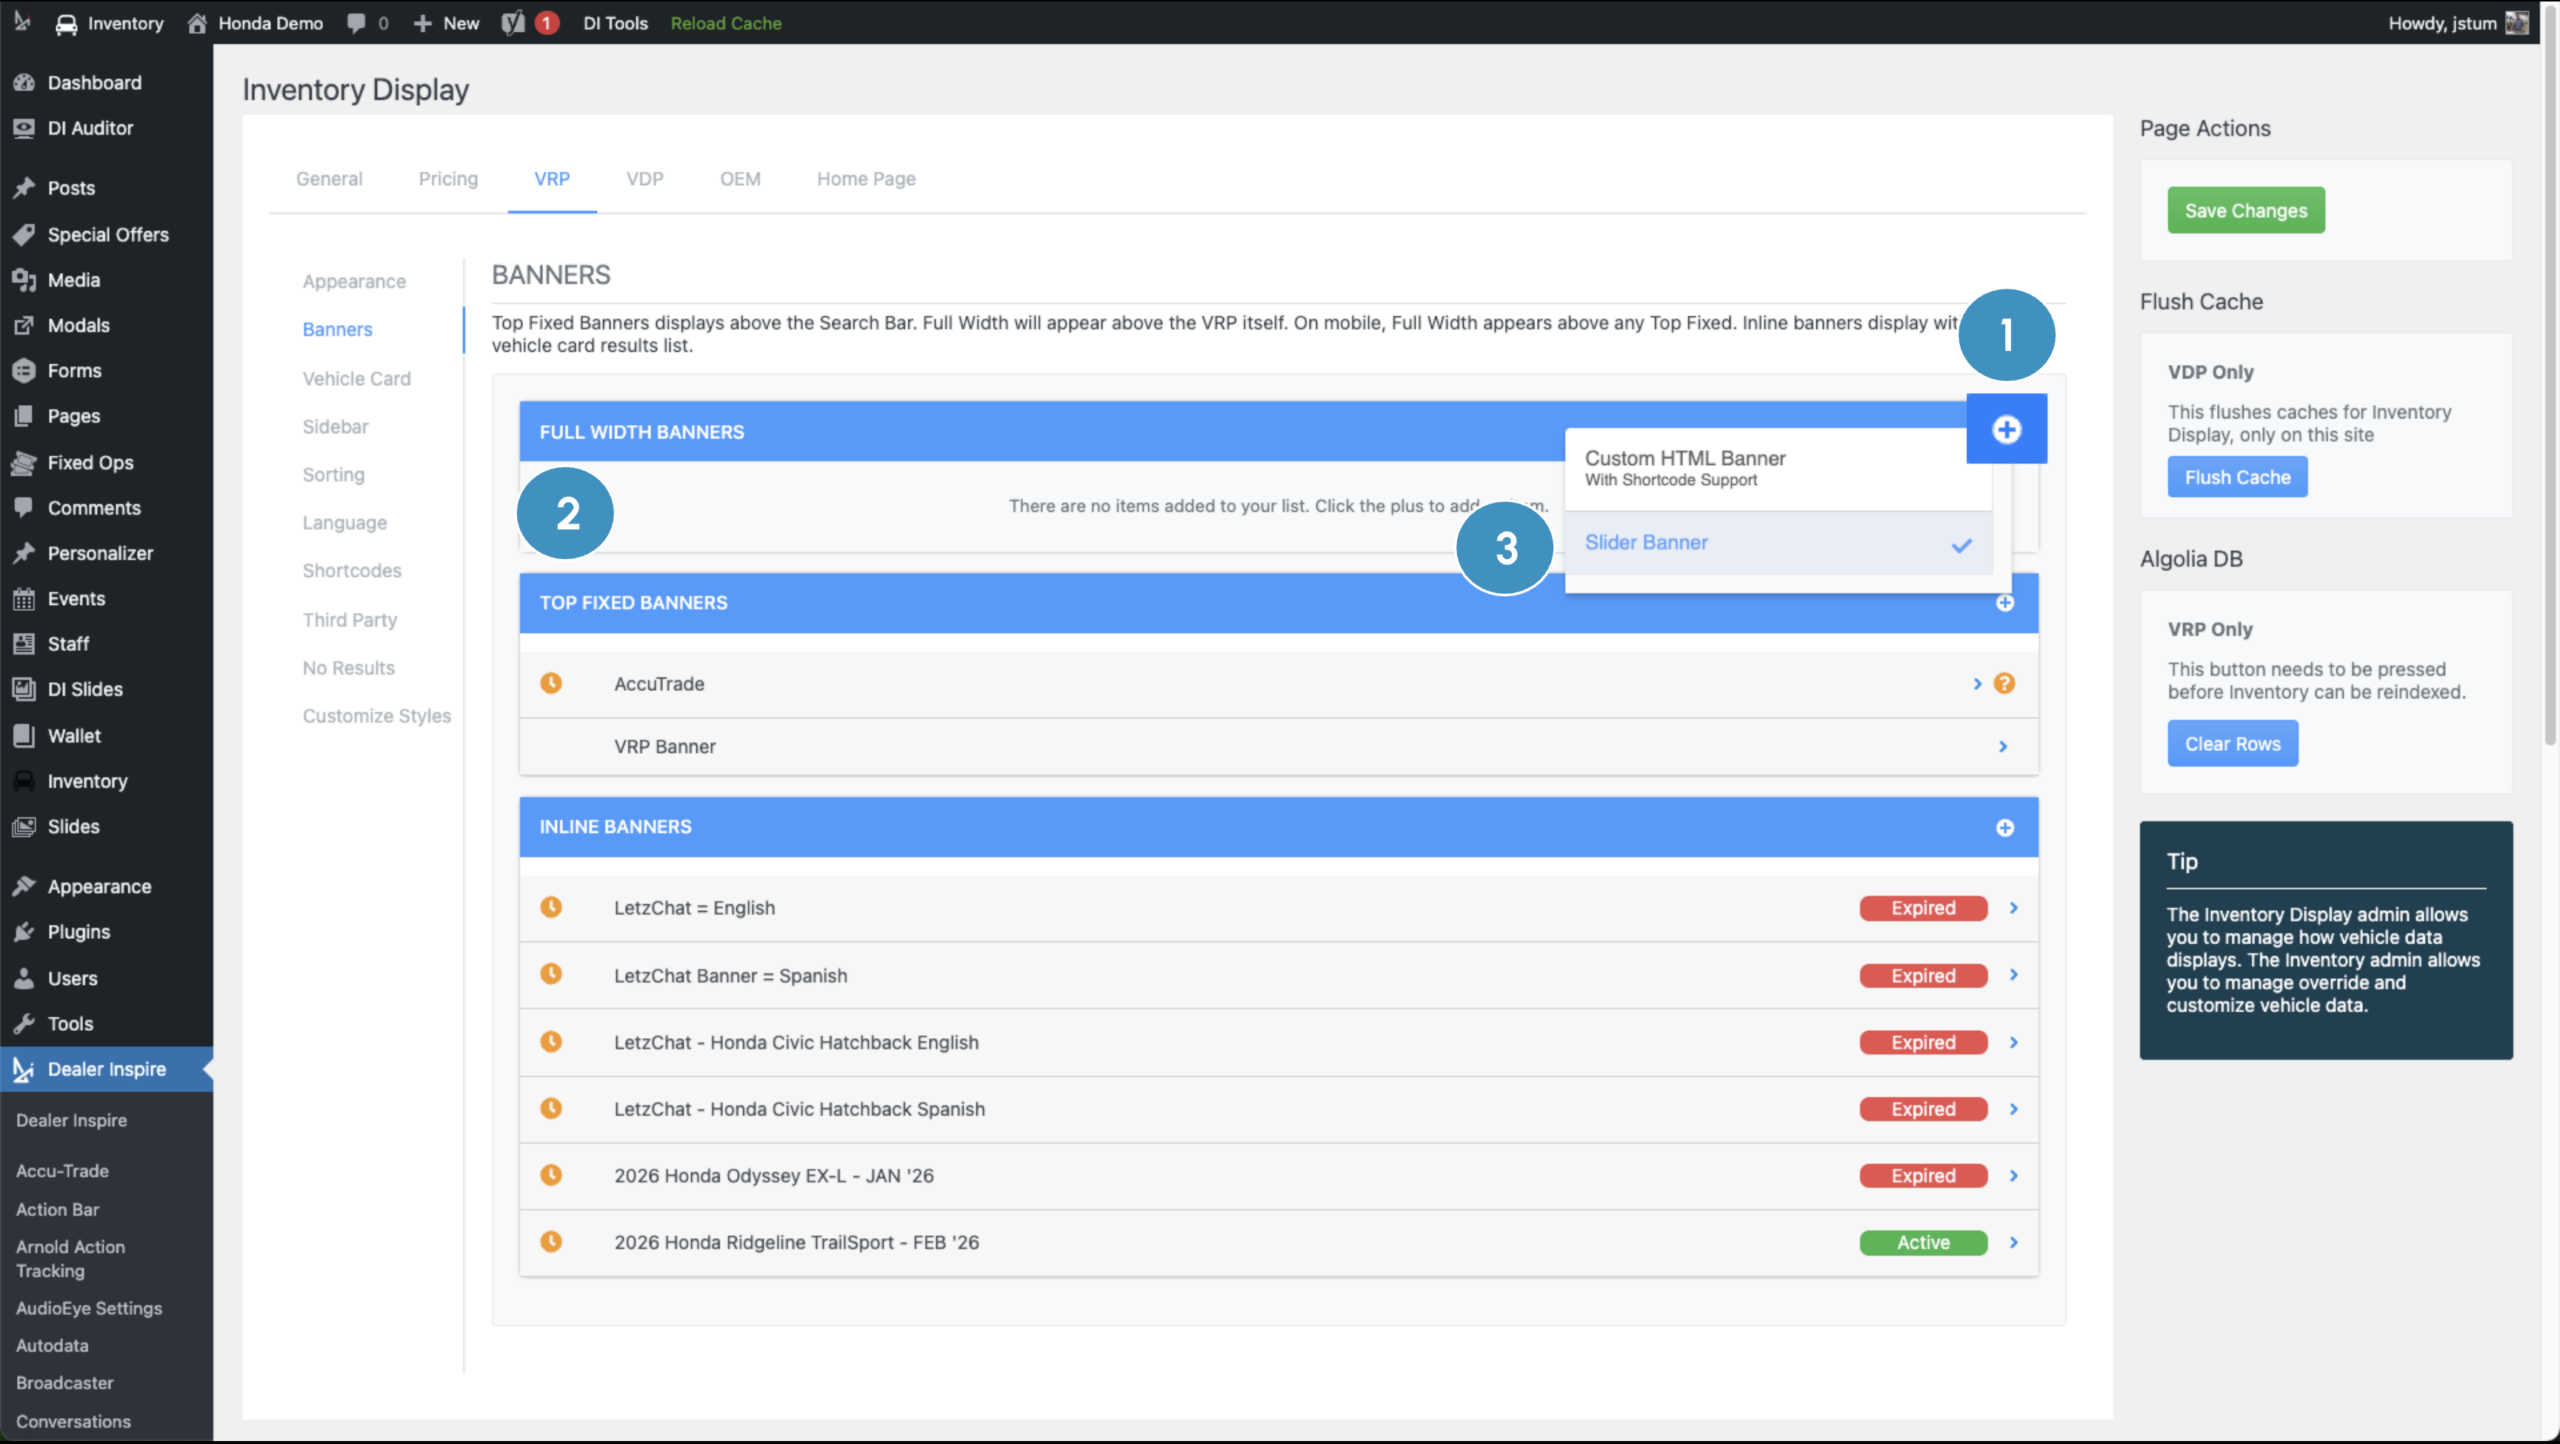
- Click the + icon to add a new banner.
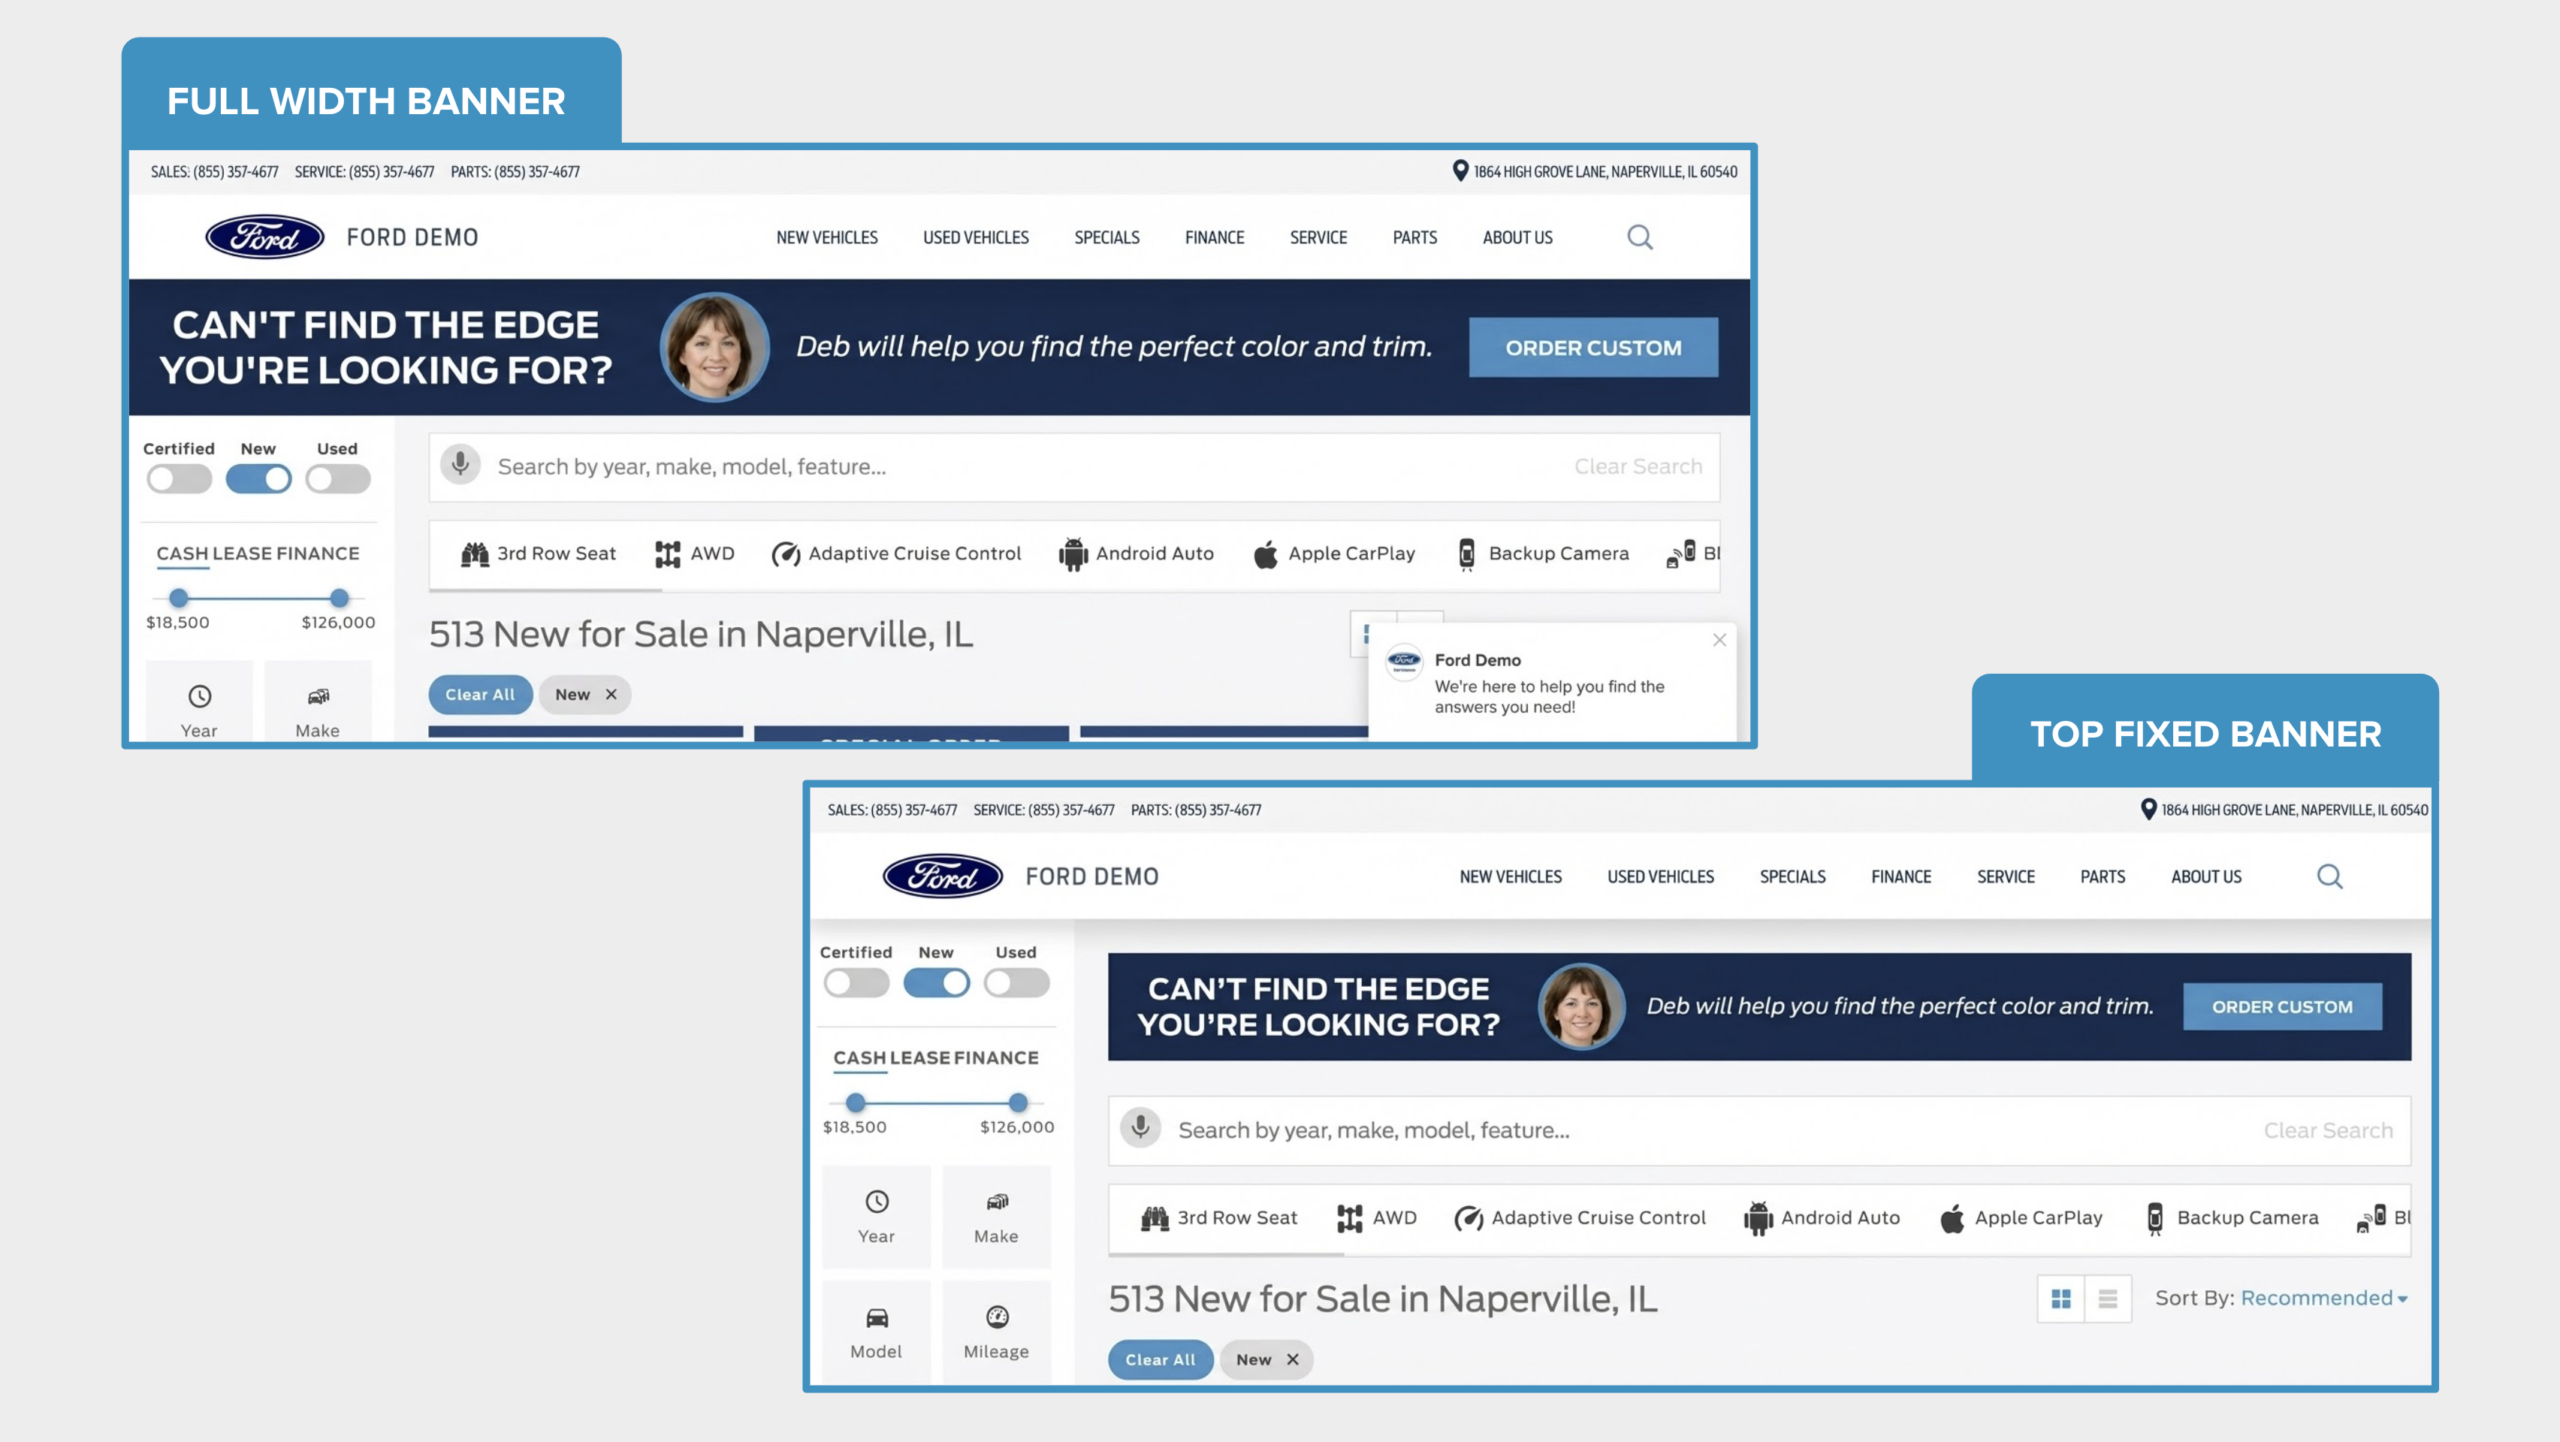
- Choose the banner type:
- Full Width – Spans the entire screen width.
- Top Fixed – Appears fixed within the width of the search results.
- Full Width – Spans the entire screen width.
- Choose the banner type:
- Slider Banner – Use this to feature rotating image content.
- Custom HTML Banner – Use this if you have custom HTML to display.
- To use the HTML option, you’ll need to provide or understand HTML code.
- Slider Banner – Use this to feature rotating image content.
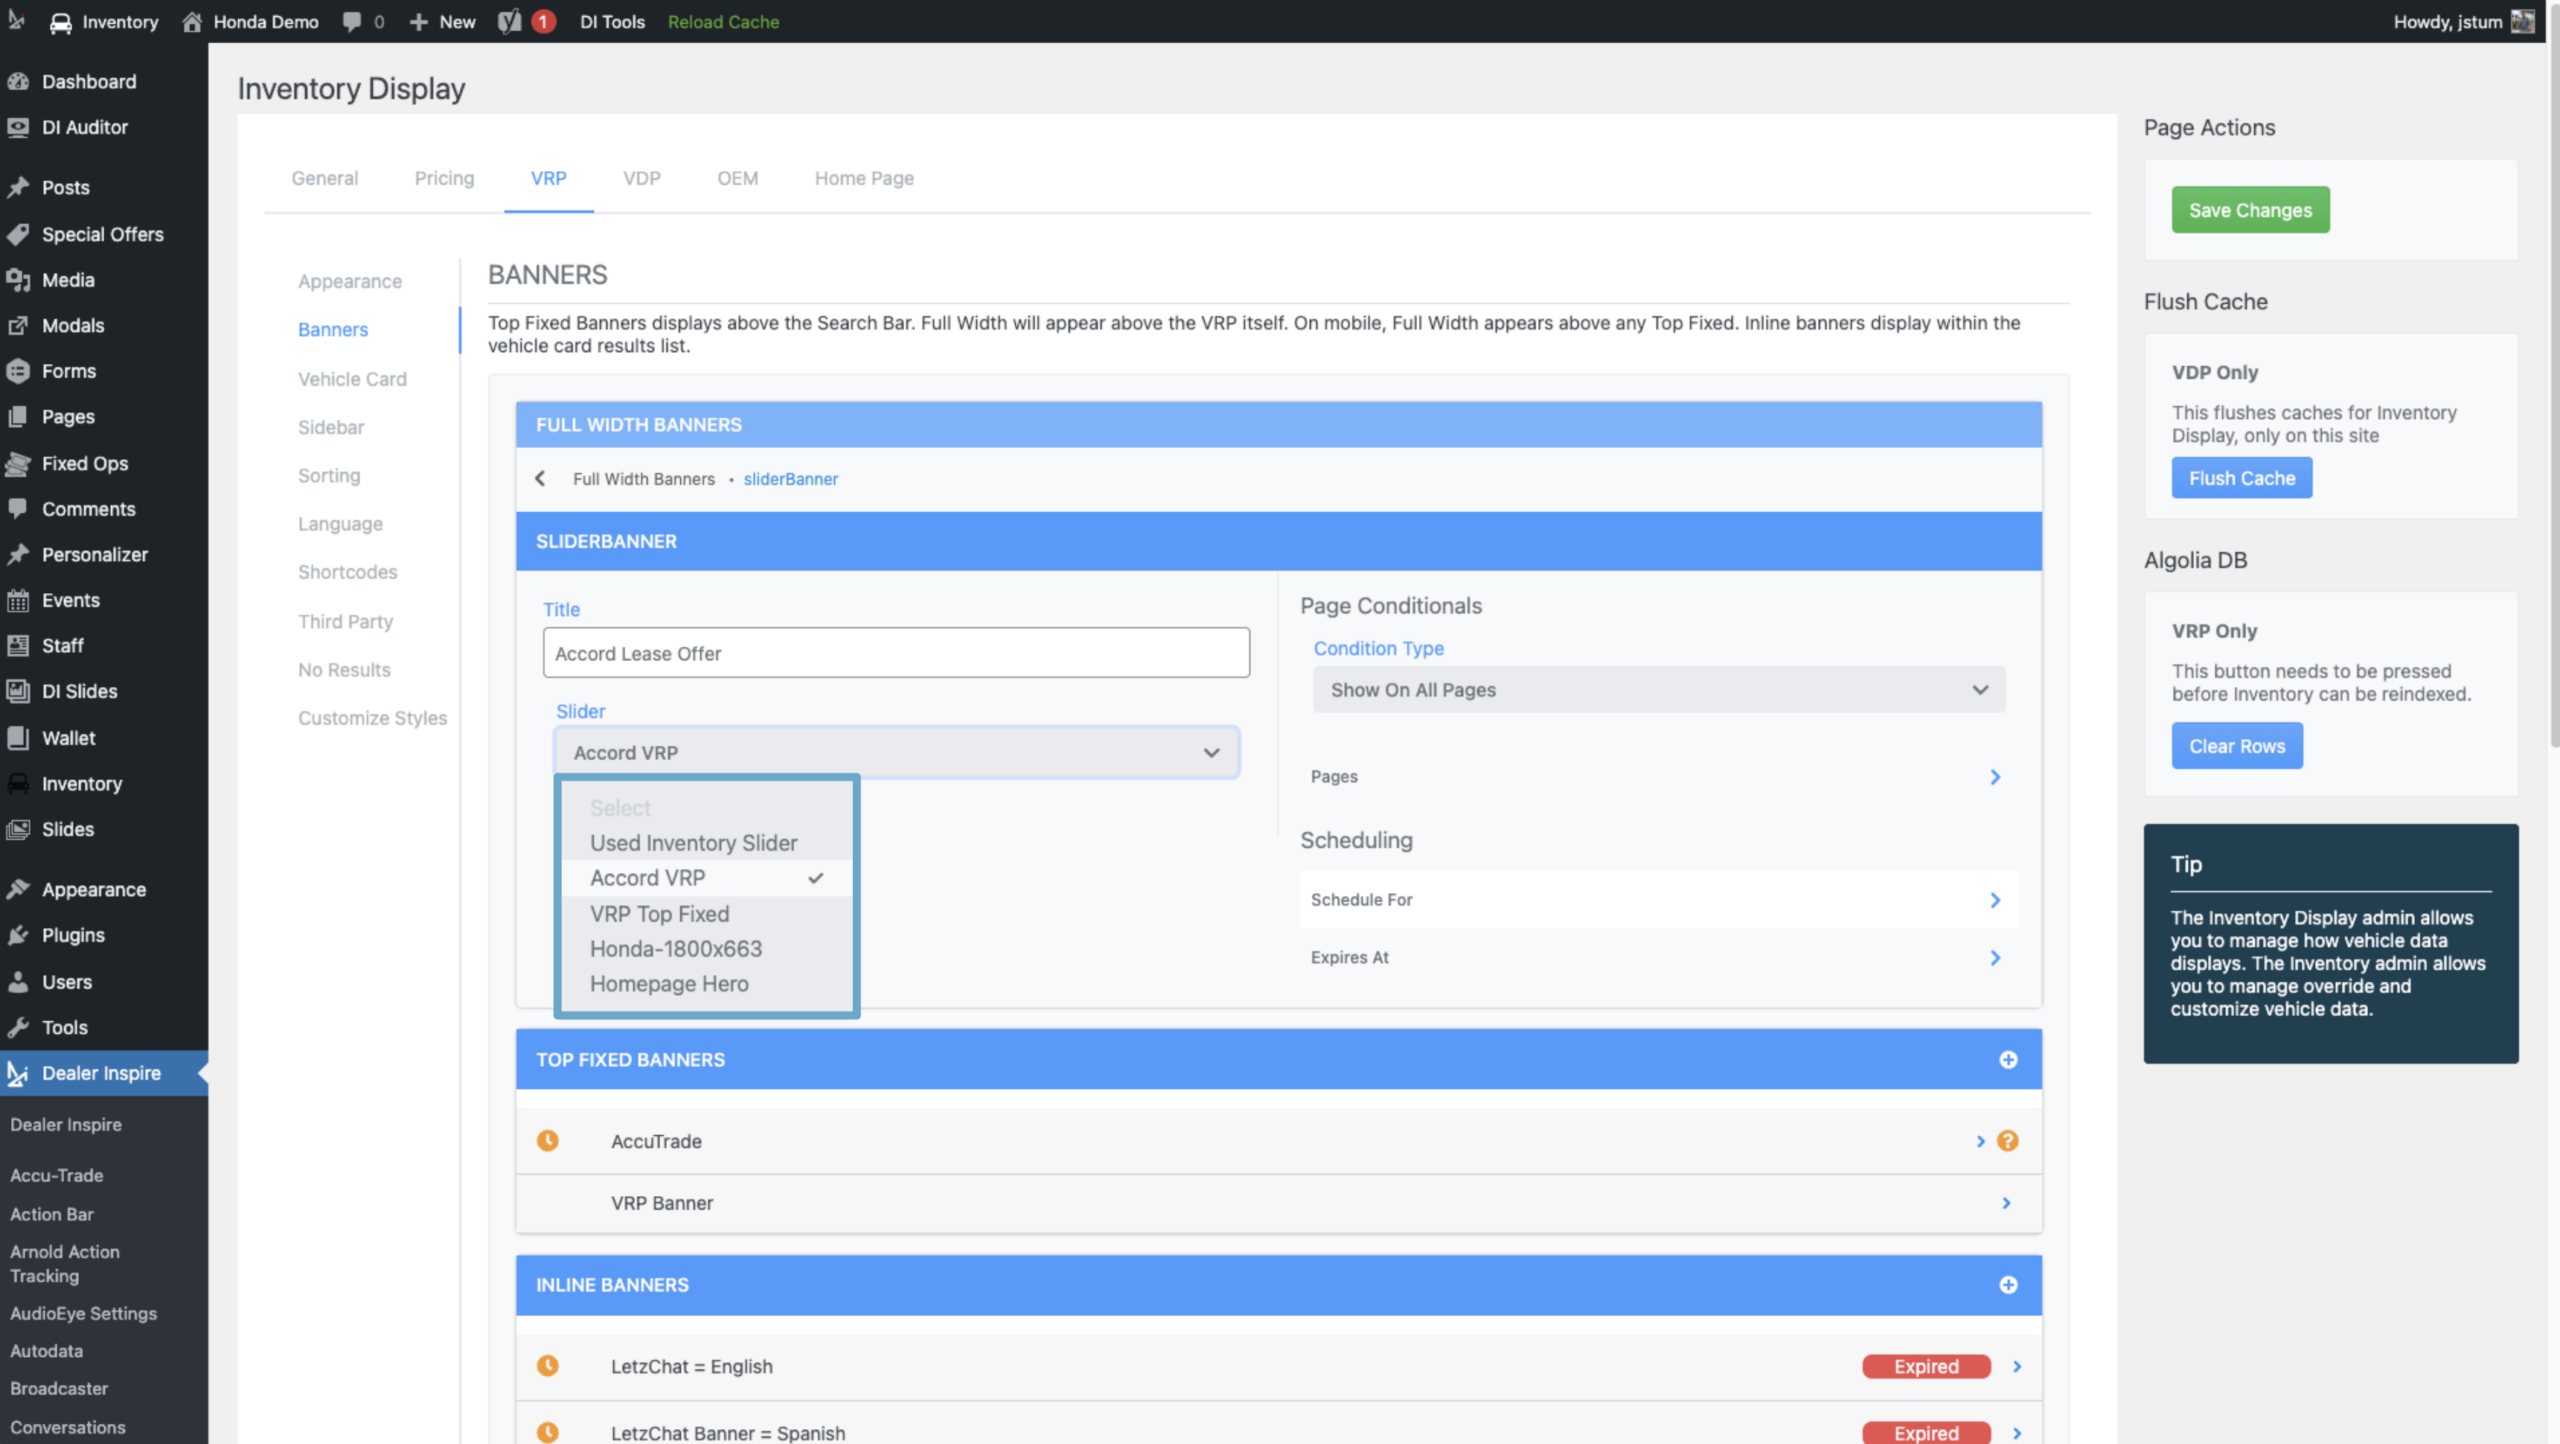
3 Configure your slider settings
Use the dropdown to choose your existing VRP slider.
Note: If your VRP slider is not listed, confirm that it has been set up properly.
4 Set page display rules (optional)
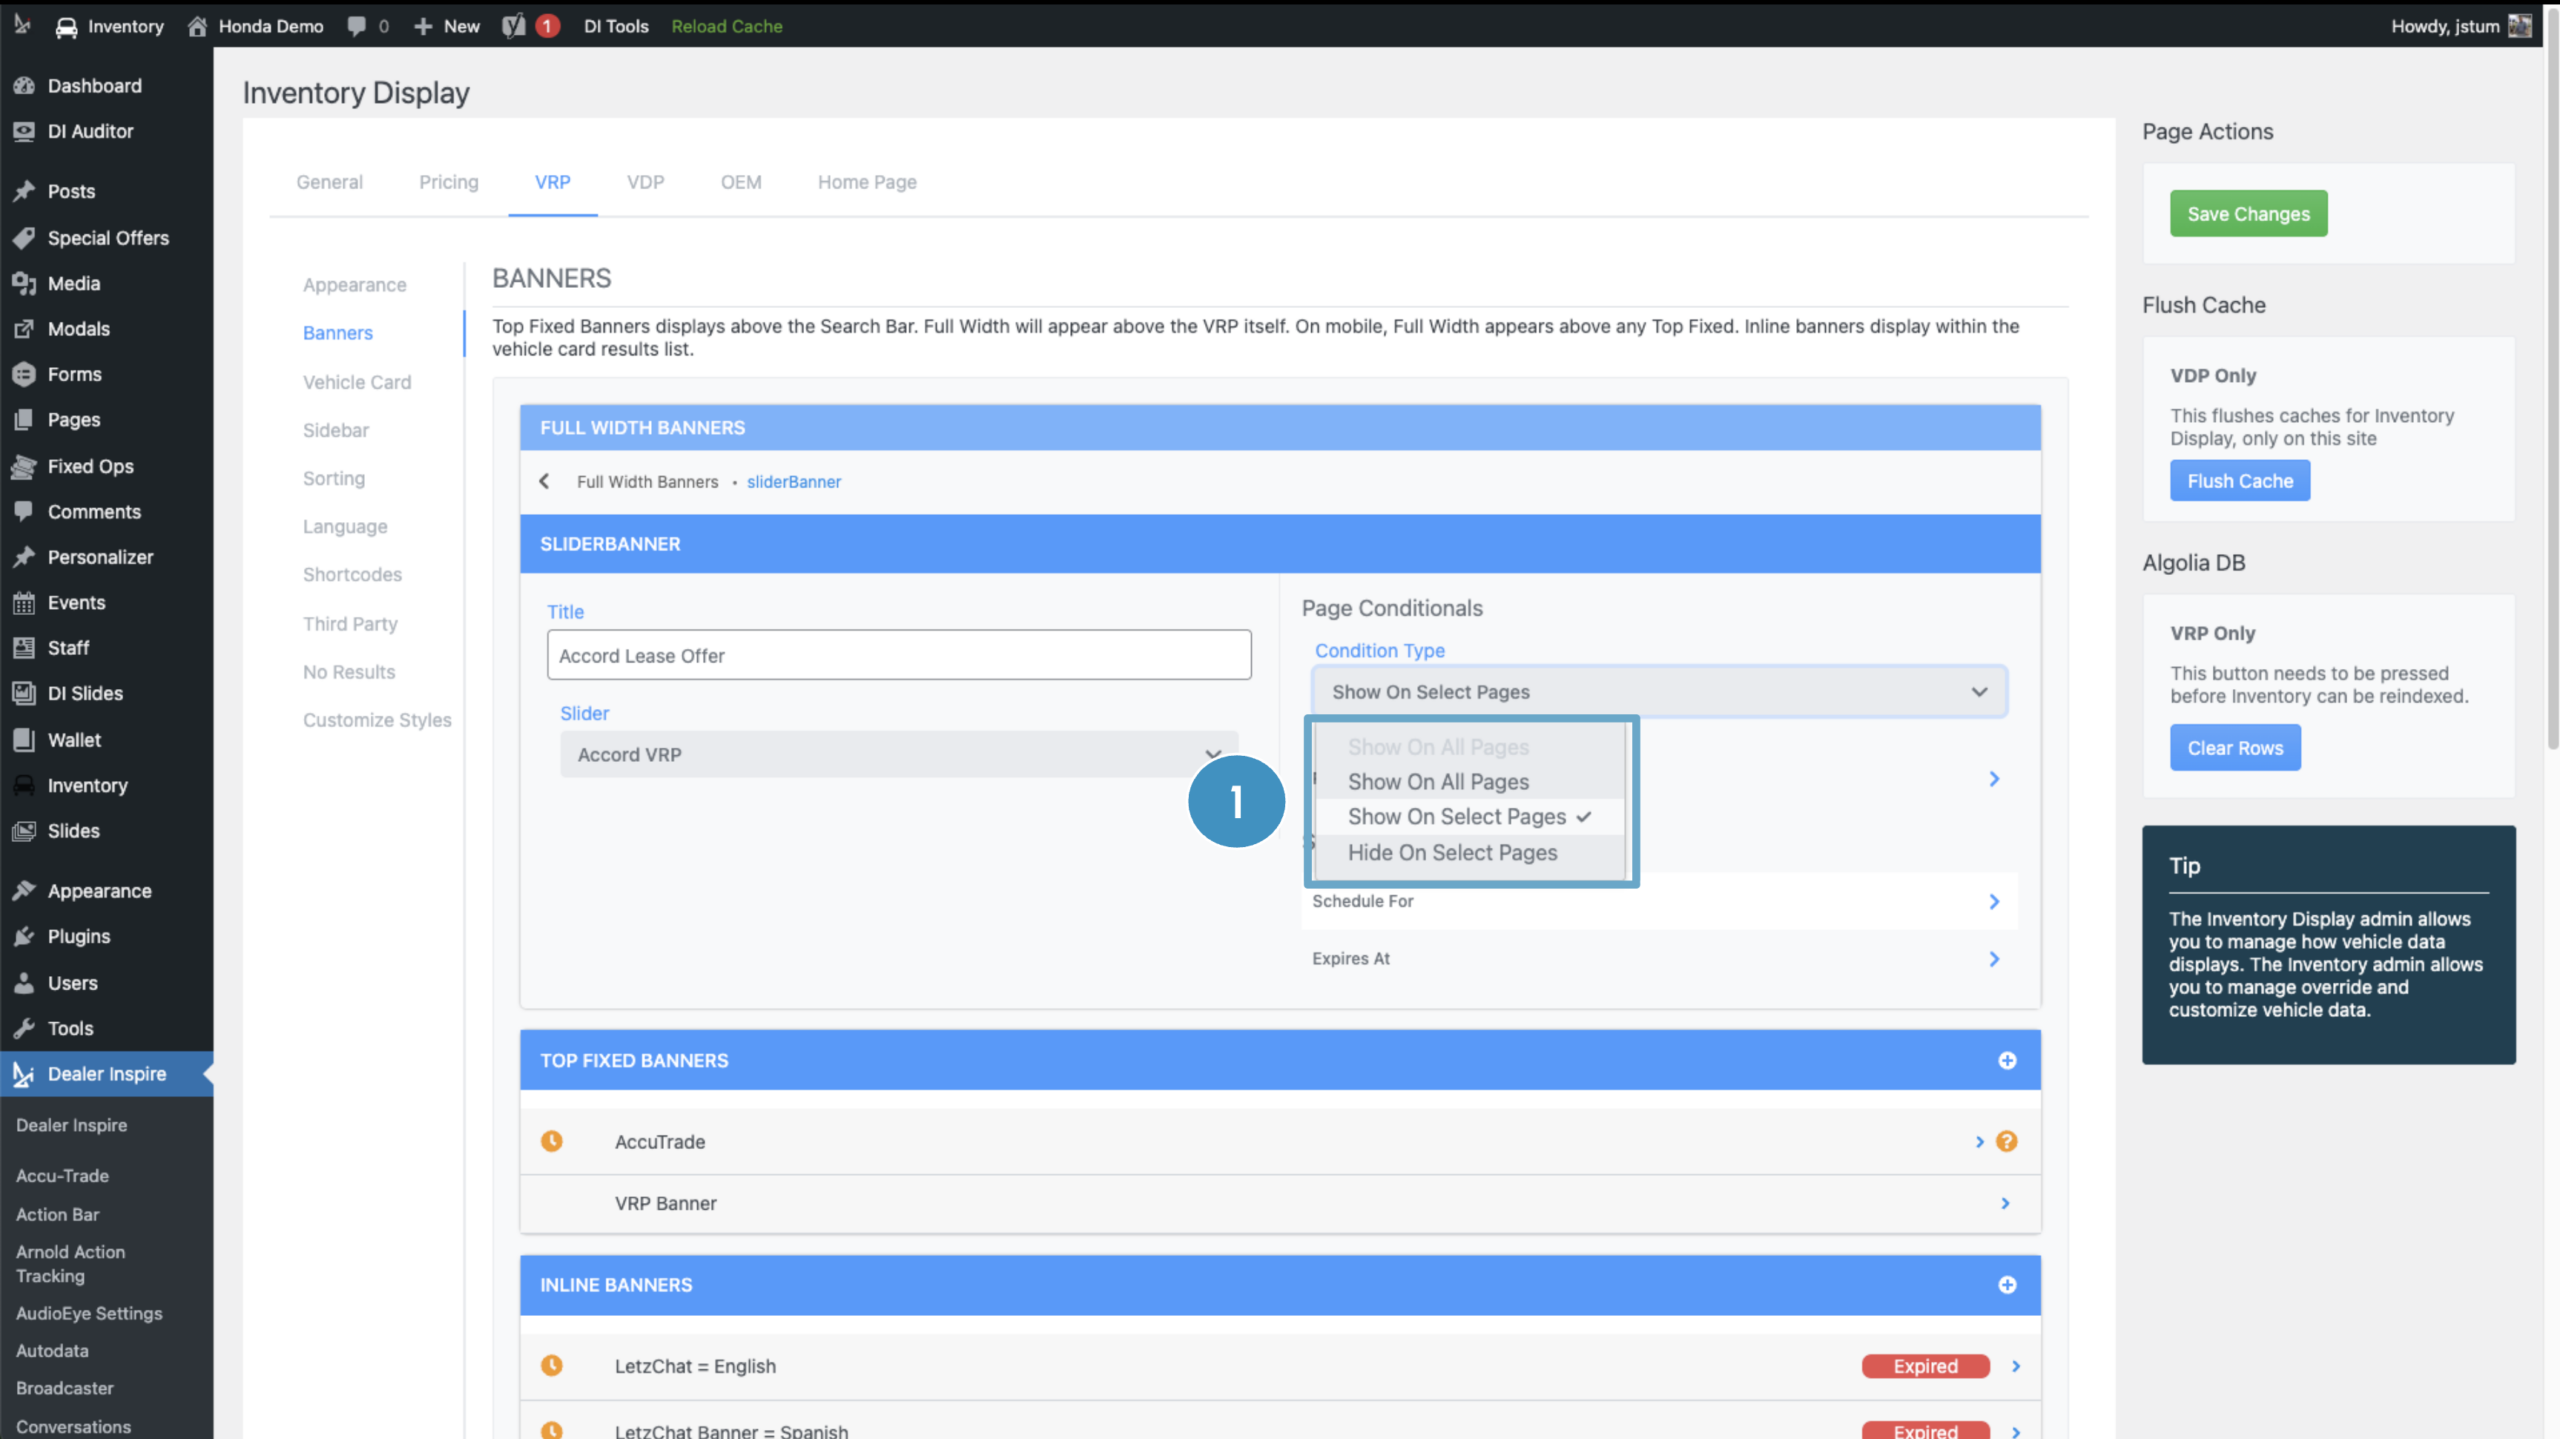
- Choose when the banner should display:
- All Pages
- Show on Select Pages
- Hide on Select Pages
- All Pages
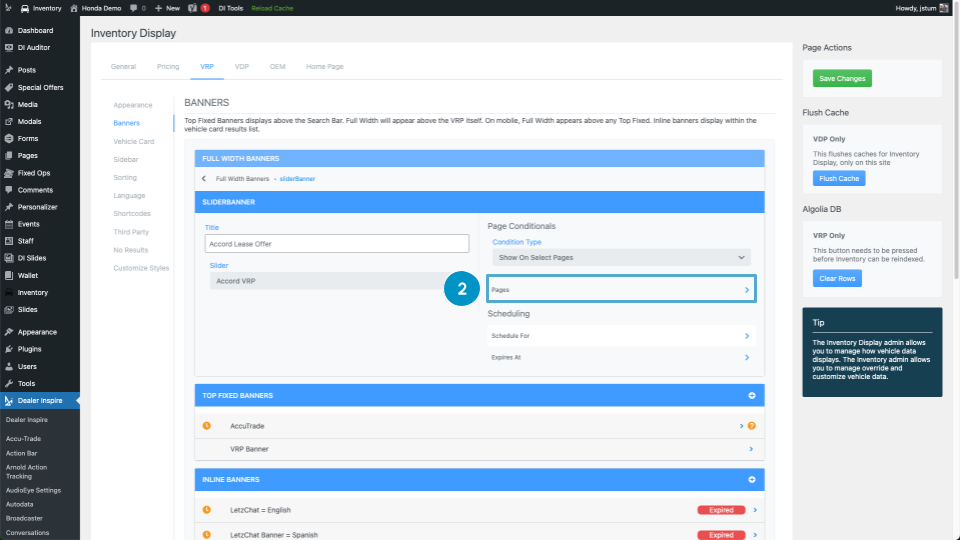
- If using “select” options, click the Pages tab
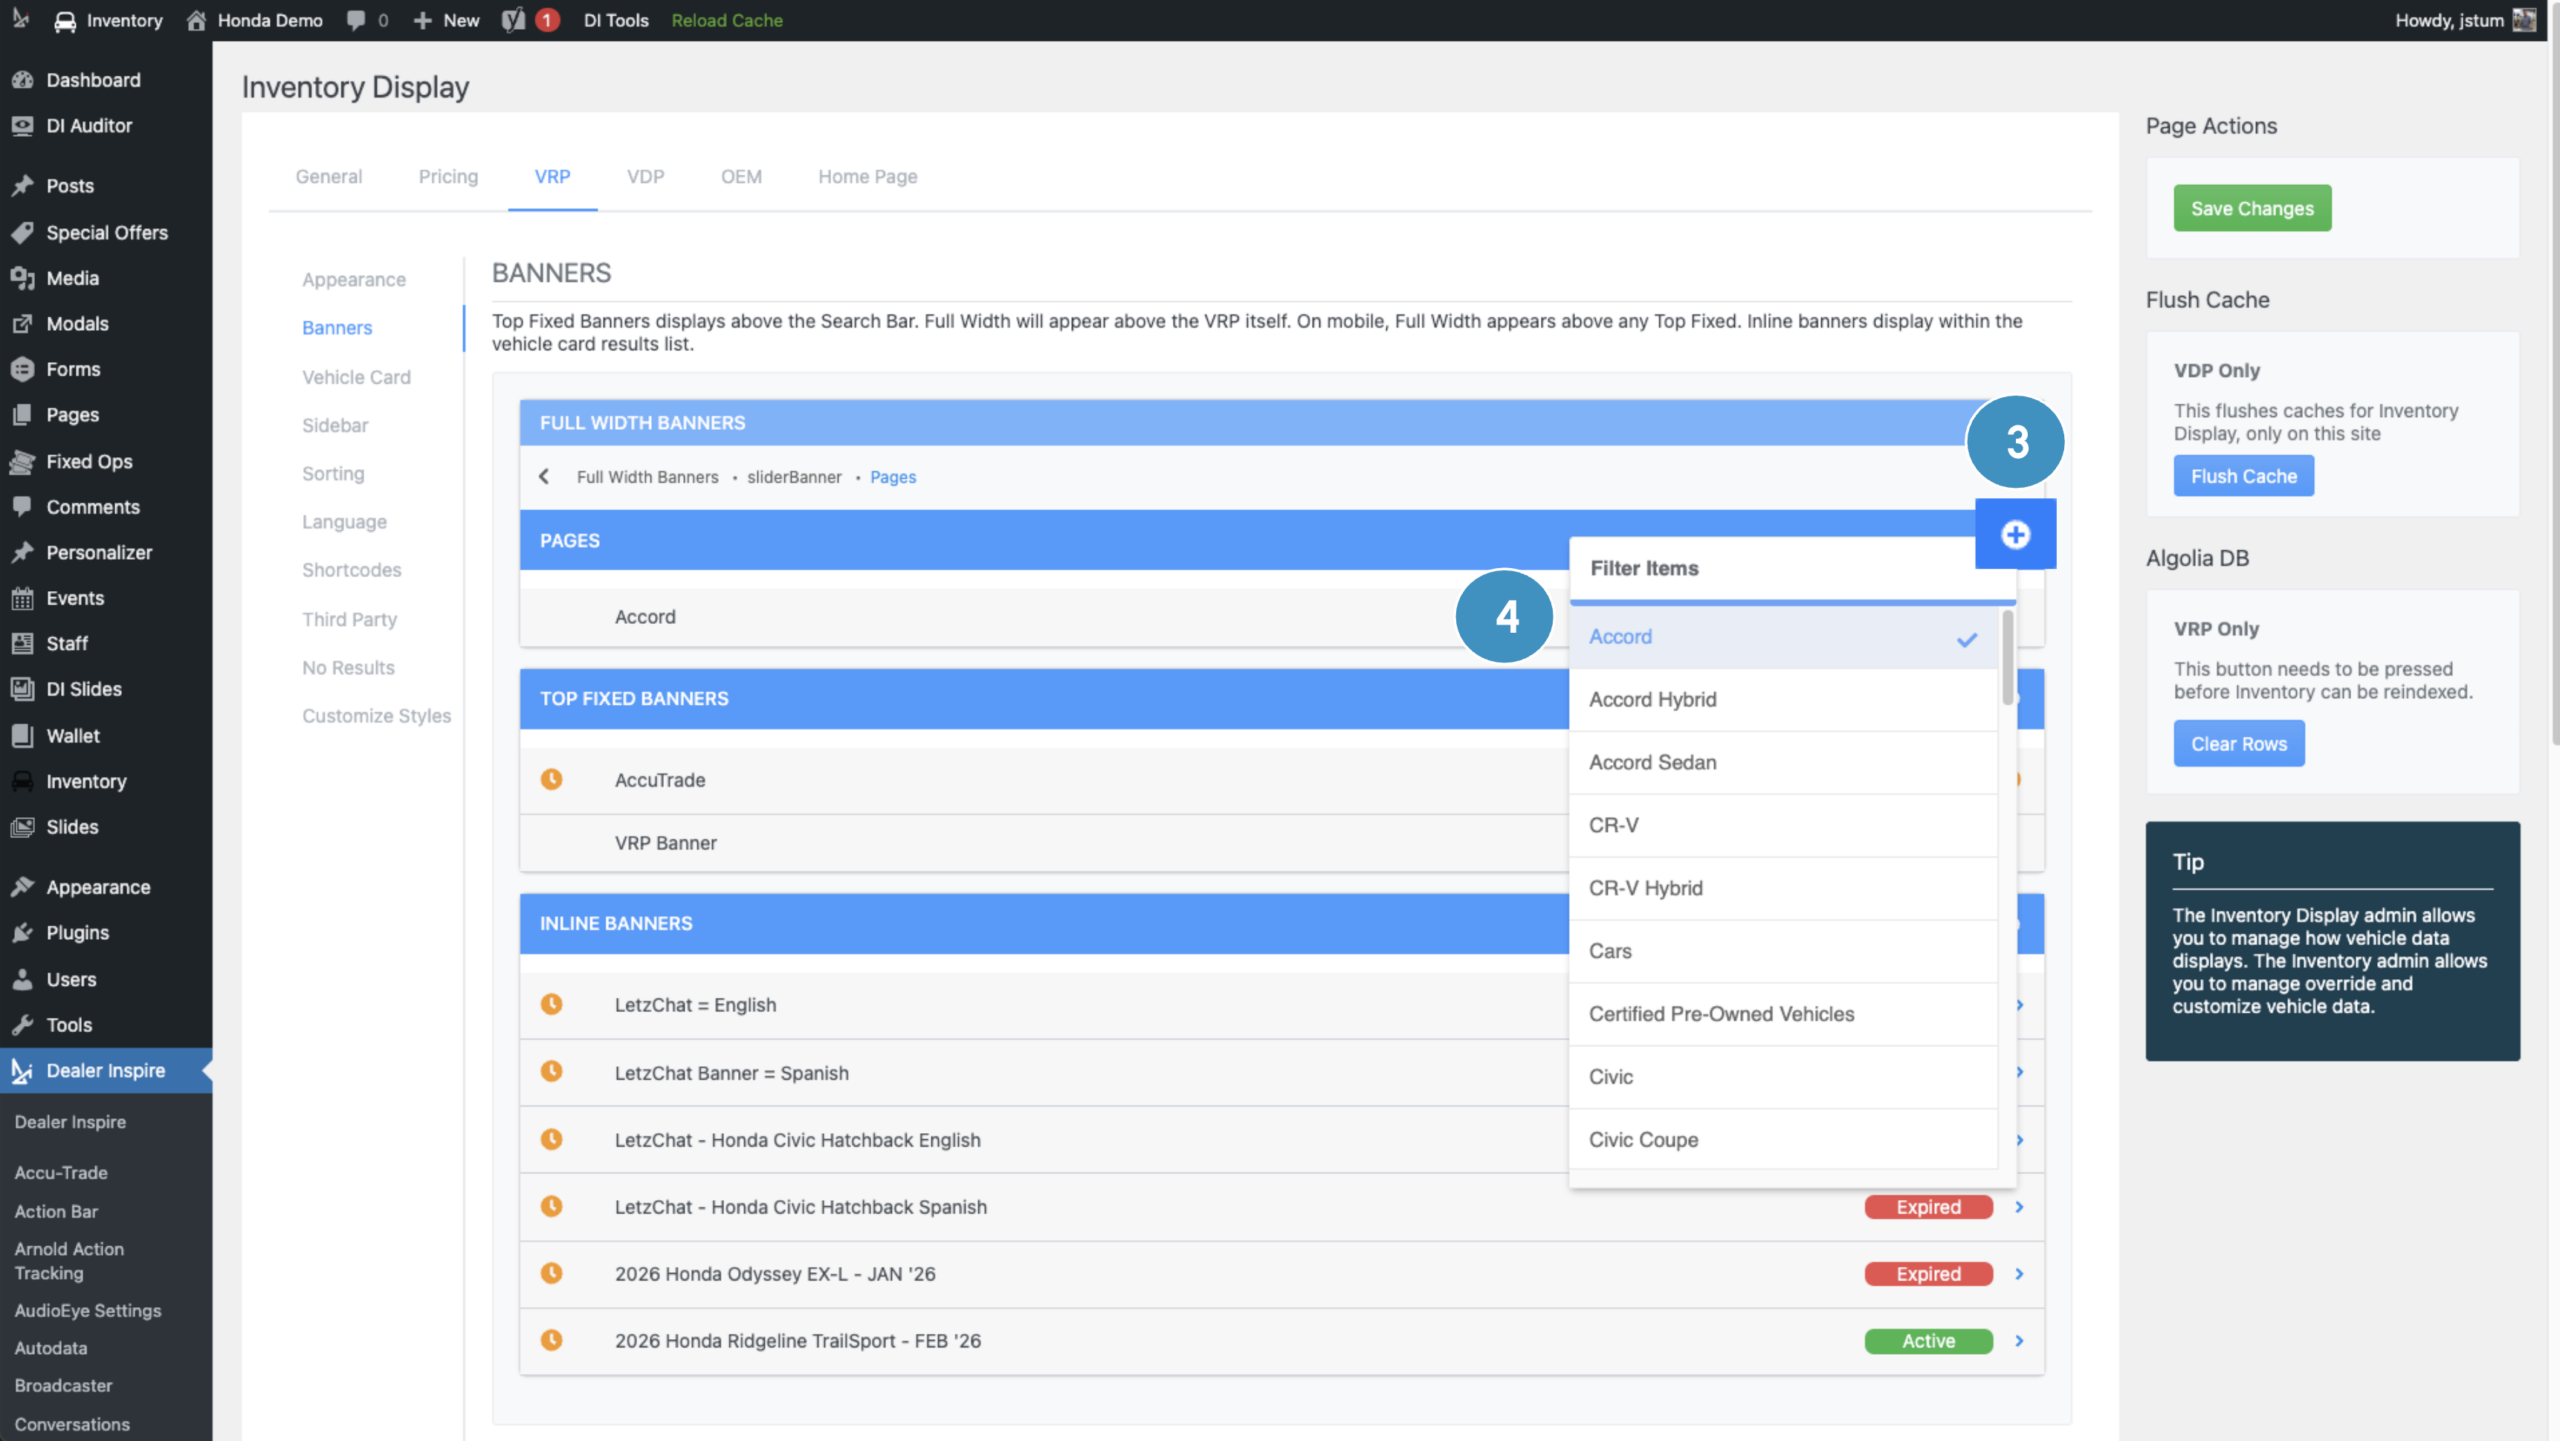
- Click the + icon to add the specific pages.
- Select the pages you want the banner to appear on
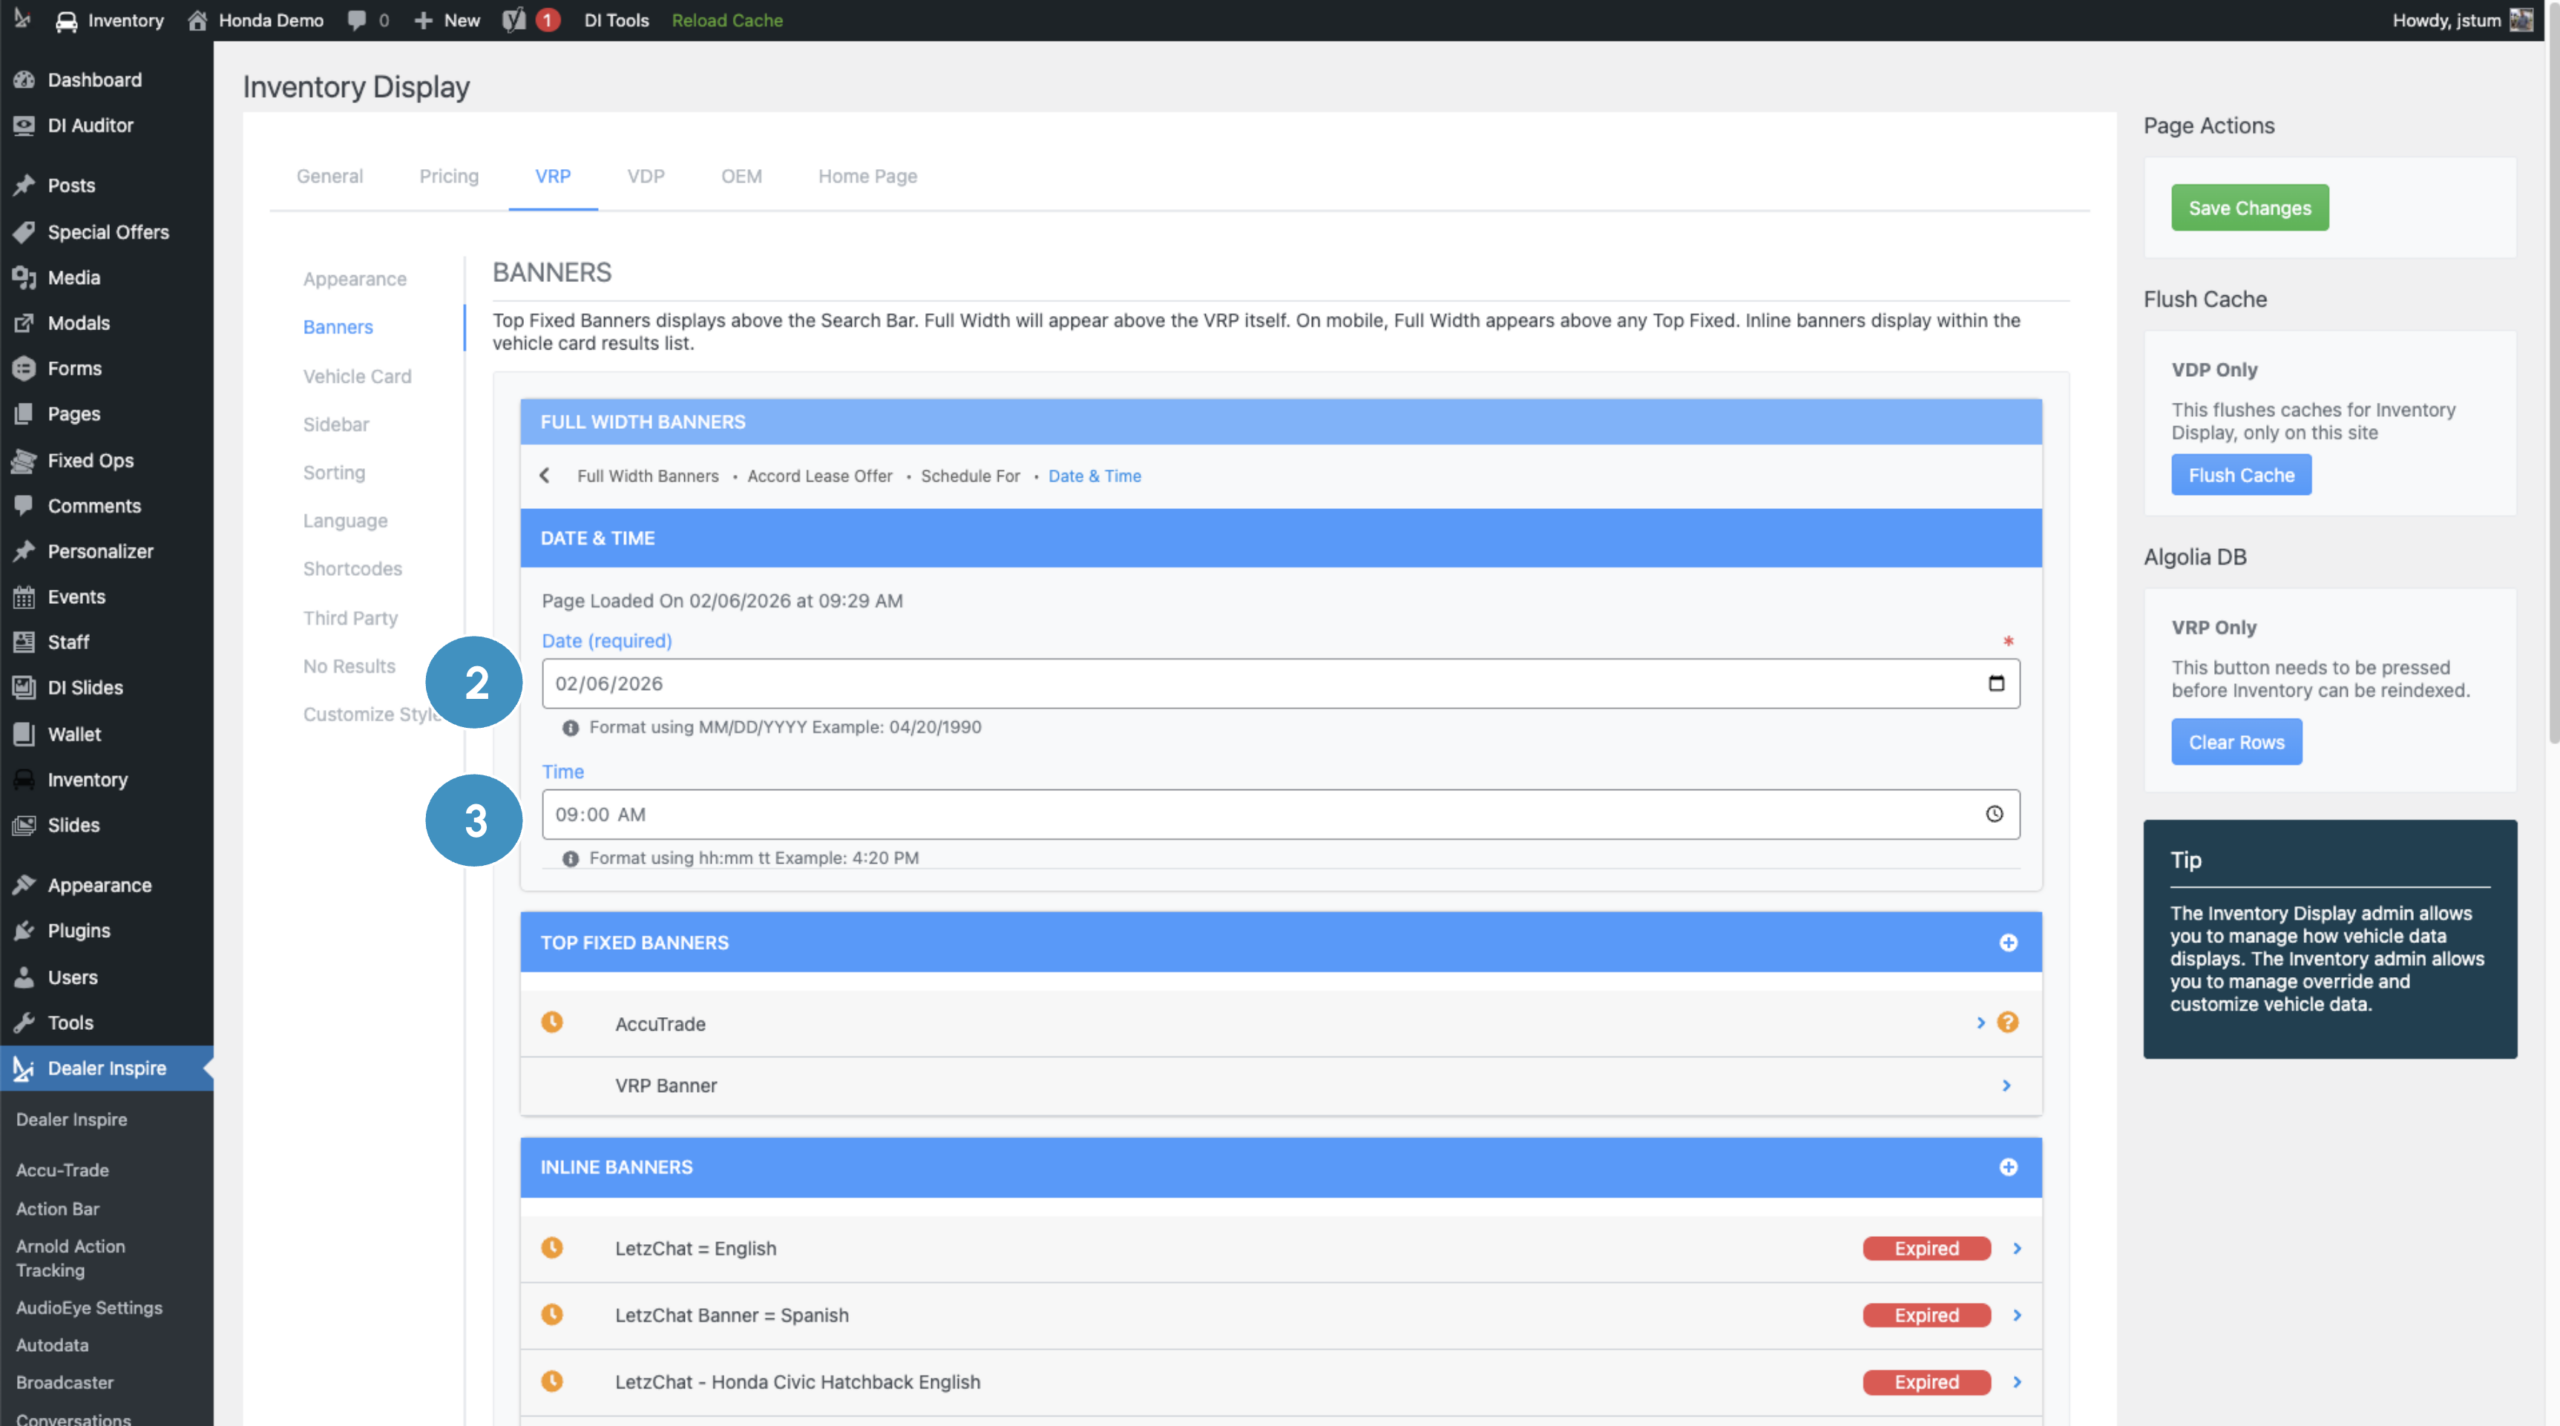
5 Schedule publish and expiry (optional)
Select your desired banner from the Banners tab.
- Use the arrow next to:
- Schedule For to choose when the banner should go live.
- Expires At to set an end date/time.
- Schedule For to choose when the banner should go live.
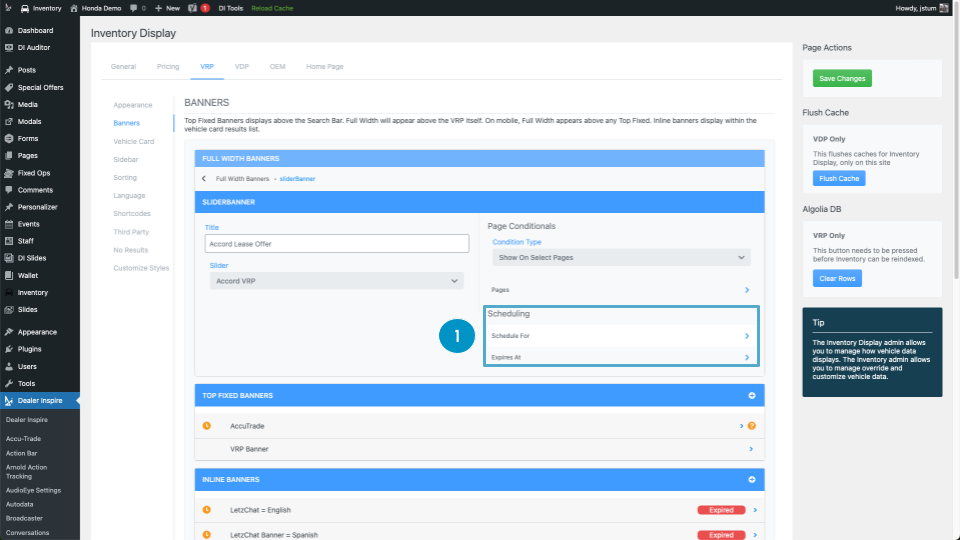
- Click the calendar icon to select the date.
- Click the clock icon to choose a specific time.
- If no time is selected, the banner will default to publish at midnight.
- Times are in Central Standard Time (CST).
- If no time is selected, the banner will default to publish at midnight.
6 Set banner order (if multiple)
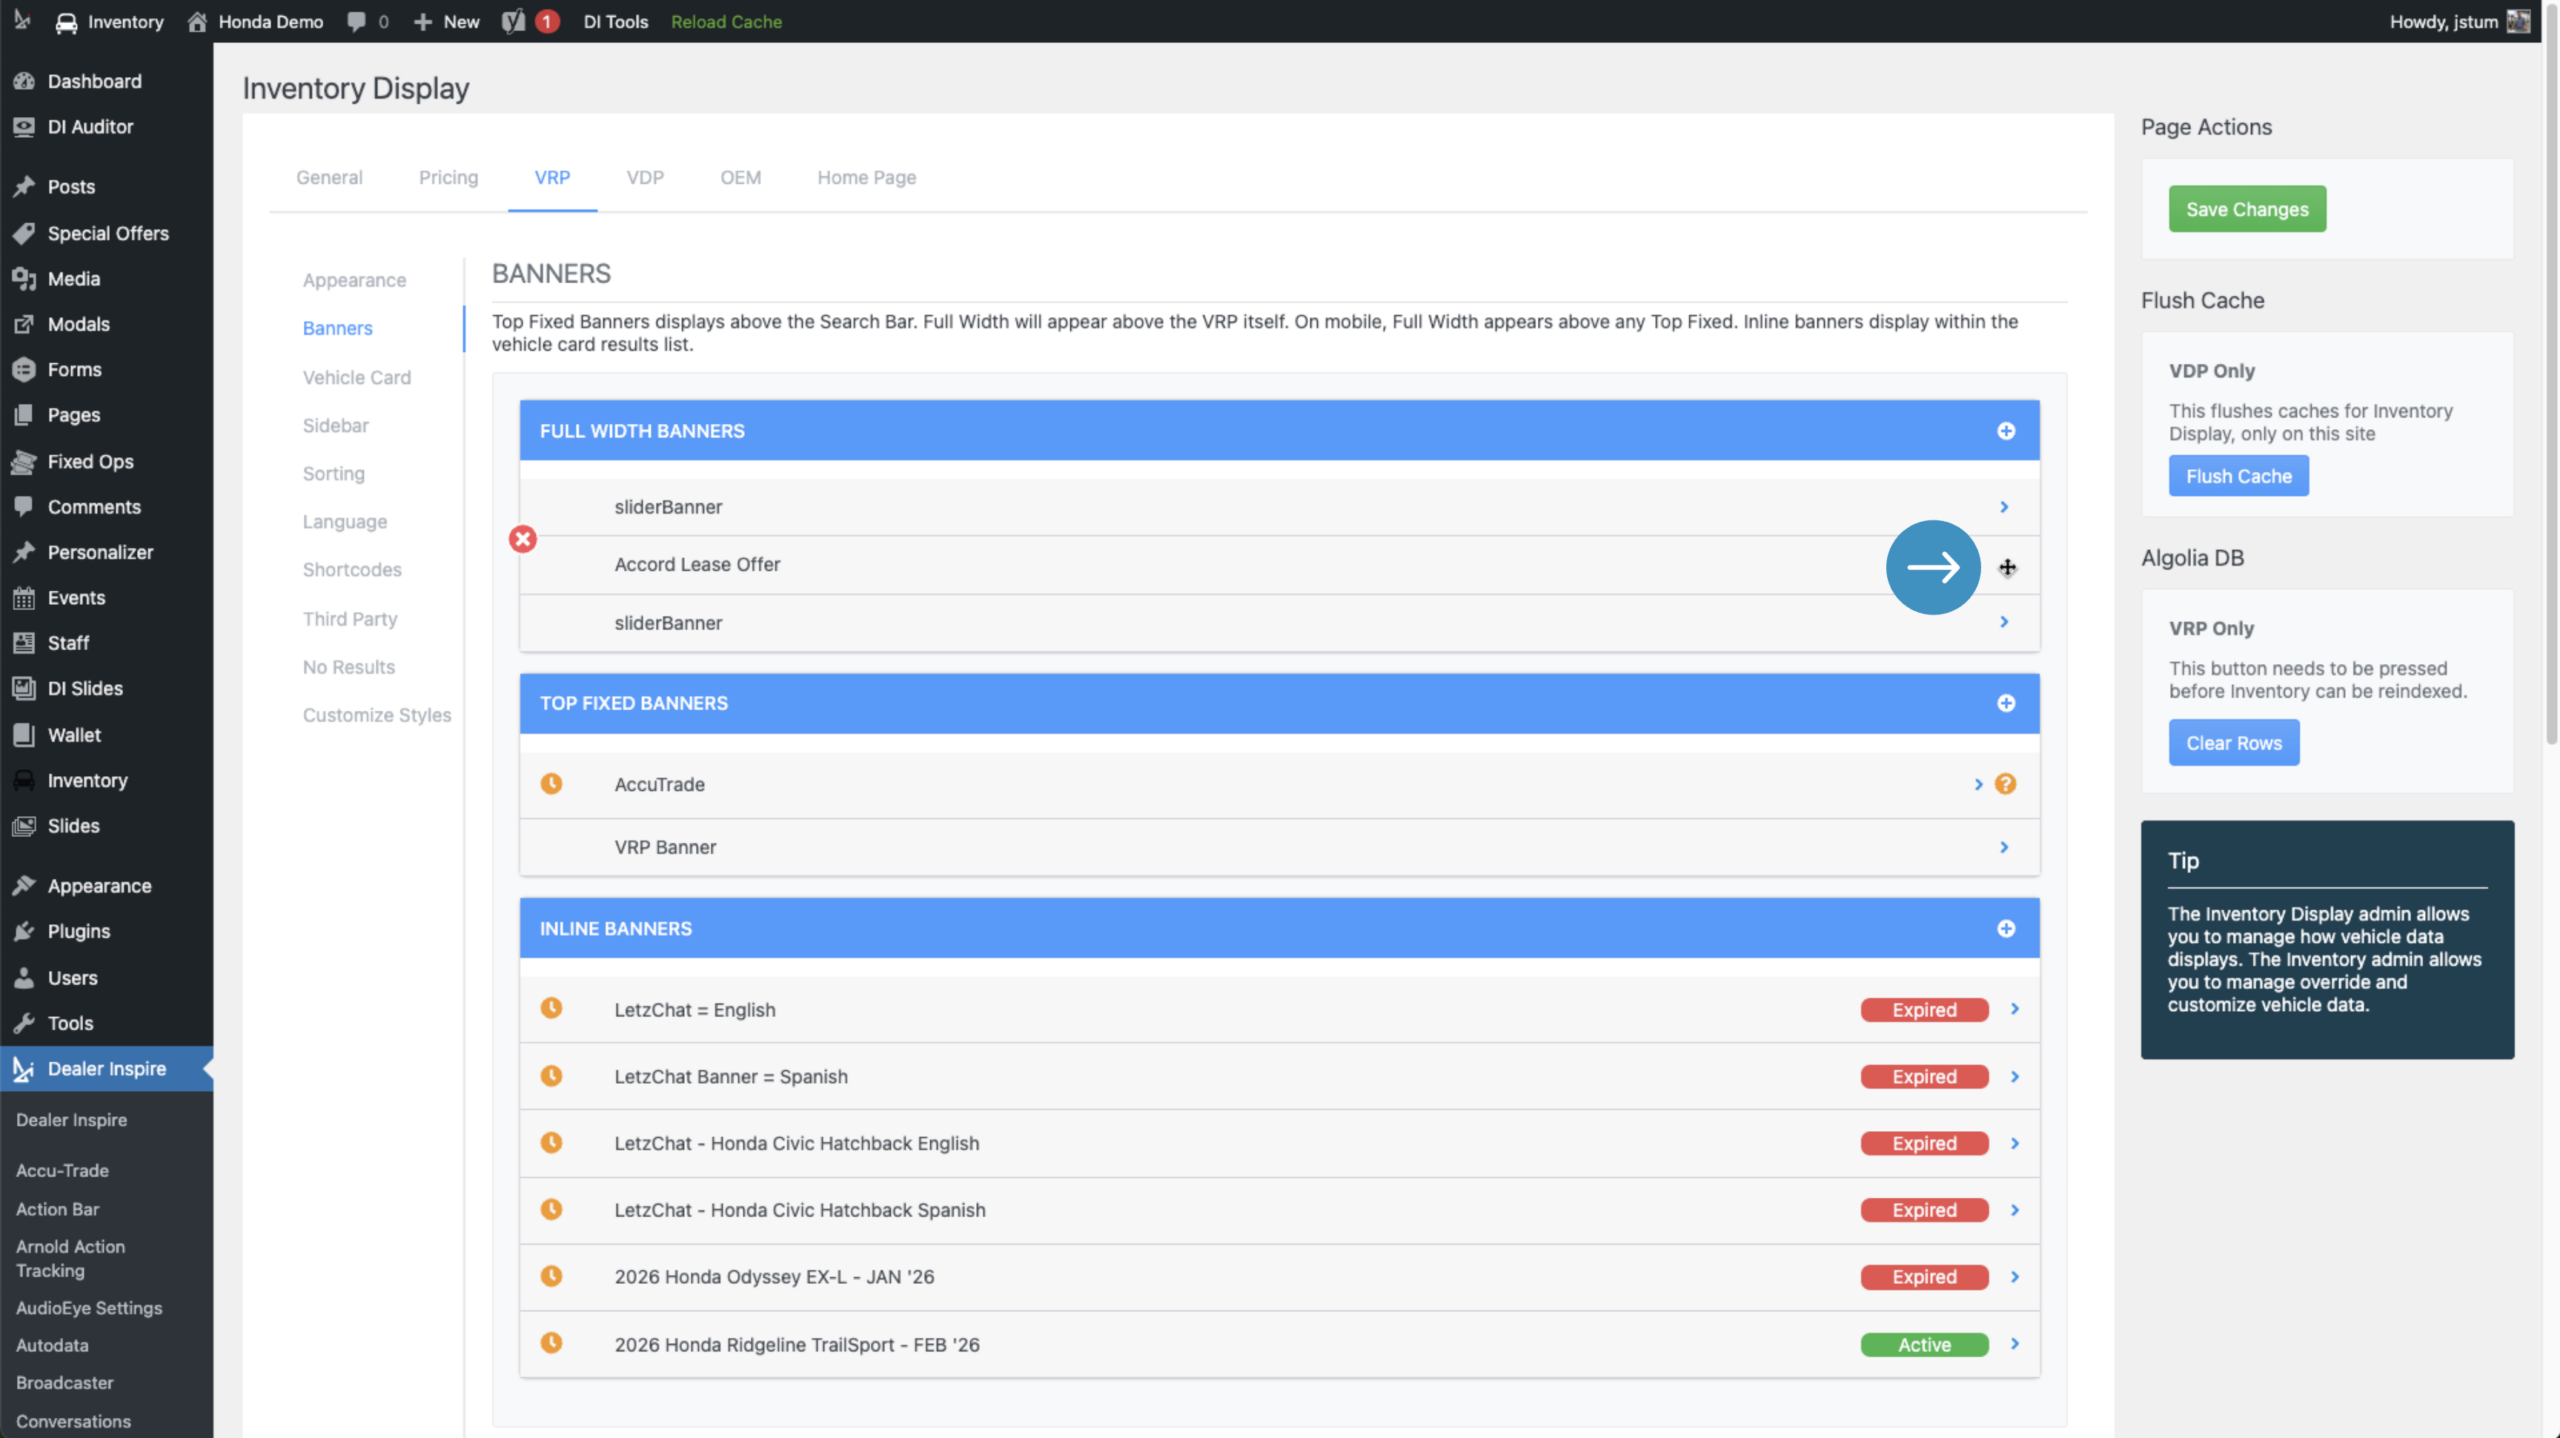
- In the Banners tab, hover over the double arrow icon next to a banner.
- Click and drag to reposition banners in your desired display order.
Note: To remove a banner, hover over the name and click the red X to delete the banner from the slider.
7 Save and preview
- Once all settings are complete, click Save Changes in the upper-right corner.
- Navigate to your VRP page and refresh the browser to preview your new banner.
- You should now see the banner displayed in the position and format you selected.
- If it doesn’t appear, double-check display rules, scheduling, and save confirmation.
- You should now see the banner displayed in the position and format you selected.