How to navigate your Dealer Inspire website
Your Dealer Inspire website is built on WordPress and includes several plugins that allow you to manage content, promotions, staff pages, personalization, and more. While the backend includes many tools, most daily updates rely on a core group of plugins.
This guide is designed as a general navigation overview. It introduces the core plugins you’ll use most often and shows you where to find them in the backend. For detailed instructions on configuring or optimizing any specific plugin, use the linked Help Center resources included throughout this article.
In this article, you’ll learn how to access your website backend, navigate the WordPress menu, understand the purpose of key Dealer Inspire plugins, and safely publish updates to your live site.
To get started
Go to the Cars.com Hub. Click Dealer Inspire, then Manage Website.
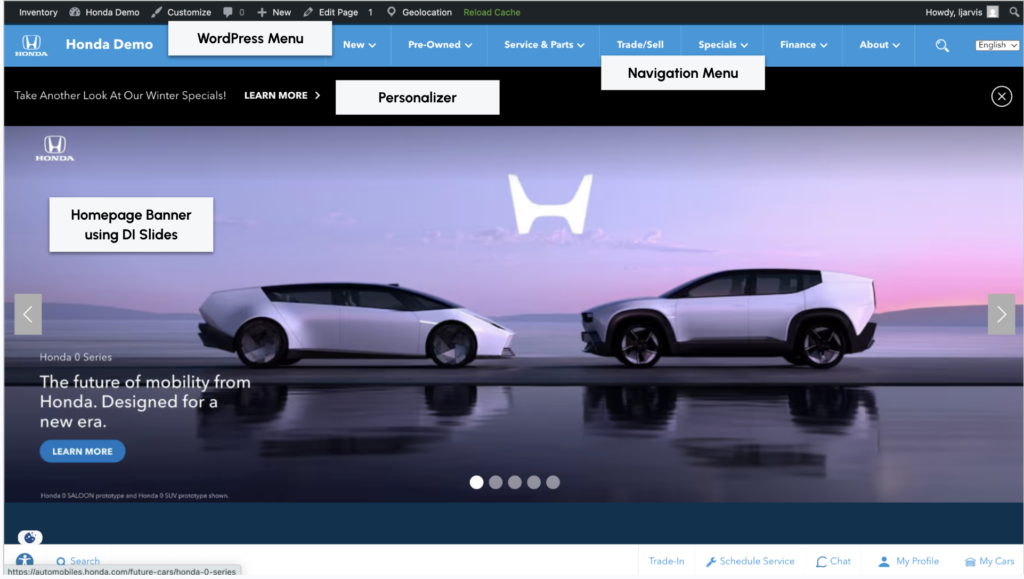
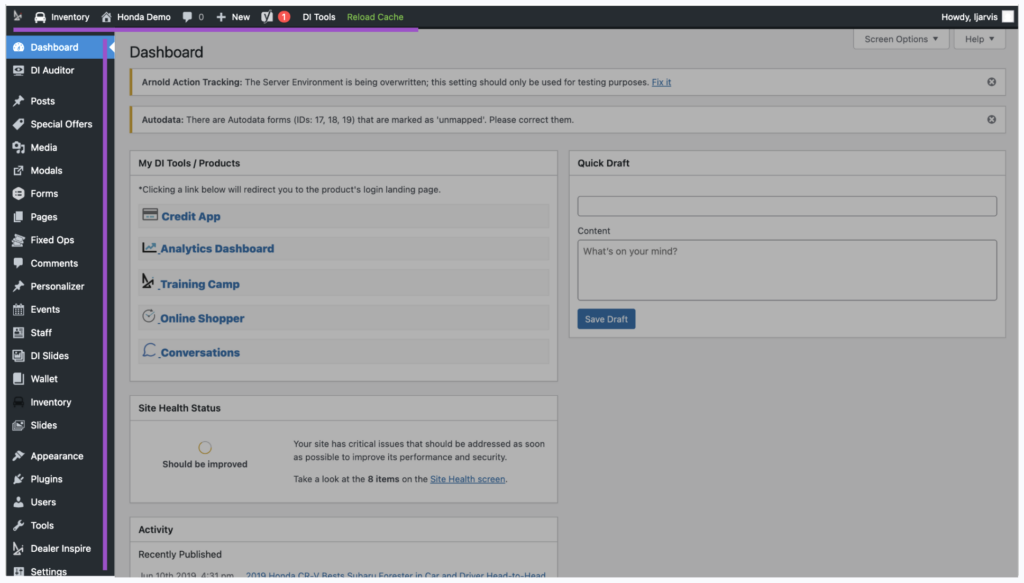
It is important to keep your digital showroom appealing and up-to-date for your shoppers. The image below calls out just a few key plugins that you have access to right now. Because you have full control over these tools, we’ll show you exactly how to get to them so you can manage your site’s customizations.
1 Navigate from Frontend to Backend
There are two primary ways to access your website backend.
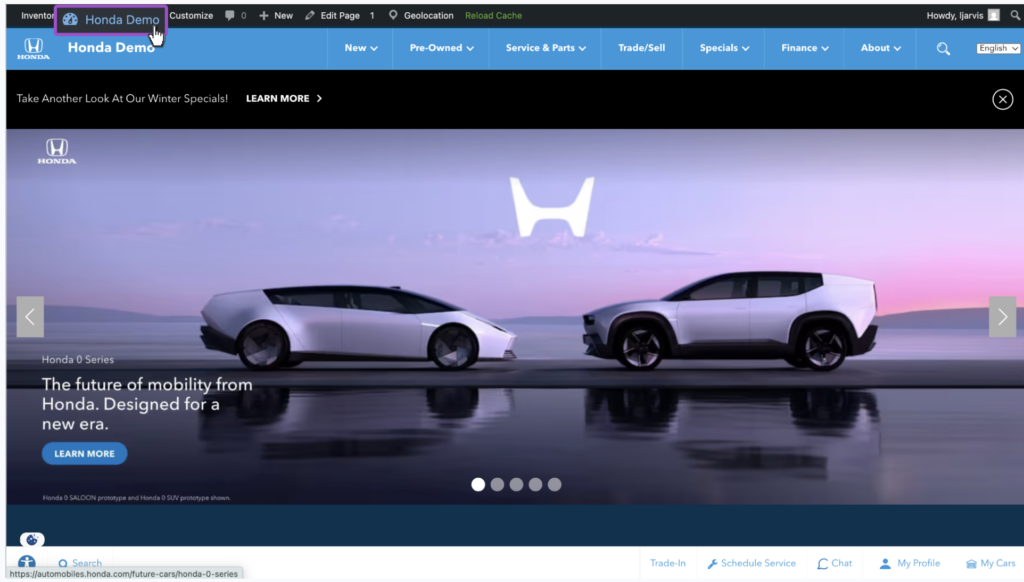
Option 1: From the Frontend (If Already Logged In)
- Visit your live website (frontend).
- If you are logged in, you will see a black admin bar at the top of the page.
- Click your dealership name in the admin bar.
- Select Dashboard or your dealership name to access the backend.
If you do not see the admin bar, you are not logged in.
Option 2: Manual Login
If you are not accessing your site through the Cars.com Hub:
- In your browser address bar, add /wp-admin to the end of your website URL.
Example: www.yourdealership.com/wp-admin - Enter your login credentials.
You will be directed to the WordPress dashboard.
2 Tour the WordPress dashboard
Once logged in:
- The left-hand menu contains all plugins and content management tools.
- The top admin bar allows you to:
- Return to the frontend.
- Use Reload Cache to push saved changes live (if applicable).
- Return to the frontend.
Most updates will begin from the left-hand navigation menu.
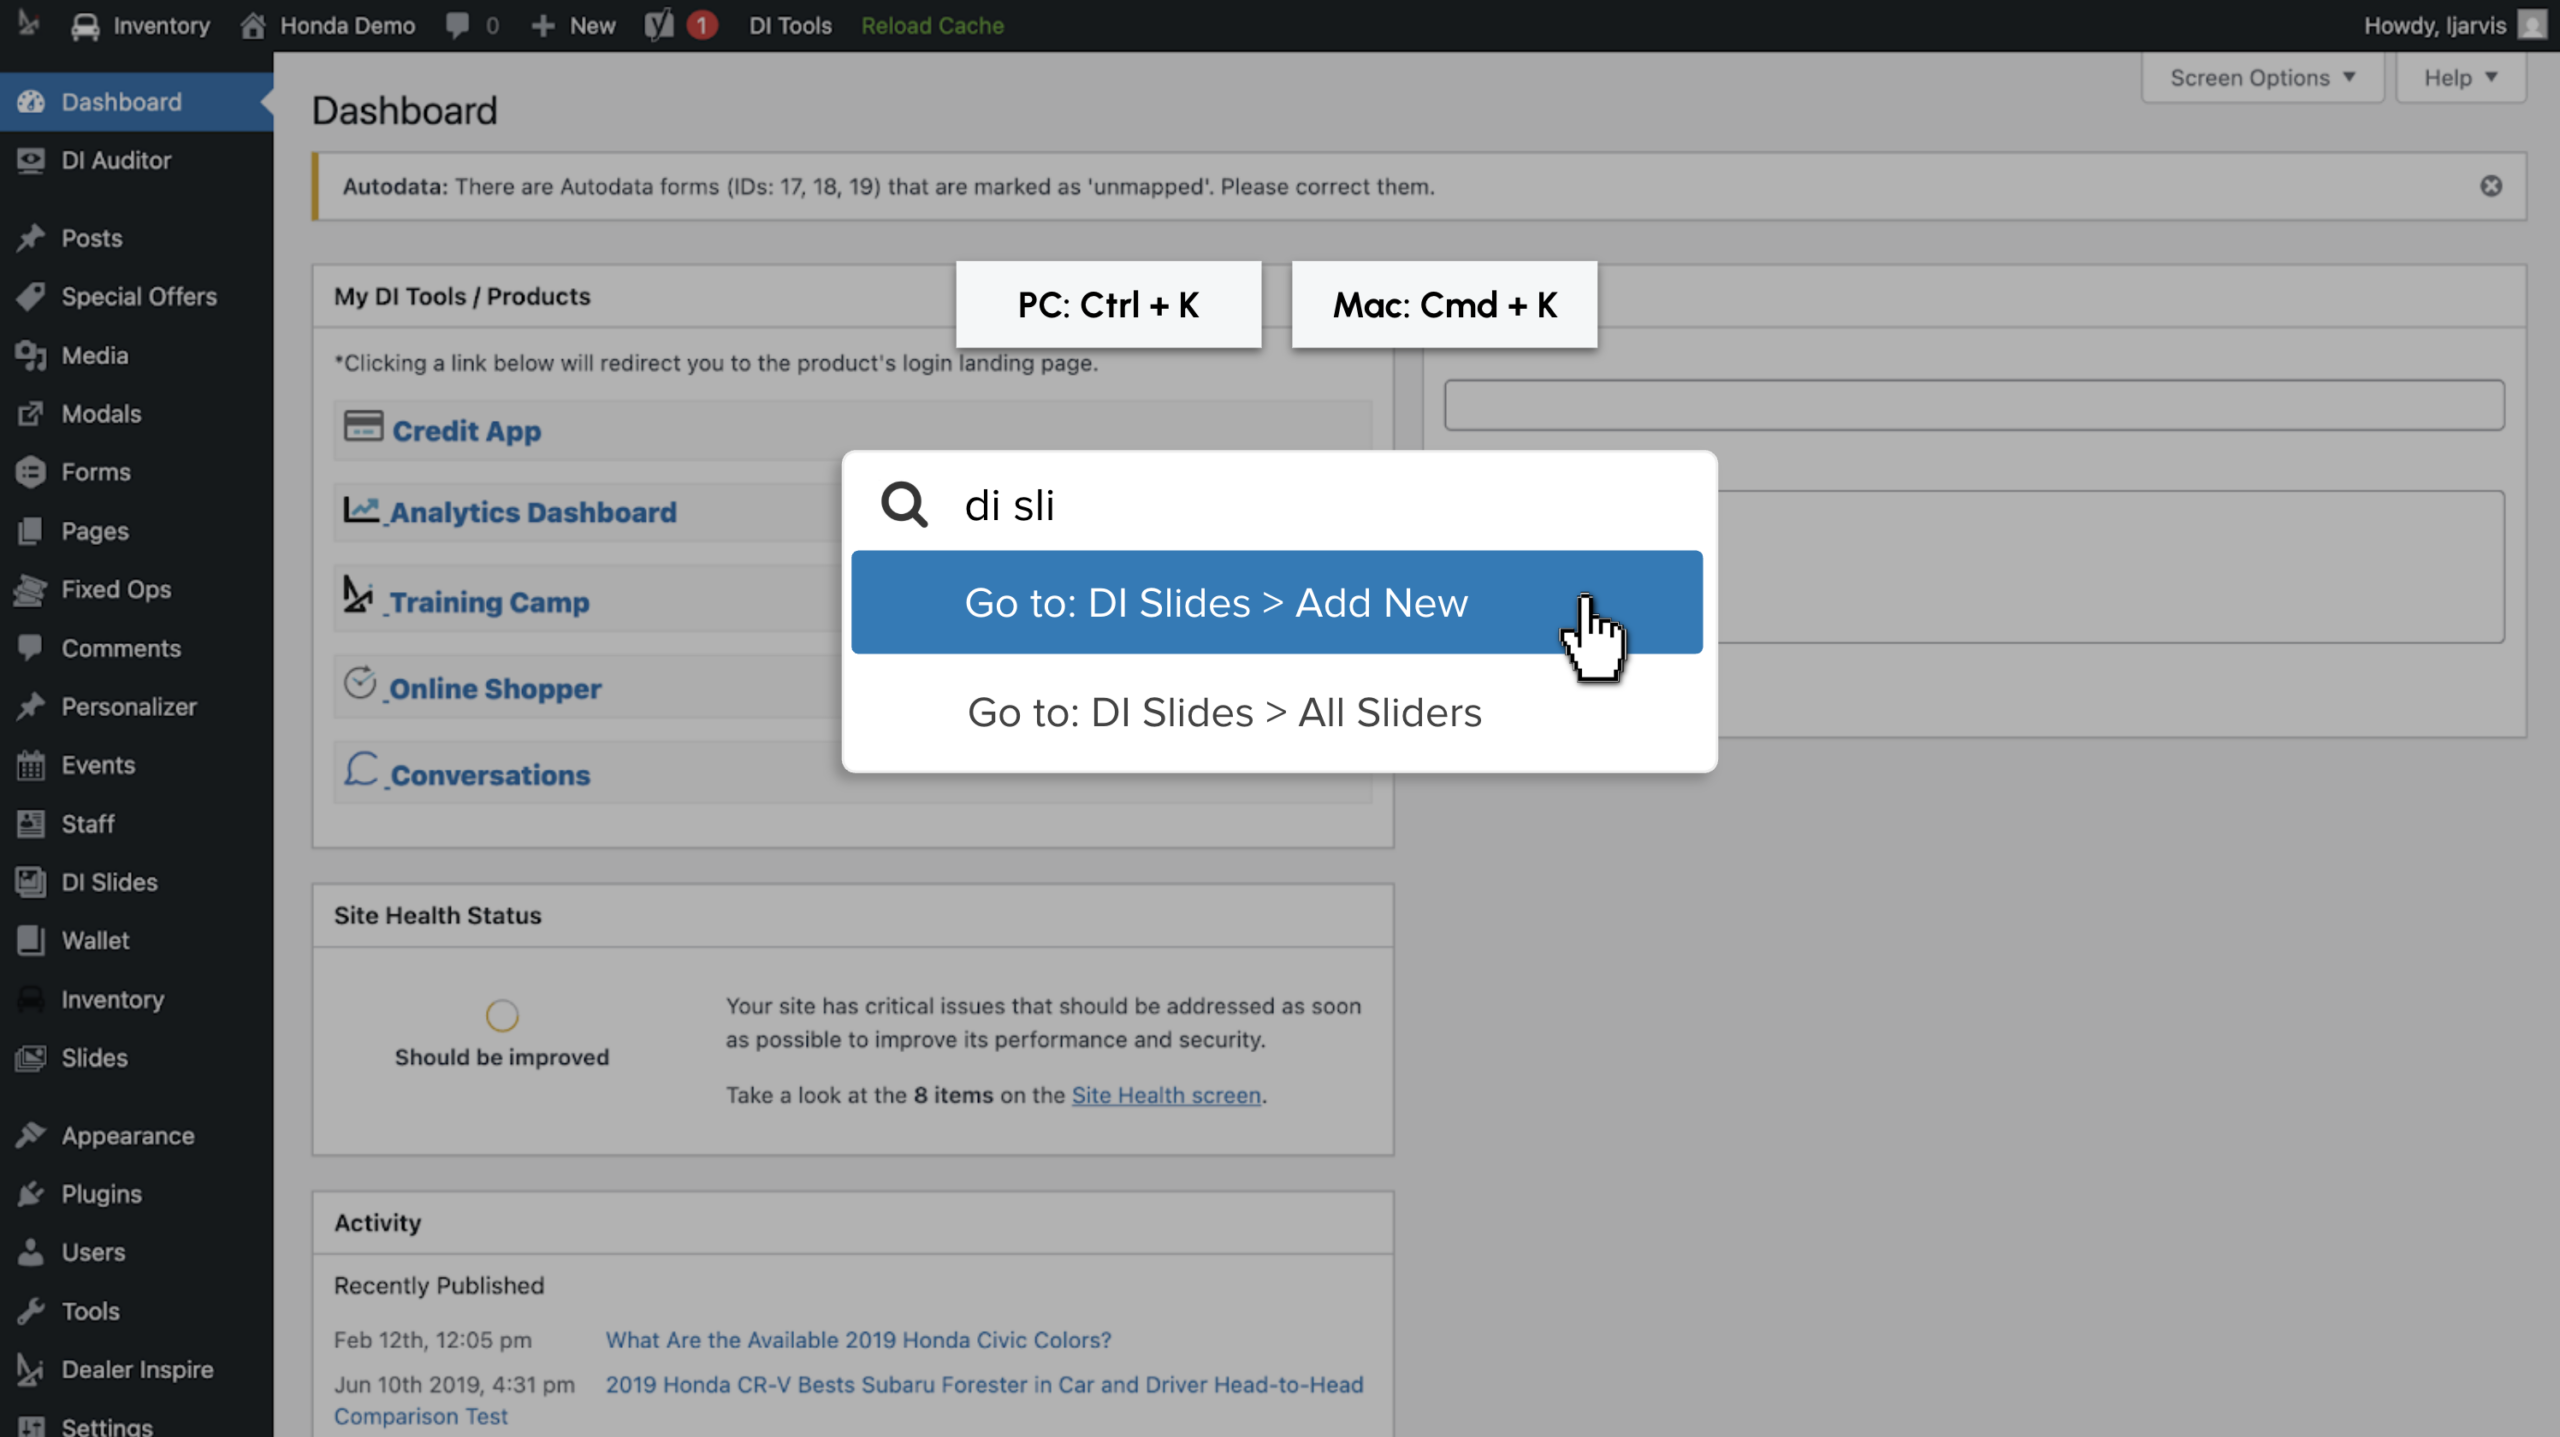
Use this shortcut on any admin screen to quickly jump to plugins:
- On a PC: Use Control + K.
- On a Mac: Use Command (⌘) + K.
3 Explore plugins and their functionality
Below is an overview of commonly used plugins and where to find them.
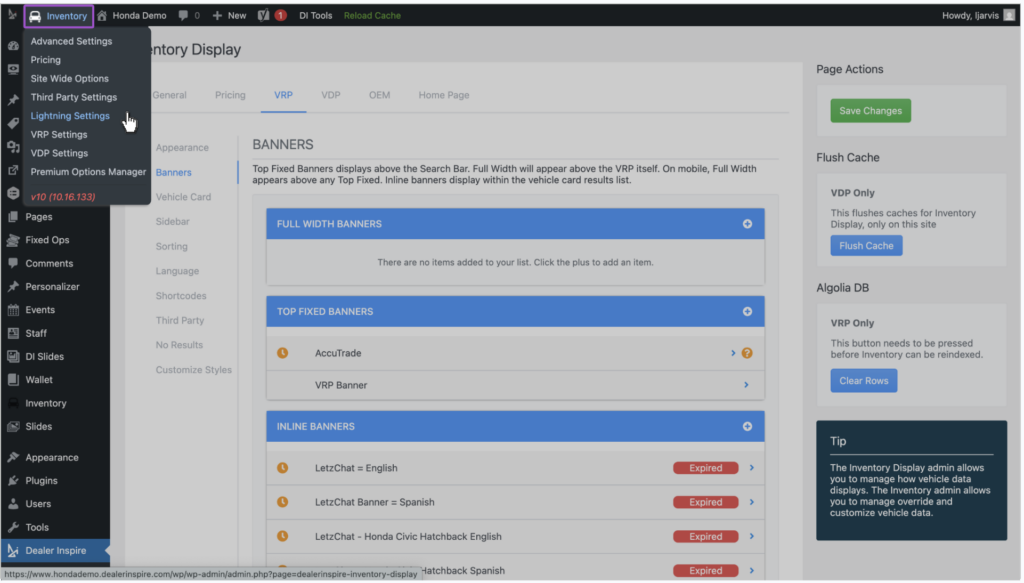
Lightning Settings
Click Inventory, then Lightning Settings.
This section controls how inventory displays on:
- VDPs (Vehicle Display Pages)
- VRPs (Vehicle Results Pages)
You can manage:
- Inline banners
- Vehicle card layouts
- Inventory display settings
Due to the advanced configuration options available here, contact support@dealerinspire.com if you are unsure about making changes.
Here’s an example of what an Inline Banner looks like on your website, which is one of the many customizations you can make within Lightning Settings.
FRONTEND VIEW
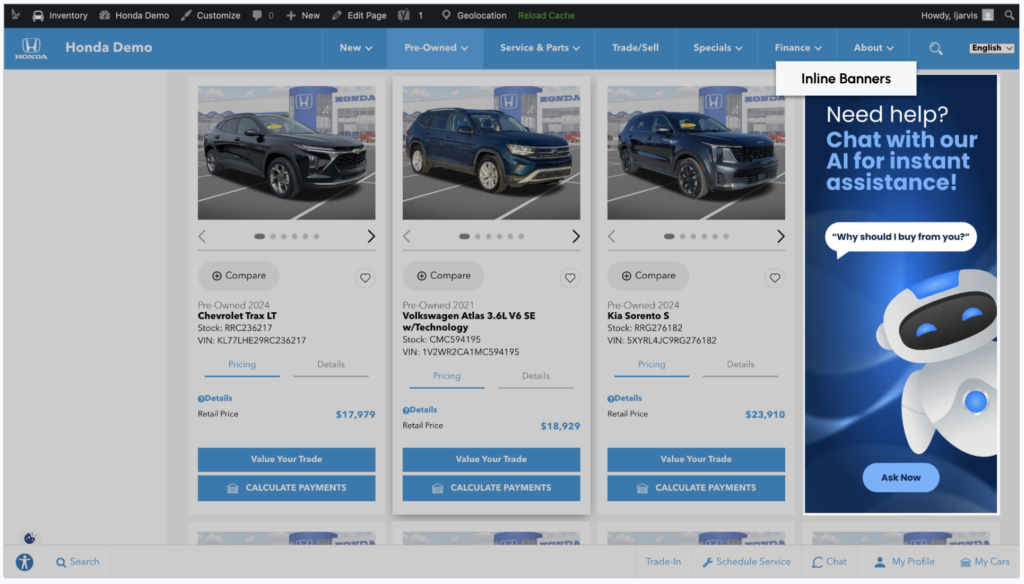
Learn more about how to add inline banners in lightning settings.
Posts (blog content)
Click Posts, then All Posts or Add New.
Use this section to:
- Publish blog articles
- Share dealership news
- Post educational content
Changes must be Published or Updated to appear live.
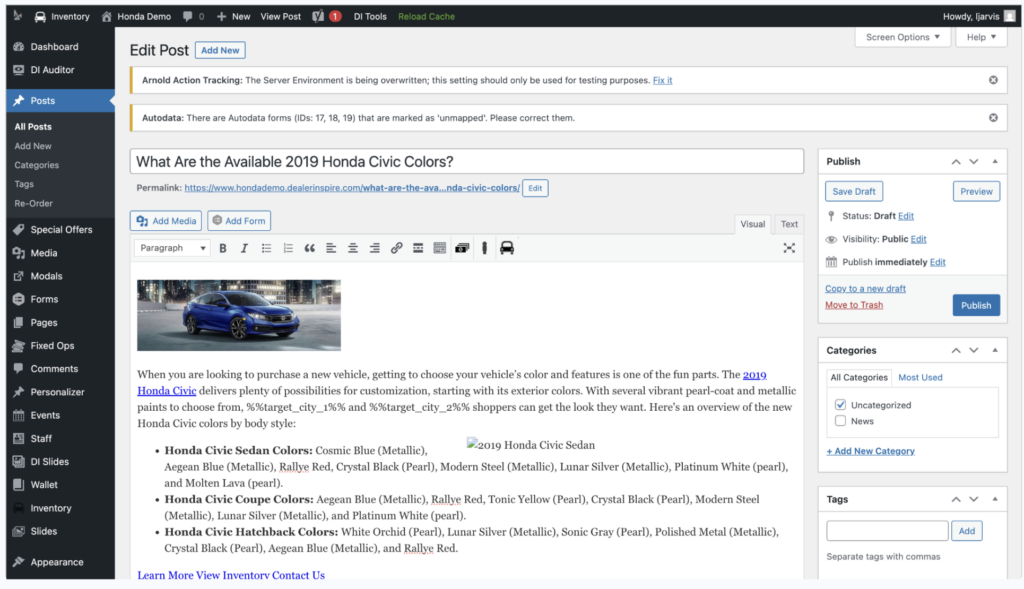
Here’s an example of what a blog post looks like on your website.
FRONTEND VIEW
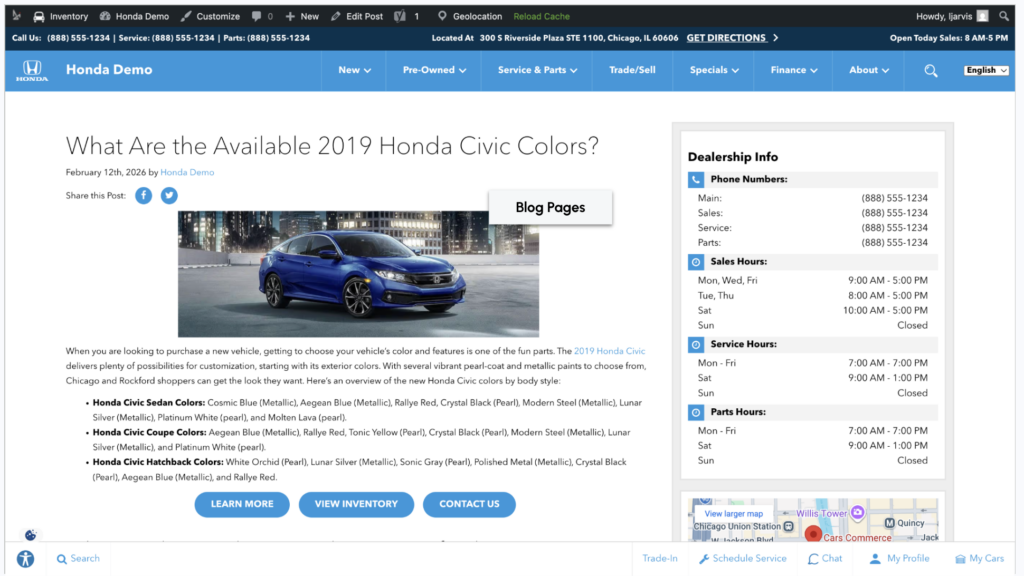
Learn more about how to create a blog post.
Special Offers
Click Special Offers, then All Offers or Add Offer.
This section allows you to:
- Create new and used inventory incentives
- Apply offers to specific vehicles
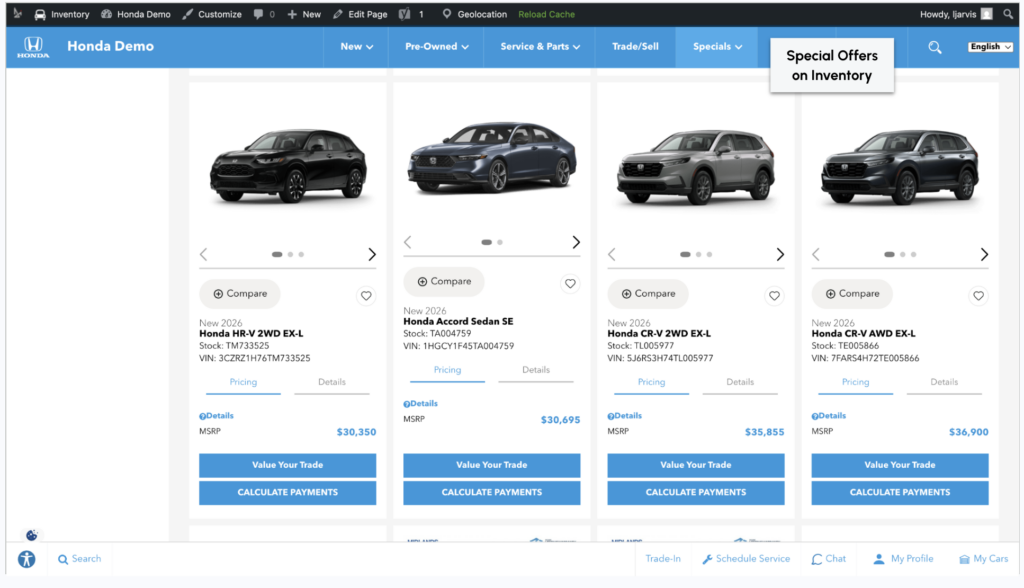
- Display specials on VRPs and VDPs
Always verify offer start and end dates before publishing.
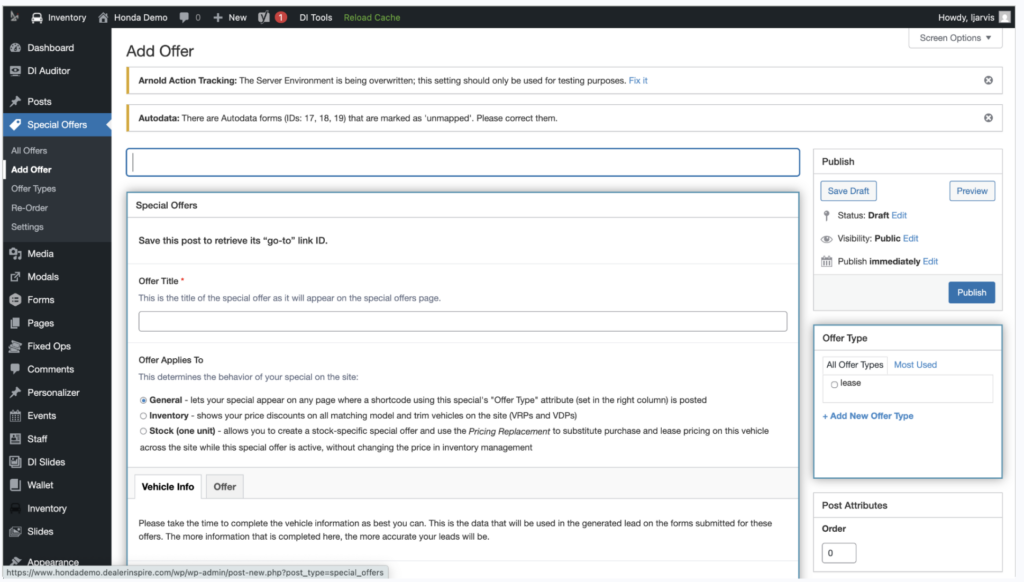
Here’s an example of what a new inventory special offers page looks like on your website.
FRONTEND VIEW
Pages (Site Builder)
Click Pages, then All Pages or Add New.
For drag-and-drop editing:
- Open a page.
- In the right-hand column, locate Page Attributes.
- Select Site Builder from the Template dropdown.
The Site Builder template allows you to:
- Add blocks and components
- Rearrange sections
- Update content without coding
Click Update or Publish after making changes.
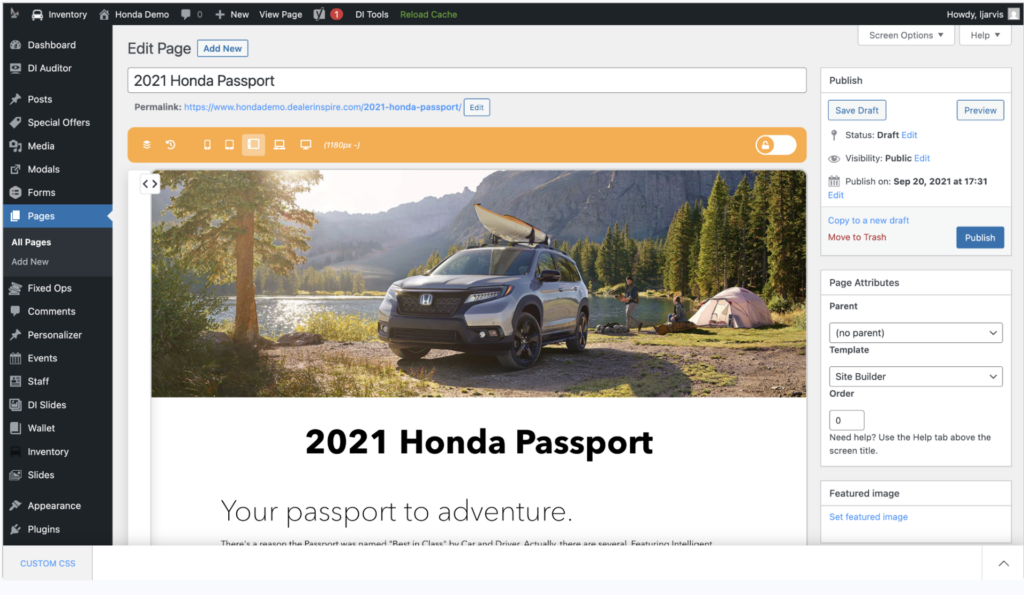
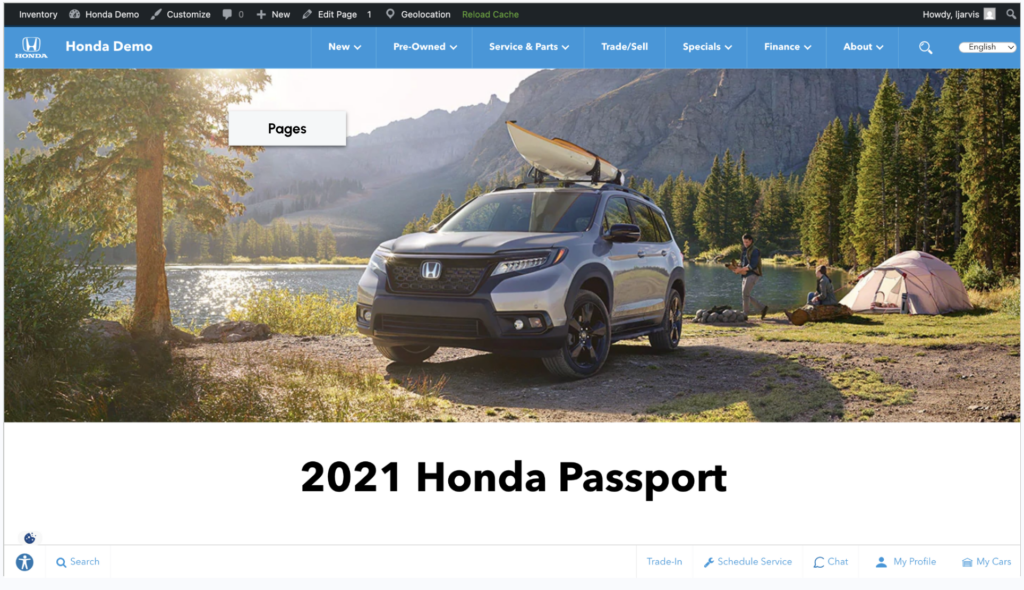
Here’s an example of what a page using the Site Builder template and visual editor widget looks like on your website.
FRONTEND VIEW
Fixed Ops (service & parts coupons)
Click FixedOps, then All Coupons or Add Coupon.
Use this plugin to:
- Create service and parts coupons
- Set expiration dates
- Manage coupon display order
Coupons must be Published to appear on the frontend.
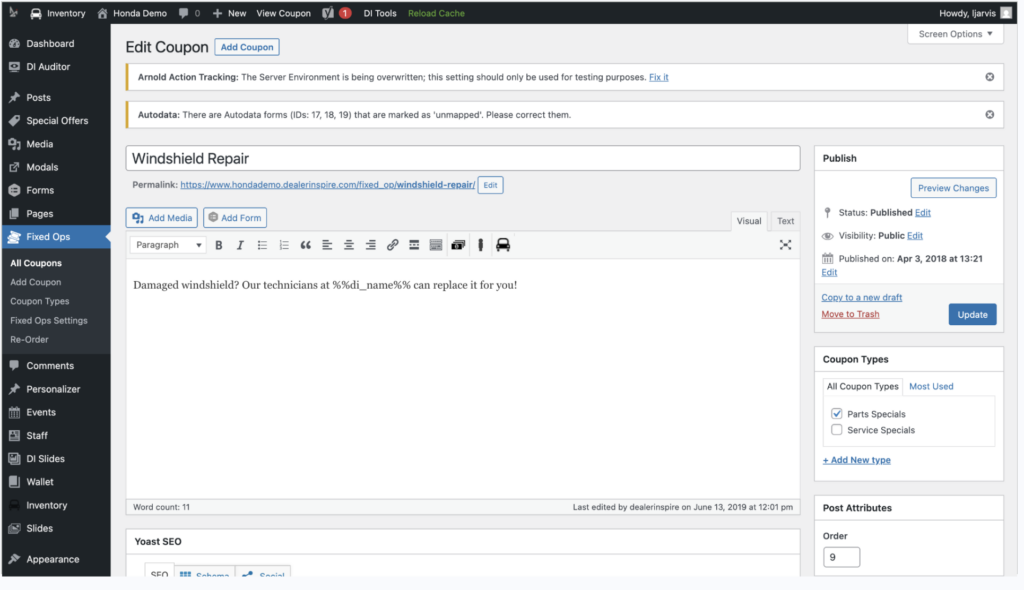
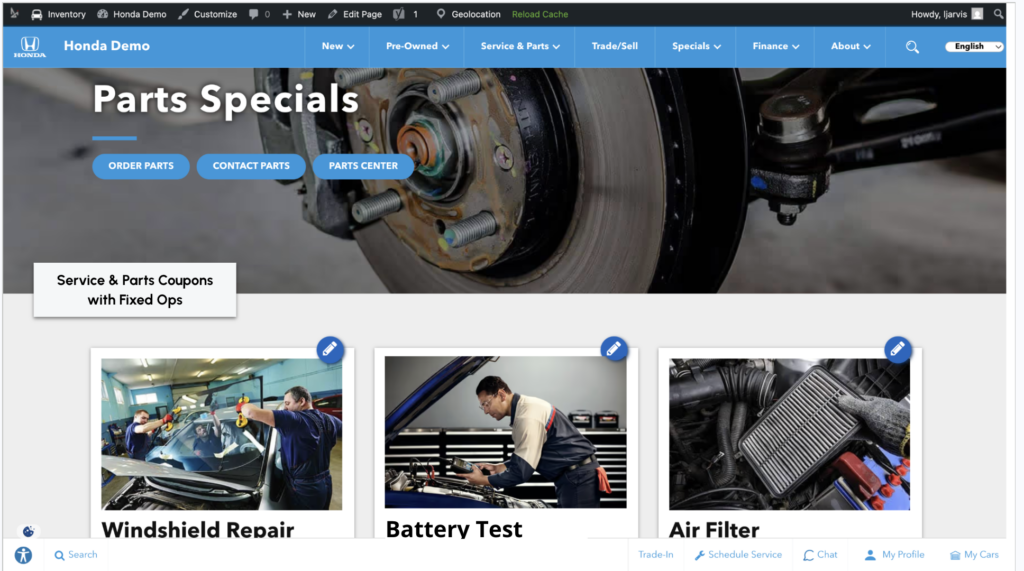
Here’s an example of what Service and Parts coupons look like on your website.
FRONTEND VIEW
Personalizer
Click Personalizer, then All Personalizers or Add New.
This plugin allows you to:
- Display custom messaging based on user behavior
- Target returning visitors
- Highlight promotions based on browsing history or location
After creating or editing a personalization rule, save and verify placement on the frontend.
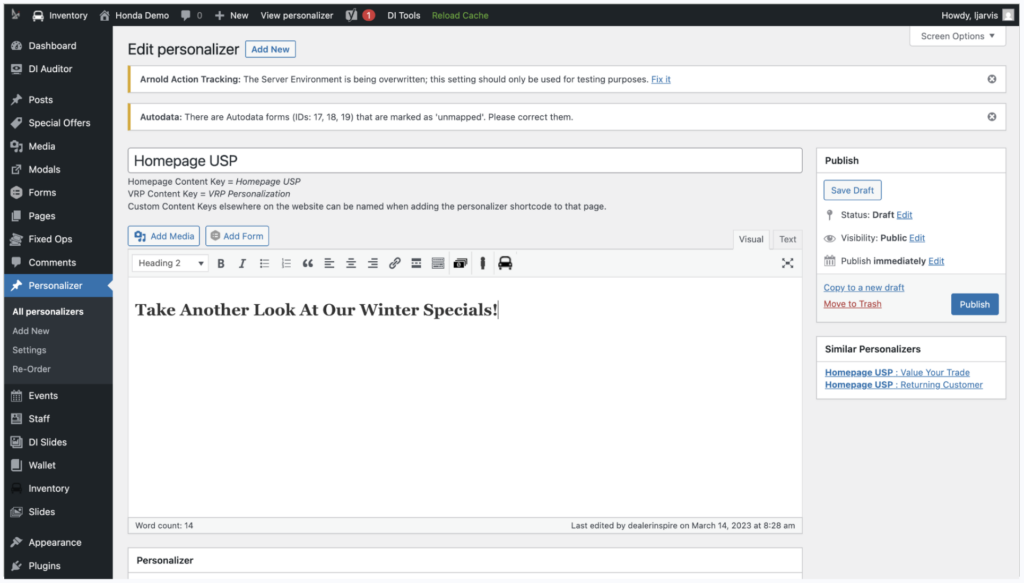
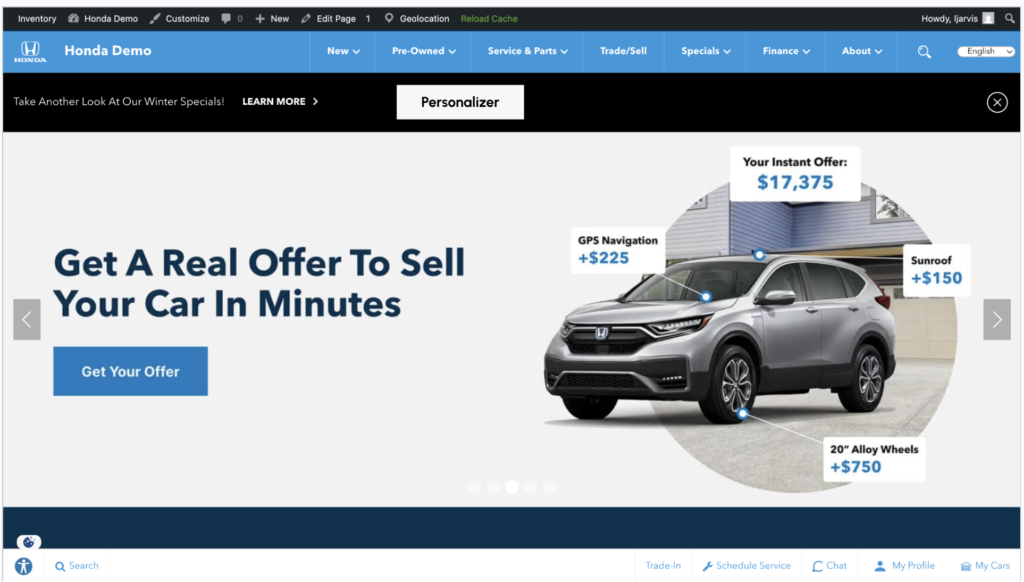
Here’s an example of what a personalized message looks like on your website. Learn more about how to set up personalized messages.
FRONTEND VIEW
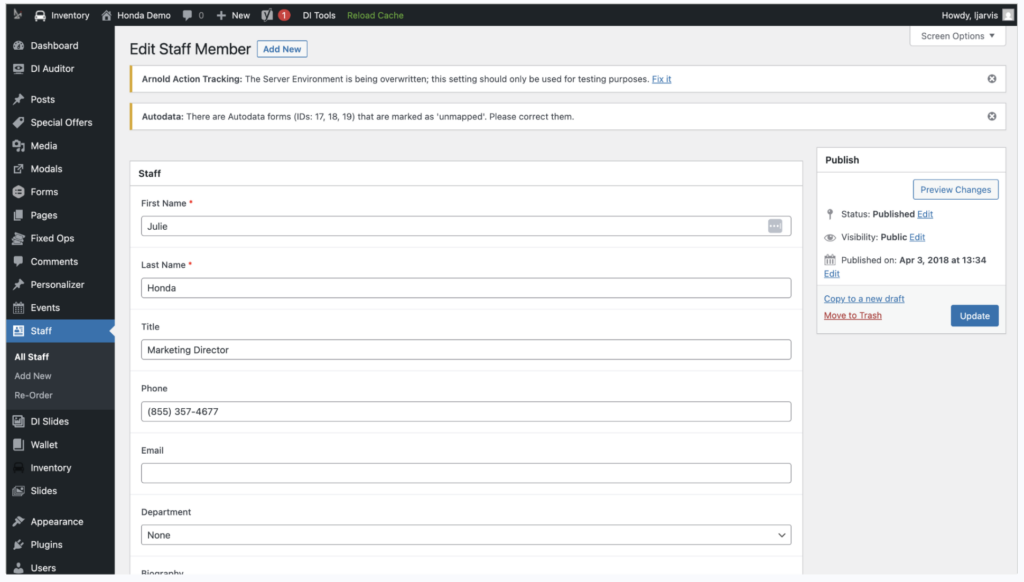
Staff
Click Staff, then All Staff or Add New.
Use this section to:
- Add or edit employee bios
- Upload staff photos
- Assign team members to departments
Update the page after making changes to ensure accuracy
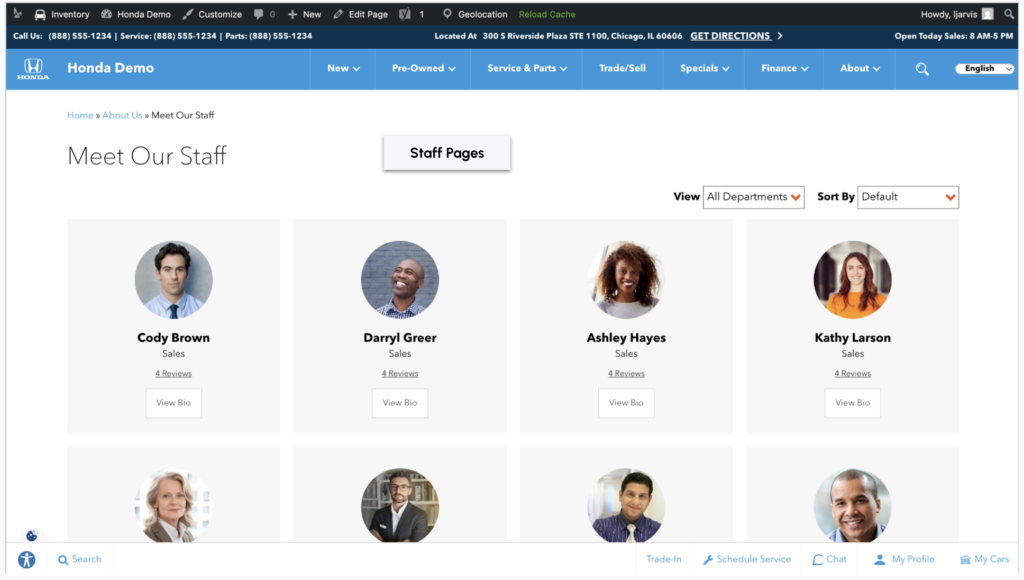
Here’s an example of what a Staff page looks like on your website.
FRONTEND VIEW
DI Slides
Click DI Slides, then All Slides or Add New.
This controls:
- Homepage banners
- VRP banners
- Slide ordering
After editing slides:
- Save or Publish changes.
- Reorder slides if necessary.
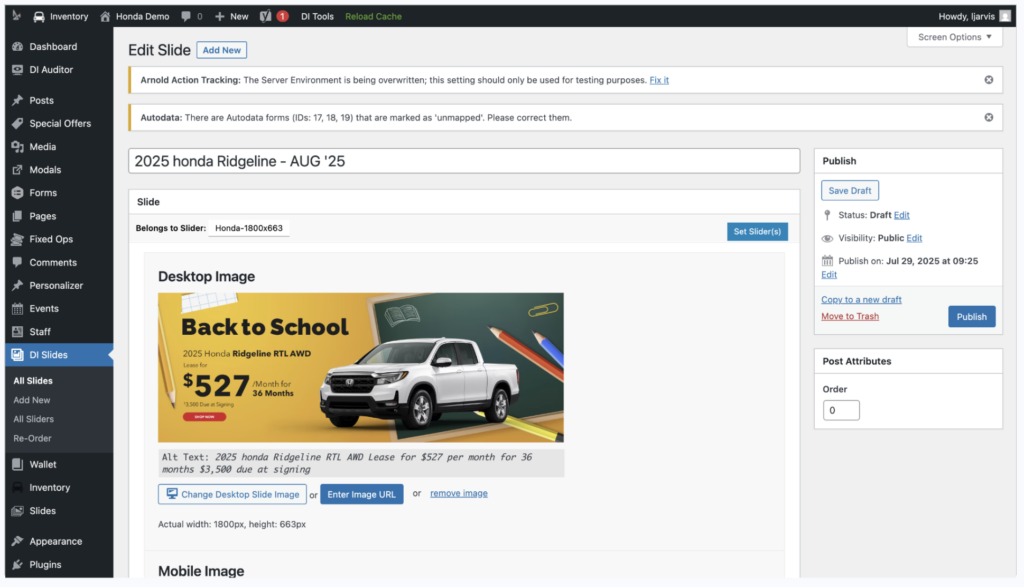
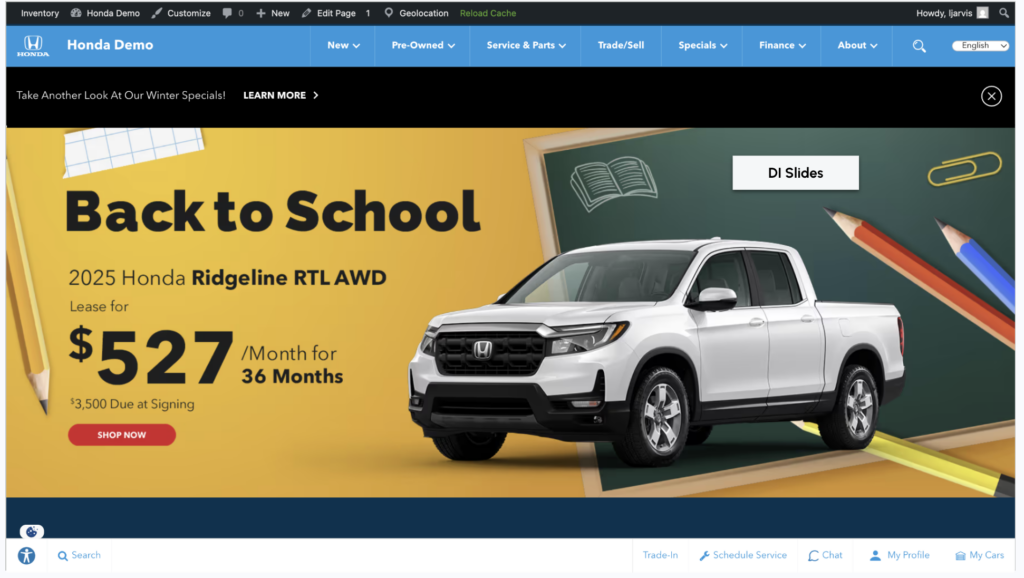
Here’s an example of what a DI image slide looks as a homepage banner on your website. Here’s how you can create a slider with DI Slides.
FRONTEND VIEW
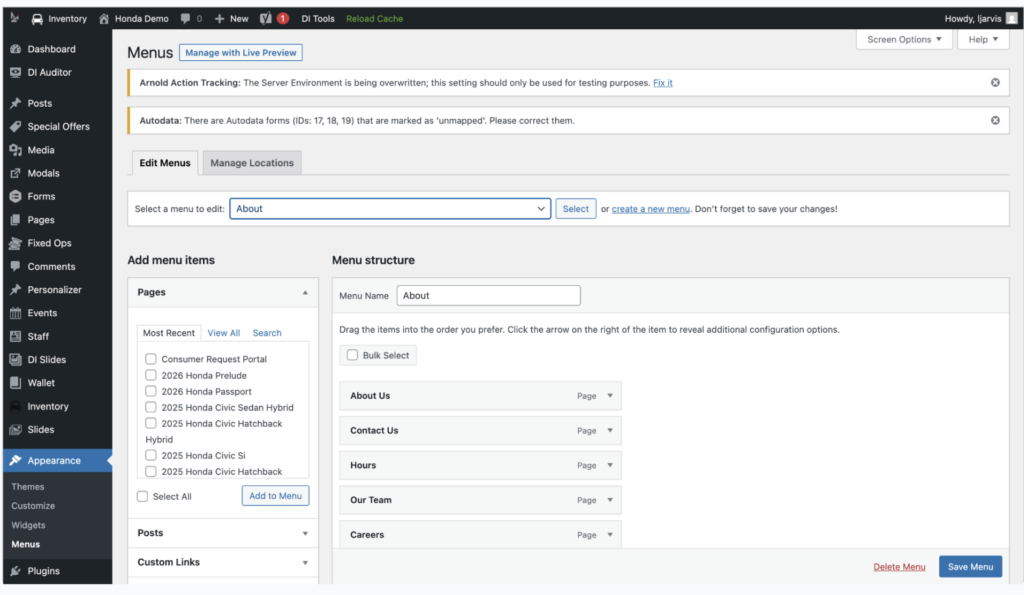
Appearance (Menus)
Click Appearance, then Menus.
This section controls:
- Navigation structure
- Dropdown menus
- Link ordering
Select the menu you want to edit from the dropdown before making changes.
Changes must be saved before they appear live.
If unsure, contact support before adjusting navigation.
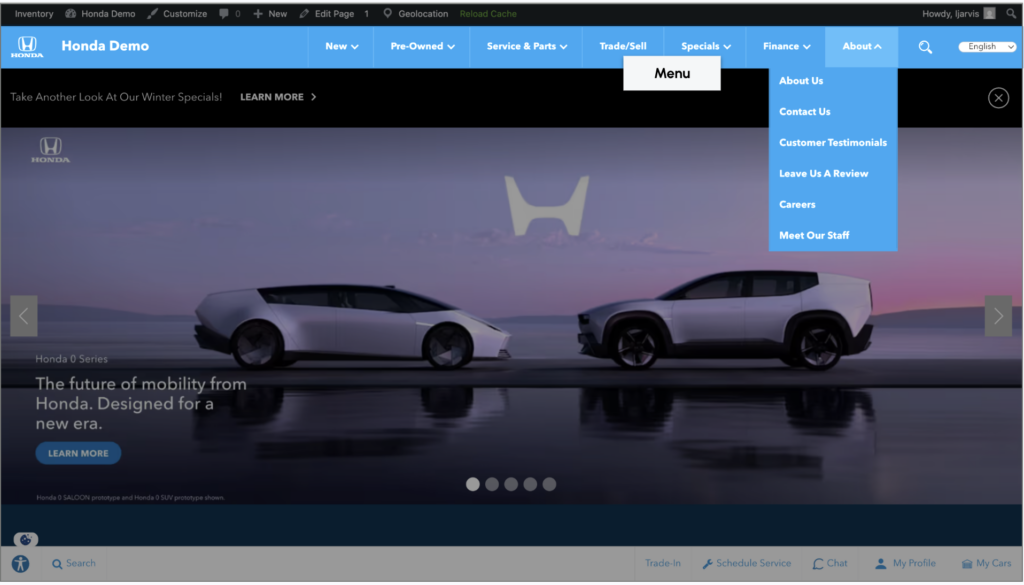
Here’s an example of what the navigation menu looks like on your website.
FRONTEND VIEW
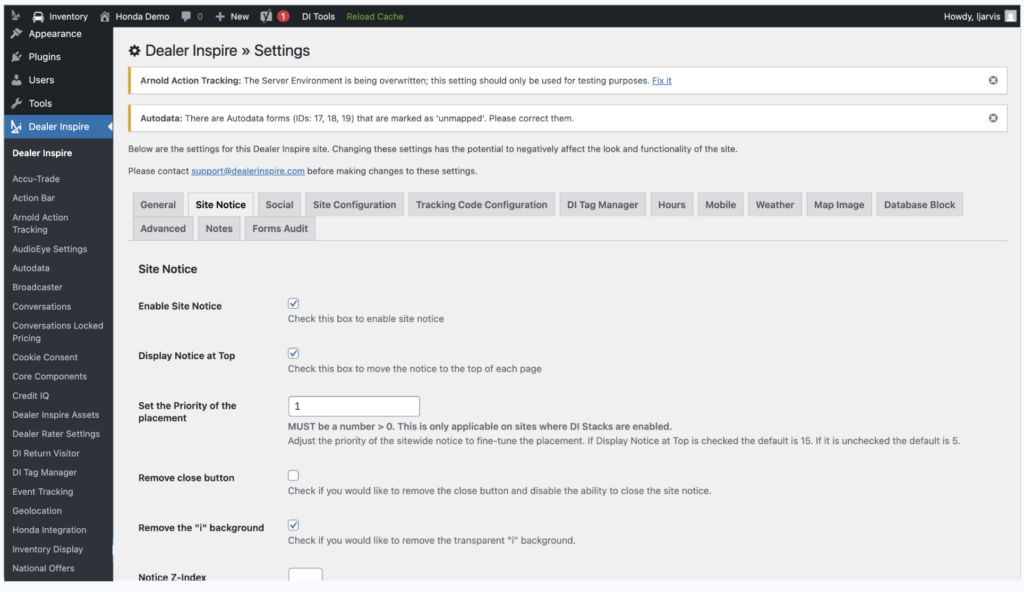
Dealer Inspire Settings
Click Dealer Inspire, then select a tab (such as Site Notice or Hours).
This section manages:
- Dealership hours
- Address information
- Social media links
- Site notice banners
Changes here affect global site information.
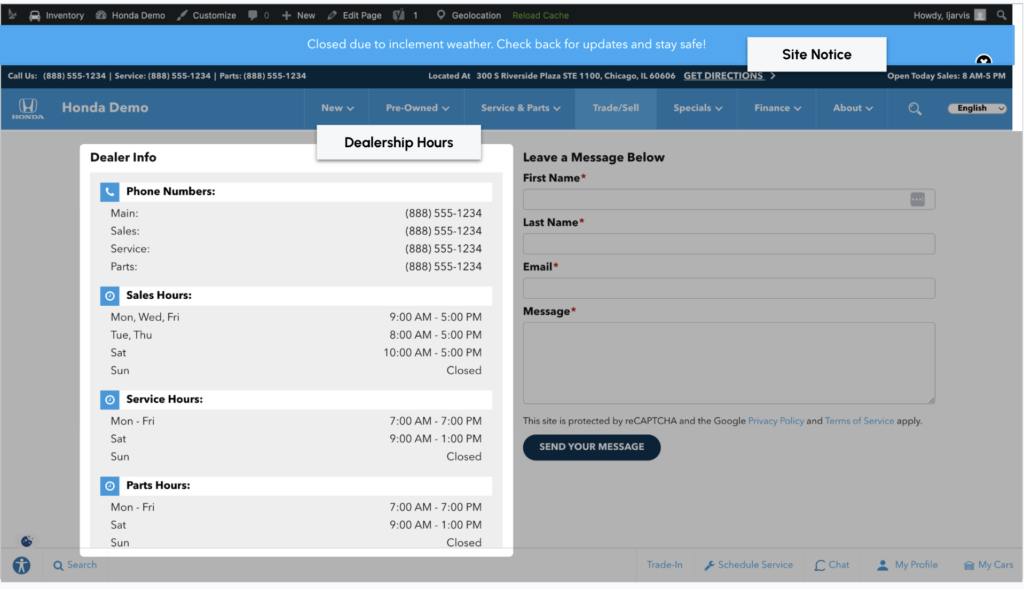
Here’s an example of what a Site Notice message looks like, and your dealership hours.
FRONTEND VIEW
4 Finalize your Updates
After making changes in any plugin:
- Save your work
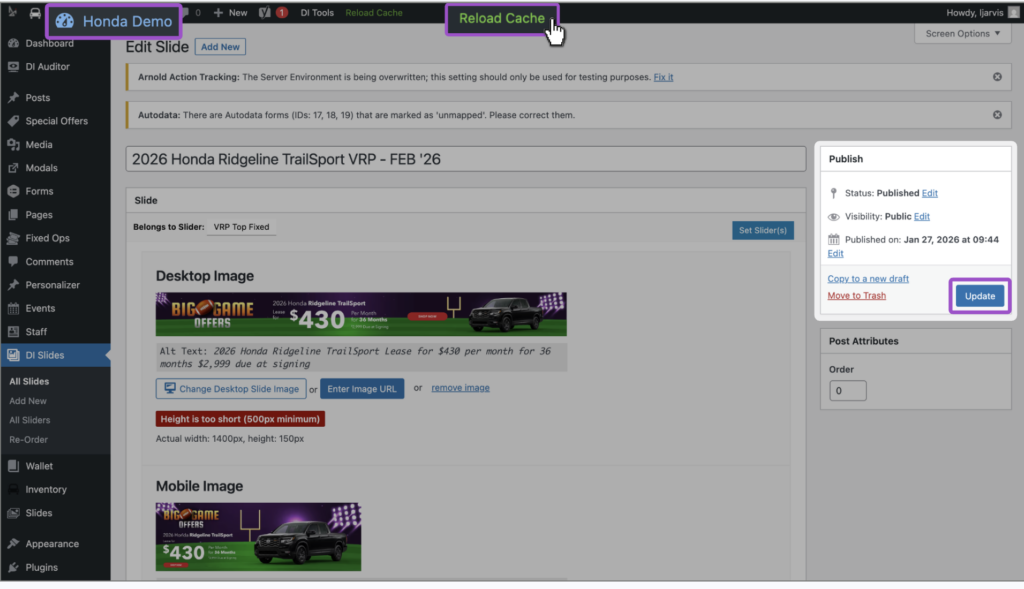
- Click Save, Update, or Publish (top-right corner).
- You may also save as Draft if not ready to go live.
- If you navigate away without saving, your changes will be lost.
- Click Save, Update, or Publish (top-right corner).
- Push changes live
- Use the Reload Cache button in the top admin bar.
- Refresh the frontend to confirm updates appear correctly.
- Reload Cache ensures saved changes are visible to shoppers immediately.
- Use the Reload Cache button in the top admin bar.
- Verify on the front end
- Click your dealership name in the top admin bar.
- Review your updates as a shopper would see them.
- Confirm formatting, links, and placement.
- Click your dealership name in the top admin bar.
Important: Do Not Edit Inventory Directly in WordPress
Avoid making pricing or vehicle data changes inside the Inventory plugin.
All inventory updates should be made through your Inventory Management System (IMS).
WordPress does not push inventory edits back to other platforms. Manual changes can create pricing inconsistencies across listing sites.
The “When in Doubt” Rule
If you encounter:
- Code fields
- Unfamiliar settings
- Unexpected layout changes
- Uncertainty about publishing
Contact support@dealerinspire.com before proceeding.st updates will begin from the left-hand navigation menu.