How to set rules with automation
AccuTrade’s Automation tab allows you to take control of your inventory strategy by creating dynamic, rules-based acquisition offers. Whether you’re looking to win more high-value trades or target specific makes and models, automation rules let you customize how and where your offers apply.
In this article, you’ll learn how to use AccuTrade’s Automation tab to create vehicle acquisition rules — helping you make competitive, targeted trade-in offers and acquire the inventory your dealership needs.
To get started
Go to the Cars.com Hub and then click on AccuTrade.
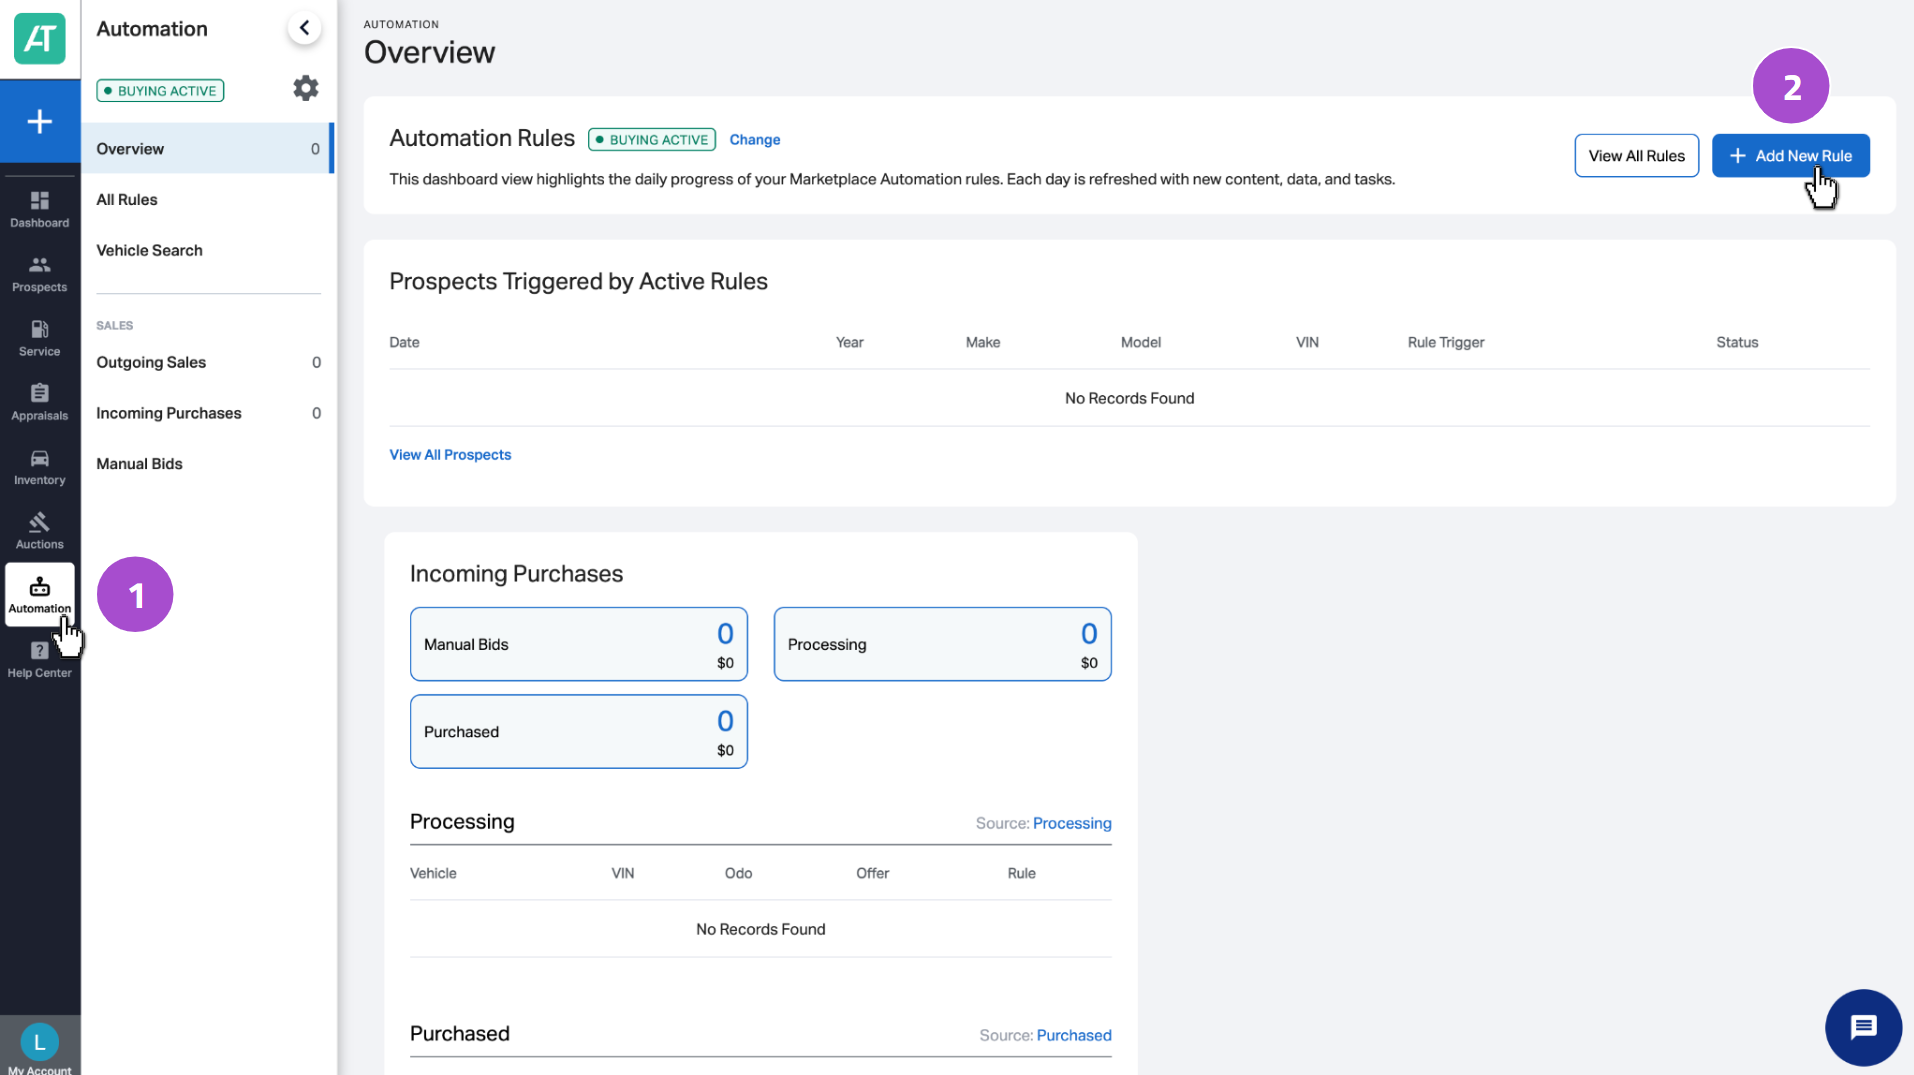
1 Open the Automation tab
- Navigate to the Automation tab.
- Click + Add New Rule to begin creating your acquisition rule.
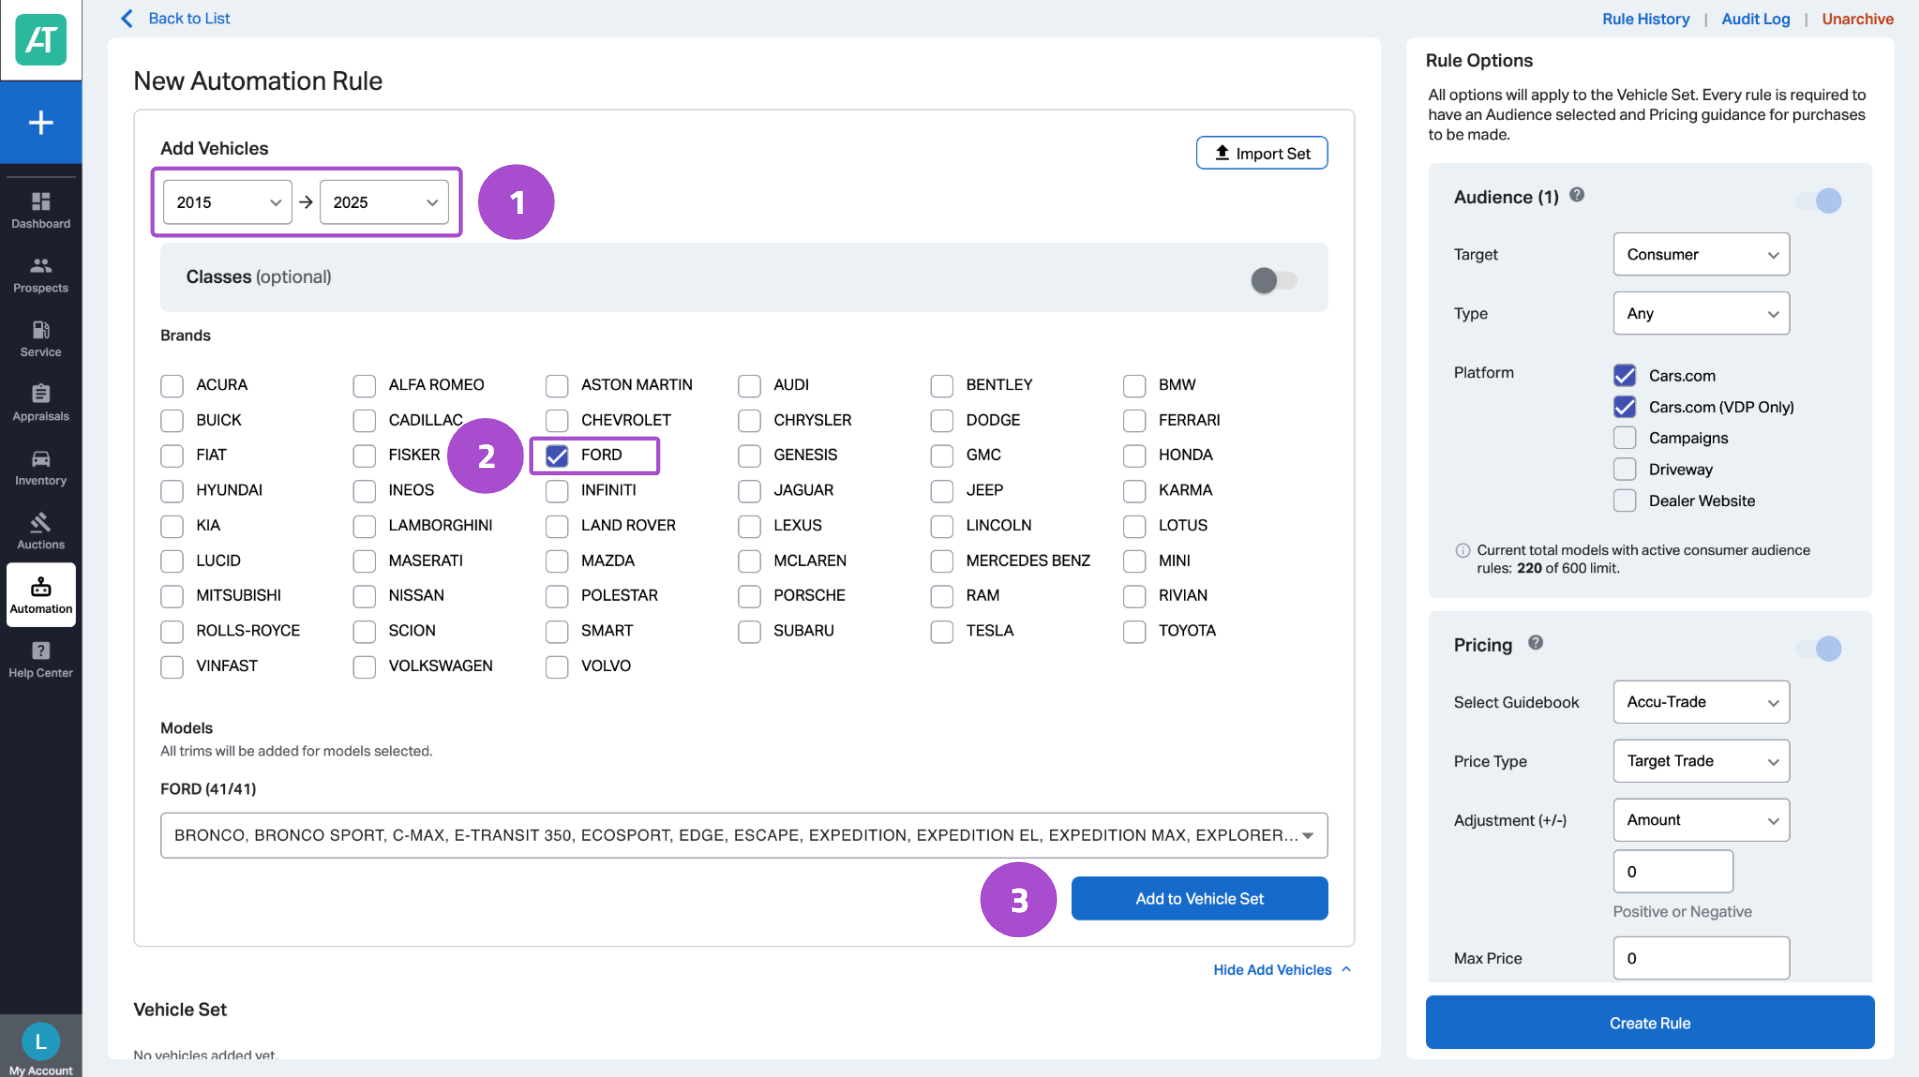
2 Select your target vehicles
- Choose a date range to narrow your vehicle selection.
- Select one or more brands (e.g., Ford).
- In the dropdown below, all matching vehicles from that brand and date range will appear.
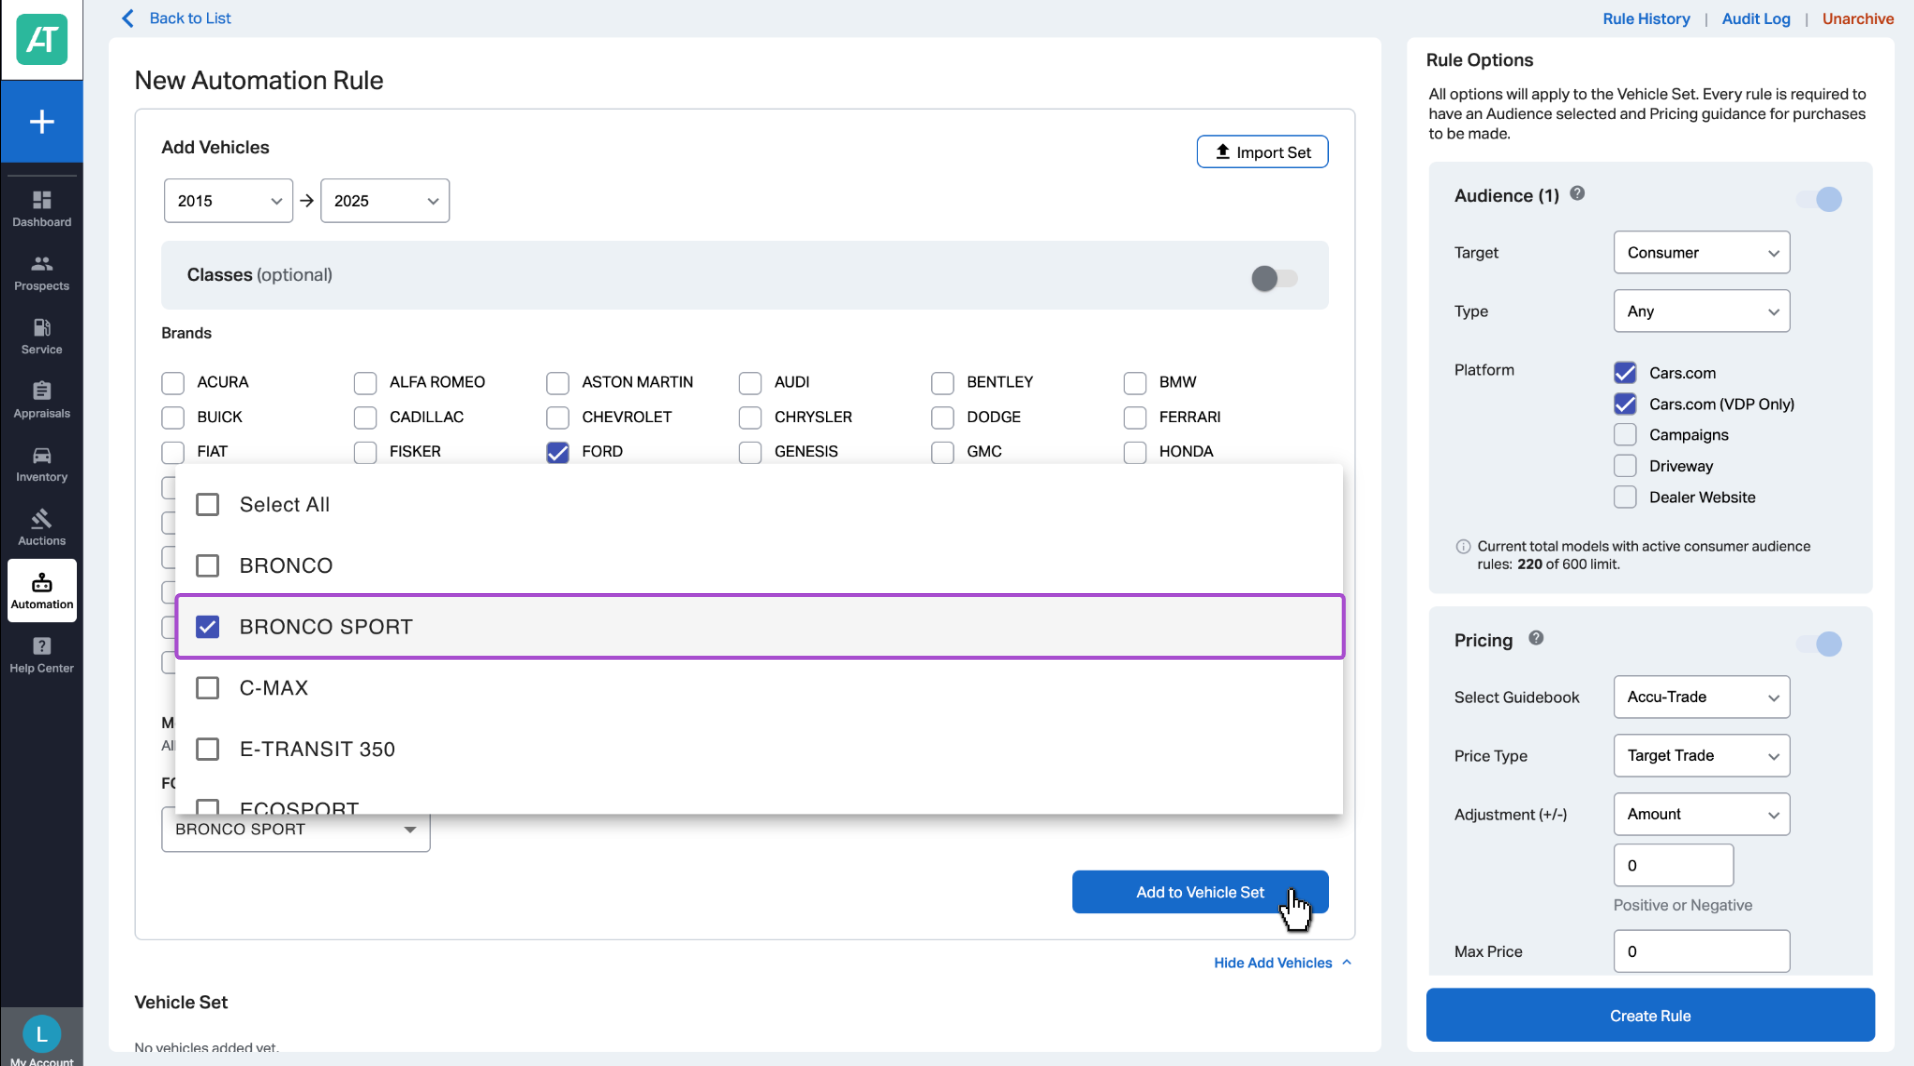
Tip: For more precise tracking, it’s best to create individual rules per vehicle. Example: Uncheck “Select All” and choose only Bronco Sport, then click Add to Vehicle Set.
3 Add trim & configuration details
- After clicking Add to Vehicle Set, a list of filtered vehicles will appear.
- To narrow further:
- Hover over Options to select specific trims or equipment configurations.
- You can also select drivetrain, fuel type, or other criteria as needed.
- Hover over Options to select specific trims or equipment configurations.
This step ensures your rule only applies to the exact vehicles you’re targeting.
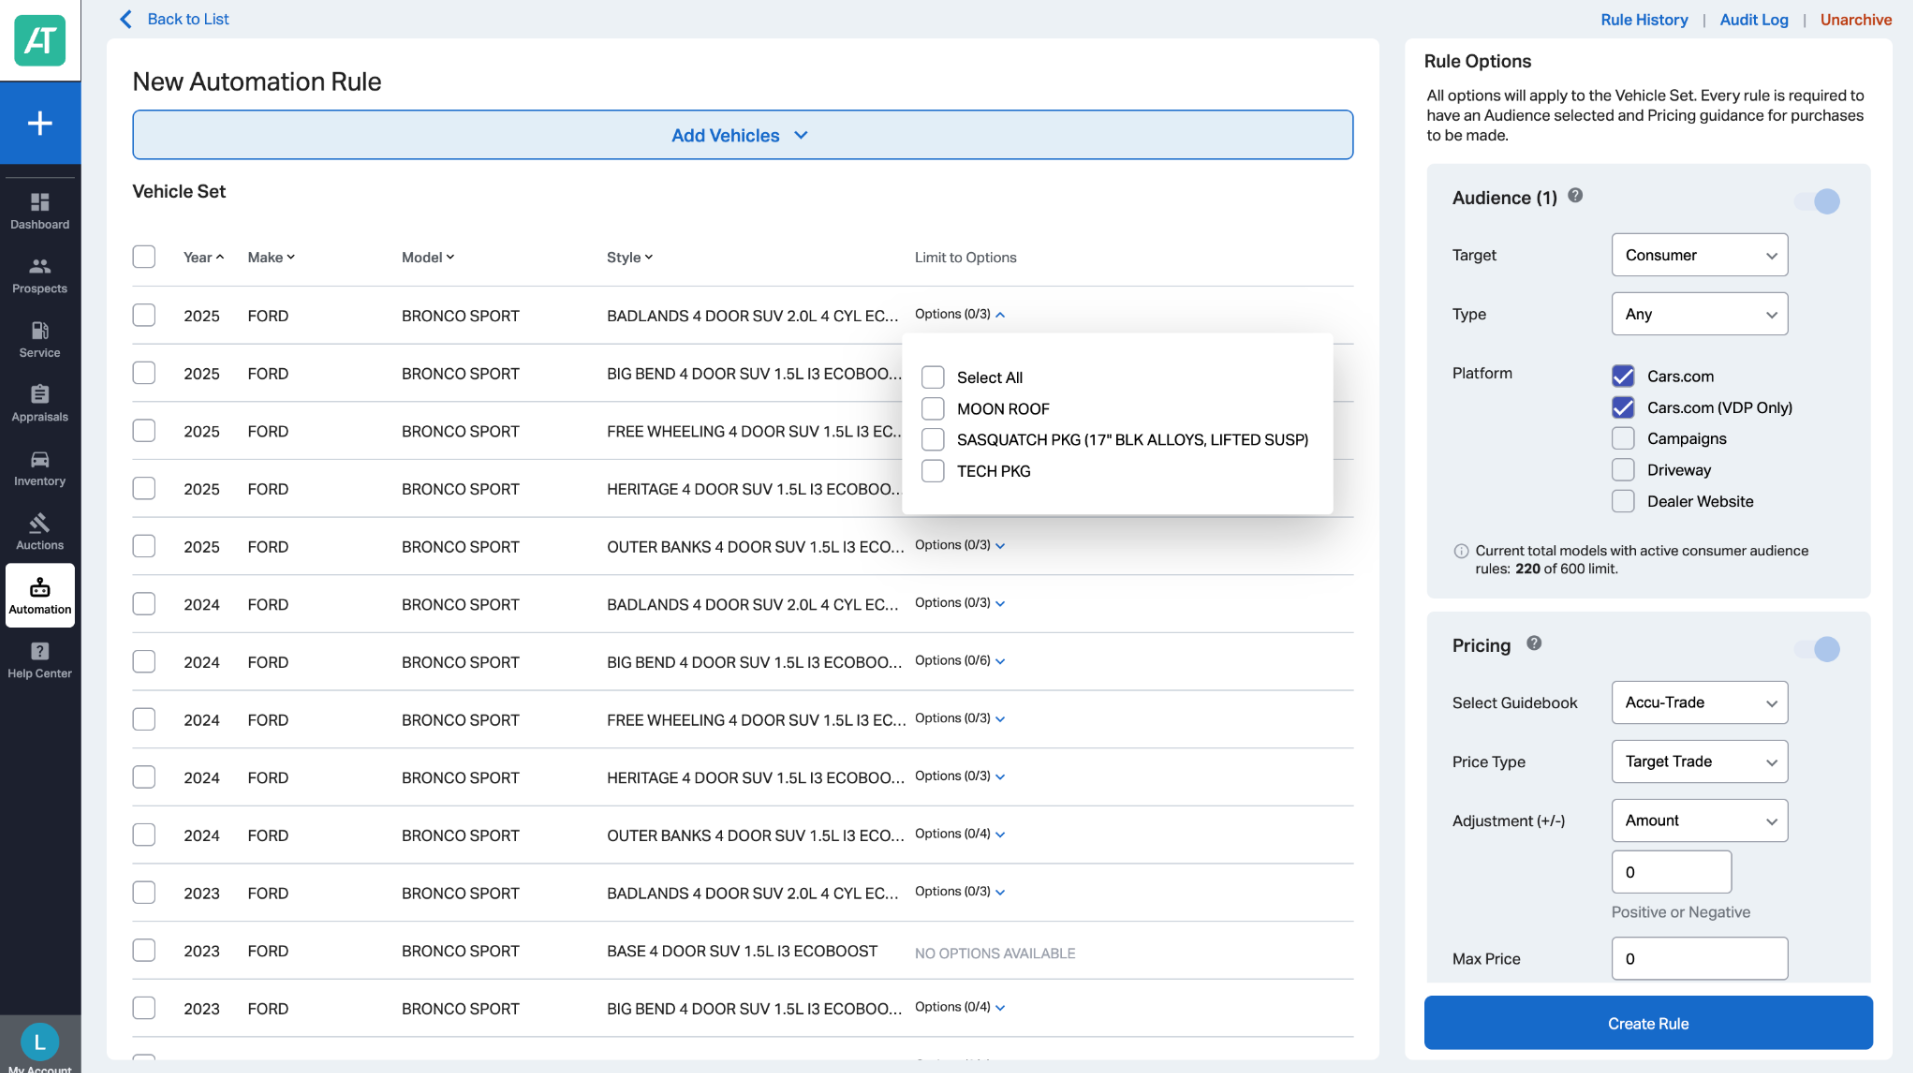
Now that you’ve selected the year, make, model, and trim details, we’ll refine your rule with more options in the right column.
4 Refine the rule parameters
On the right-hand side under Rule Options, you can define how your offers are calculated and where they apply:
- Audience: Choose Dealer or Consumer
- Transaction Type: Select Trade, Sale, or Any
- Platform(s): Choose where the rule will apply (e.g., Cars.com, internal tools)
- Guidebook: Defaults to AccuTrade, or choose KBB, BlackBook, etc.
- Price Type: Trade In, Auction, or Retail
- Condition: Select from Excellent, Very Good, Good, or Fair
- Adjustment: Choose Amount ($) or Percentage (%), then enter your value
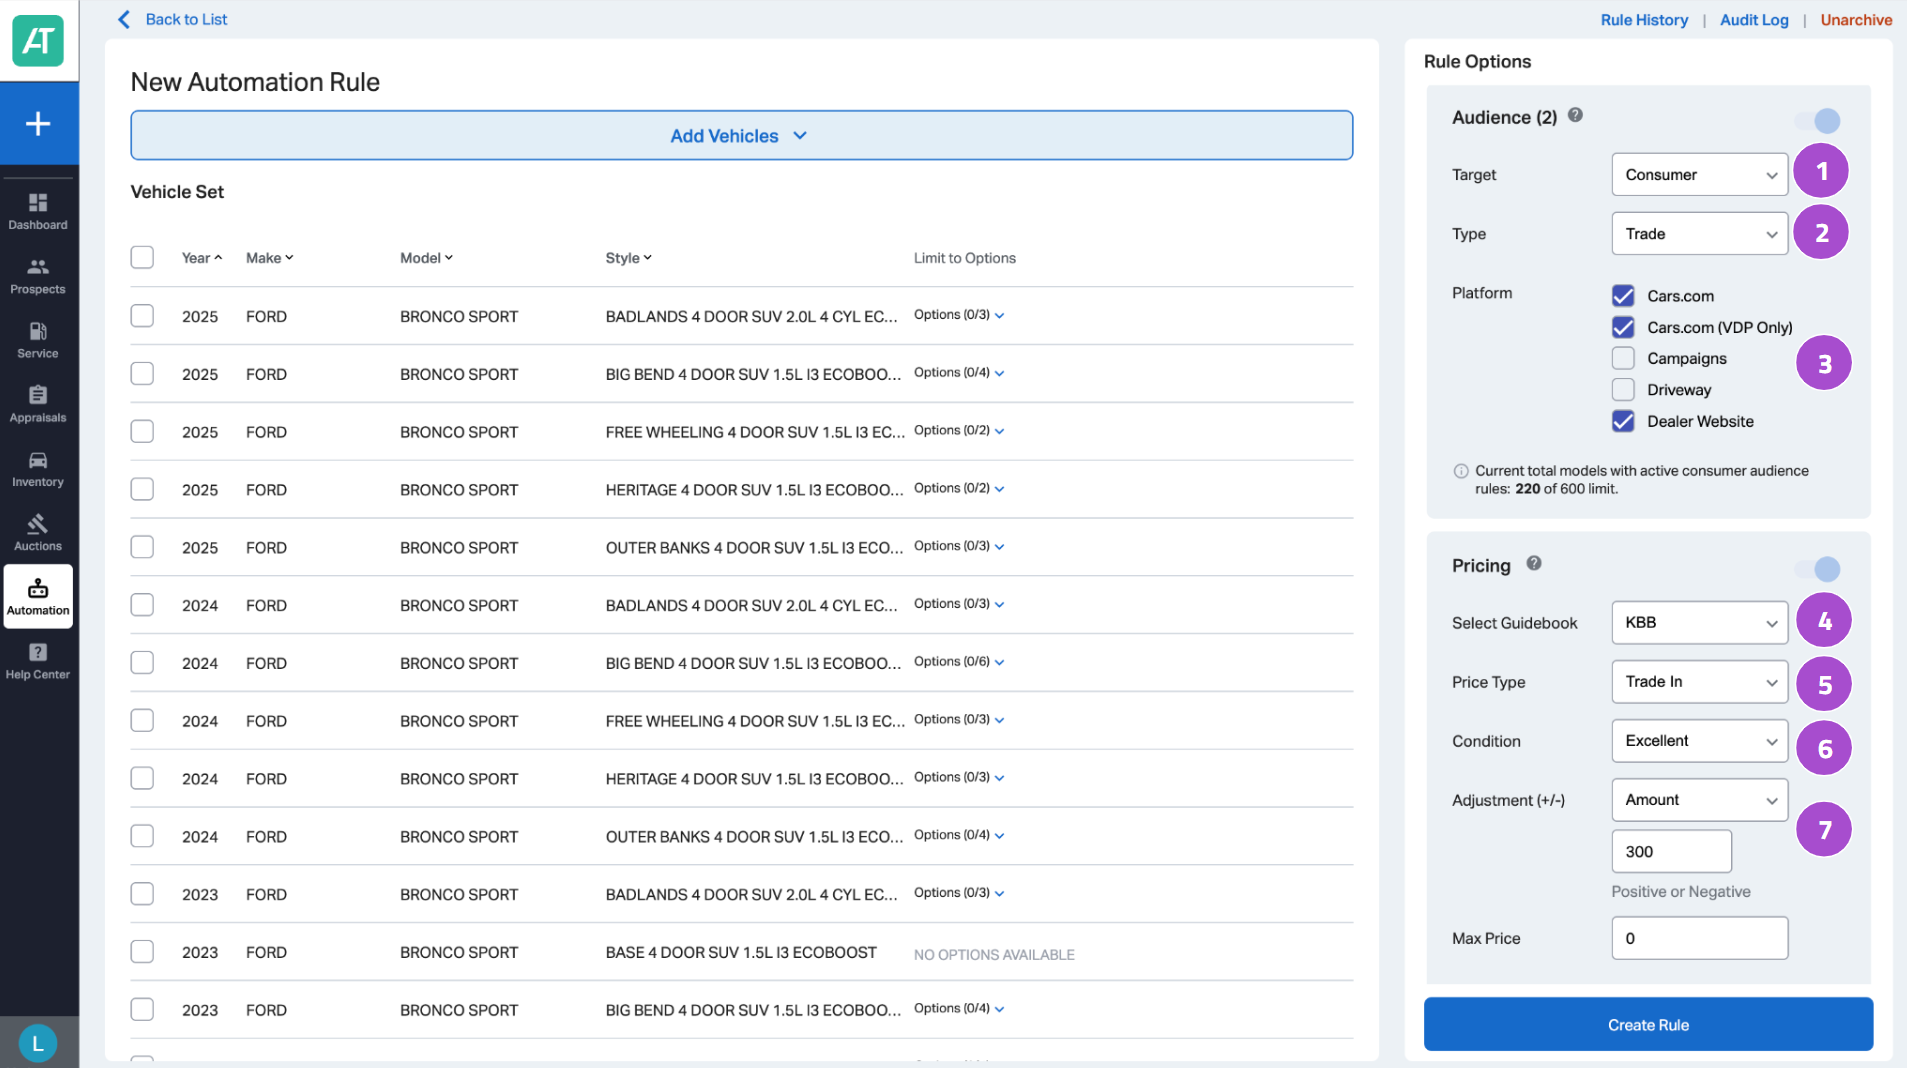
Example: To outbid standard trade-in tools, you might select:
- Guidebook: KBB
- Price Type: Trade In
- Condition: Excellent
- Adjustment: $300 above guidebook value
This helps you win over sellers compared to other sources.
5 Add optional filters
You can further customize your rule with optional criteria:
- Purchase Radius: Set how far you’re willing to acquire from.
- Mileage: Set odometer limits.
- Condition Filters: Exclude accident vehicles, lemon titles, etc.
- Vehicle Details: Include or exclude features like sunroof, leather seats, or color.
Best Practice: Keep filters broad to cast a wide net, then refine based on lead performance and exit strategy.
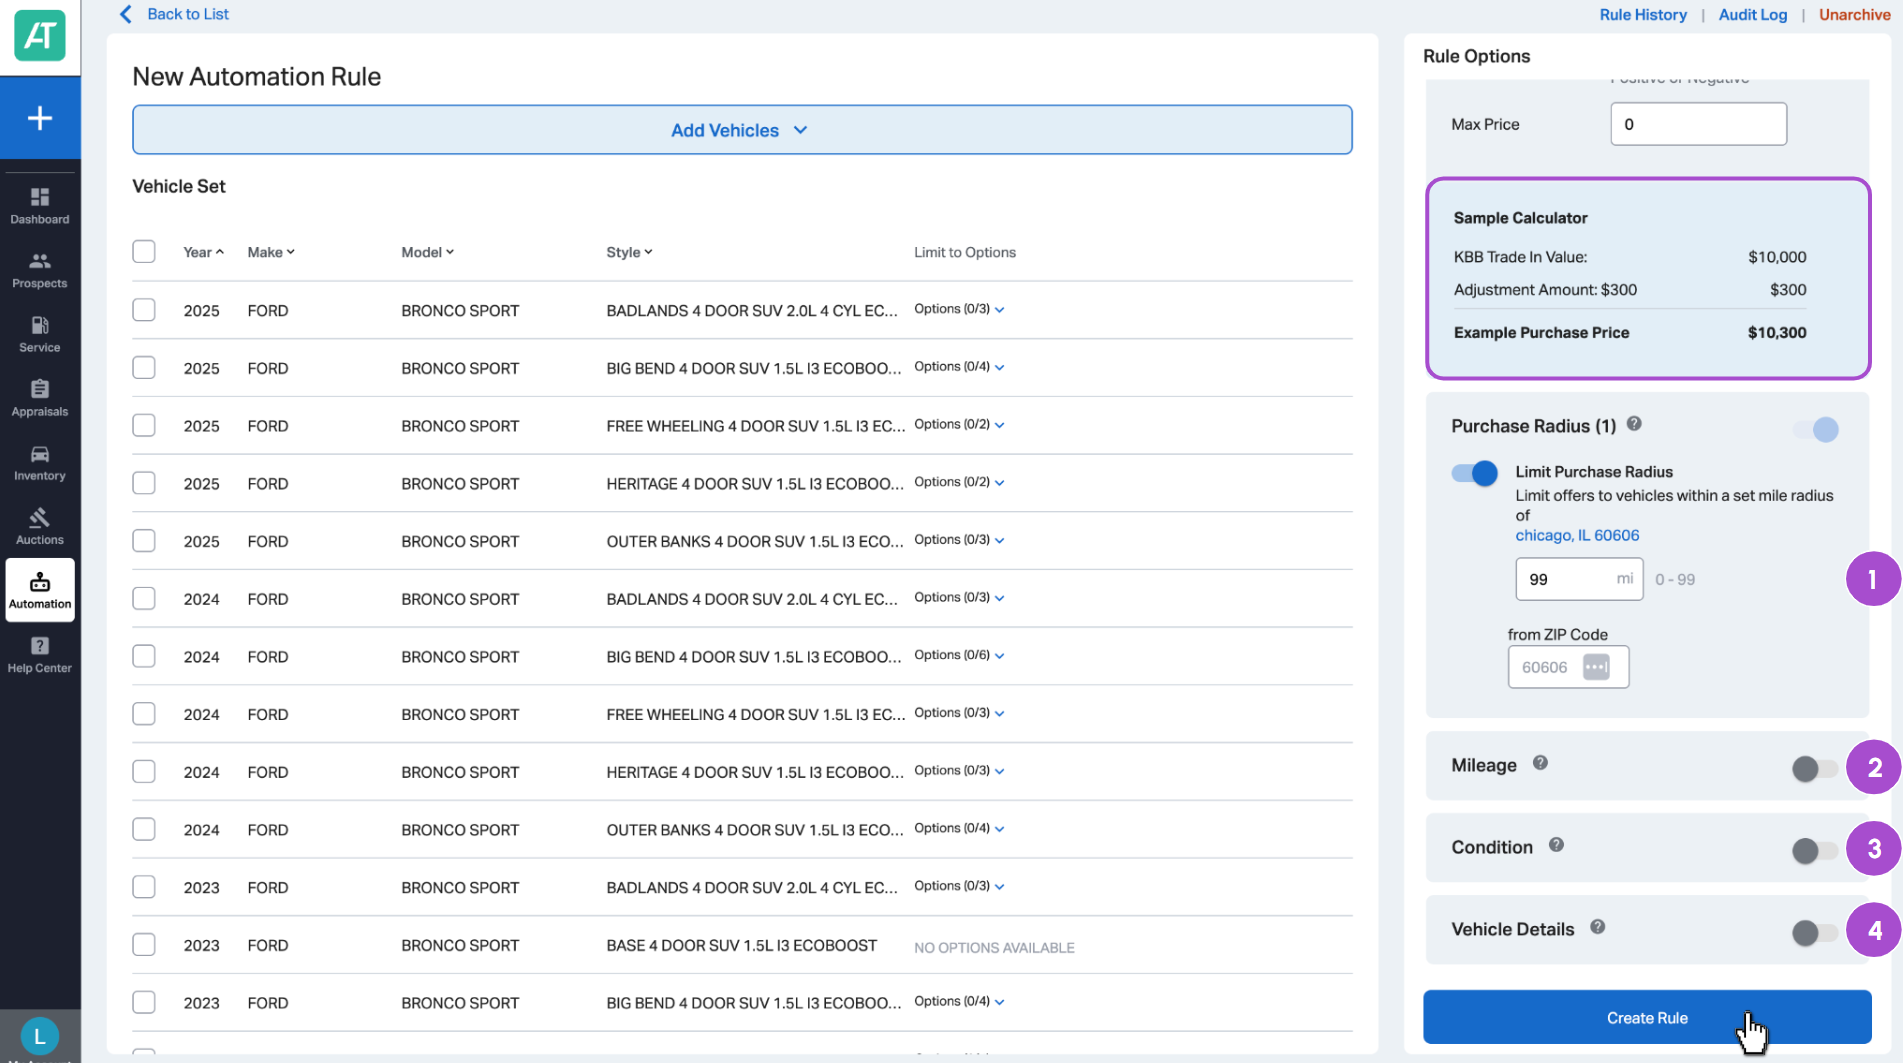
When you’re ready, click Create Rule.
6 Finalize and enable your rule
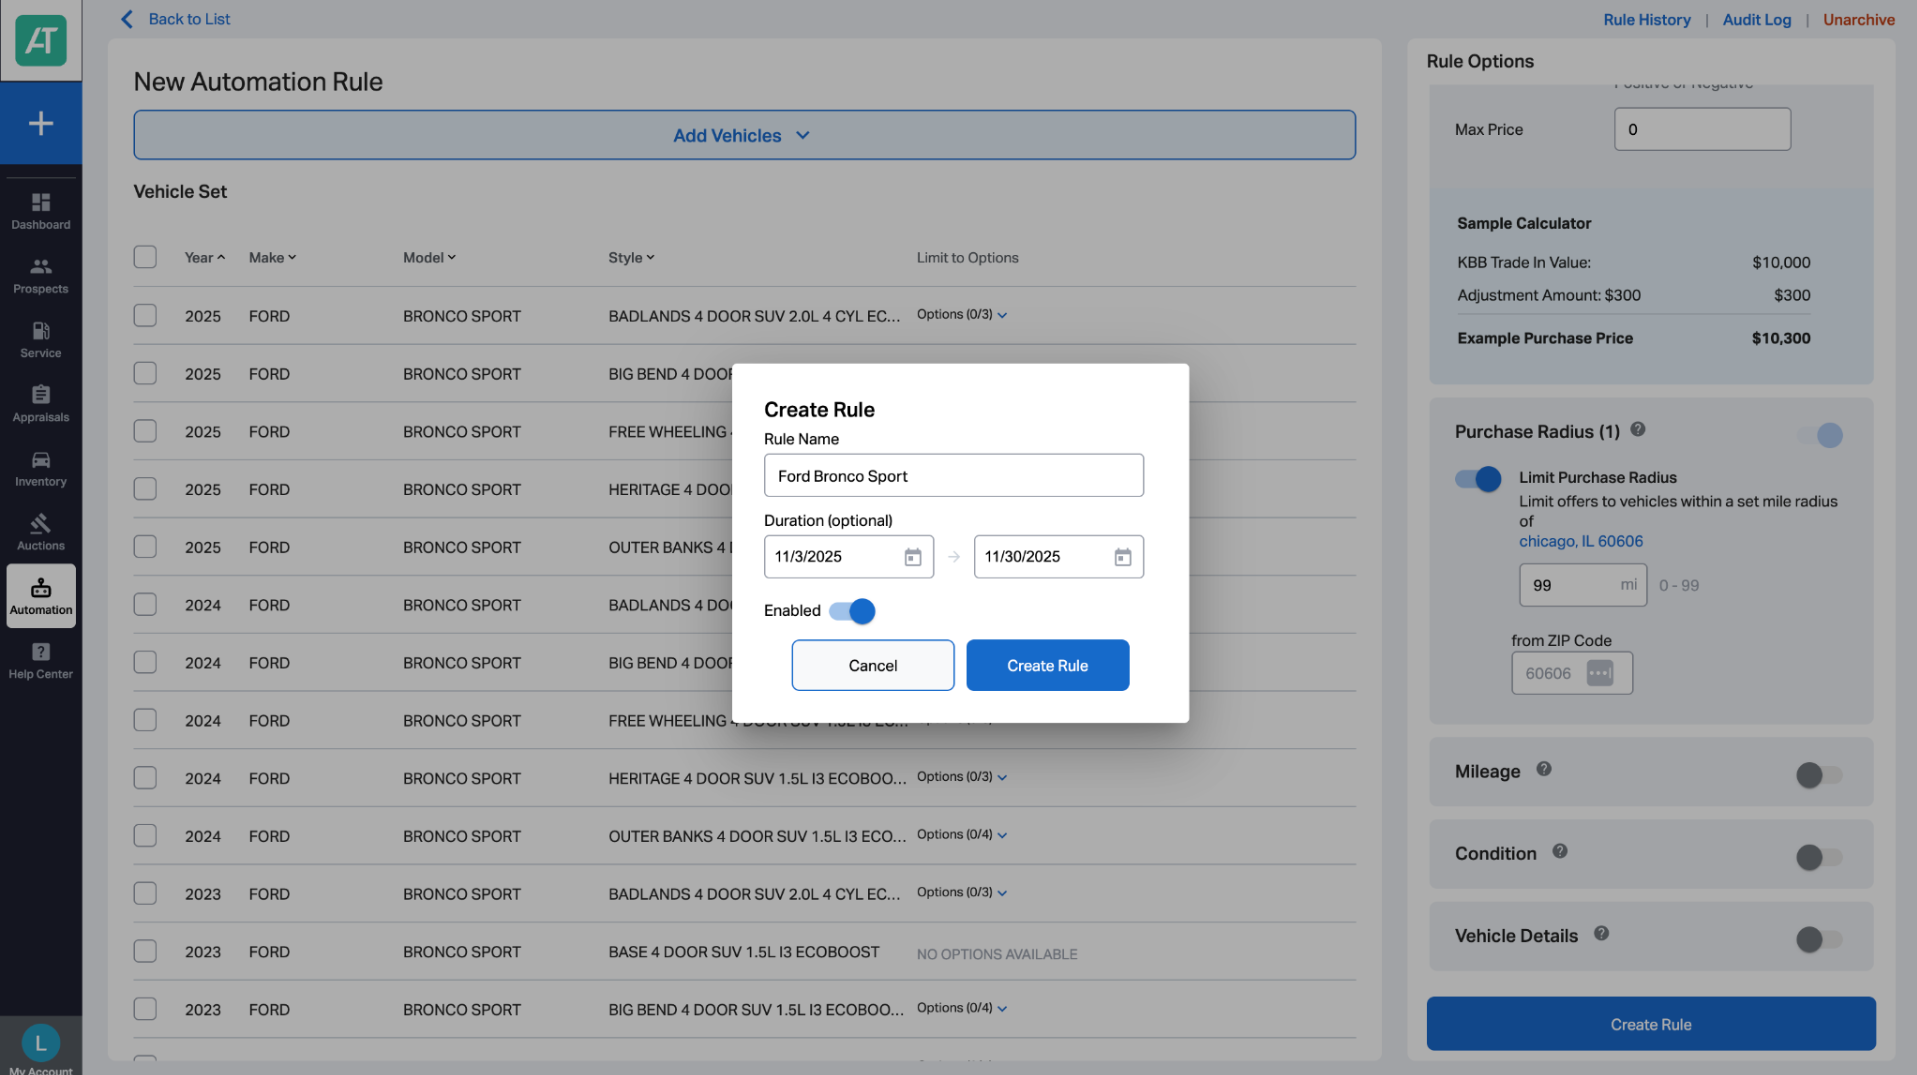
- Add a clear rule name (e.g., “Ford Bronco Sport – $300 Over KBB”).
- Set an active duration if the rule is temporary.
- Toggle Enabled to ON.
- Click Create Rule.
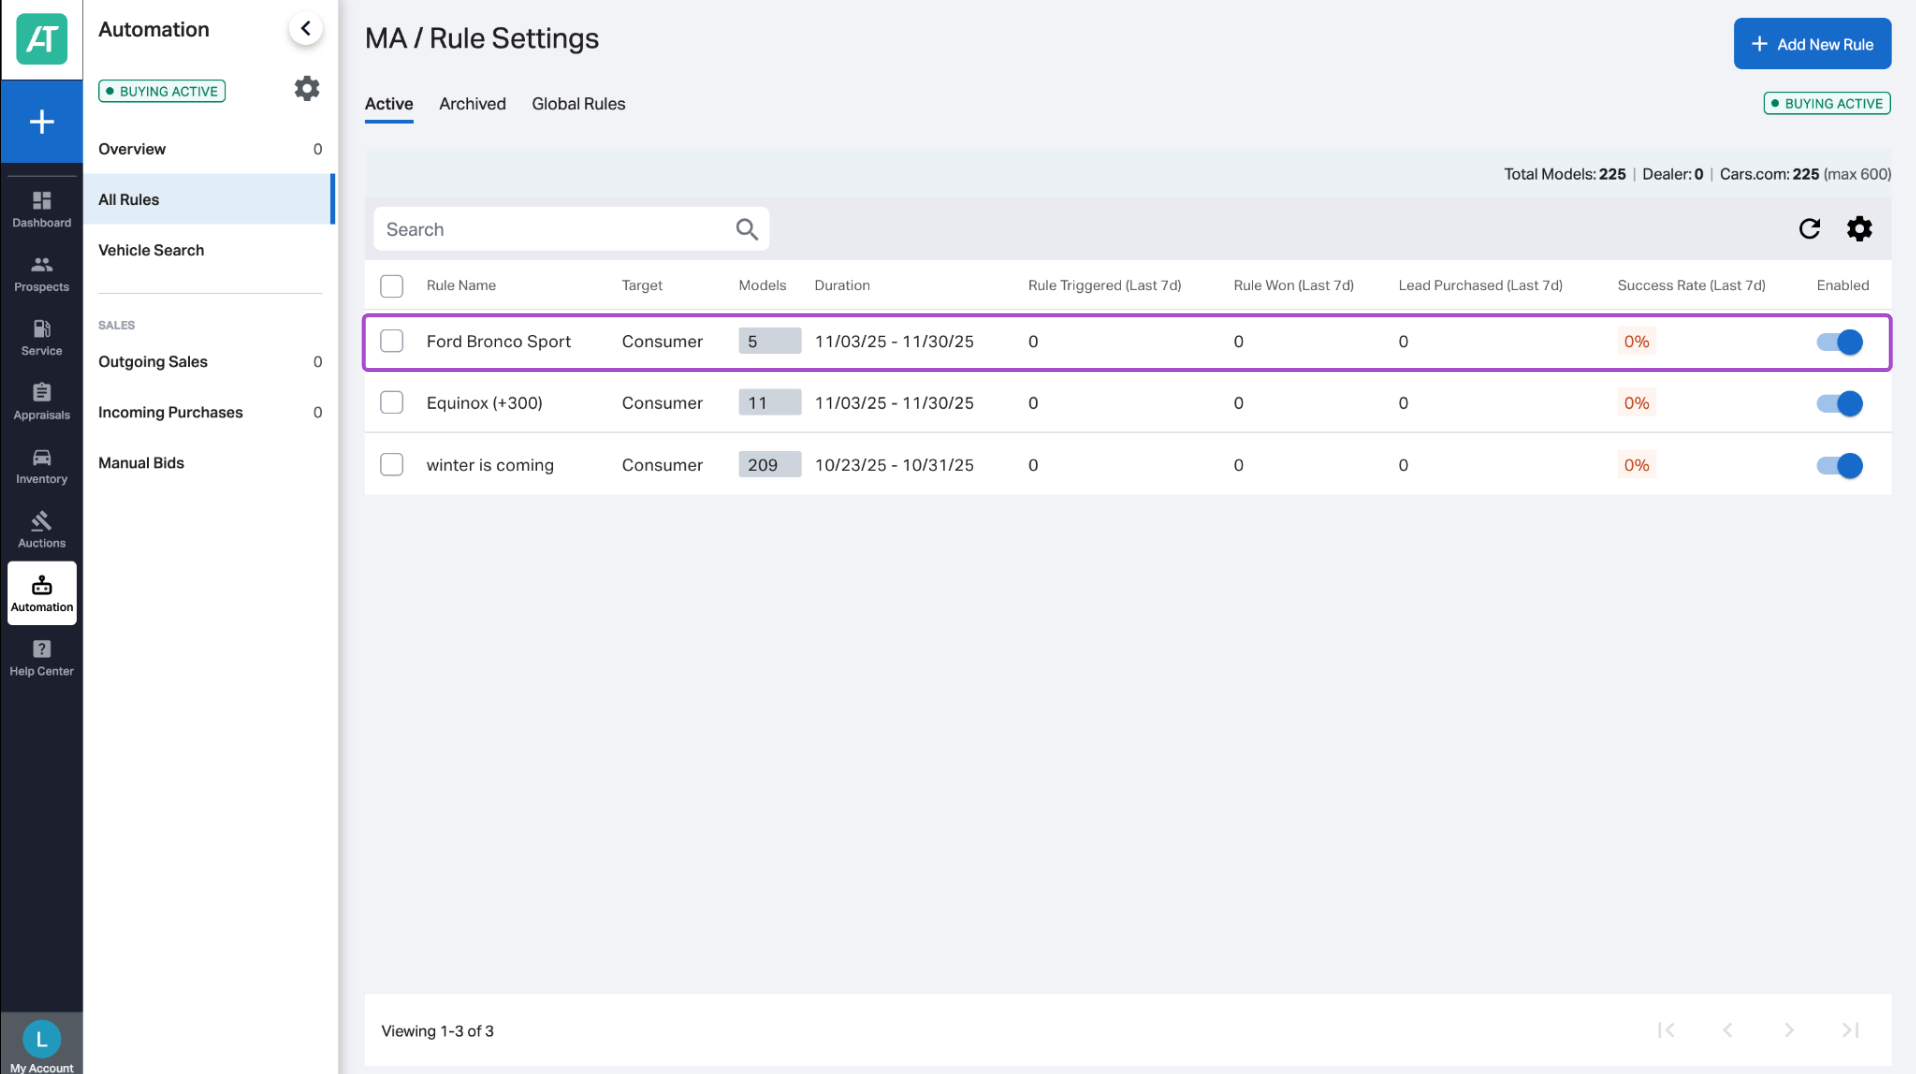
You’ll return to the Automation > All Rules list, where you can view a summary of your rule, including:
- Triggered leads
- Leads won
- Success rate
7 Identify leads triggered by your rule
Once active, you’ll start seeing leads that matched your rule:
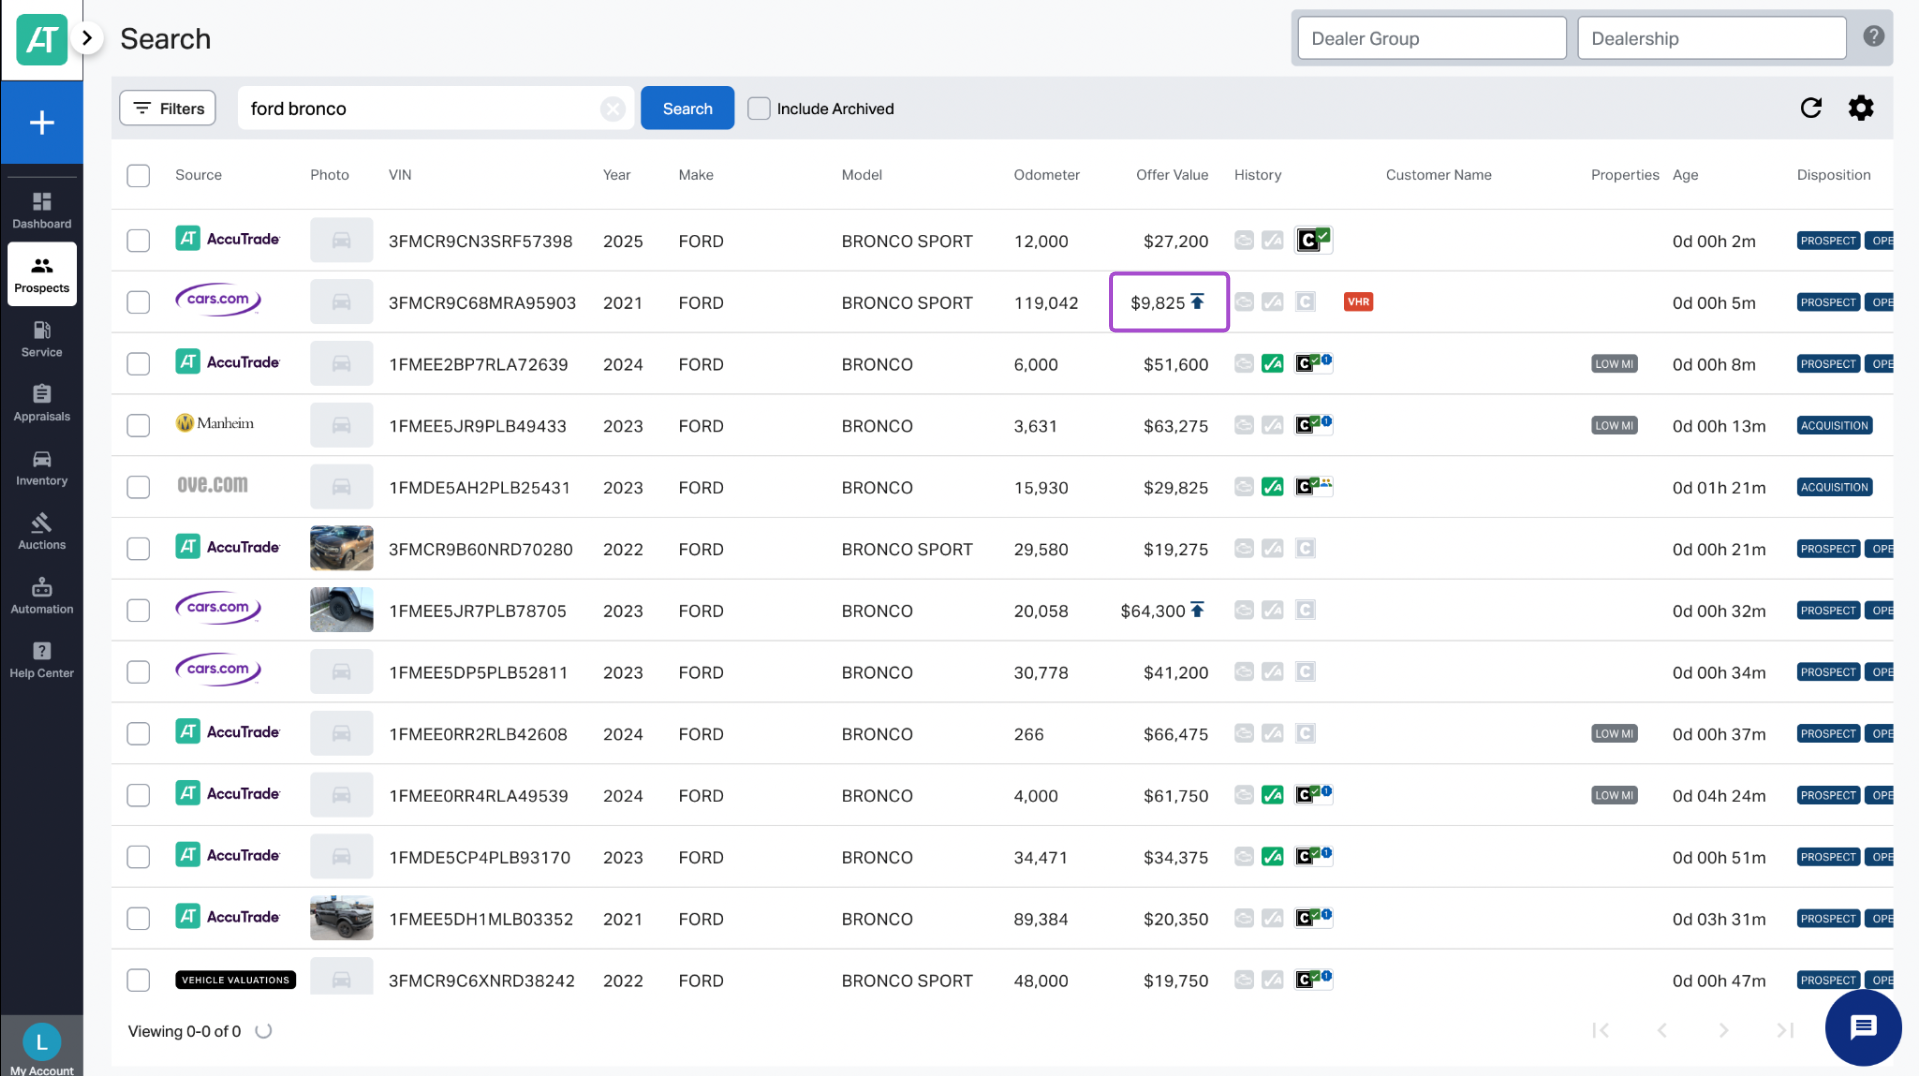
- In the lead list, a blue arrow next to the estimated value indicates a rule-triggered lead.
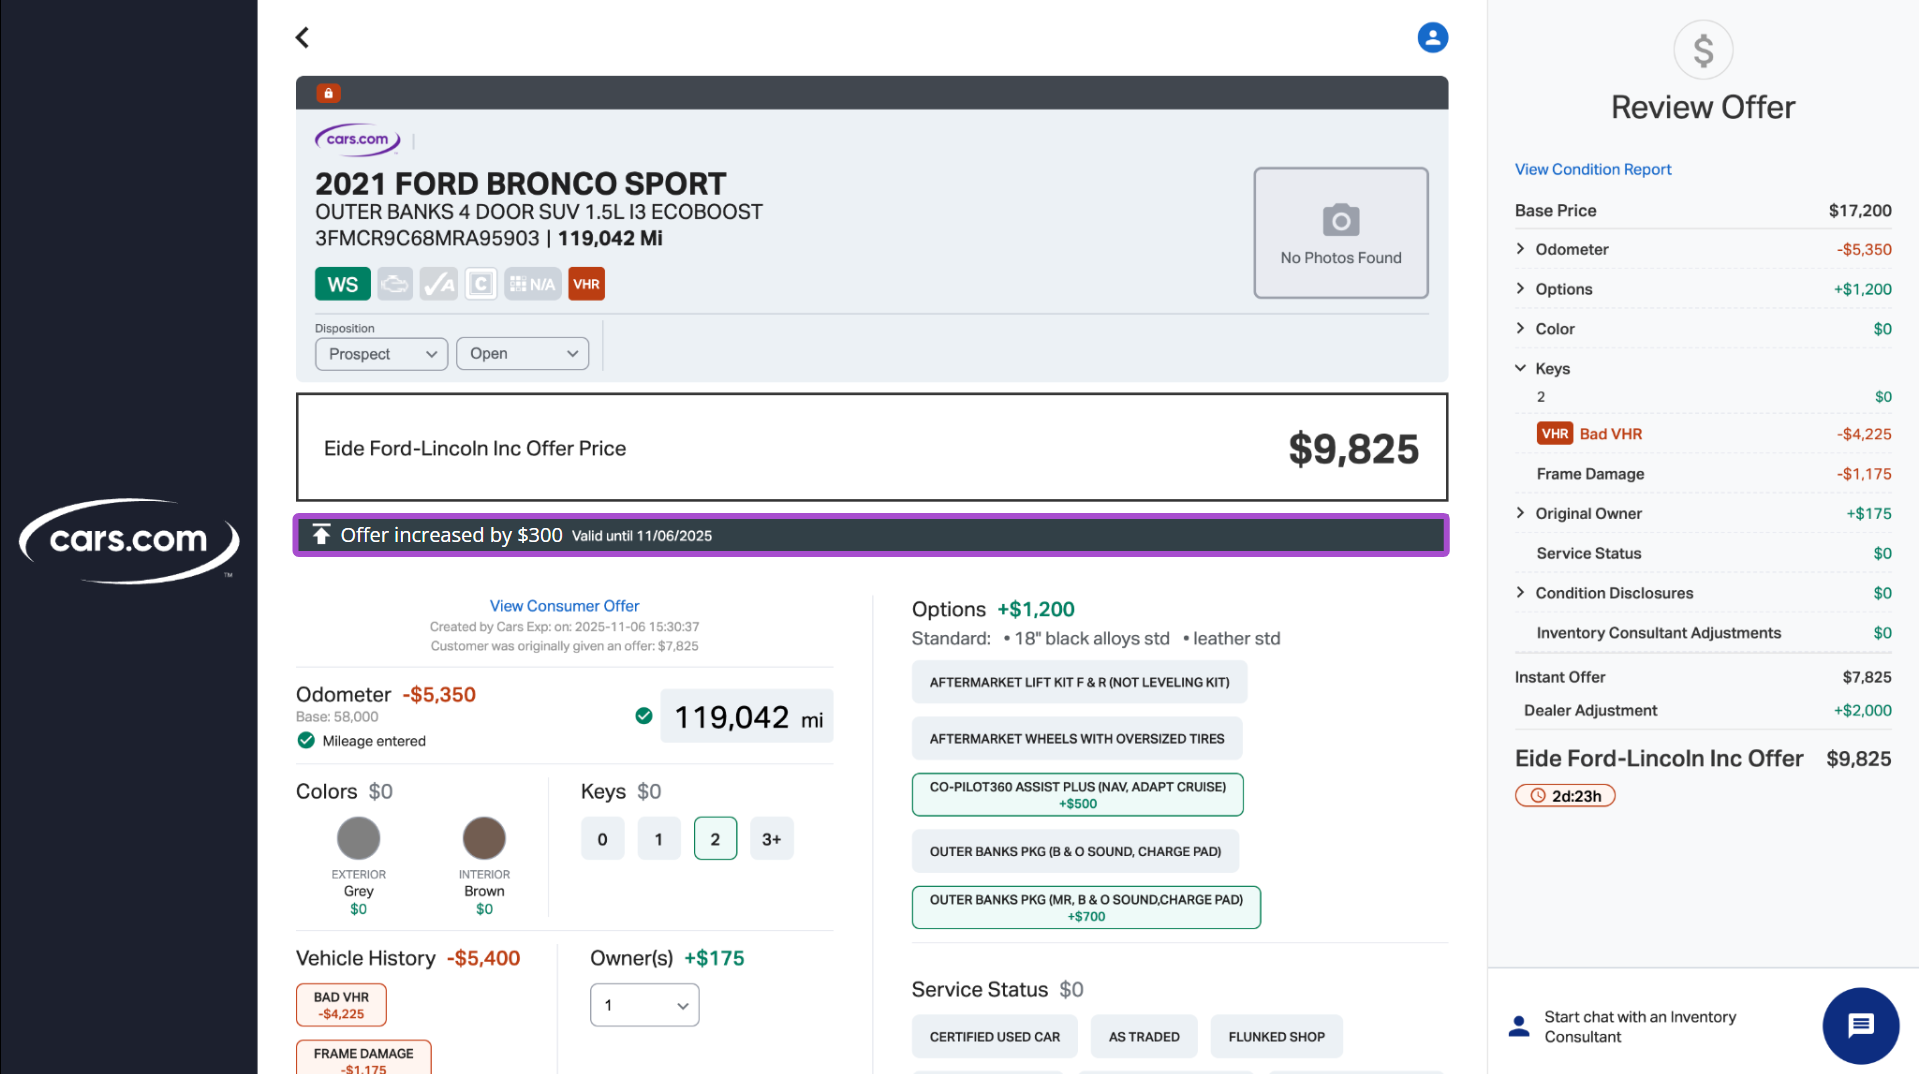
- Clicking into the lead shows a disclaimer detailing how the offer was adjusted based on your rule.
This makes it easy to track which leads were influenced by your pricing strategy.