How to create a slider with DI Slides
Before you can add image or video slides to your Dealer Inspire website, you’ll need a slider in place to house them. DI Slides makes it easy to create custom rotating banners for your homepage, vehicle pages, or any additional page you’ve created on your site.
In this article, you’ll learn how to create a new slider in DI Slides, configure its settings, and add it to a web page using a shortcode.
To get started
Go to the Cars.com Hub. Click Dealer Inspire, then Manage Website.
1 Add a new slider
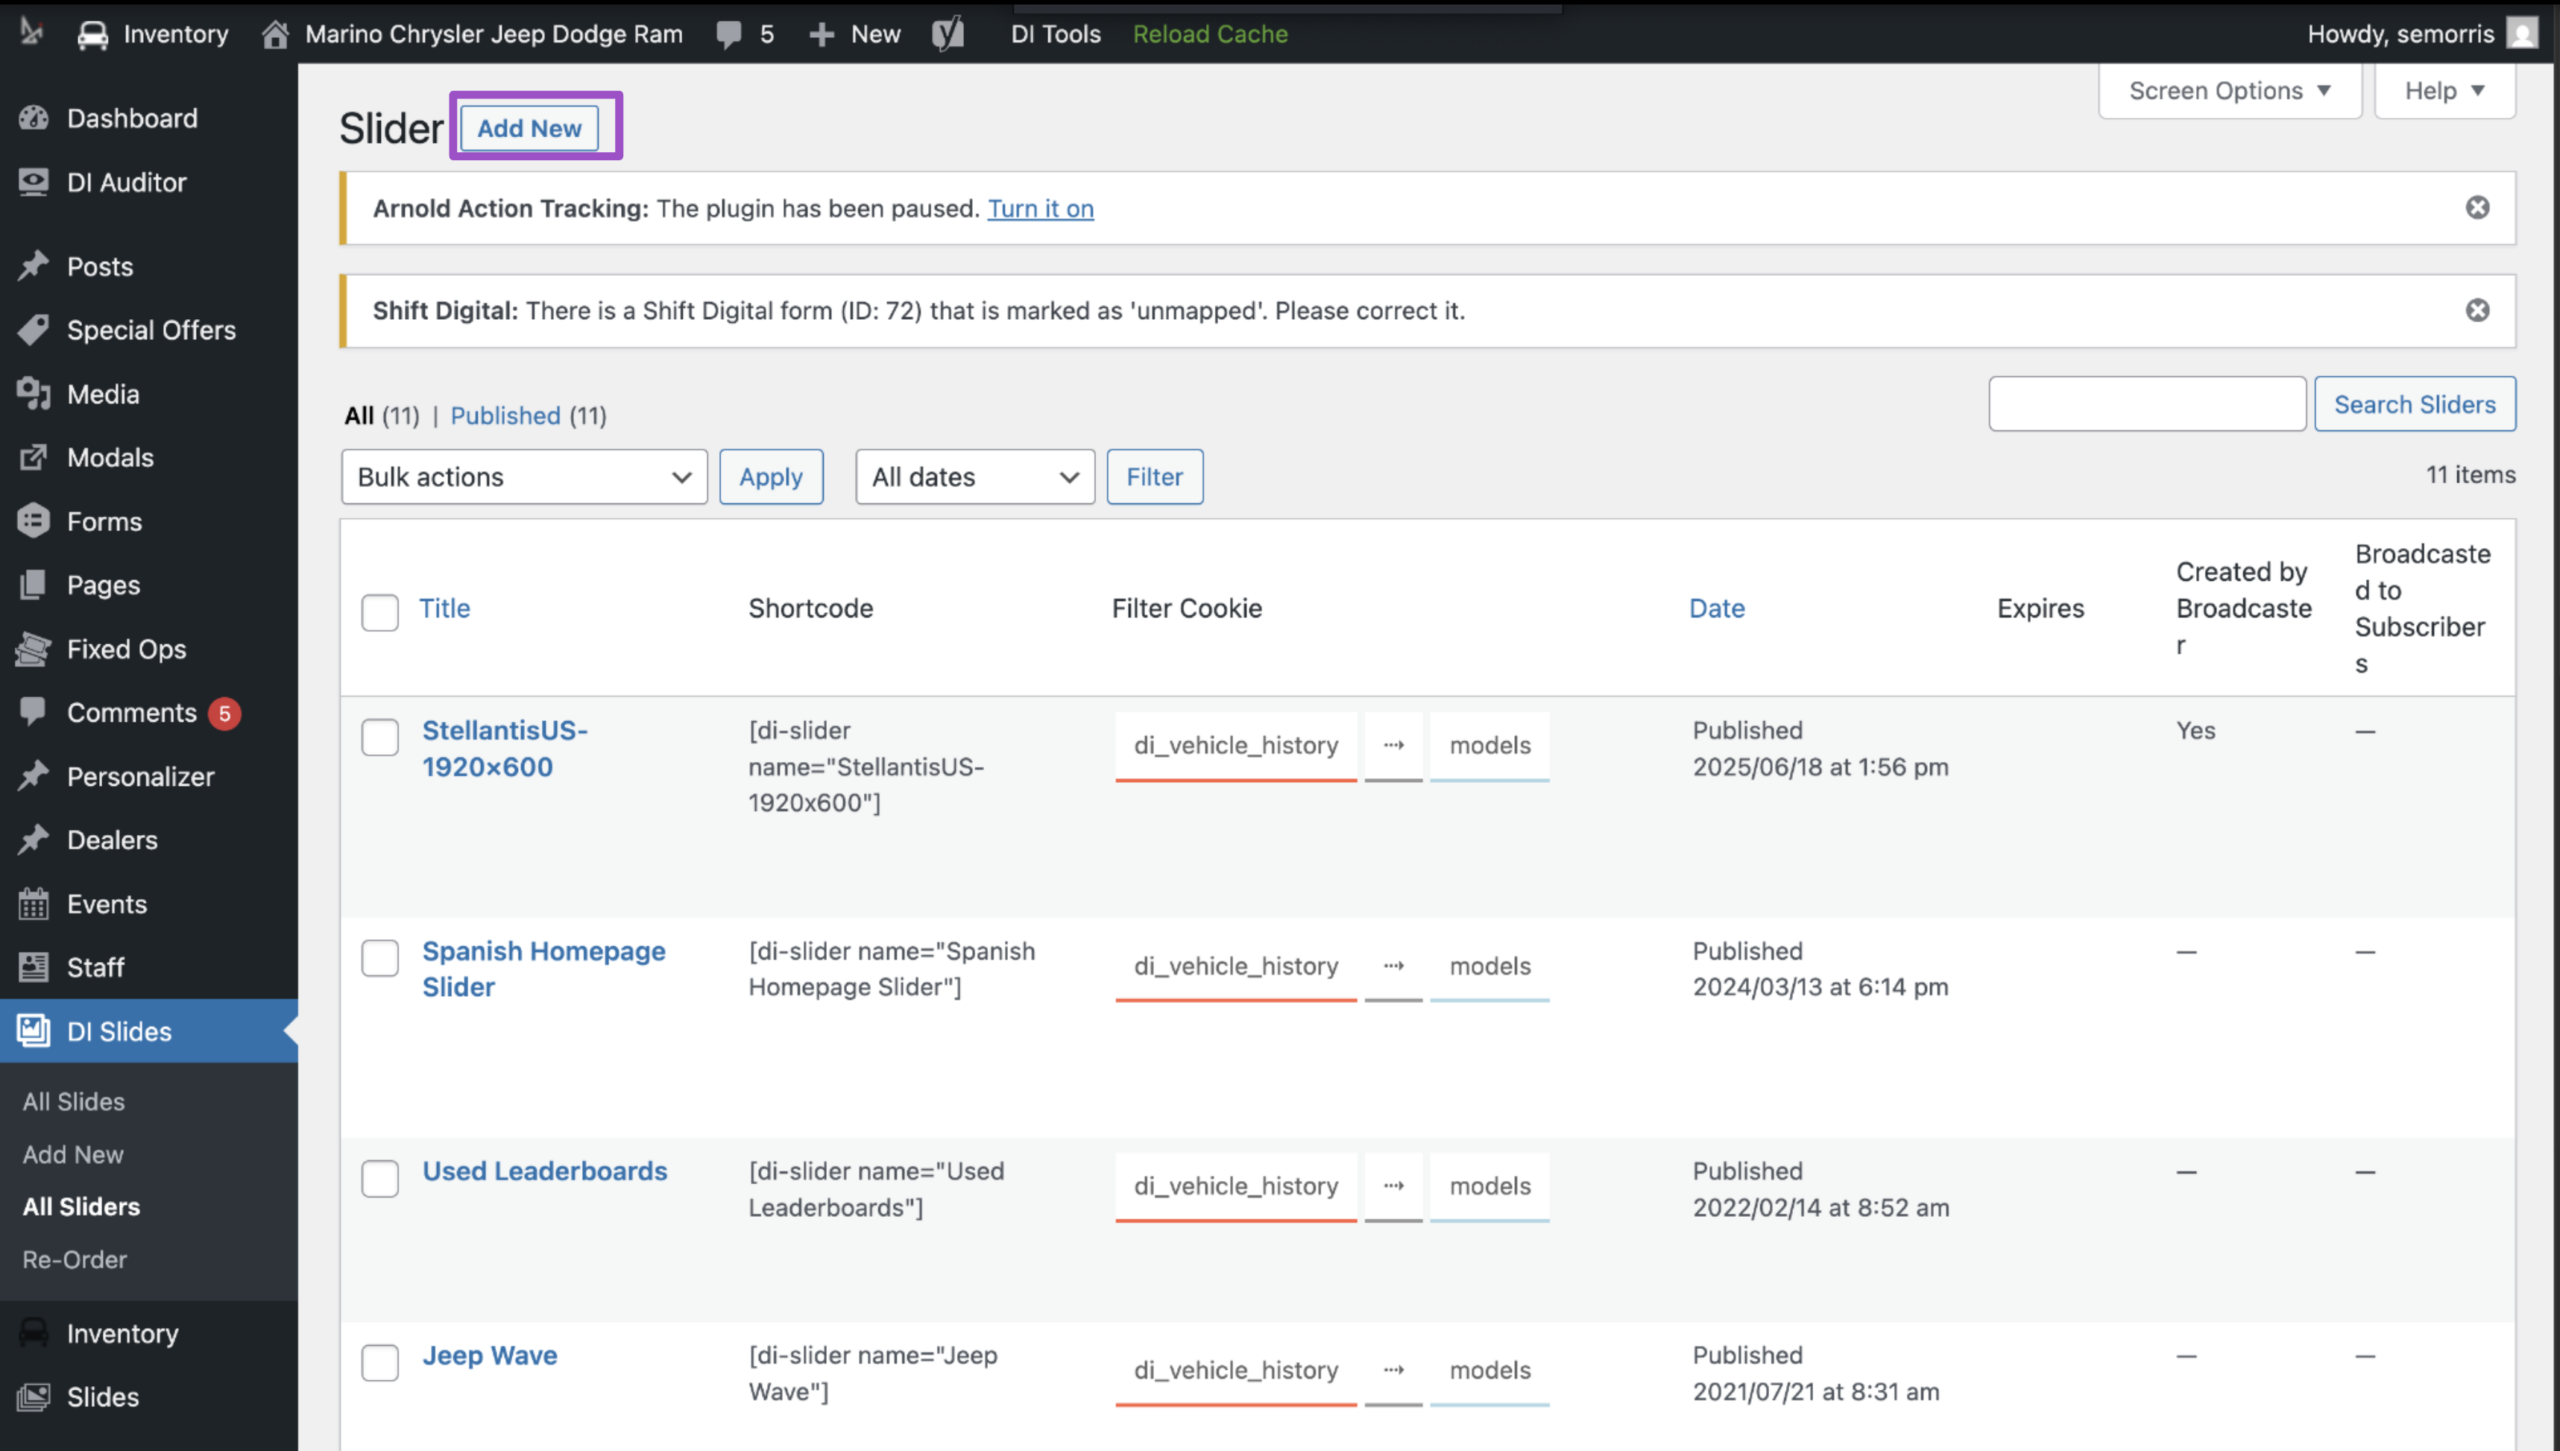
- In the WordPress menu, click DI Slides > All Sliders
- Check that the slider you need doesn’t already exist
- Click Add New to create a new one
2 Name your slider
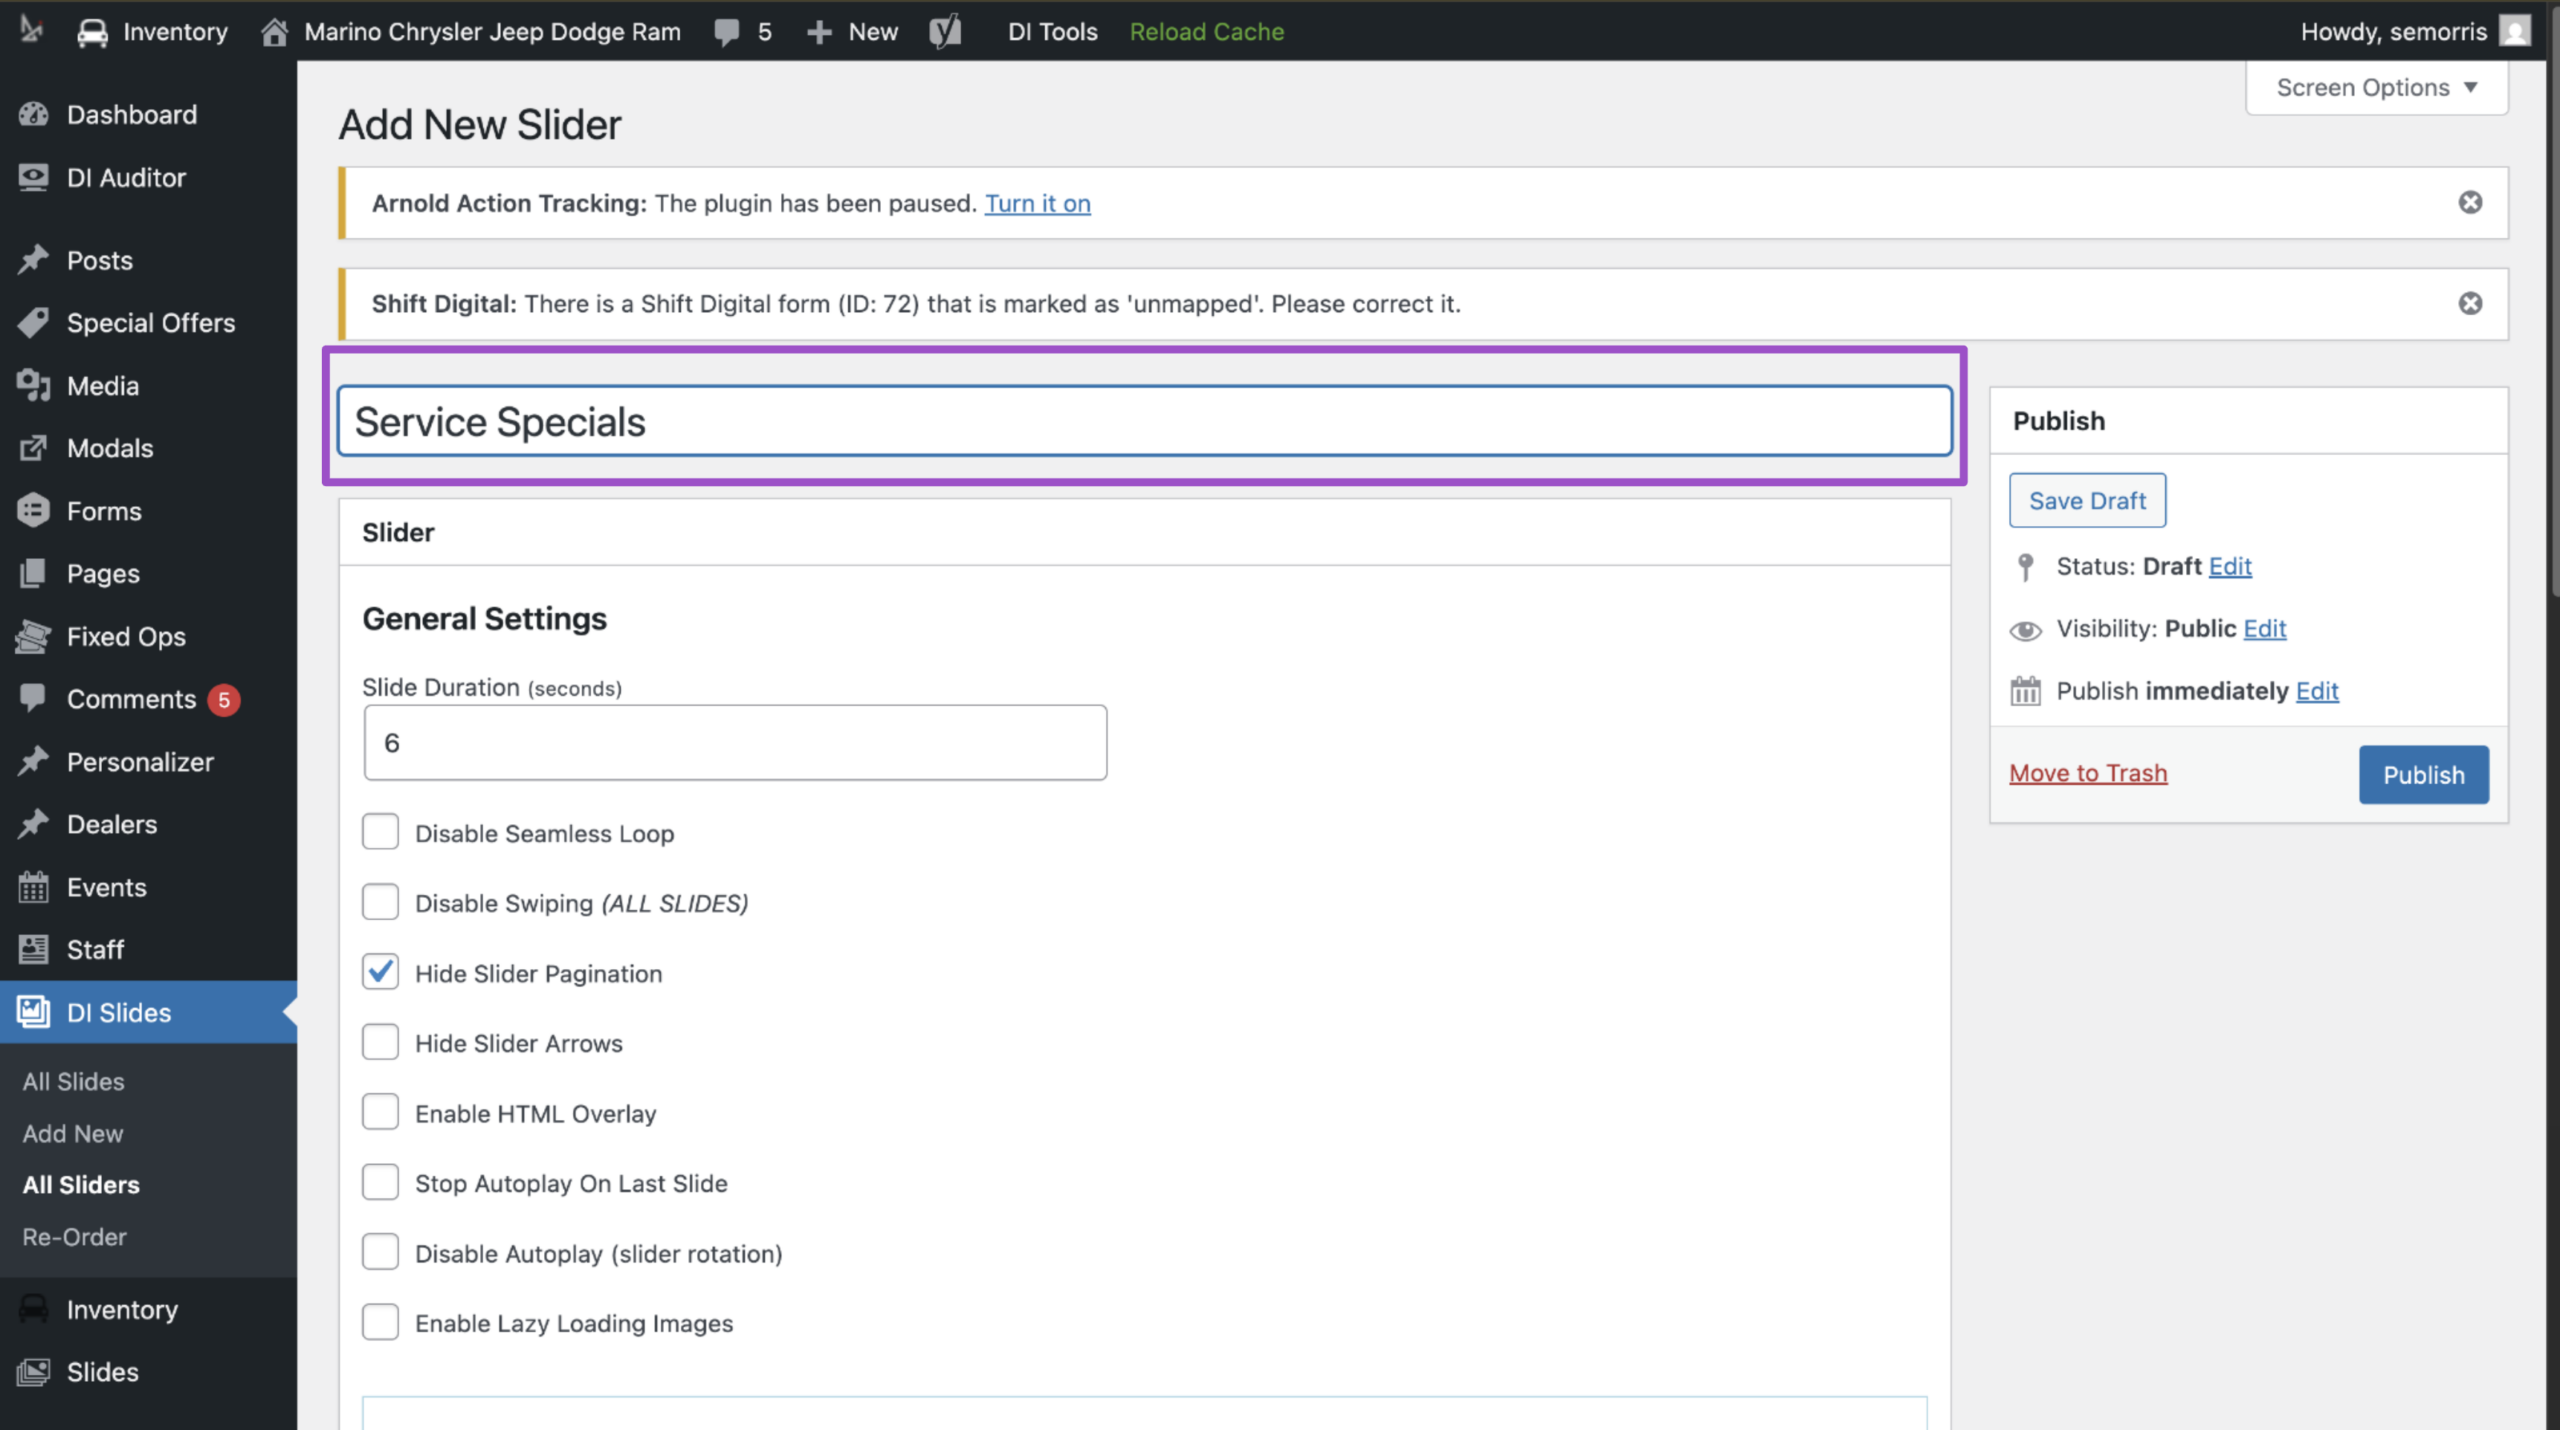
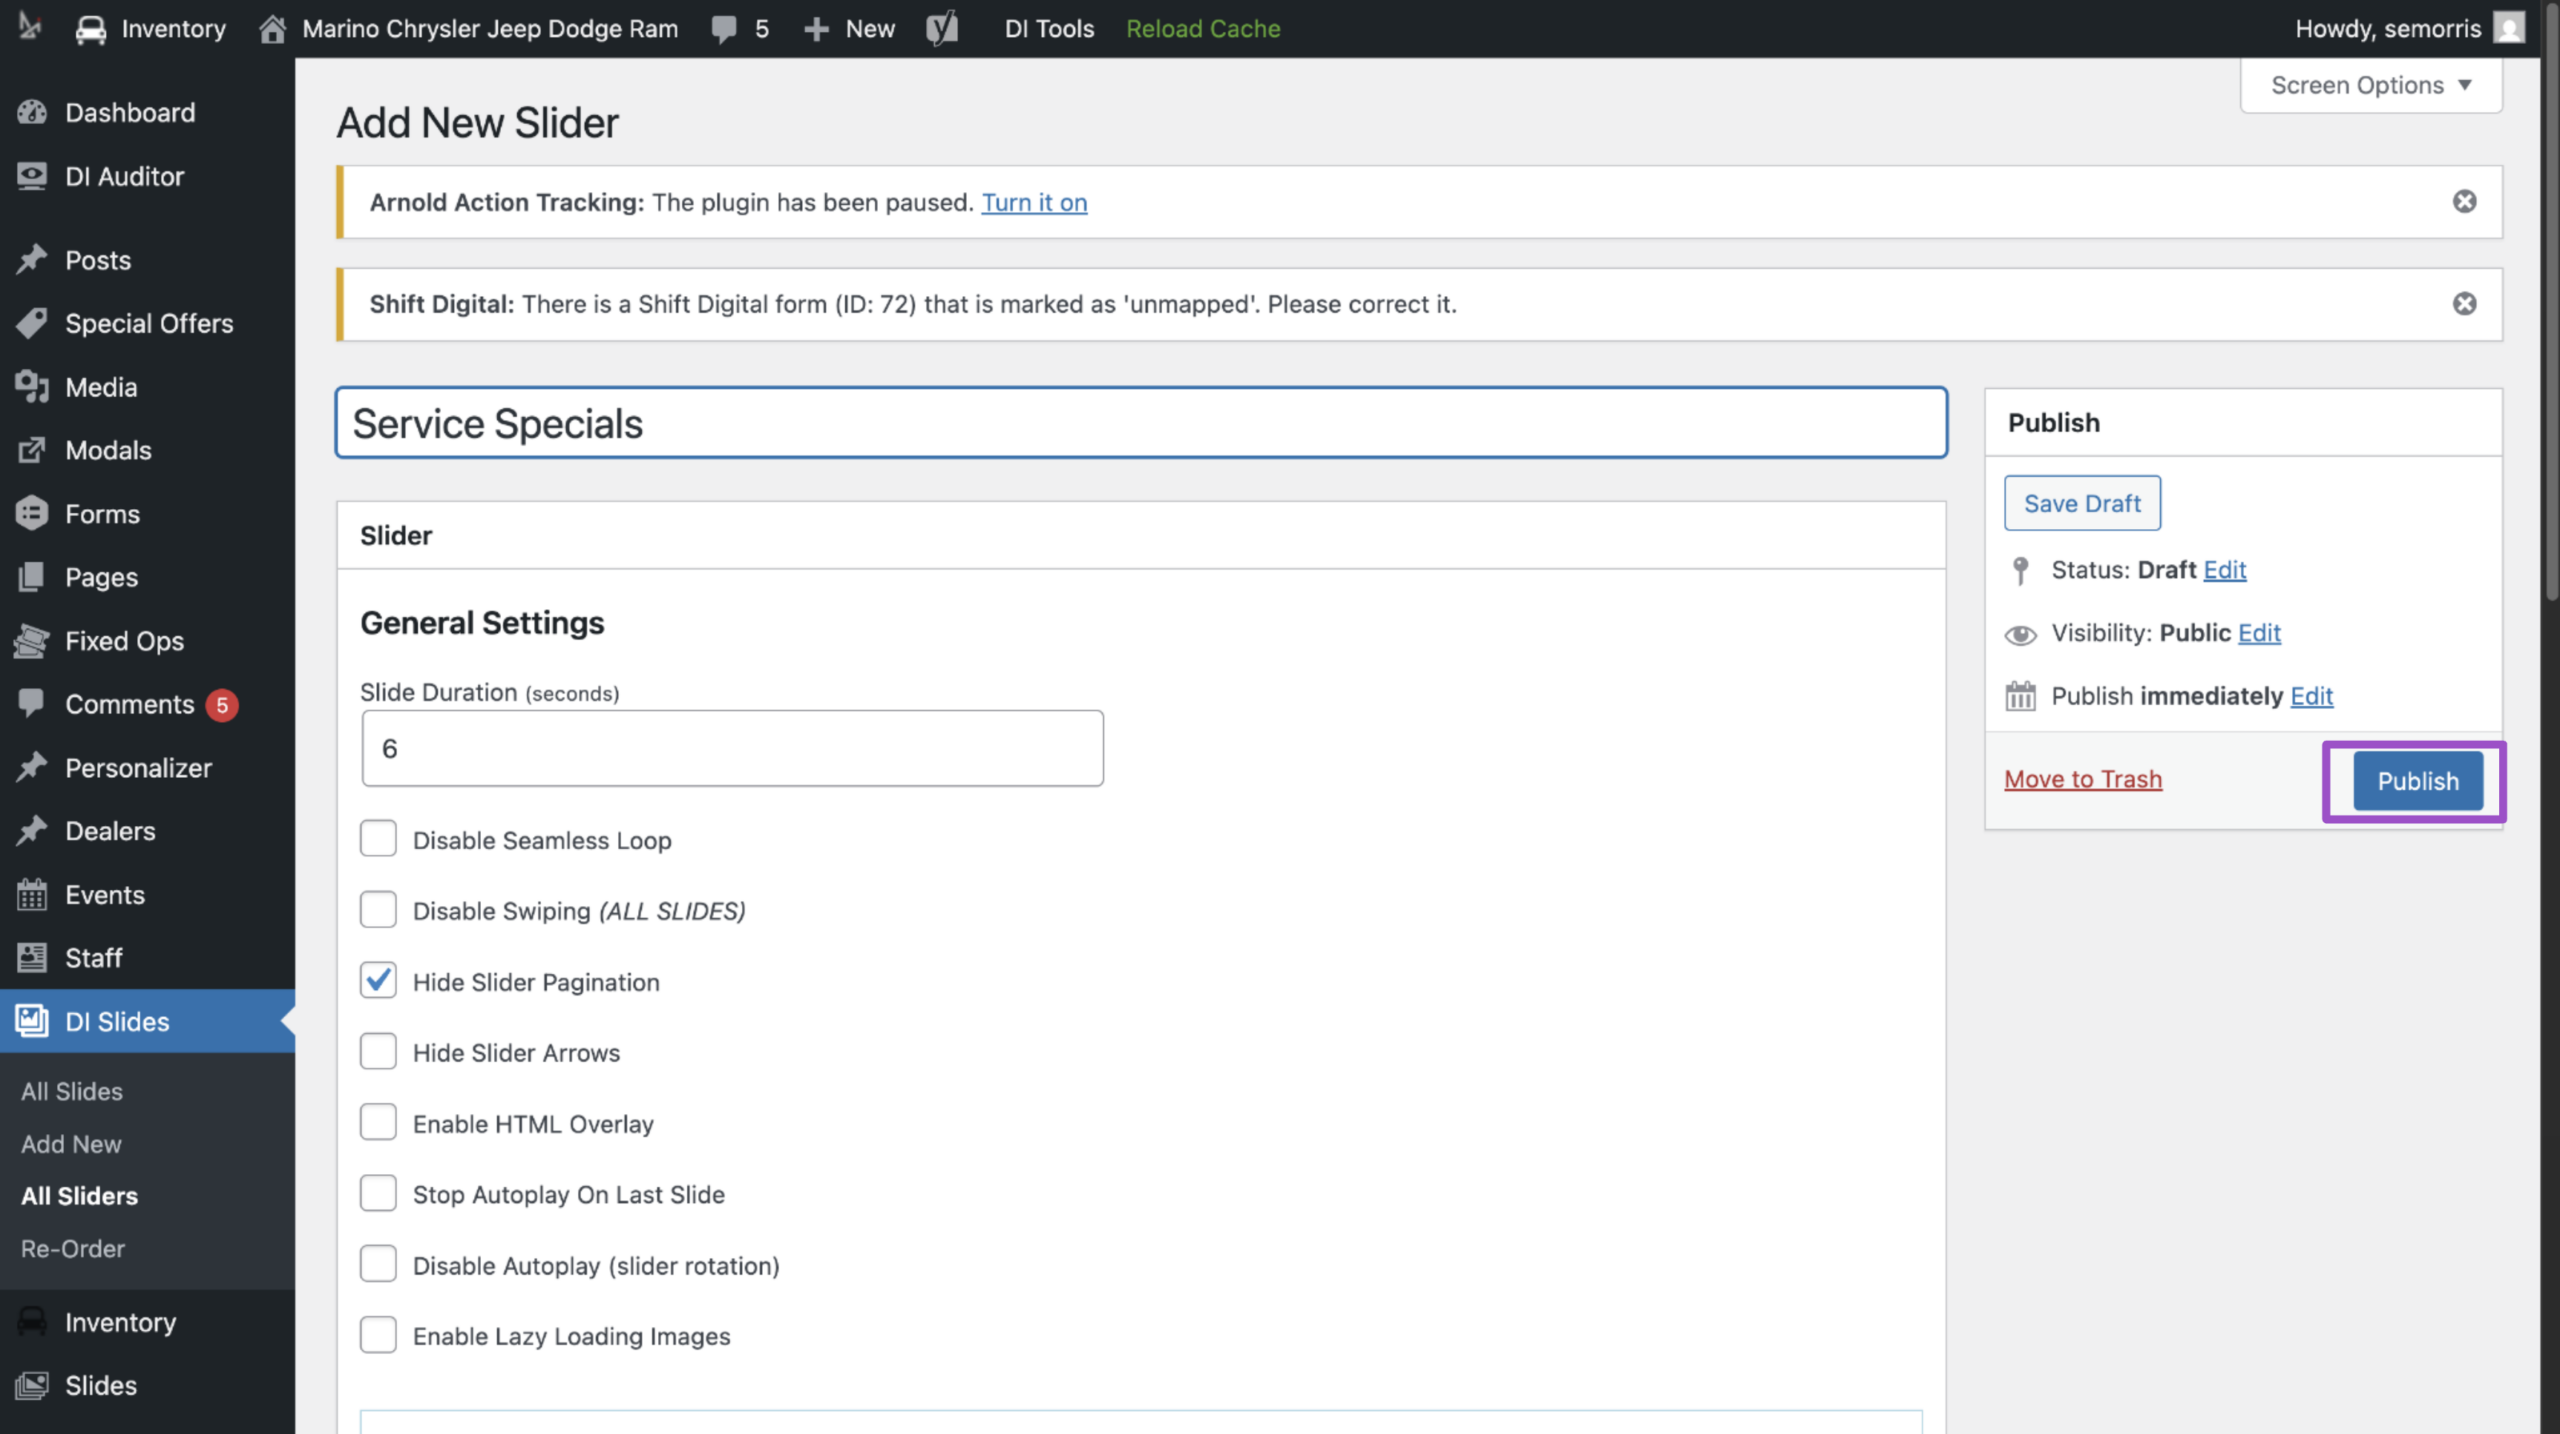
- Give your slider a descriptive name that indicates where it will display on your website.
3 Adjust slider settings
DI Slides gives you control over how your slider behaves on the page. There are two main setting groups: General Settings and Image Sizes.
General Settings
You can enable or disable the following behaviors:
- Slide Duration: How many seconds each slide displays before auto-advancing
- Disable Seamless Loop: Prevents smooth transition from last slide back to first
- Disable Swiping: Disables manual swiping on mobile or touchscreen devices
- Hide Slider Pagination: Hides the navigation dots at the bottom of the slider
- Hide Slider Arrows: Hides left/right arrows that allow users to navigate manually
- Enable HTML Overlay: Adds a text editor box to each slide for on-image messaging
- Stop Autoplay on Last Slide: Prevents slides from cycling again after finishing
- Disable Autoplay: Requires manual clicks to progress through slides
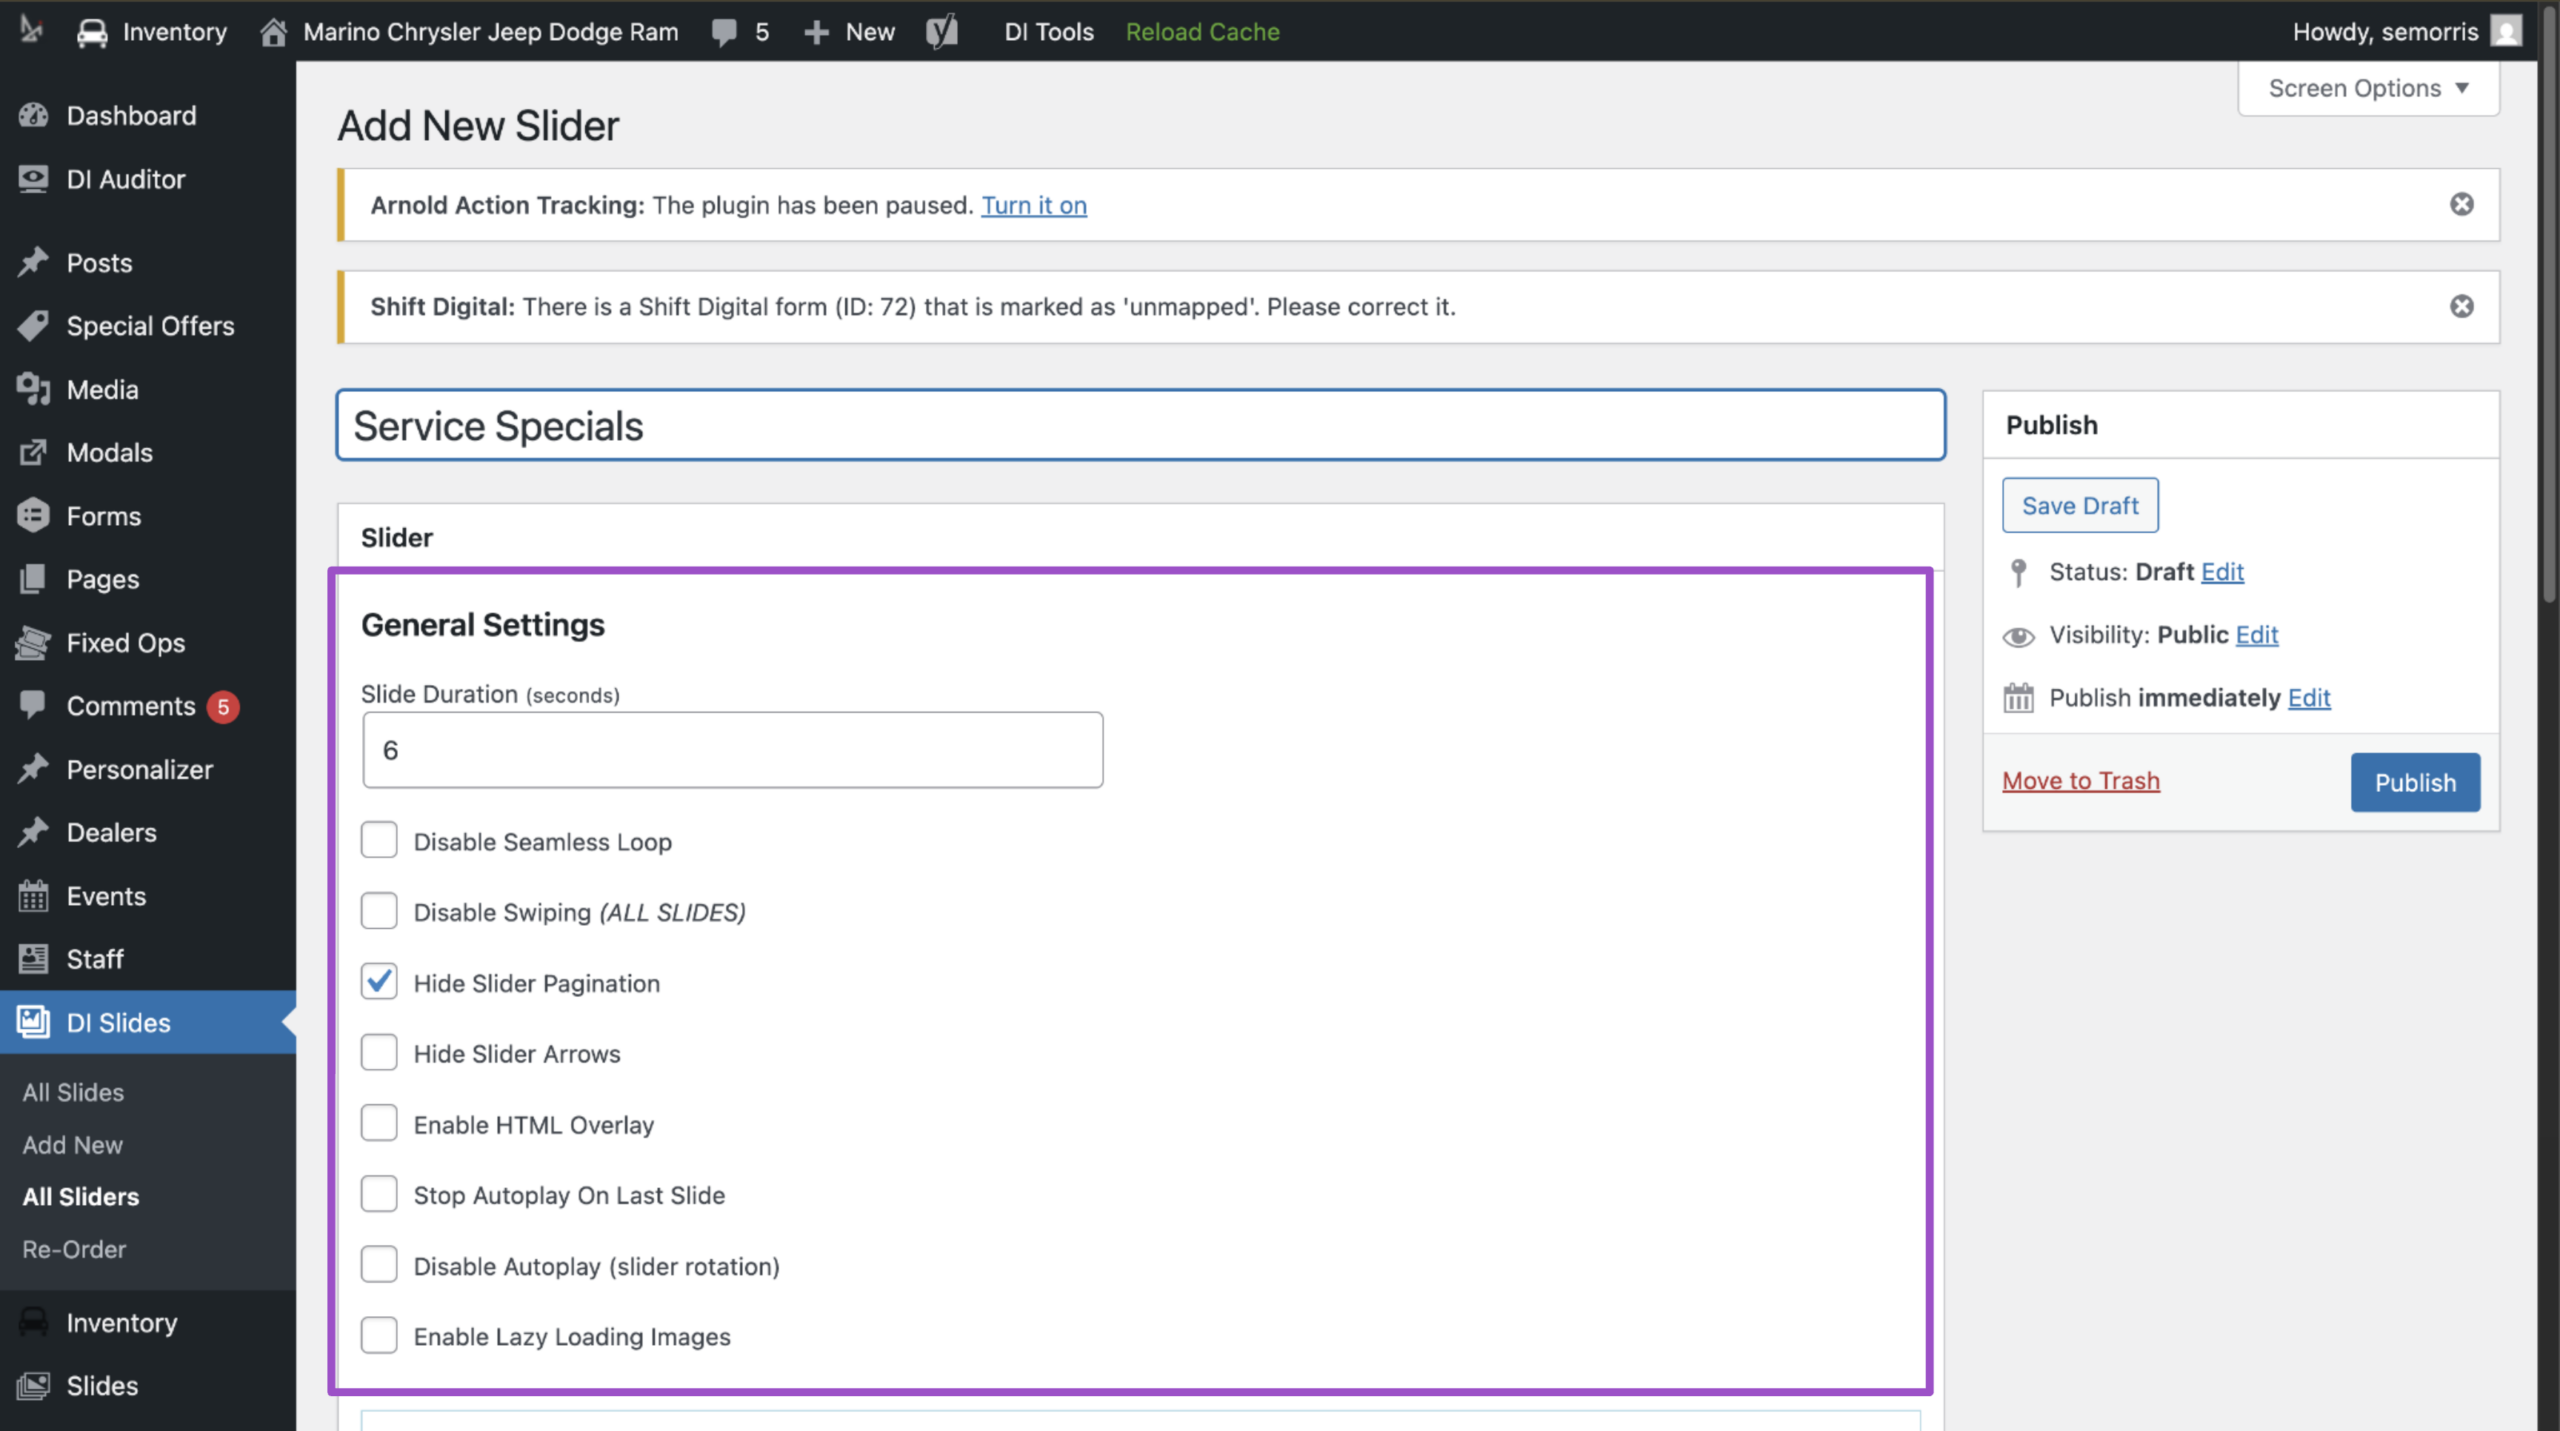
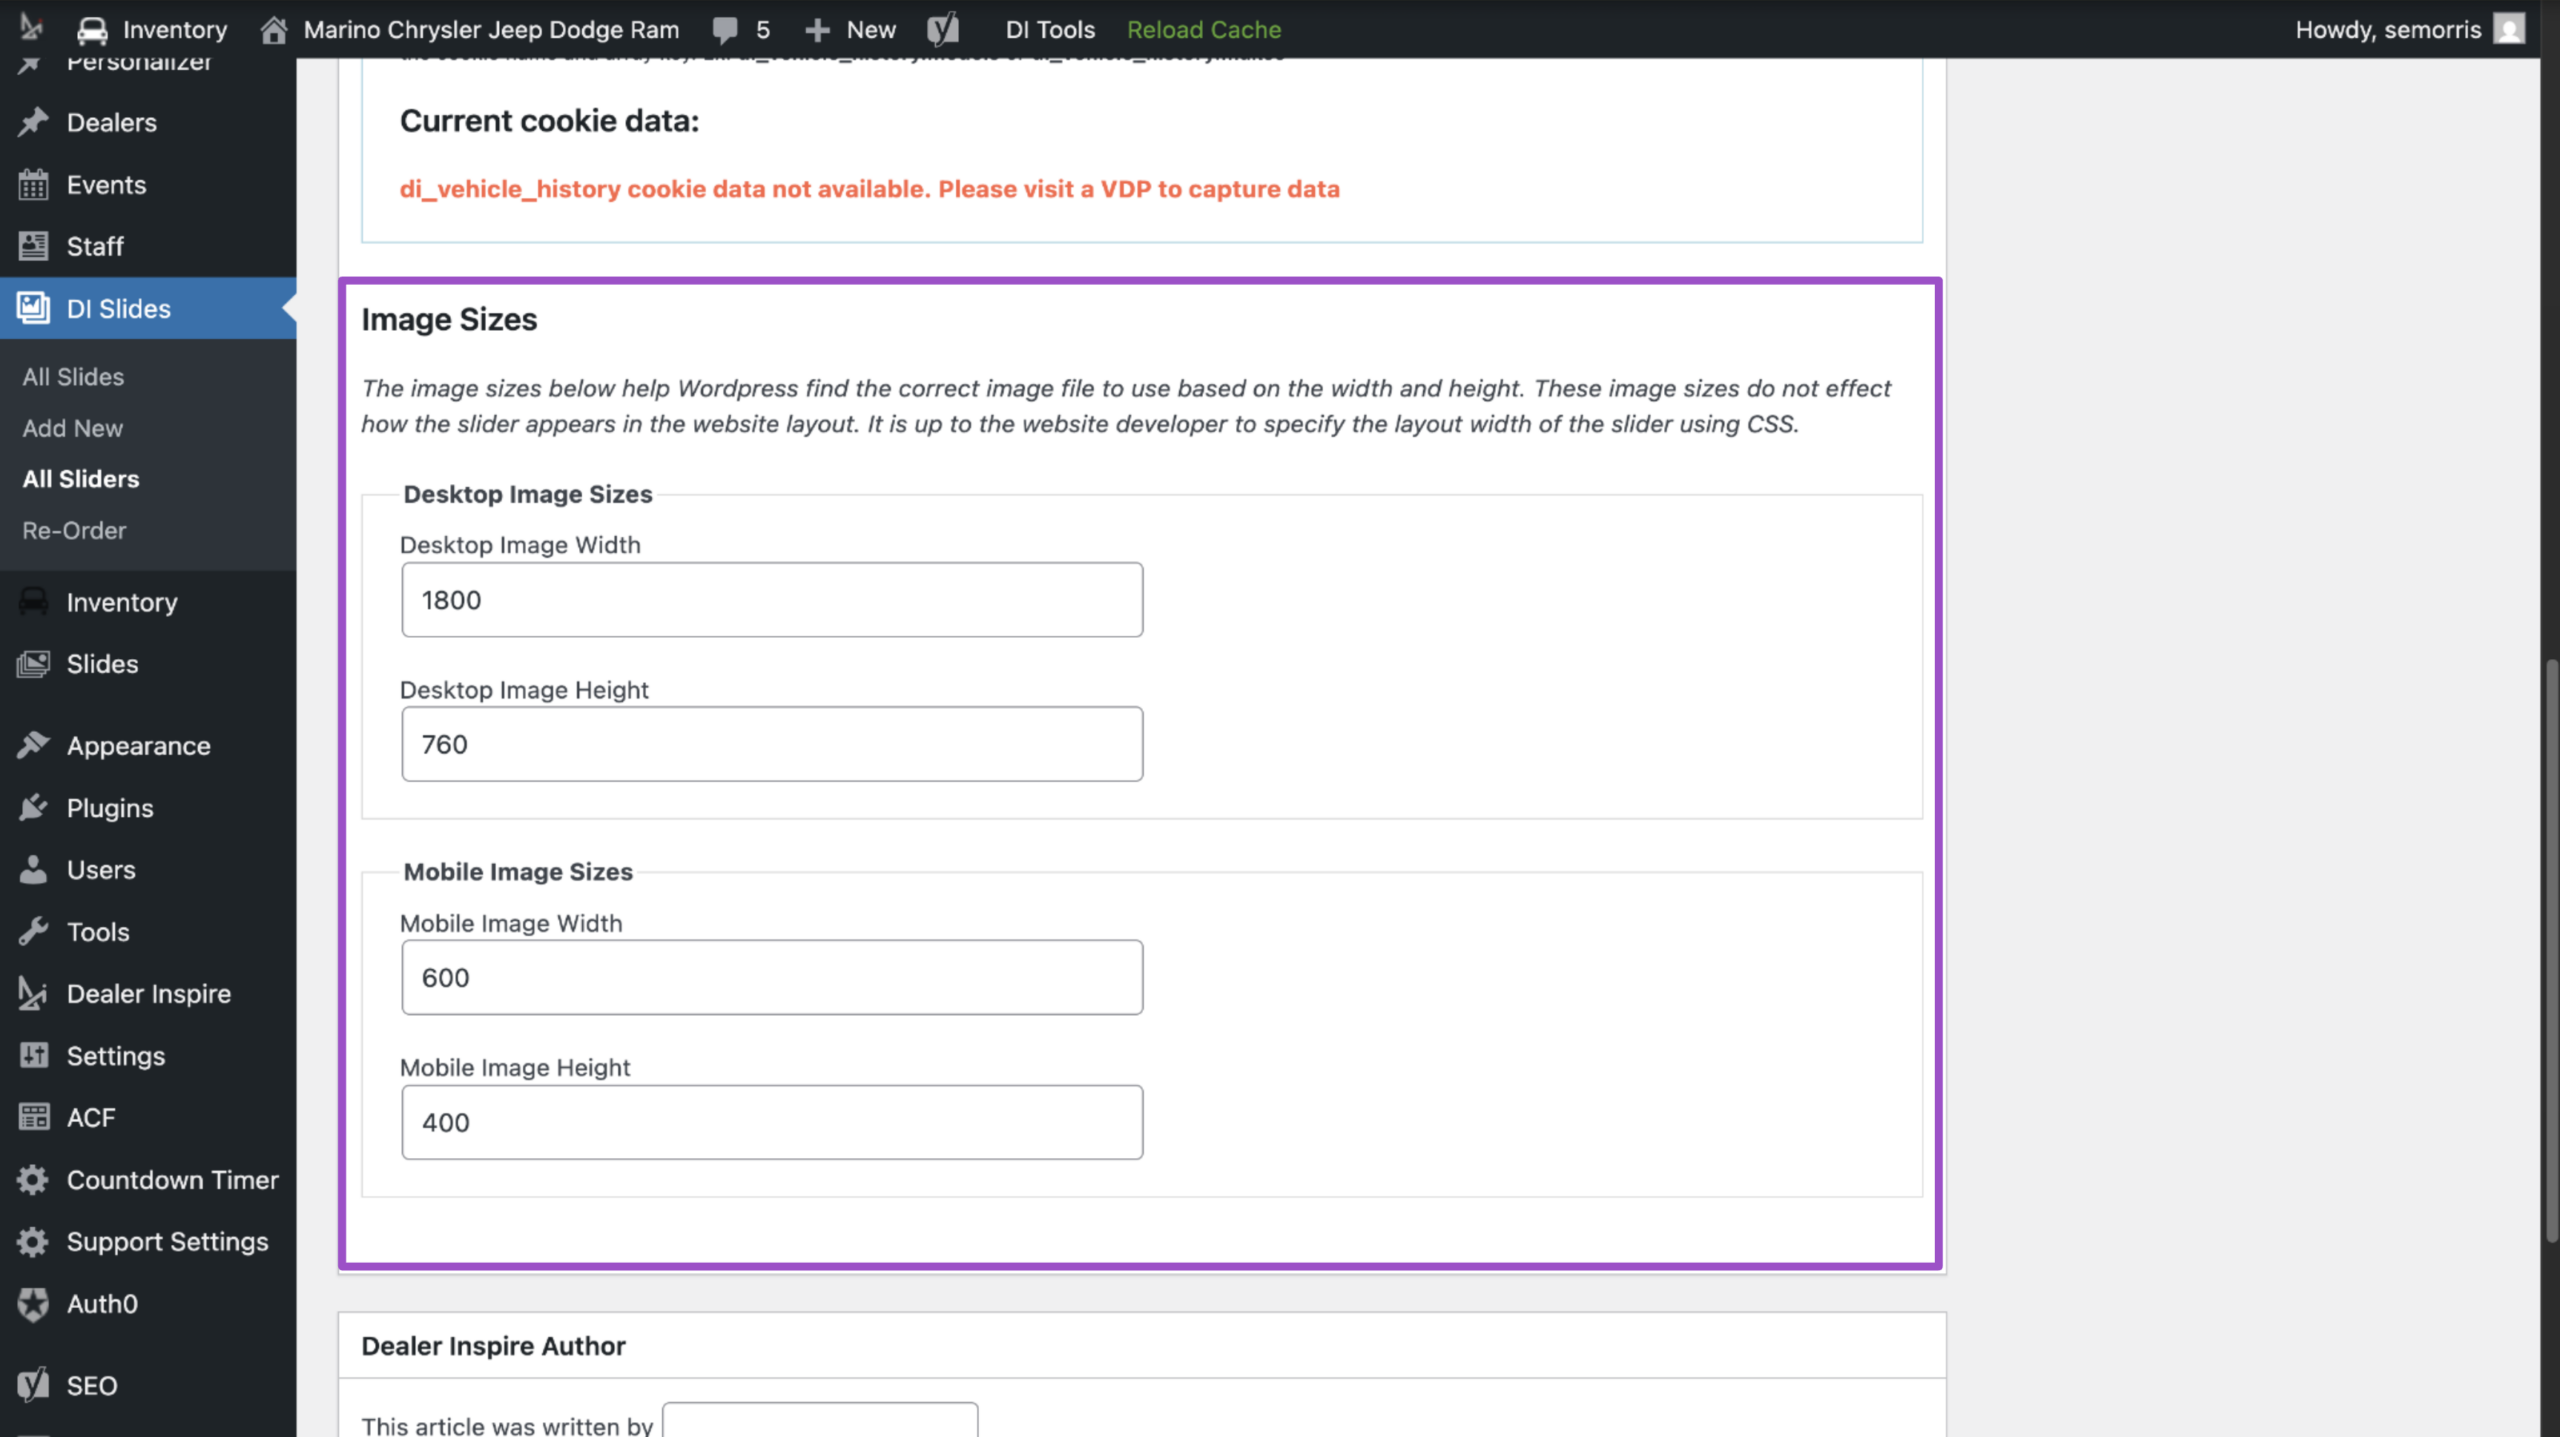
Image Sizes
Recommended image sizes are pre-filled in this section. These control image rendering but do not impact the layout width on your site.
Note: Slider layout and position are controlled by your website’s CSS. If you’d like to adjust the visual width or placement, email support@dealerinspire.com.
When finished, click Publish to create your new slider.
4 Add the slider to a web page
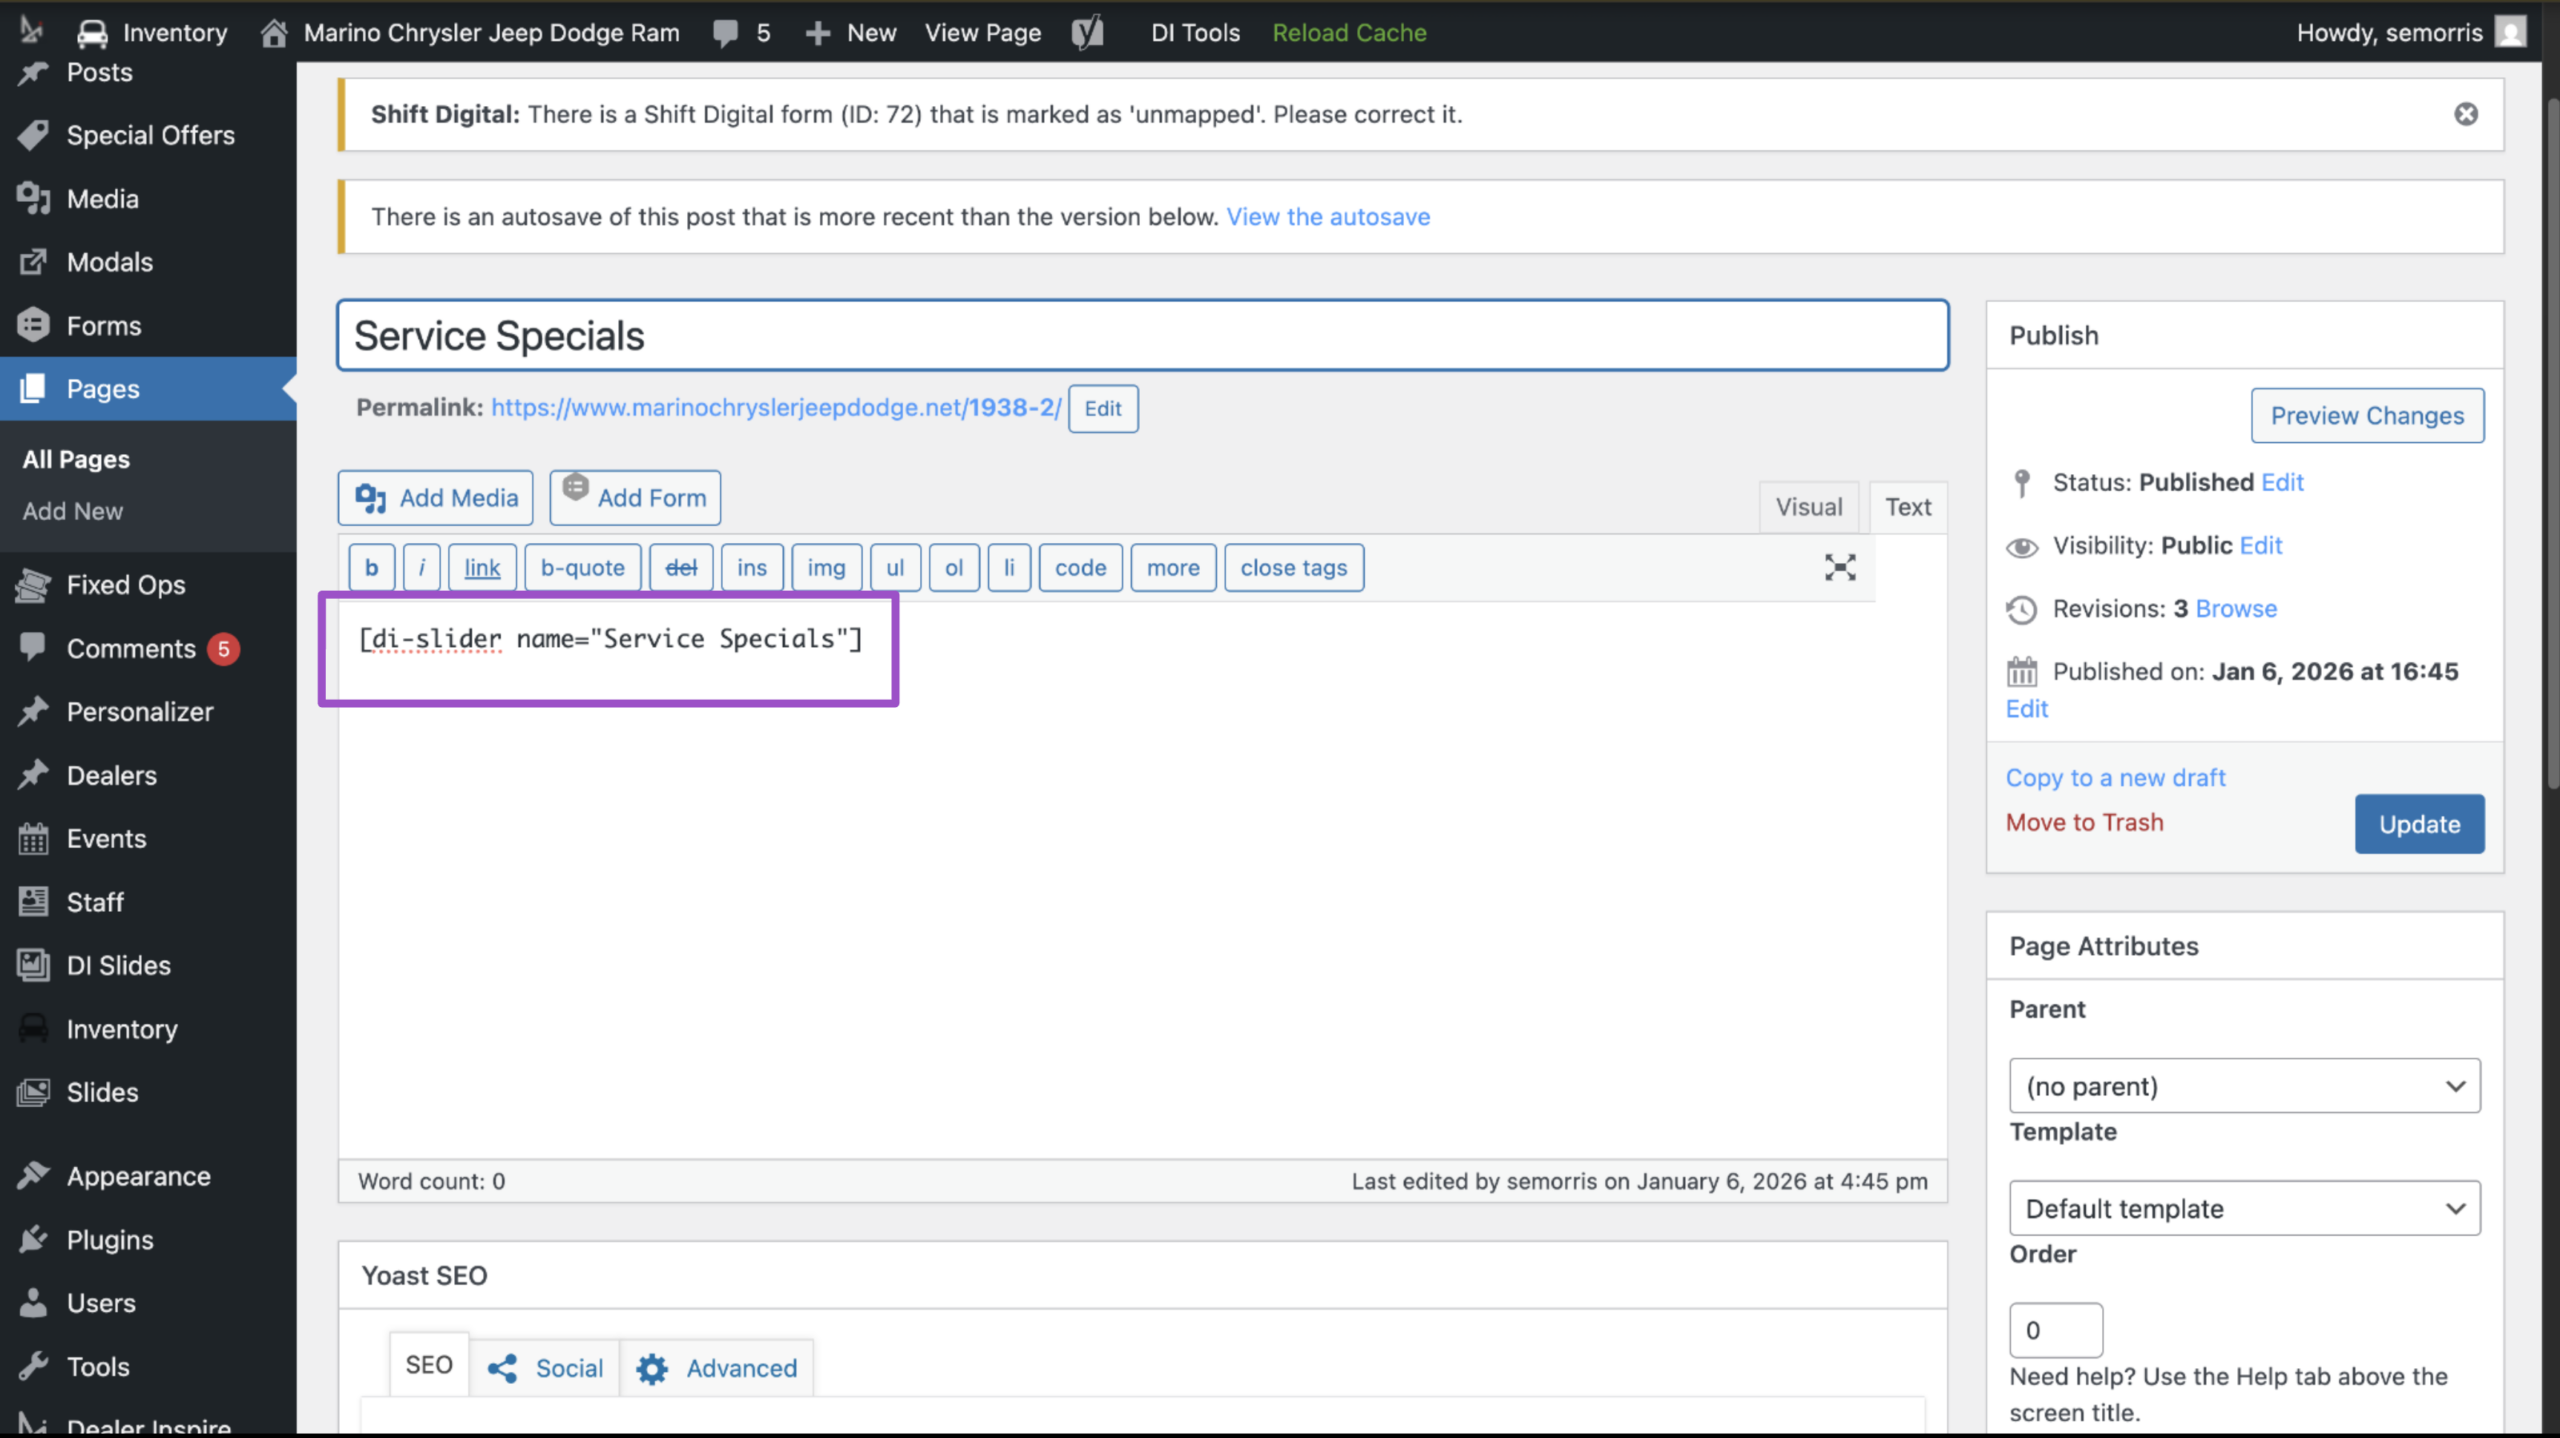
Once you’ve published your slider, you can add it to the Web page you want it to appear on:
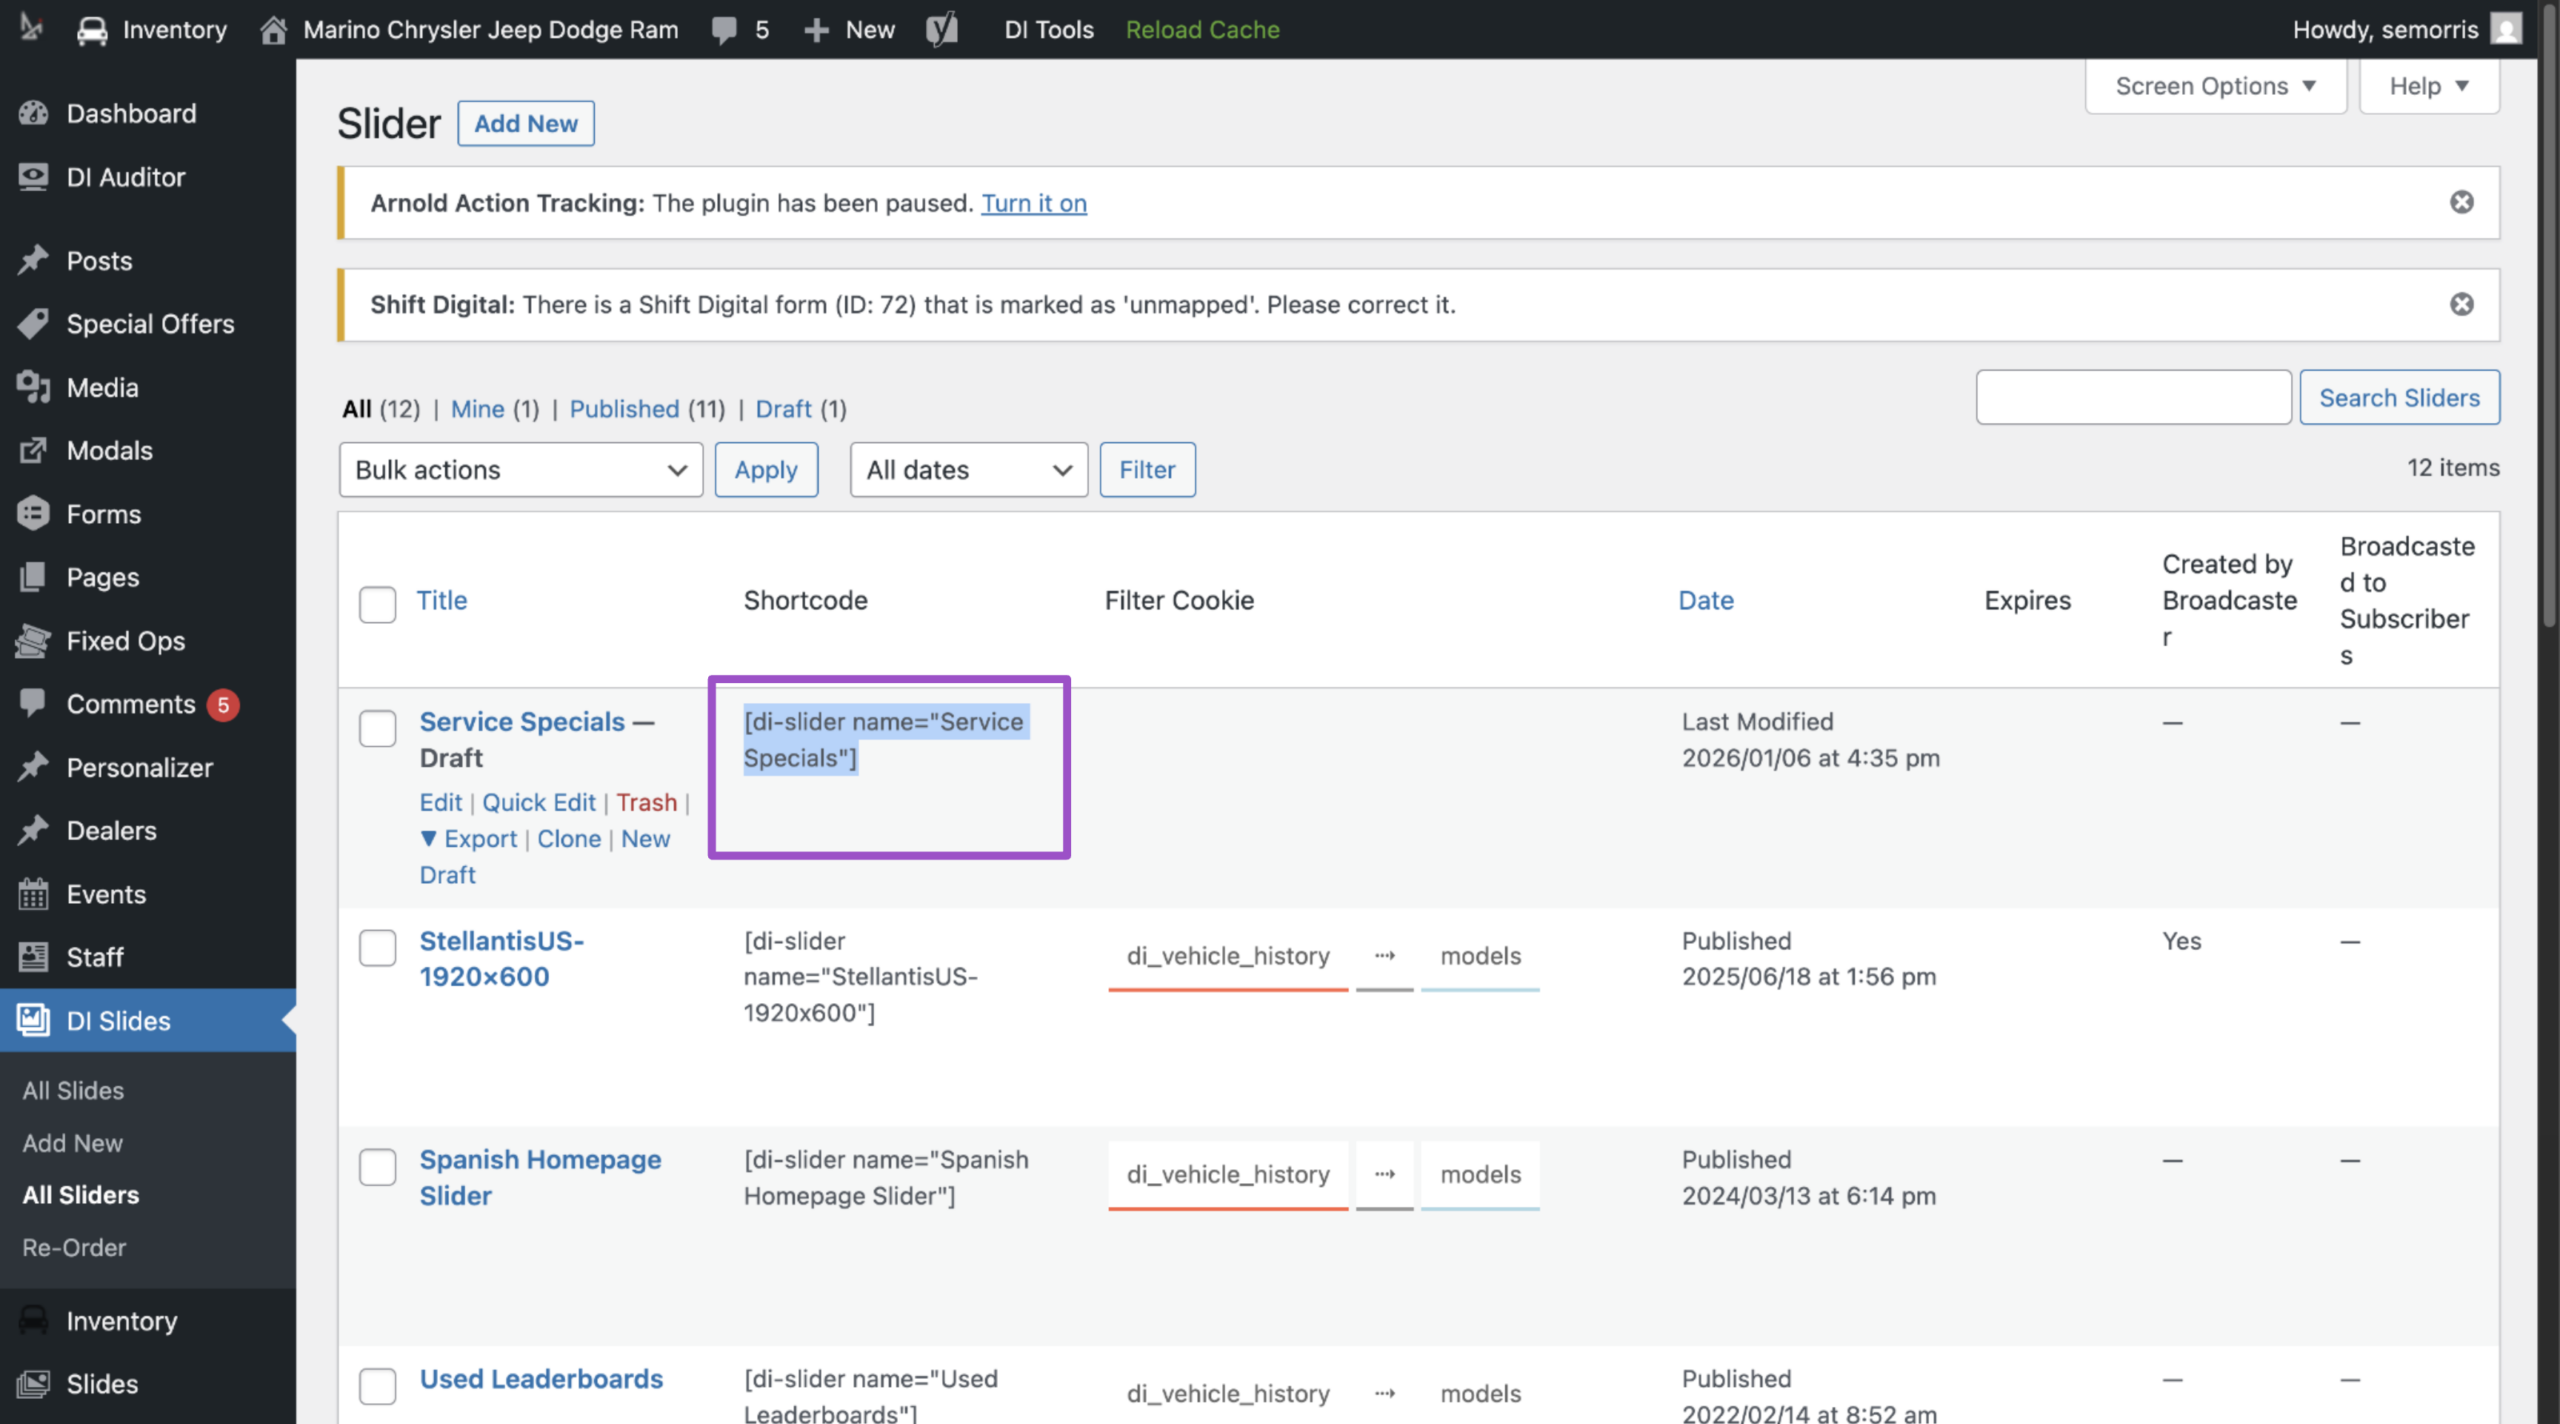
- From your All Sliders list, copy the shortcode for the new slider in the Shortcode column.
- Go to Pages, select the desired page, and paste the shortcode into the Text tab of the WordPress editor
Note: If you want to add a new slider to your Home Page, it must be done by a developer. Email support@dealerinspire.com to submit a request to add the new slider to your Home Page.