How to create new pages
Site Builder is Dealer Inspire’s visual editor tool with a drag-and-drop interface that allows you to build pages using a library of pre-built components and widgets. Use the Site Builder template to create new pages for your dealership website efficiently and intuitively. No code needed!
In this article, you’ll learn how to create new pages using the Site Builder page template, no code needed. Learn how to create a new page in WordPress, choose the Site Builder template, and customize the page using customizable widgets.
To get started
Go to the Cars.com Hub. Click on Dealer Inspire, then Manage Website.
Tentaculum ipsum dolor sit amet, cephalopodus adaptabilis bringsus clarity to murkyus appraisalis waters.
1Navigate to pages
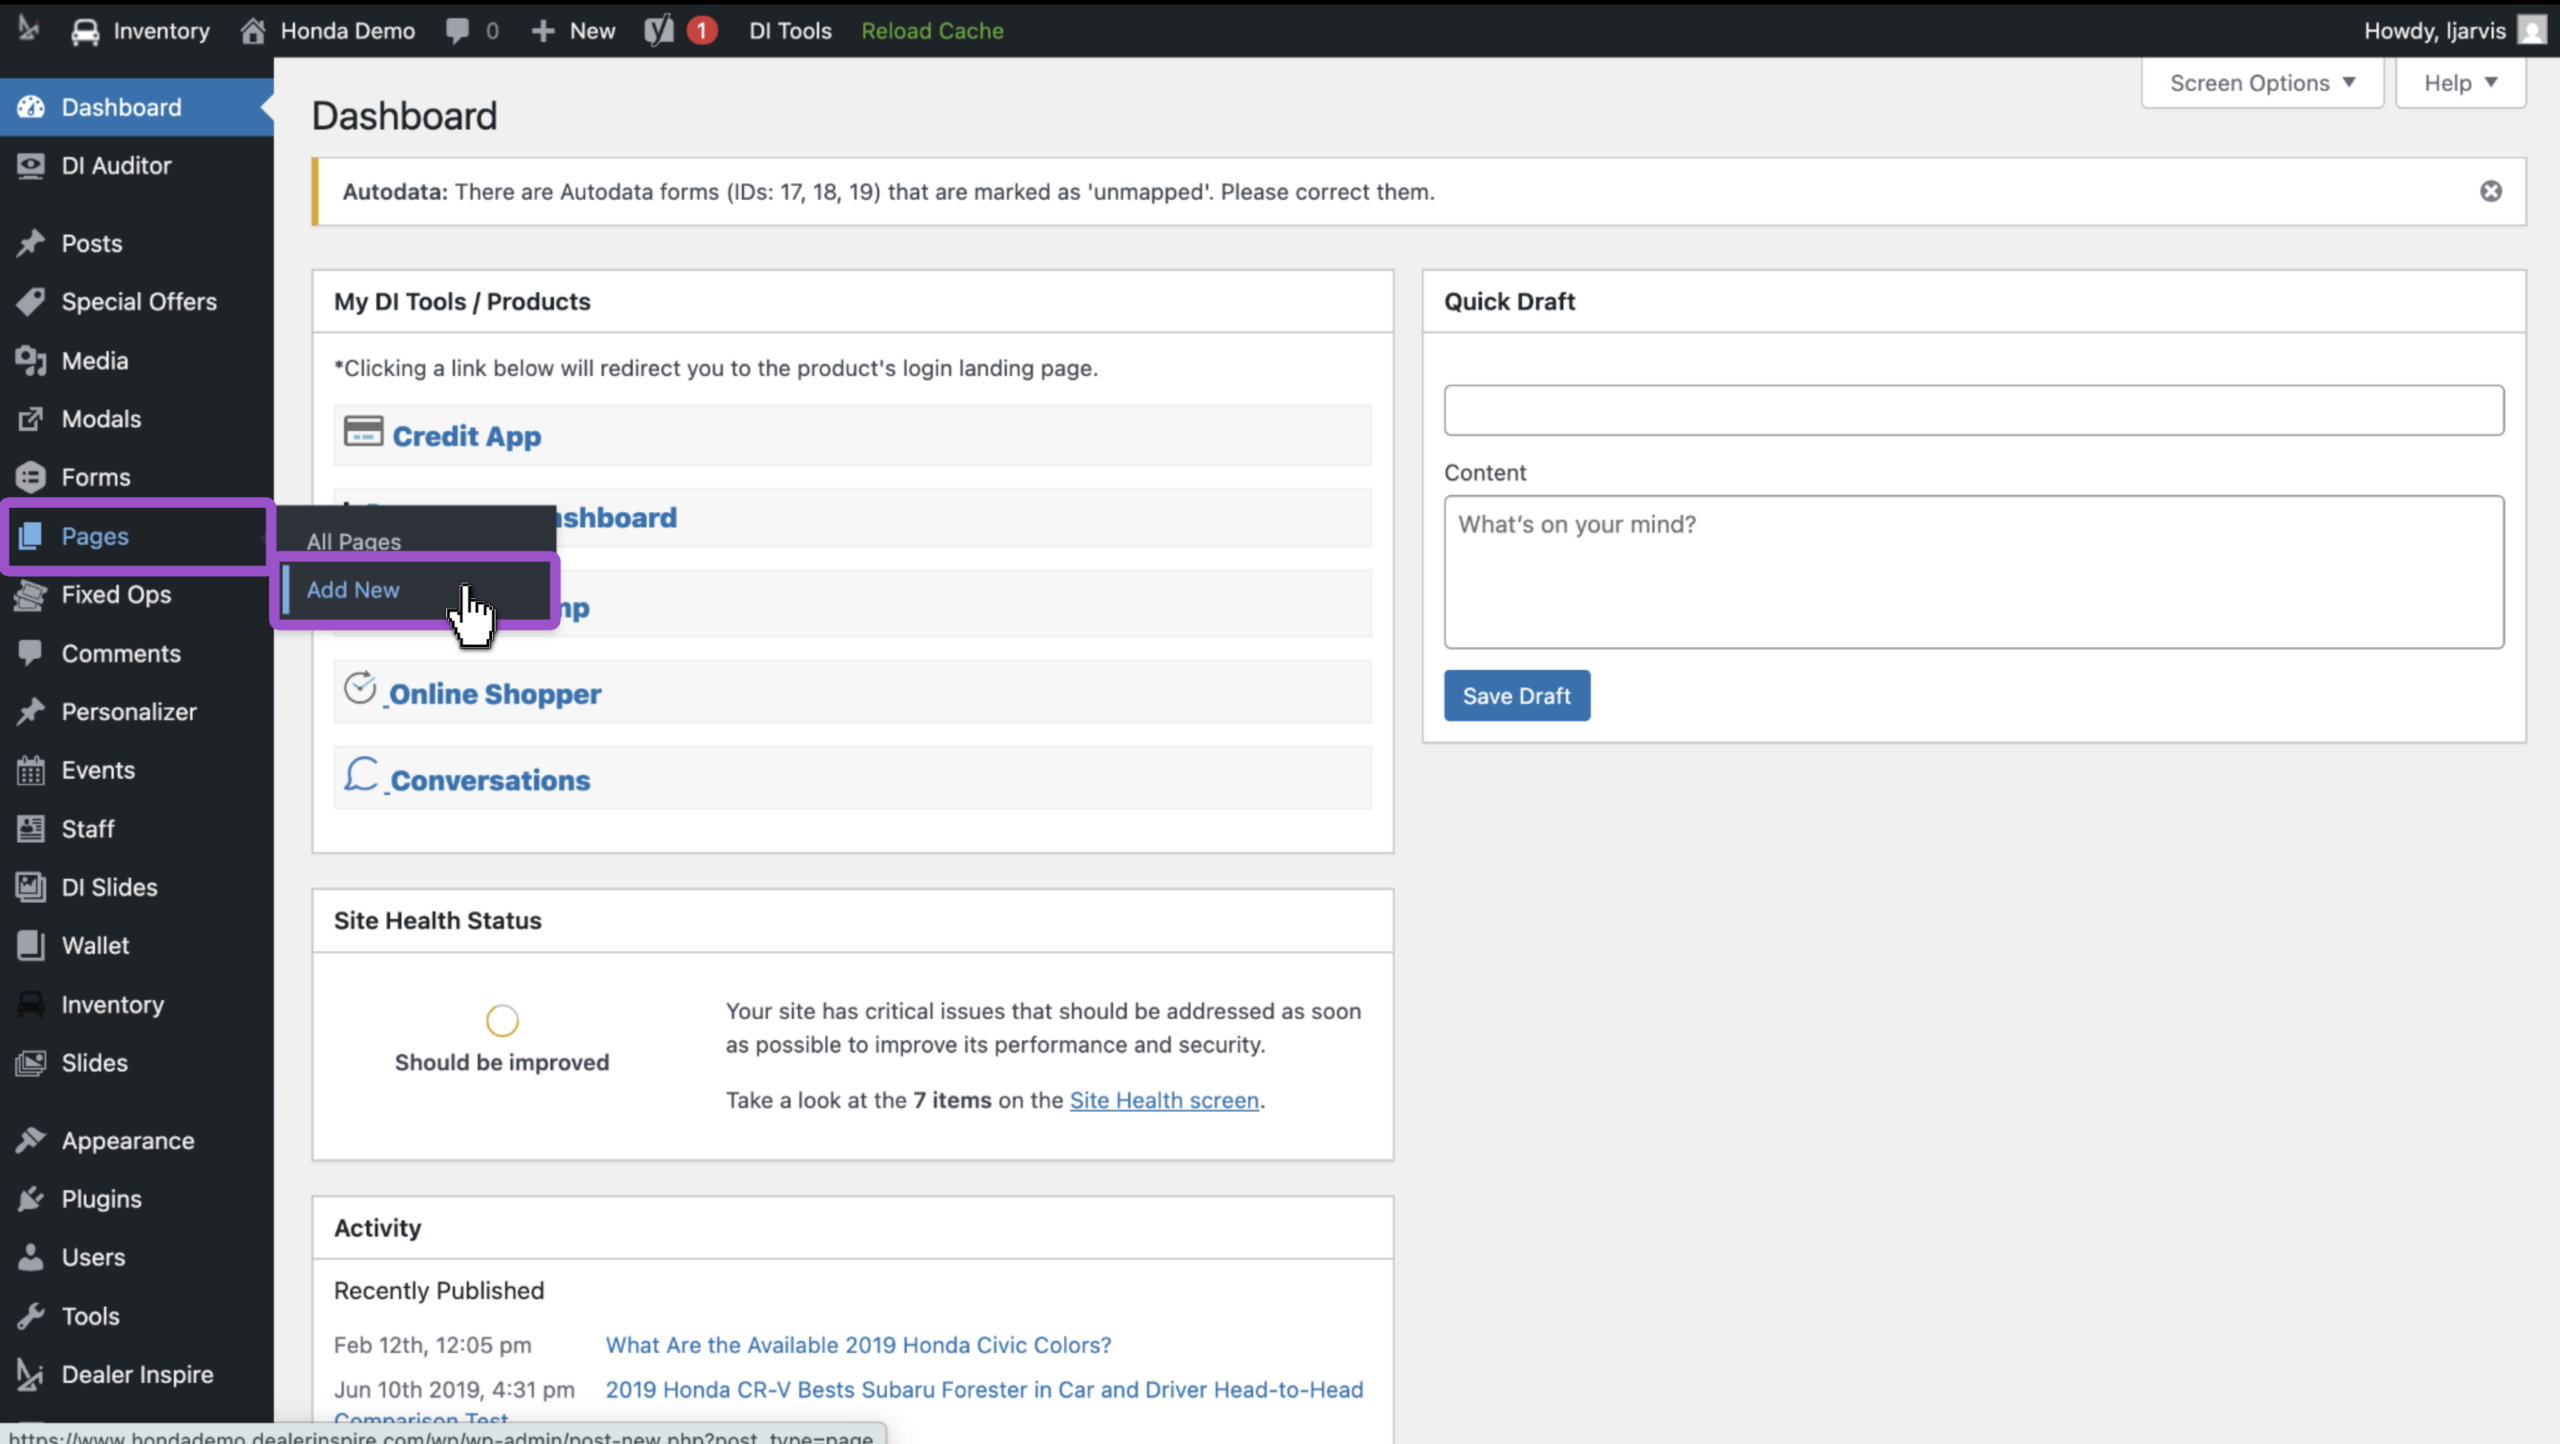
From the backend menu:
- Hover over Pages
- Click Add New
2 Set up the Site Builder page
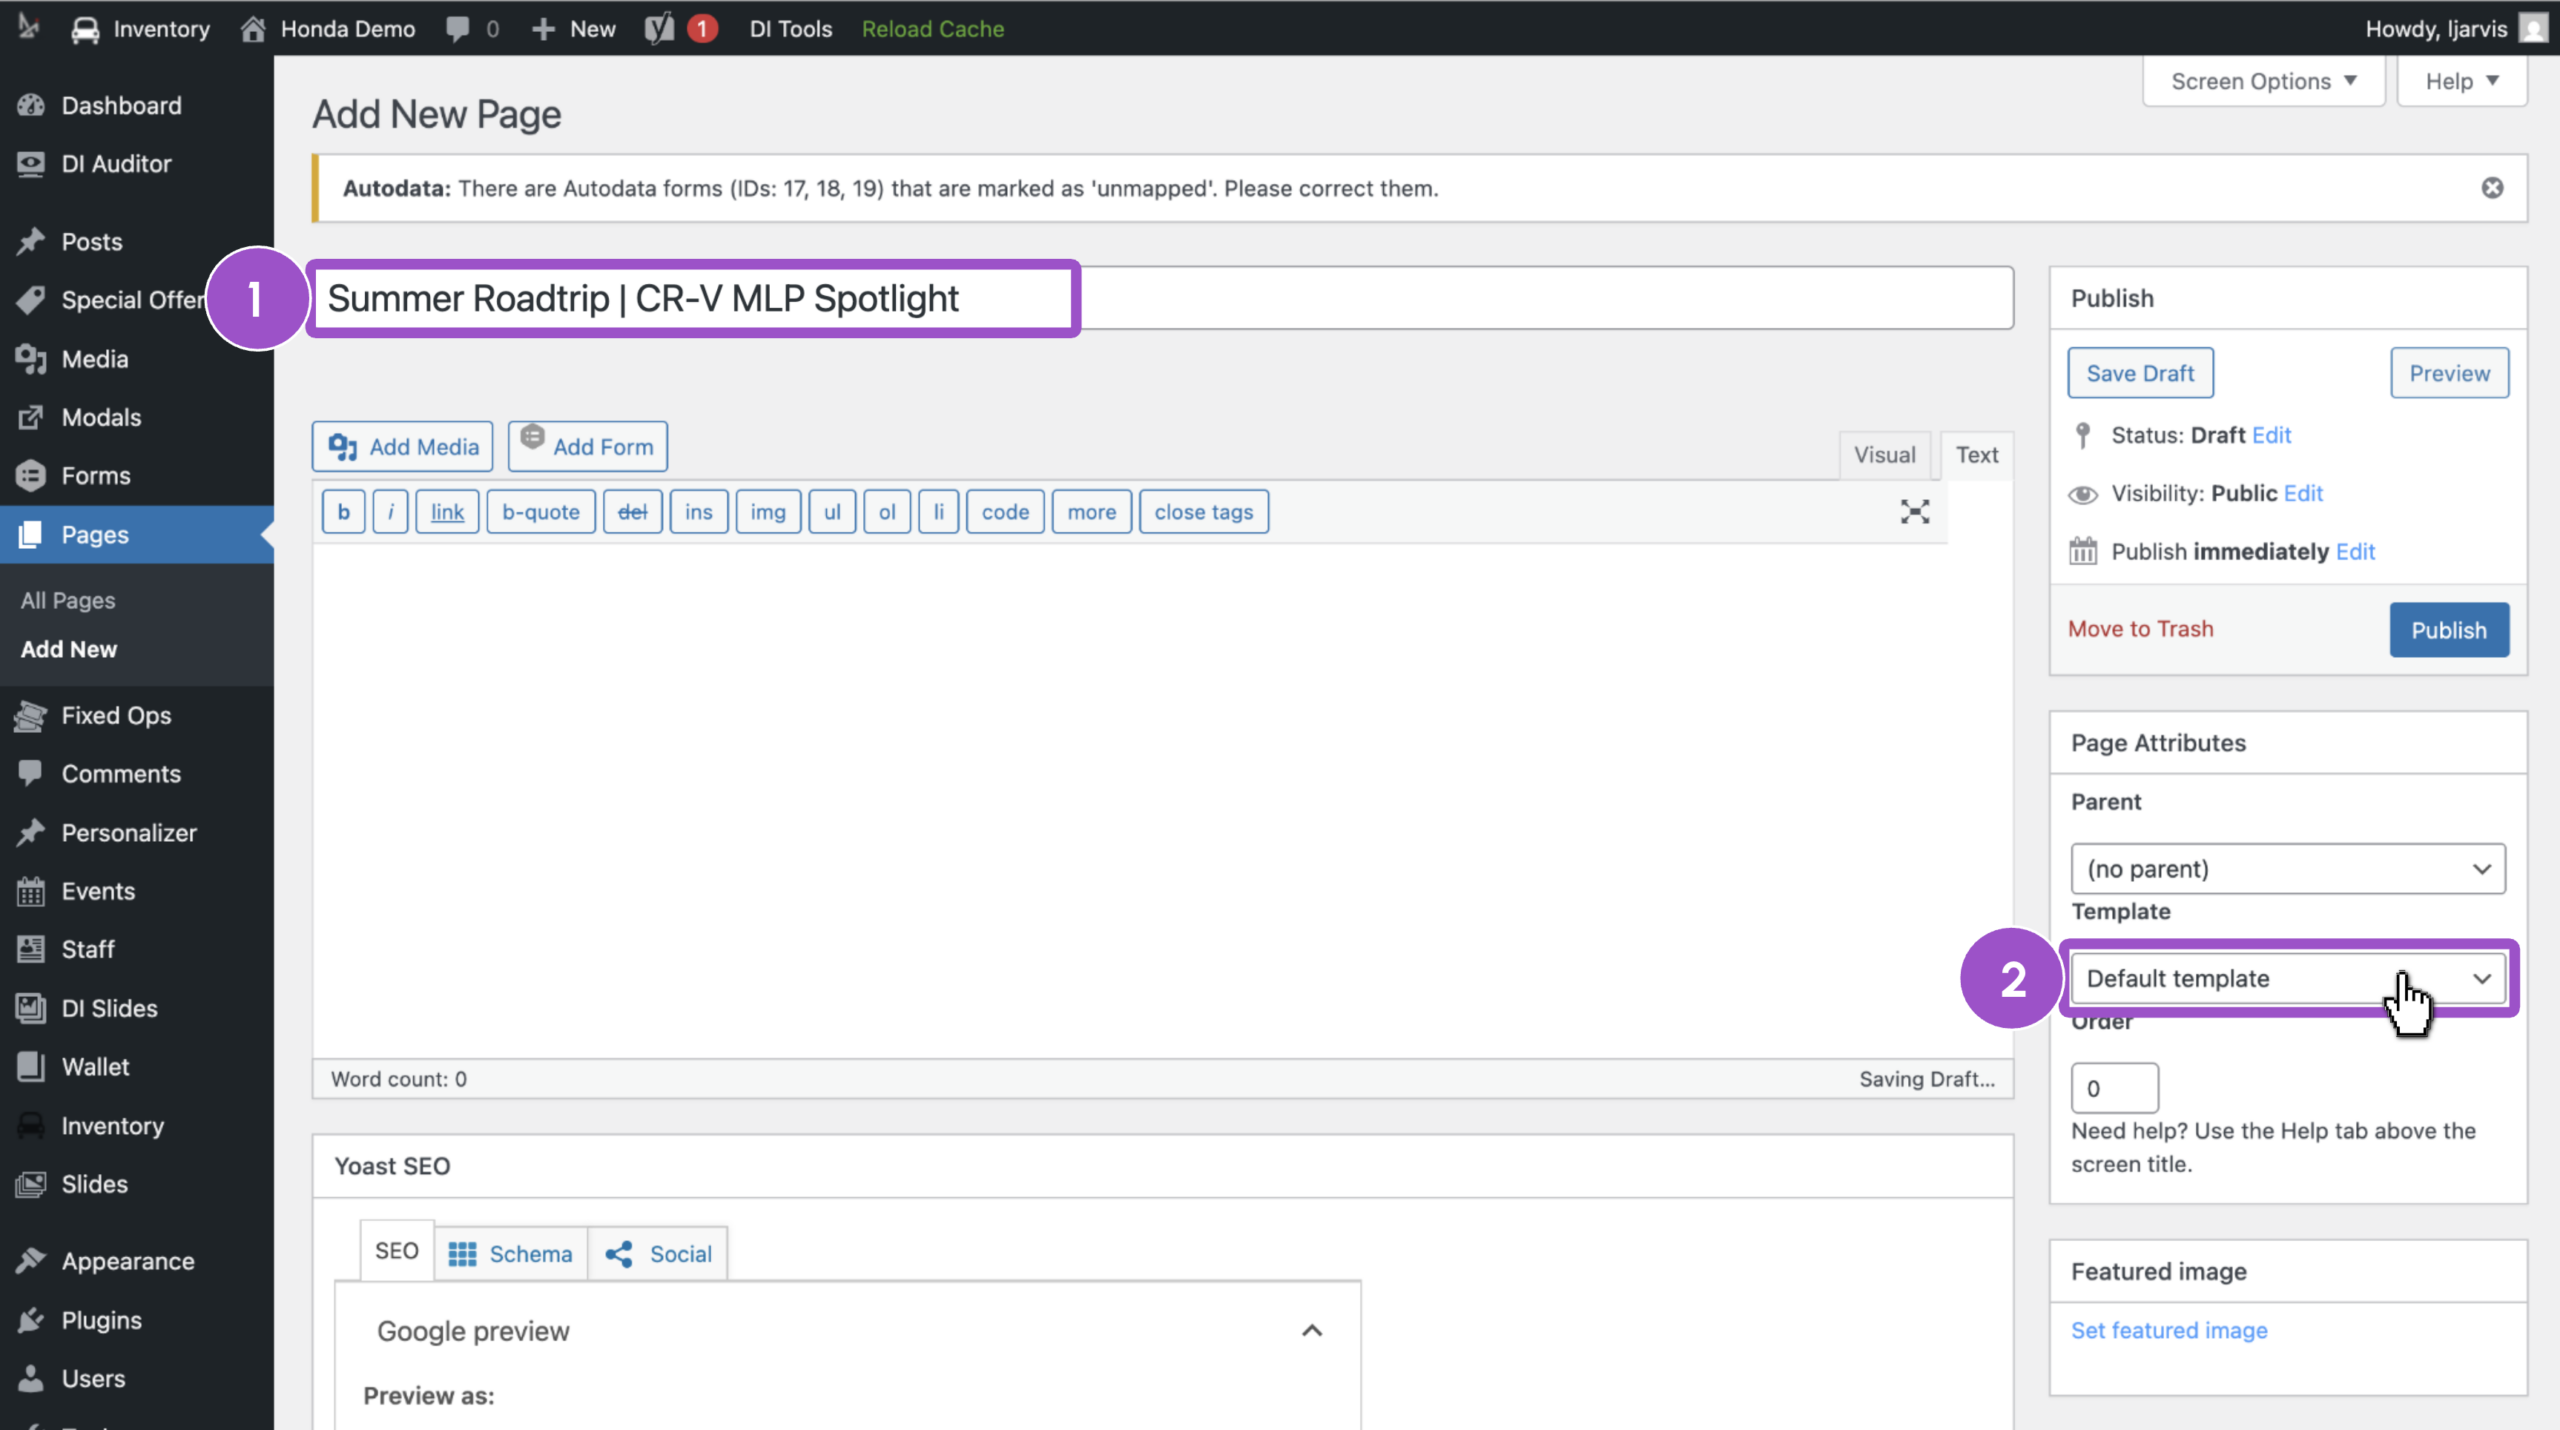
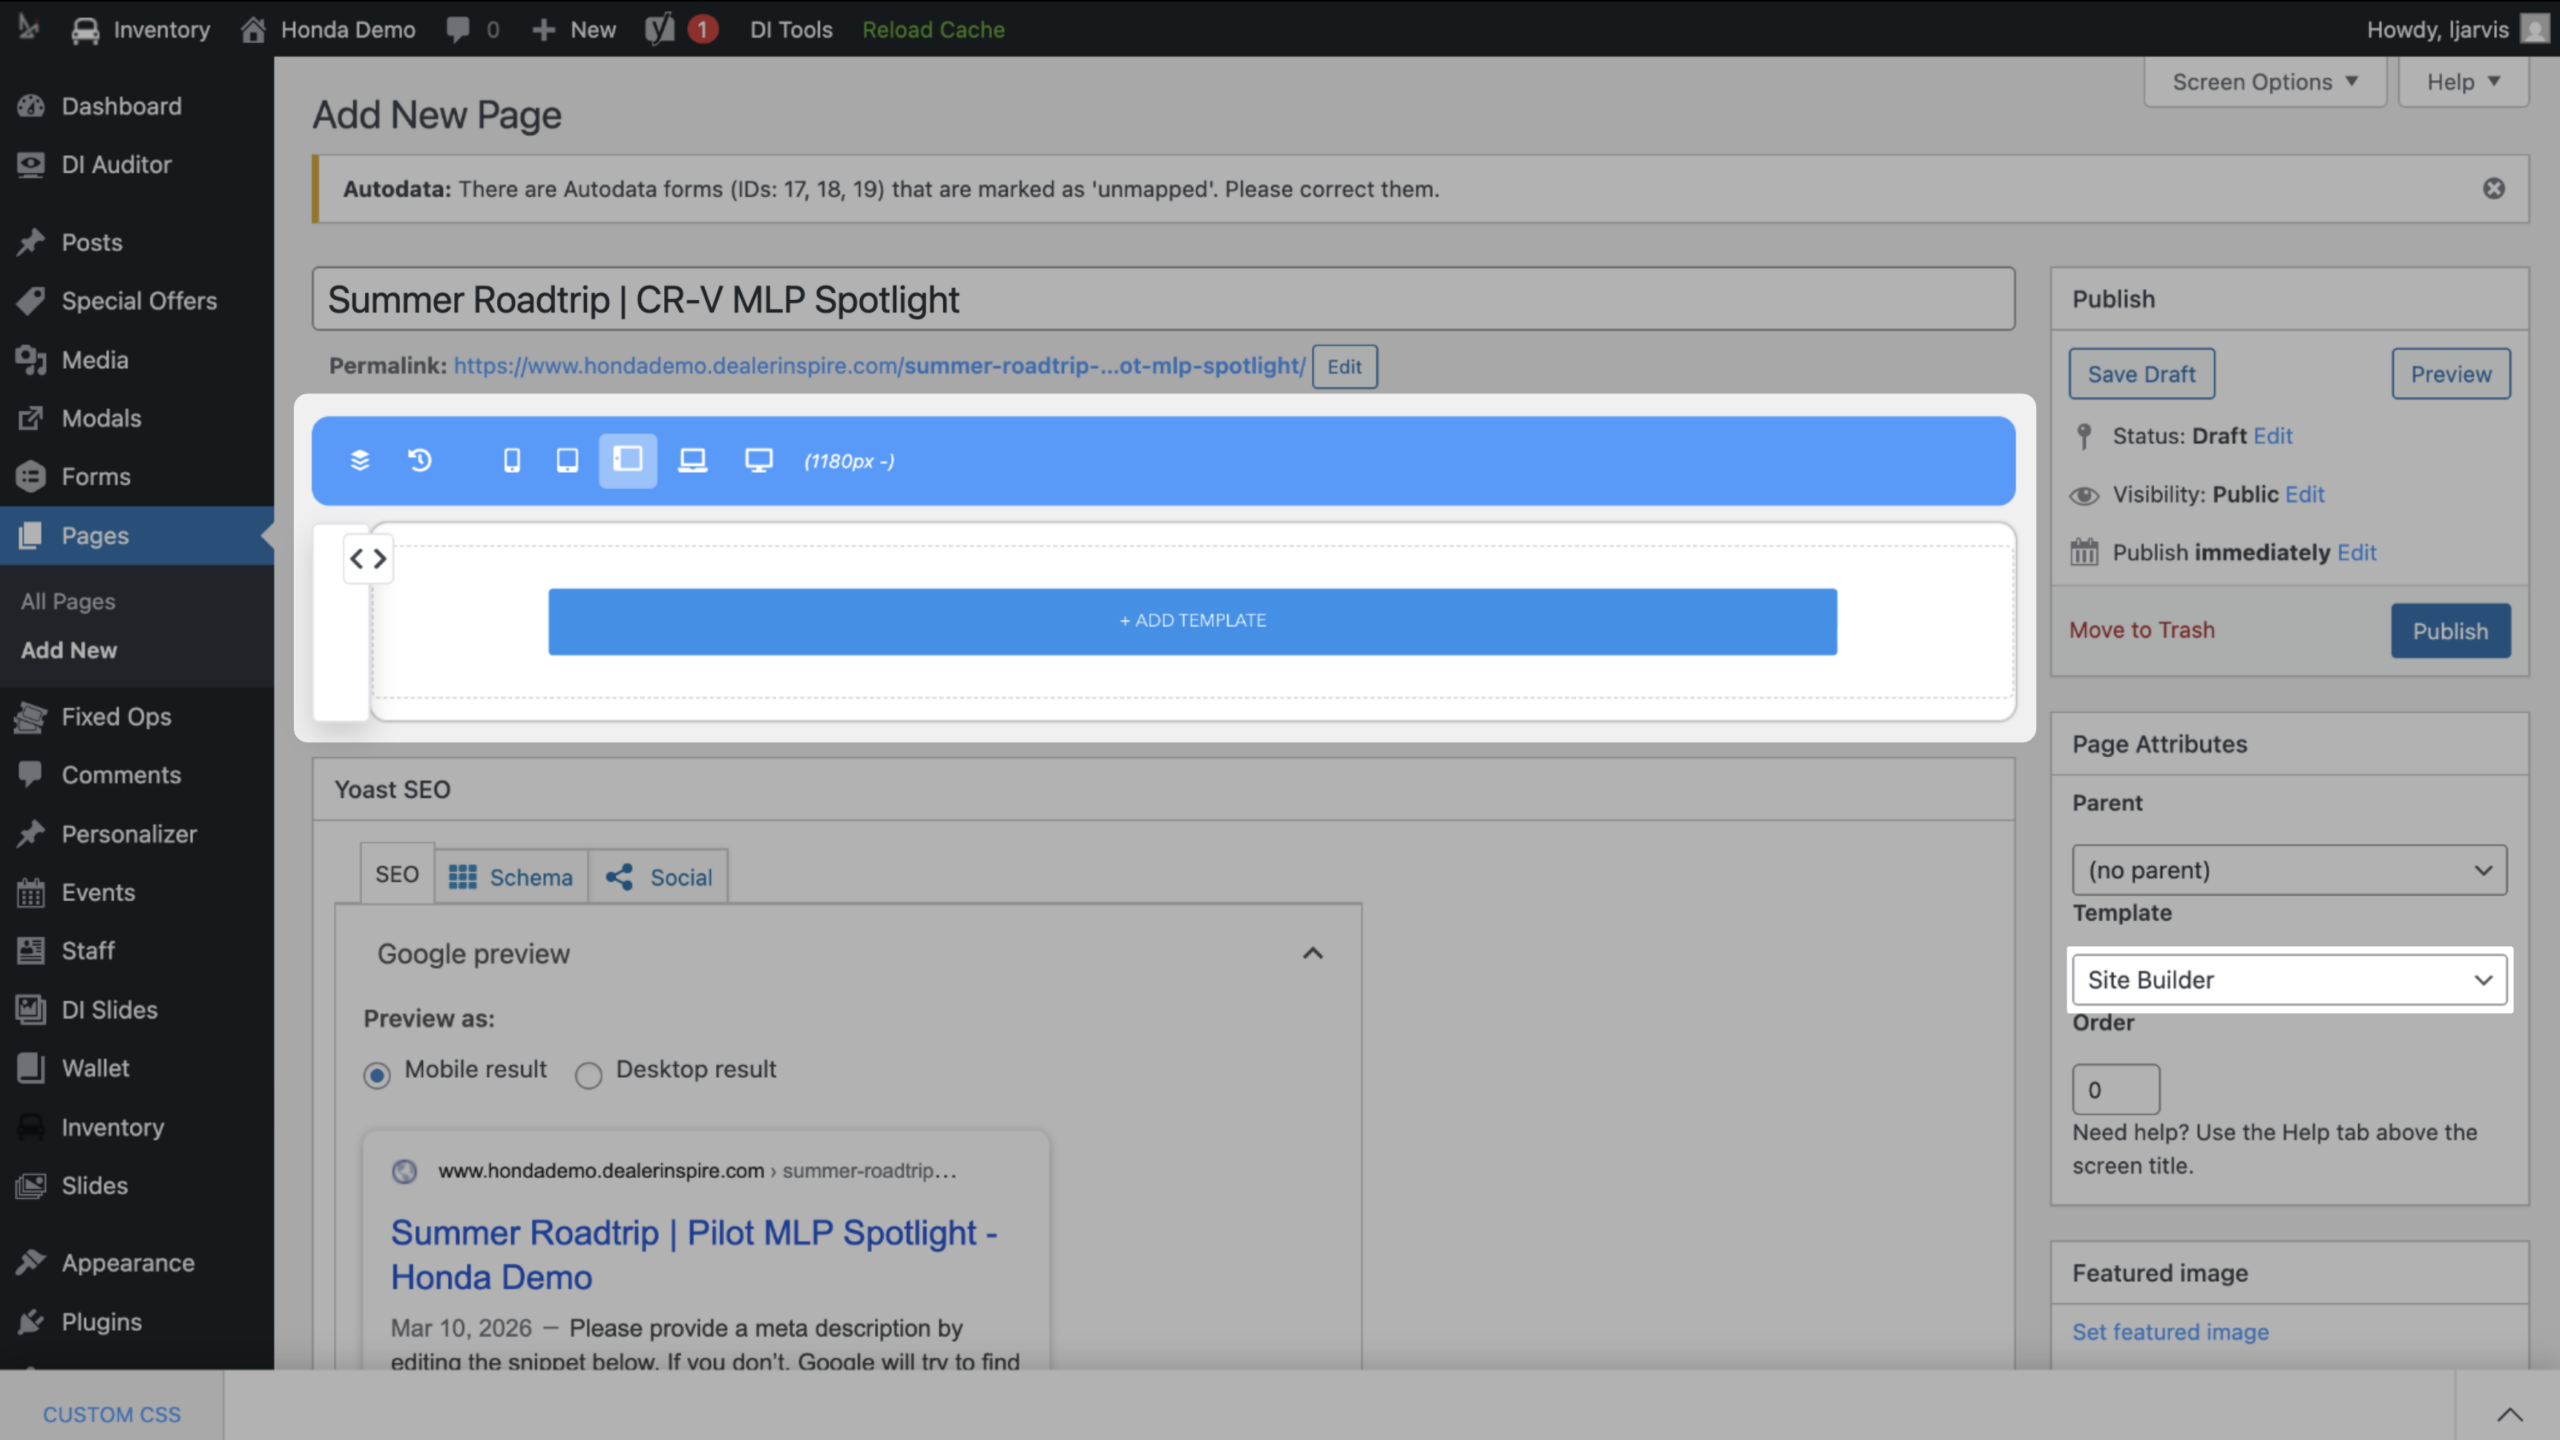
- Title your page
- Select Site Builder from the template dropdown under Page Attributes
The page will display the Site Builder widget to easily add:
- Template
- Blocks
- Components
Click + Add Template to begin building your page.
3 Choose a template
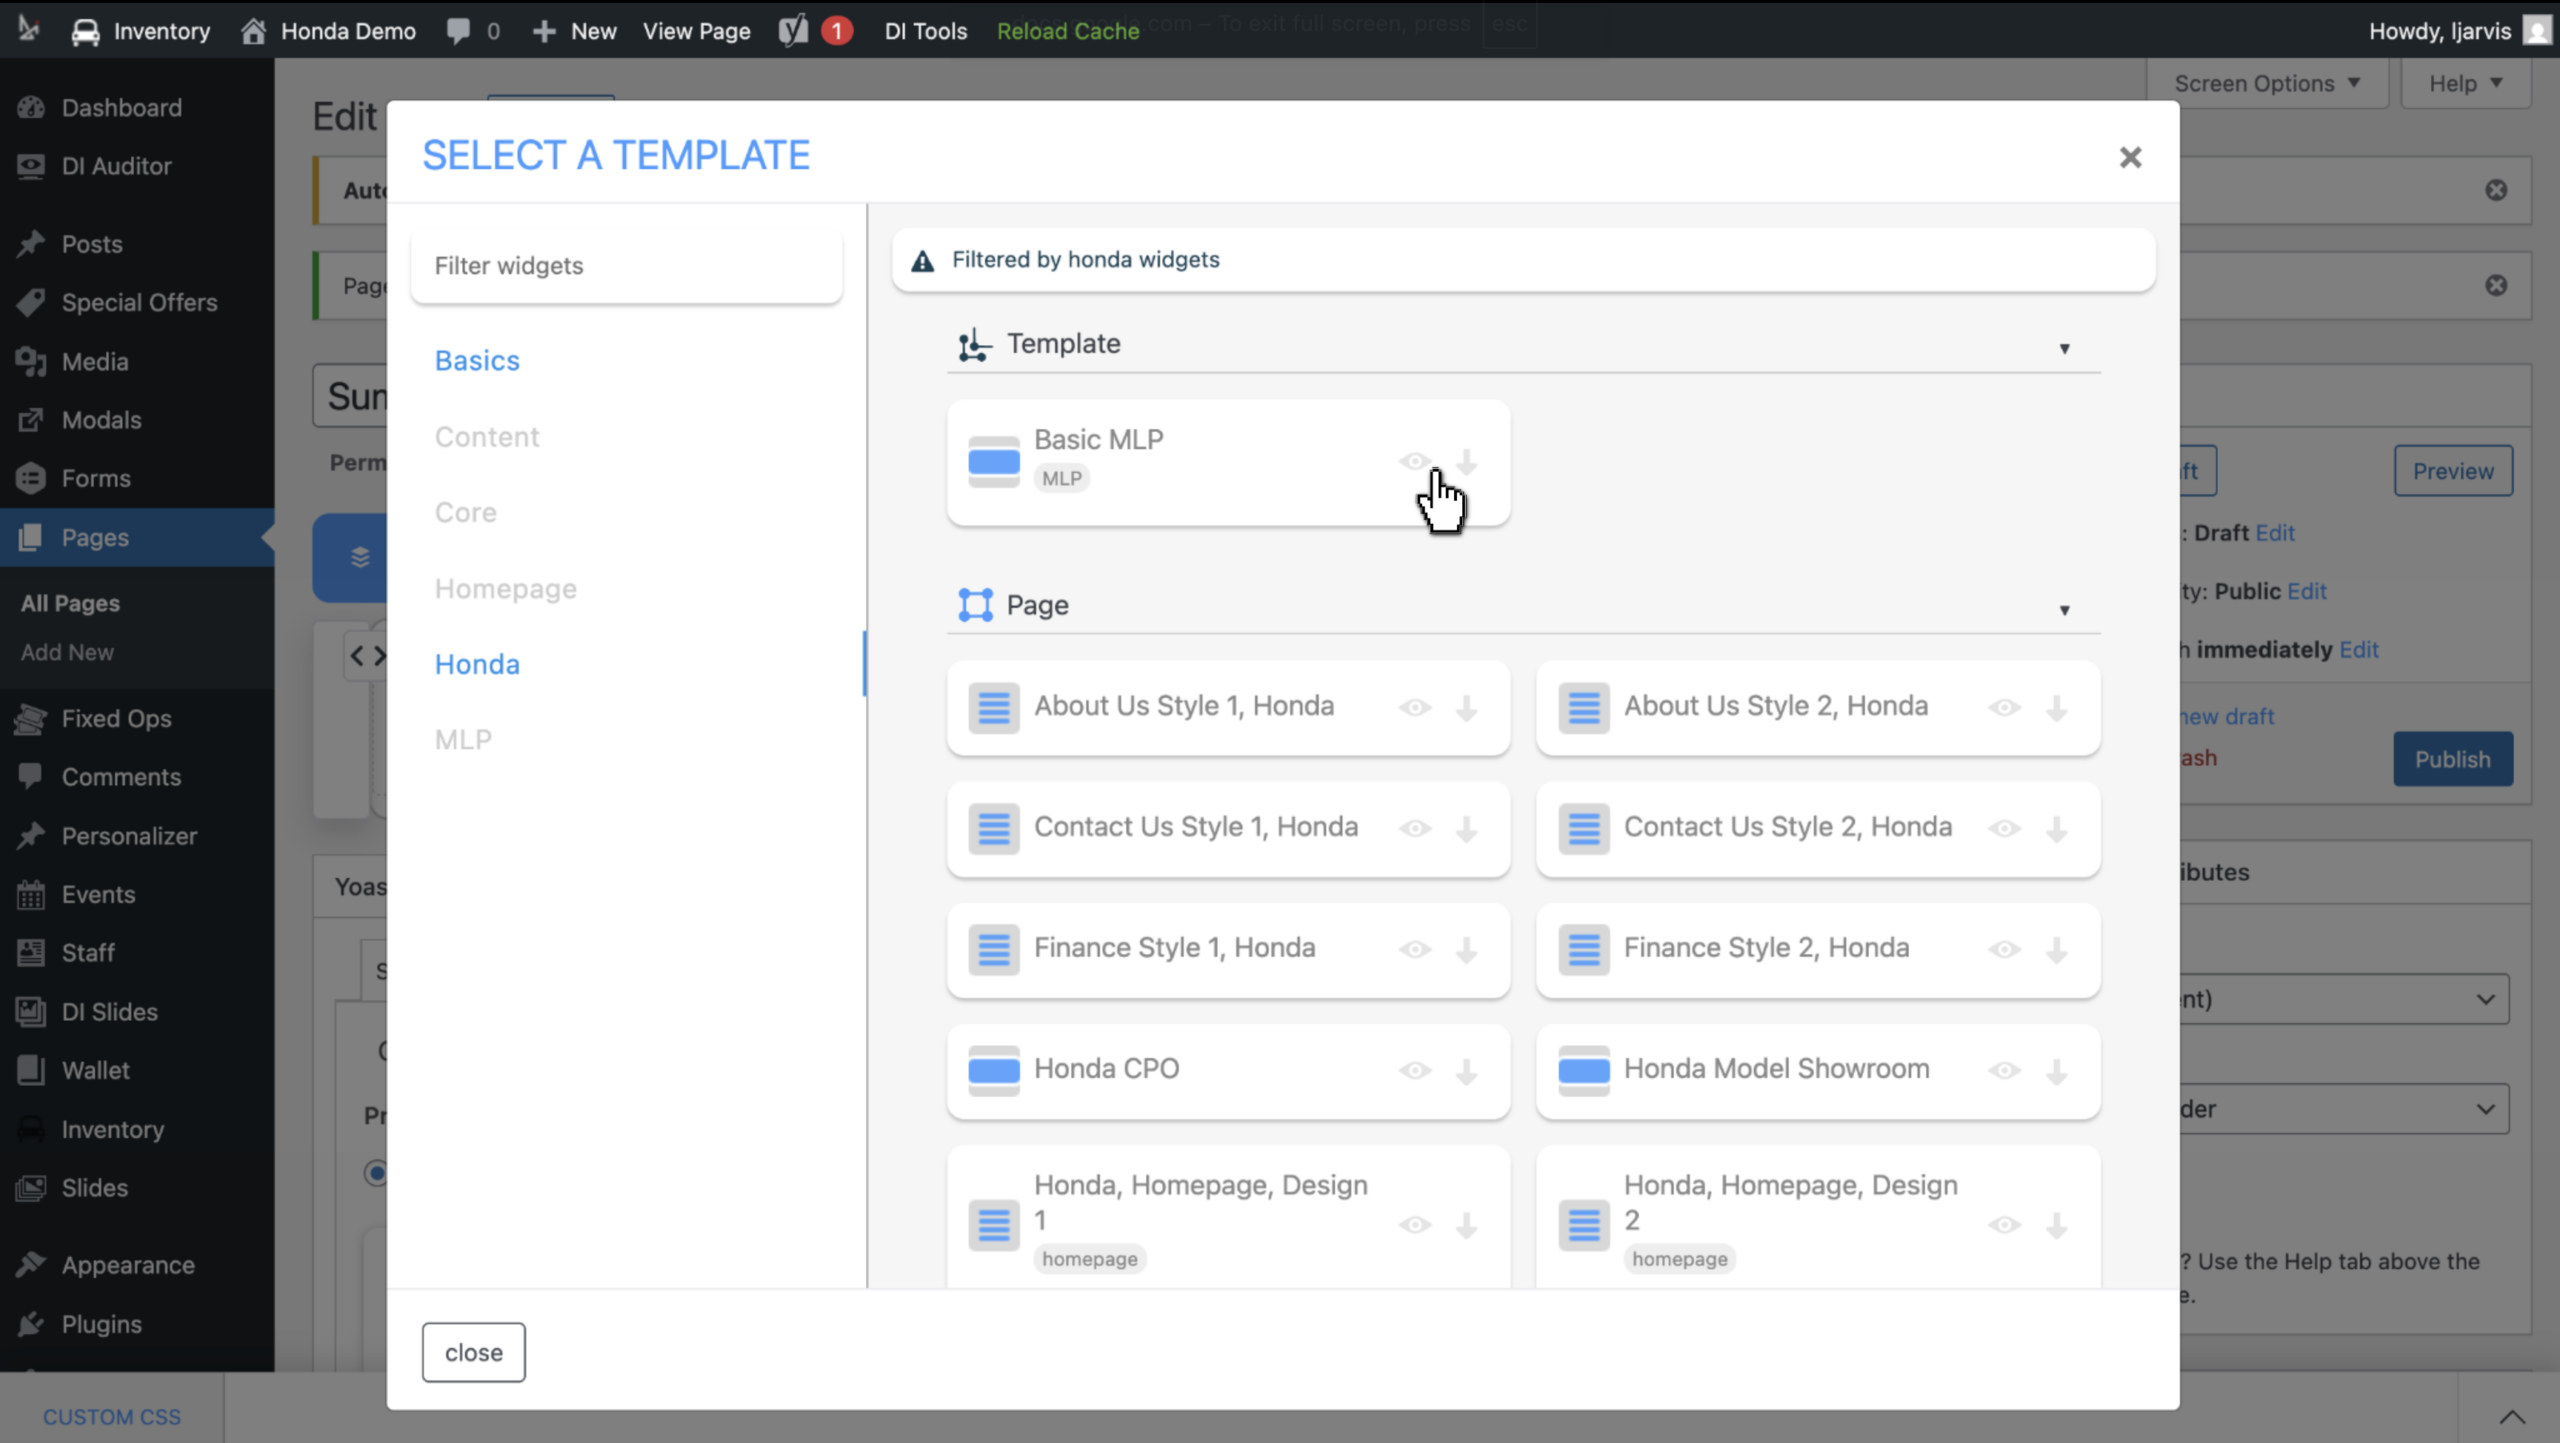
- Click or search through various templates
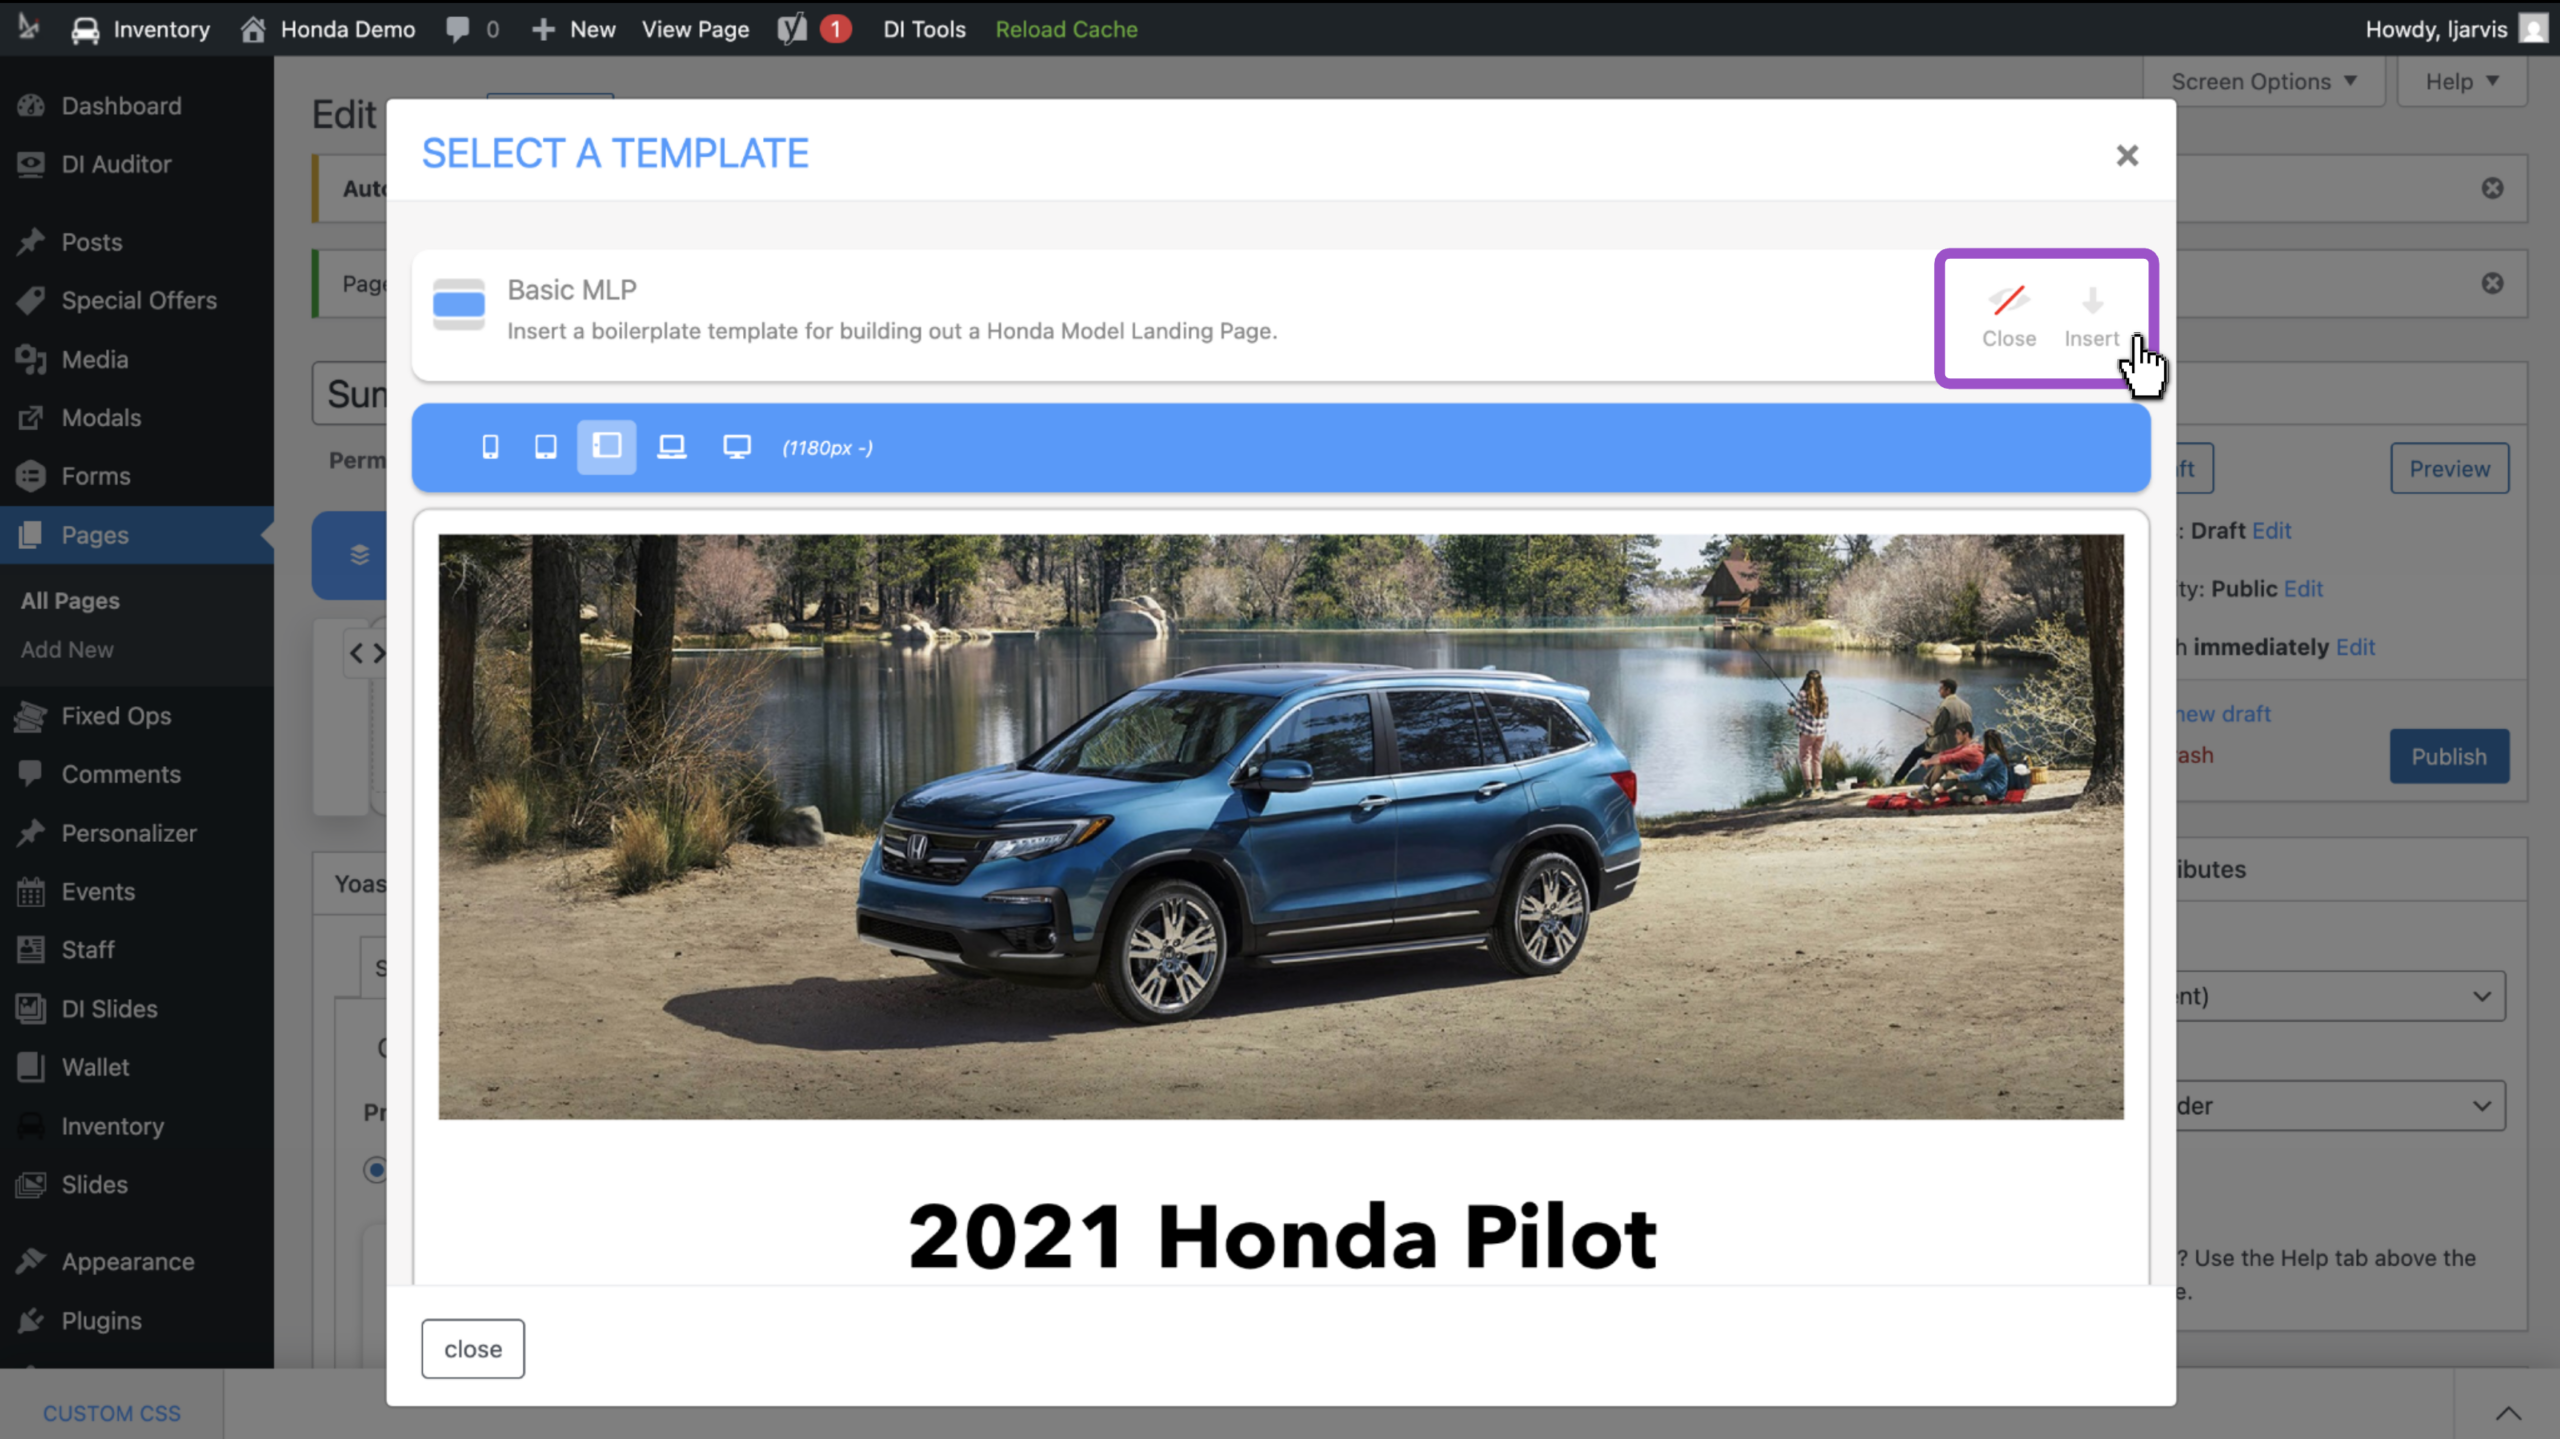
- Click the eye icon to preview a template before inserting it into your page
- Click close to go back to the list of templates
- Click insert to use the template
- Click the x in the top right corner to exit out of the template window entirely
Tip: Choose a template that aligns with your page’s goal. Templates are just a starting point. You can customize every detail to make it your own.
Learn how to navigate the Site Builder widgets before building the page.
Navigating the Site Builder widget
Hover over the dotted lines around the page to determine what block or component to edit.
- Template: the layout for the entire page.
- Block: the sections that organize the page. Think of blocks as a container for components.
- Component: the specific content on the page, like buttons, images, or text.
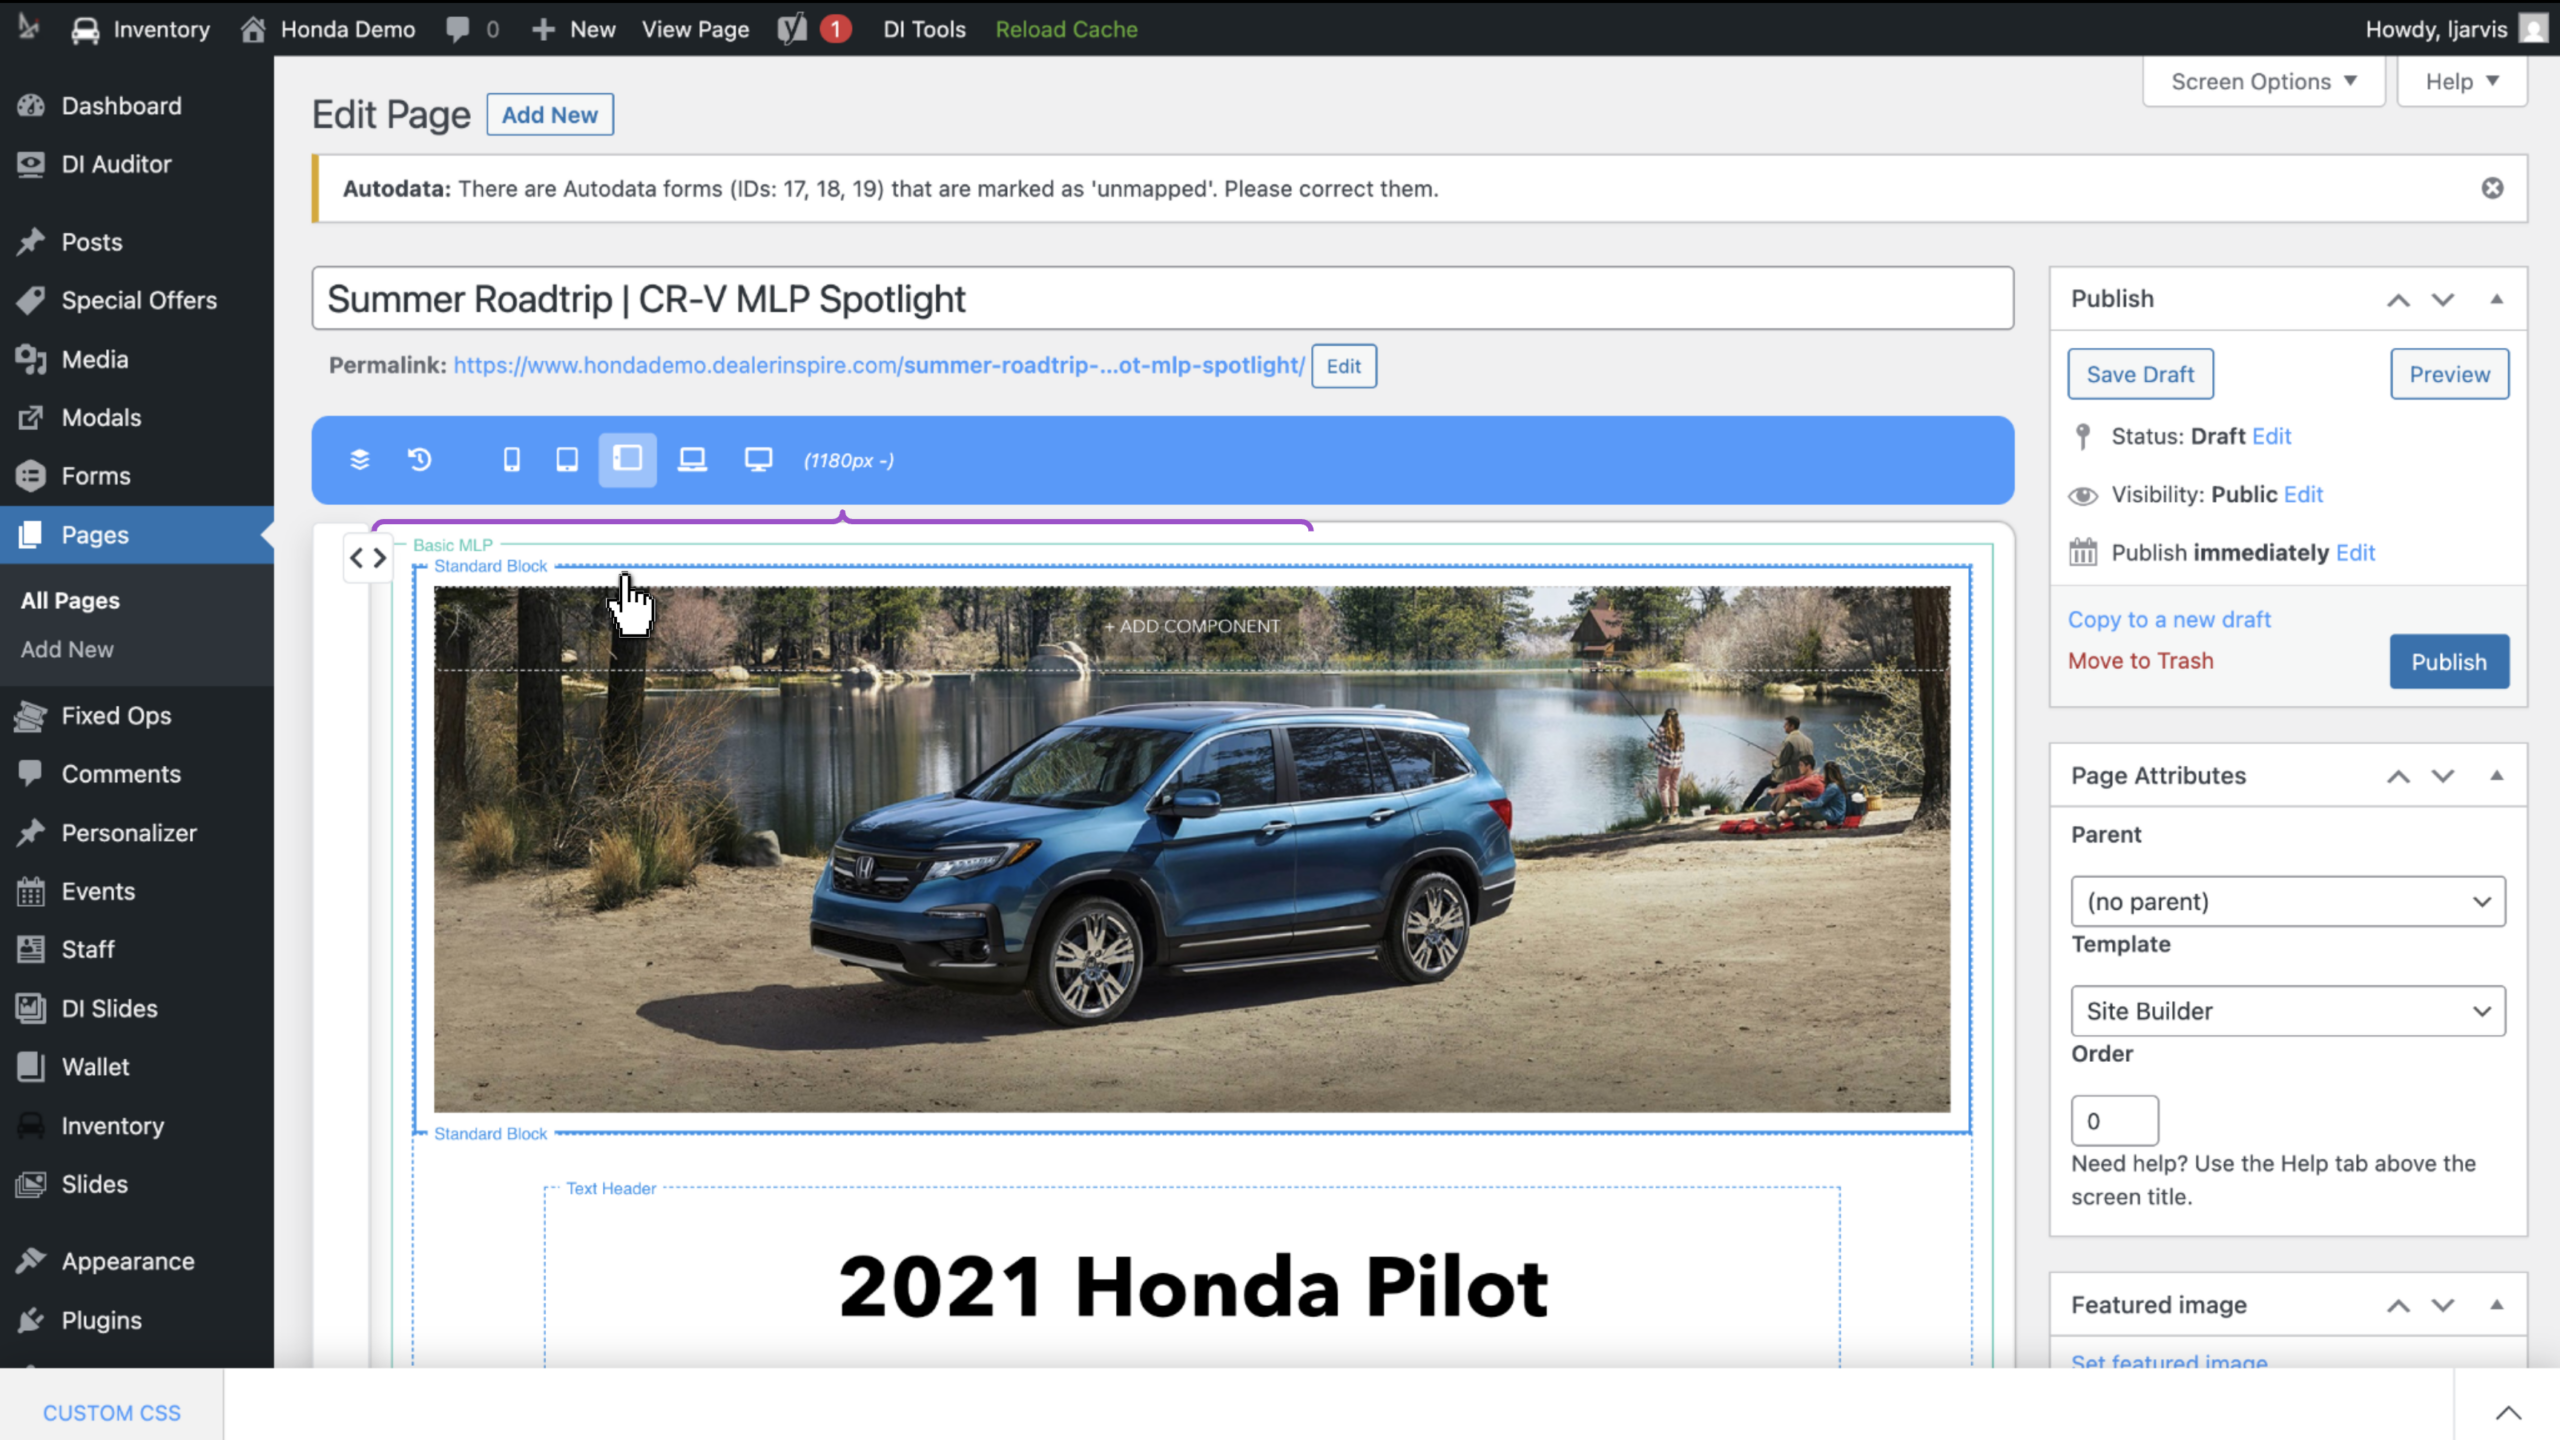
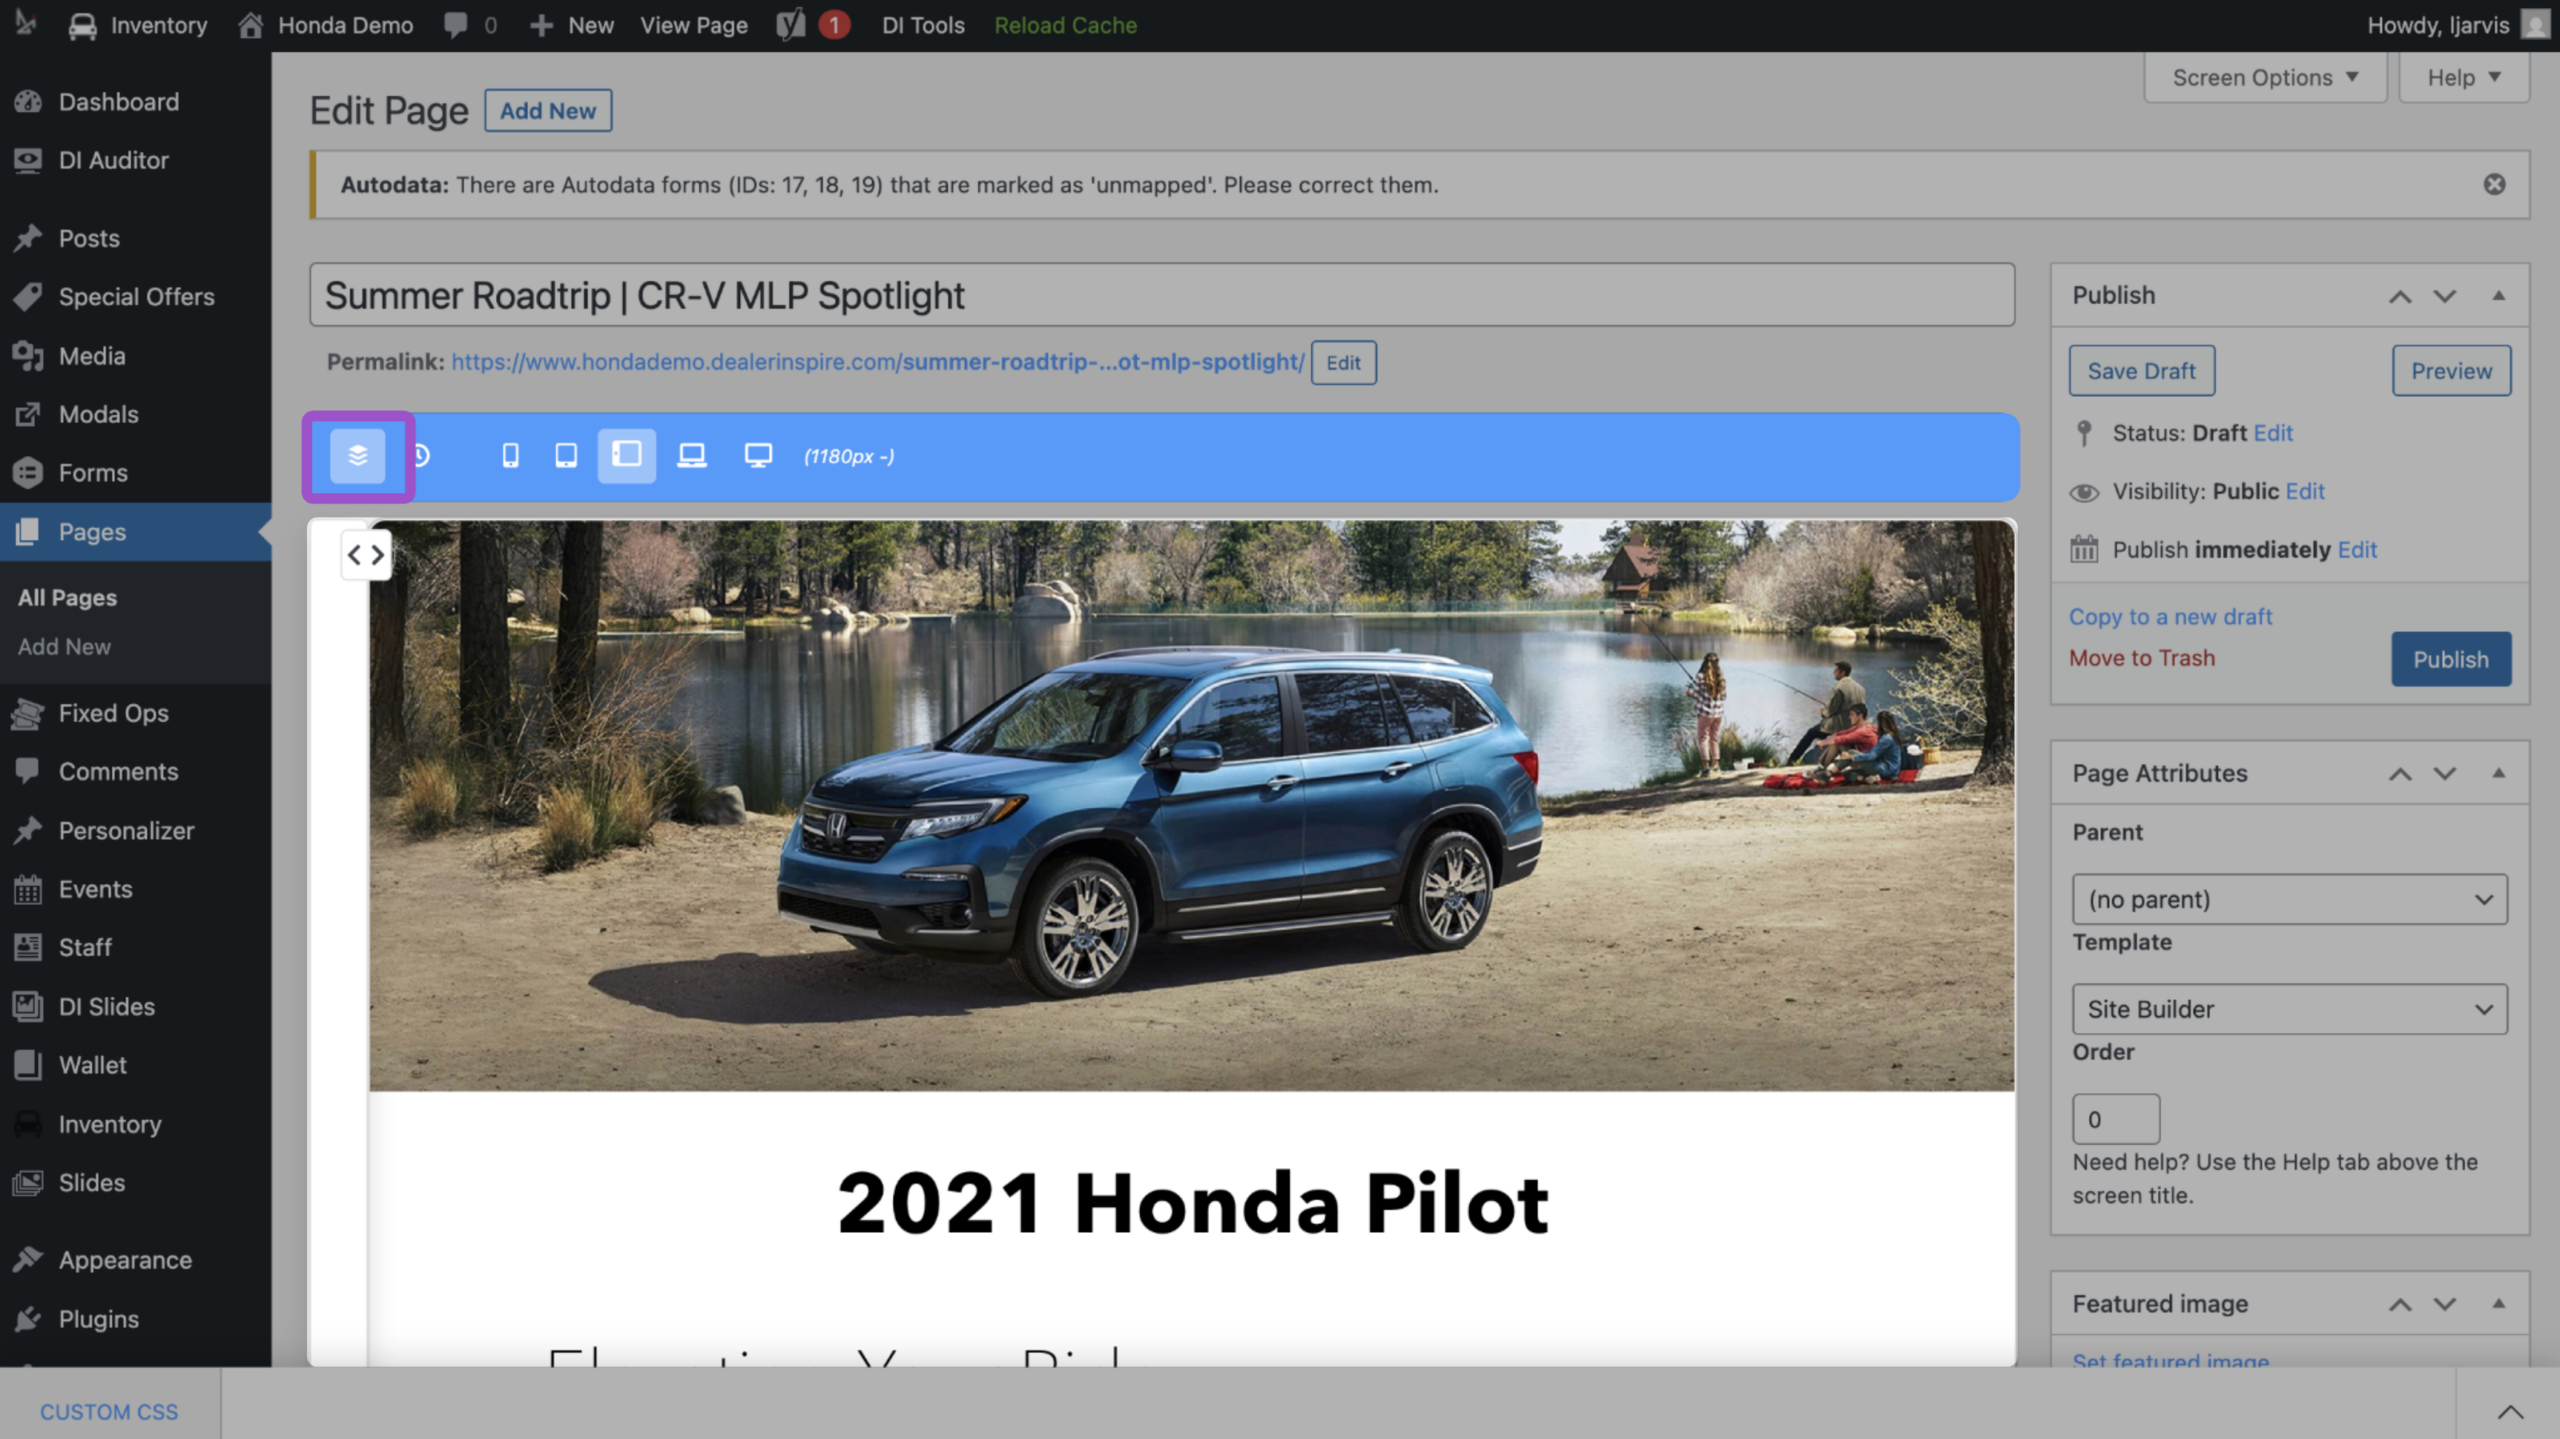
Use the blue bar to change the layout of your page.
- Click the layer icon to toggle between preview mode and editing mode
Tip: Toggle the layer icon if you don’t see the dotted lines of blocks and components.
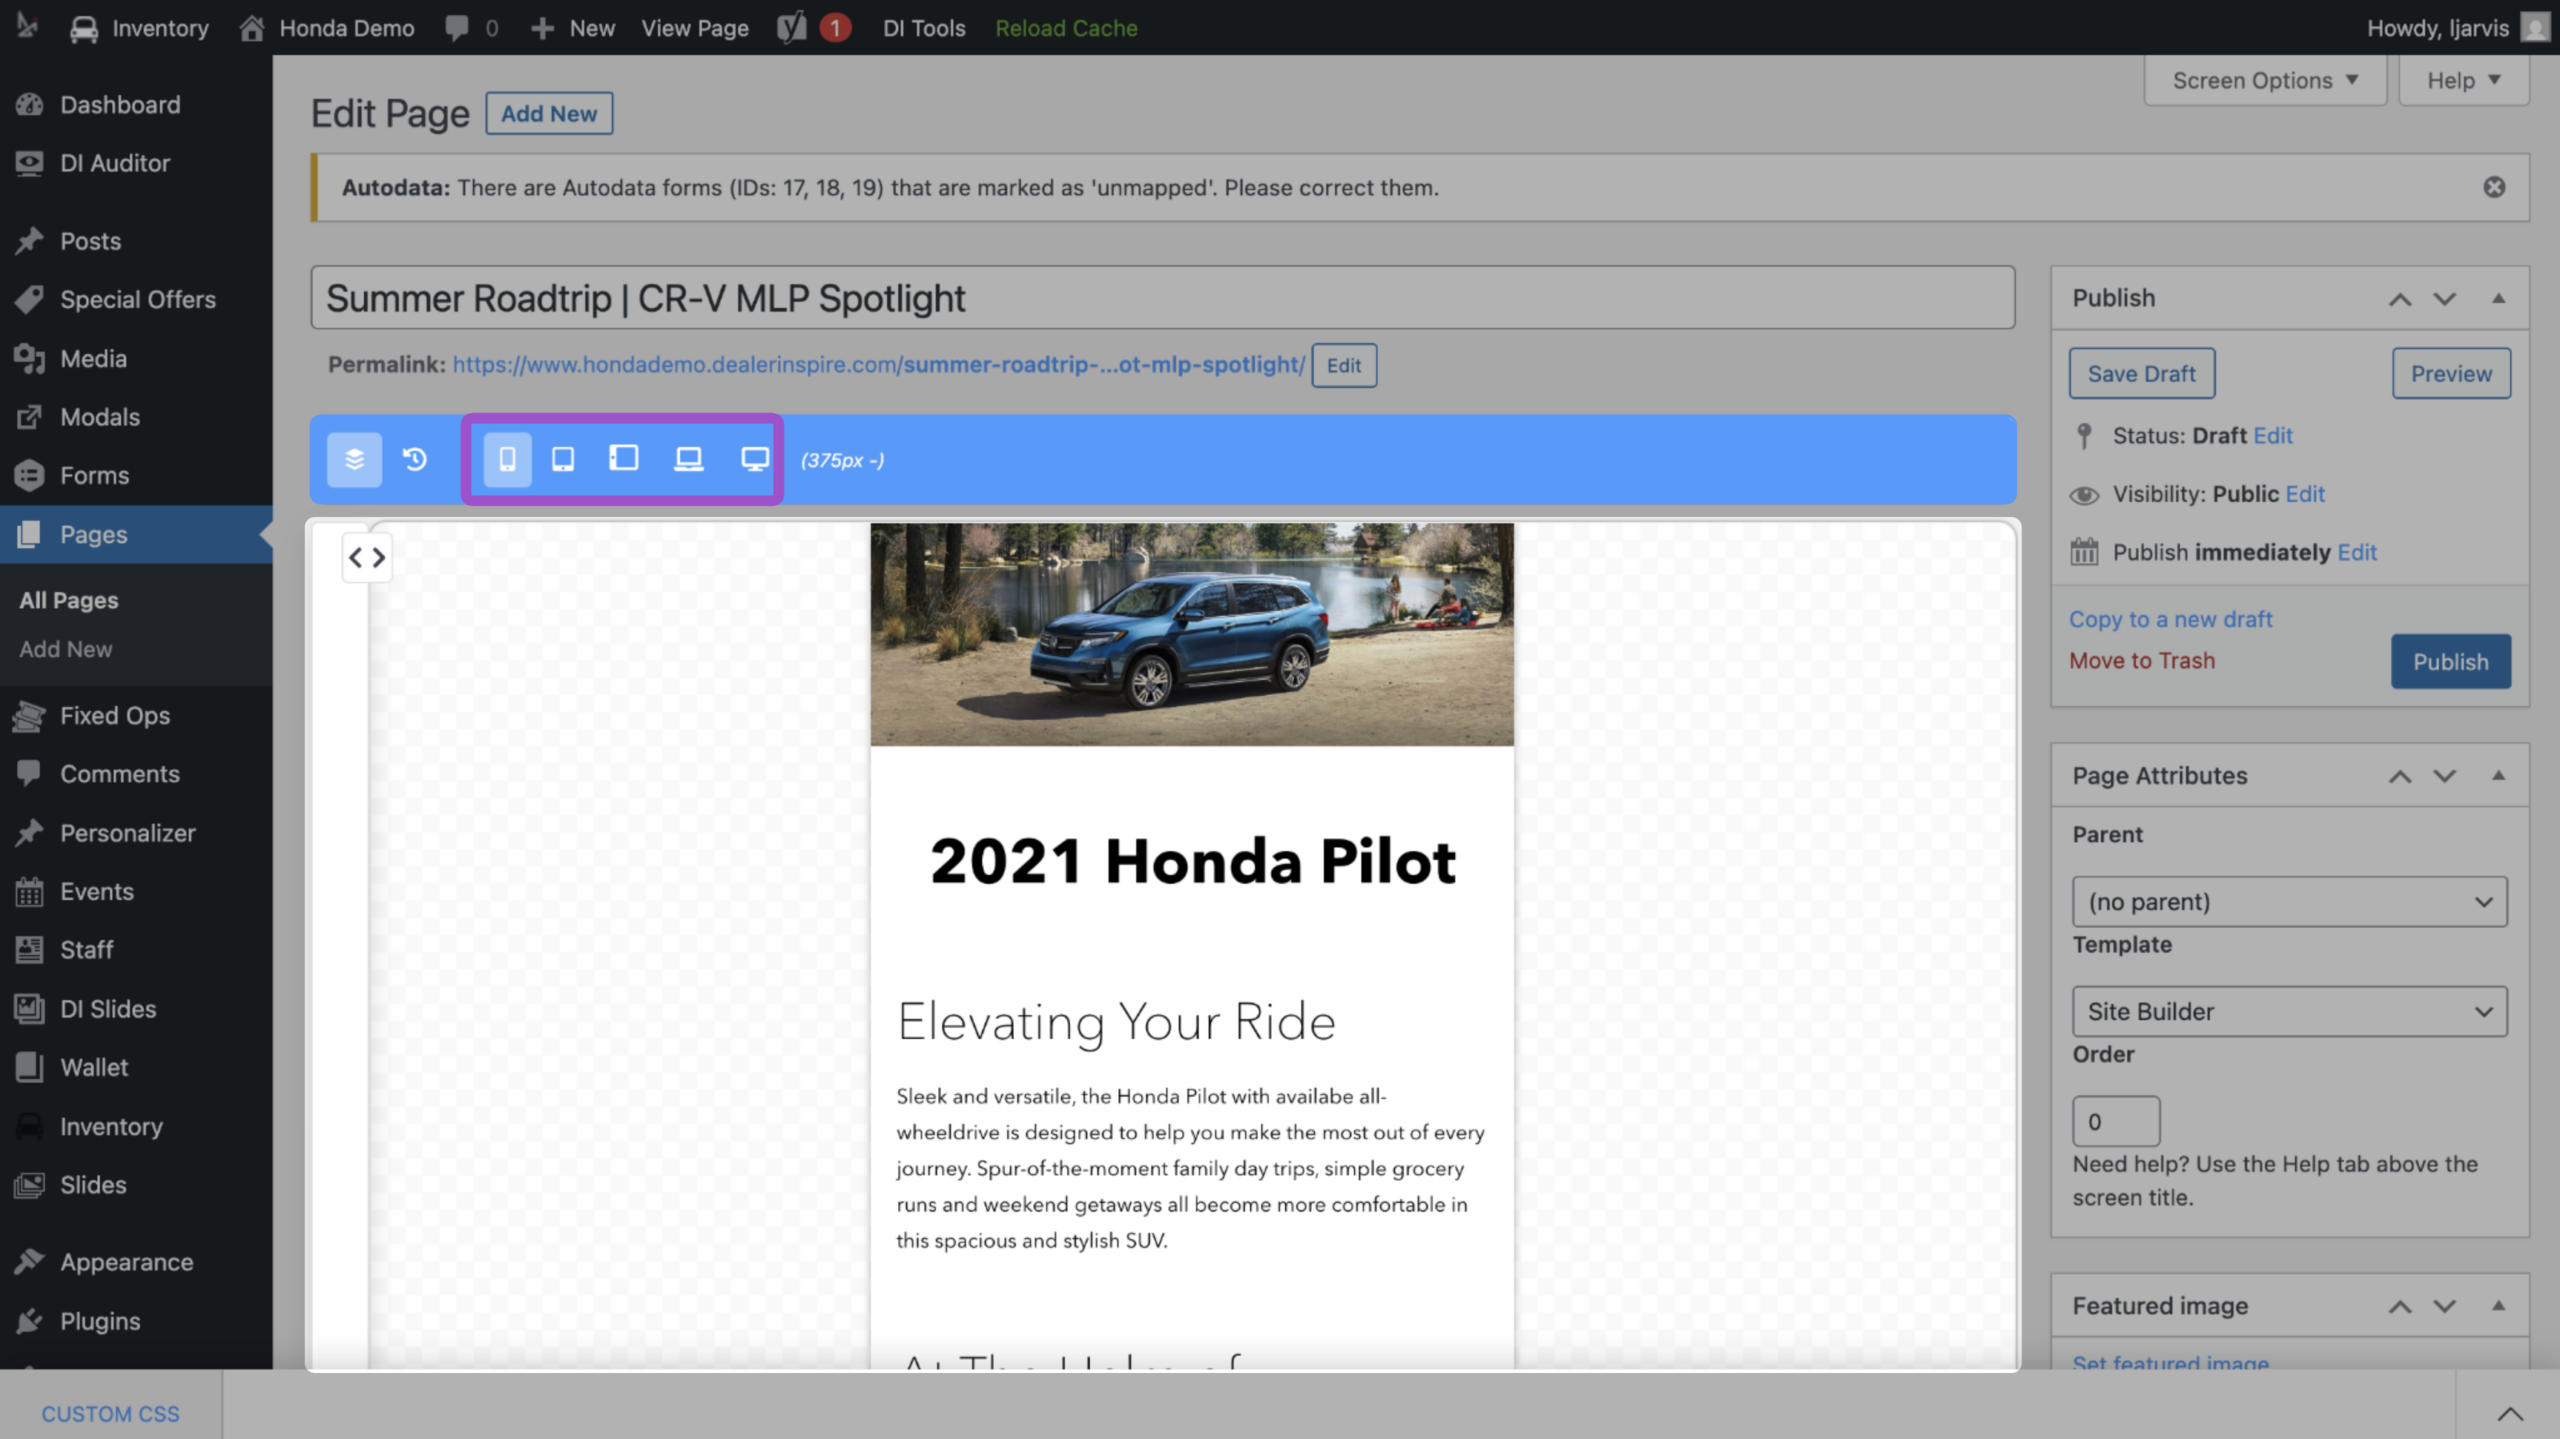
Toggle between the screen layout icons to preview how your page would appear on
- Mobile
- Tablet
- Laptop
- Desktop
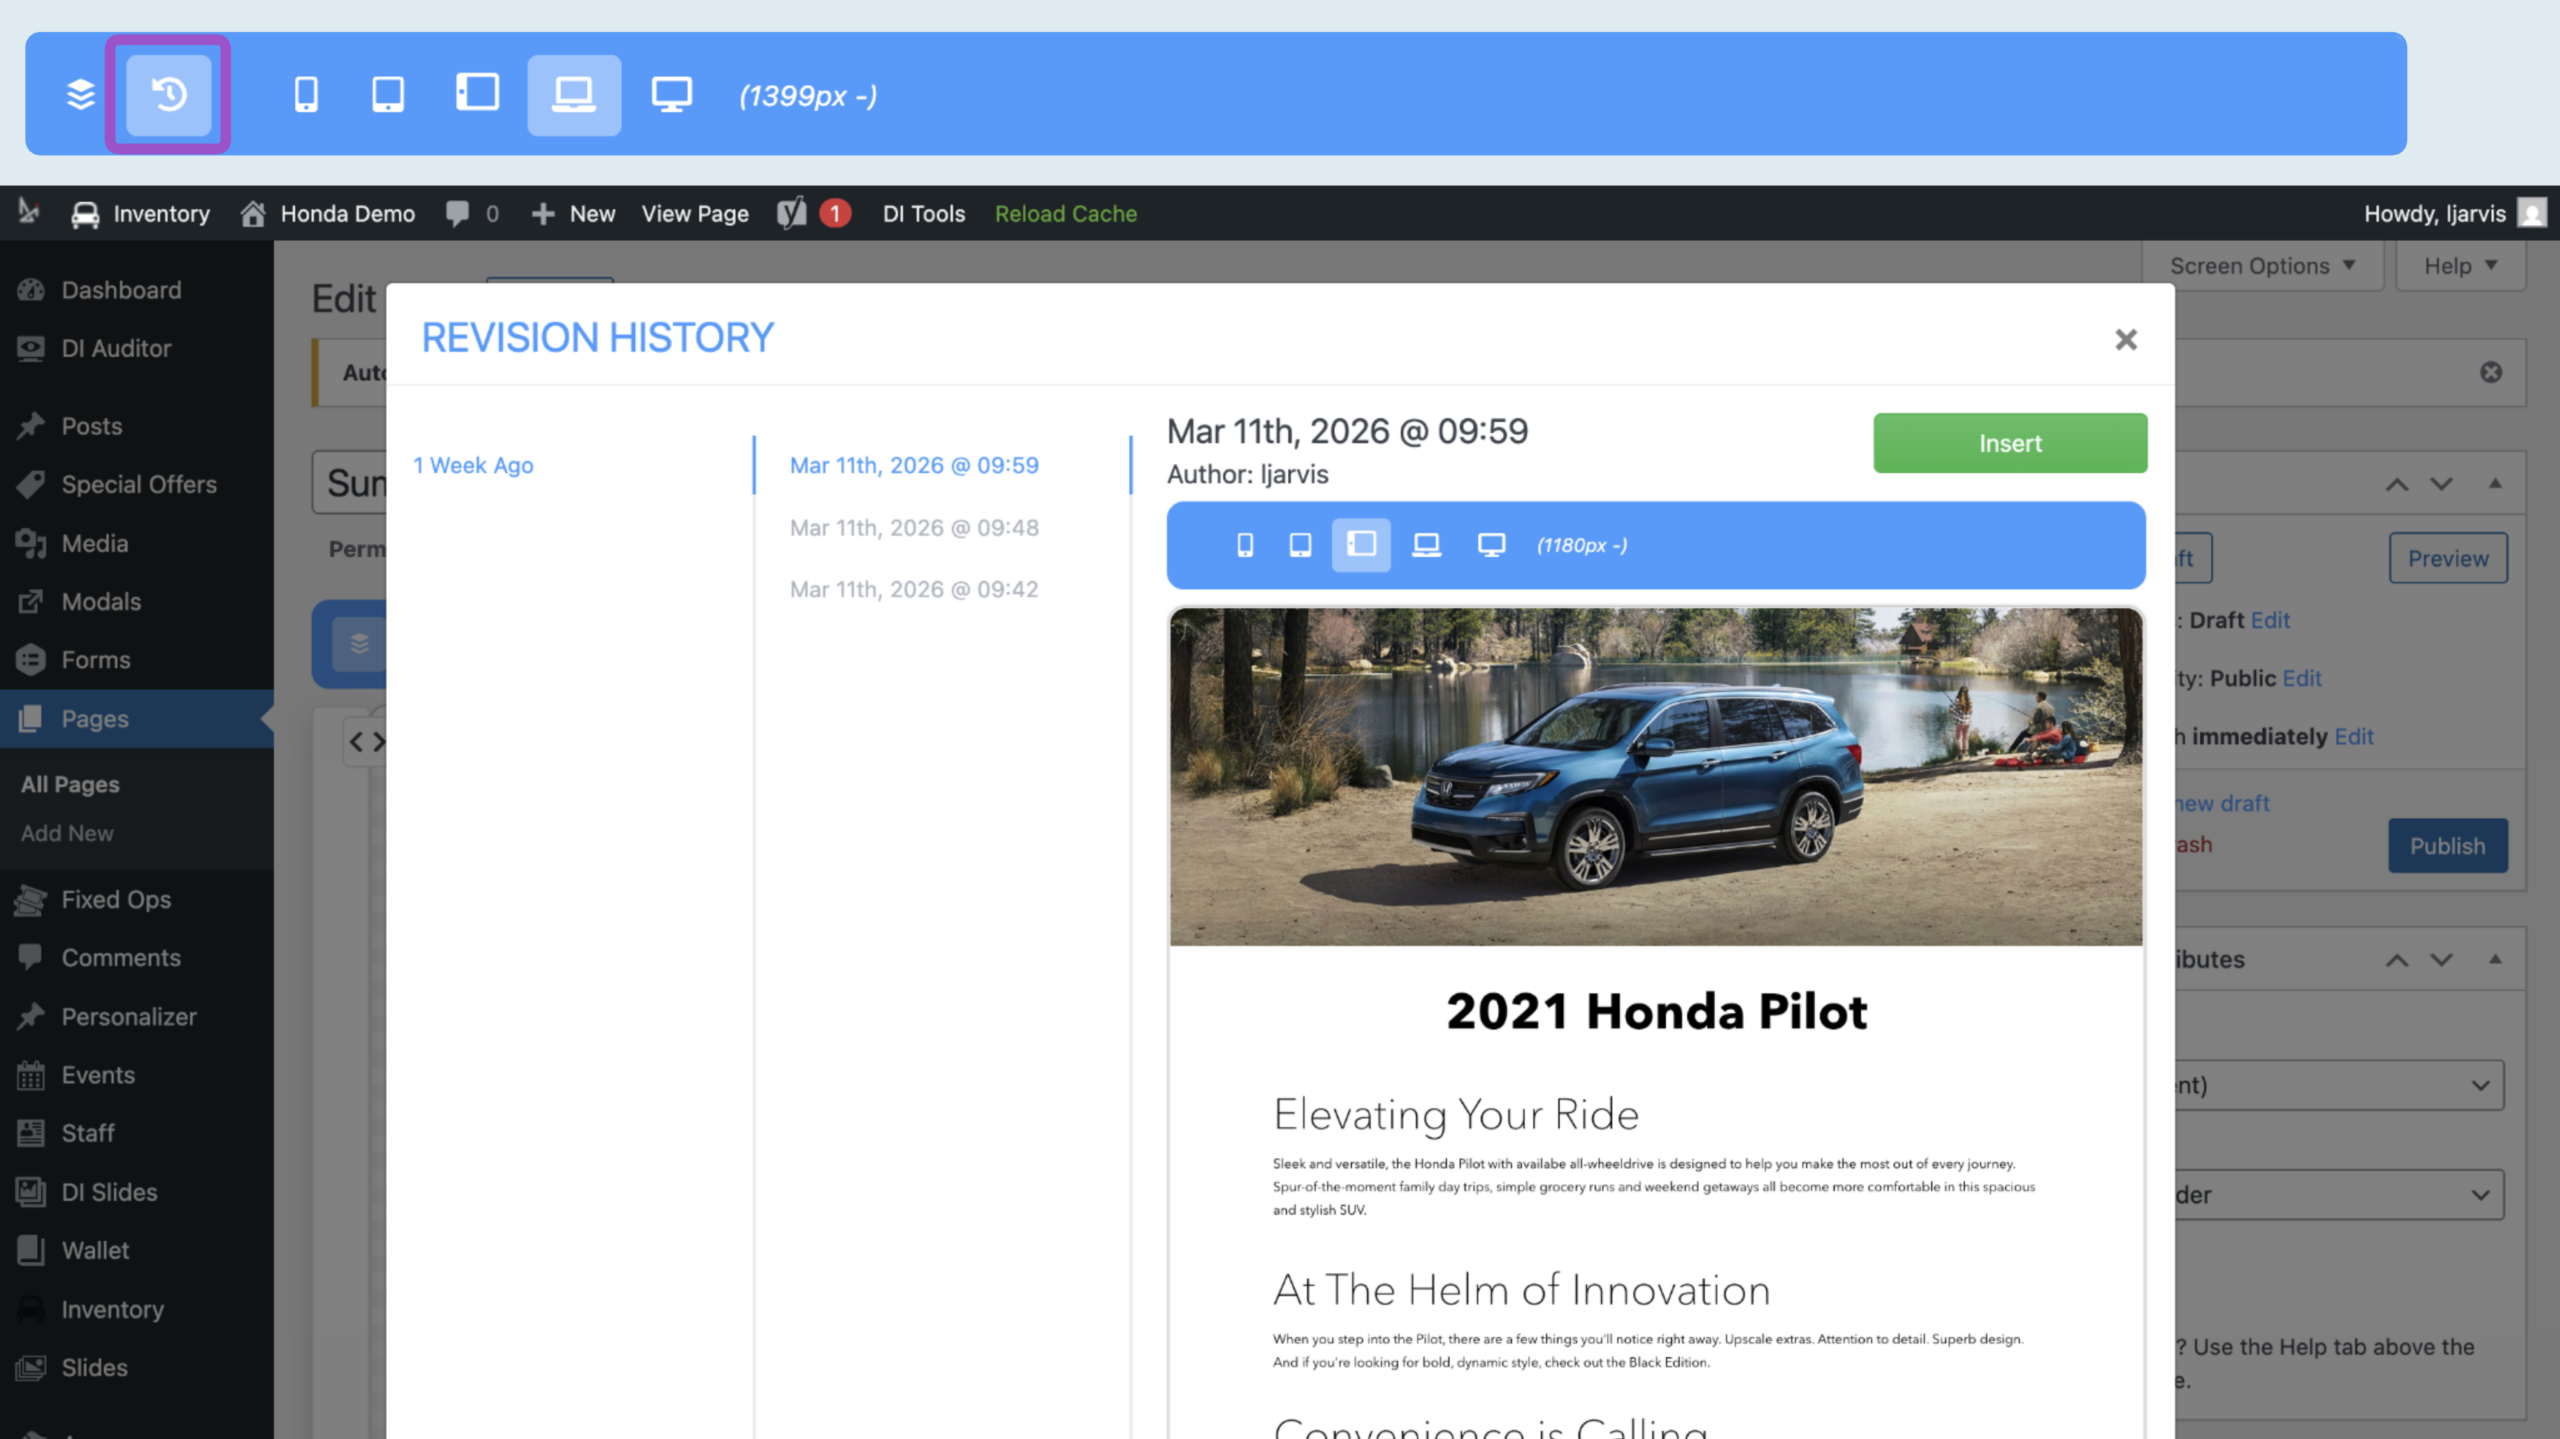
Select the clock icon to see the revision history.
- Scroll though the timestamps to see your versions
- Click Insert to revert back to an earlier draft
- Click the x icon to exit out of revision history
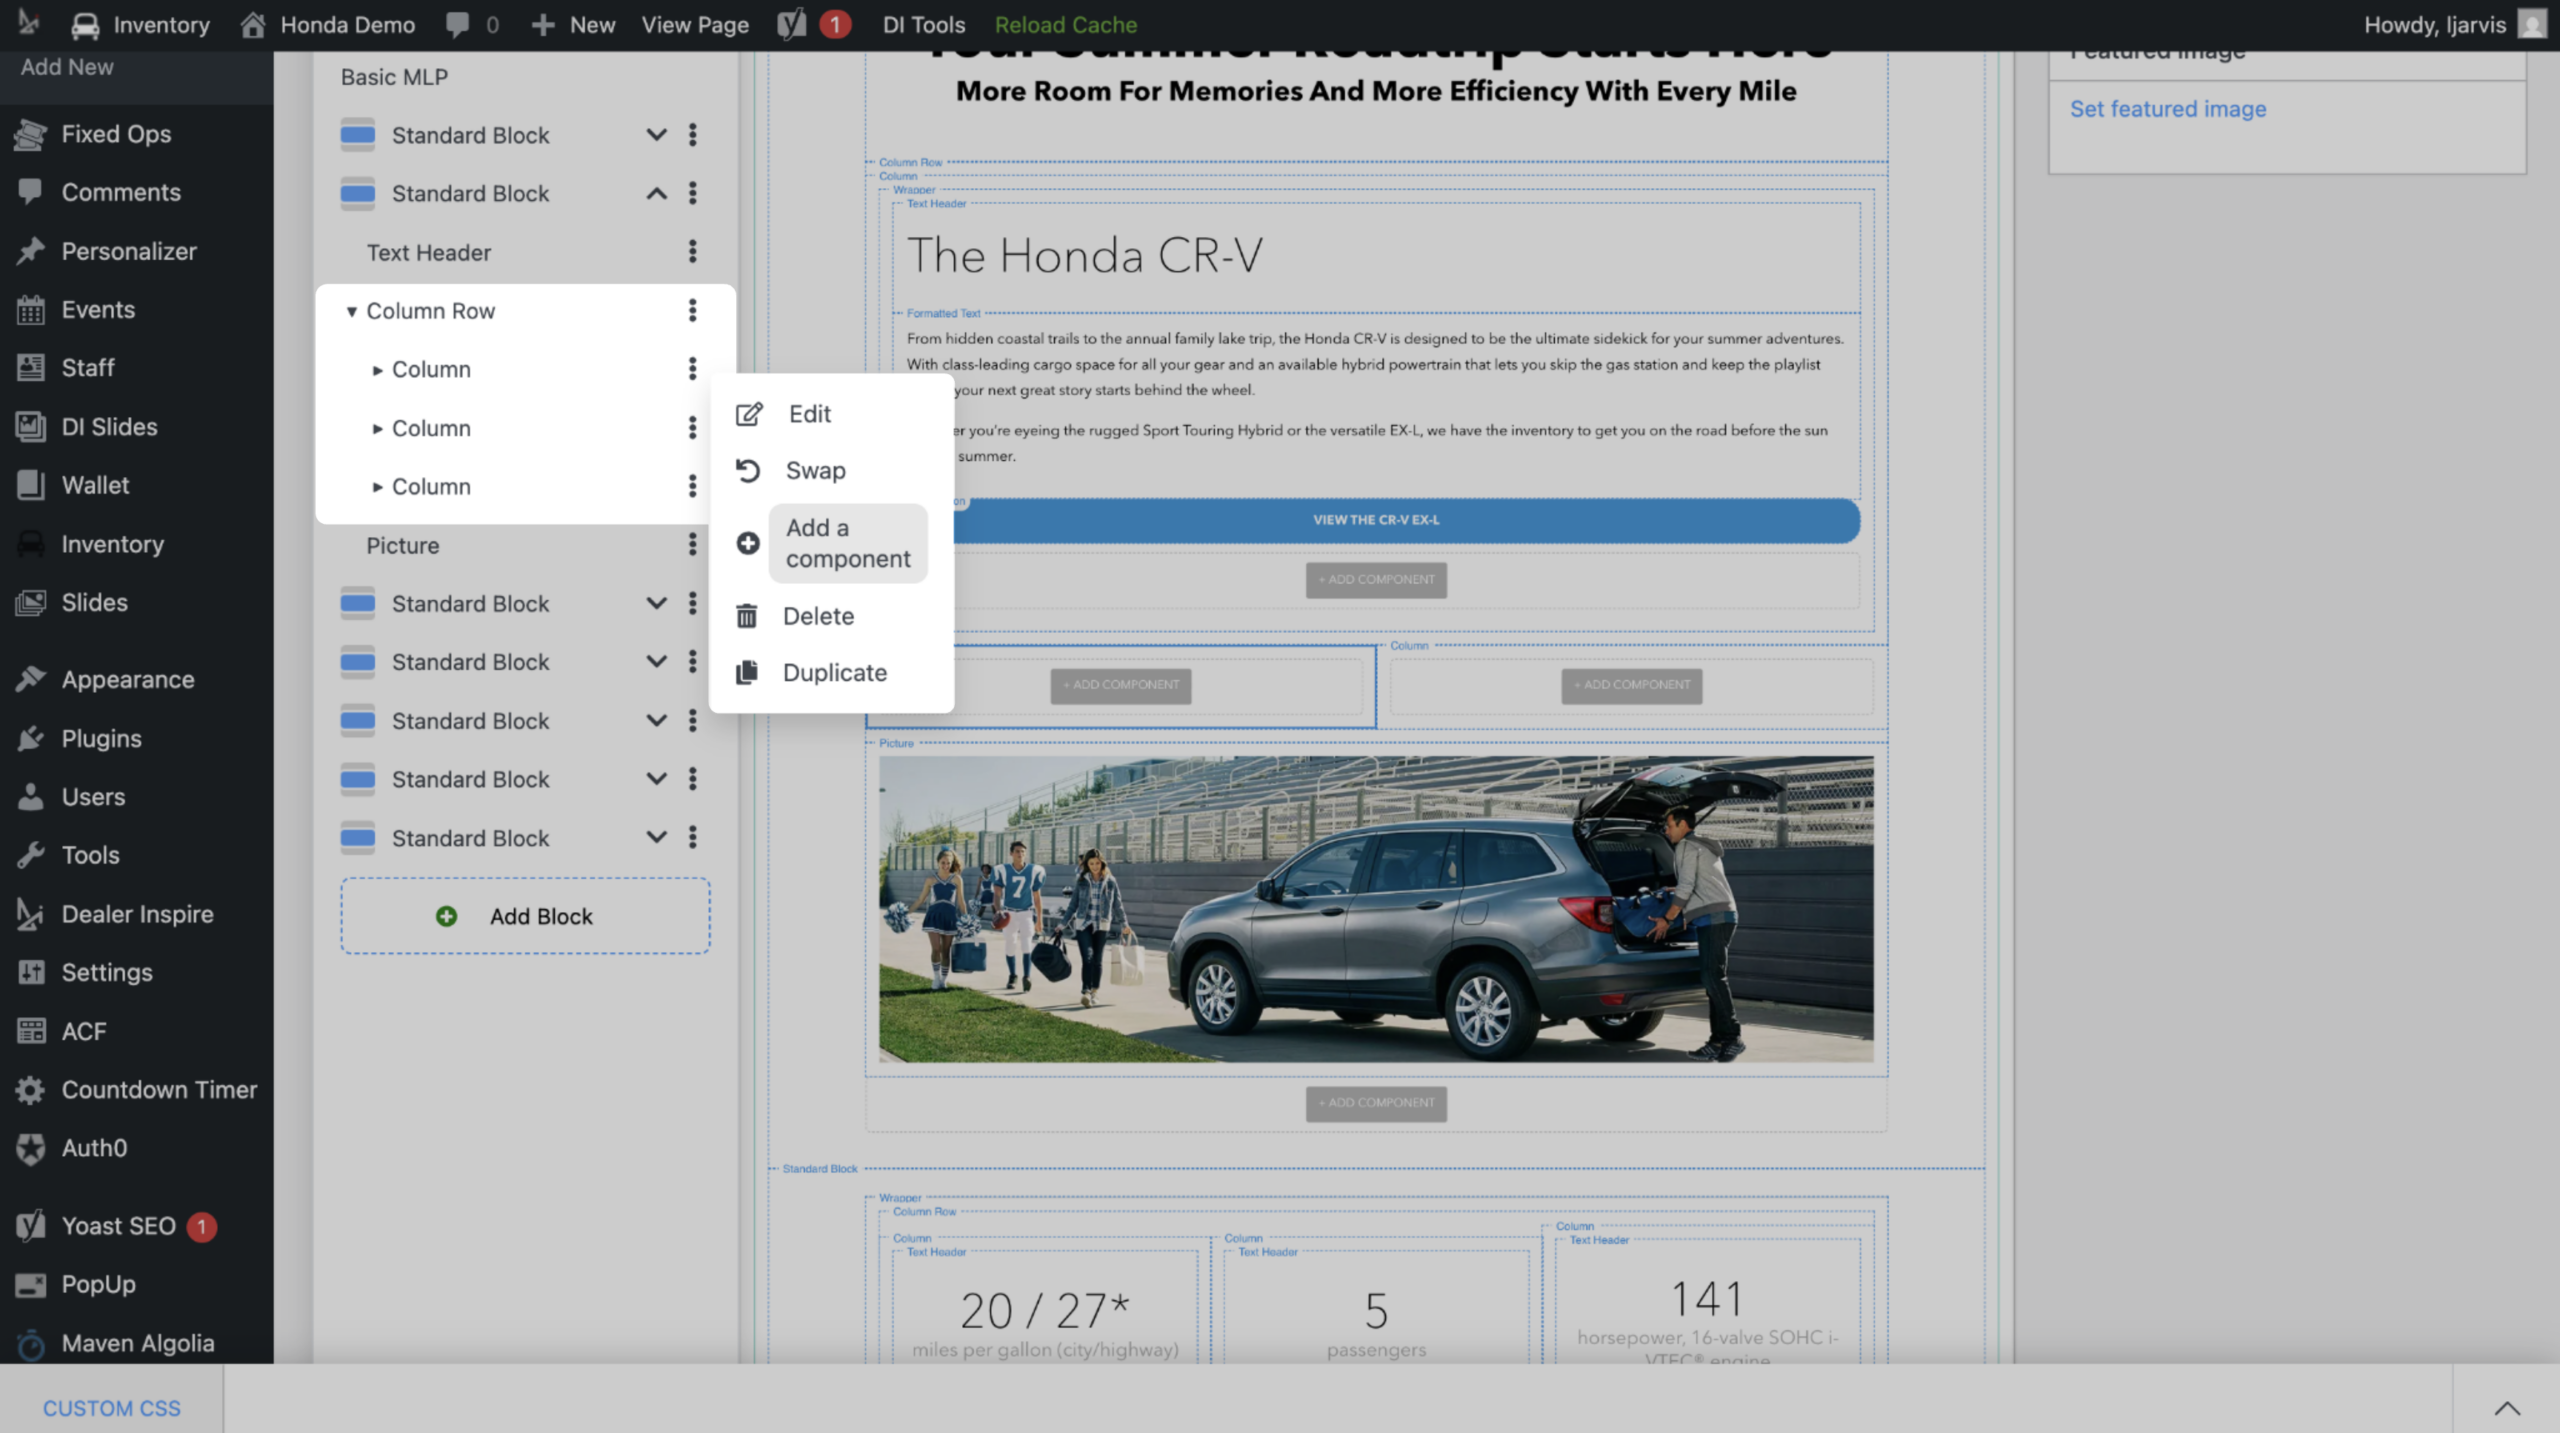
- Click the widget tree (double arrows) to expand a list of all blocks and components
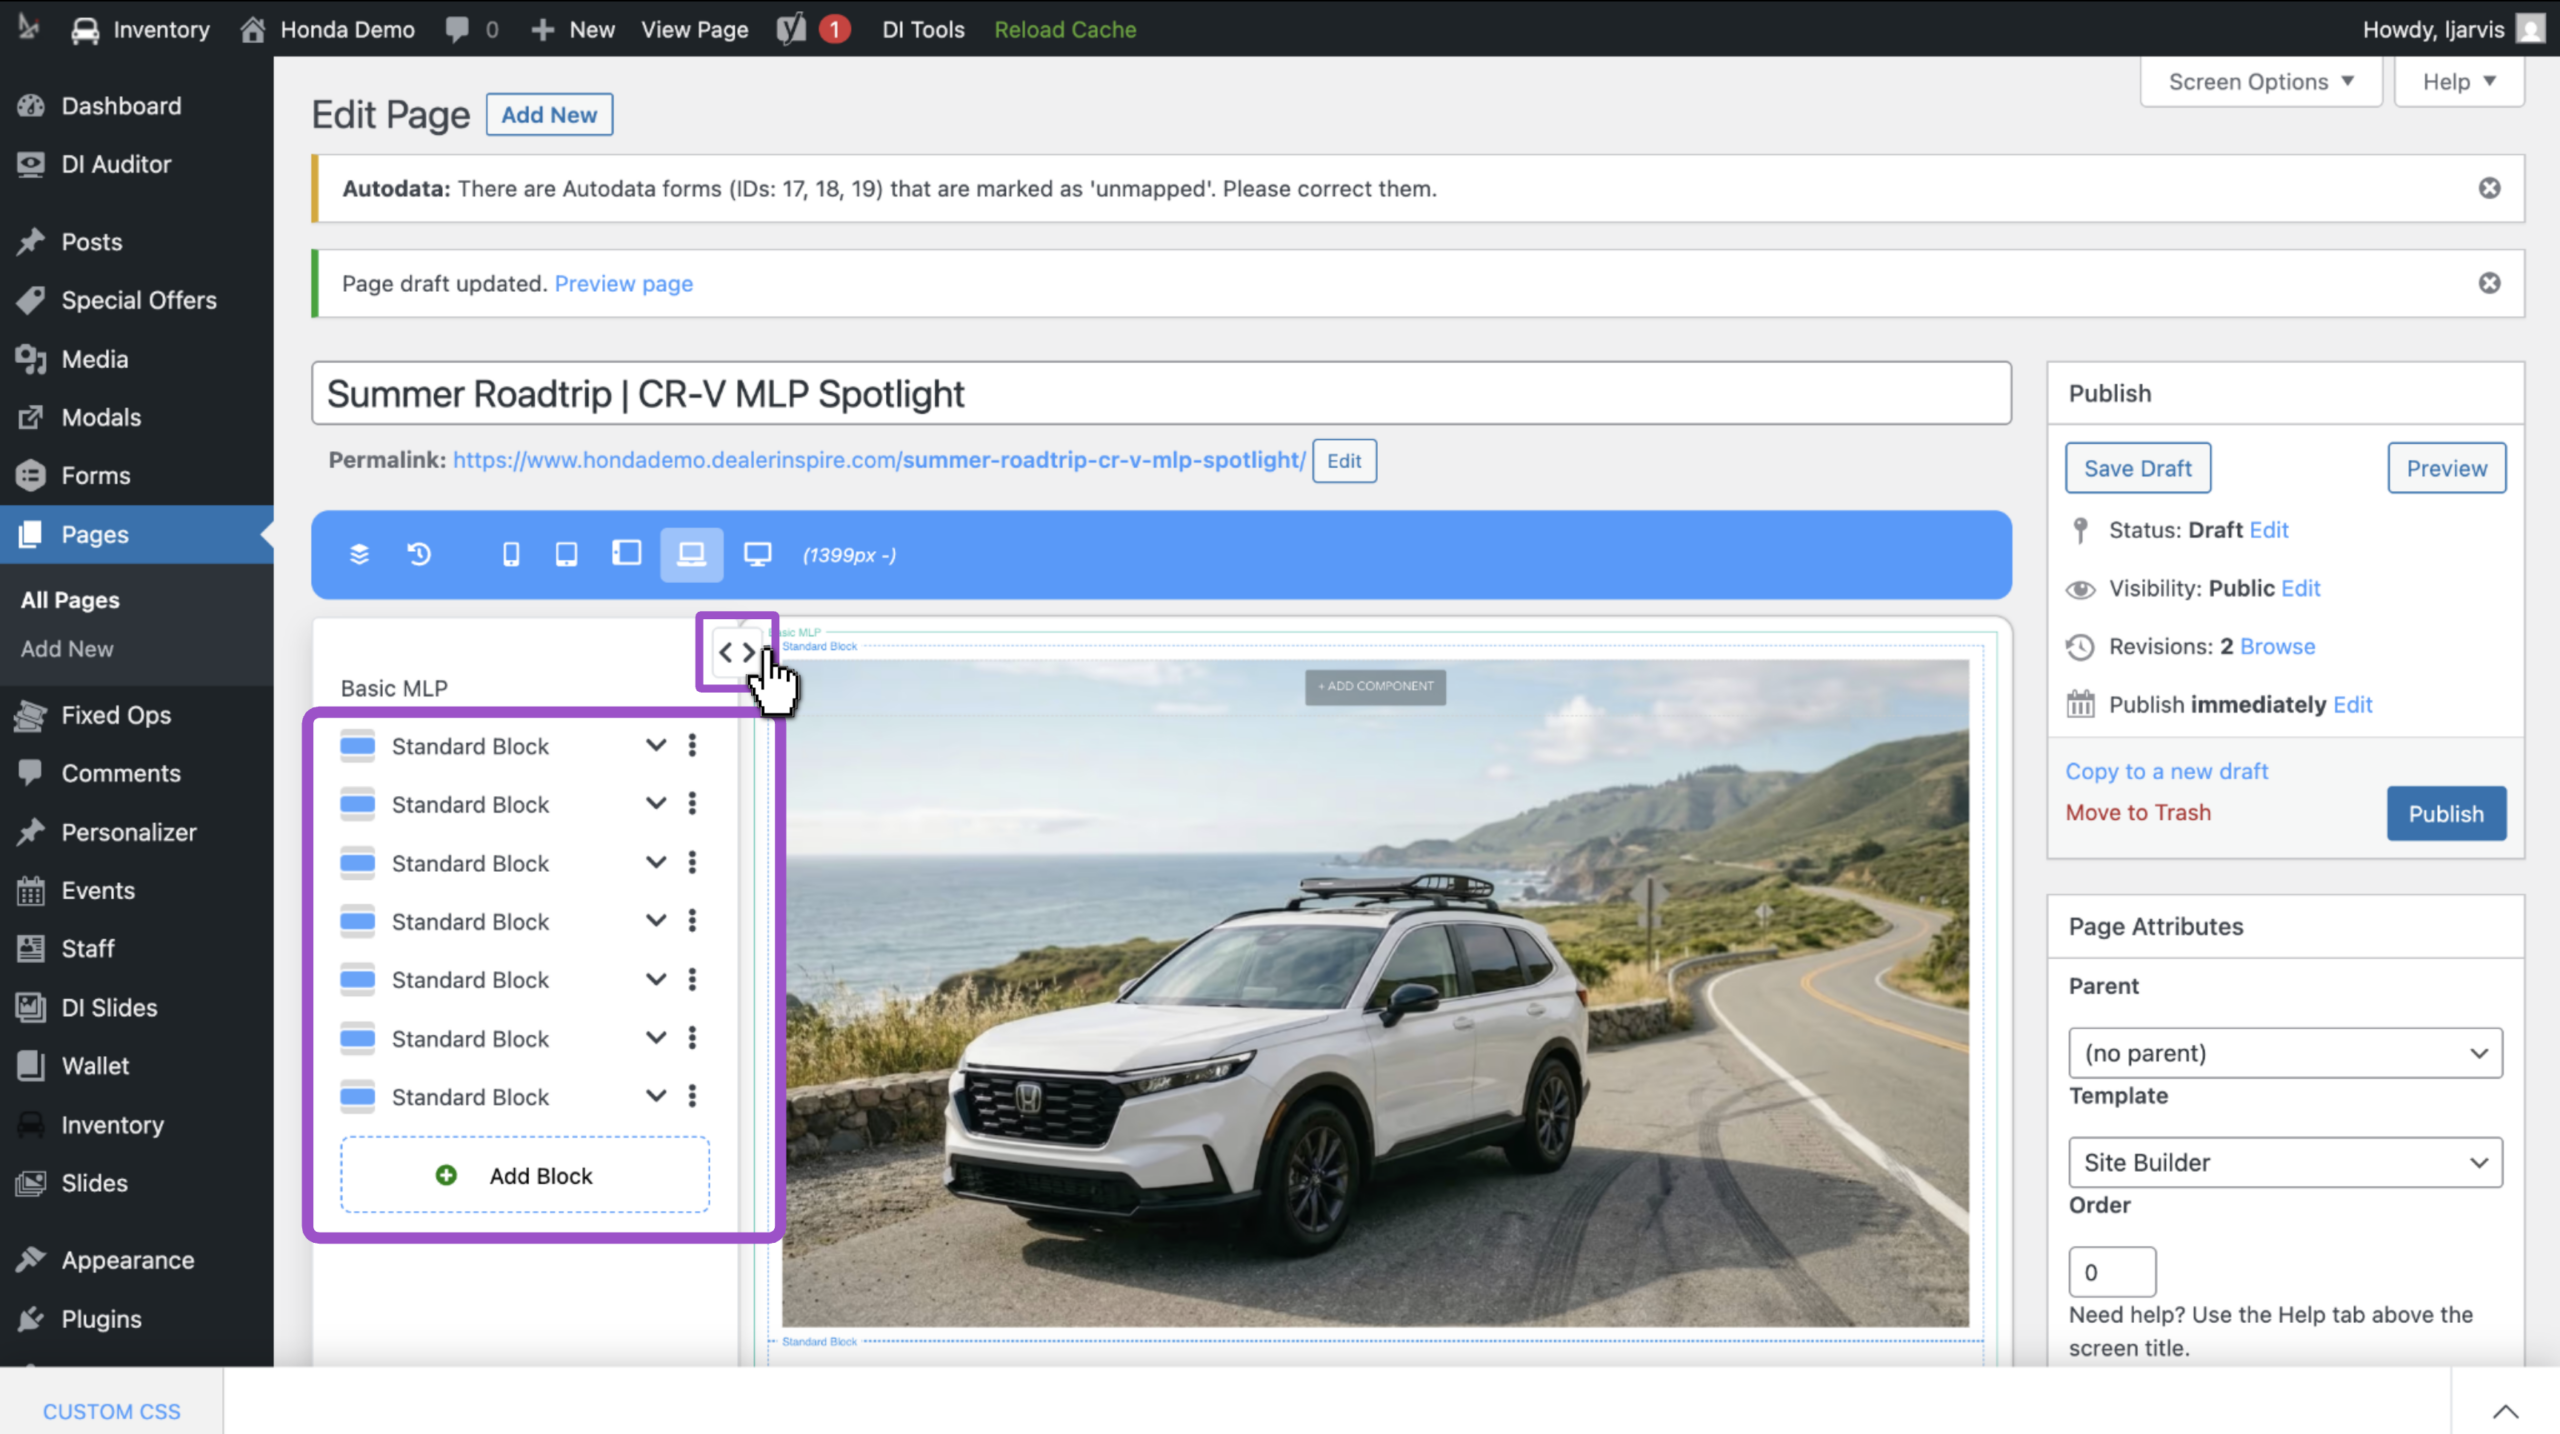
- Select a section
- Edit
- Swap
- Add a Component
- Delete
- Duplicate
- Or, add a new block
Edit the page your way: click an element on the page or select it from the list to make changes.
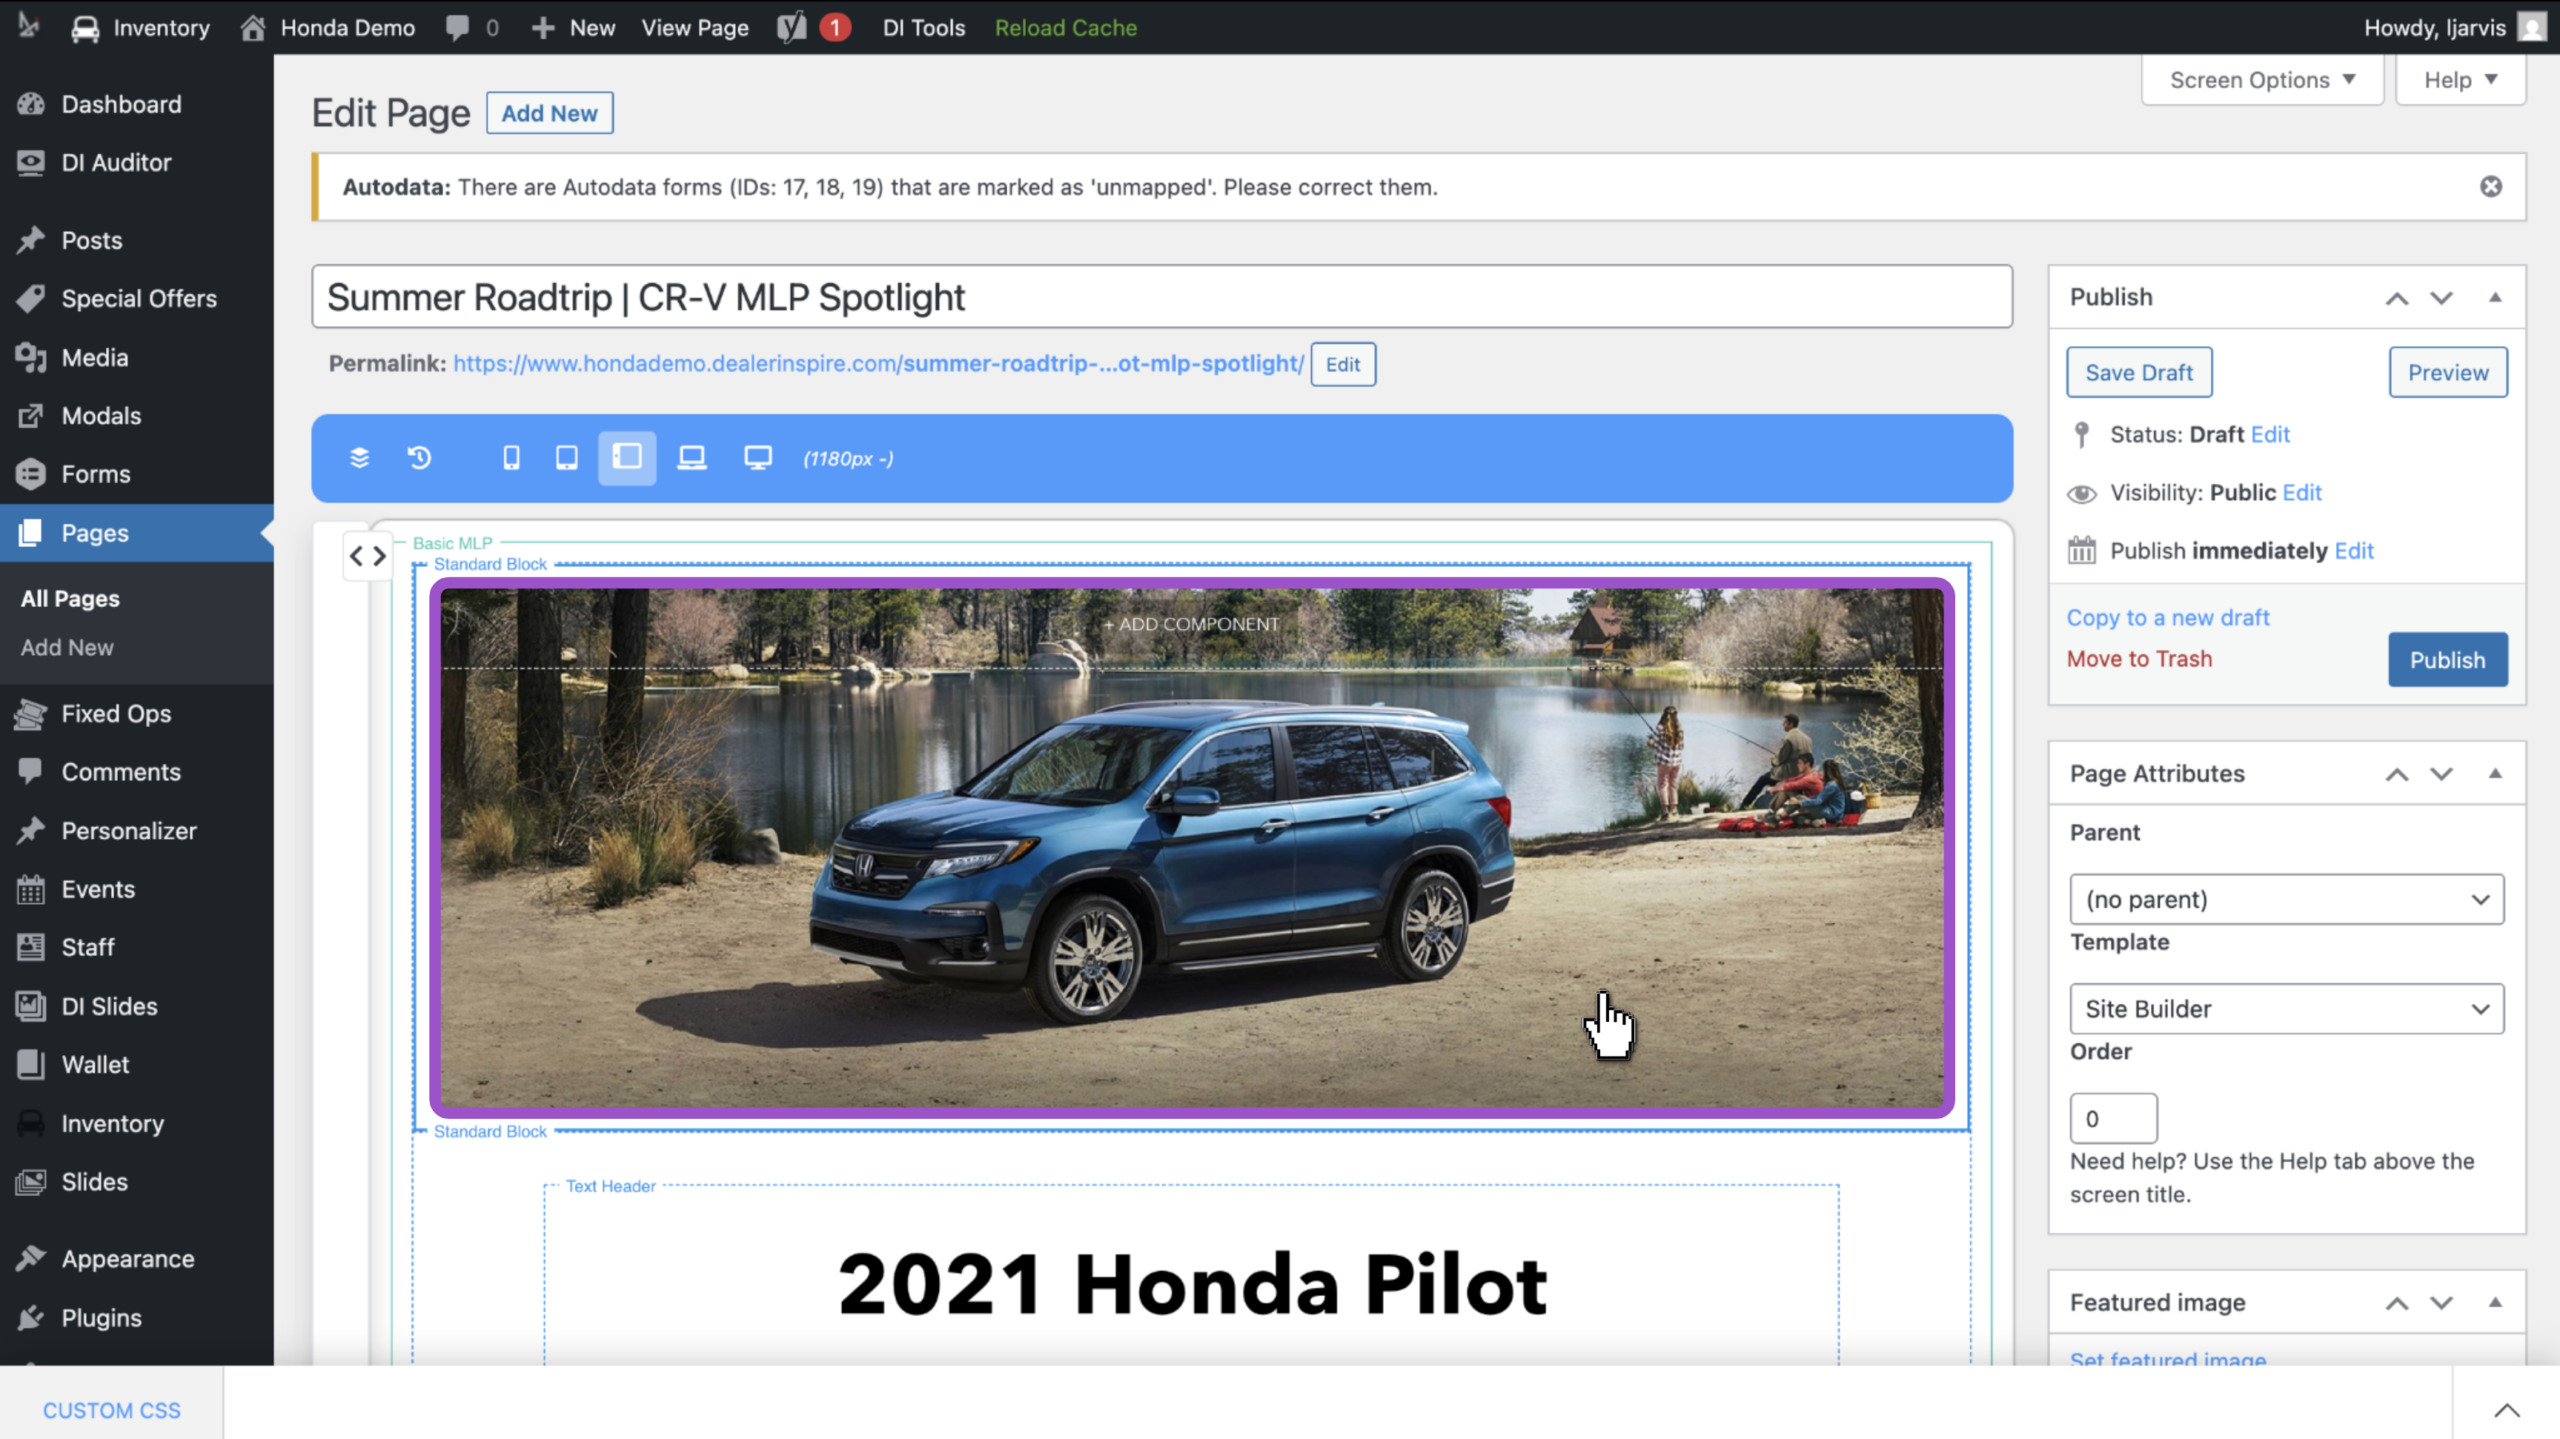
4 Add a hero image
- Click on the component to edit
That is the hero image in this example.
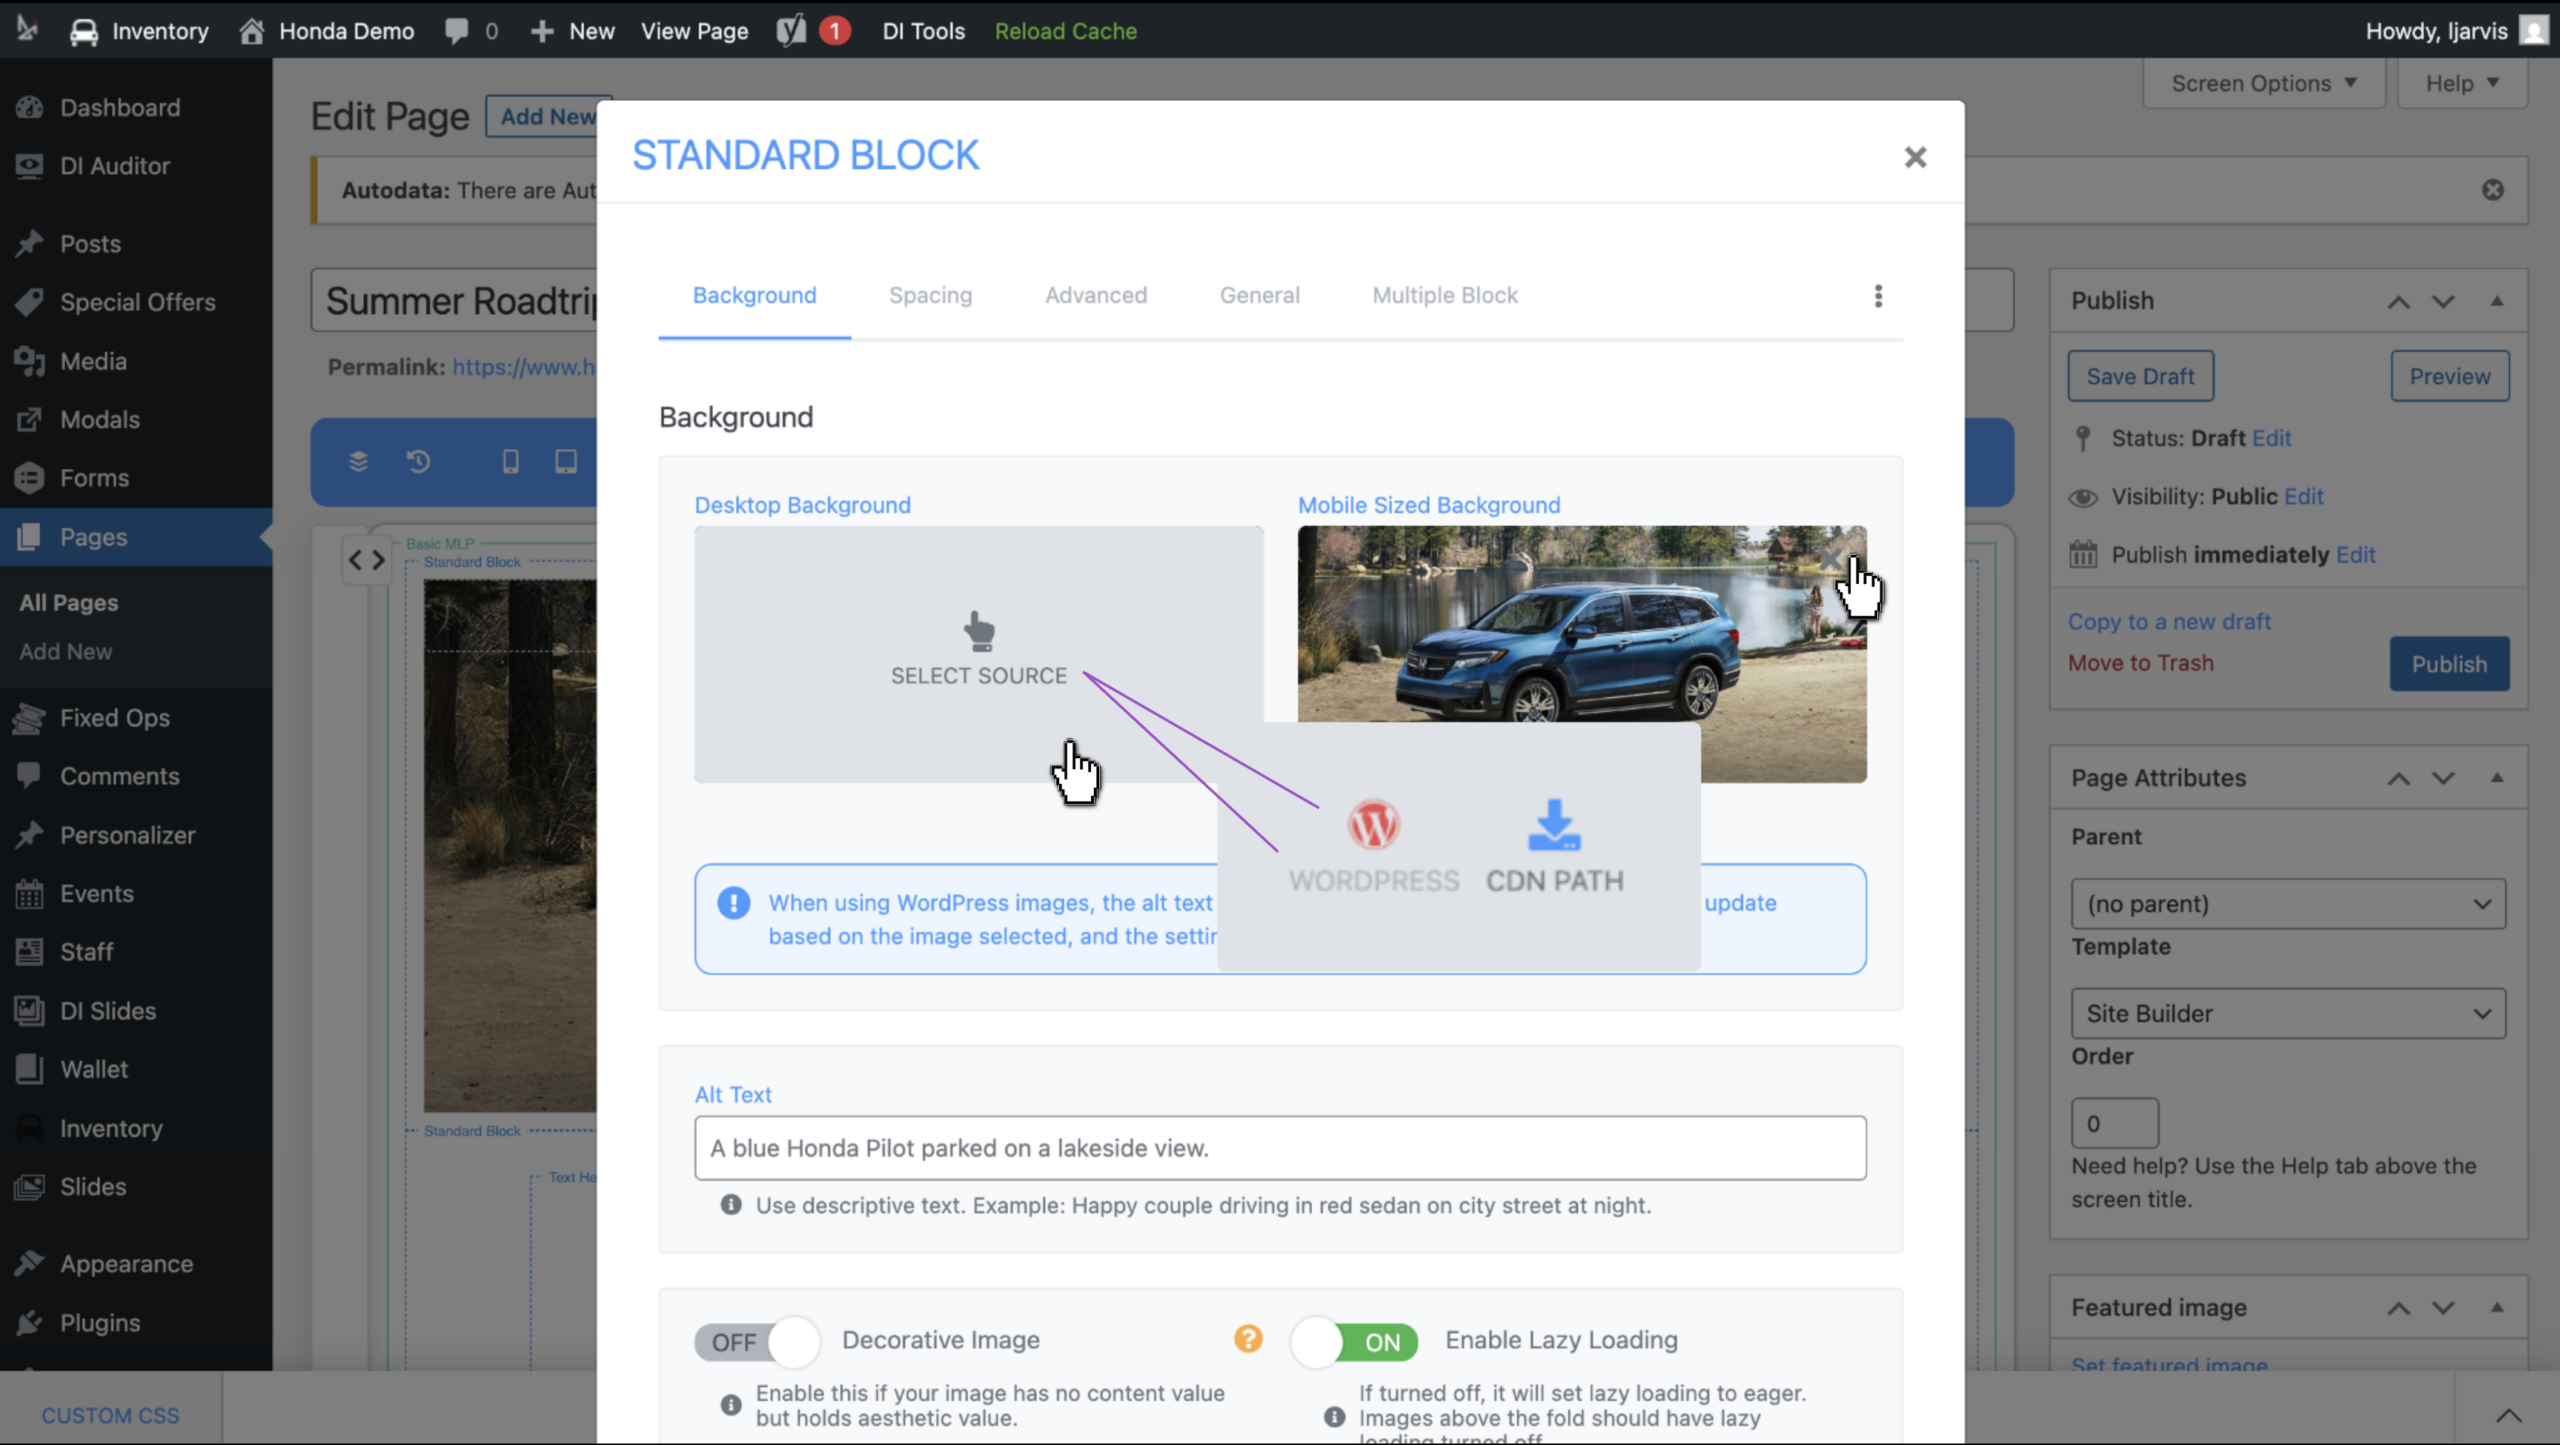
- You’ll default to the Background tab
- Click the x in the top right corner to remove the existing image (if applicable)
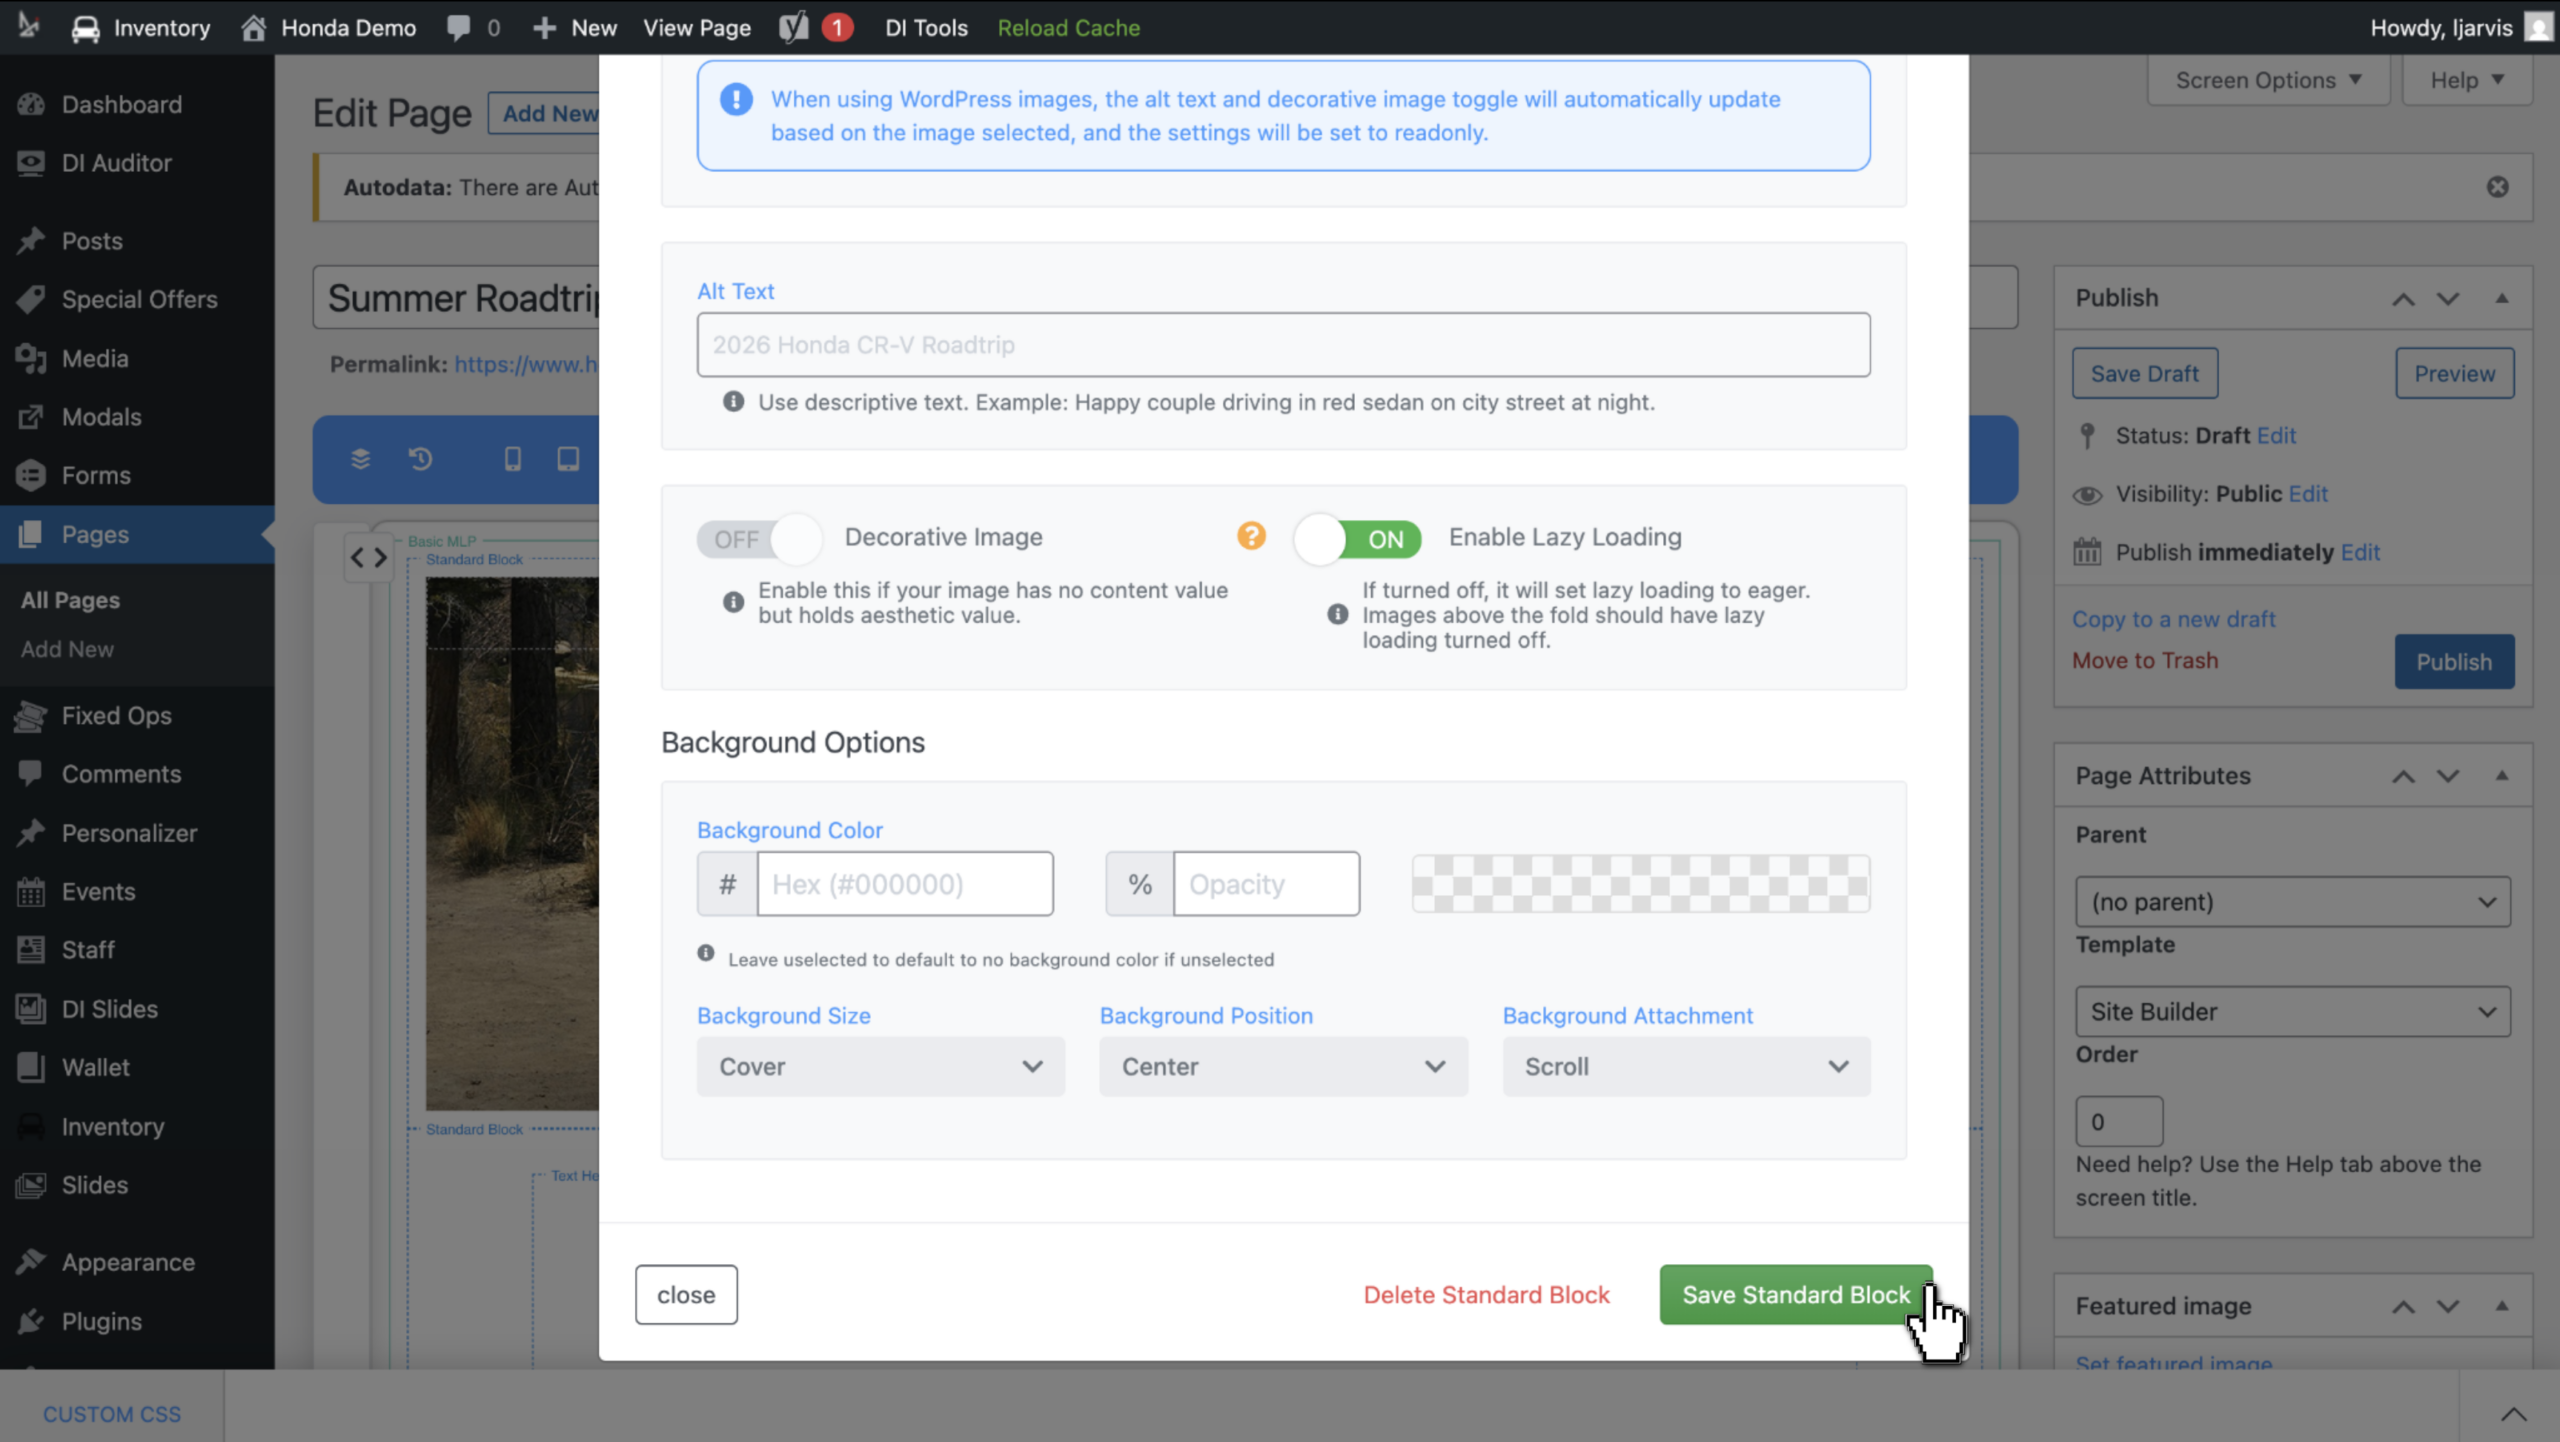
- Click Select Source, then WordPress to upload or insert a new image
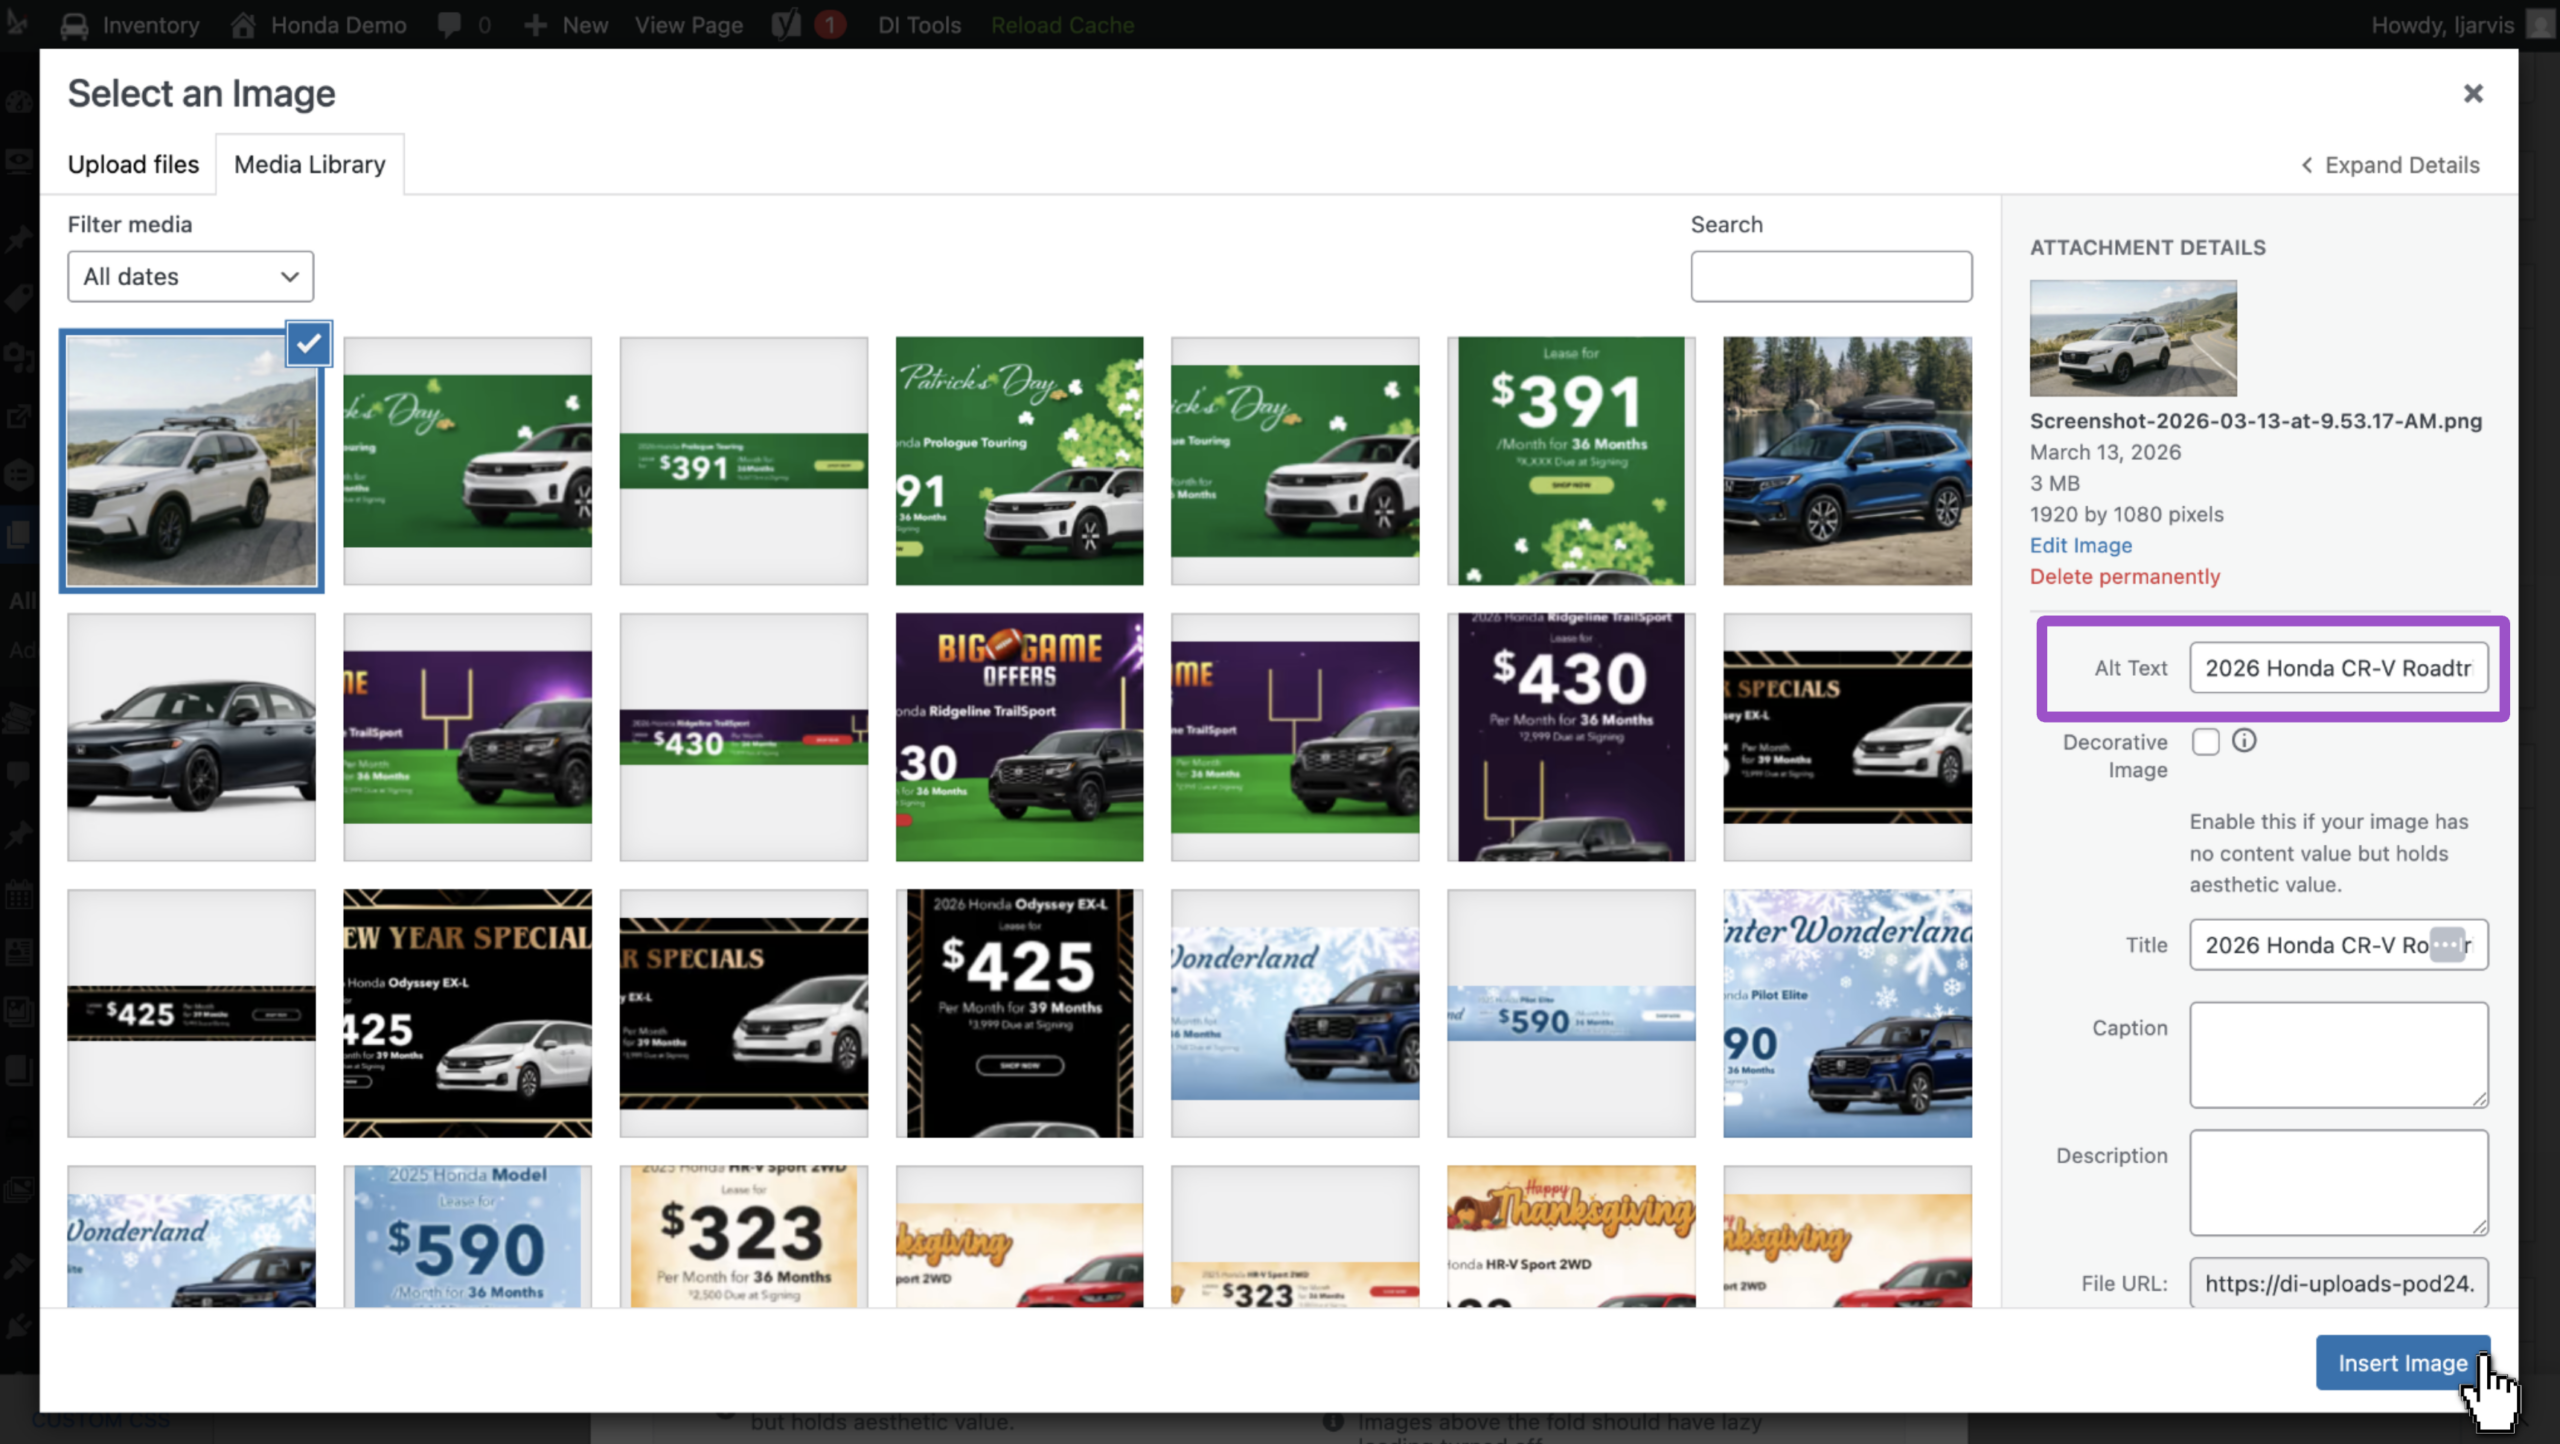
- Add Alt Text to your image for the accessibility of screen readers and to improve SEO
- Click Insert
- You’ll notice other tabs and settings
- These aren’t necessary when simply adding an image
- Scroll to the bottom of the page and click Save Standard Block
5 Update the header
- Click into the Text Header component
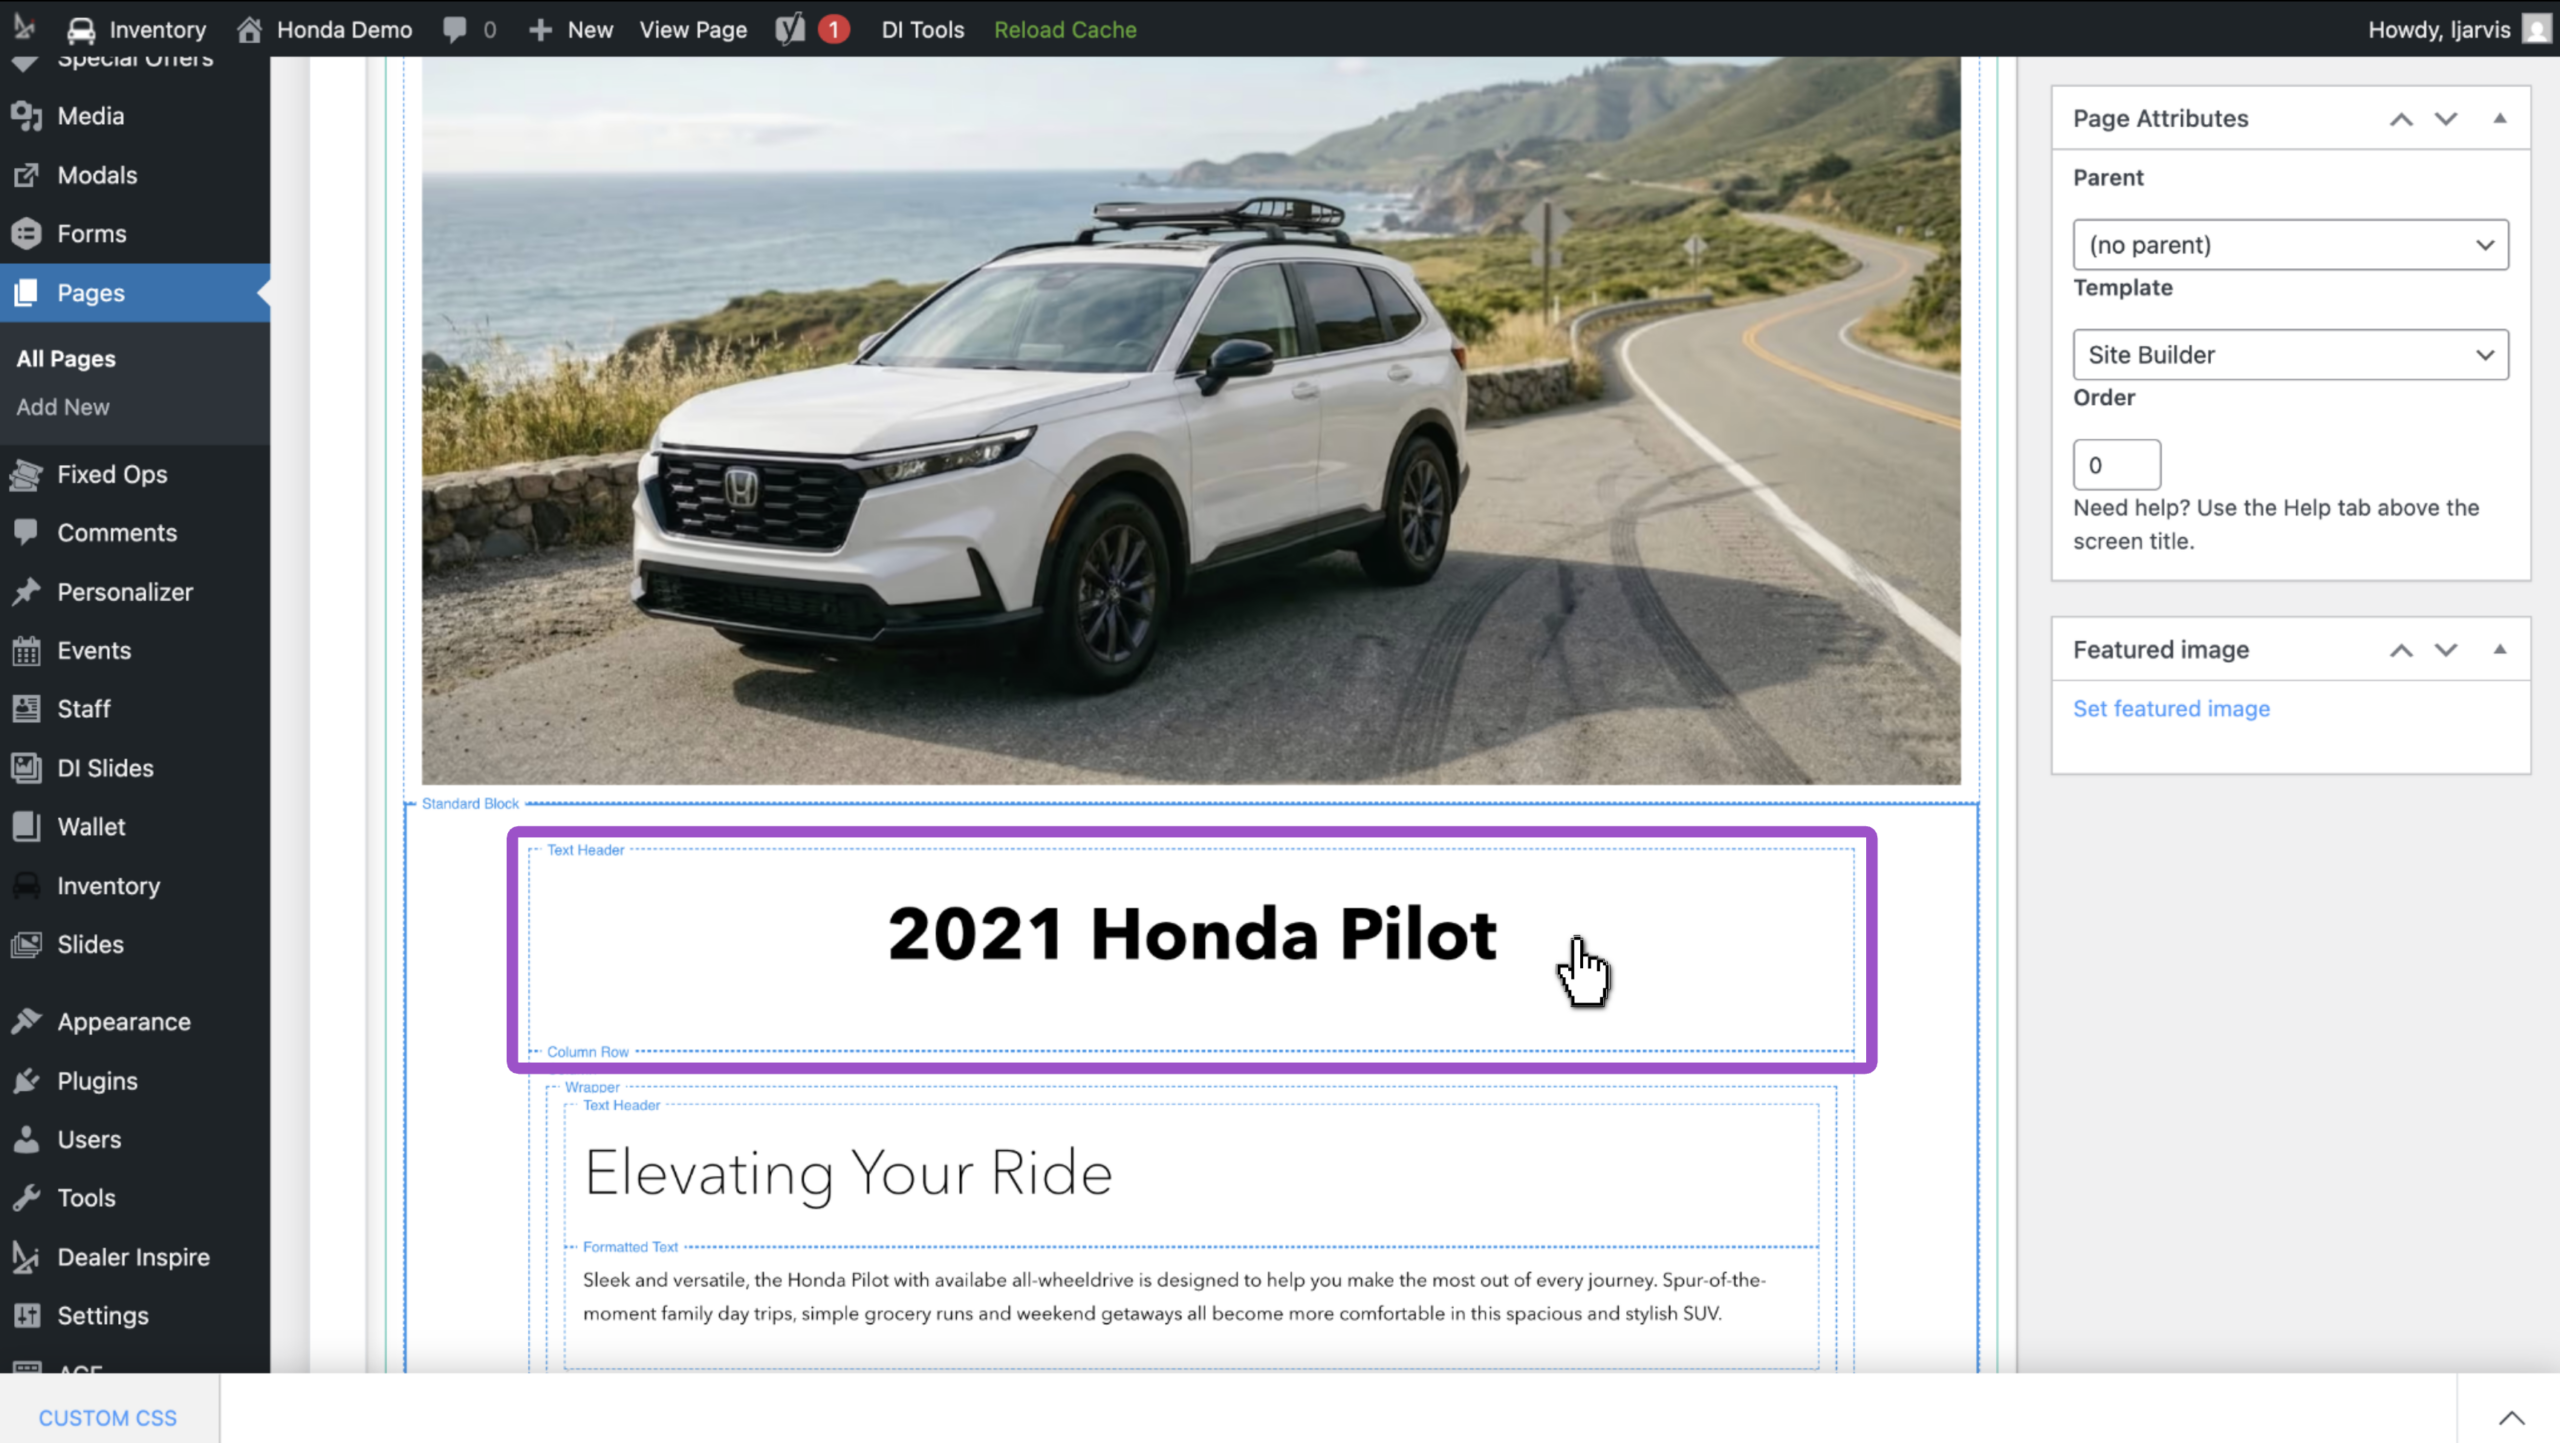
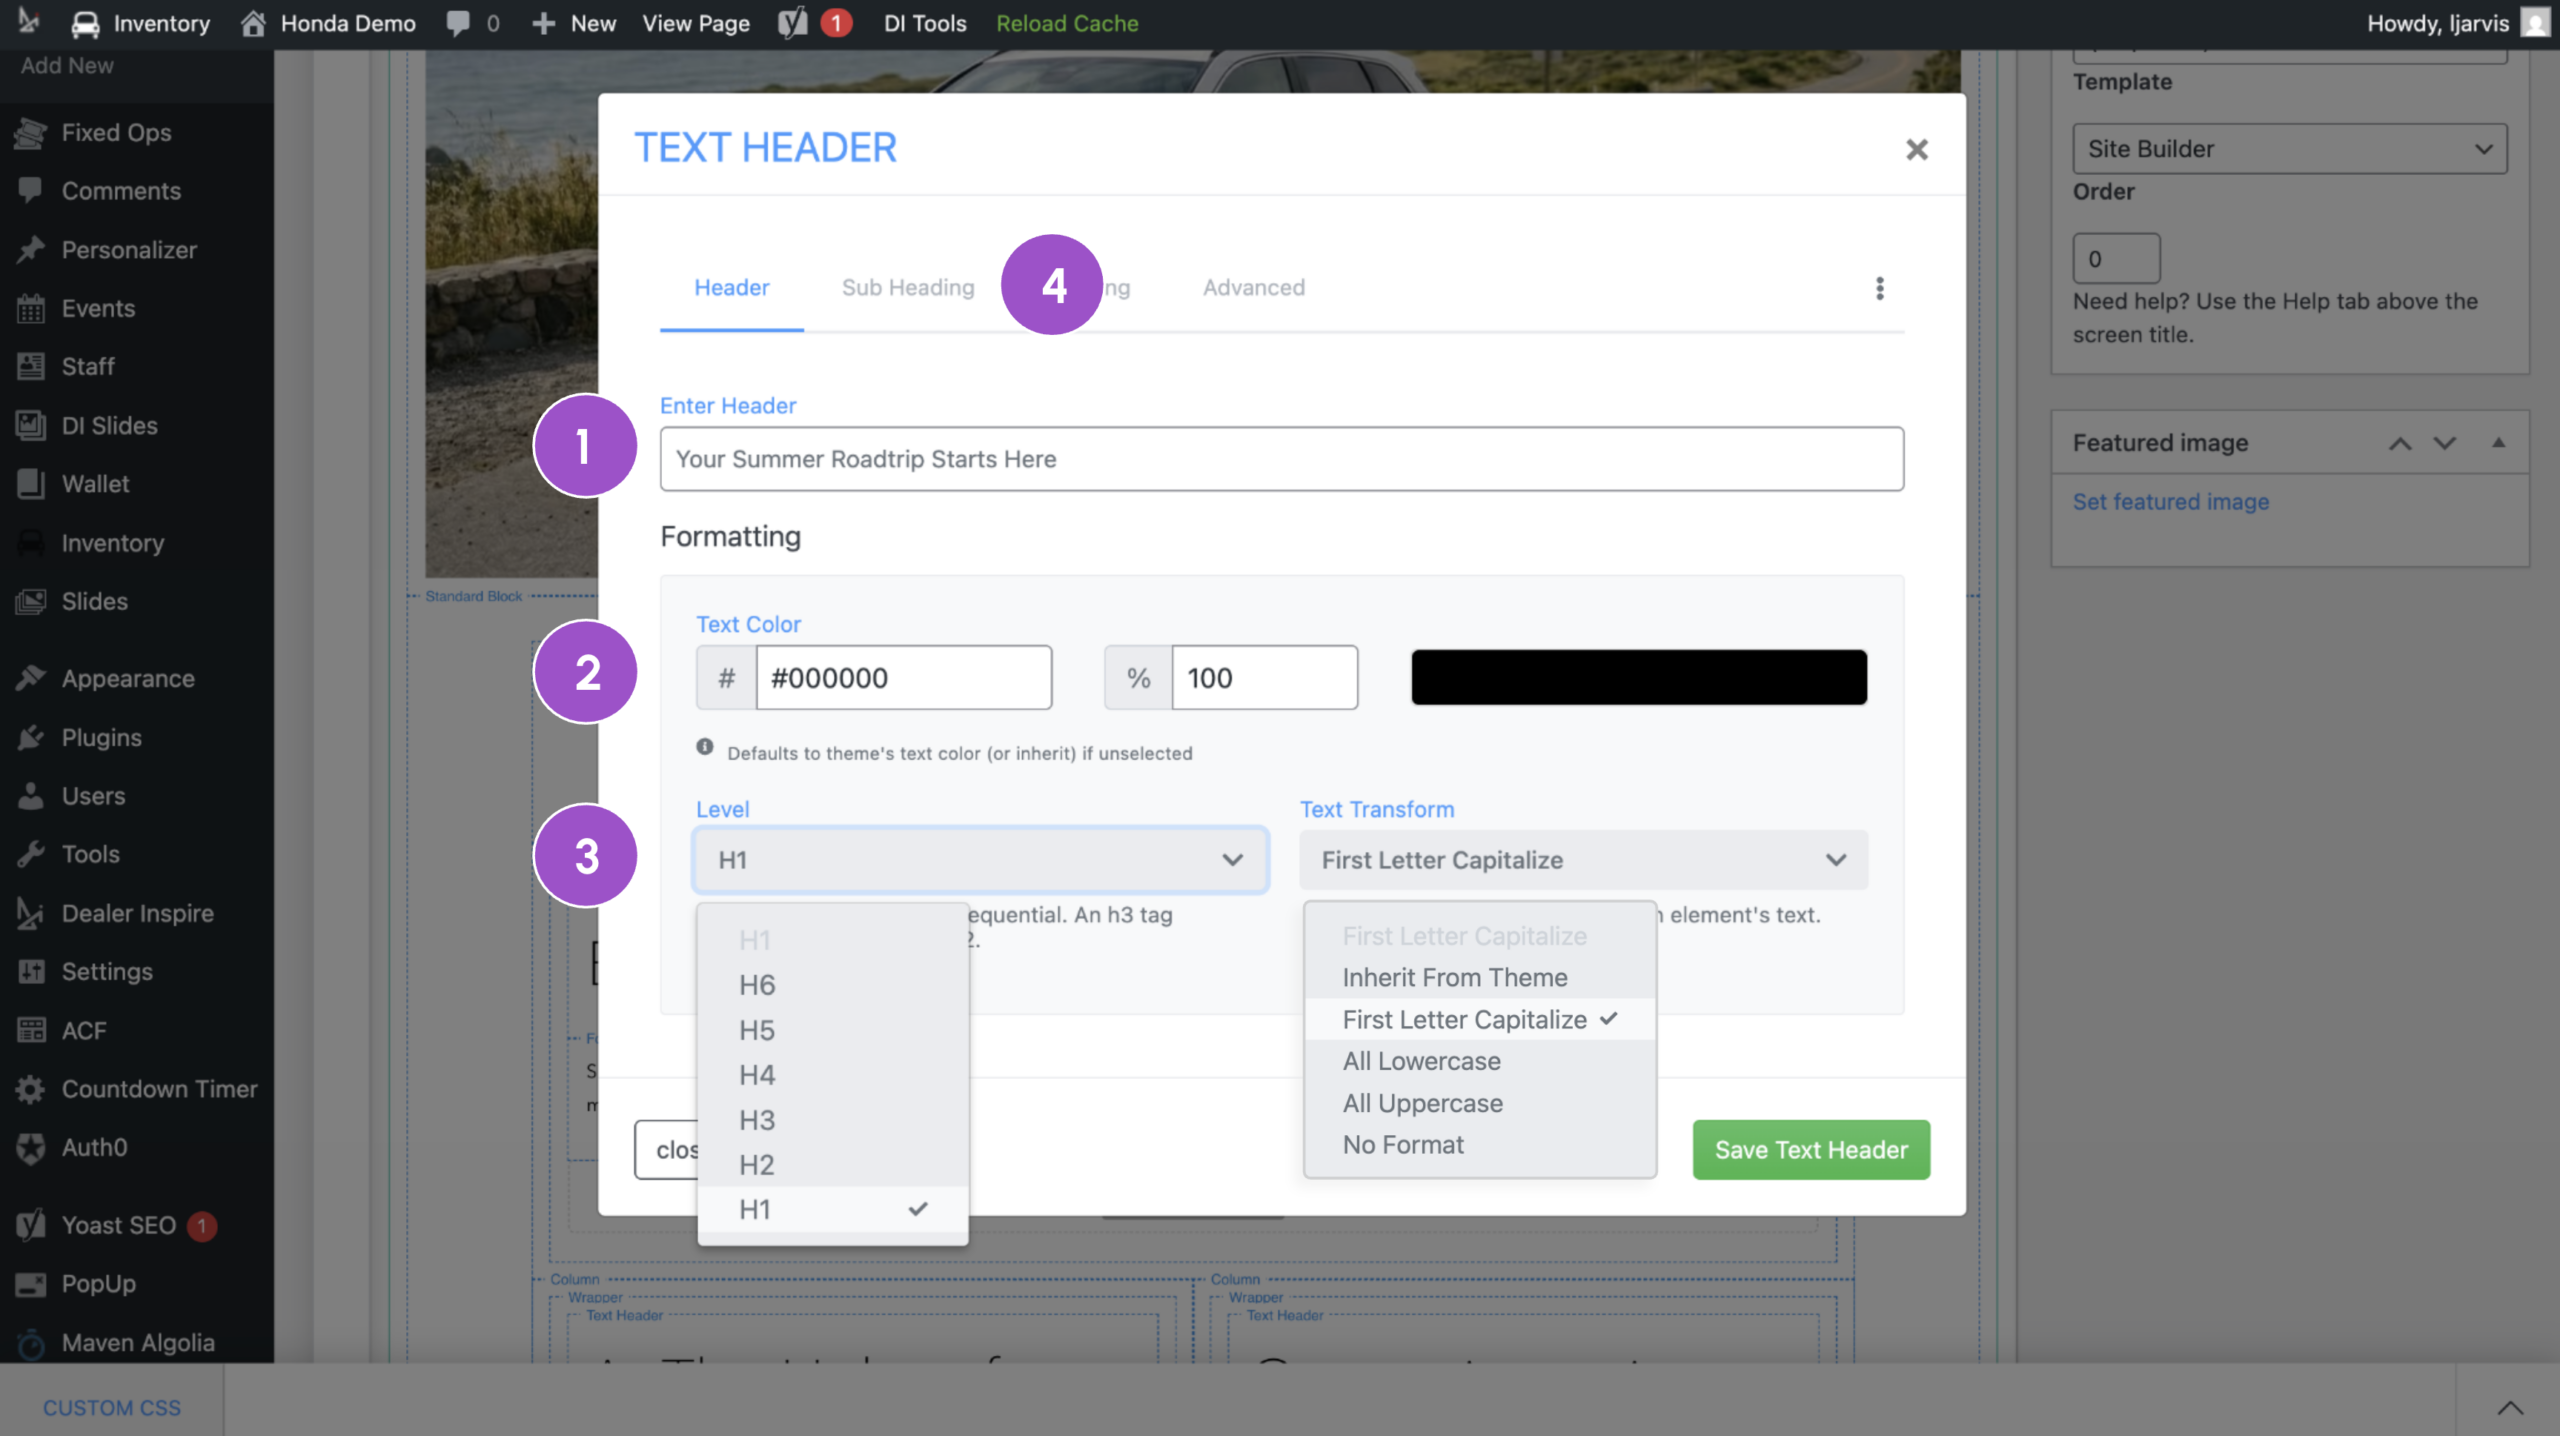
- Enter your header text
- Update the text color with a hex code and adjust the opacity (optional)
- Select the size of your header and determine how you want the text to appear
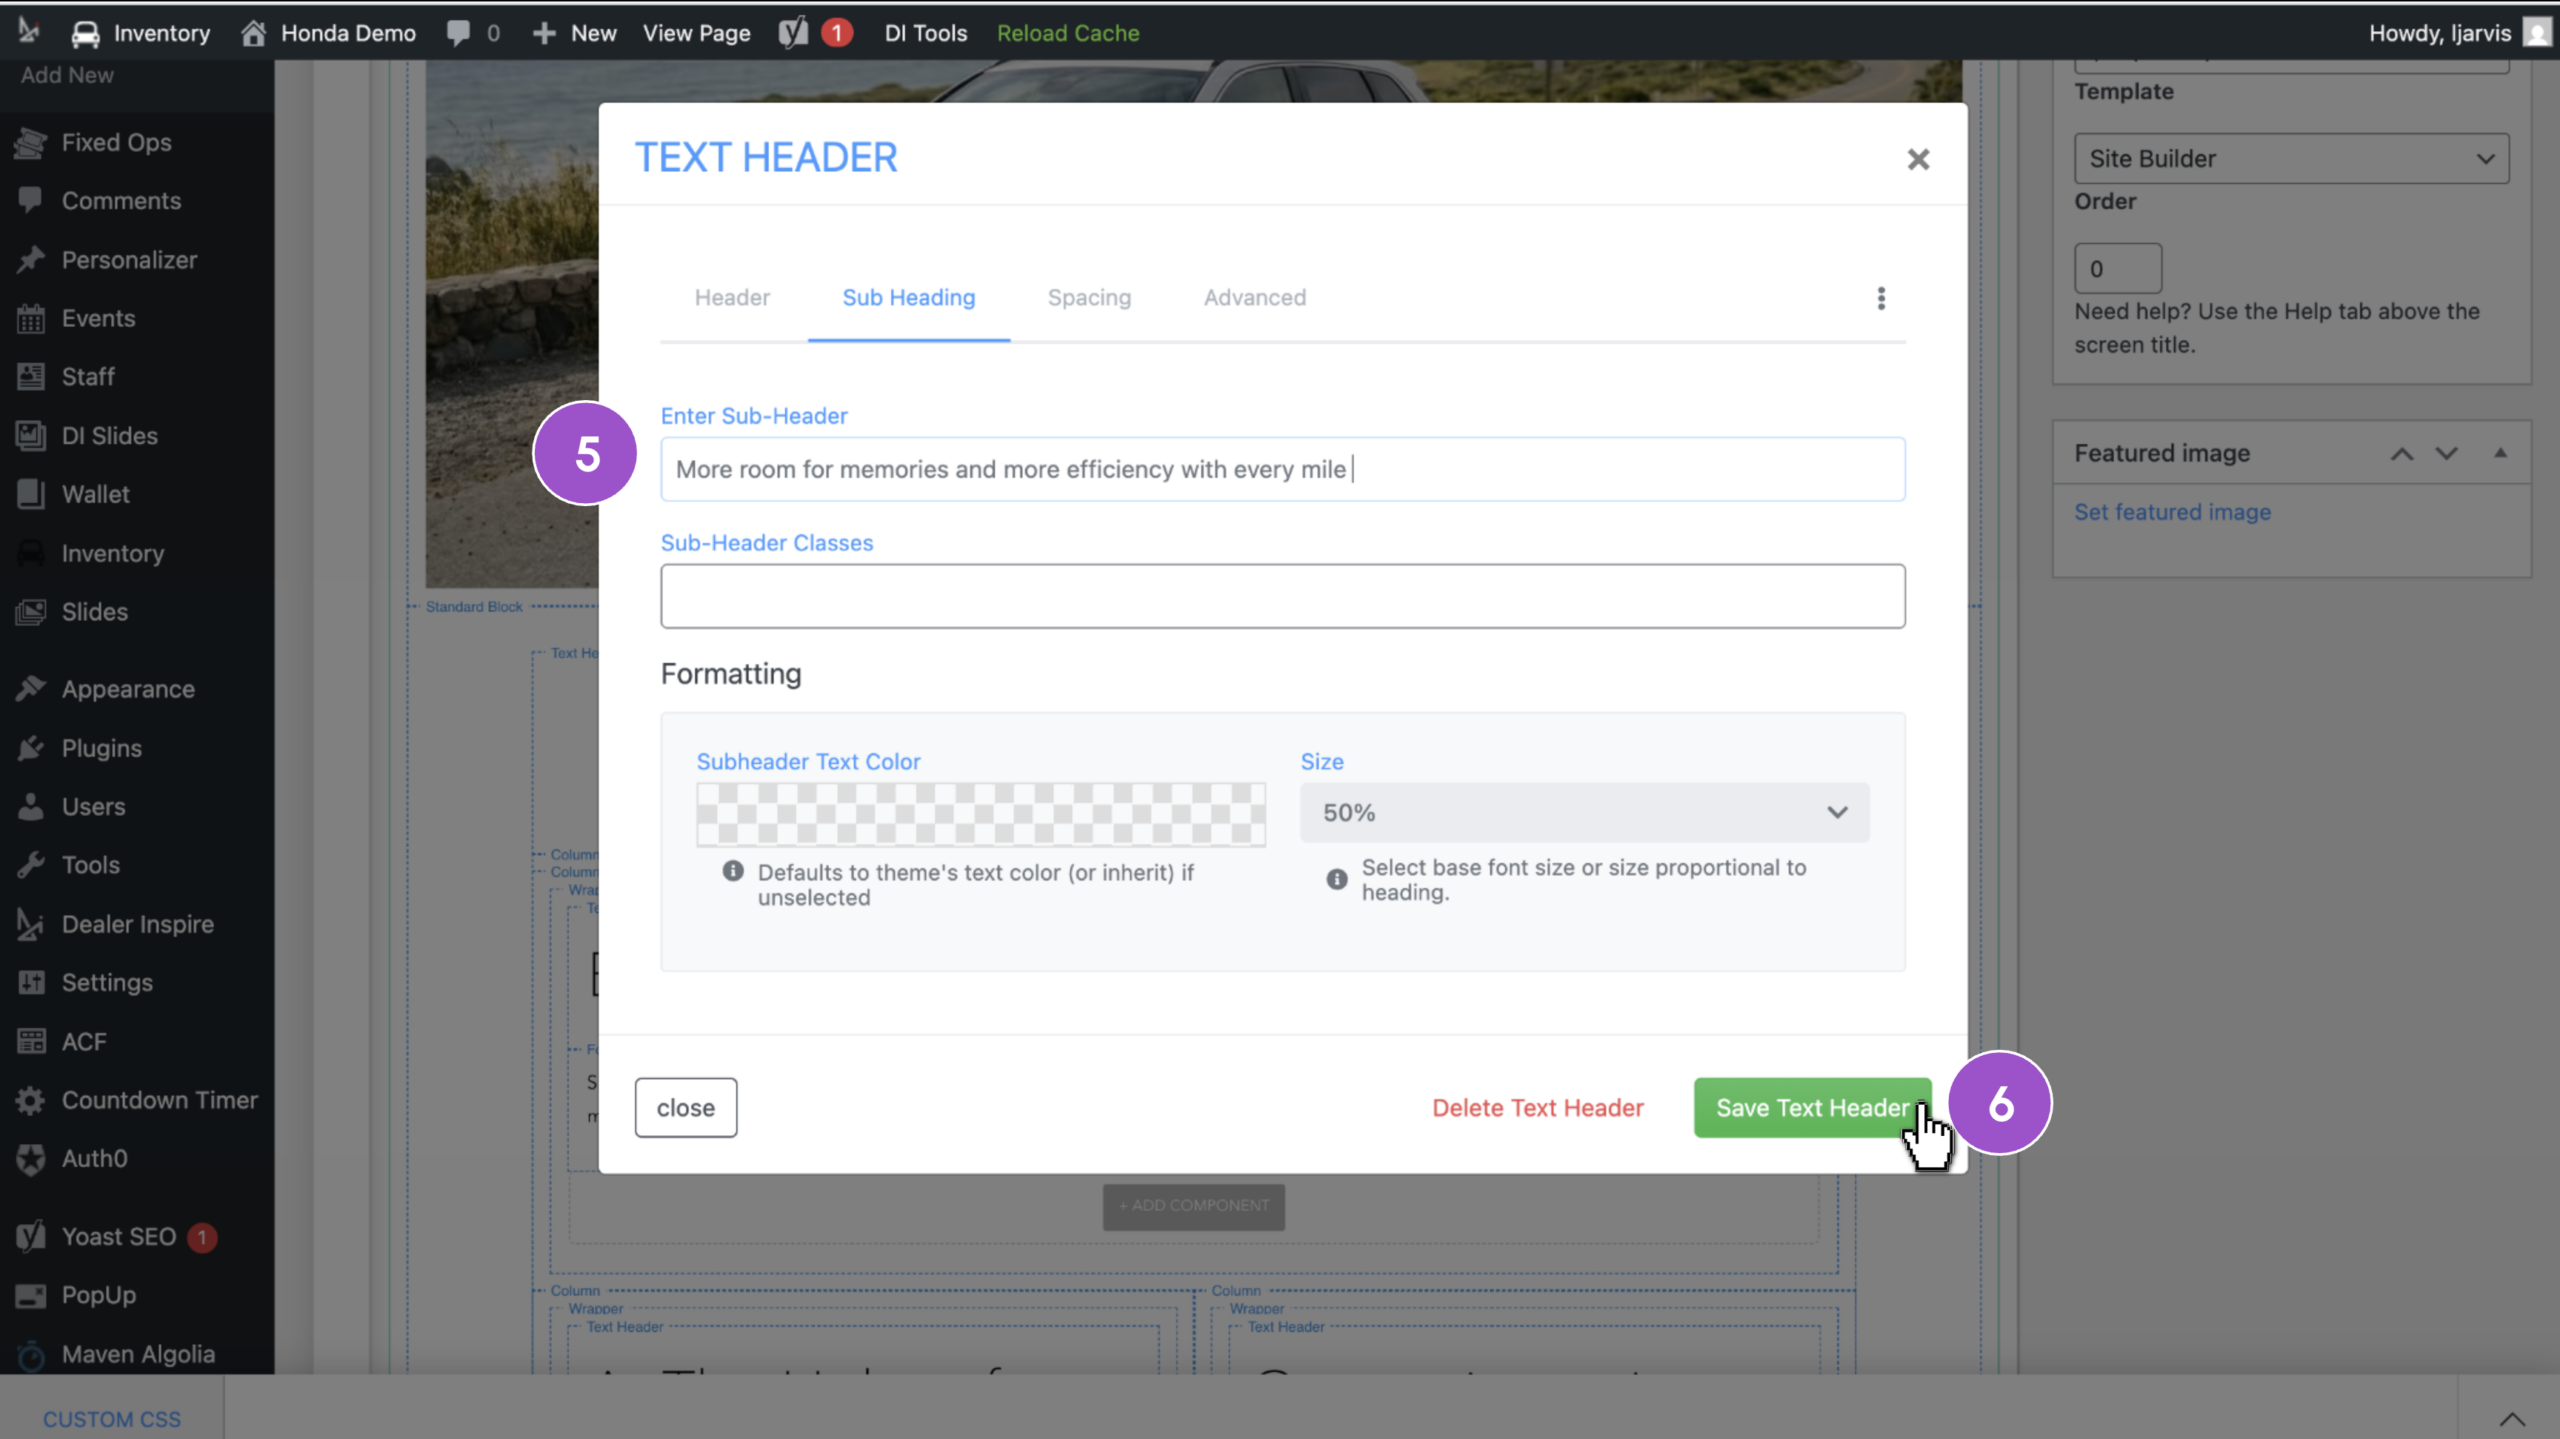
- Click the Sub Heading tab
- Add a sub header into the field
- Click Save Text Header
6Add a new component
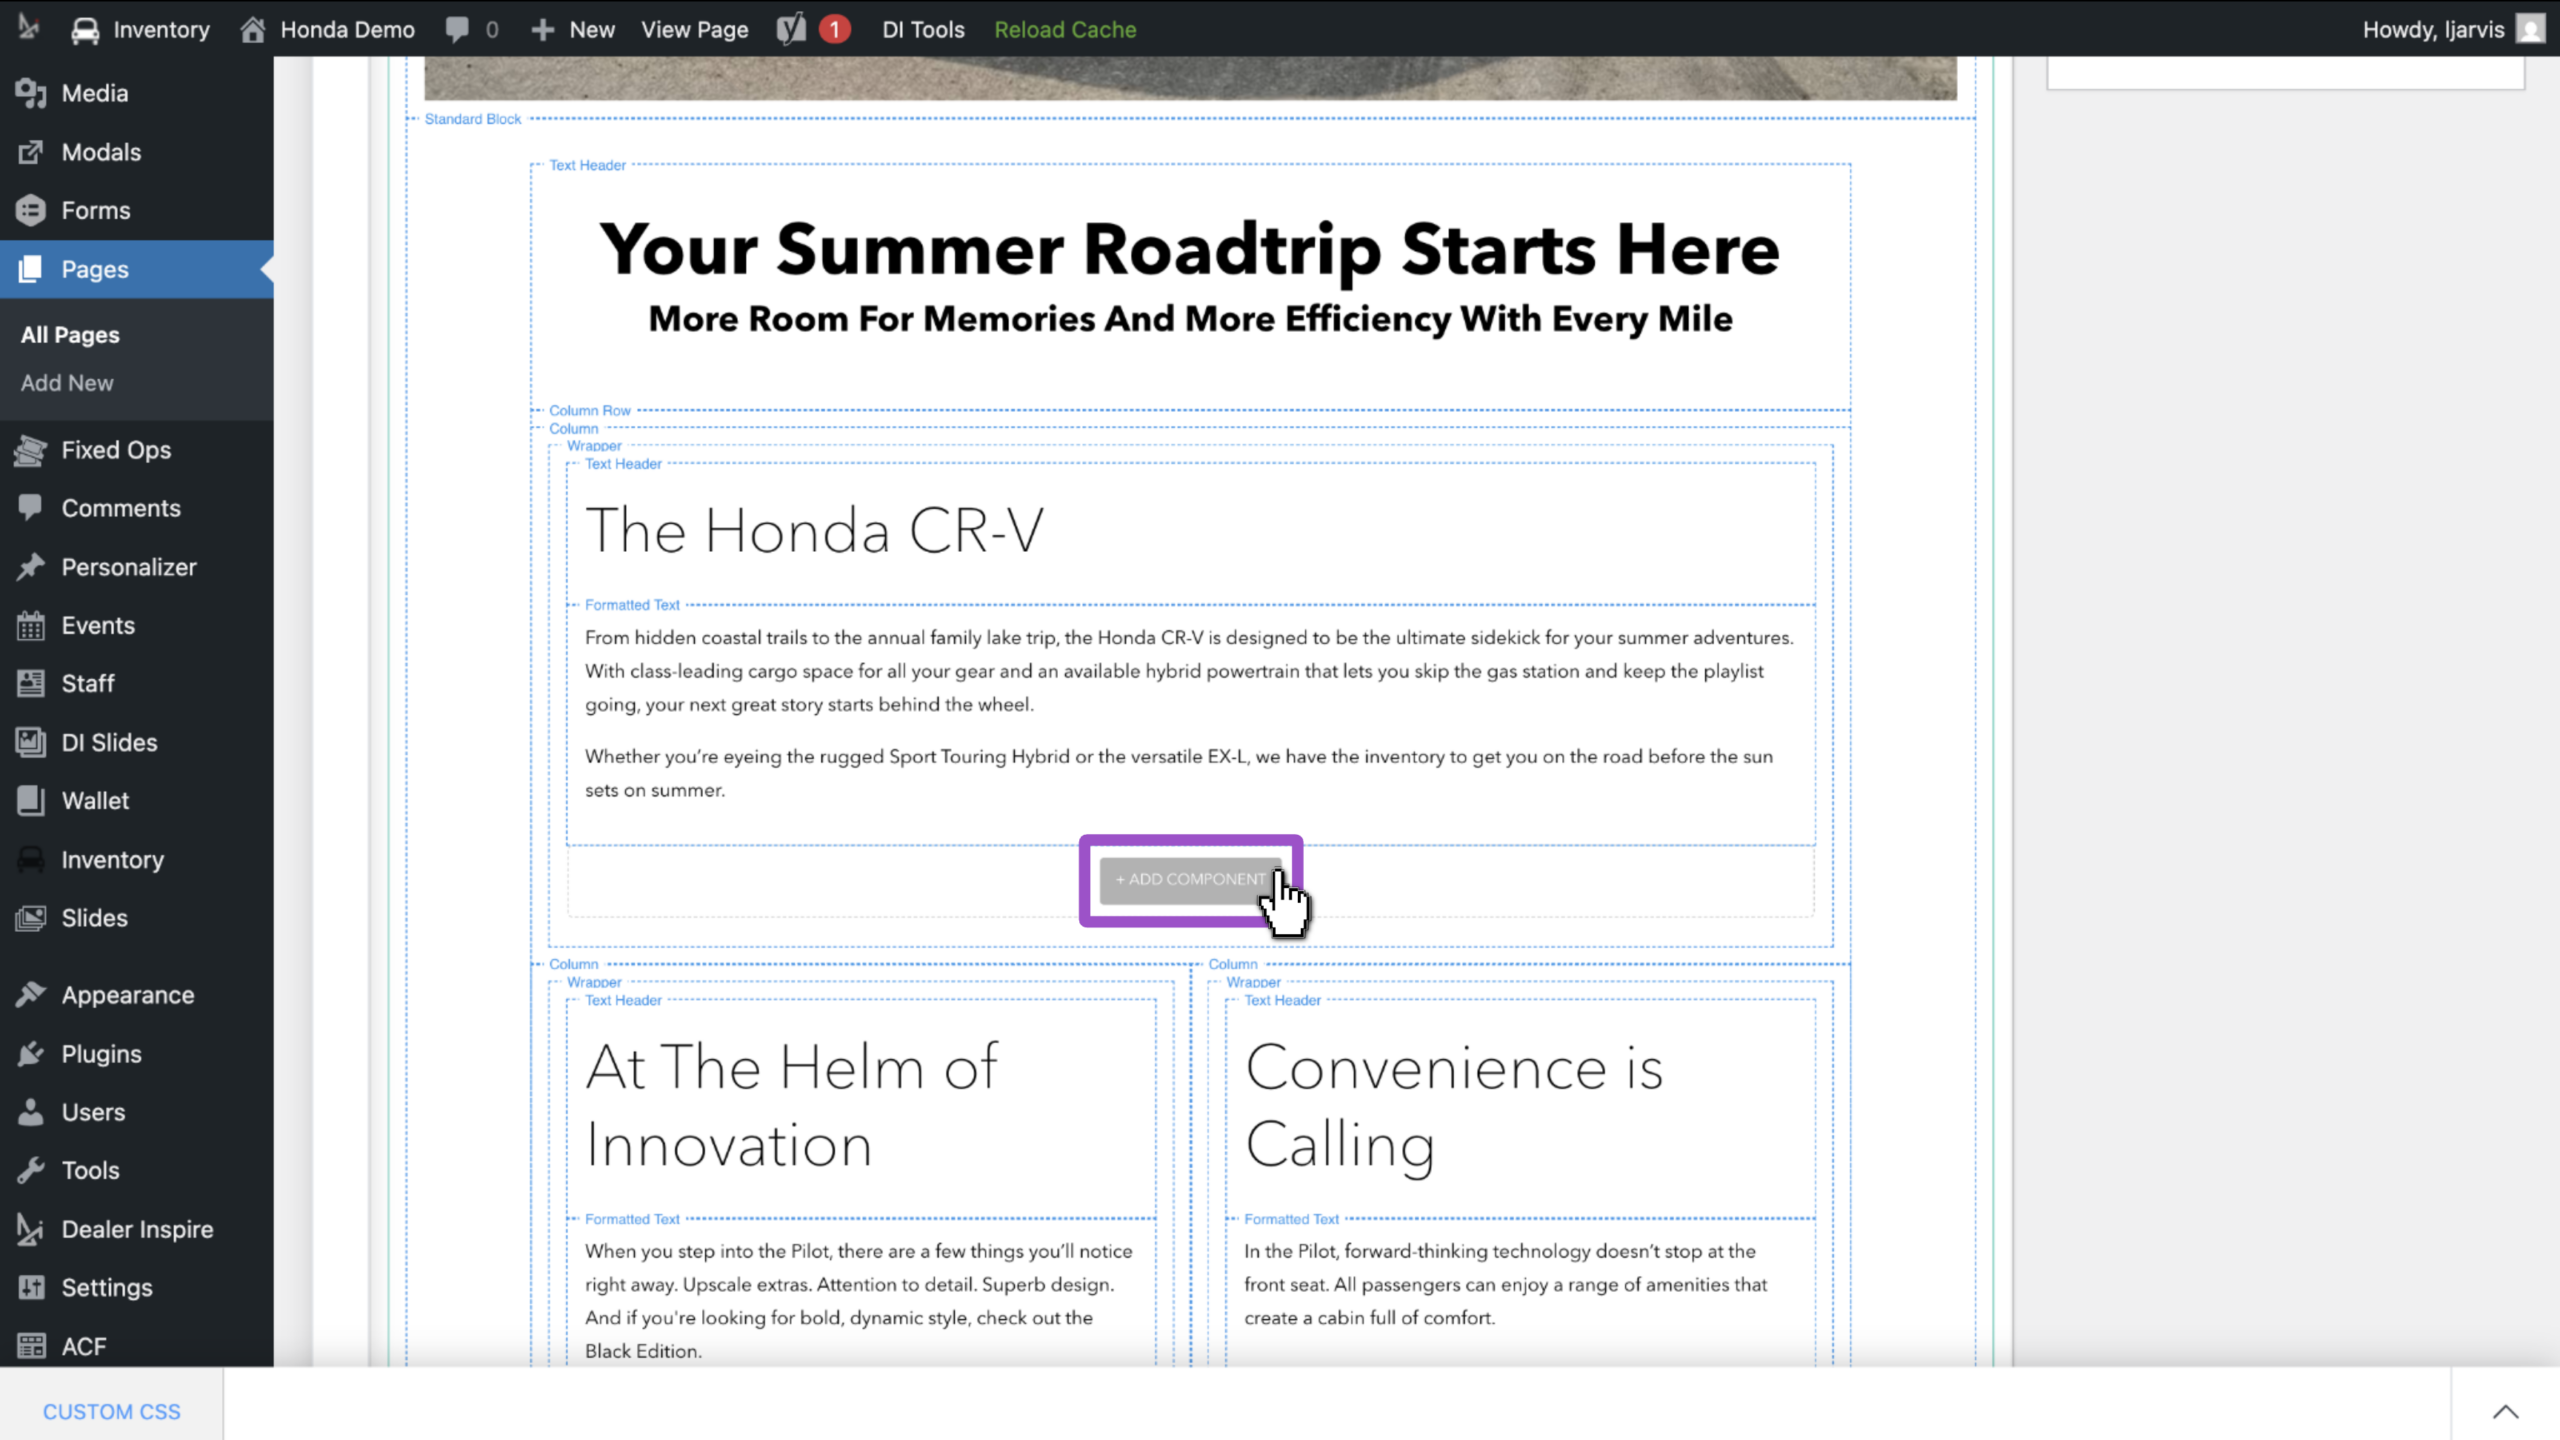
At any point you can add a new component rather than replace existing components.
- Click + Add Component
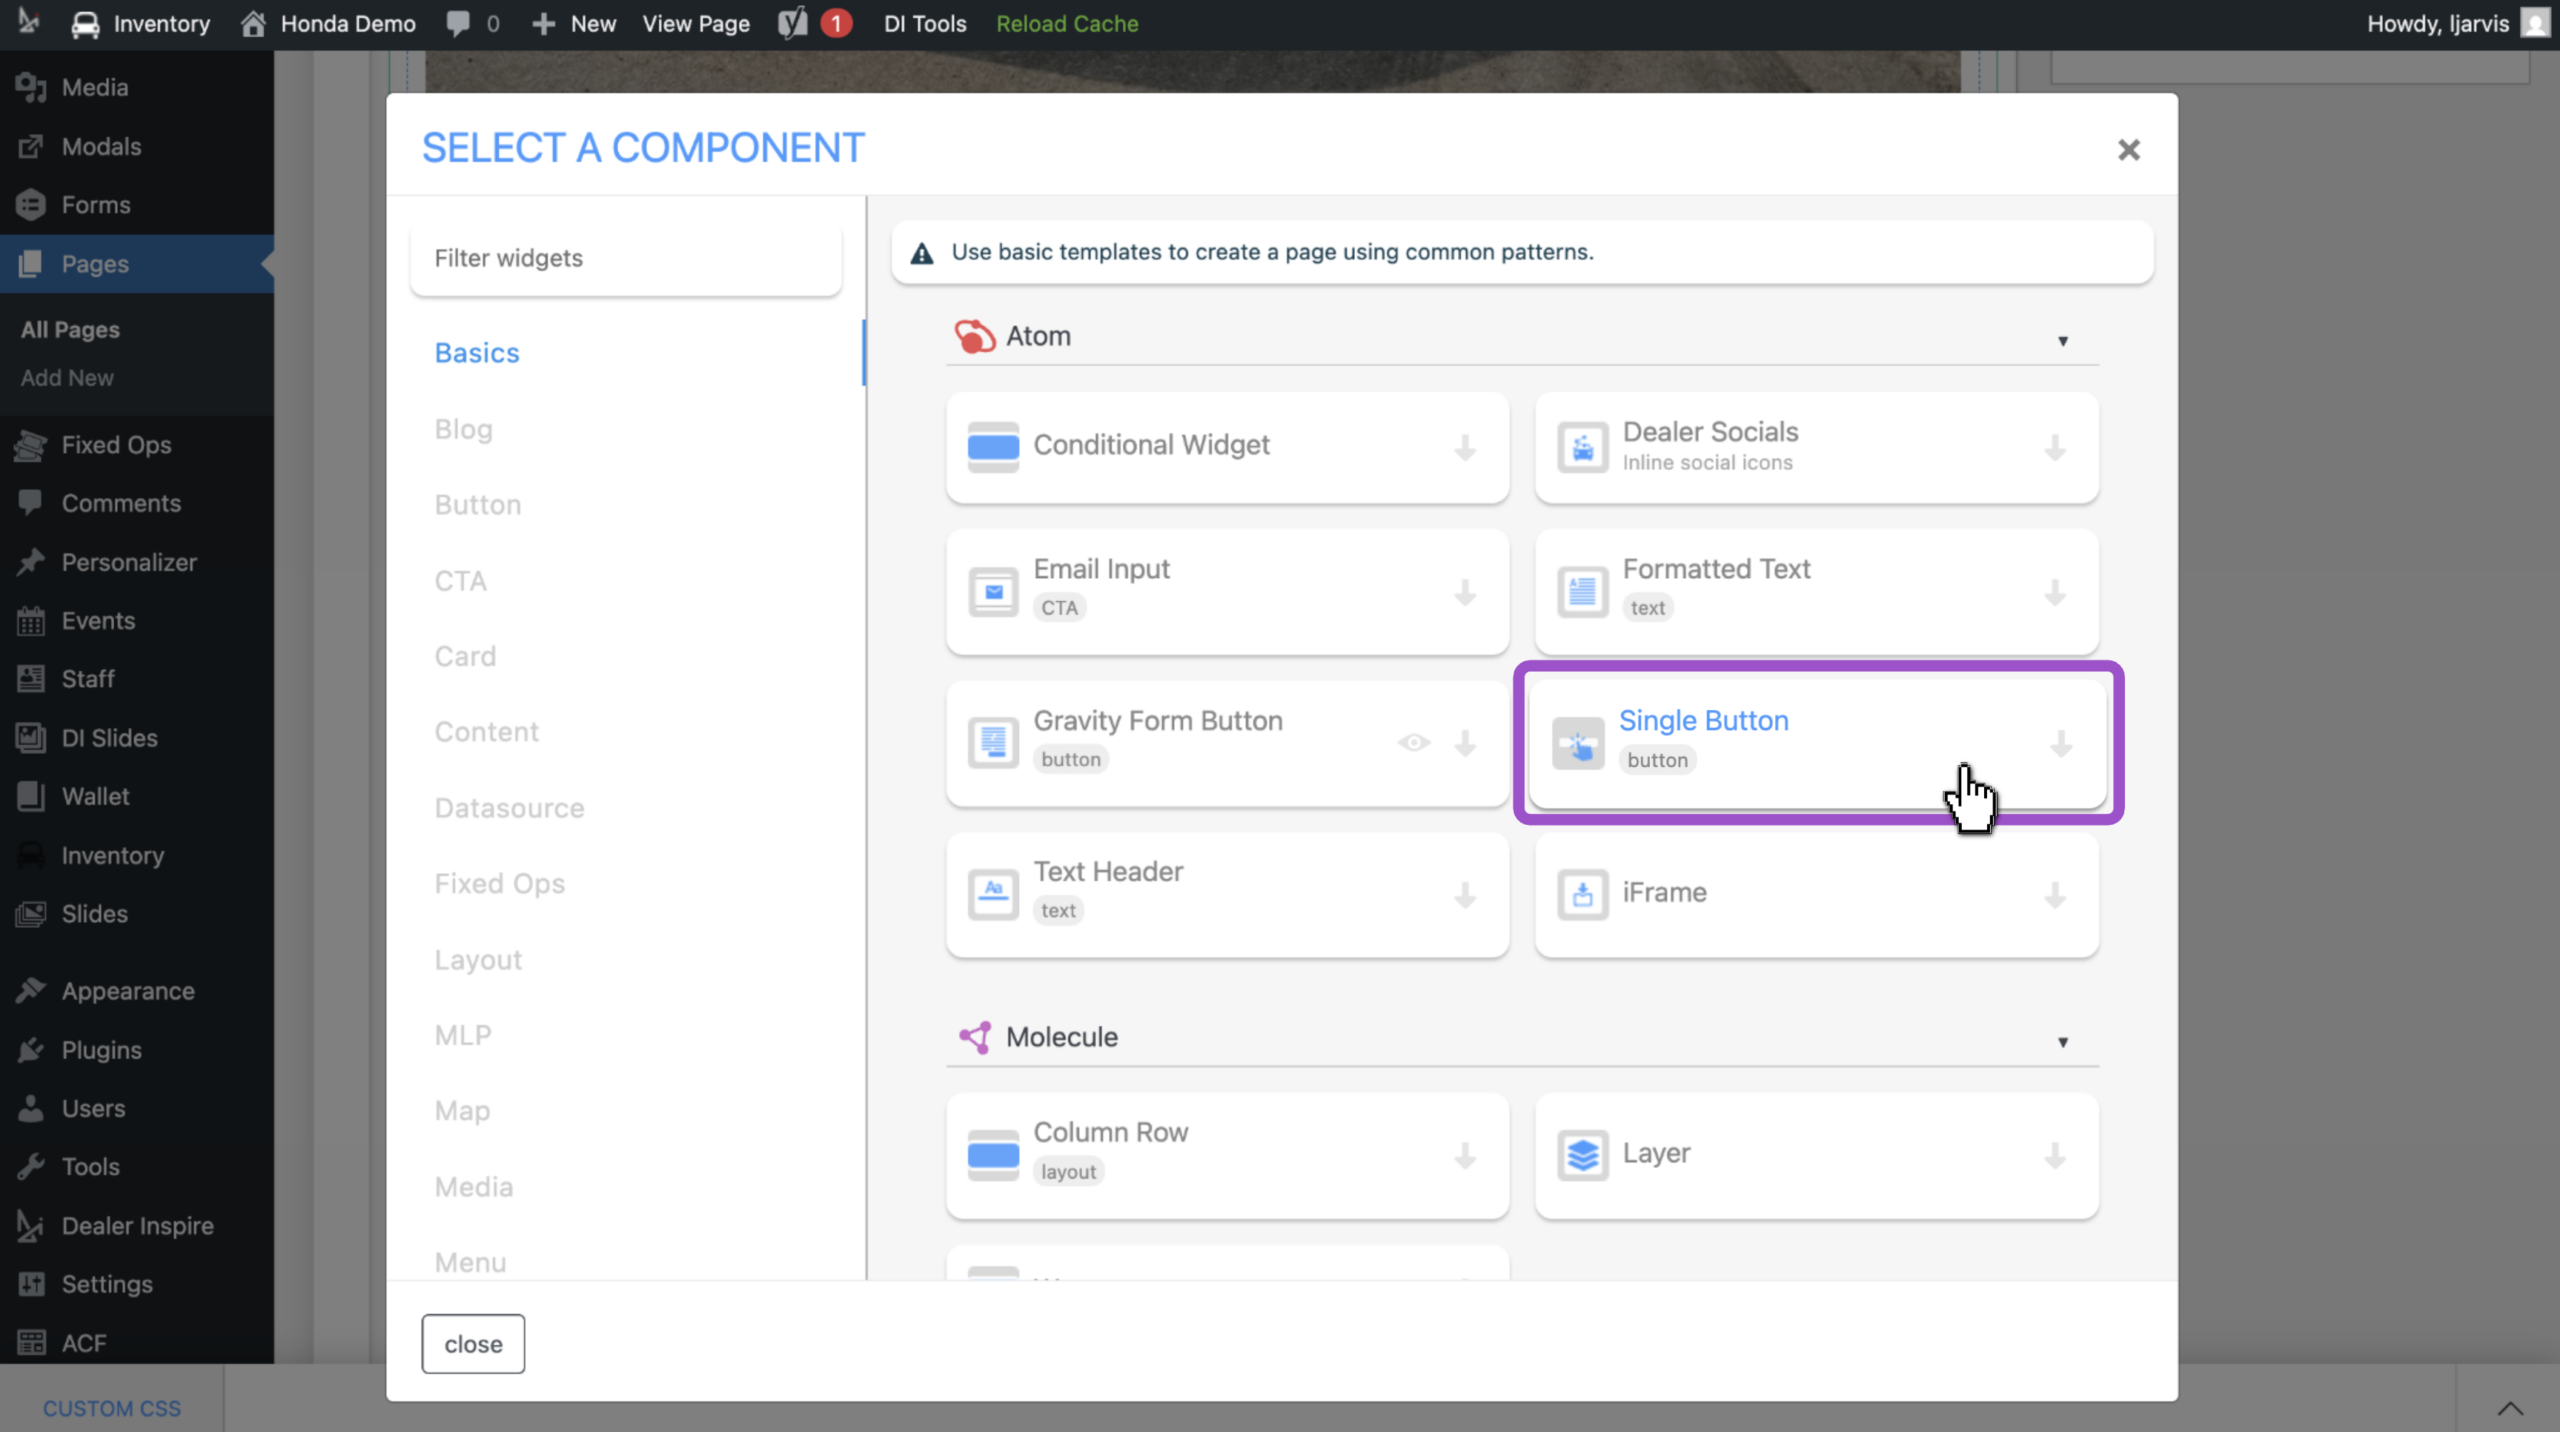
Click or search through the list of components to find the right addition to your page.
- Select Single Button to add a CTA, for example
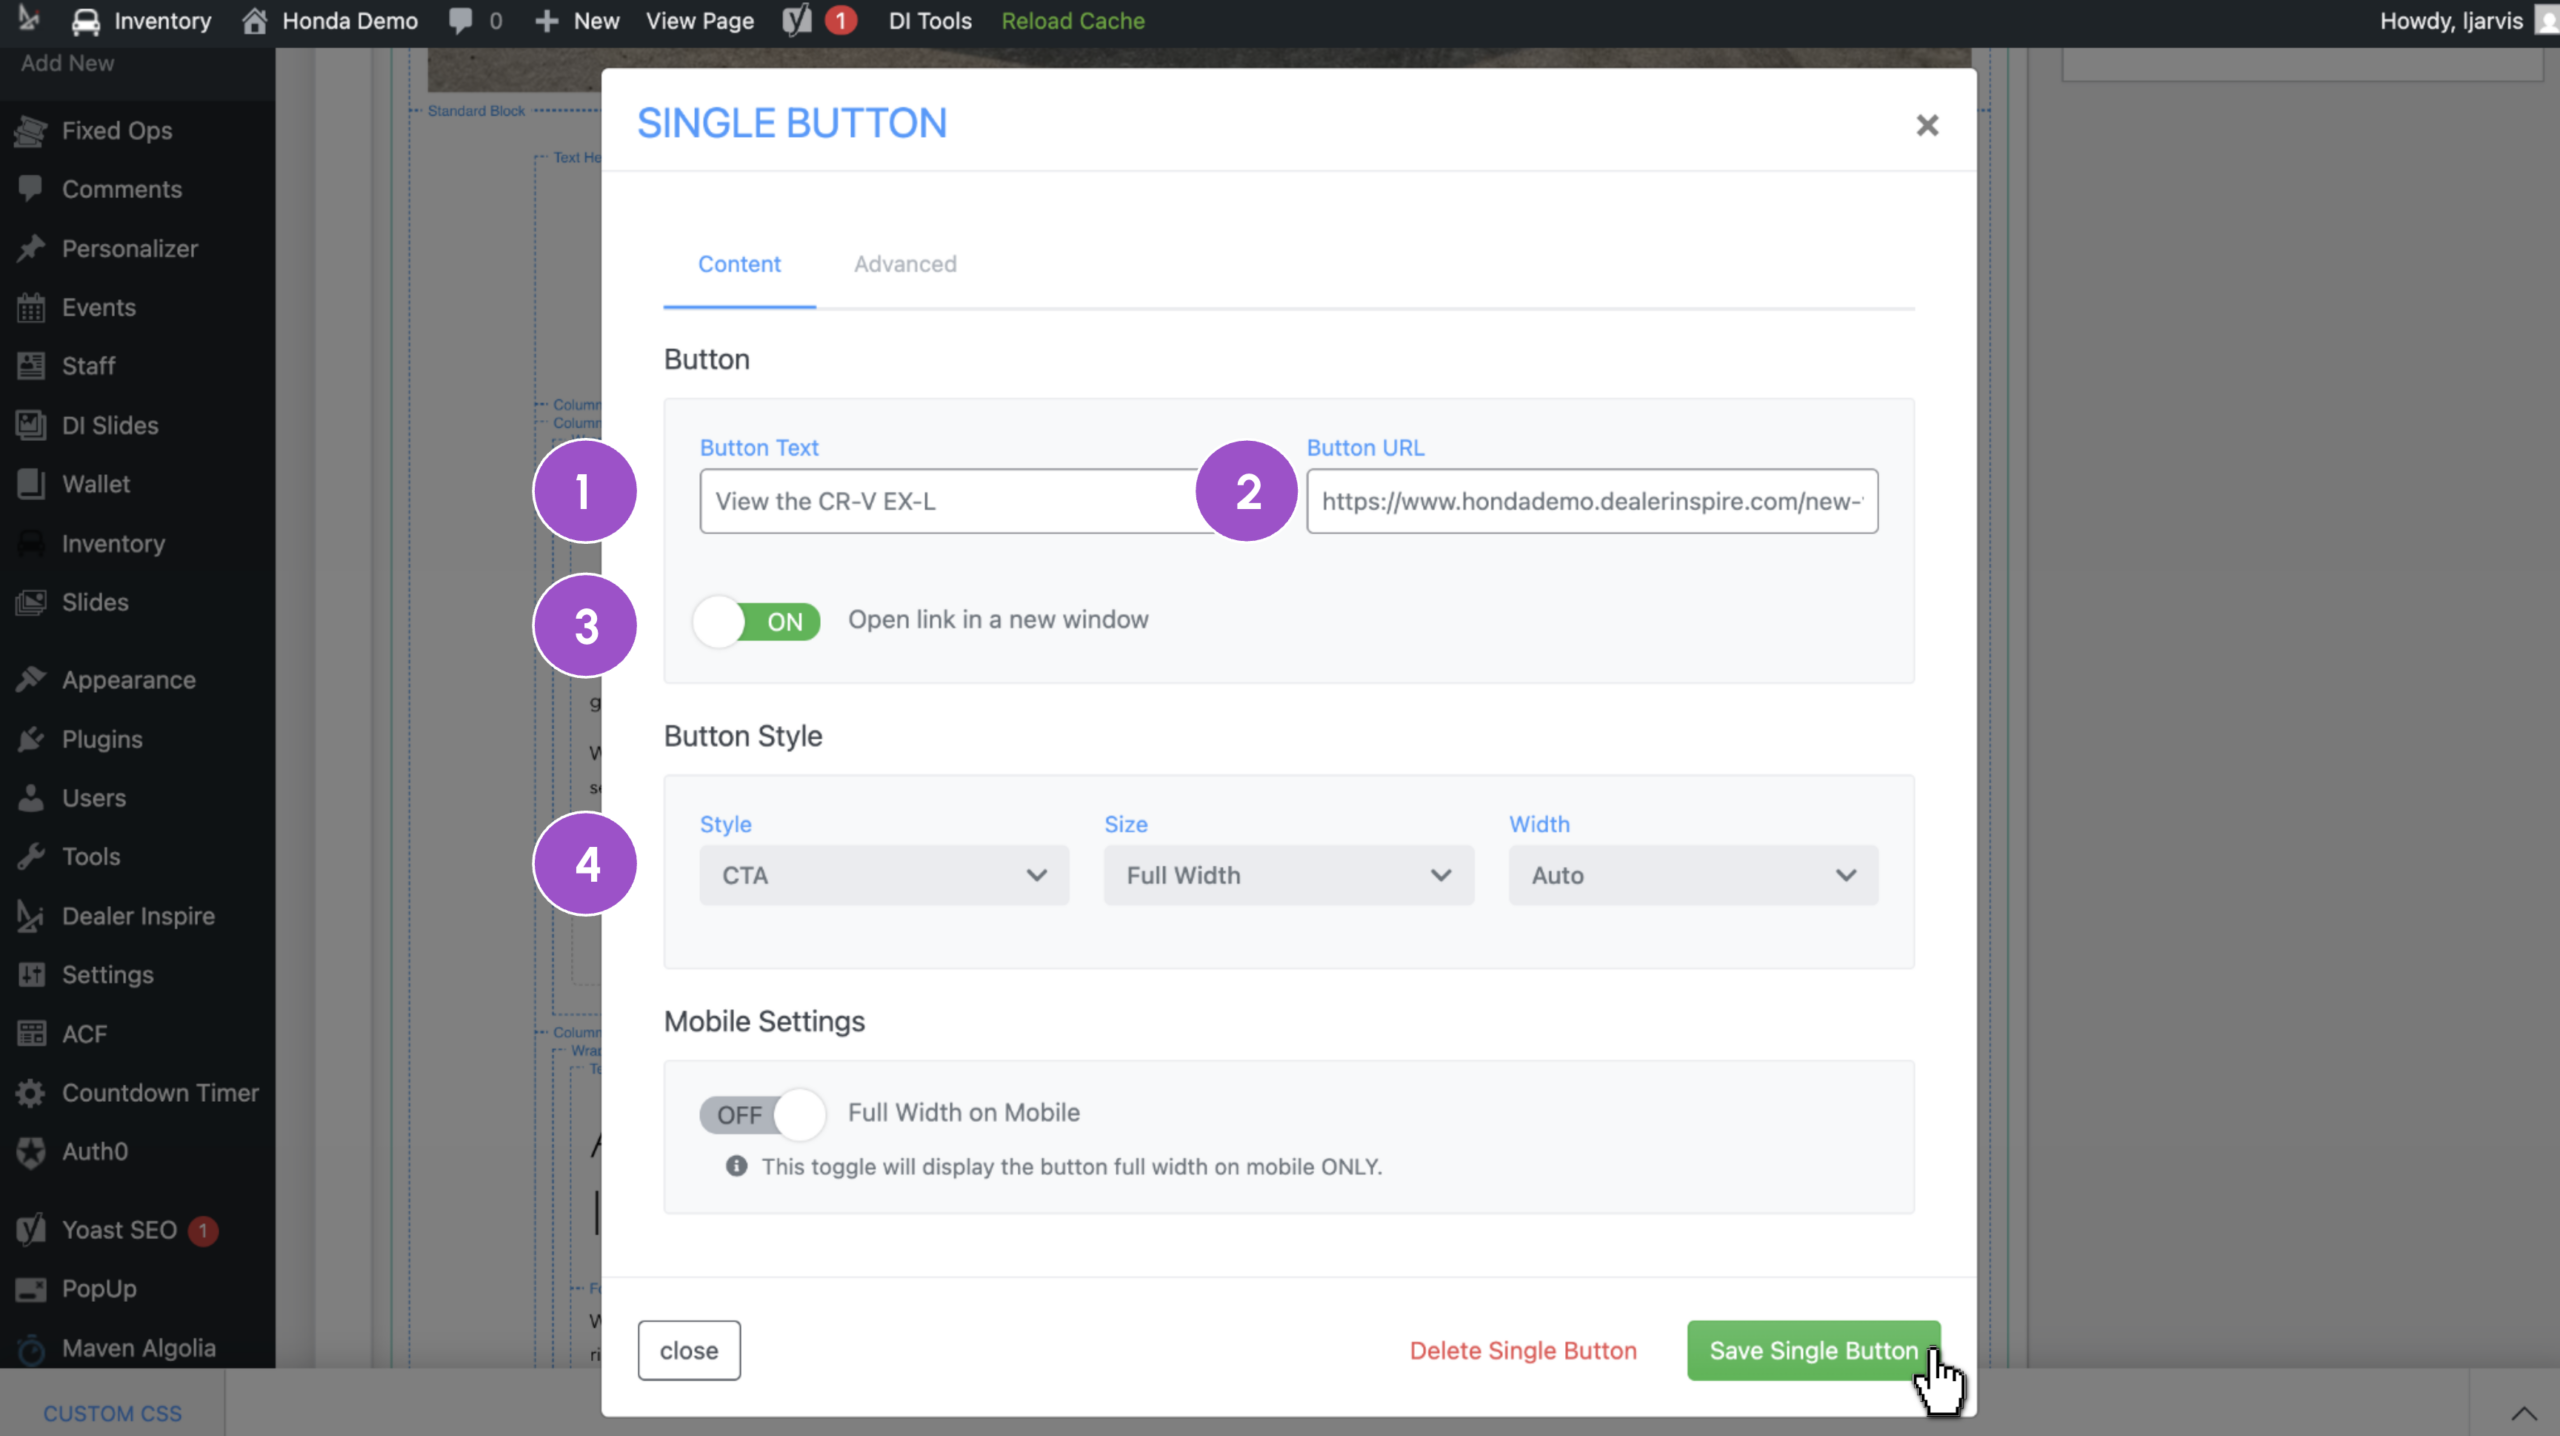
Customize the component.
- Add button text
- Include a link to the page you want the click to route to
- Click the toggle to determine if the click should open in a new tab
- Adjust the buttonstyle (optional)
- Click Save Single Button
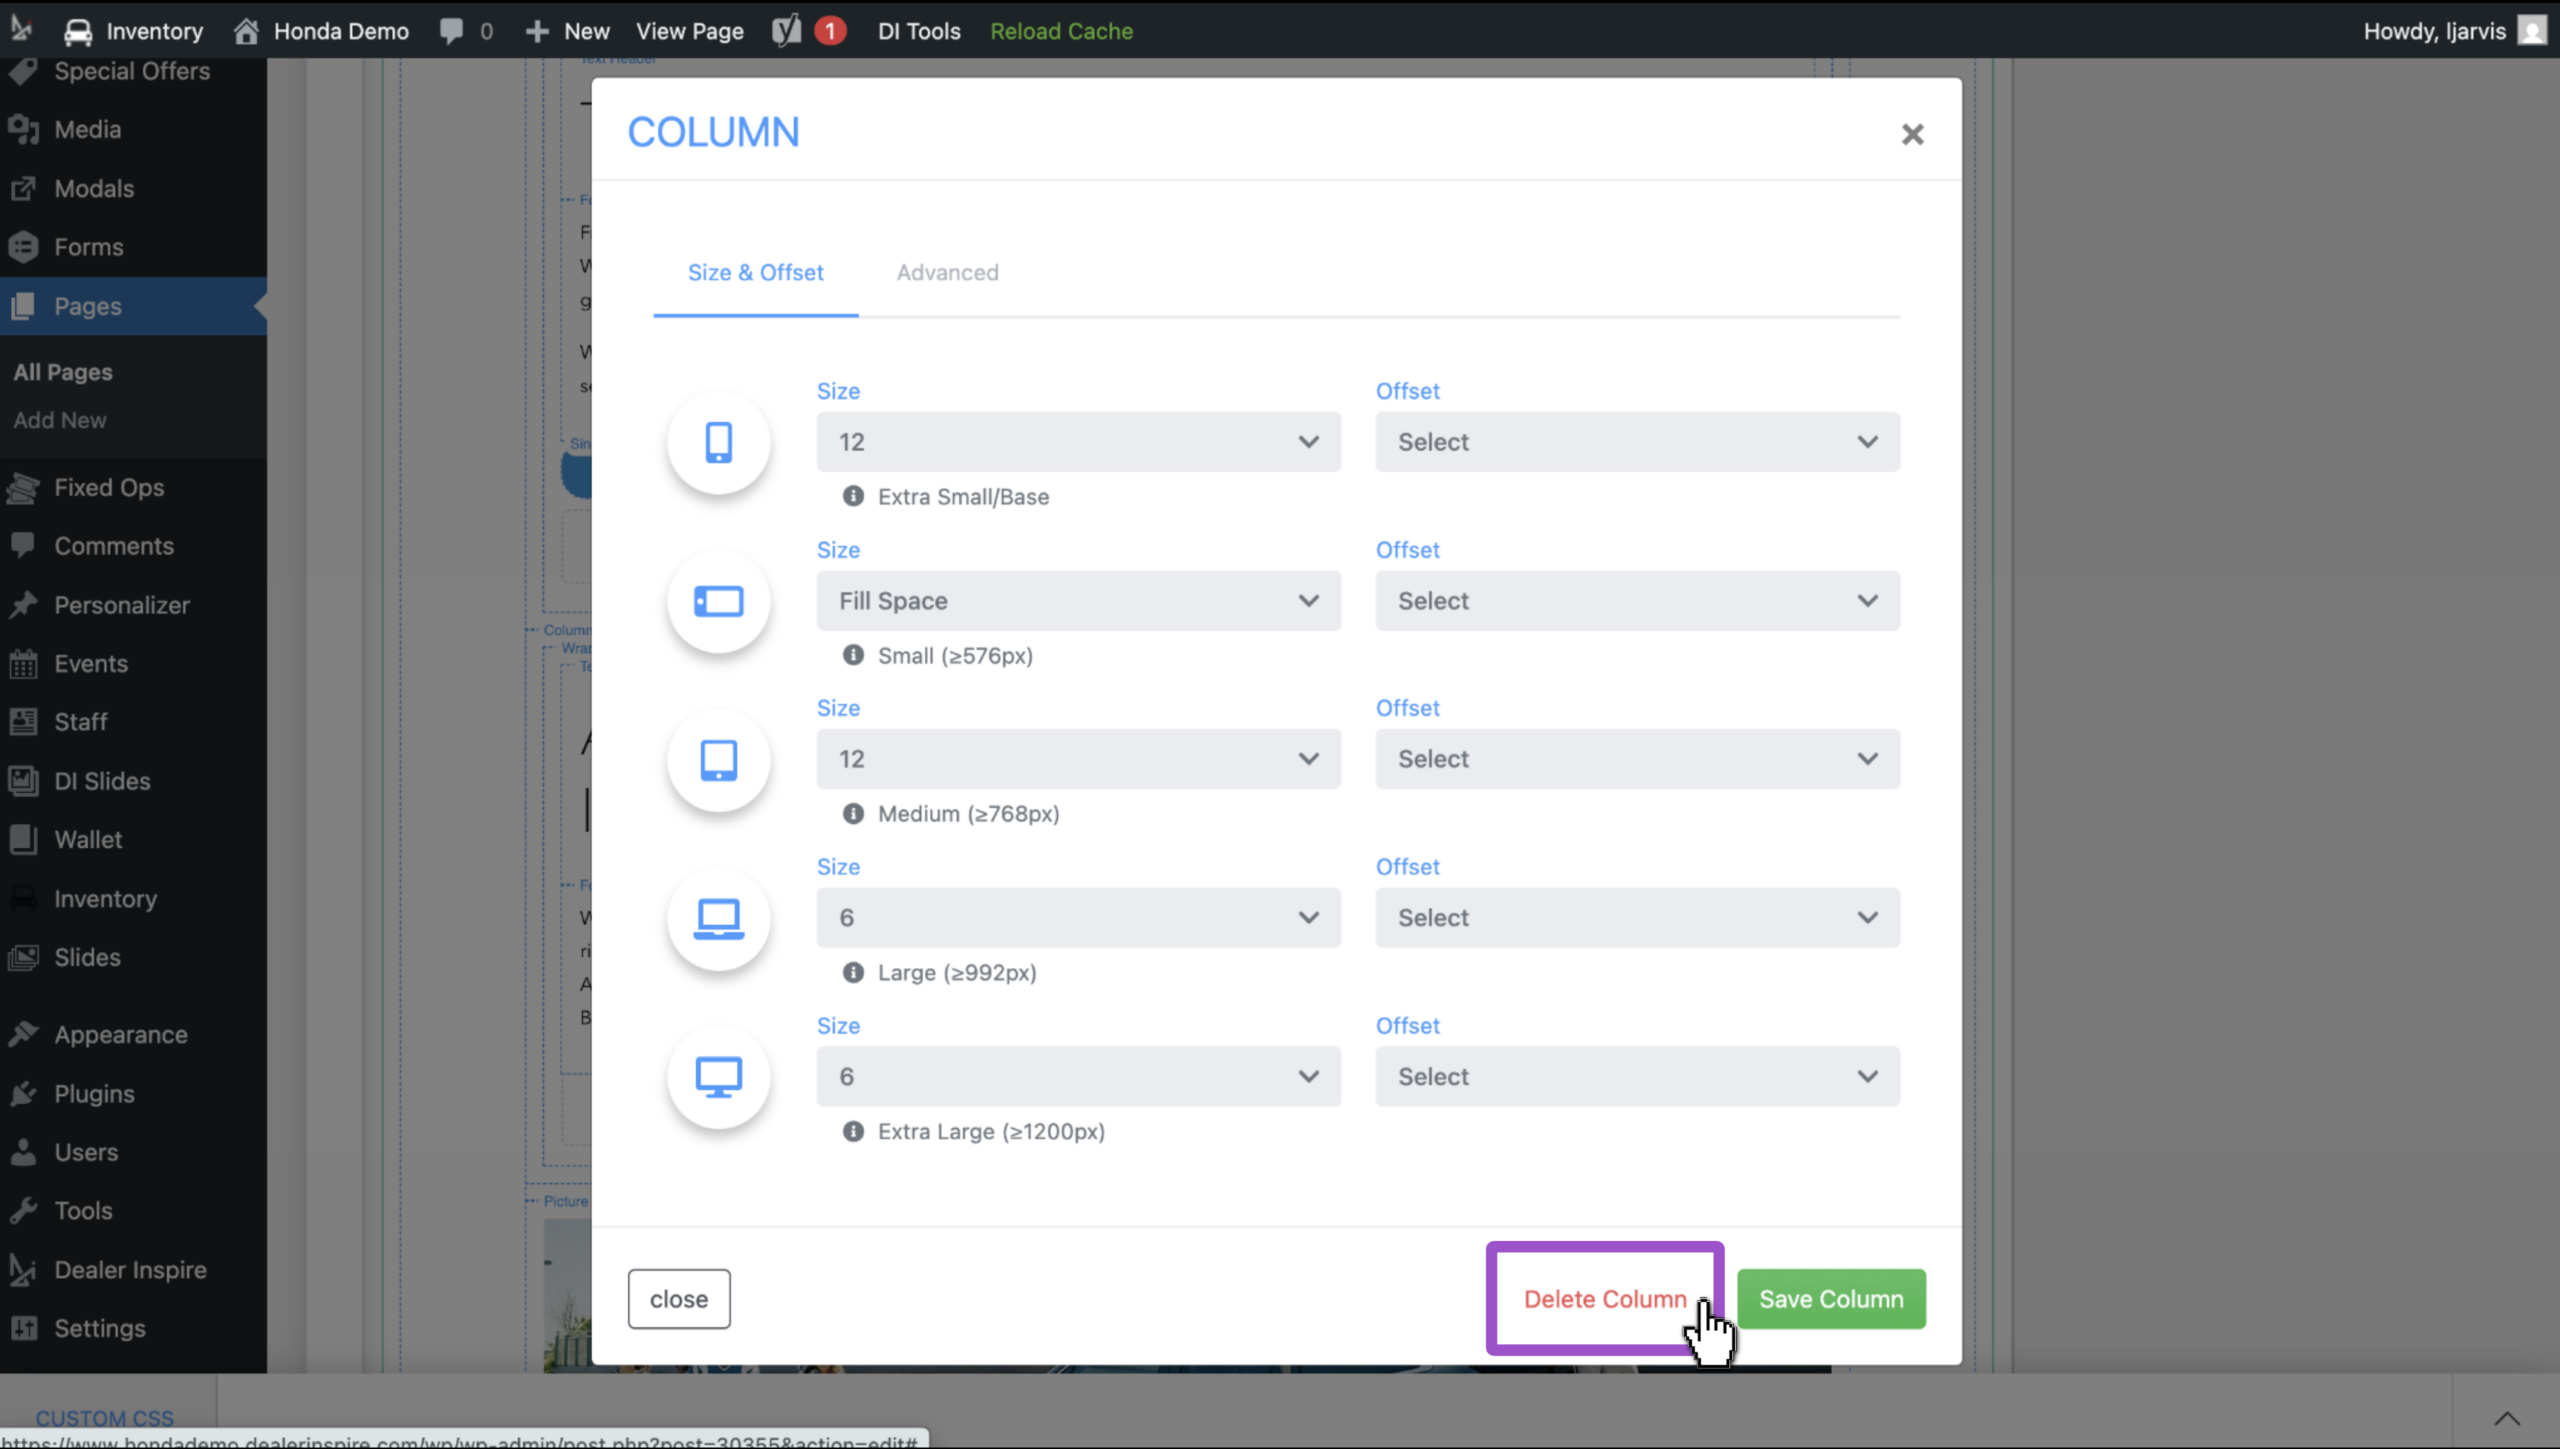
7 Delete a section
You can delete a component or block from your template page.
- Click the component or block
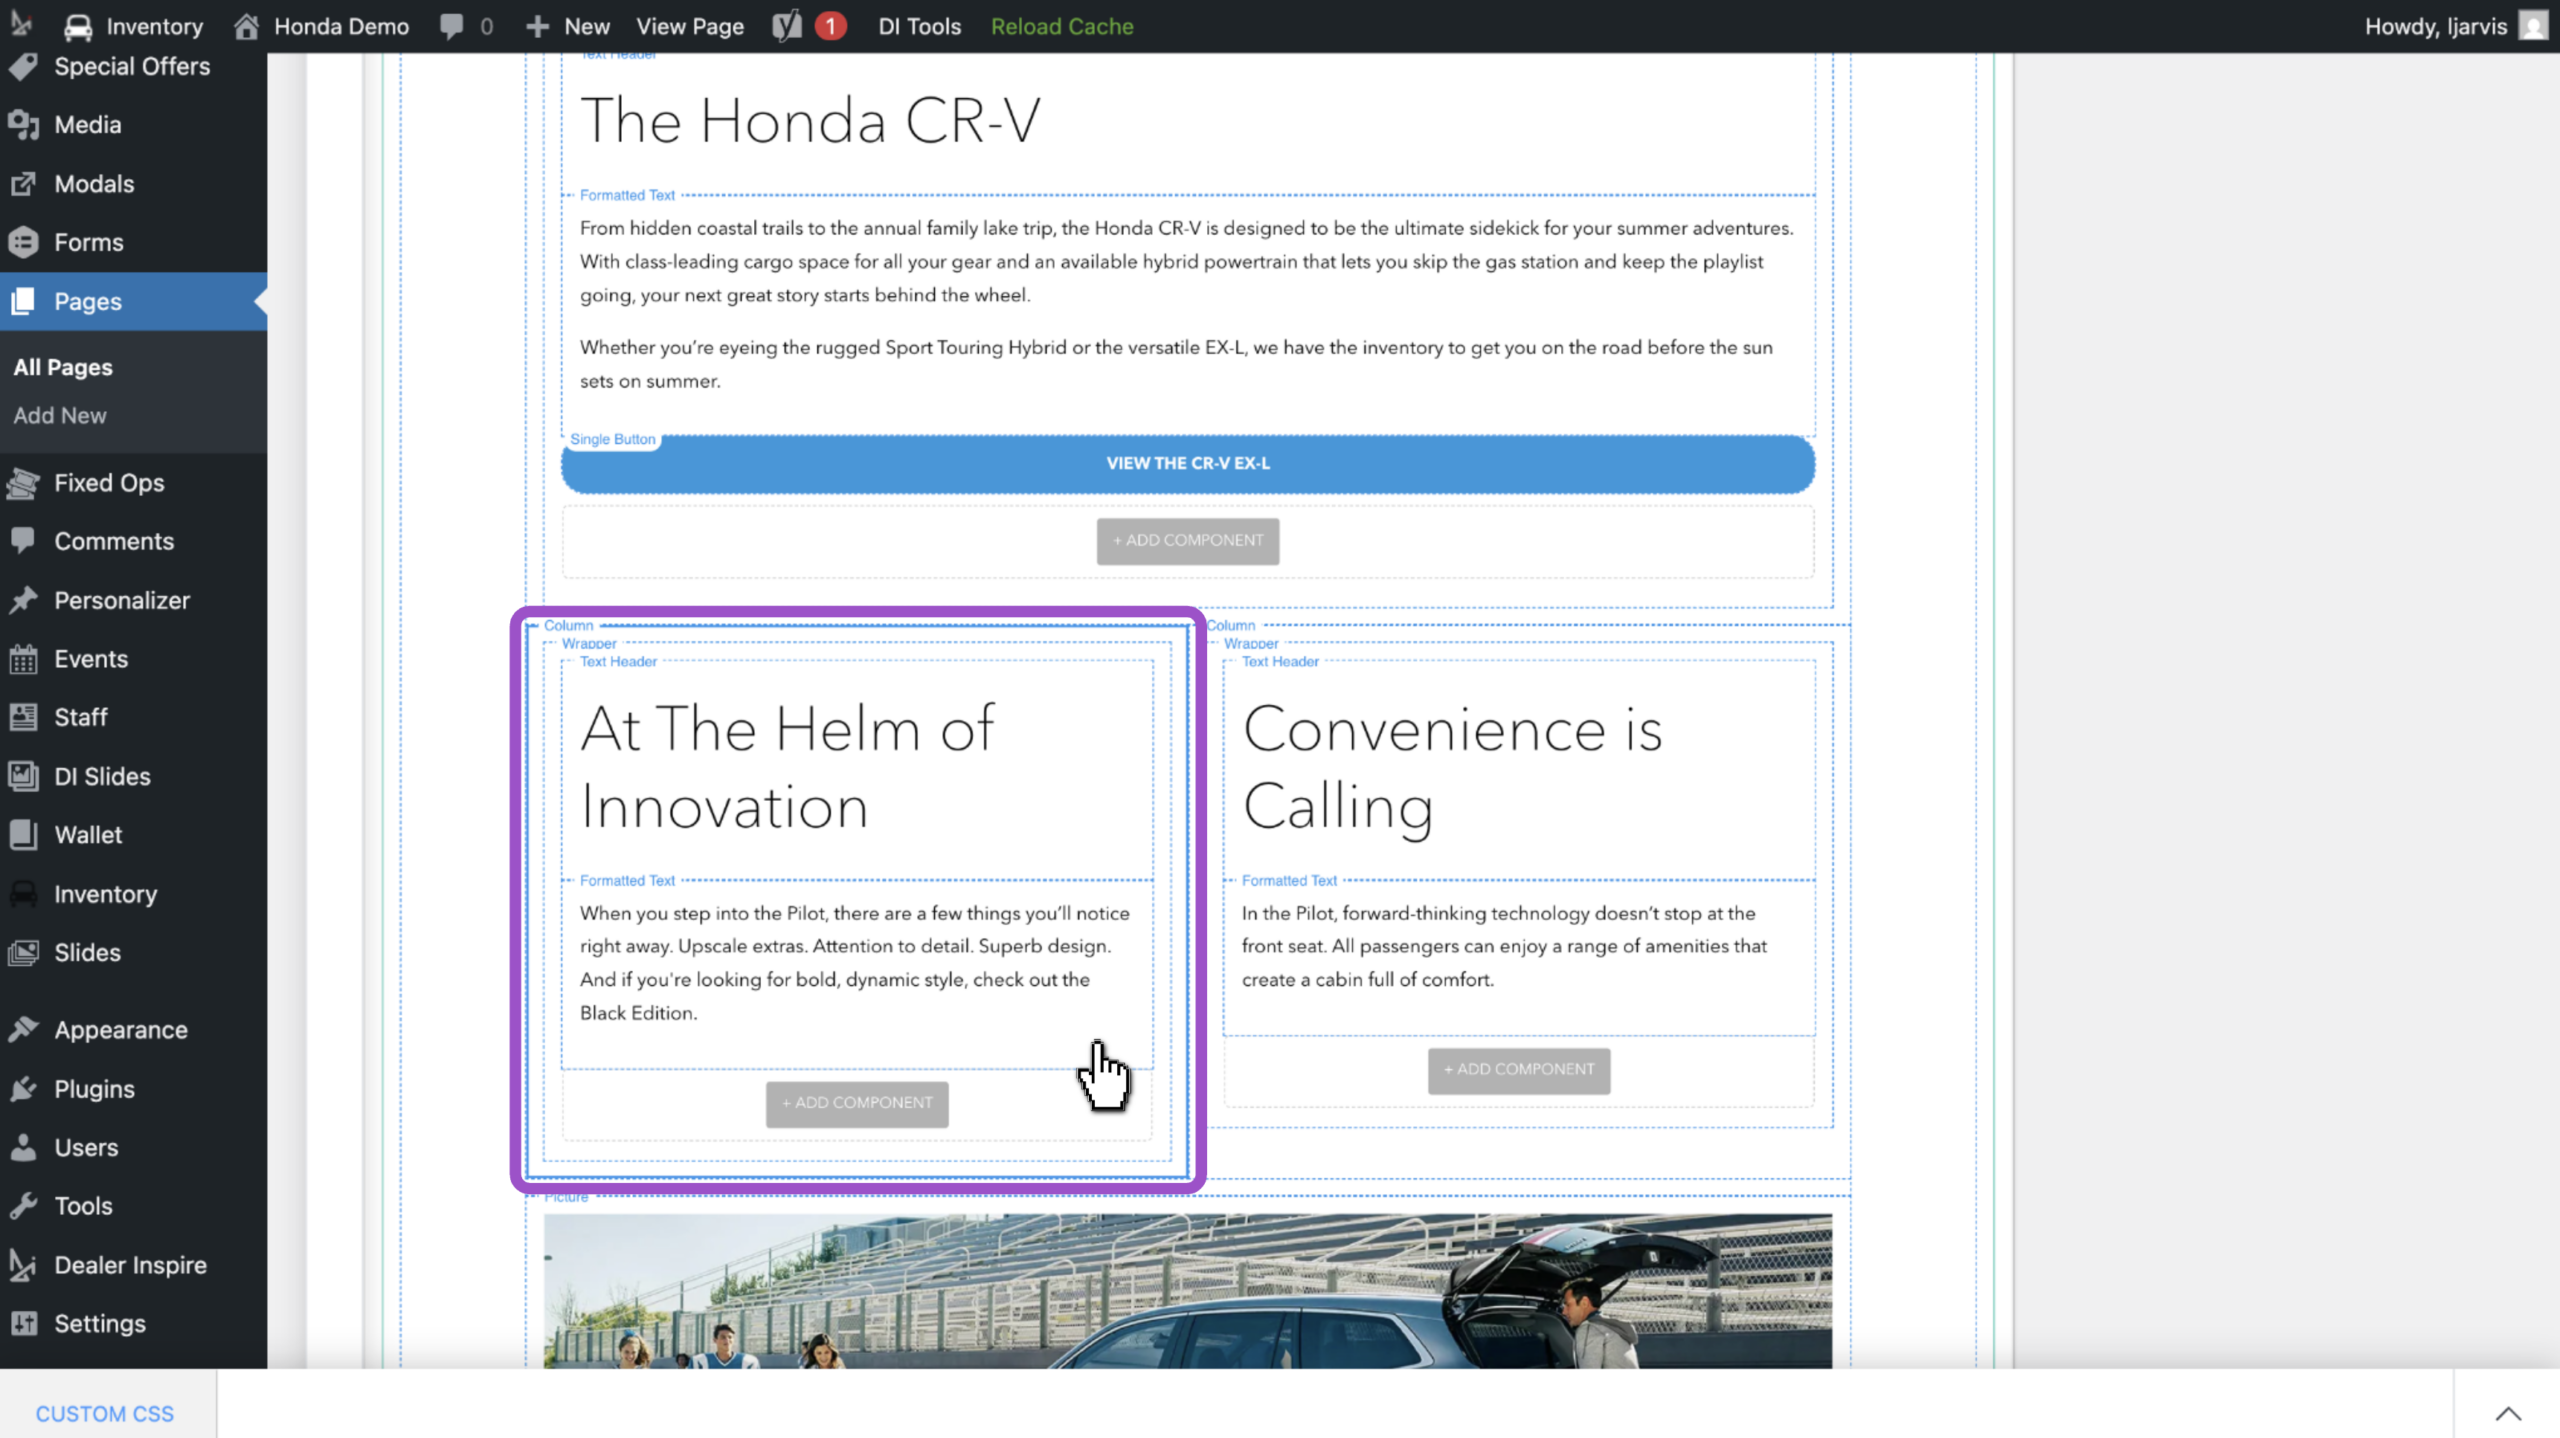
- Click Delete Column
- Click OK to confirm the action
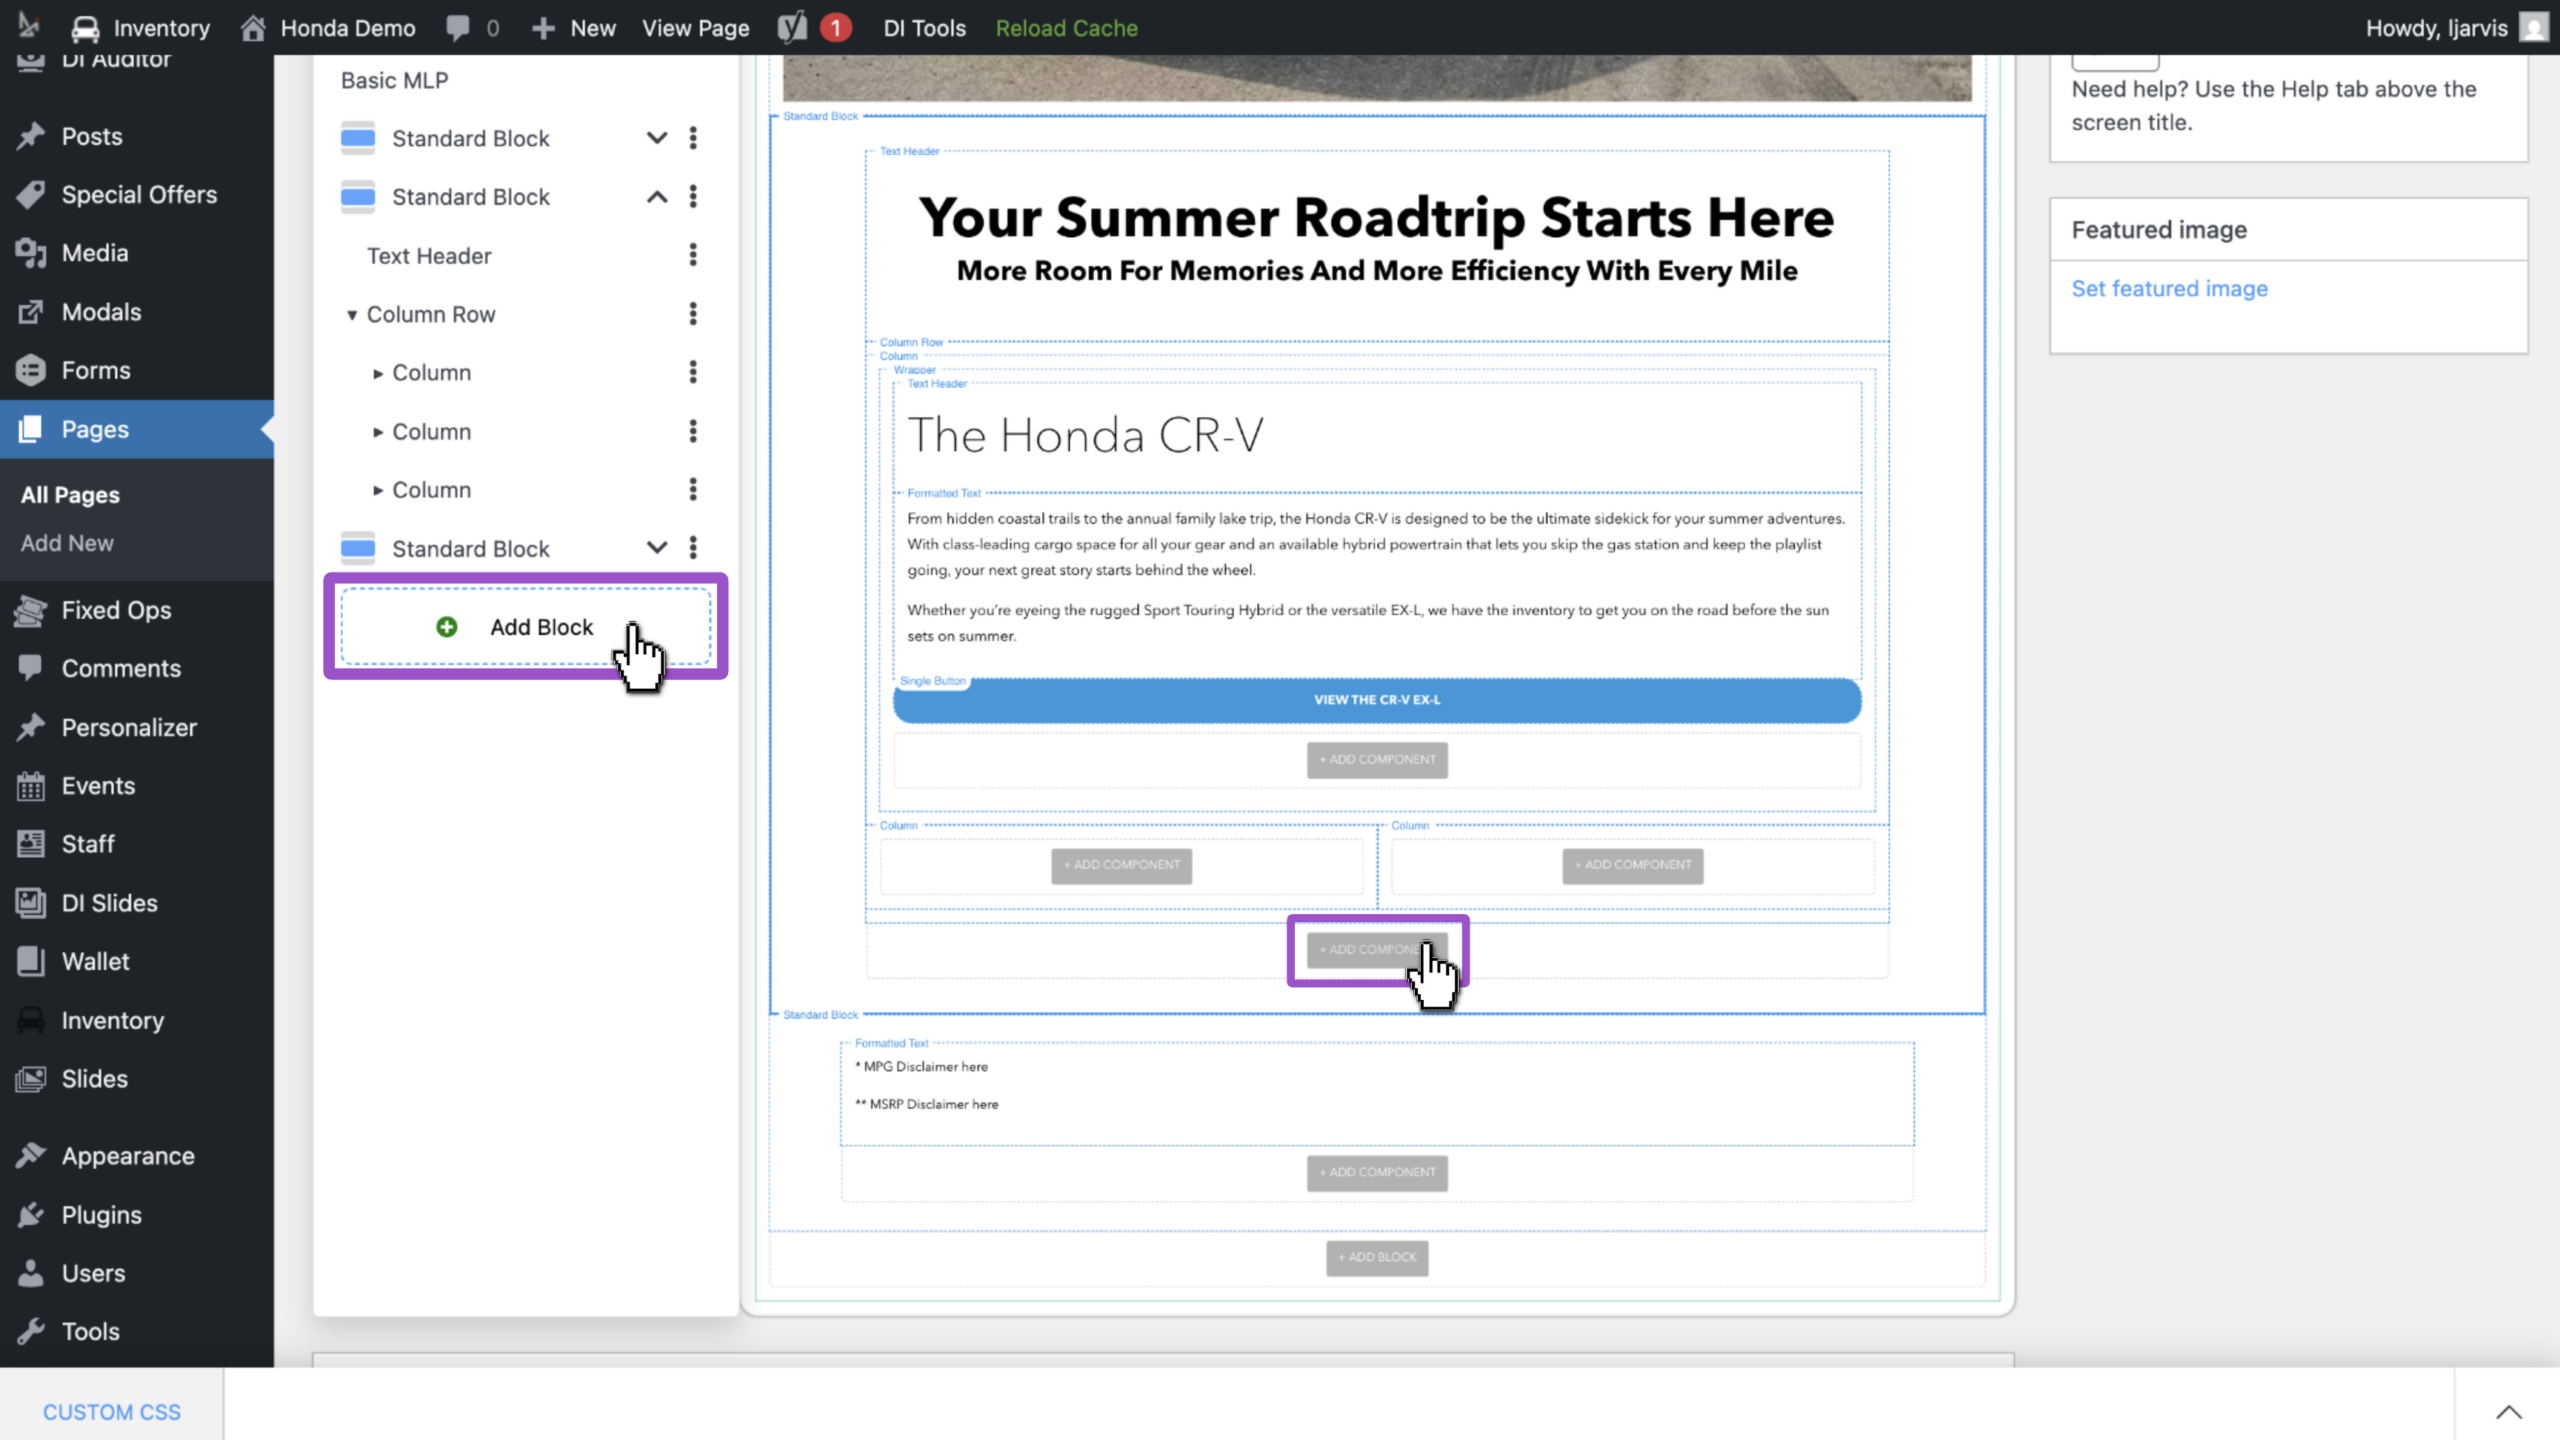
8 Add a new section
- Choose a new block
- This will appear below the fold of the highlight standard block box in the image
- Or, choose to add a component
- This will appear within the highlighted container
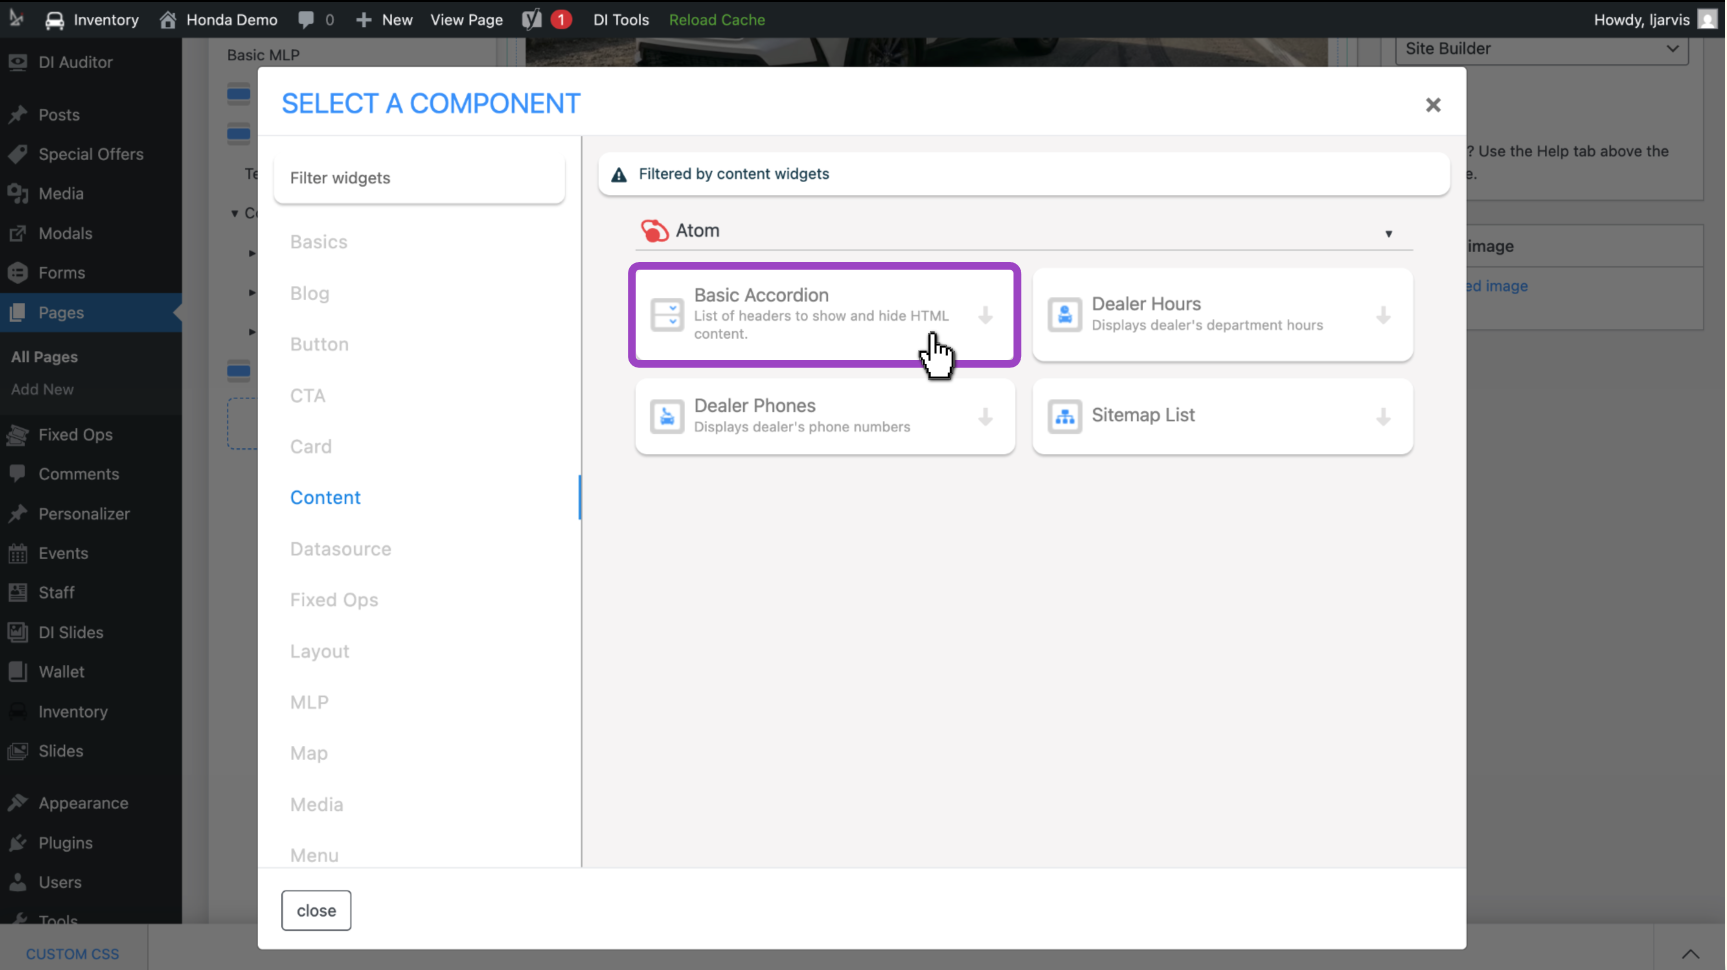
- Click or search through to find the right widget
- Click the widget to insert it into the page
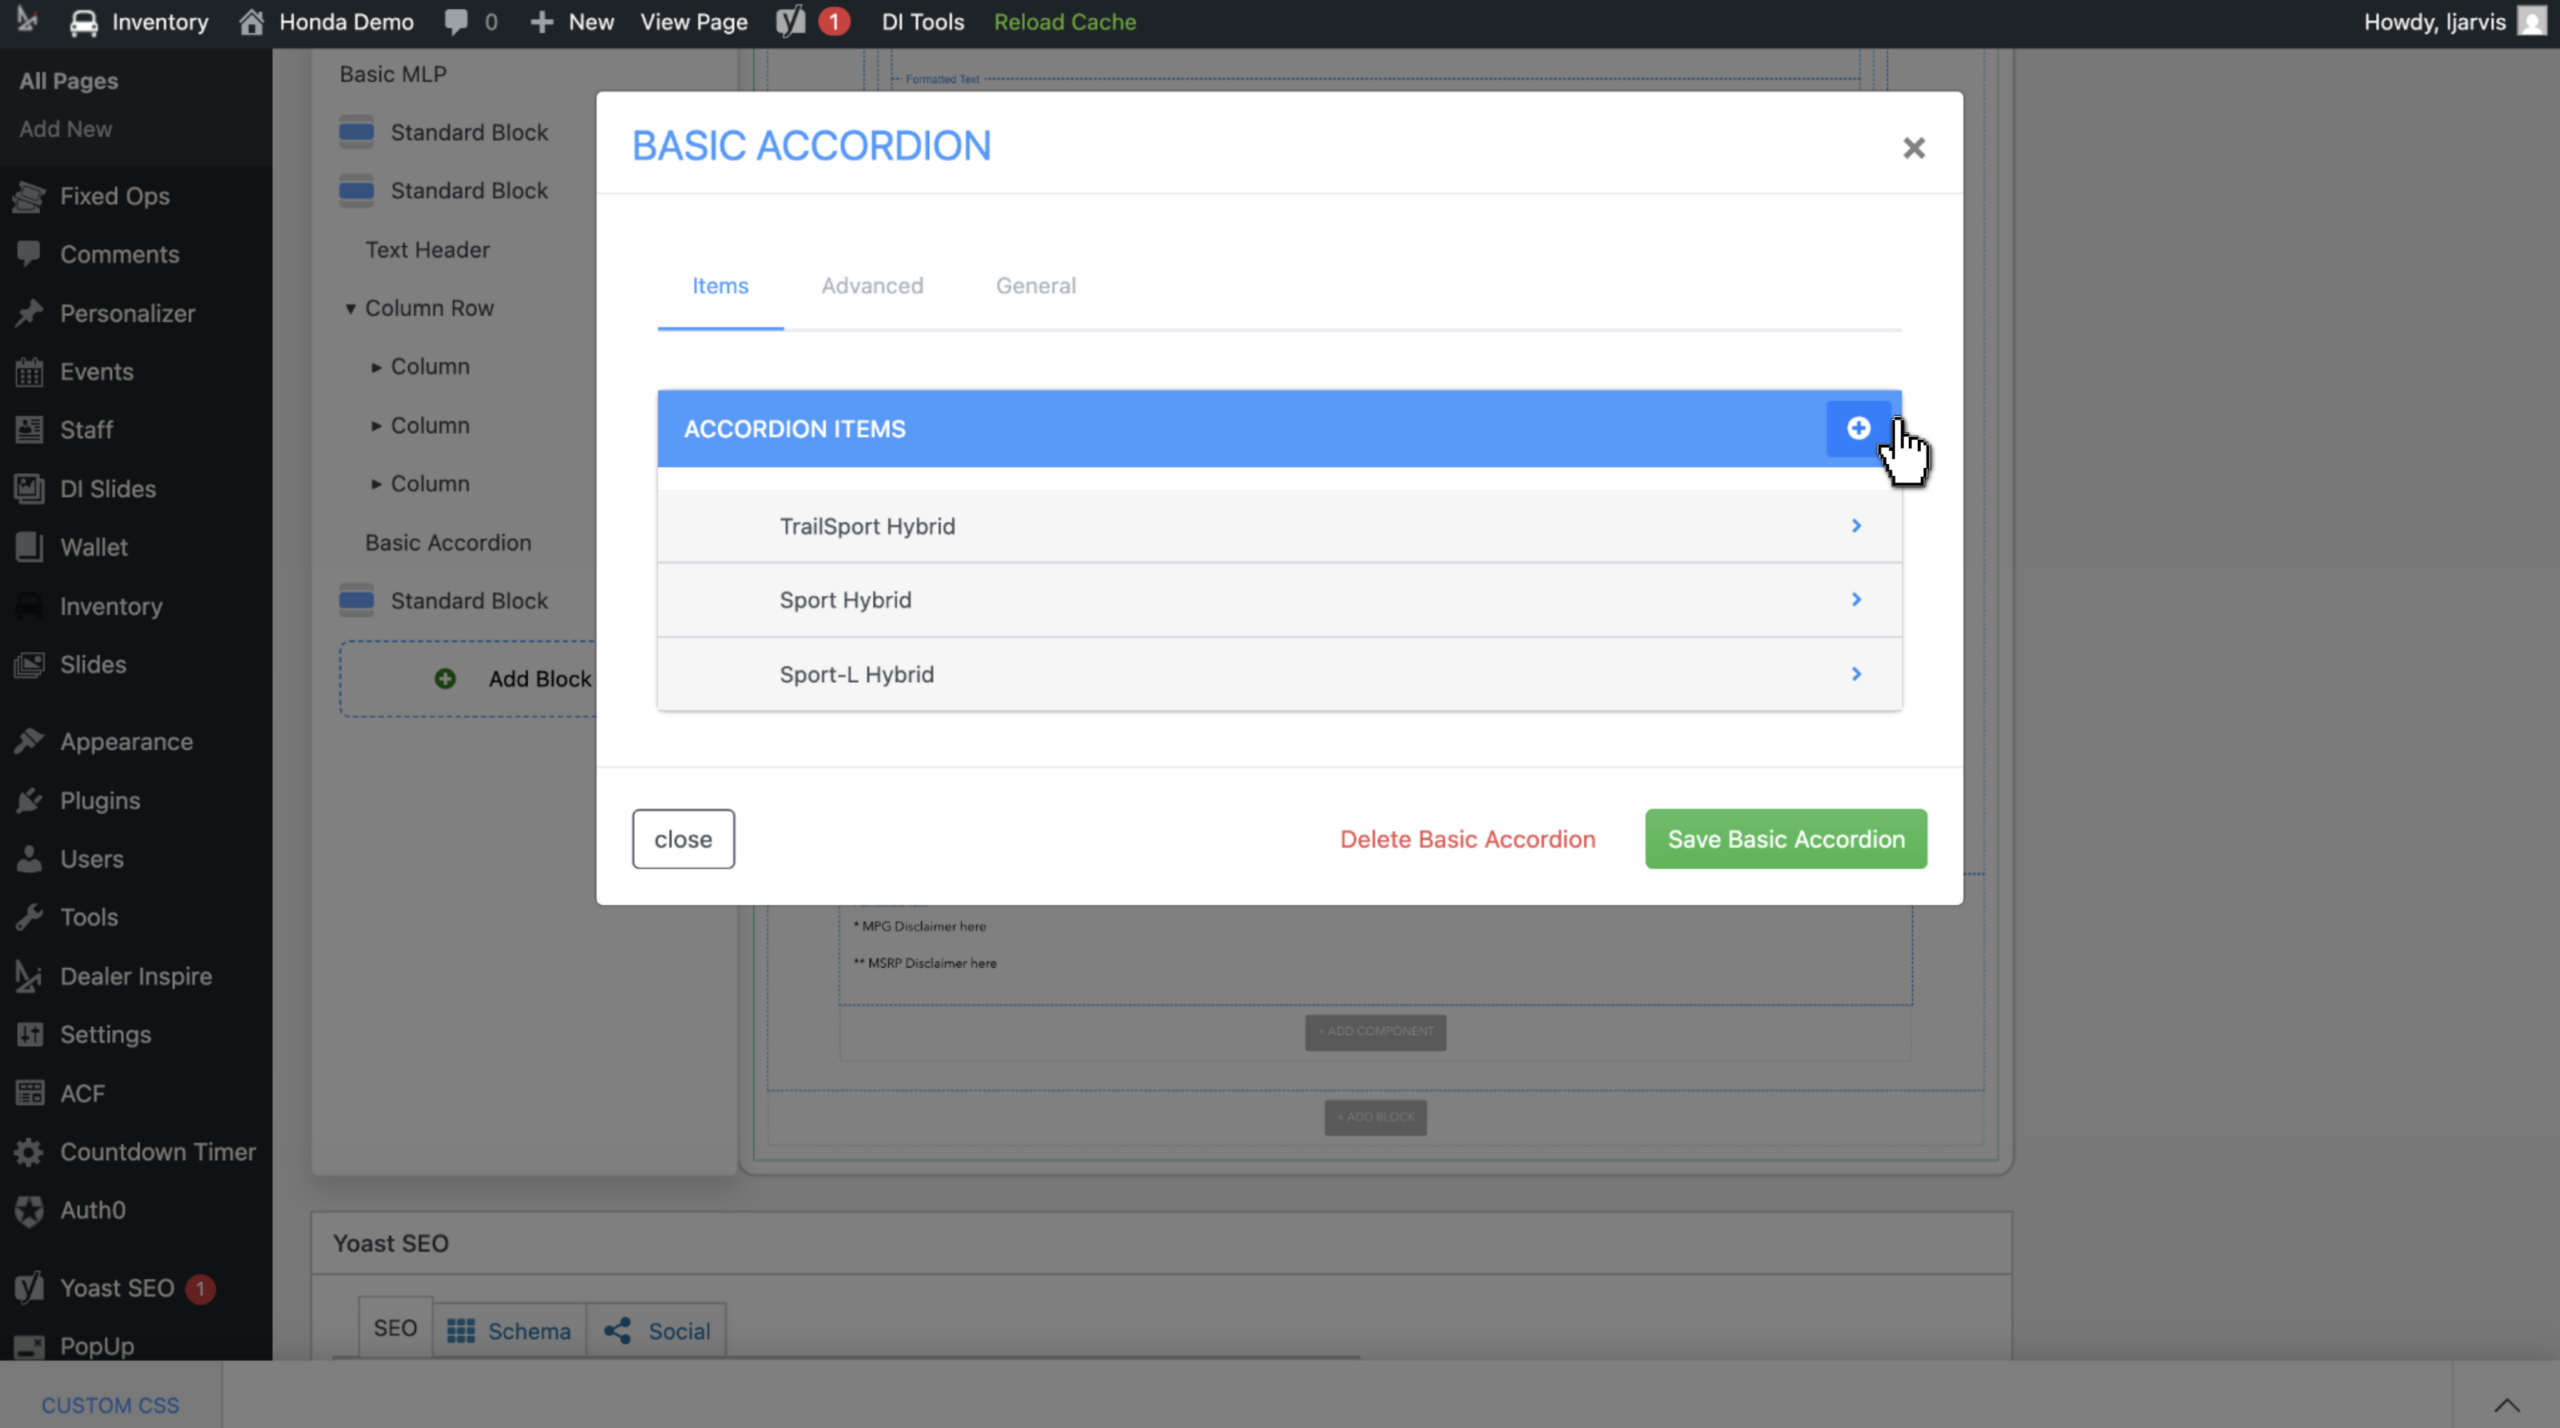
We’re using Basic Accordion to highlight the trim levels for the CR-V in this example.
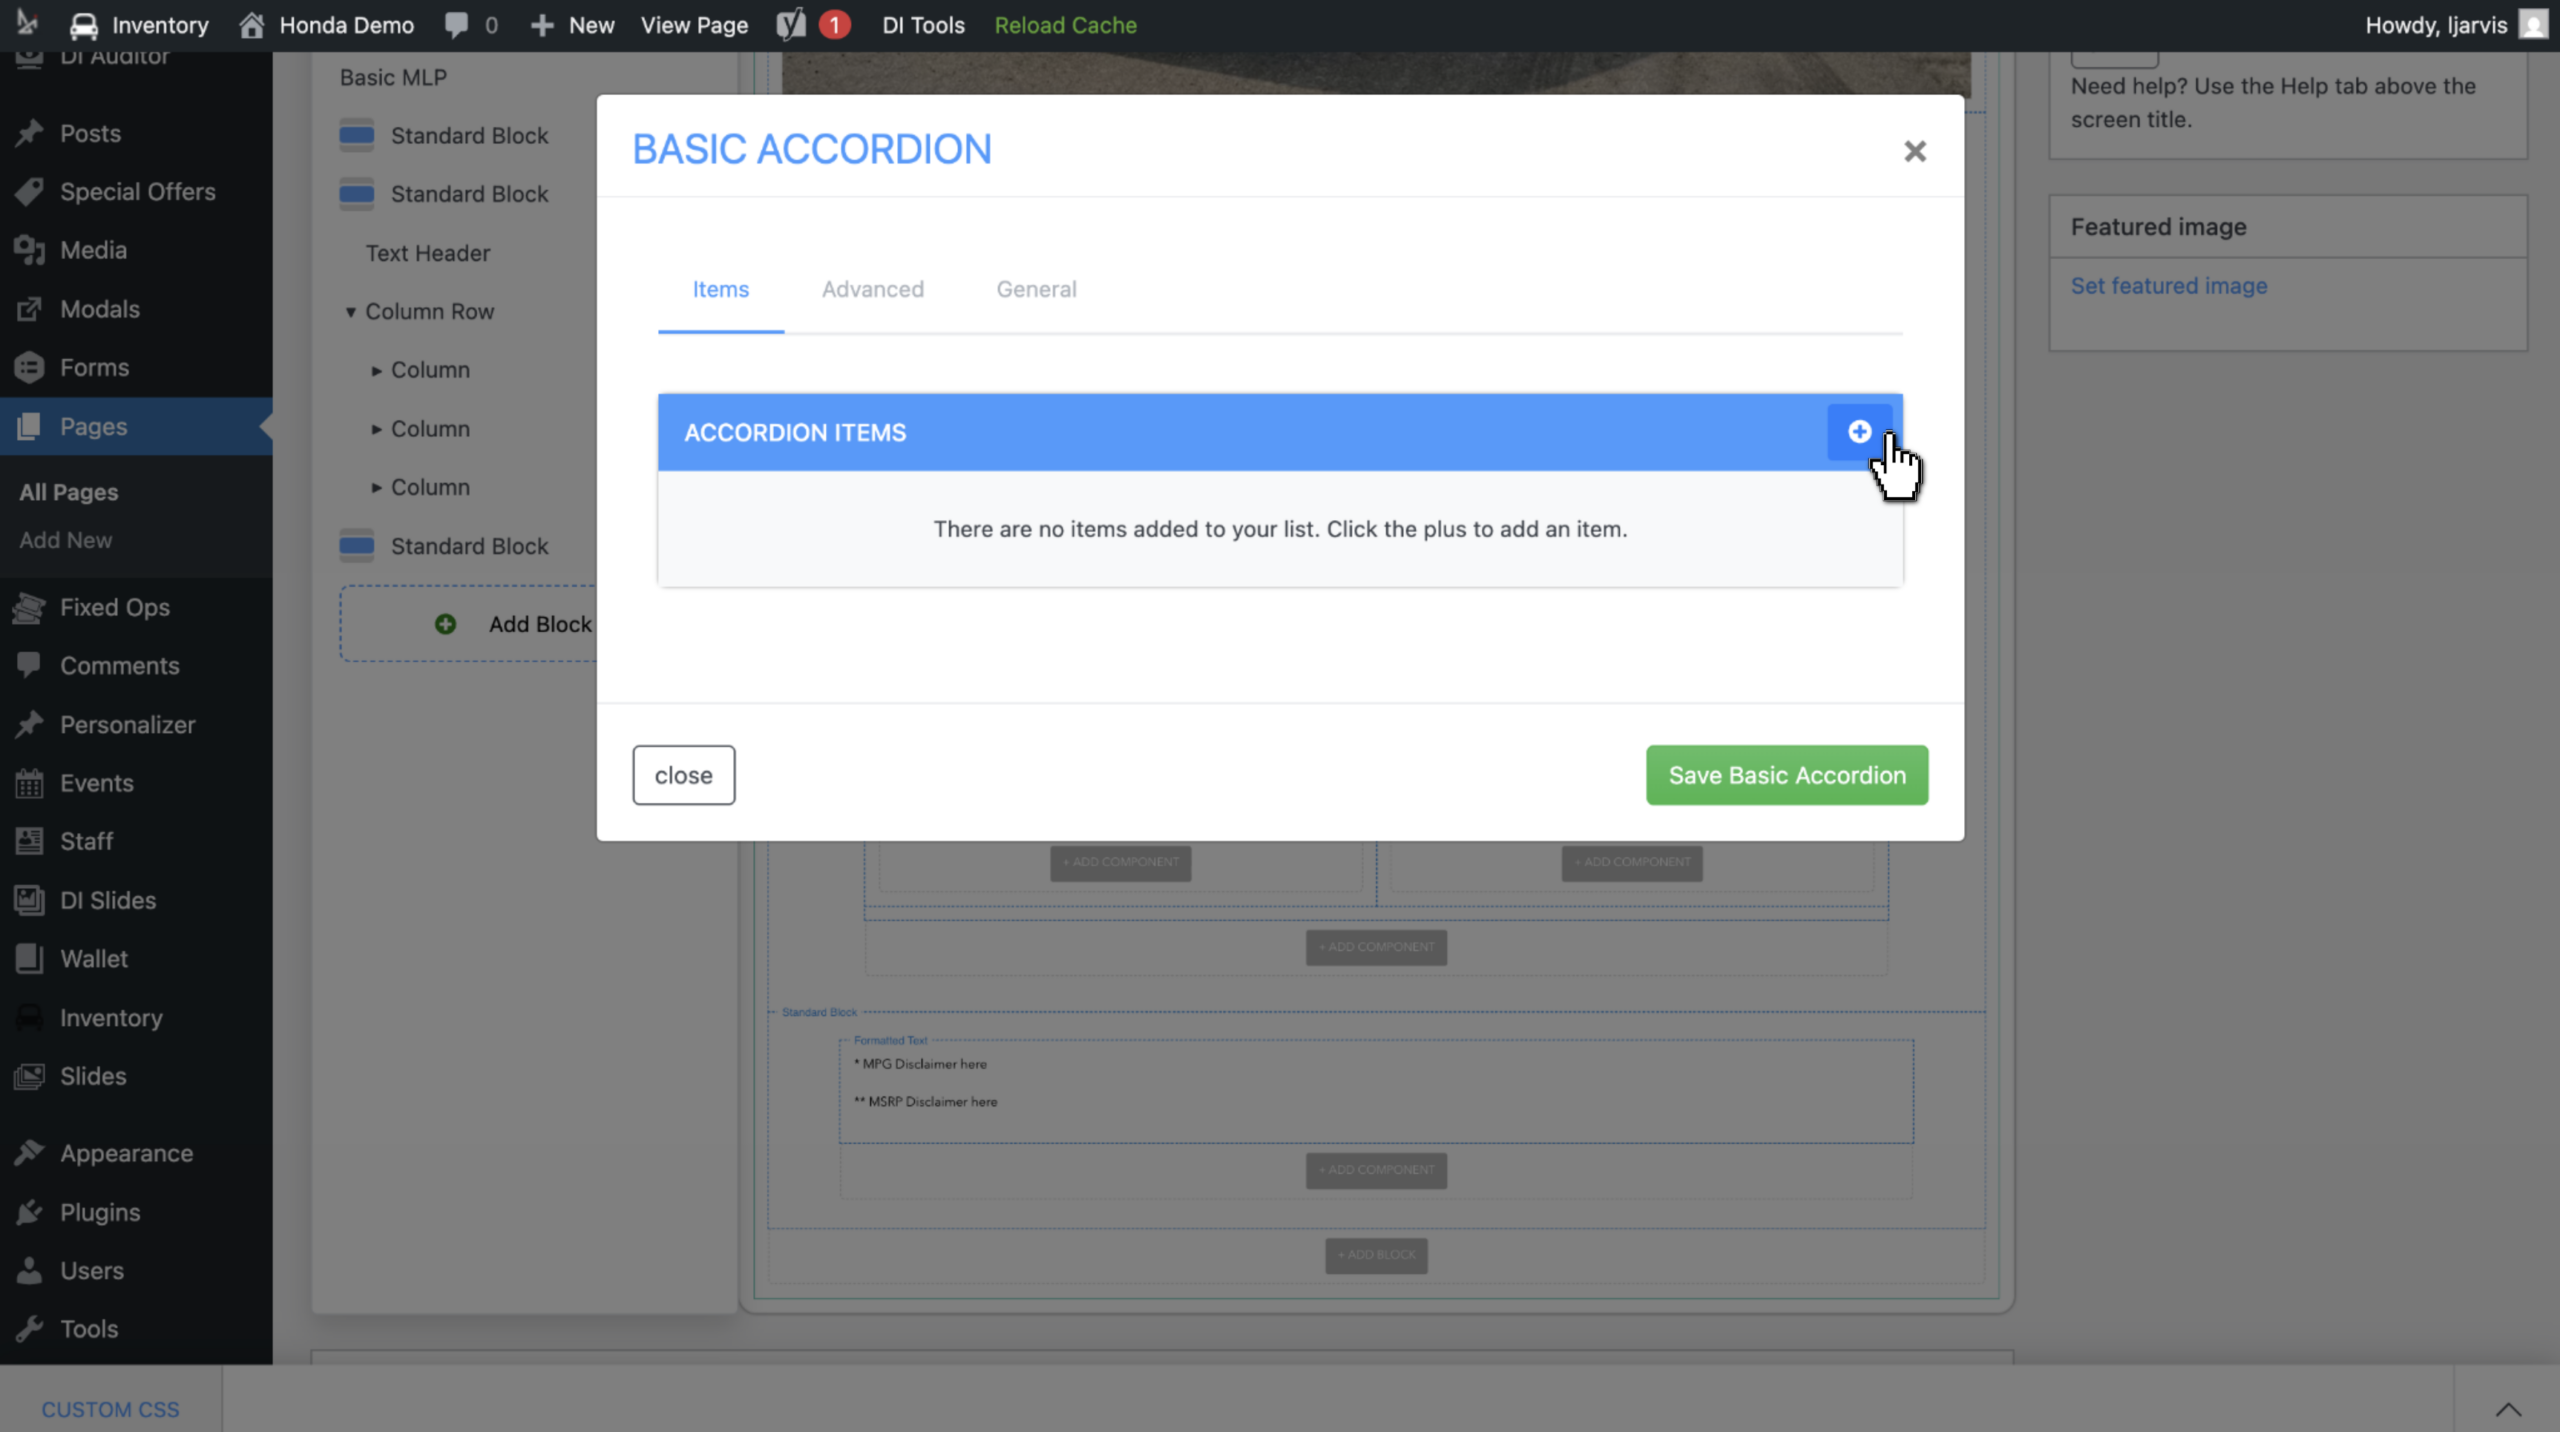
Follow the prompts in the pop-up window to build out your new component. For this example:
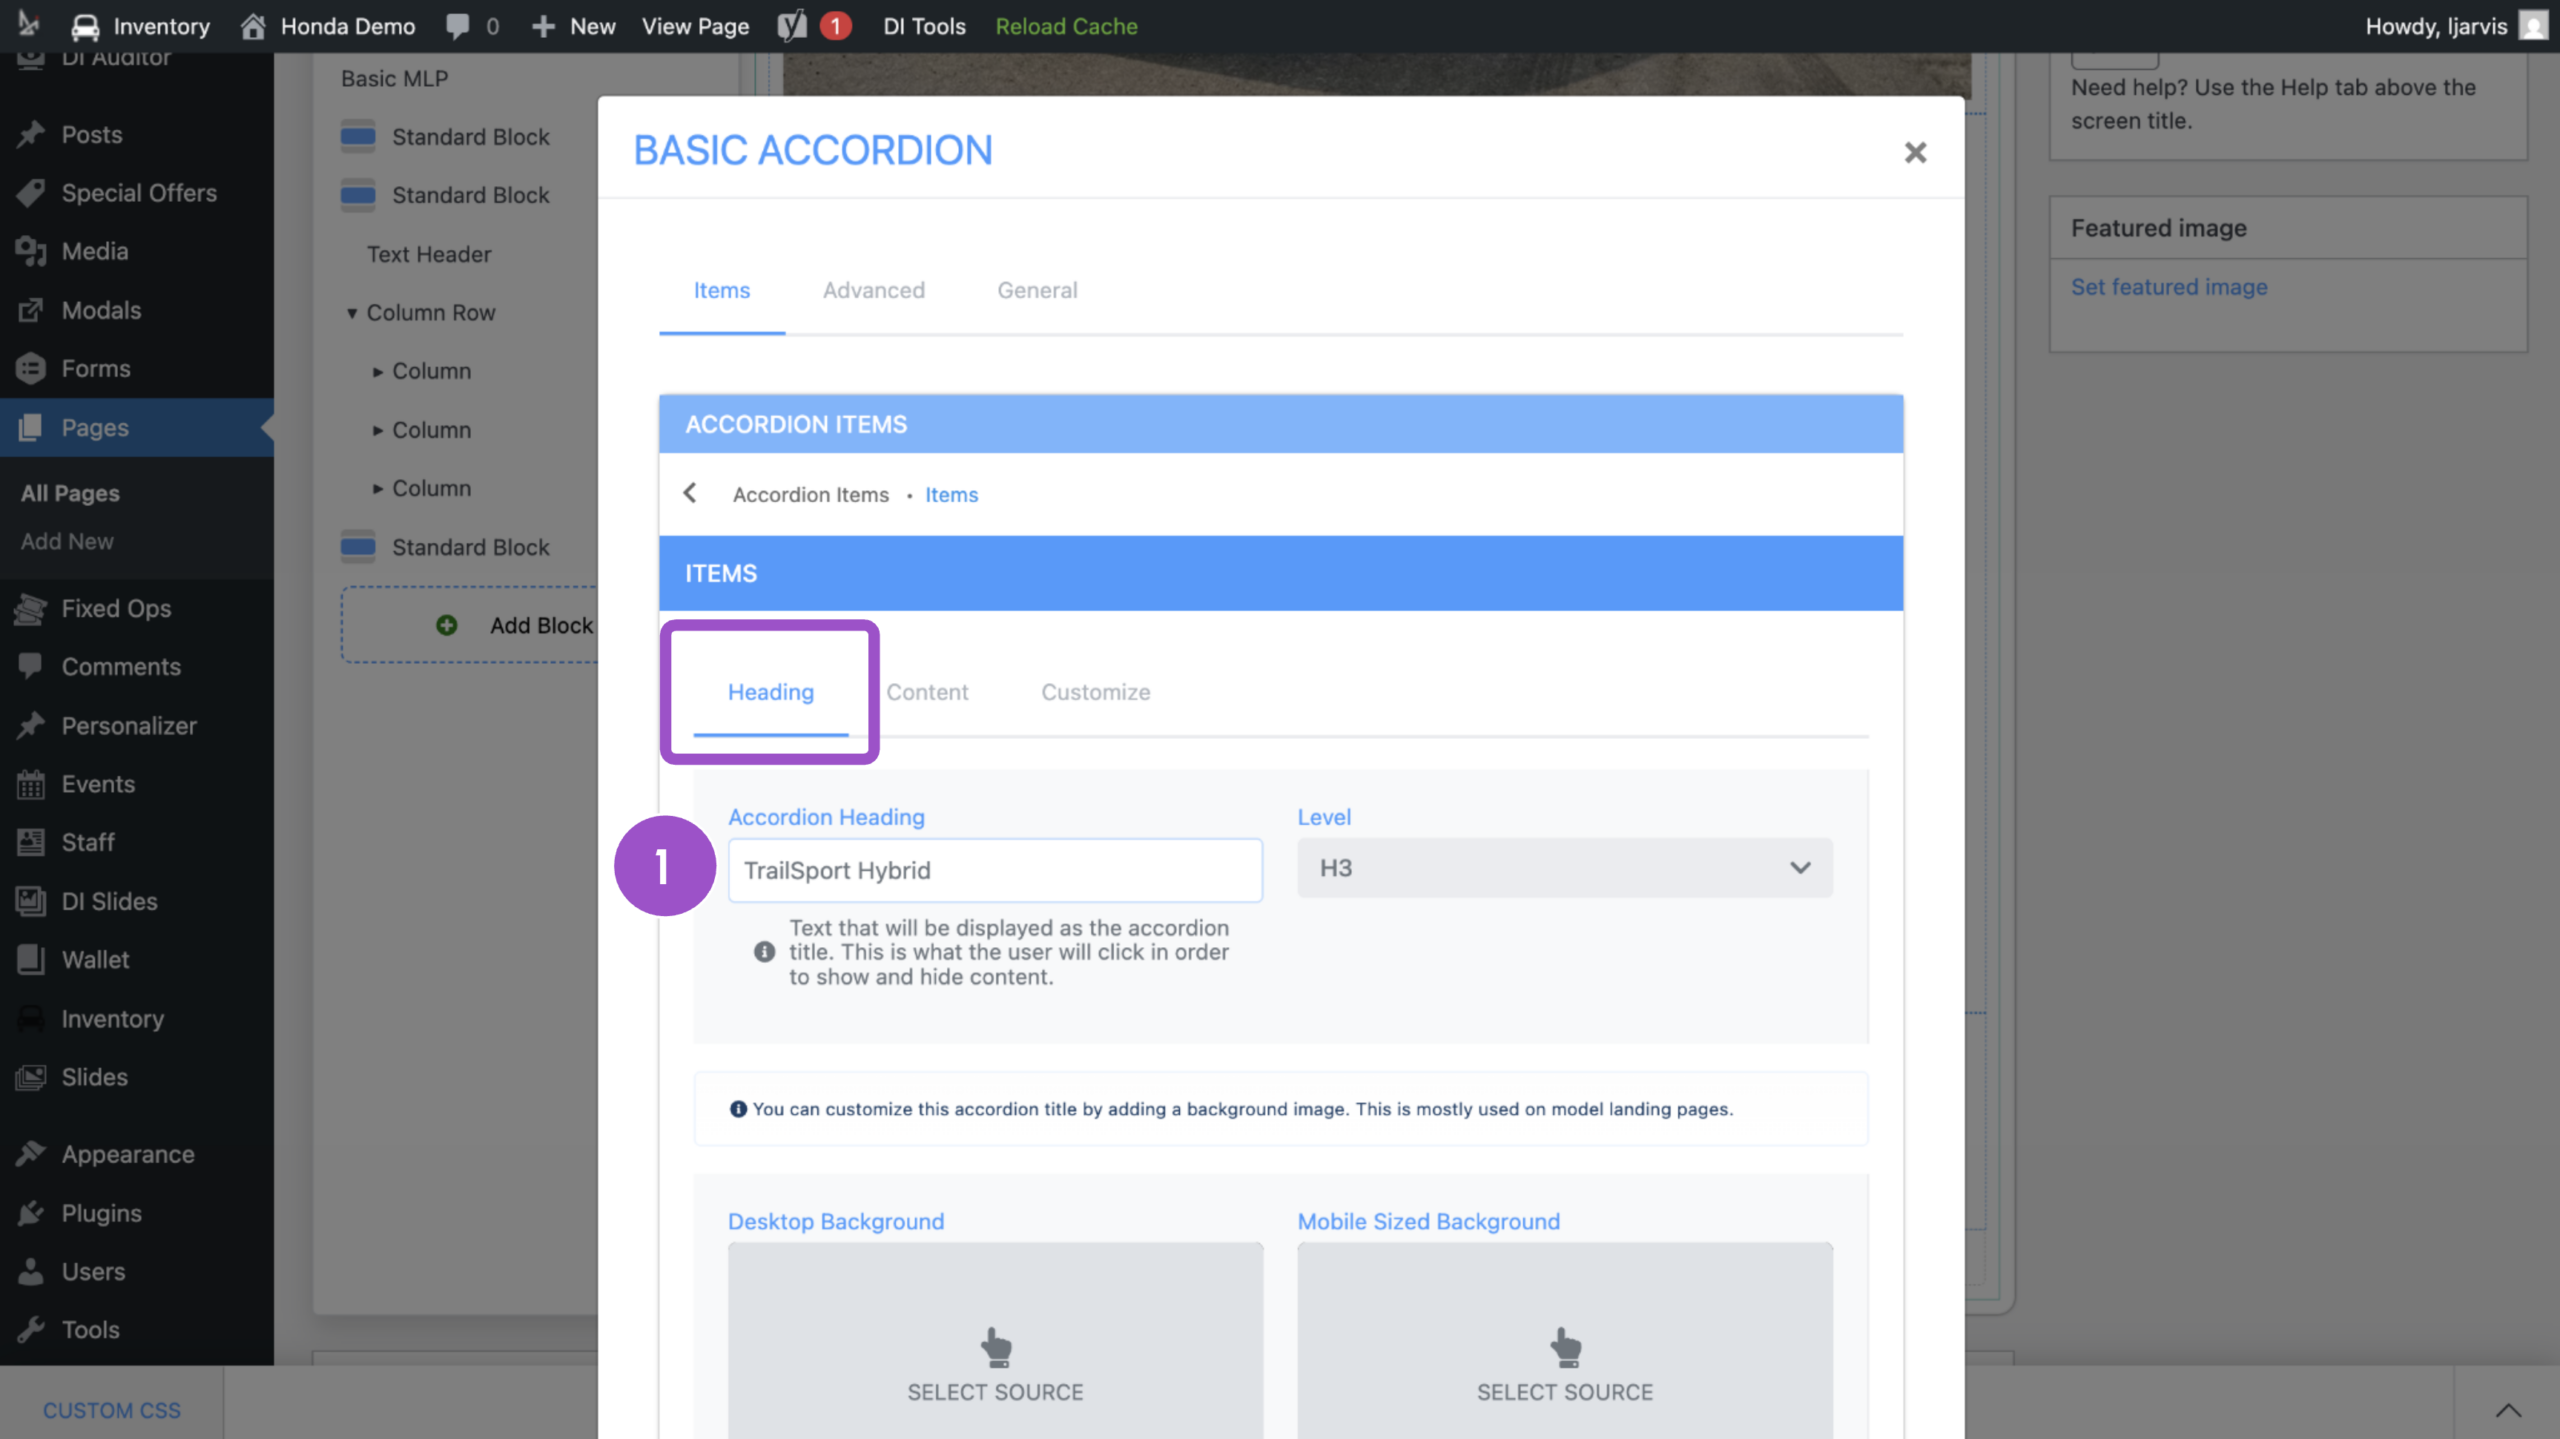
- Click the blue plus sign to add to the accordion (which is like a click-to-expand list)
- Add a heading
Tip: you can add a background image for each list item, or customize by color (see step three).
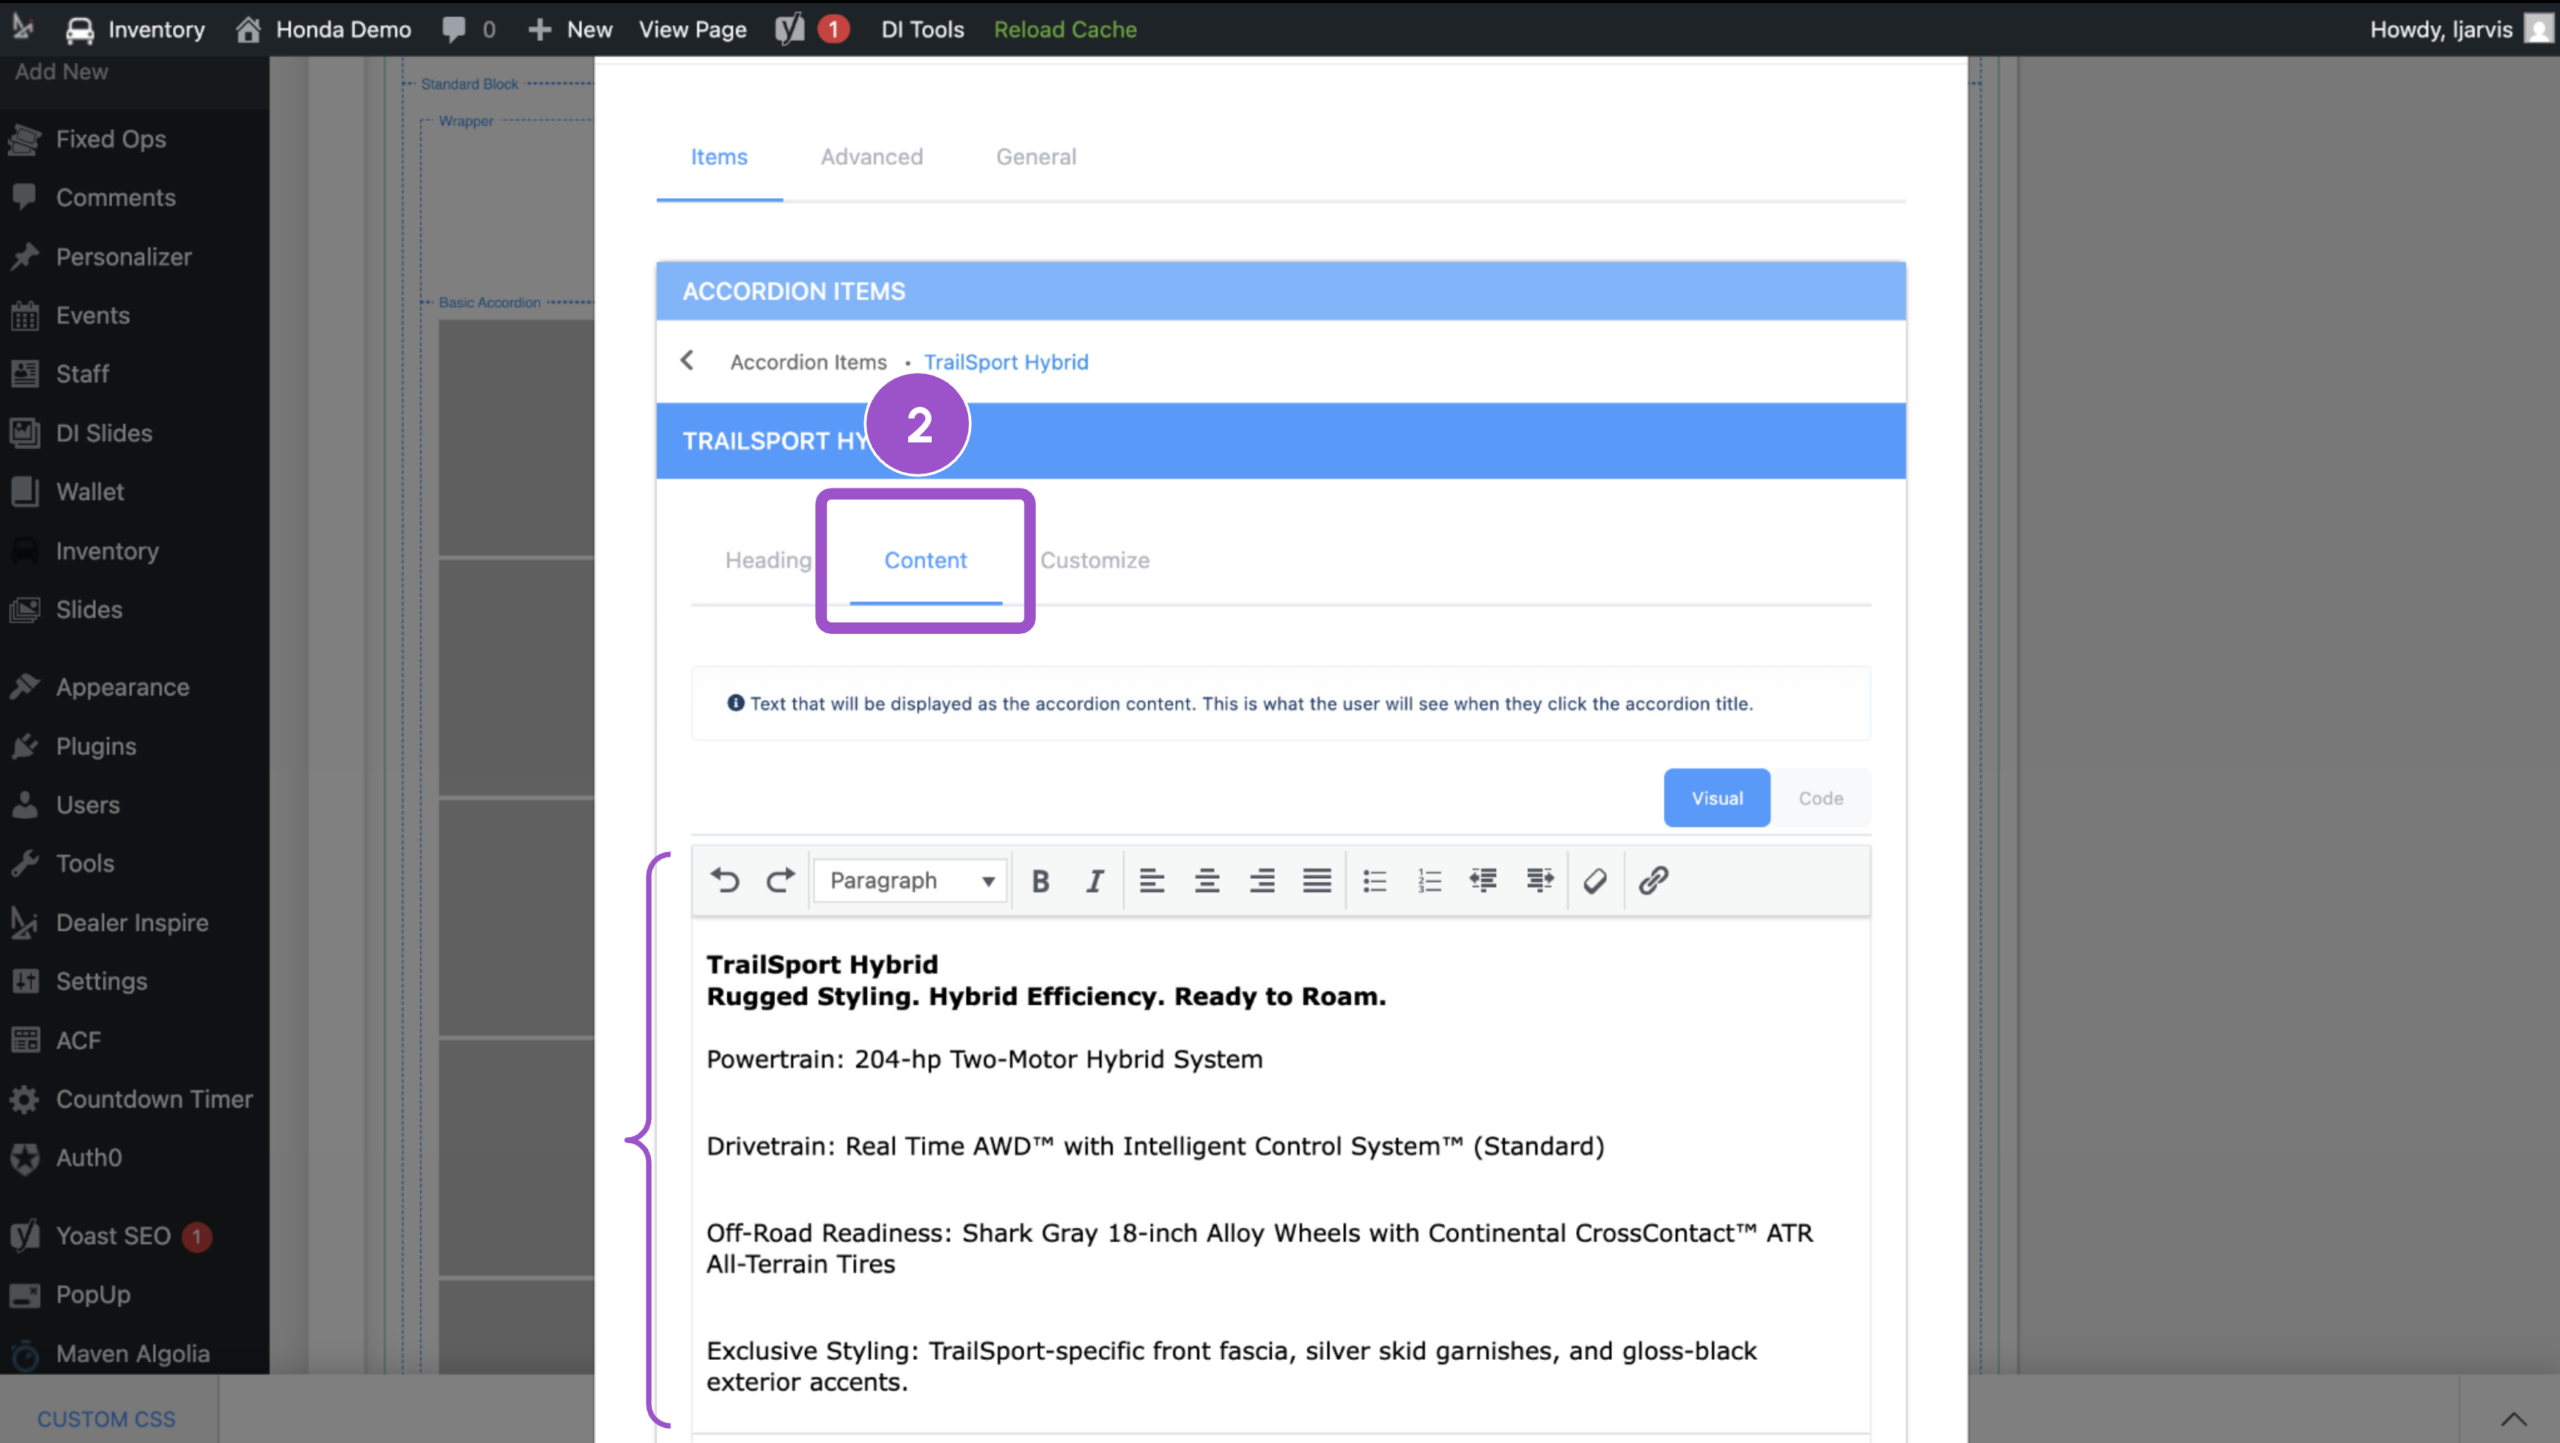
- Click the content tab
- Add details about the list item in the text box
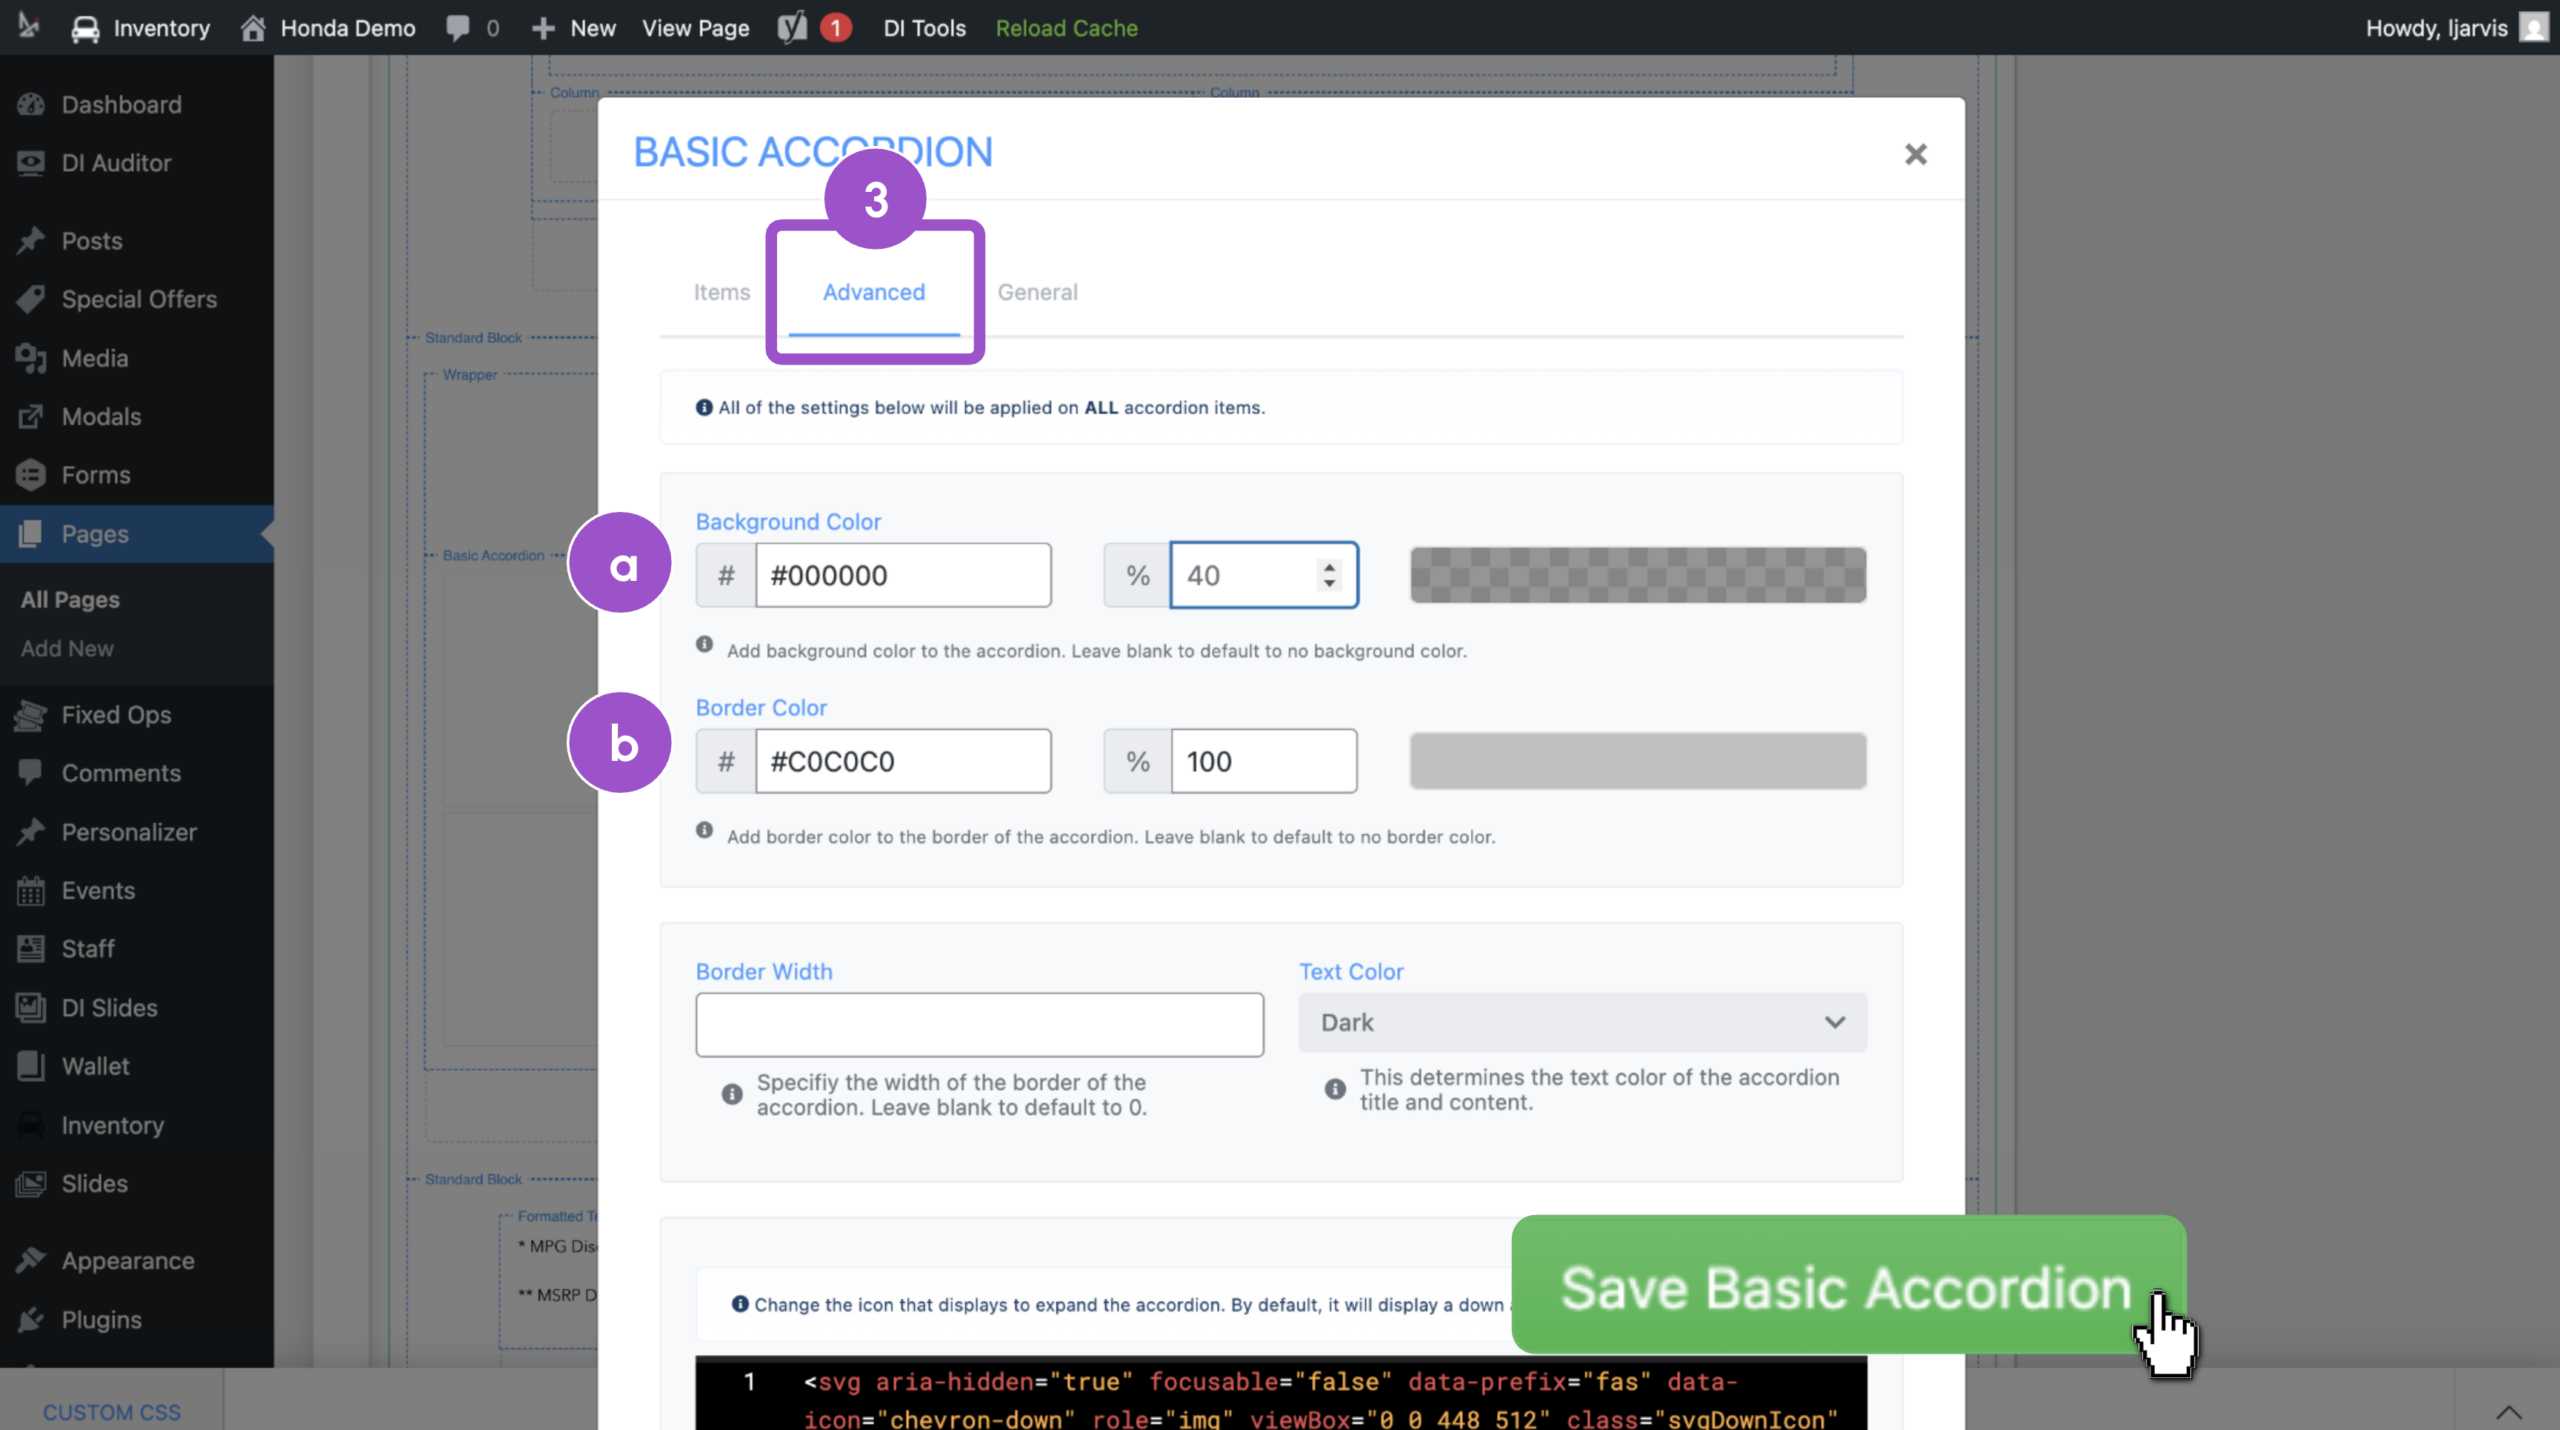
- Click the Advanced tab at the top (optional)
- Update the background color and opacity
- Add a border color to each accordion item
- Click Save Basic Accordion at the bottom of the window
Click into the component to continue adding to the accordion list.
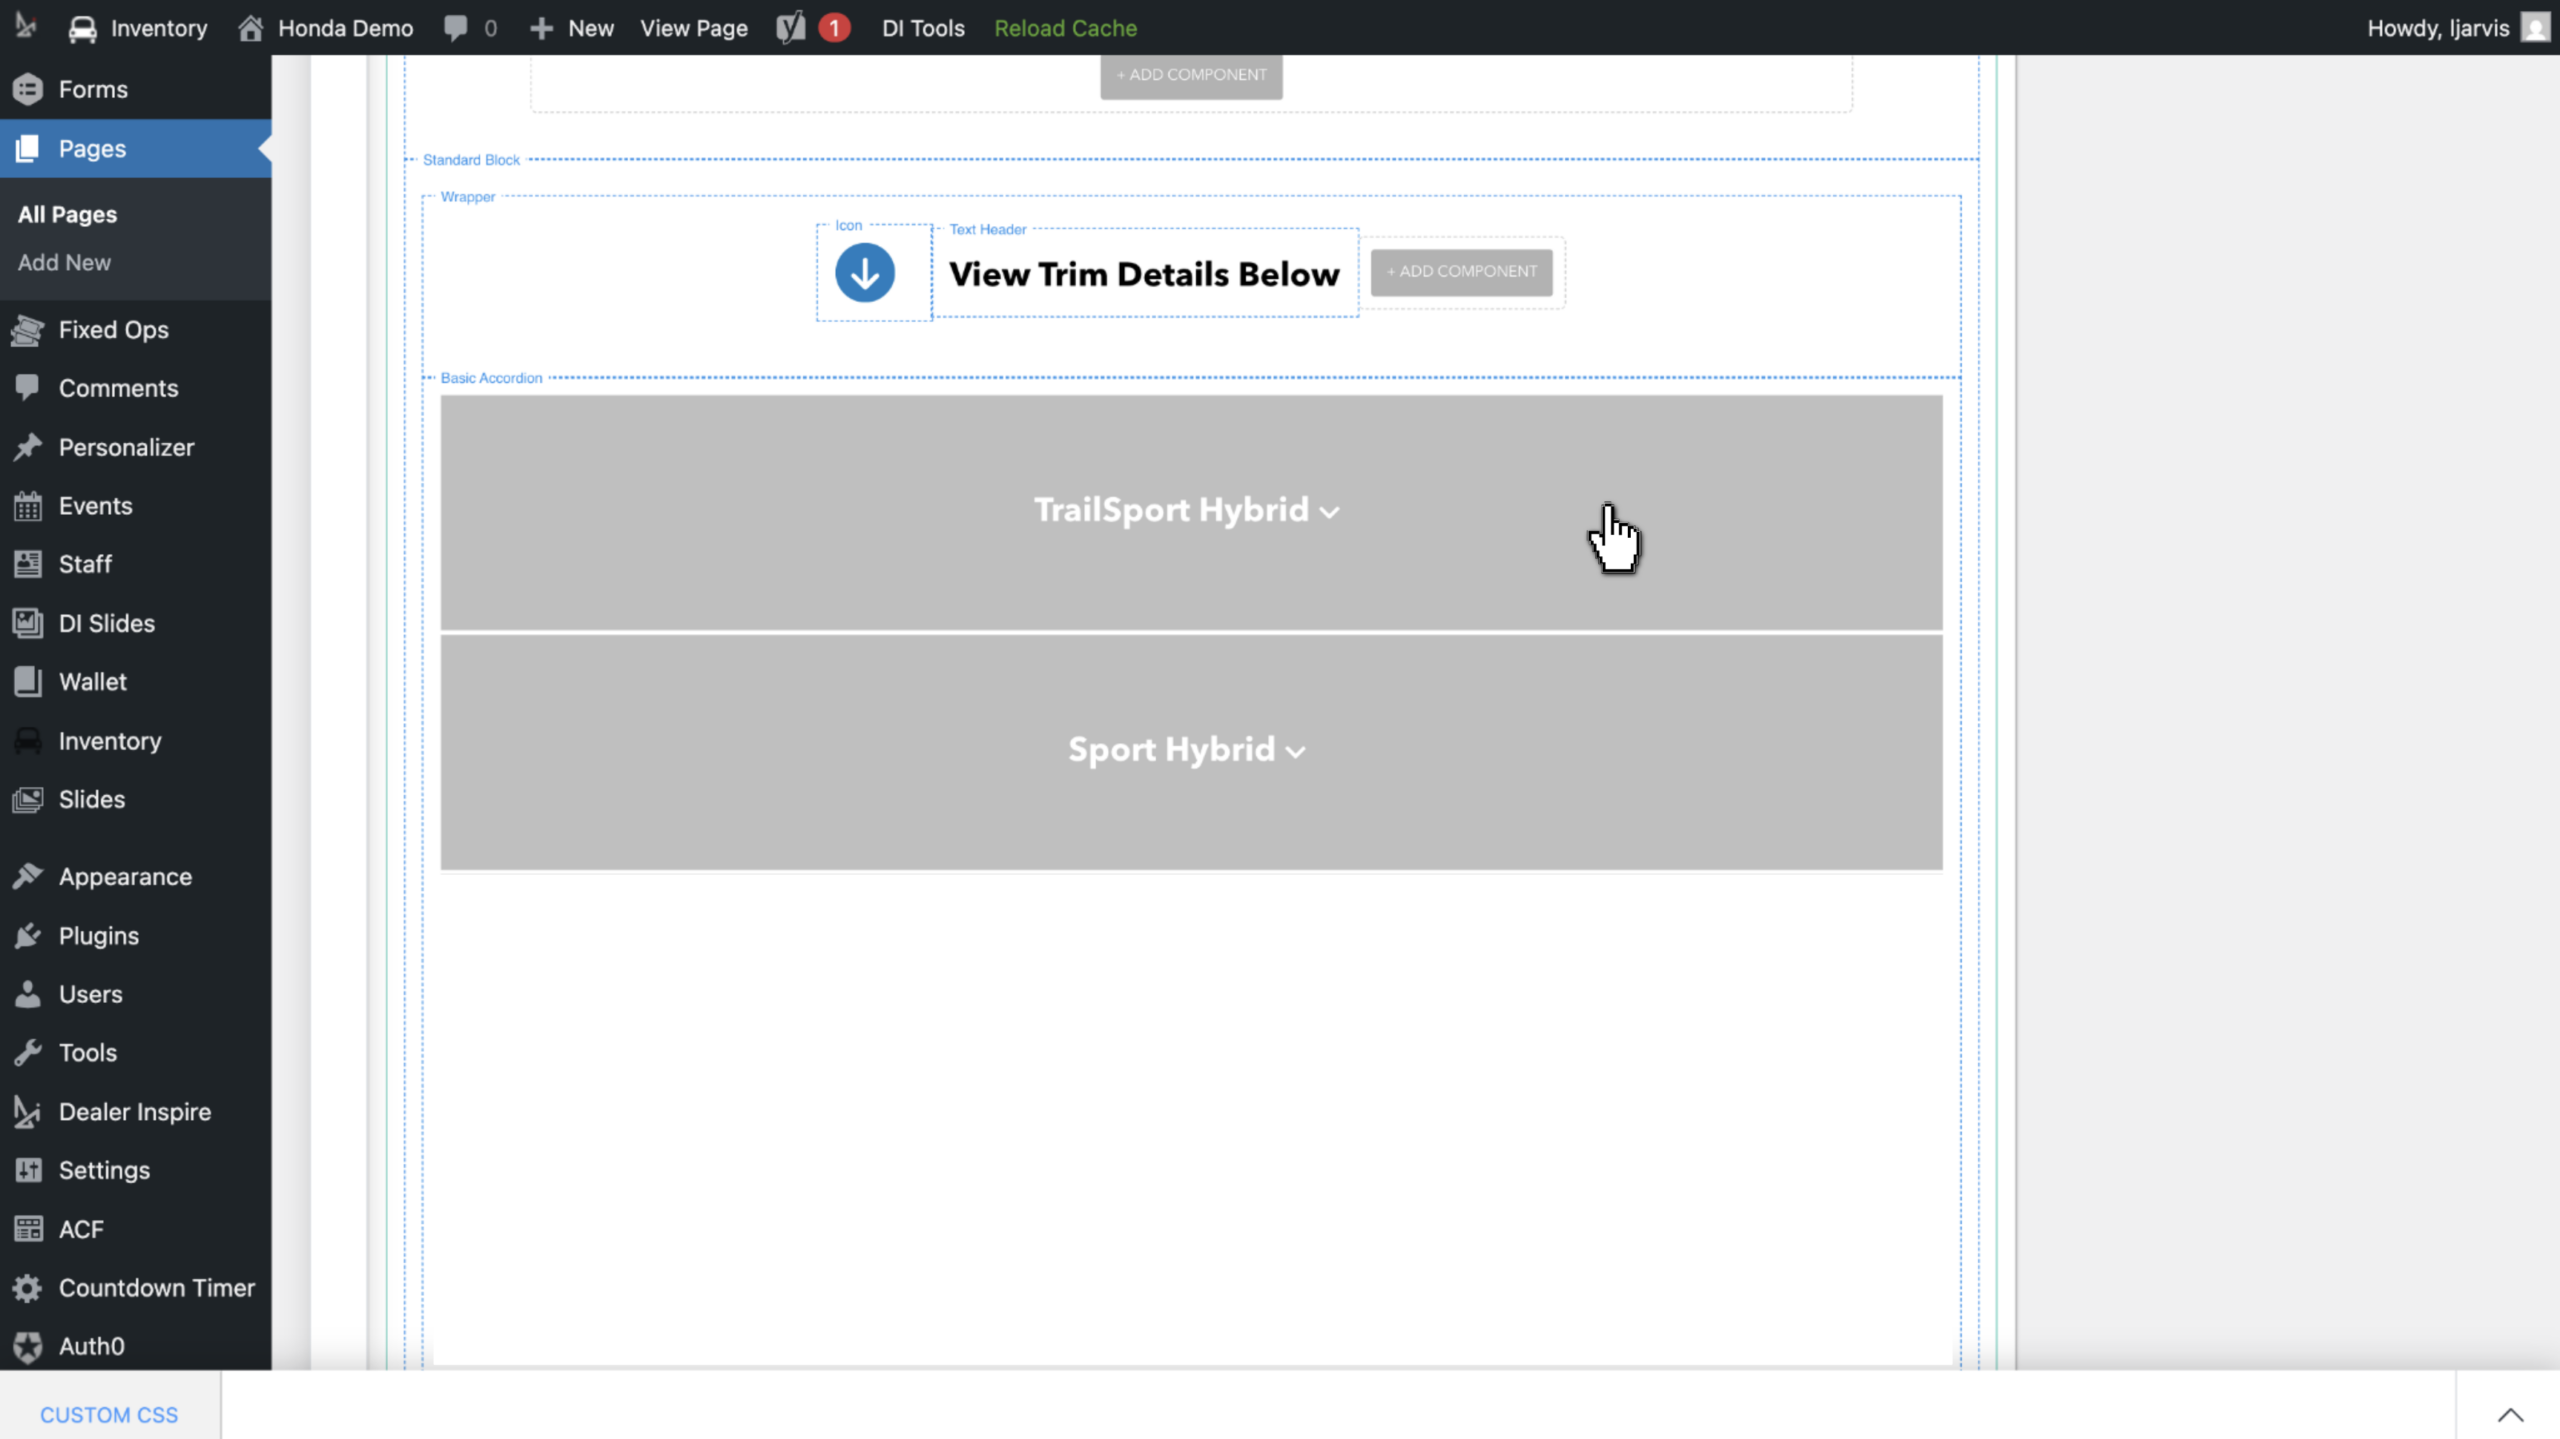
Repeat as needed.
9 Continue editing the page
Next from the template is a new block with a disclaimer component. Let’s add our disclaimer.
- Click the component to edit
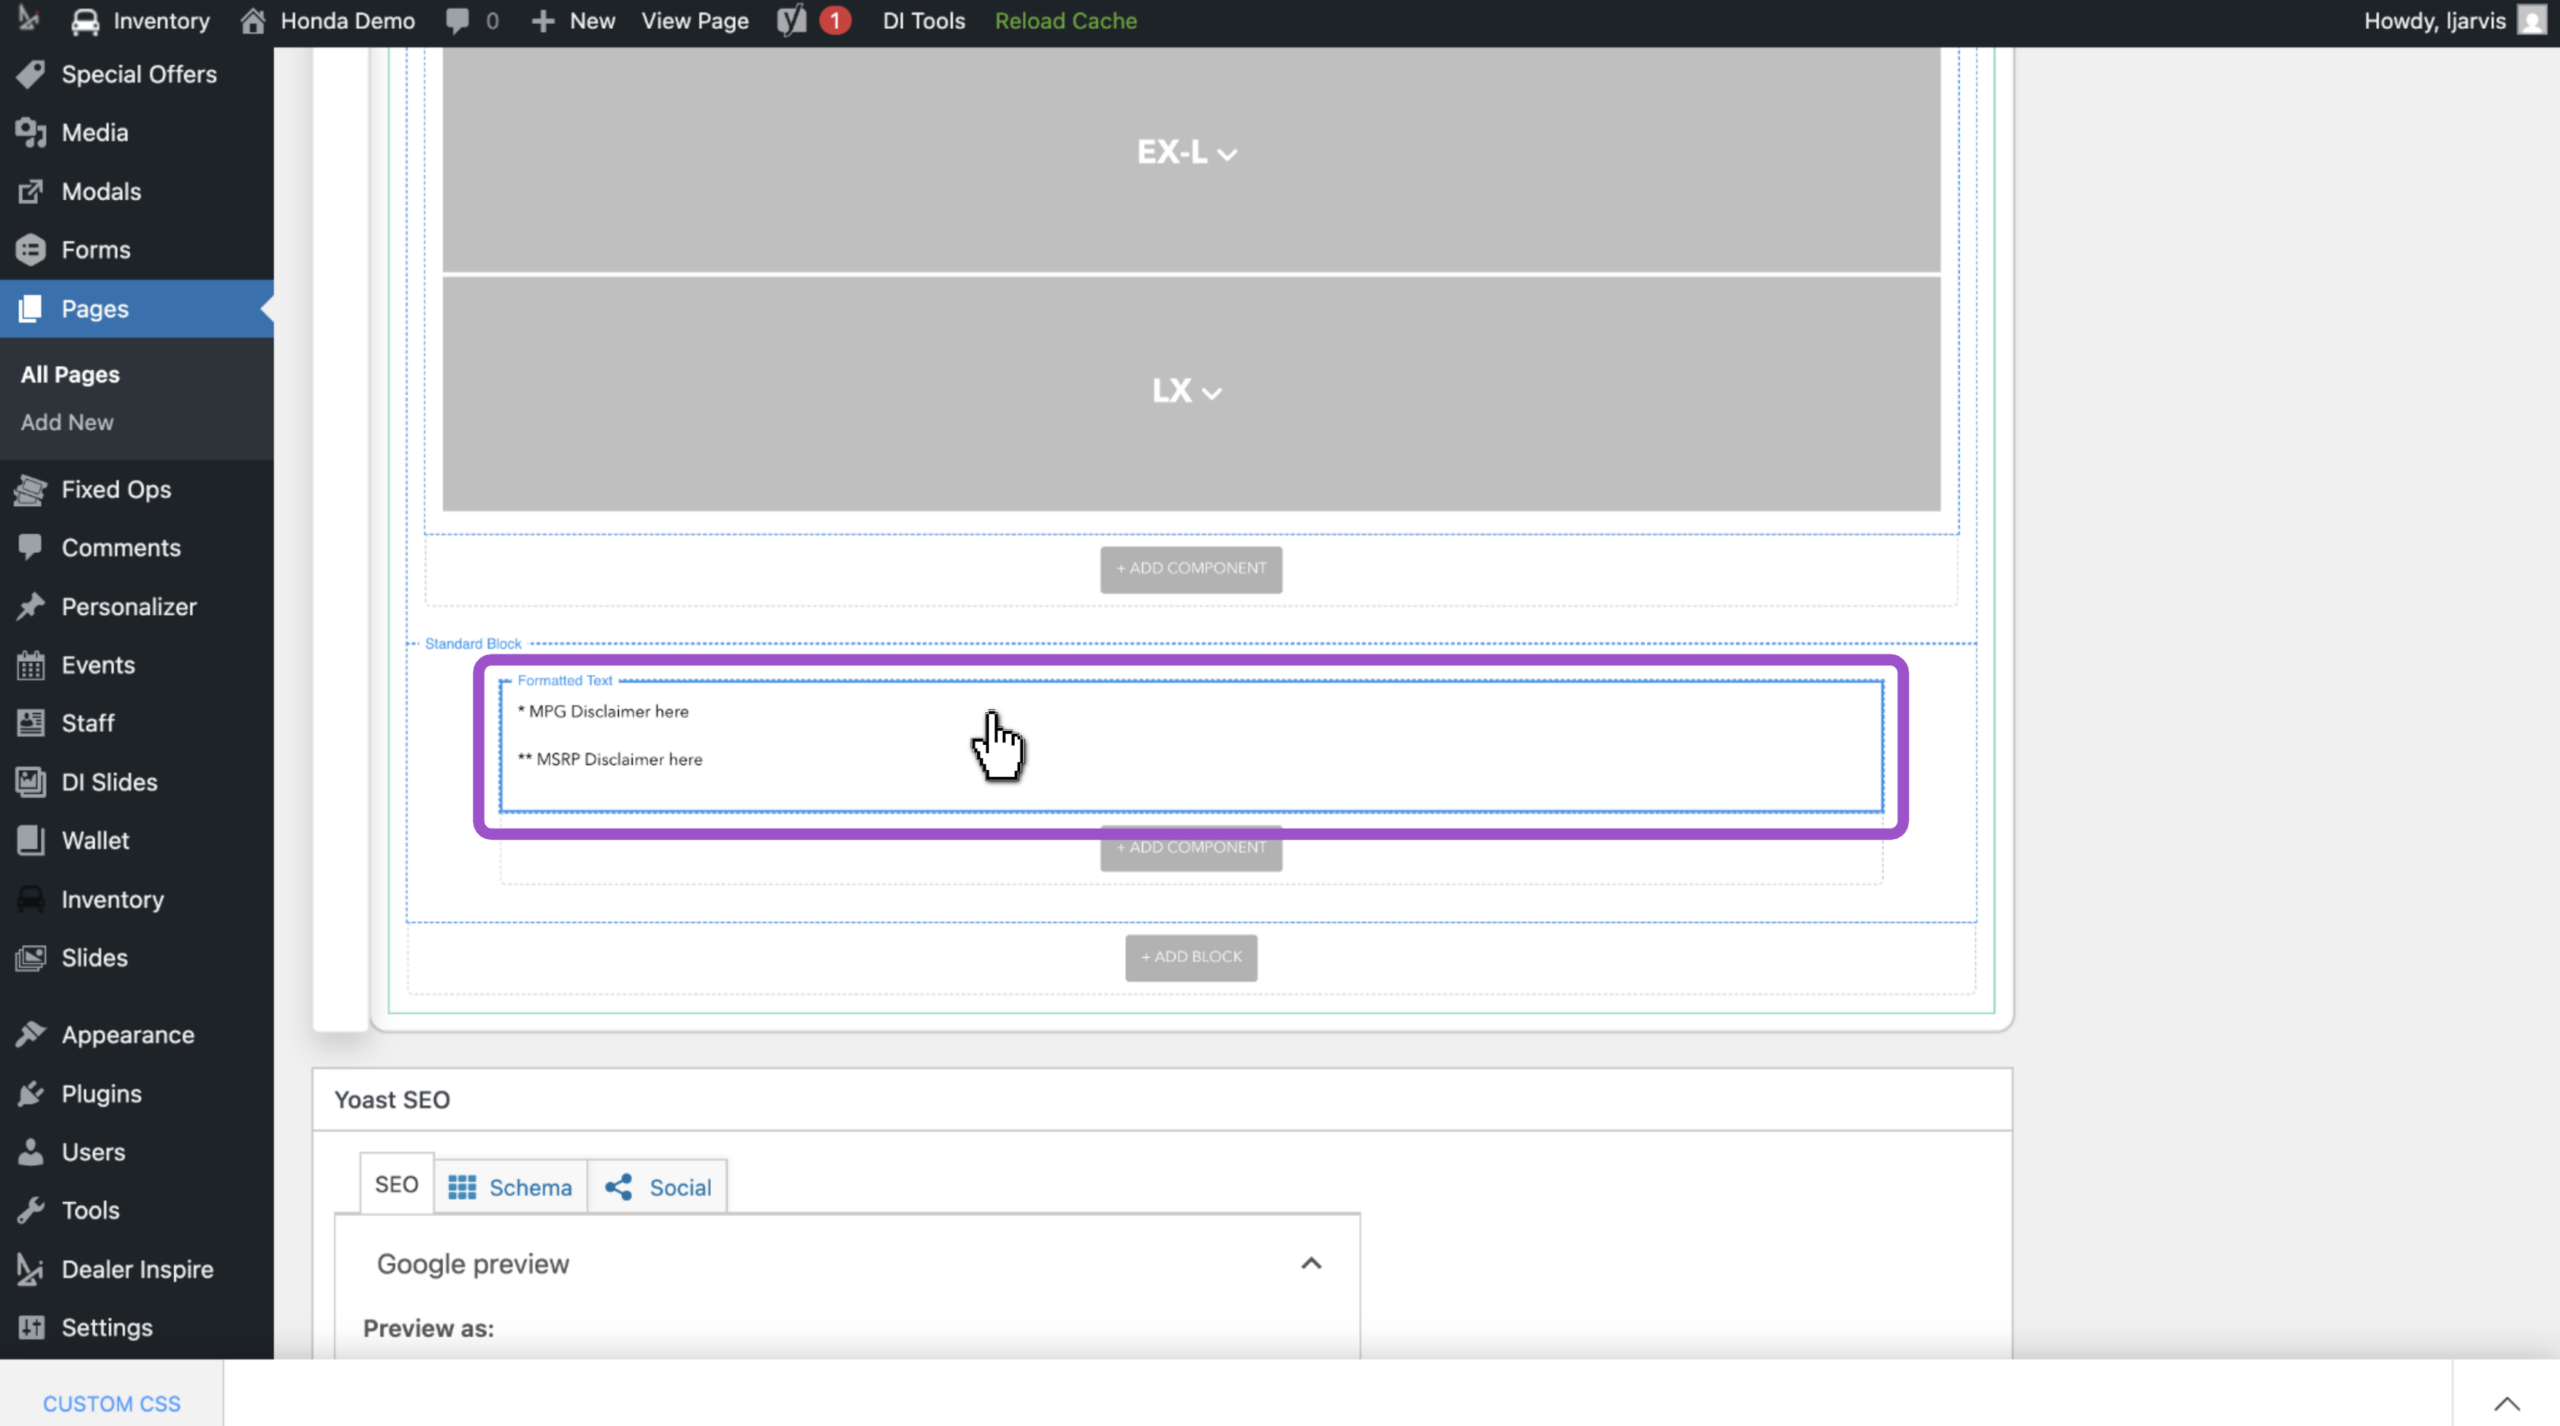
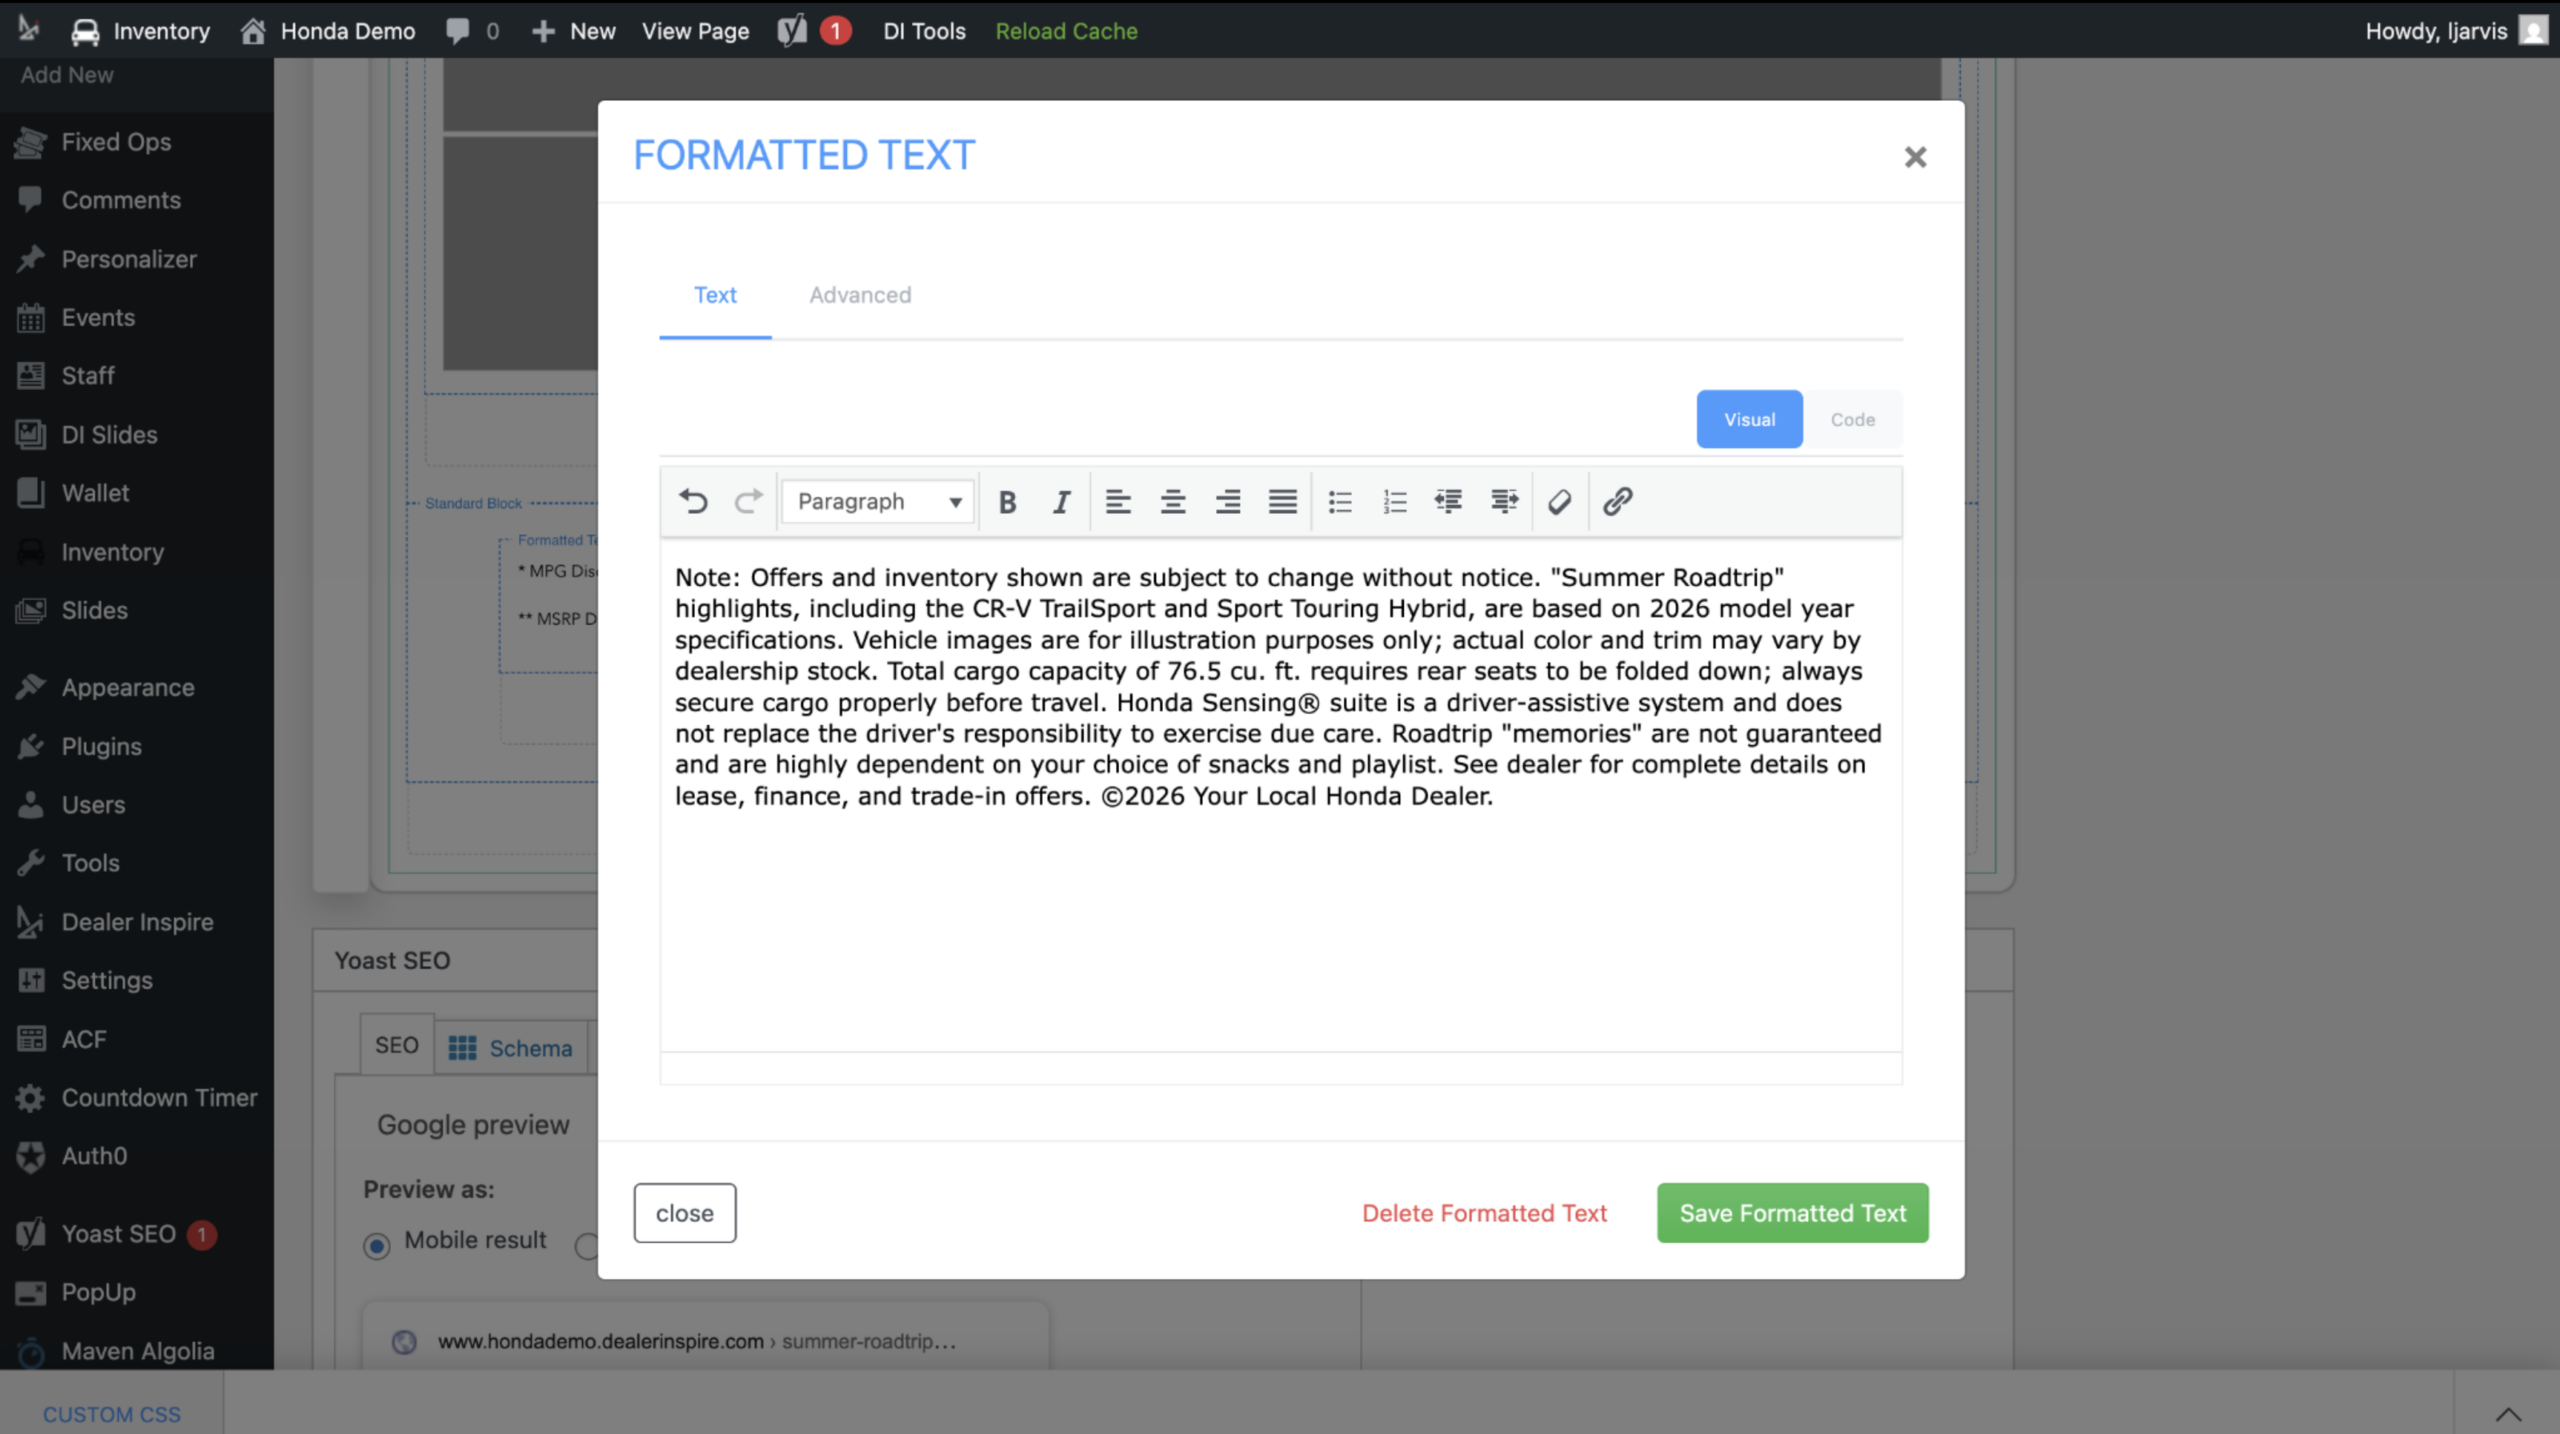
- Replace the text with your disclaimer
- Click Save Formatted Text
10 Preview and publish the page
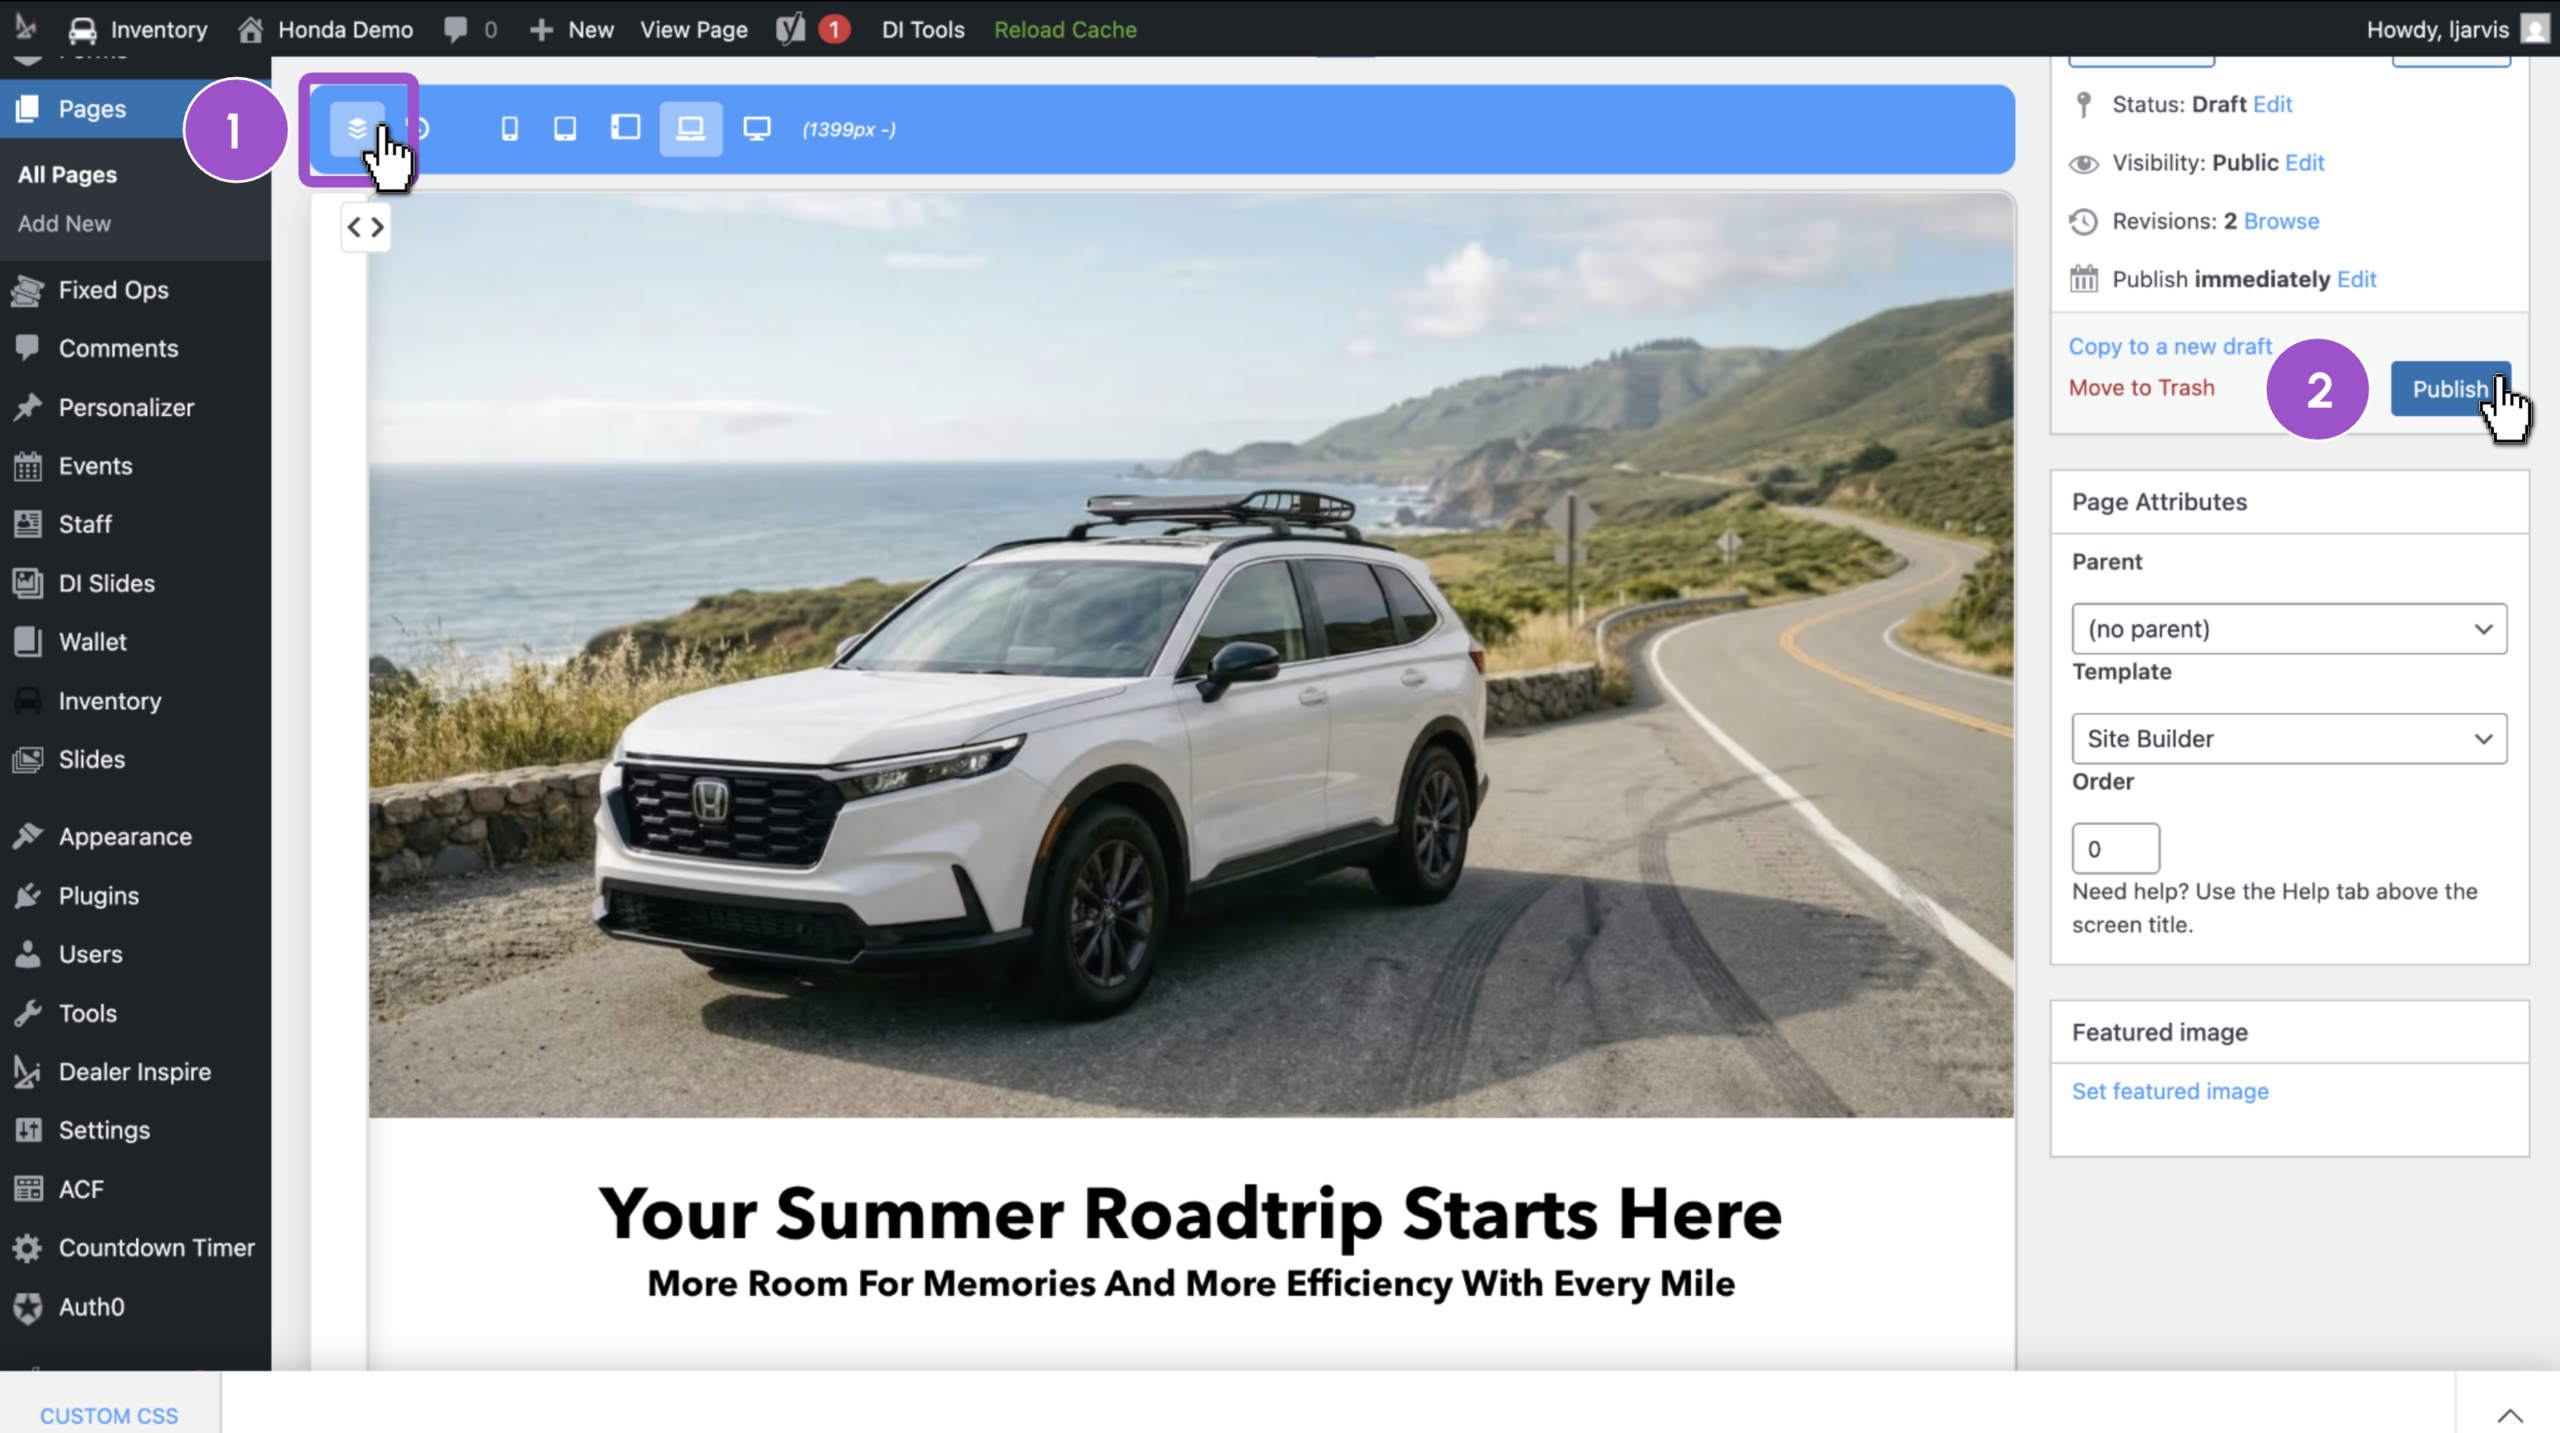
Preview your page before publishing. Scroll back up to the top to:
- Click the layer icon to remove the editing lines and preview the page
- Click publish
Click view page at the top of your screen to see your live page as your shoppers would see it.
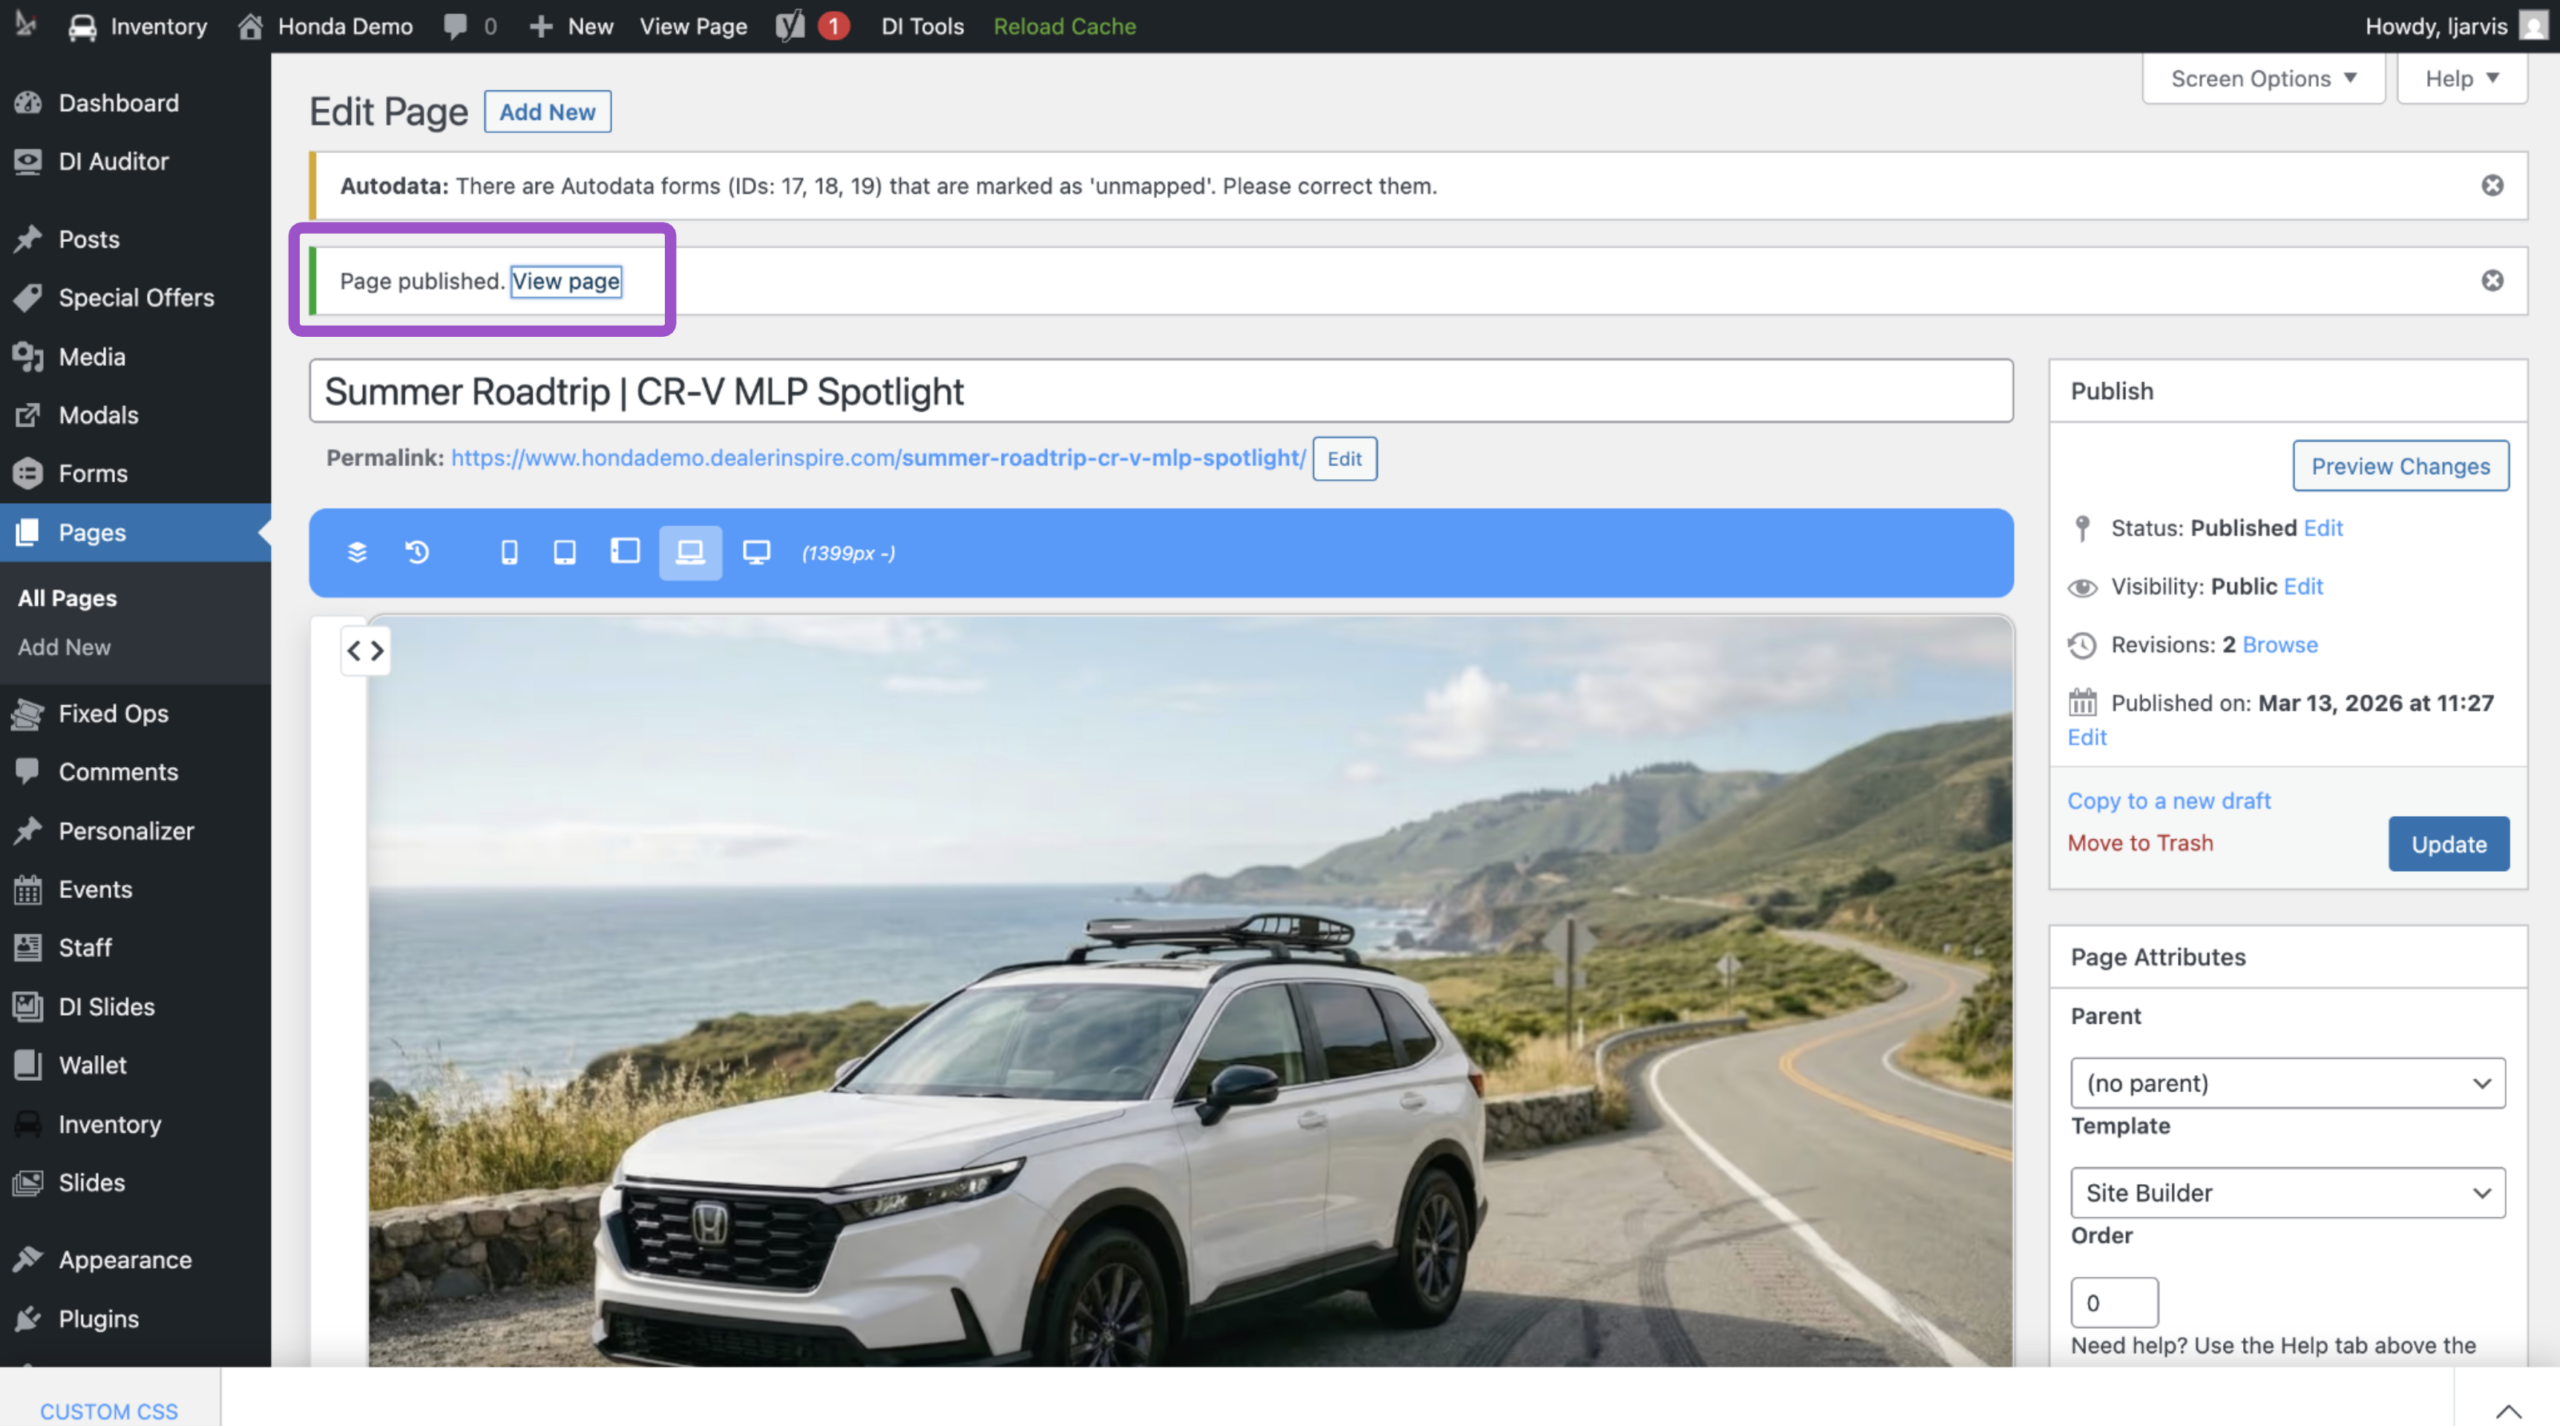
My page is published. Now what?
- Incorporate your page in social media posts
- Include a link to this landing page in email campaigns
- Direct shoppers here who show interest in CR-Vs when they chat with your team
- Utilize Personalizer to direct shoppers to this page when they’ve viewed the CR-V VDP
- Optimize your page for AEO
- People ask AI assistants questions and advice
- Consider including an FAQ section to your page that may answer their questions
- Example: “How much cargo space does a 2026 CR-V have?”
- This helps your page show up in AI-generated answers
How to edit existing site builder pages
Now that you know how to create a new page using Site Builder, you can edit any other Site Builder page with confidence by adding new widgets and components.
- Find a page to edit or add to
- Click Edit Page at the top of the screen
- Note: you must be logged in to your website
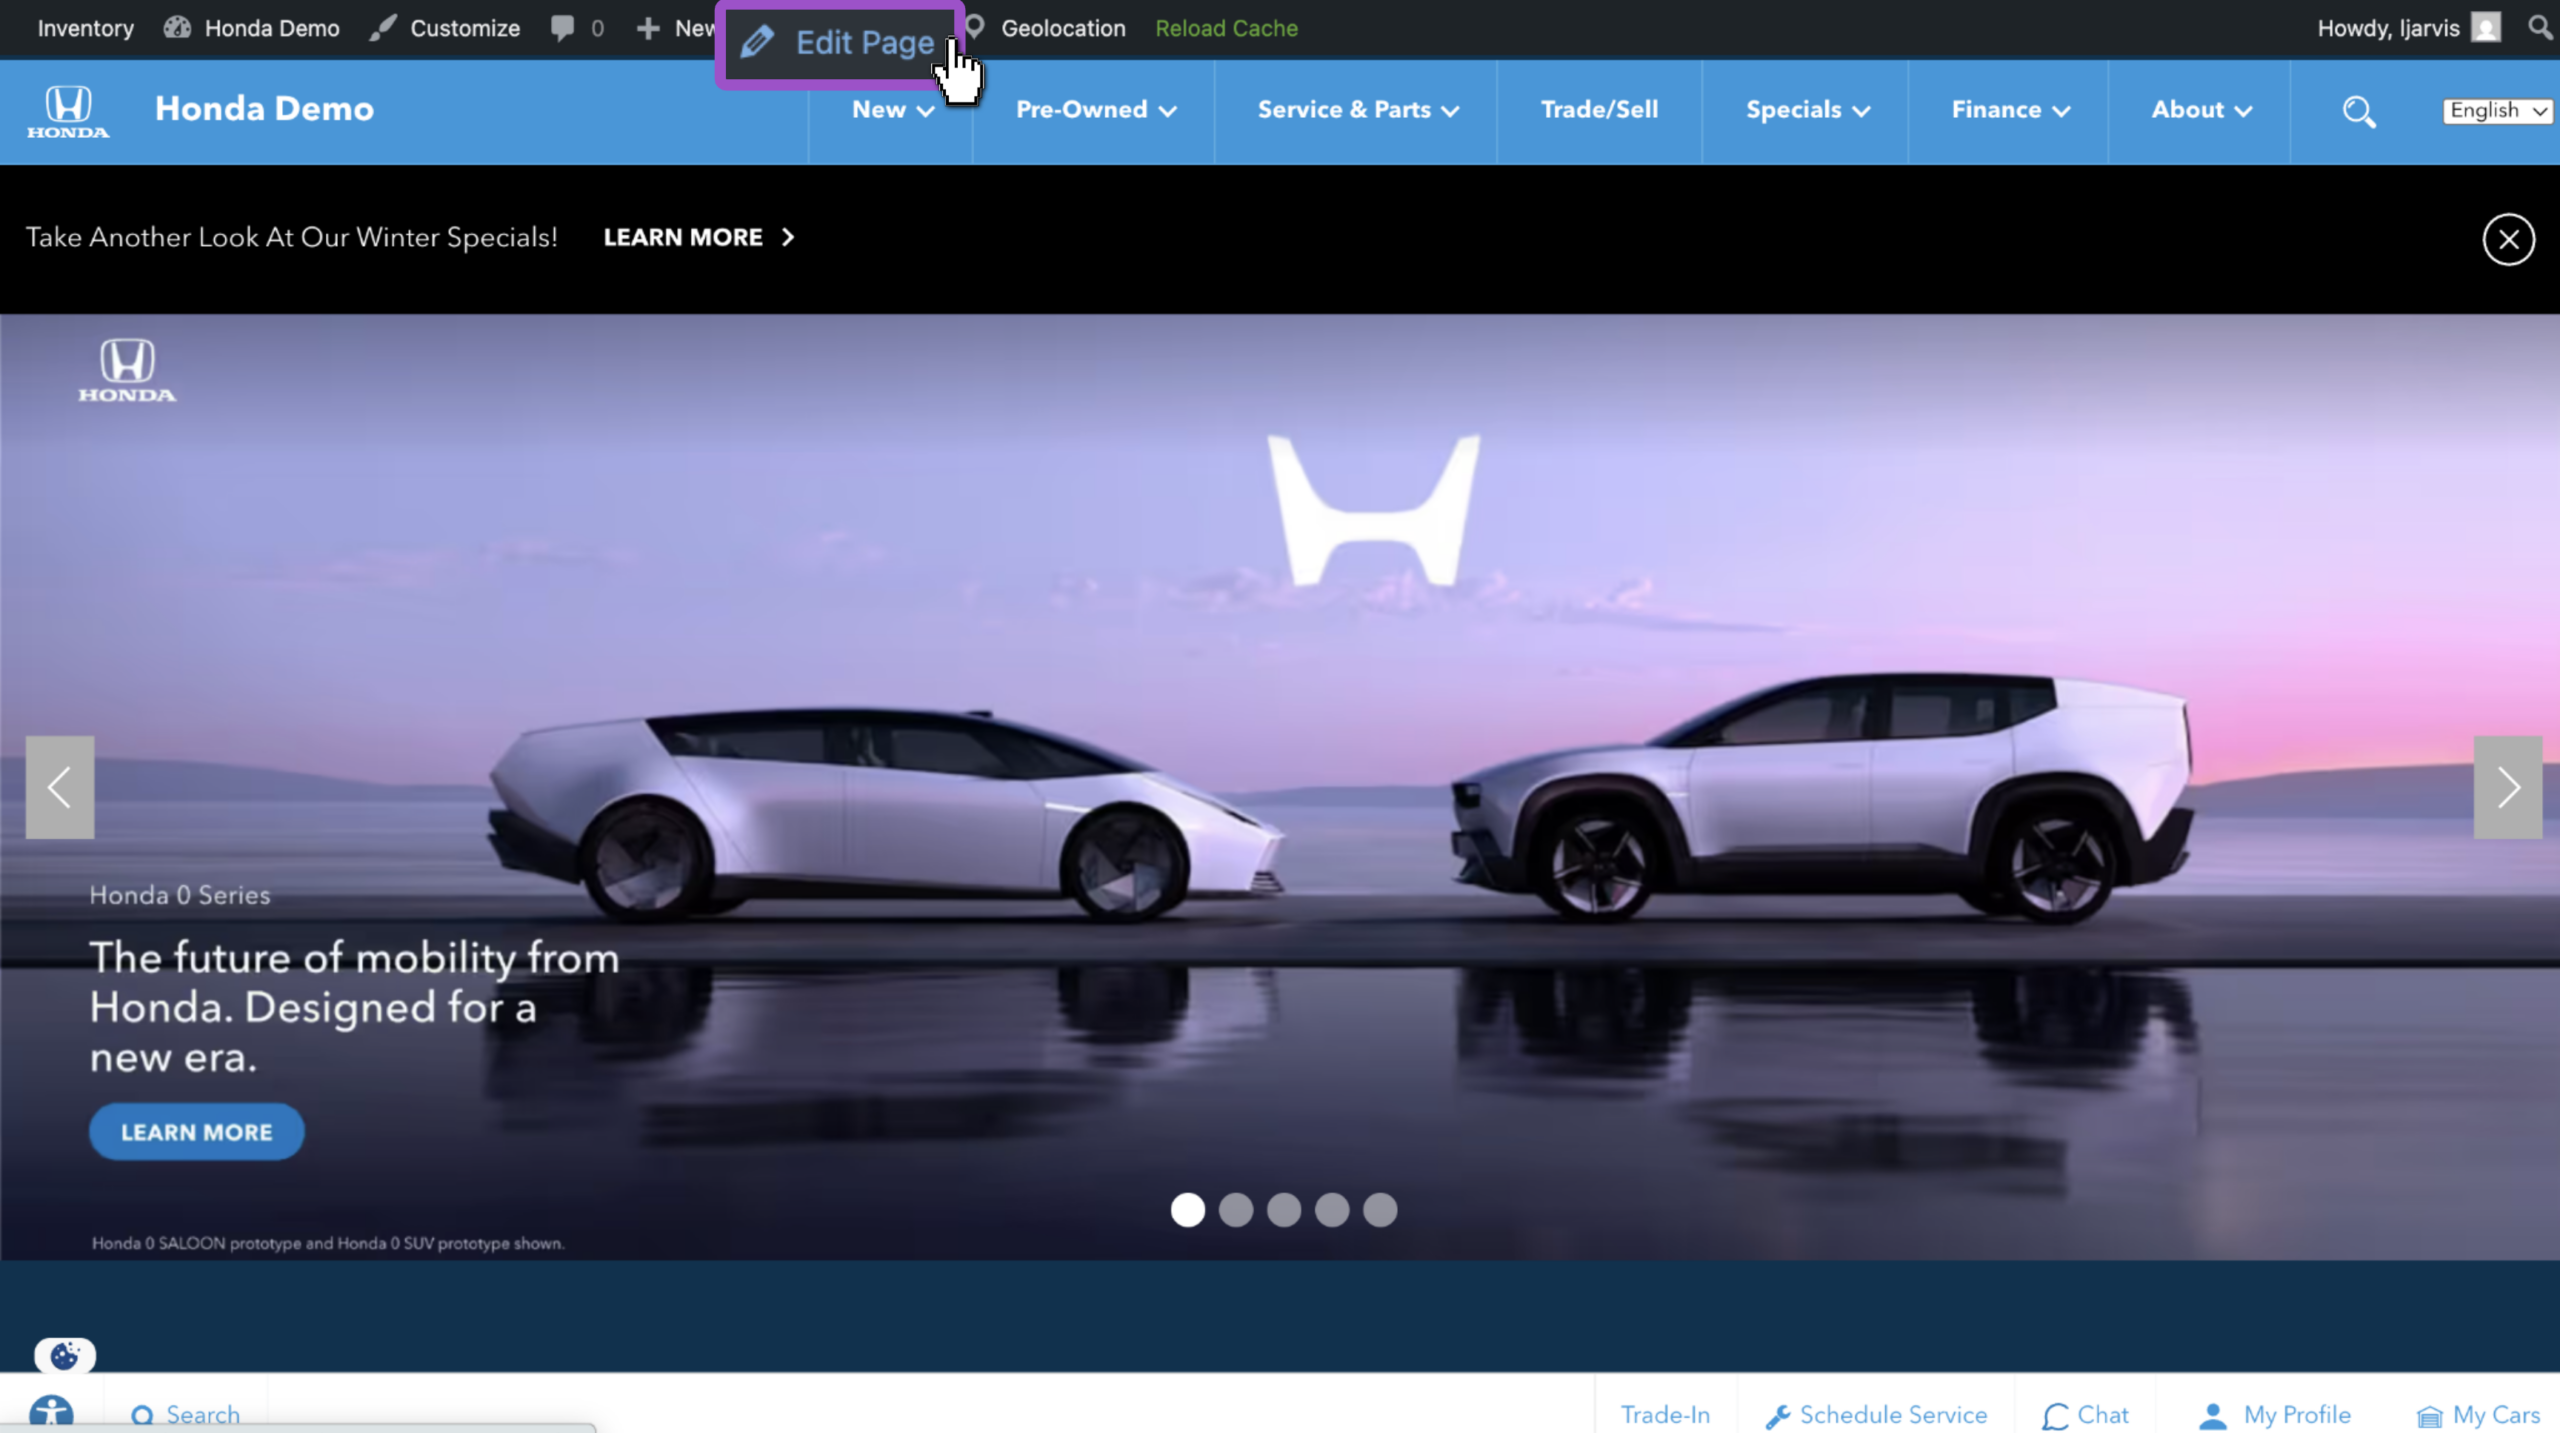
BACKEND VIEW OF THE PAGE
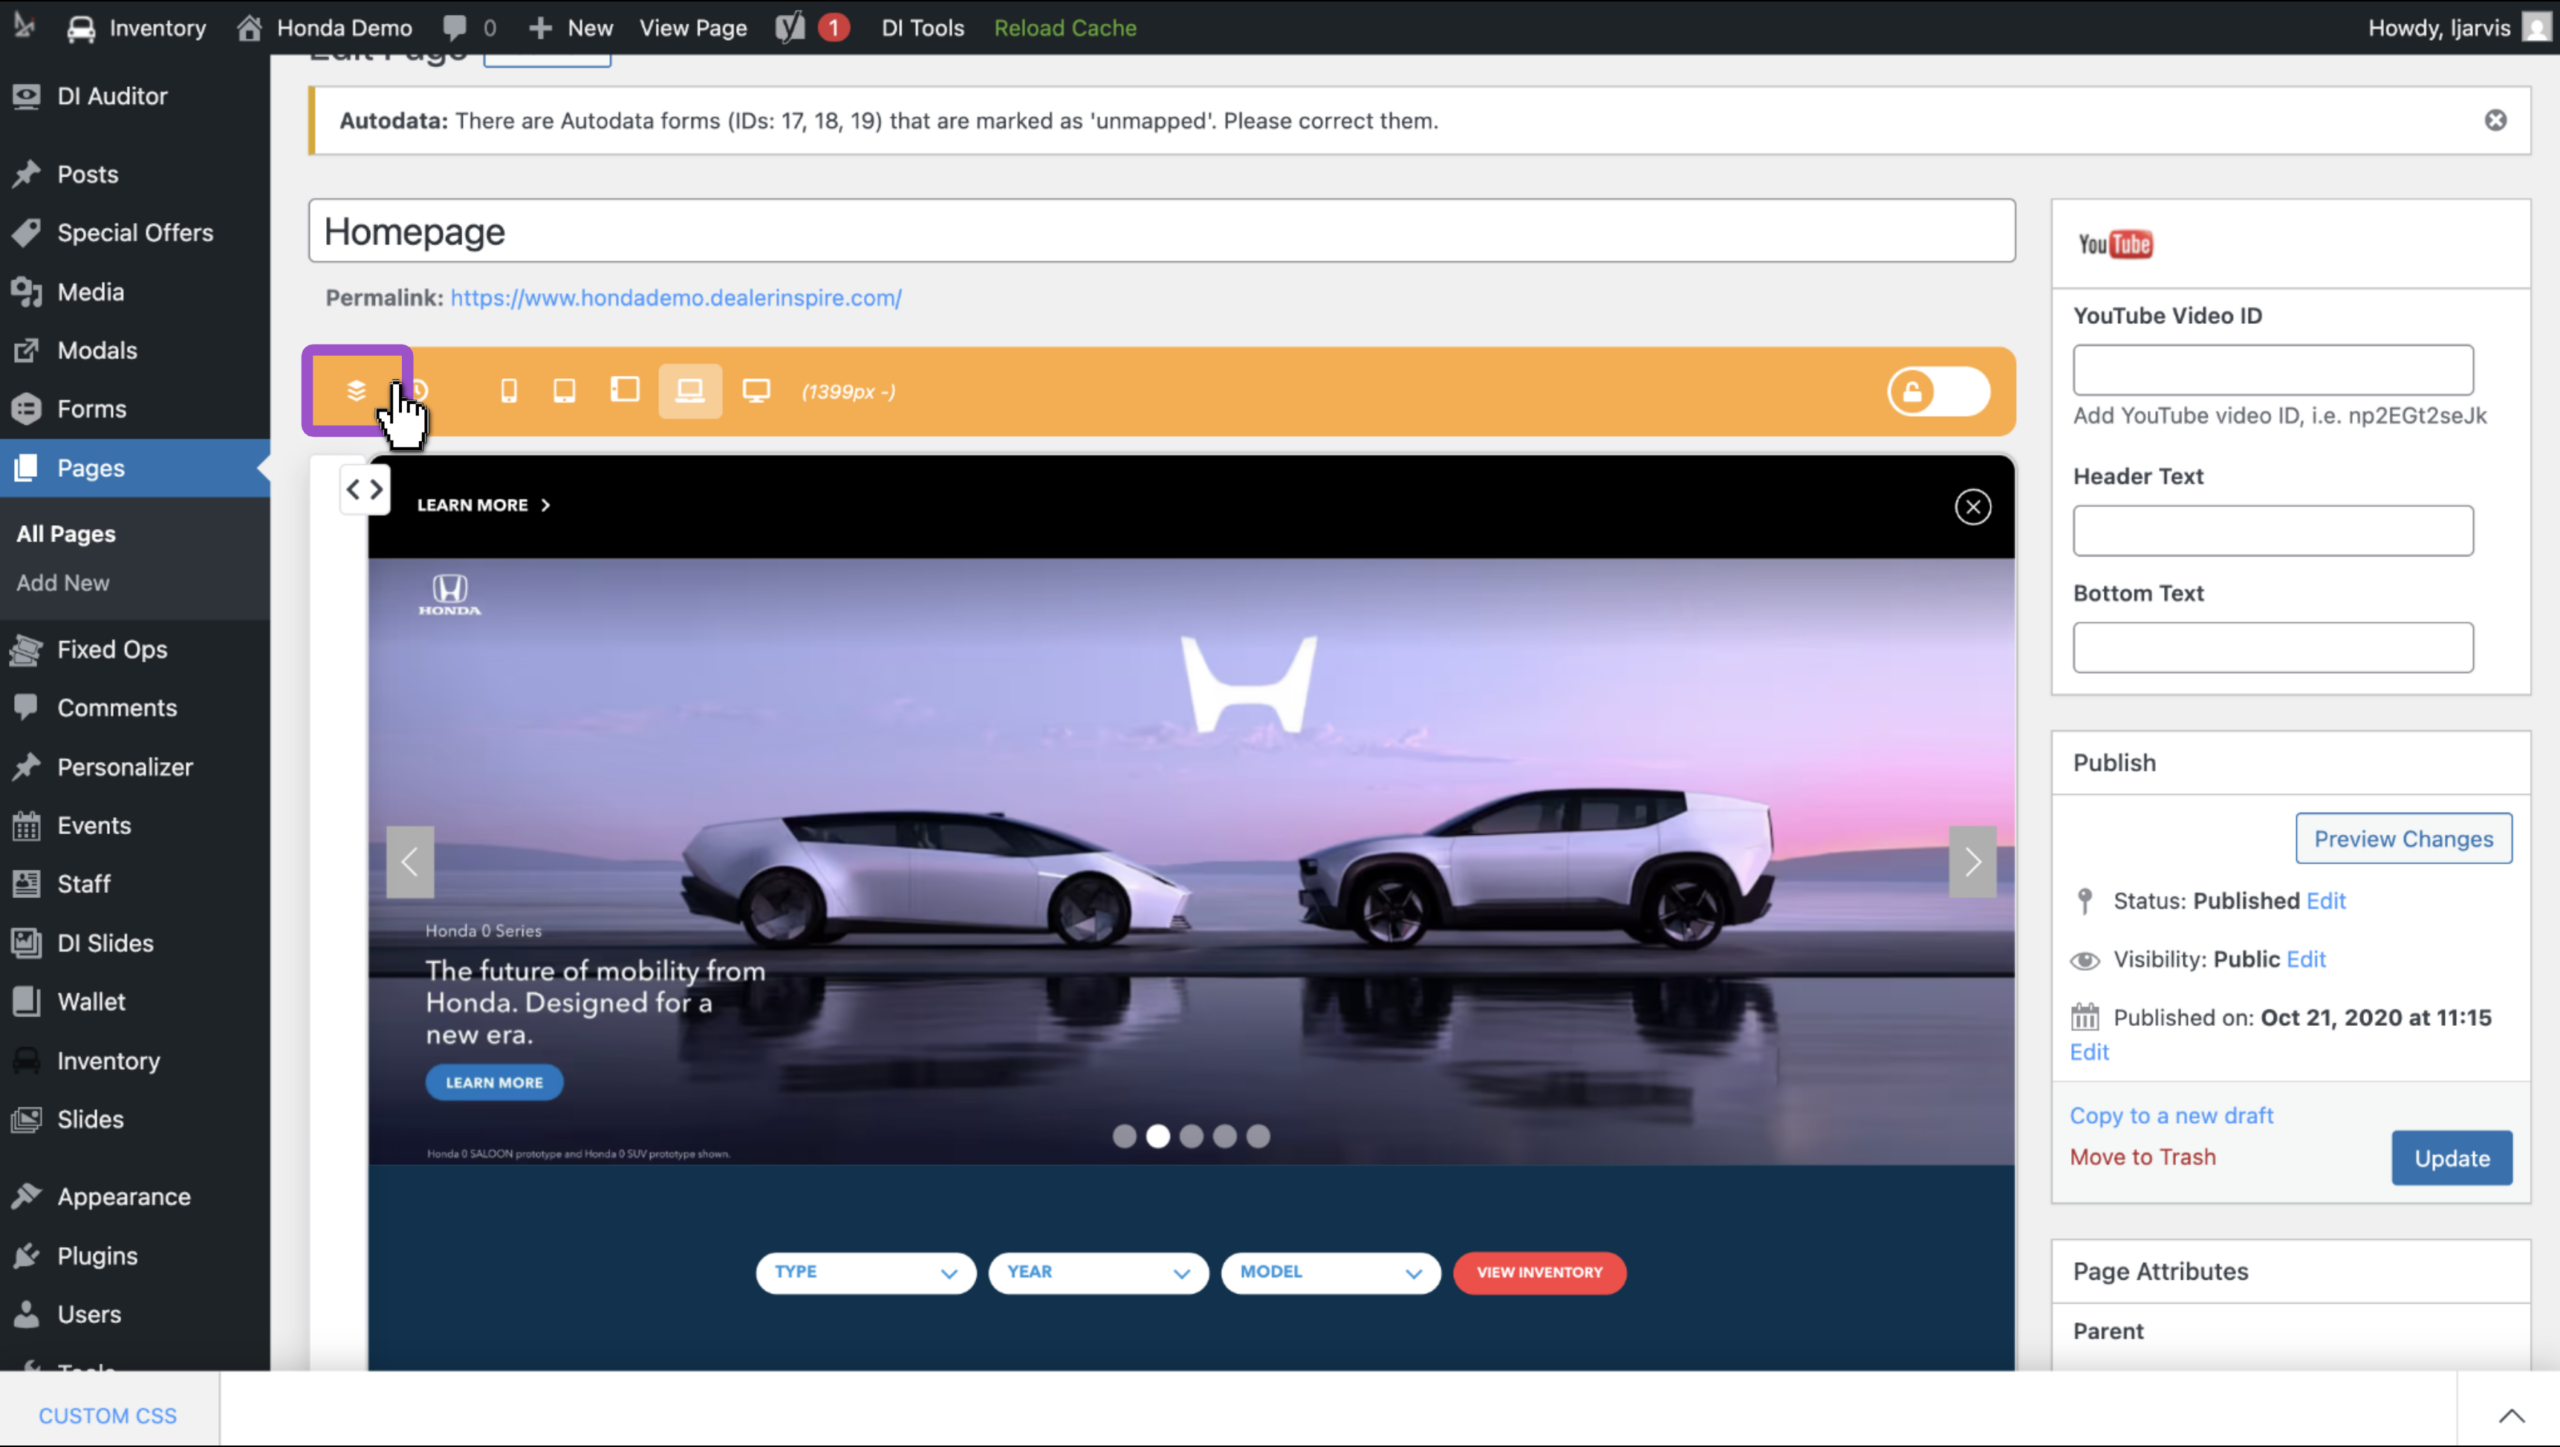
Scroll to the bottom of the page or use the widget-tree arrows at the top to add a new block.
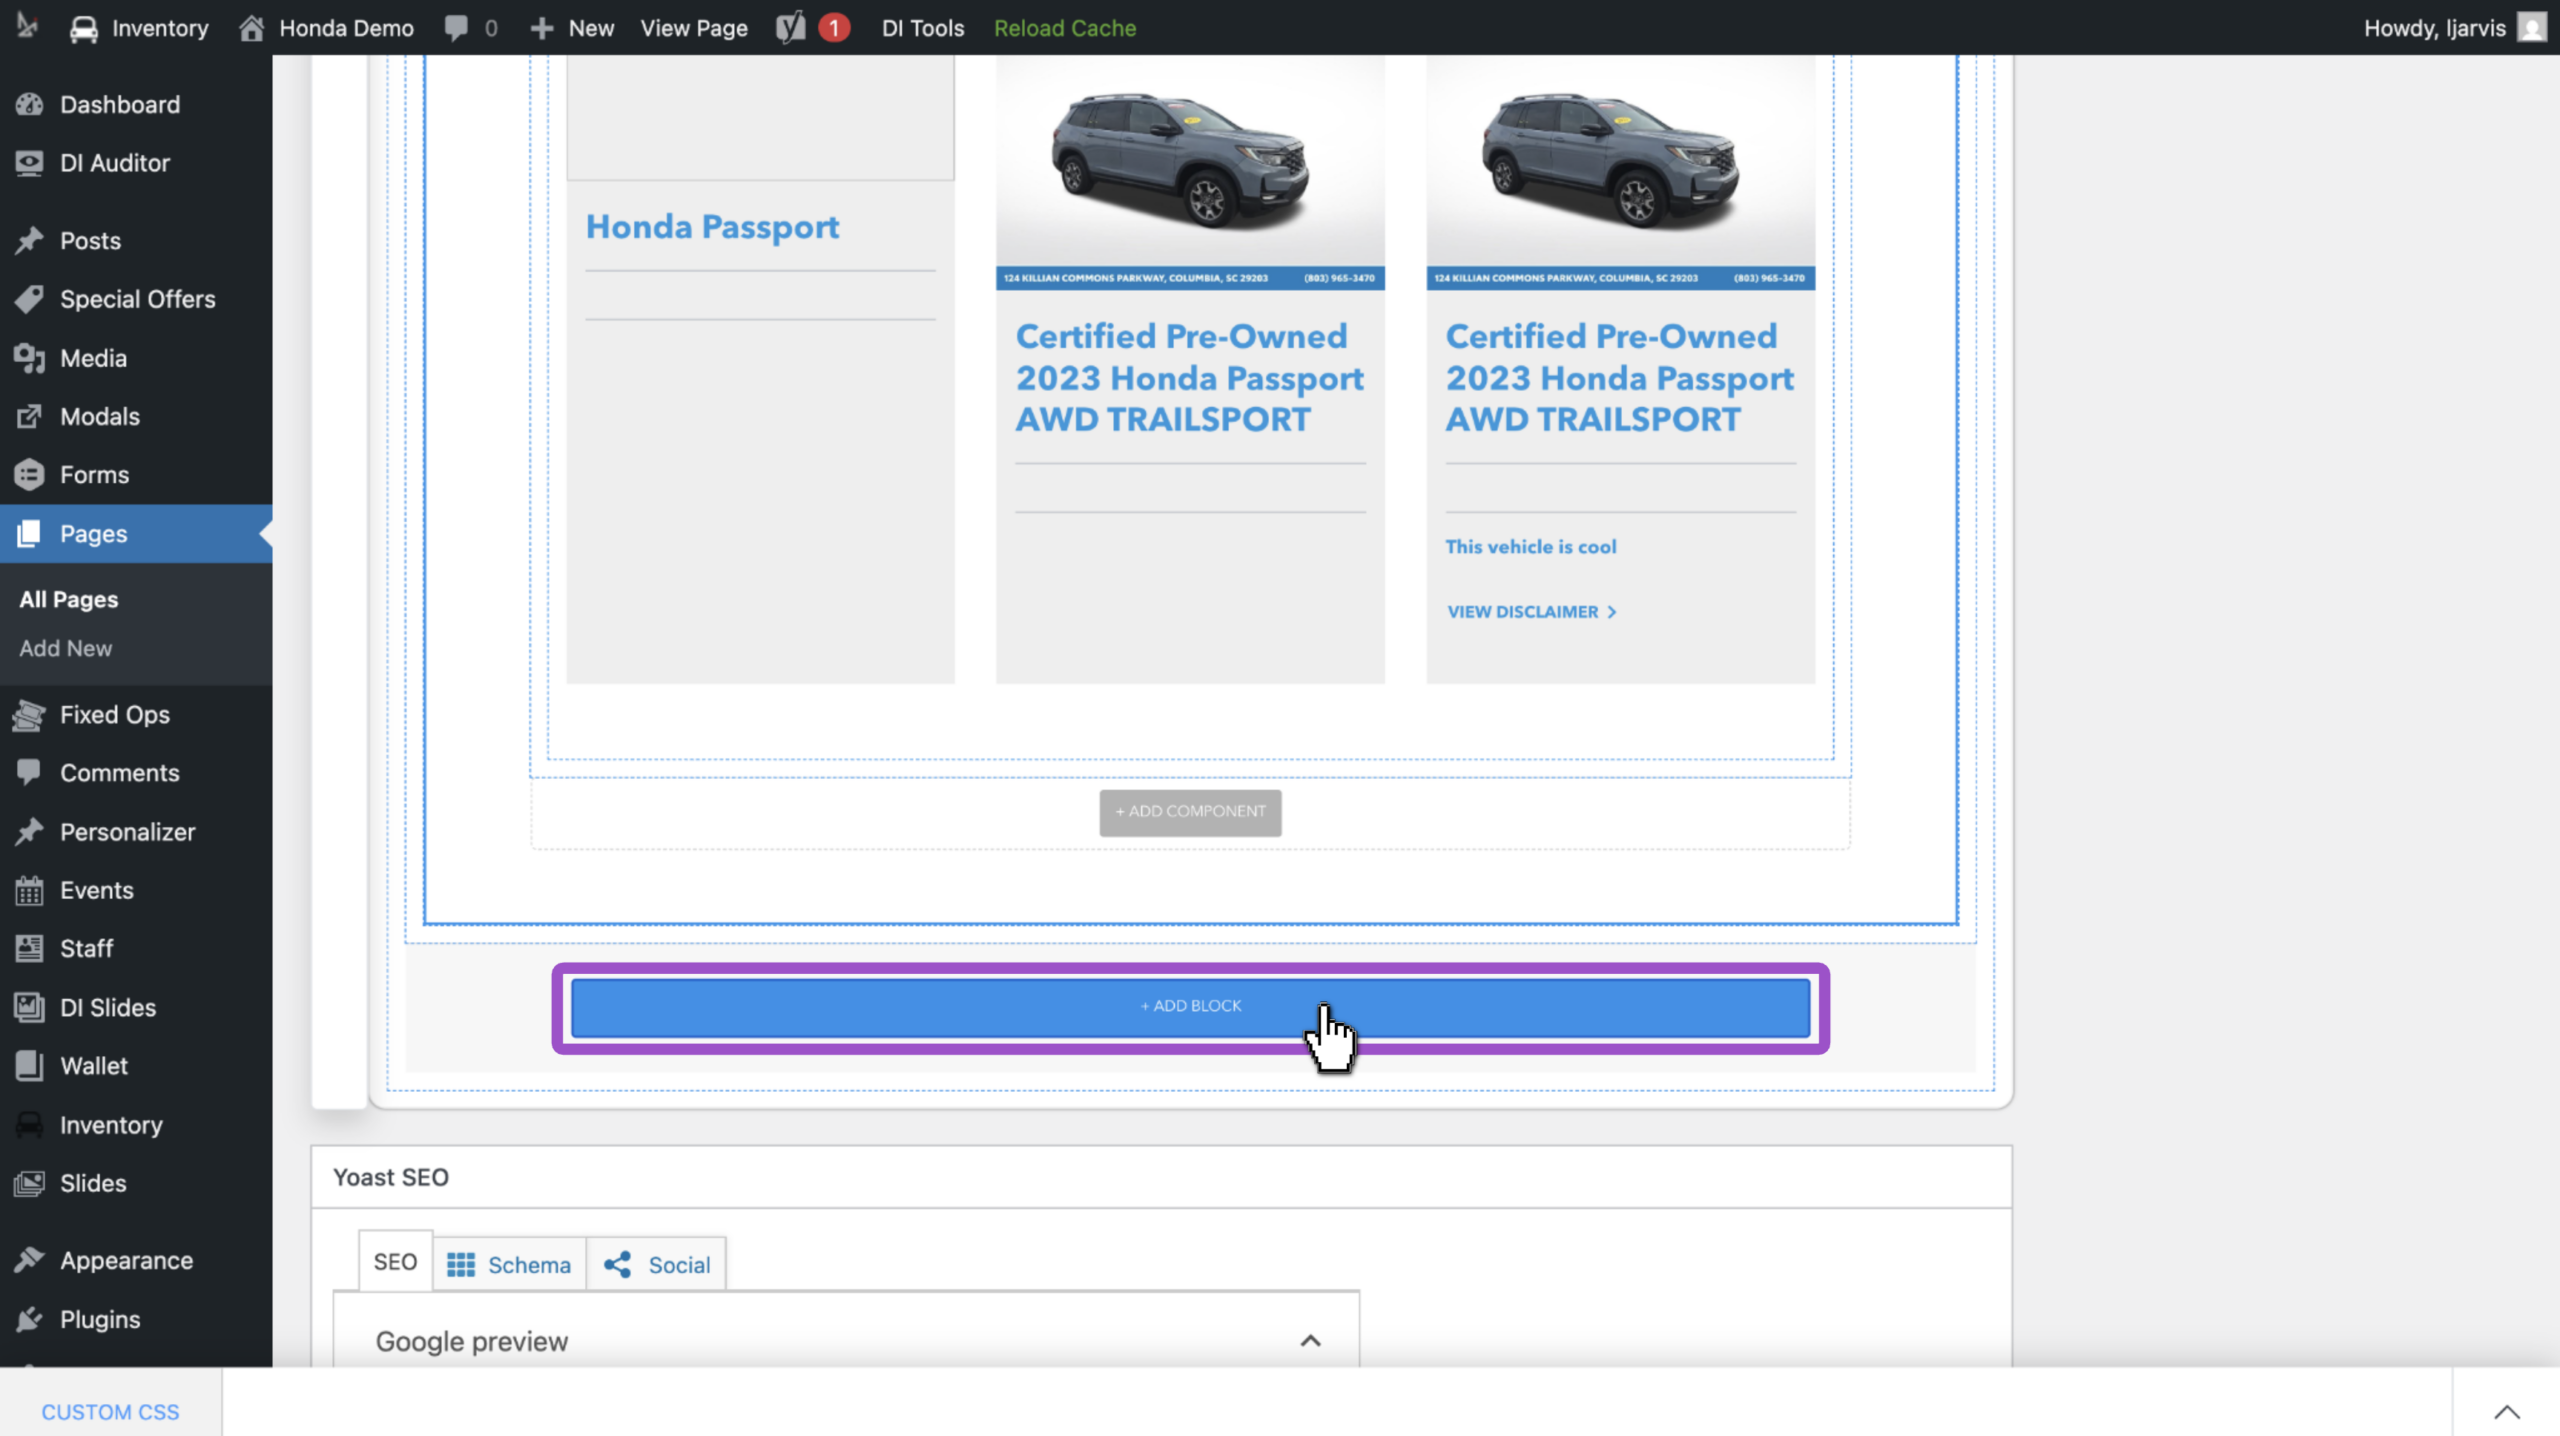
Consider adding widgets like:
- Special Offers: to highlight inventory promotions
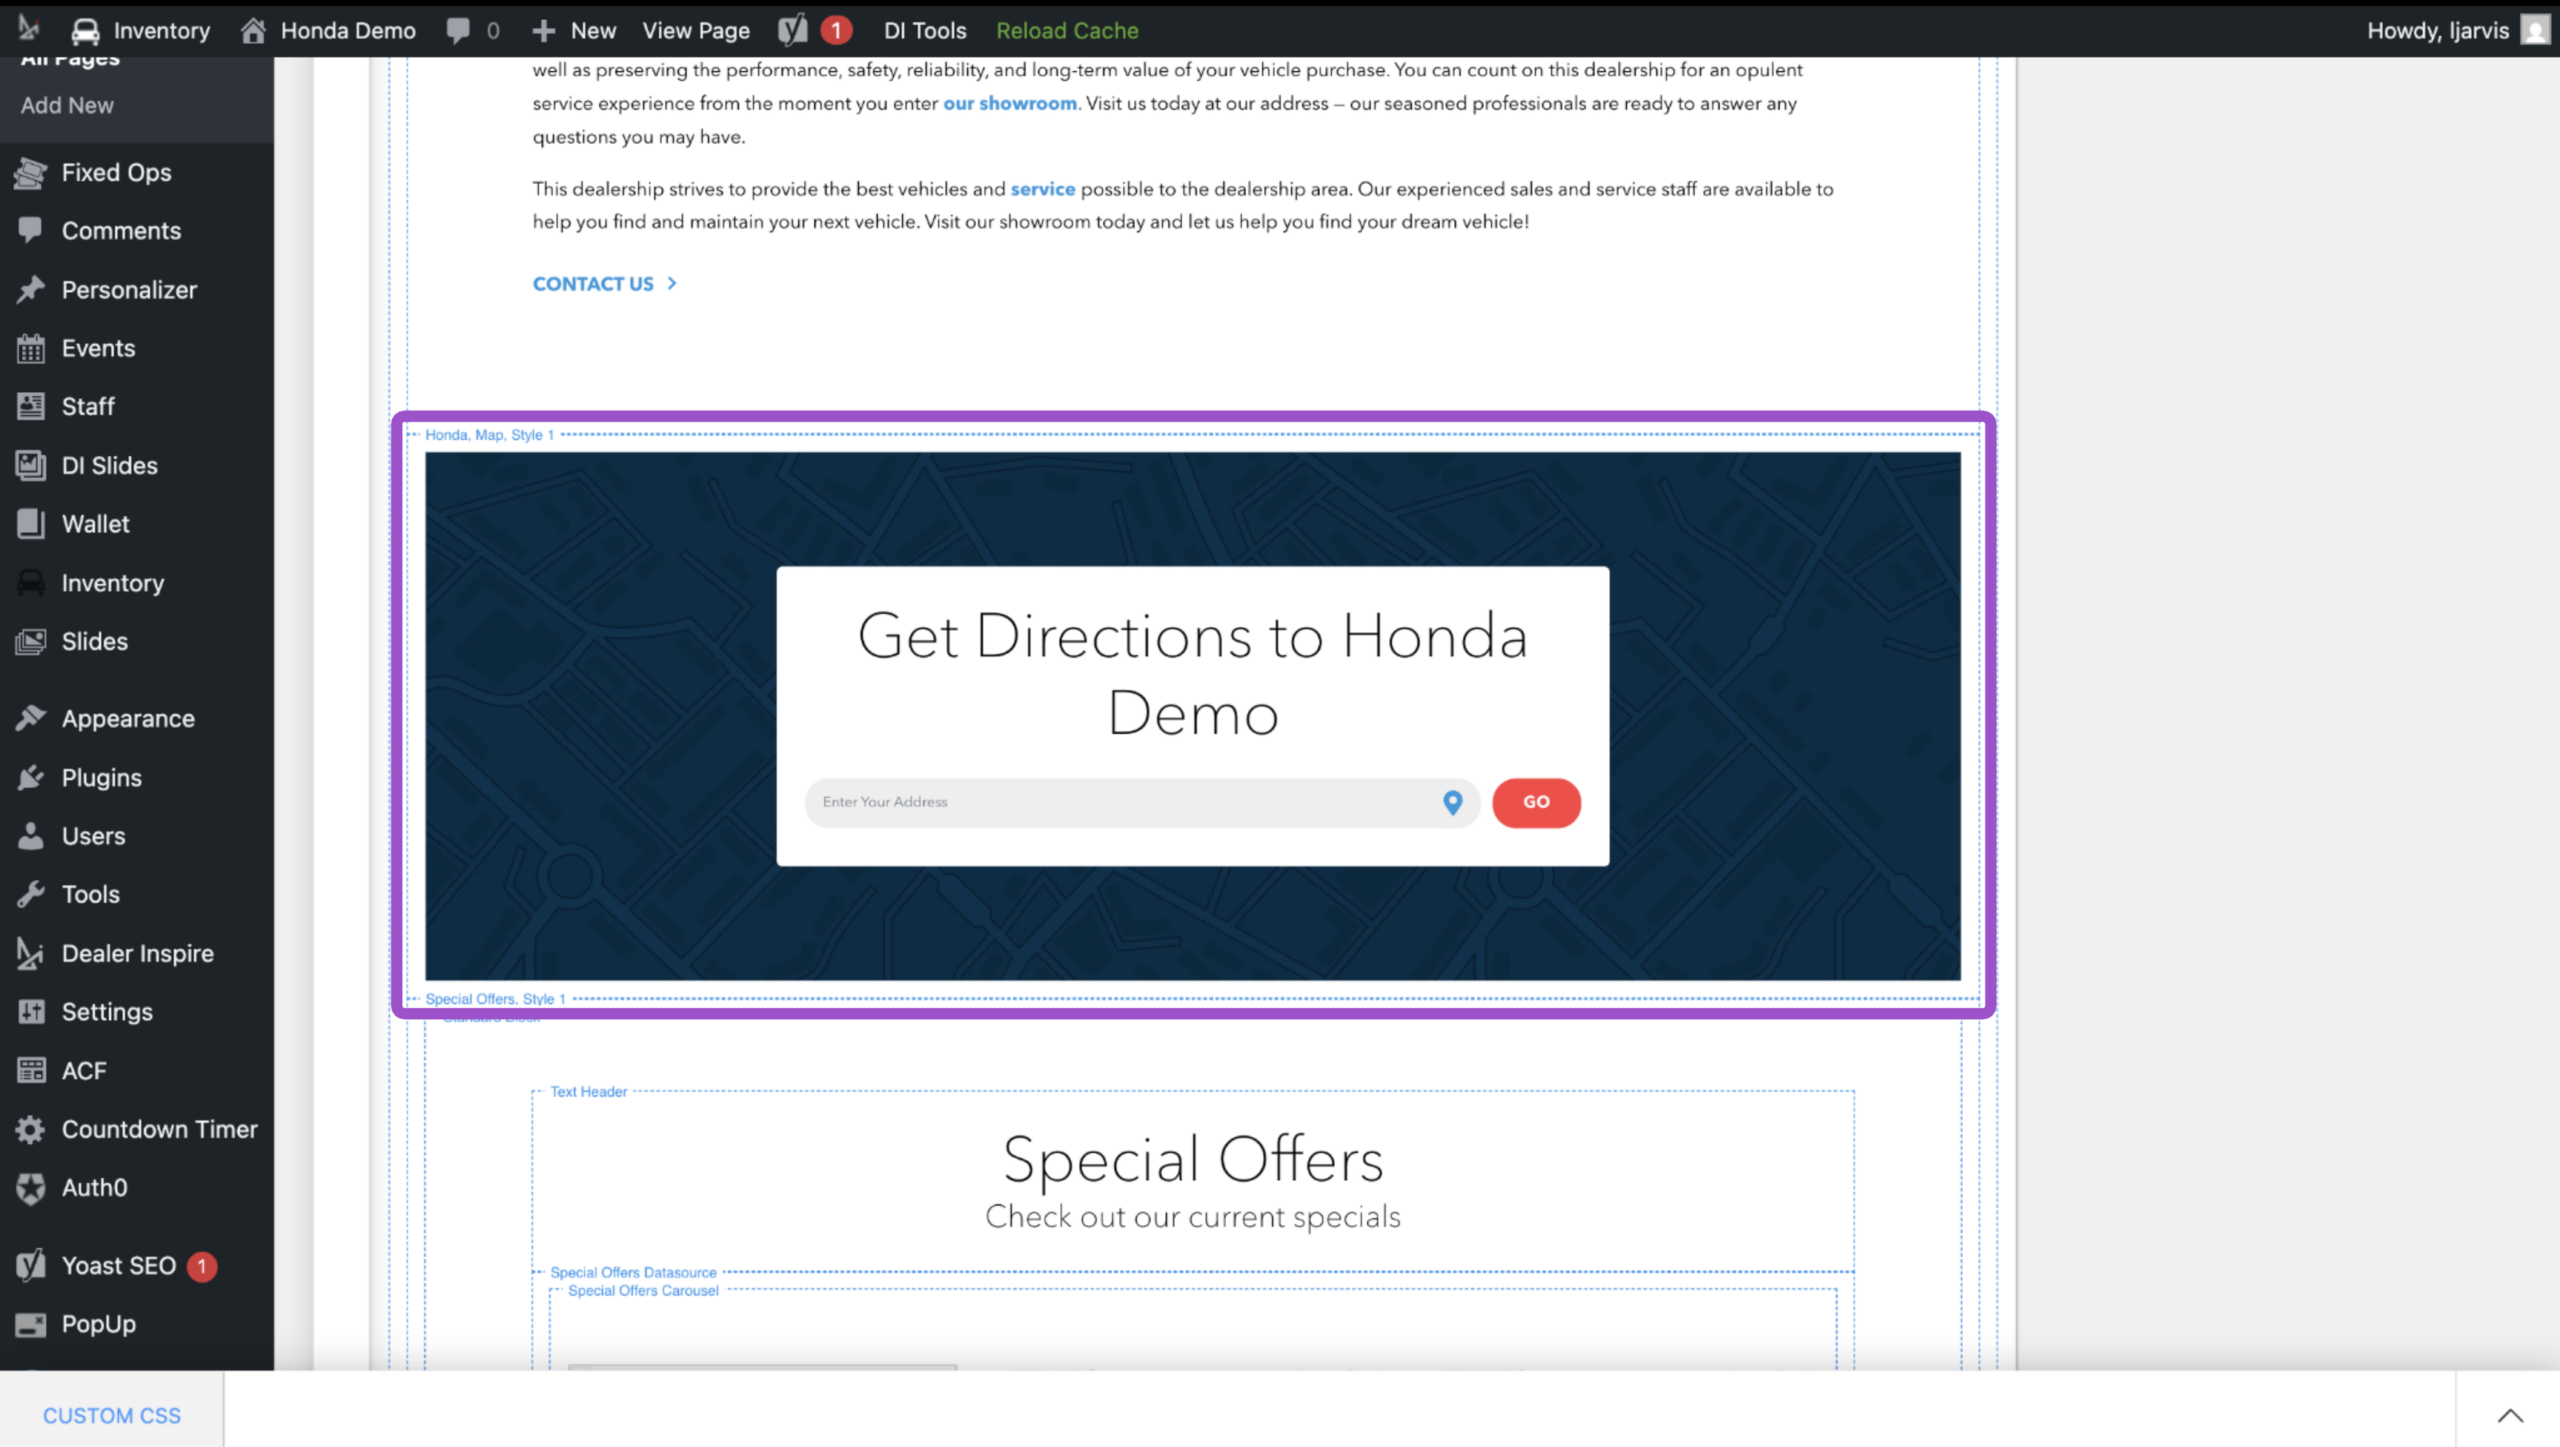
- Map: to make it easy for shoppers to take that next step in their research
- Columns: to compare two makes or trim levels
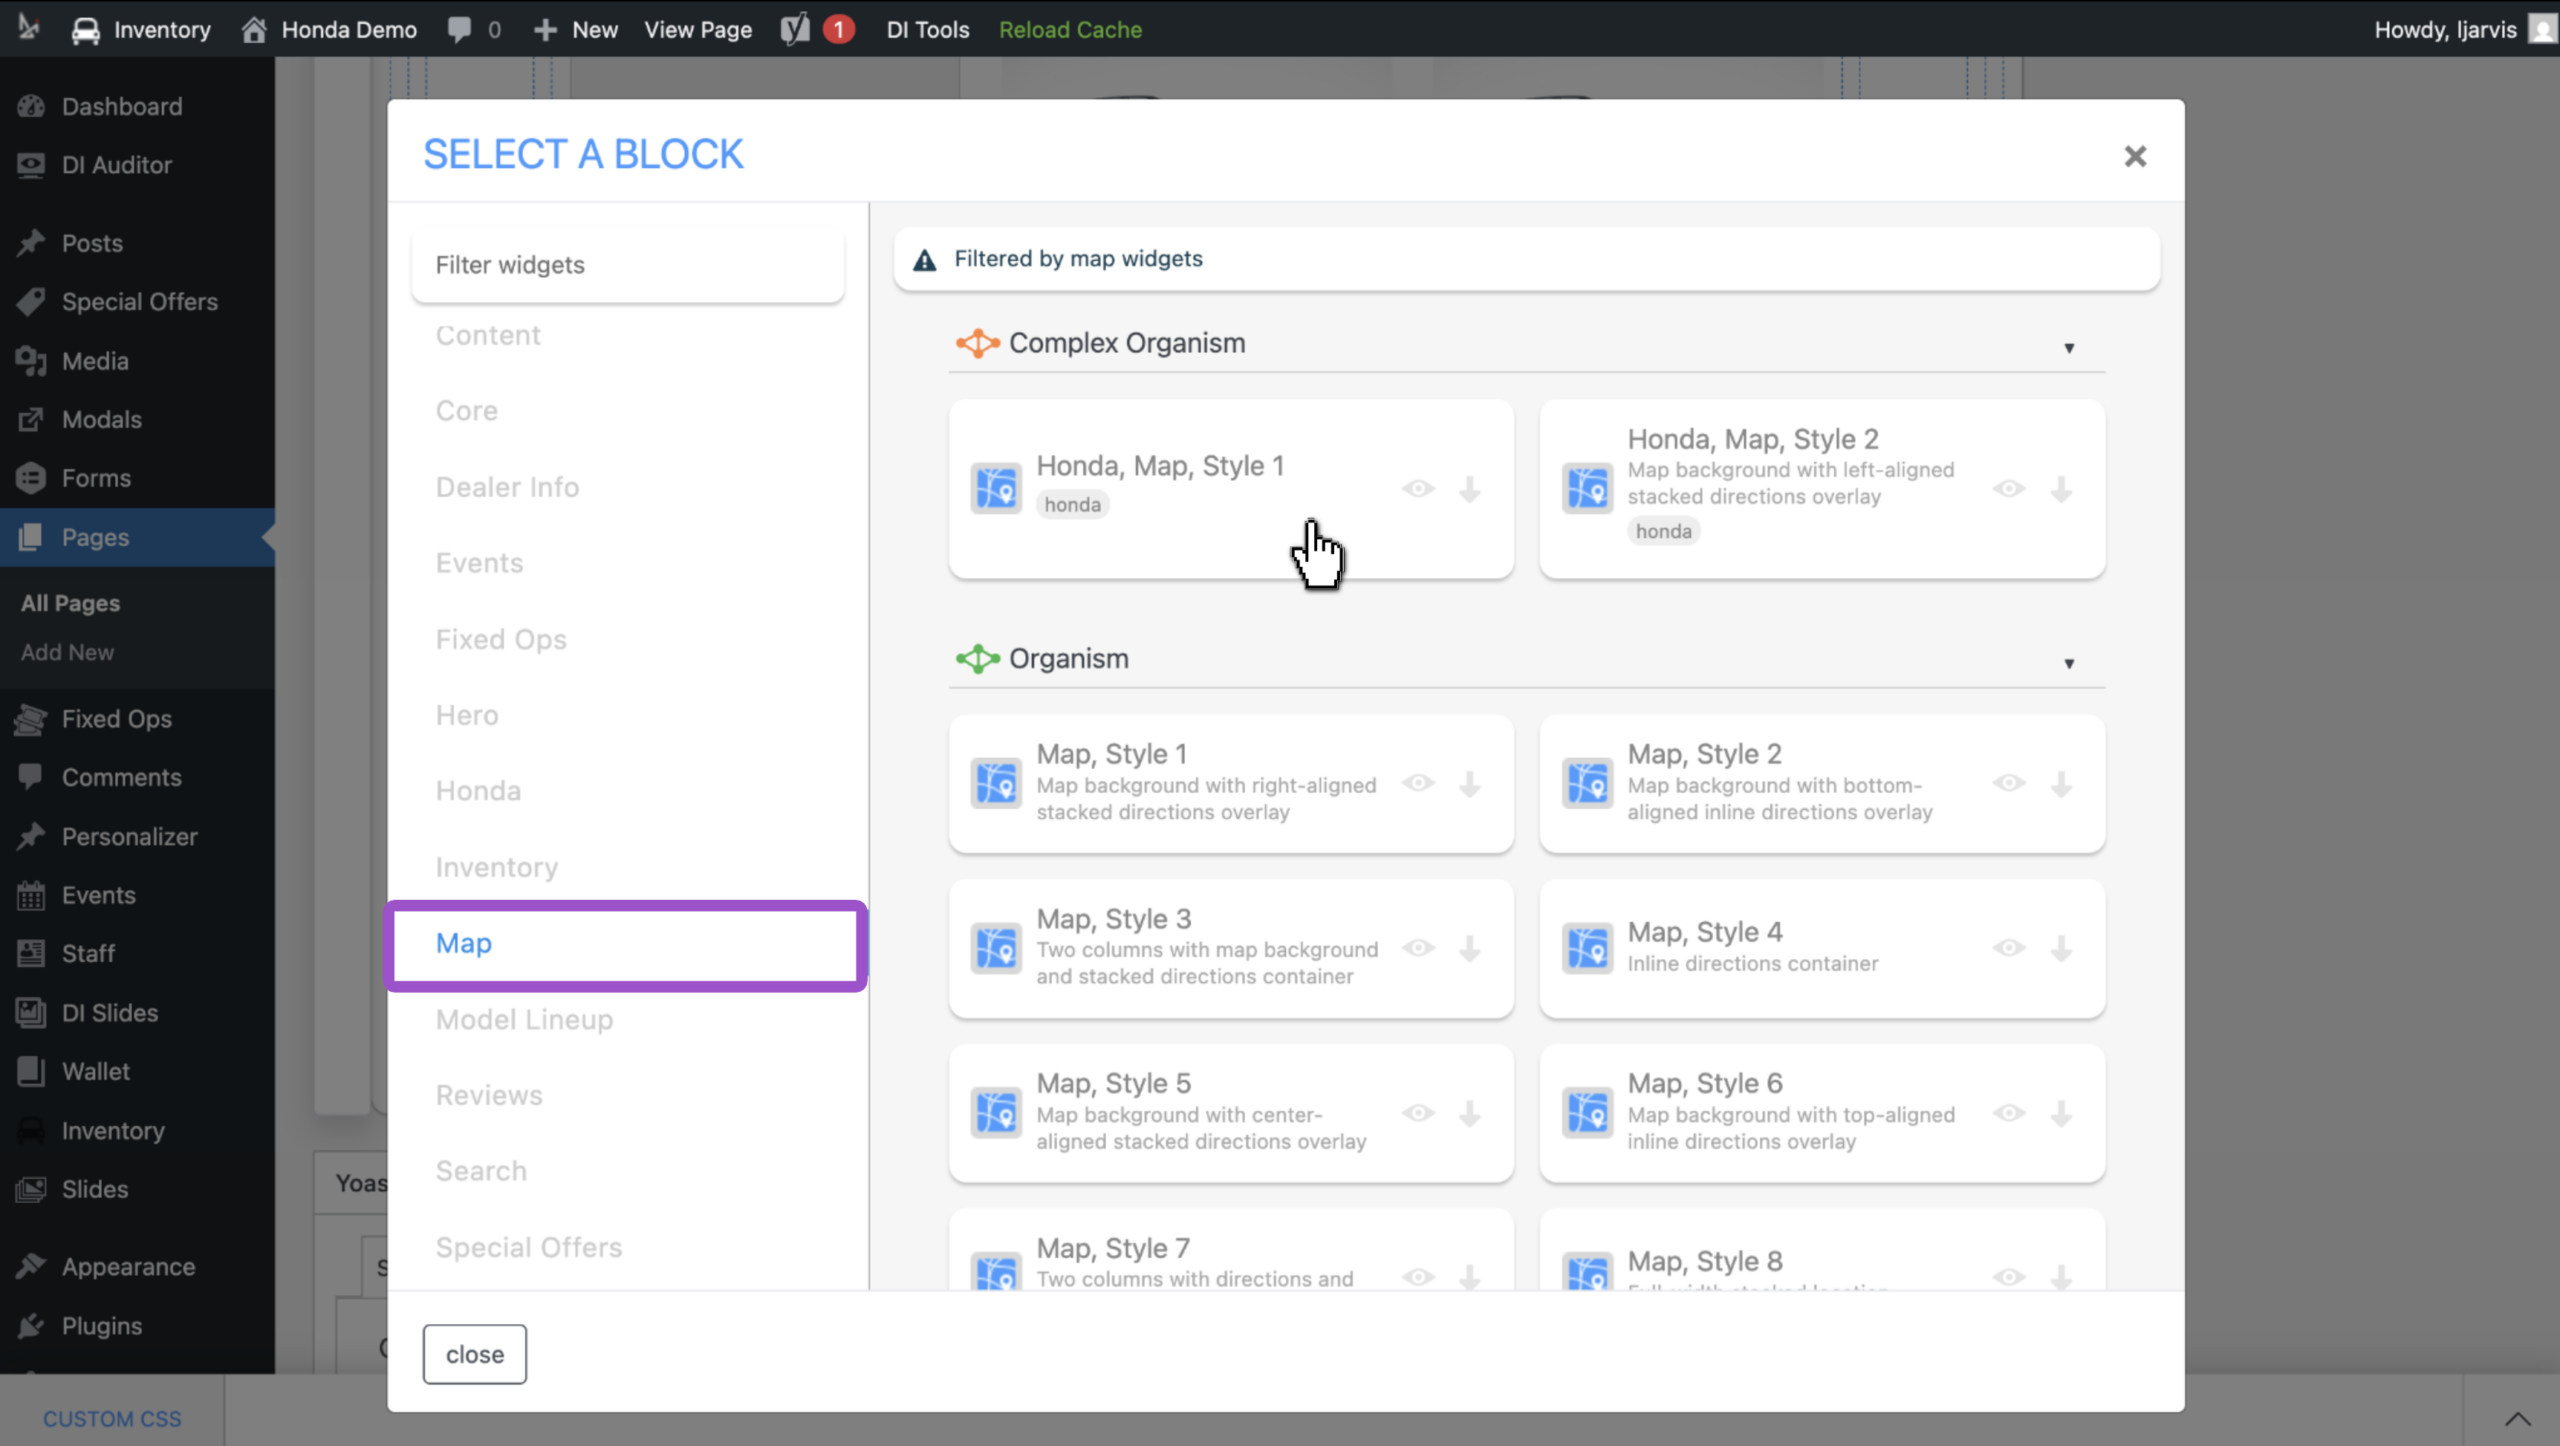
- Click into the widget to add
- Customize and adjust as needed
Need access to Site Builder?
Reach out to support@dealerinspire.com