How to capture leads with Vehicle Build & Price
The Vehicle Build & Price tool (Vehicle Configurator) allows shoppers to customize a vehicle’s trim, colors, and features directly on your website. When the Lead Gate feature is enabled, shoppers are prompted to submit their contact information during or after the build process. This allows your dealership to capture high-intent leads and send them directly to your CRM.
In this article, you’ll learn how to enable the Lead Gate feature, customize the lead form actions and disclaimers, and understand how the lead capture experience appears to shoppers.
To get started
Go to the Cars.com Hub. Click Dealer Inspire, then Manage Website.
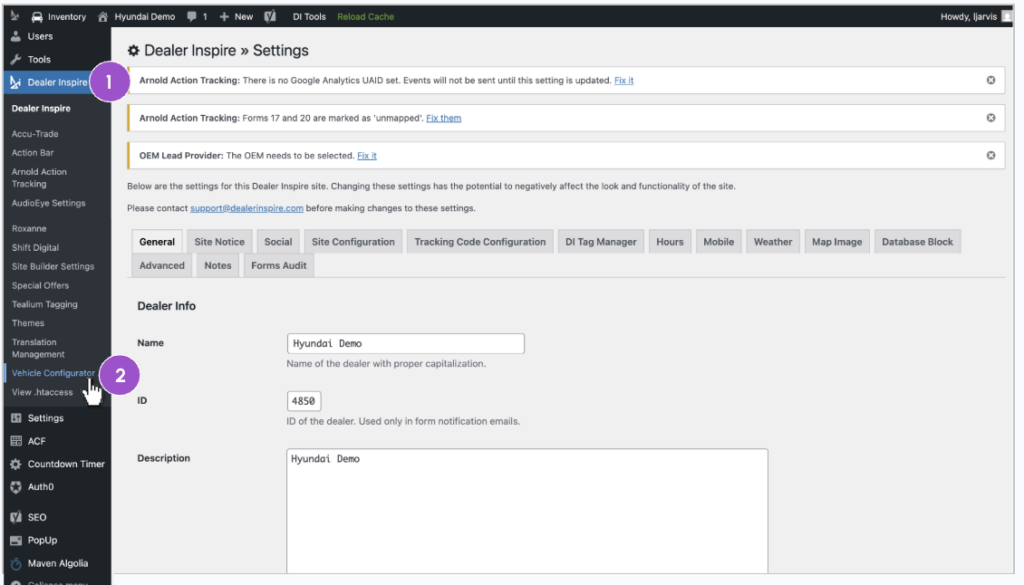
1 Navigate to Vehicle Configurator
From the backend of your website:
- In the left-hand menu, click Dealer Inspire.
- Scroll down and select Vehicle Configurator.
2 Enable the lead gate
You’ll default to the Settings tab.
- Locate the Lead Gate toggle.
- Switch the toggle On to enable lead capture.
When enabled, shoppers will be prompted to submit a form during or after completing the vehicle build process.
If the Lead Gate toggle is off, no form will appear and no leads will be captured through this tool.
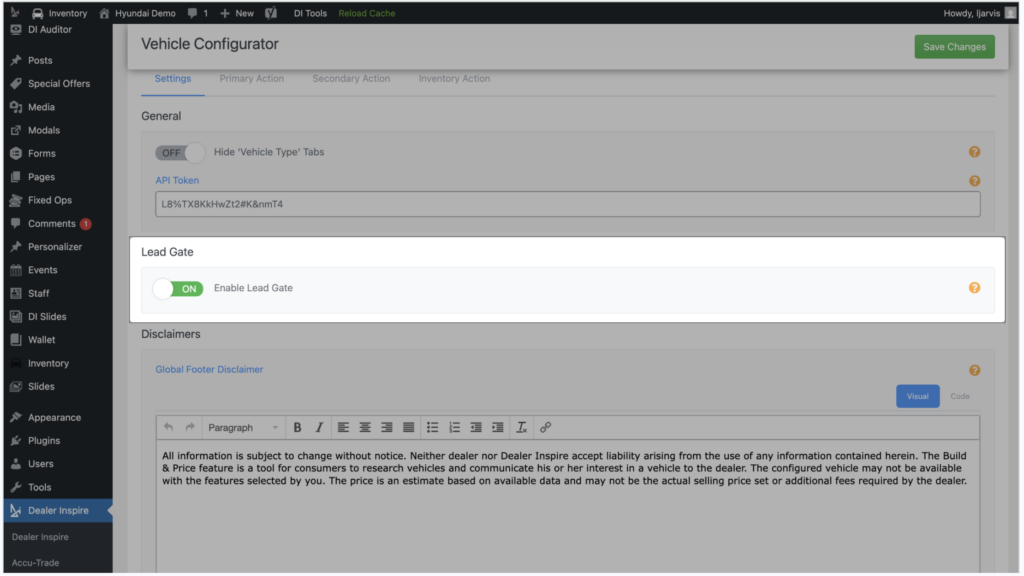
3 Update the disclaimer
Below the Lead Gate toggle, you will see a Disclaimer field.
- Enter or update the disclaimer text as needed to align with your dealership’s compliance or brand requirements.
- This disclaimer will appear on the vehicle build page beneath the configurator experience.
Ensure the language meets any required legal or privacy standards before saving.
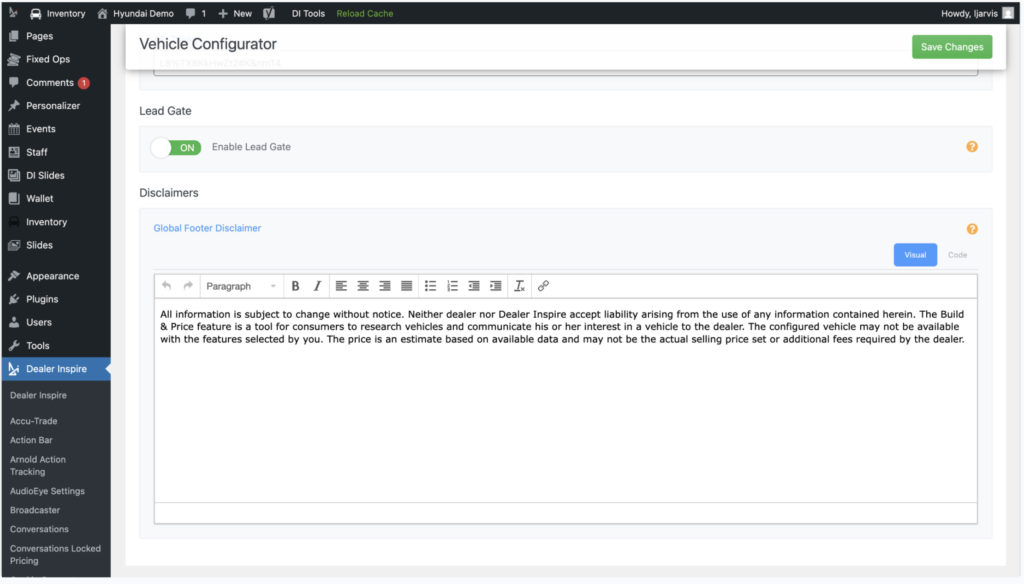
4 Customize lead form actions
The Lead Gate includes configurable call-to-action (CTA) buttons that open lead forms.
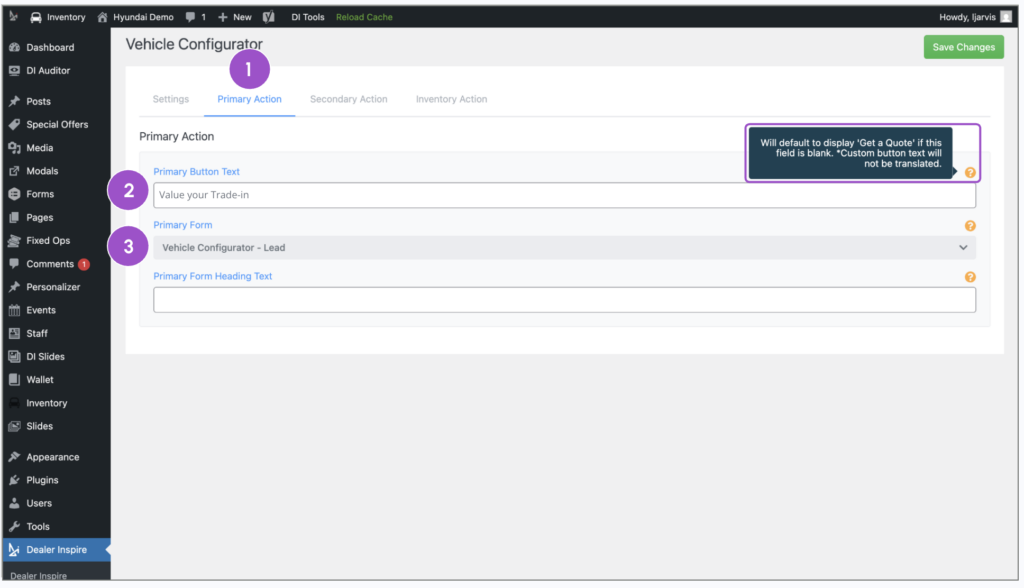
Configure the Primary Action
- Click the Primary Action tab.
- Enter the text you want displayed on the CTA button (“Get Today’s Price” or “Check Availability”).
- Select the form you want this action to open.
The selected form determines:
- What information is collected from the shopper.
- Where the lead is routed in your CRM (based on the form’s existing configuration).
Configure the Secondary Action
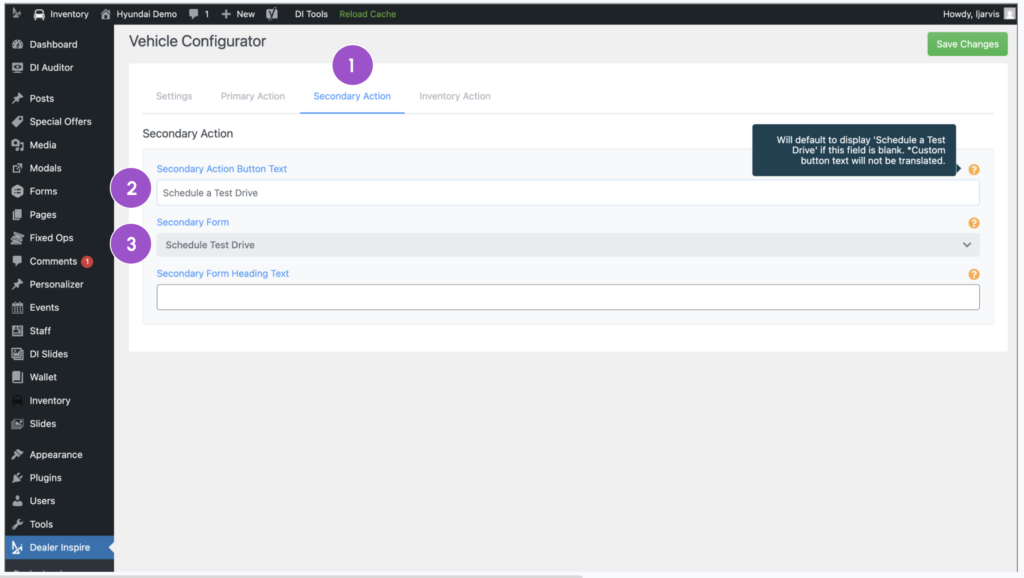
- Click the Secondary Action tab.
- Enter CTA button text.
- Select a different form to associate with this action.
The secondary action provides an additional engagement opportunity, such as:
- Value Your Trade
- Schedule a Test Drive
- Request Financing Information
Both actions should link to properly configured forms to ensure accurate CRM routing.
5 Save your changes
After configuring:
- Lead Gate toggle
- Disclaimer
- Primary and Secondary Actions
Click Save Changes in the top-right corner
Customer experience overview
Understanding how the Lead Gate appears to shoppers helps confirm proper configuration.
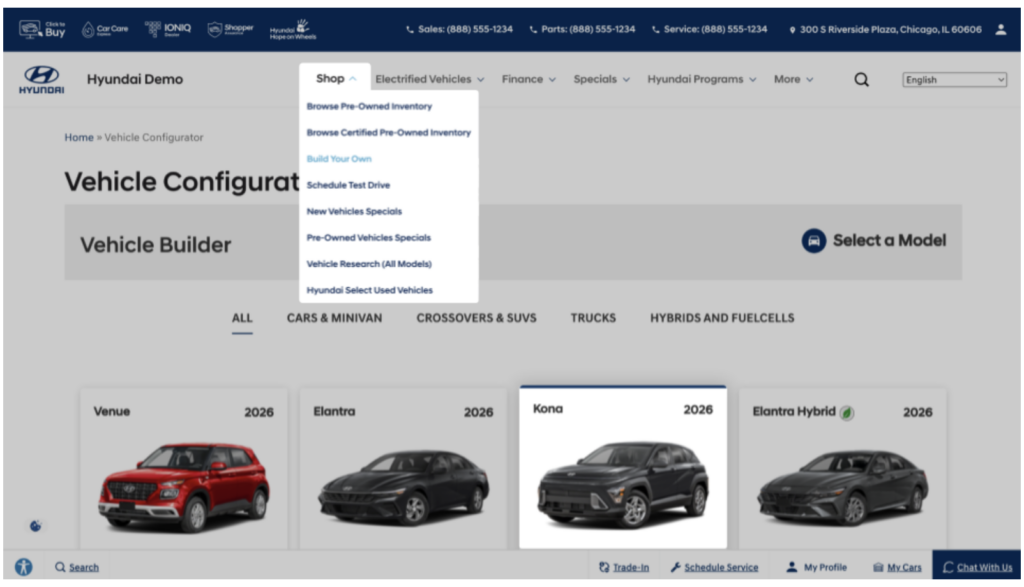
A shopper selects your Build Your Own menu option and launches the Vehicle Configurator.
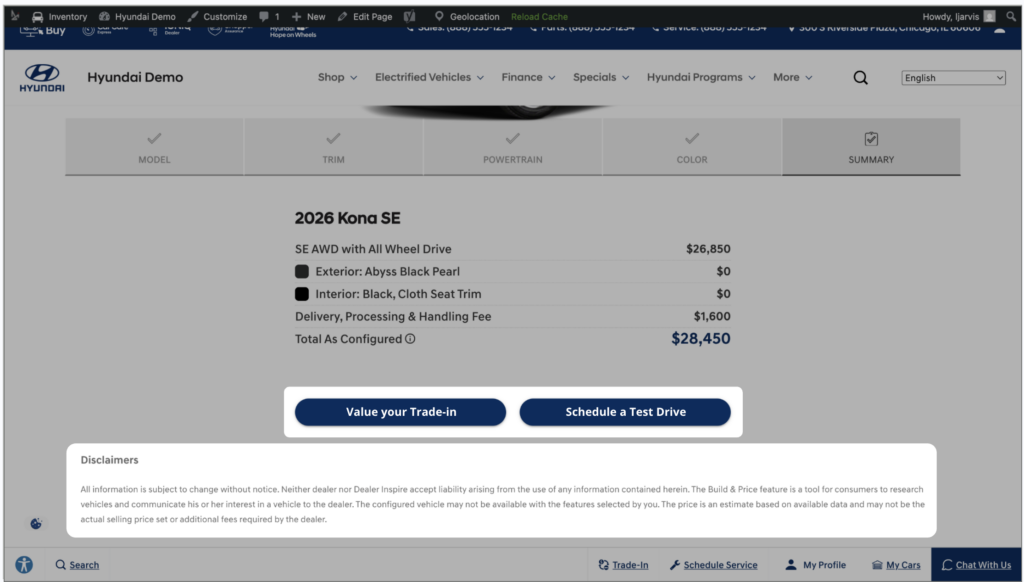
After progressing through the vehicle customization process, the shopper is prompted to submit a contact form.
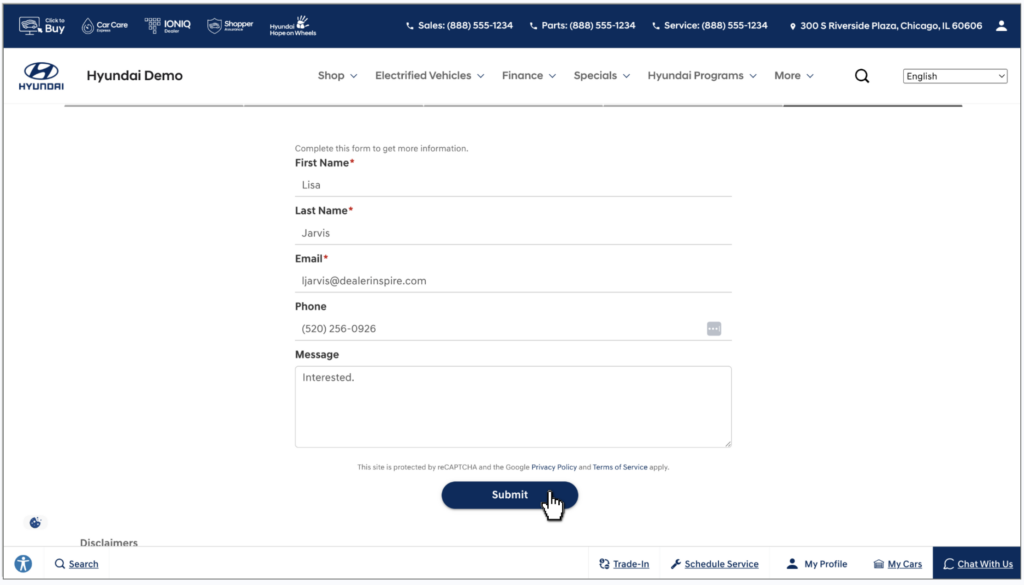
After submitting the form:
- The shopper receives a summary of their selected vehicle specifications.
- The Primary and Secondary CTA buttons remain visible, encouraging additional actions.
- Your configured disclaimer appears below the vehicle build screen.
This keeps the shopper engaged while providing your dealership with detailed build preferences tied to the submitted lead.