How to use DI Slides to add videos to your website
DI Slides makes it easy to feature dynamic video content across your Dealer Inspire website — including on your homepage, vehicle detail pages, or custom pages. This plugin lets you embed YouTube videos directly into sliders to grab shopper attention and showcase promotions, vehicles, or dealership branding.
In this article, you’ll learn how to create a video slide using DI Slides, customize its settings, publish it, and troubleshoot common video issues.
Before you begin
Make sure you have the following ready:
- An existing slider created in DI Slides
- A YouTube-hosted version of your video
Why YouTube?
YouTube ensures faster load times, reliable playback across devices, and broad browser support — making it the most effective way to host dealership videos.
To get started
Go to the Cars.com Hub. Click Dealer Inspire, then Manage Website.
1 Add a new slide
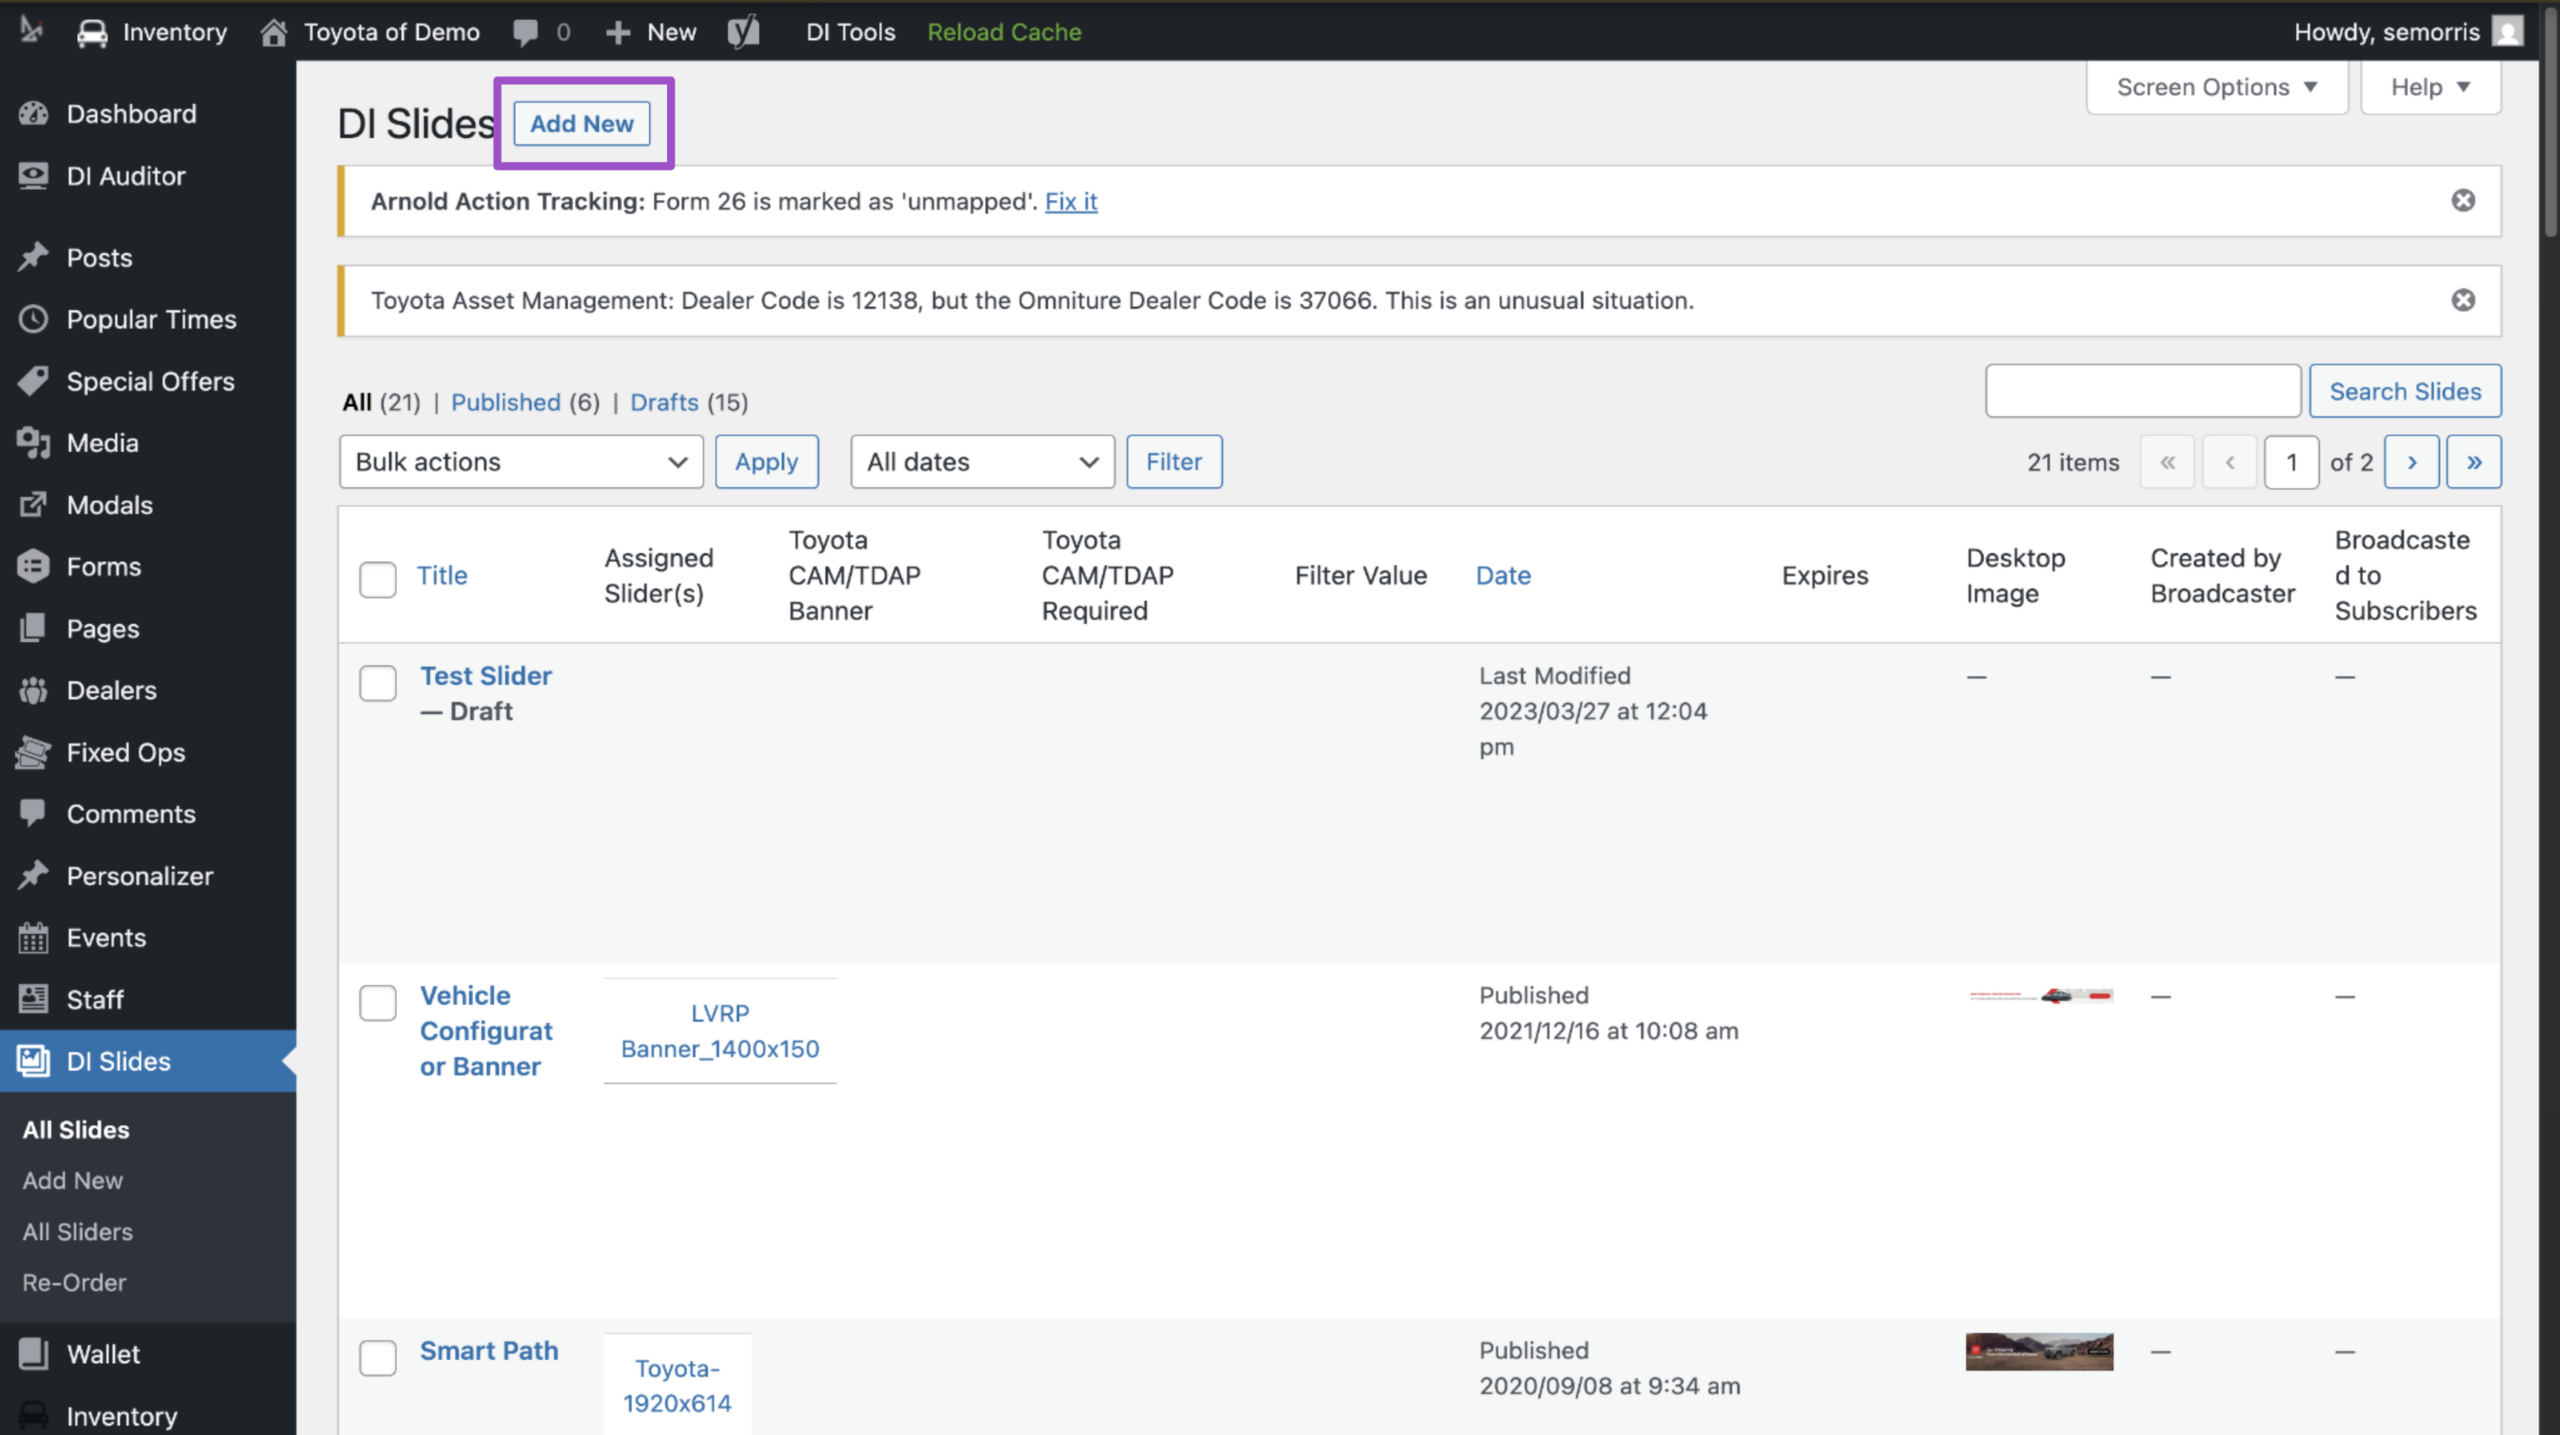
- In the WordPress menu, click DI Slides
- Select Add New
2 Name your slide
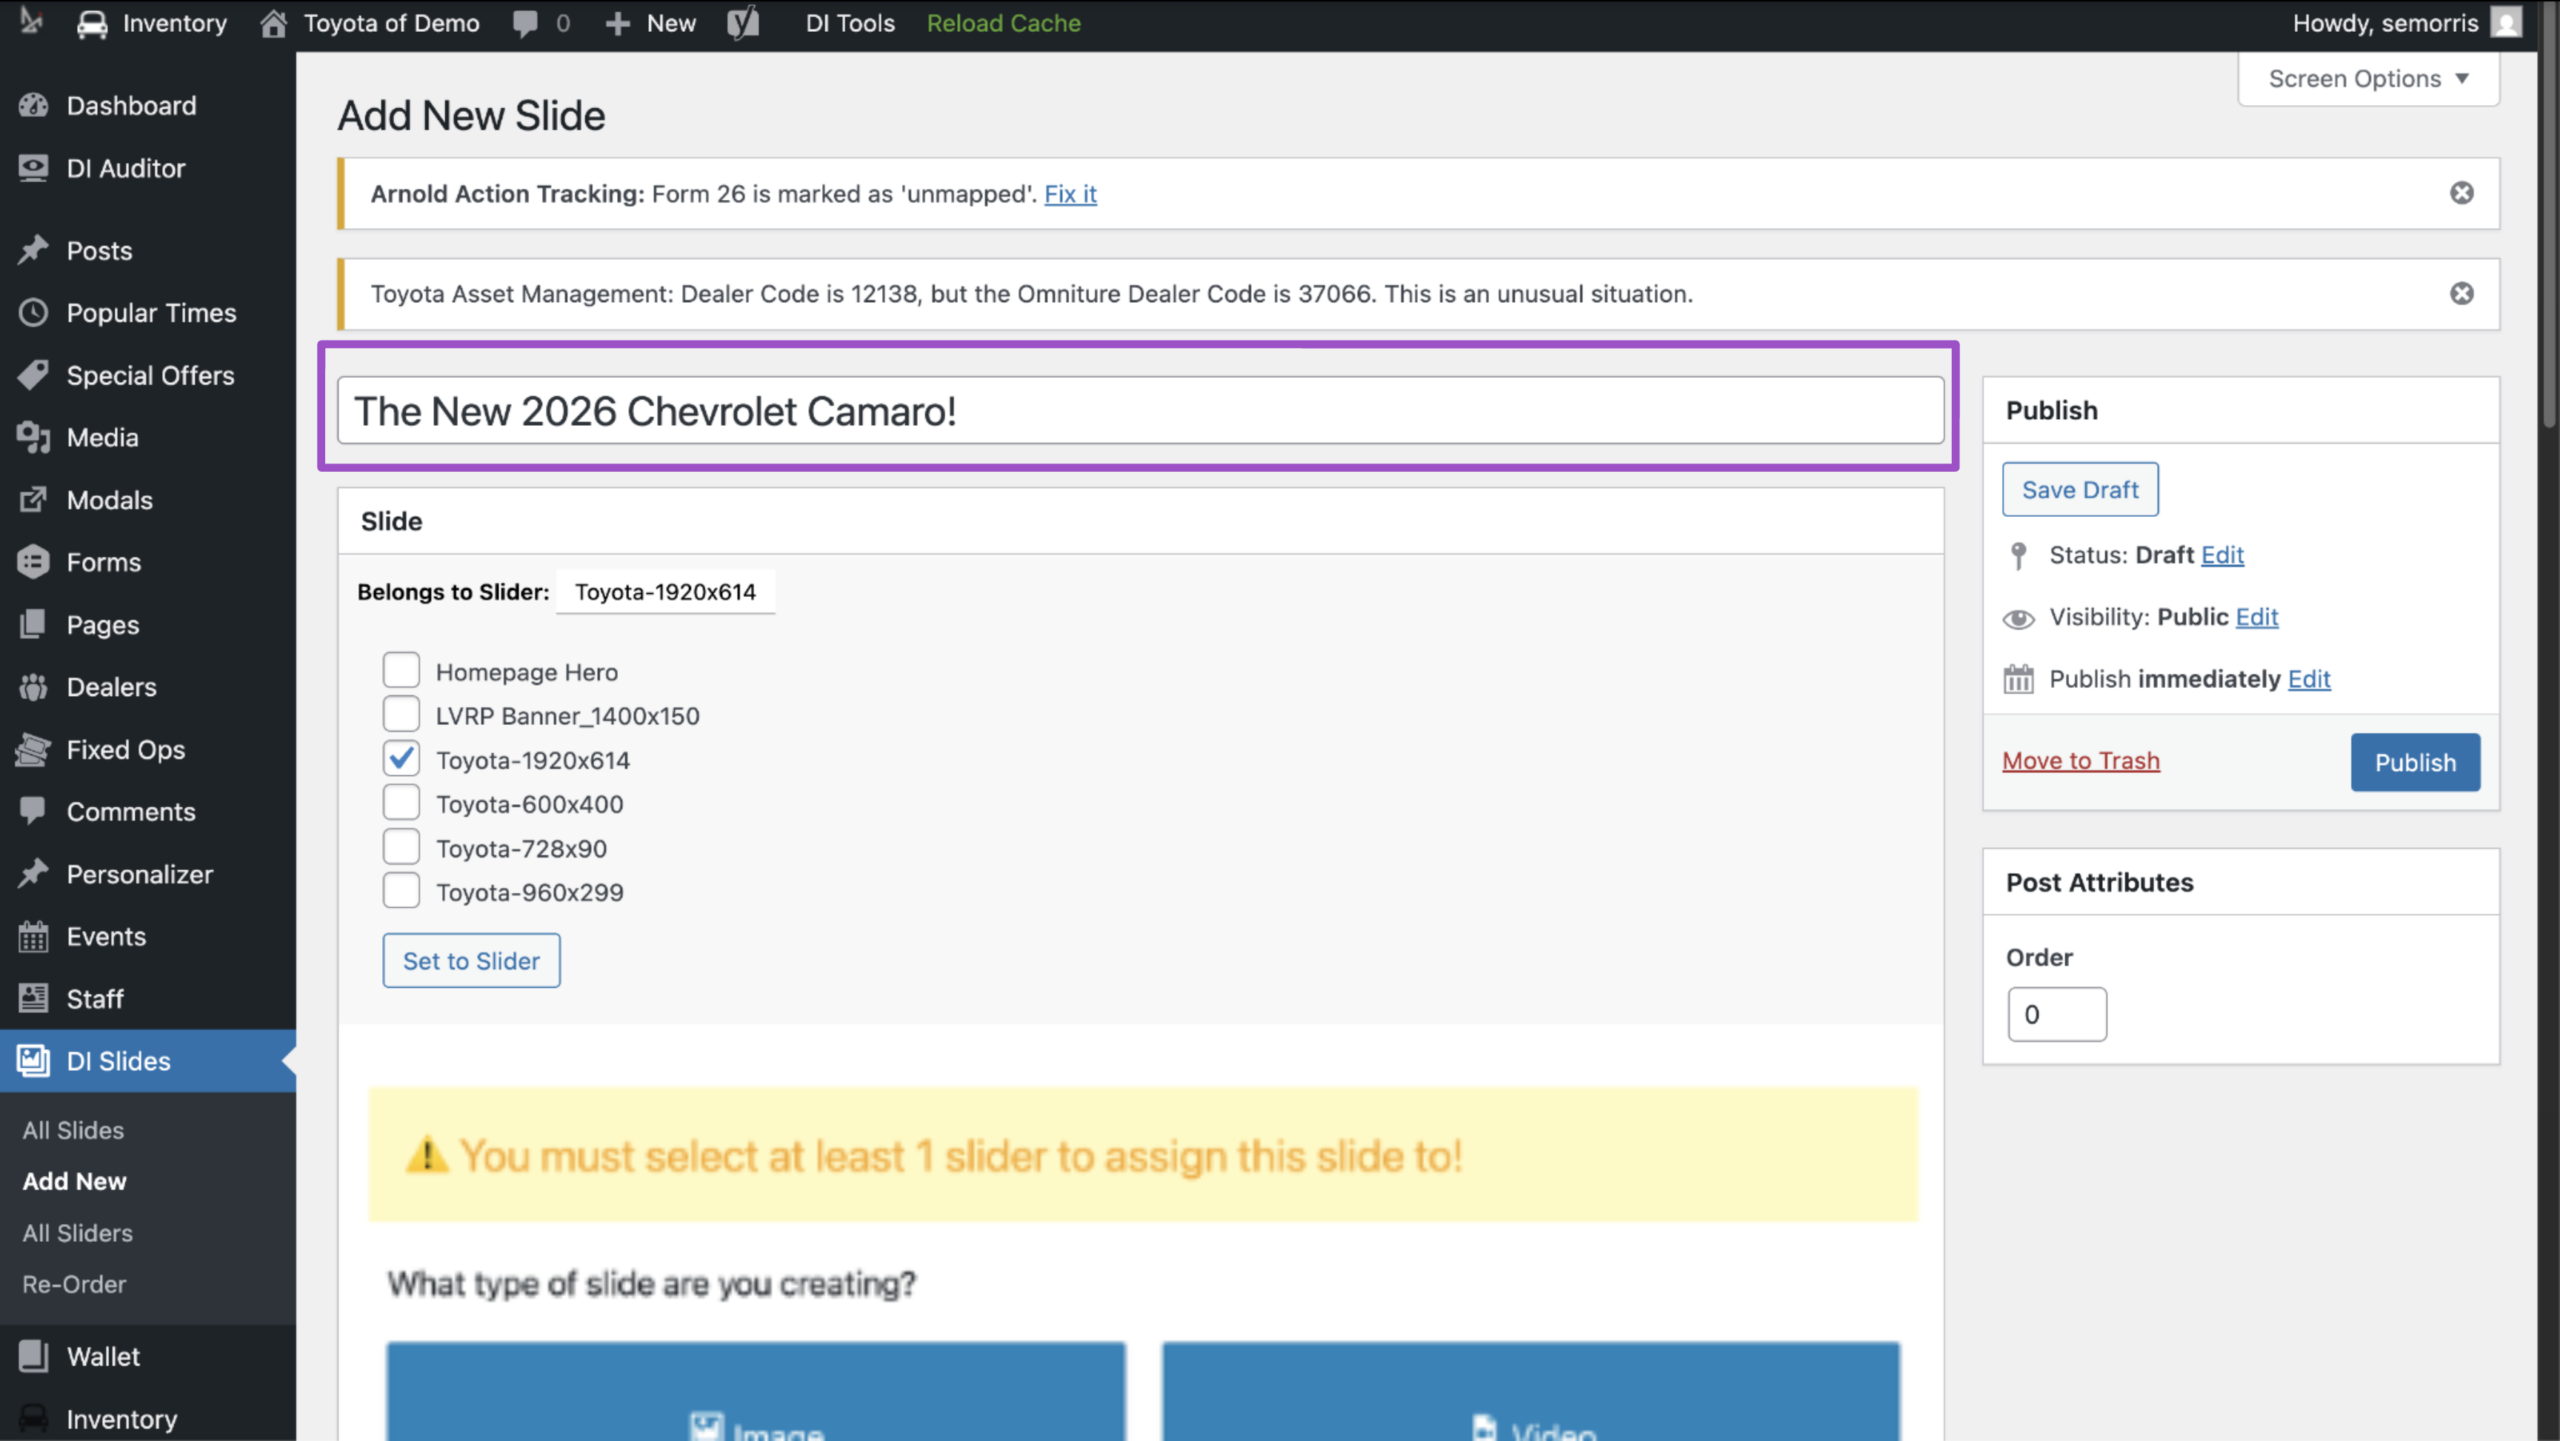
- Enter a descriptive title for your slide.
Note: This title is for backend organization only and won’t display to customers.
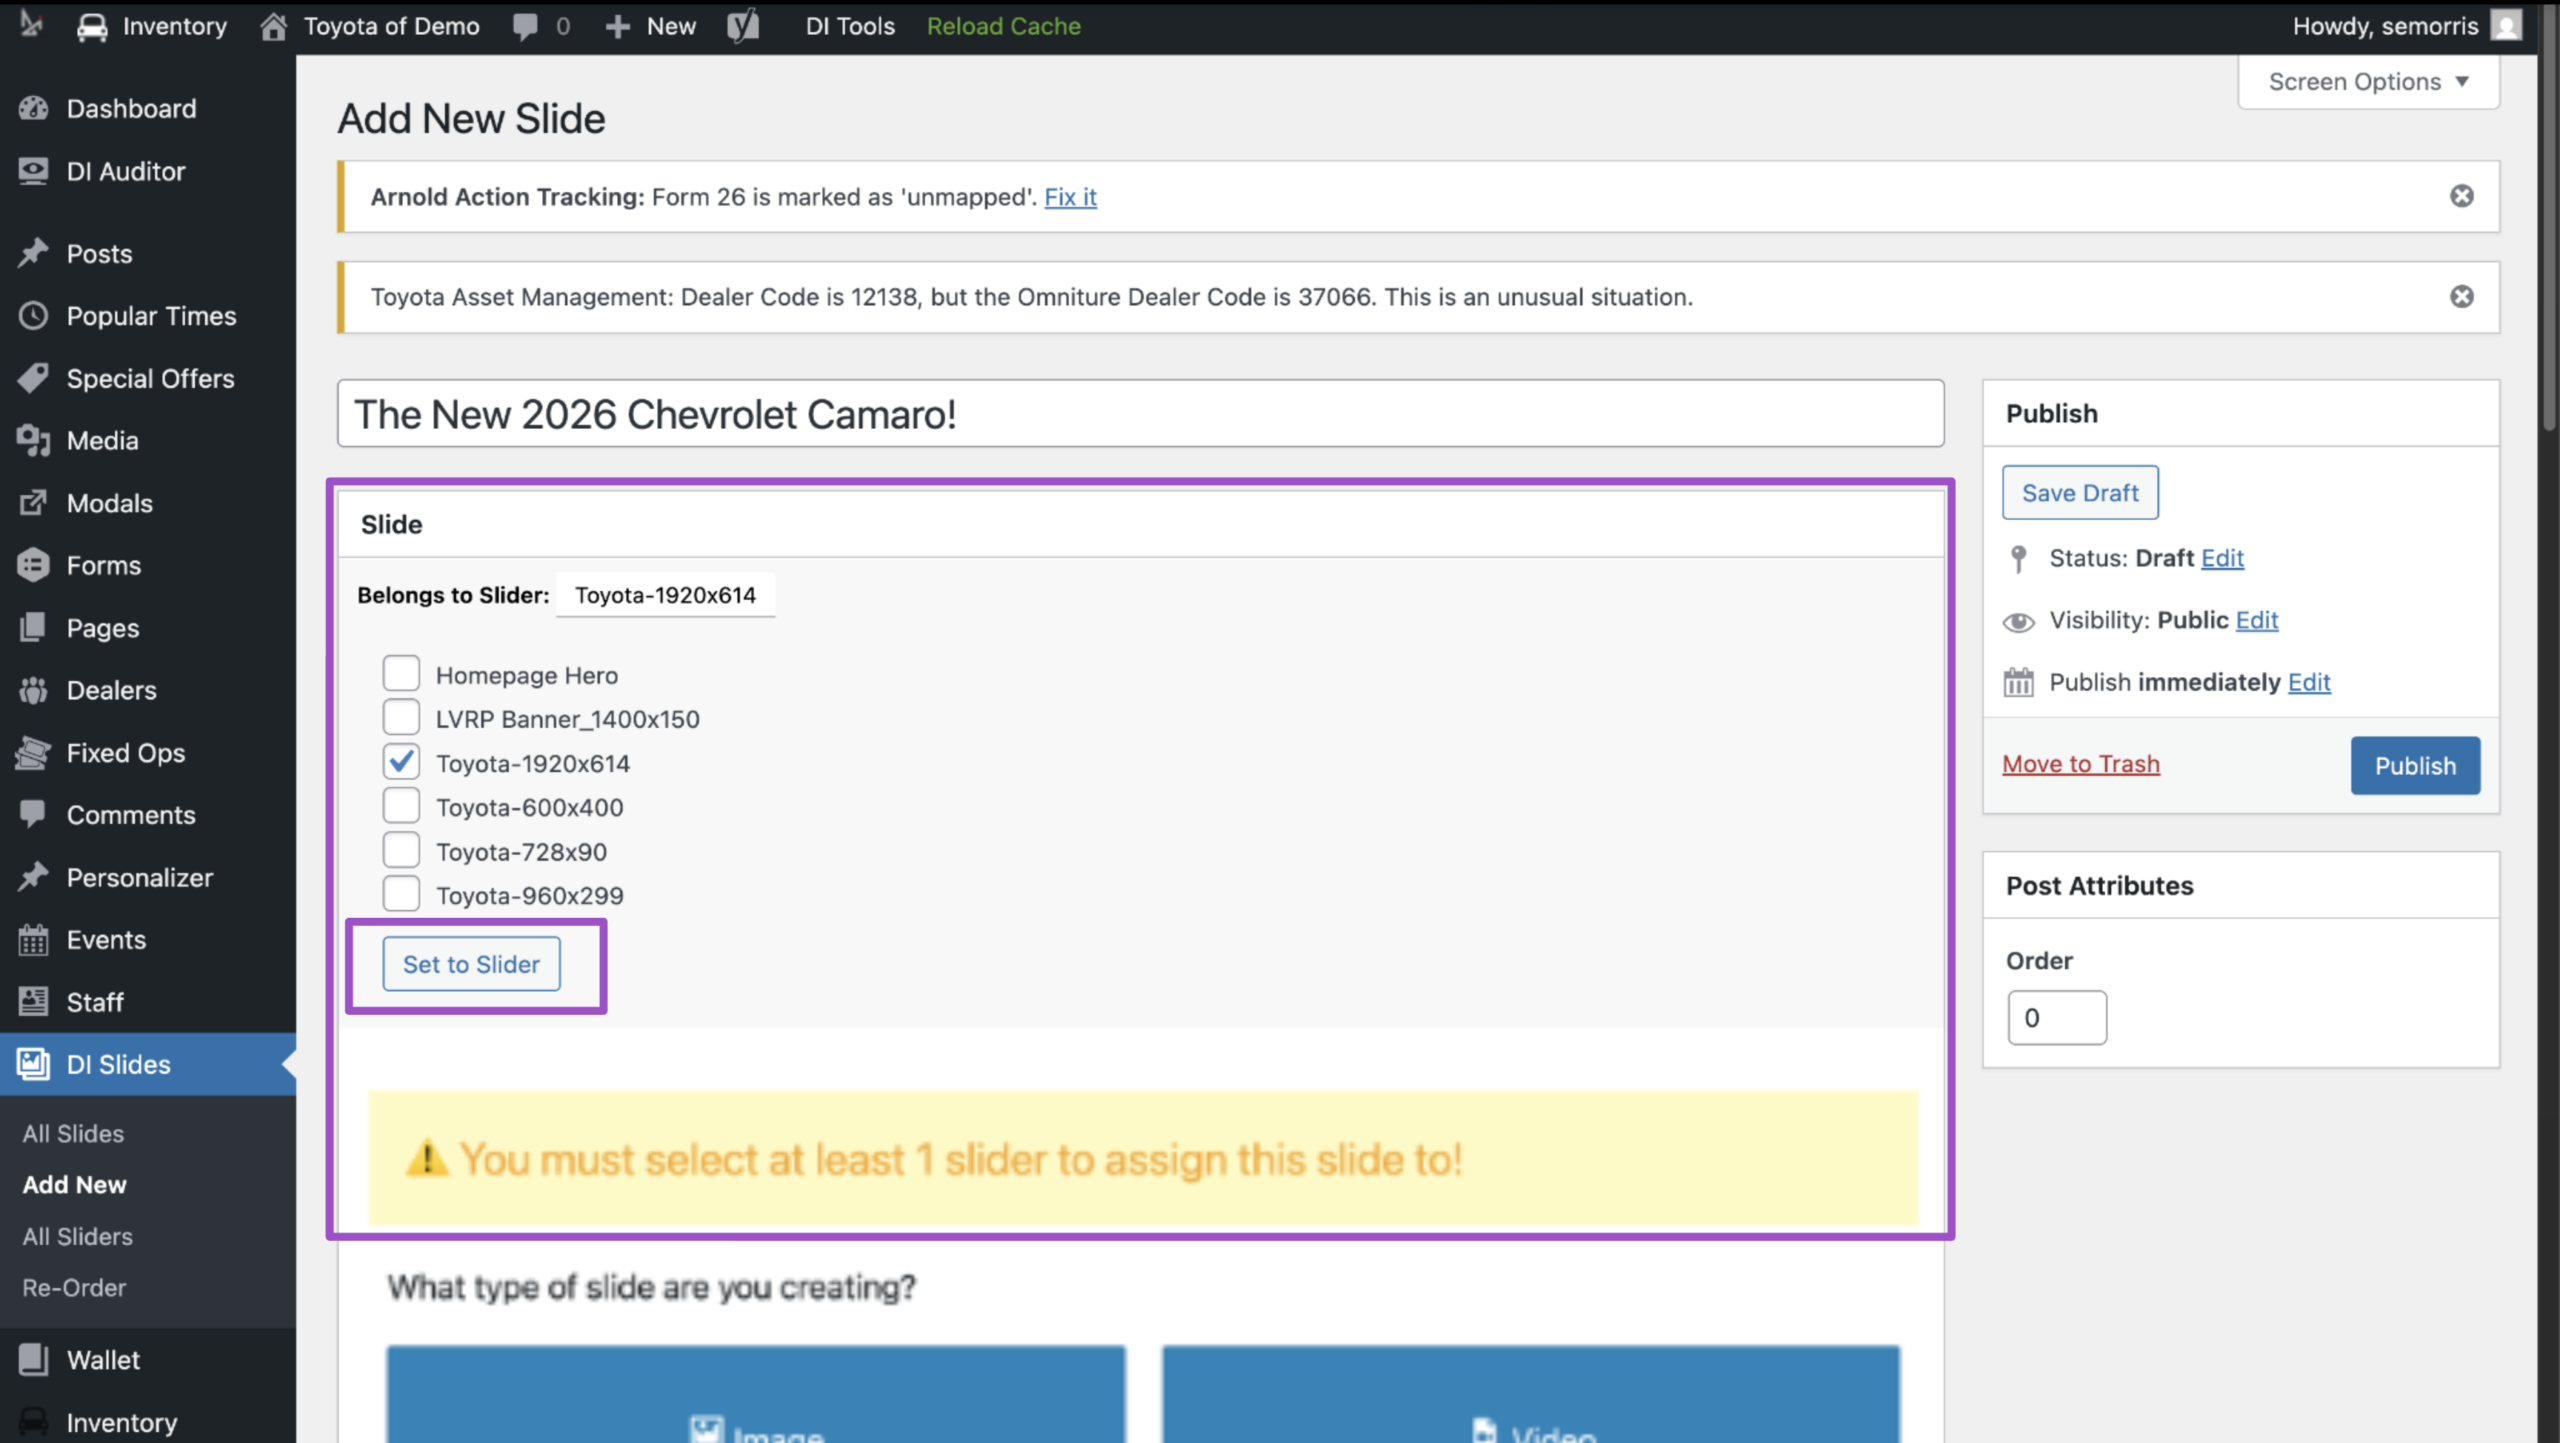
3 Assign the slide to a Slider
- In the Slide section, select the slider(s) where you want the video to appear. Click Set to Slider.
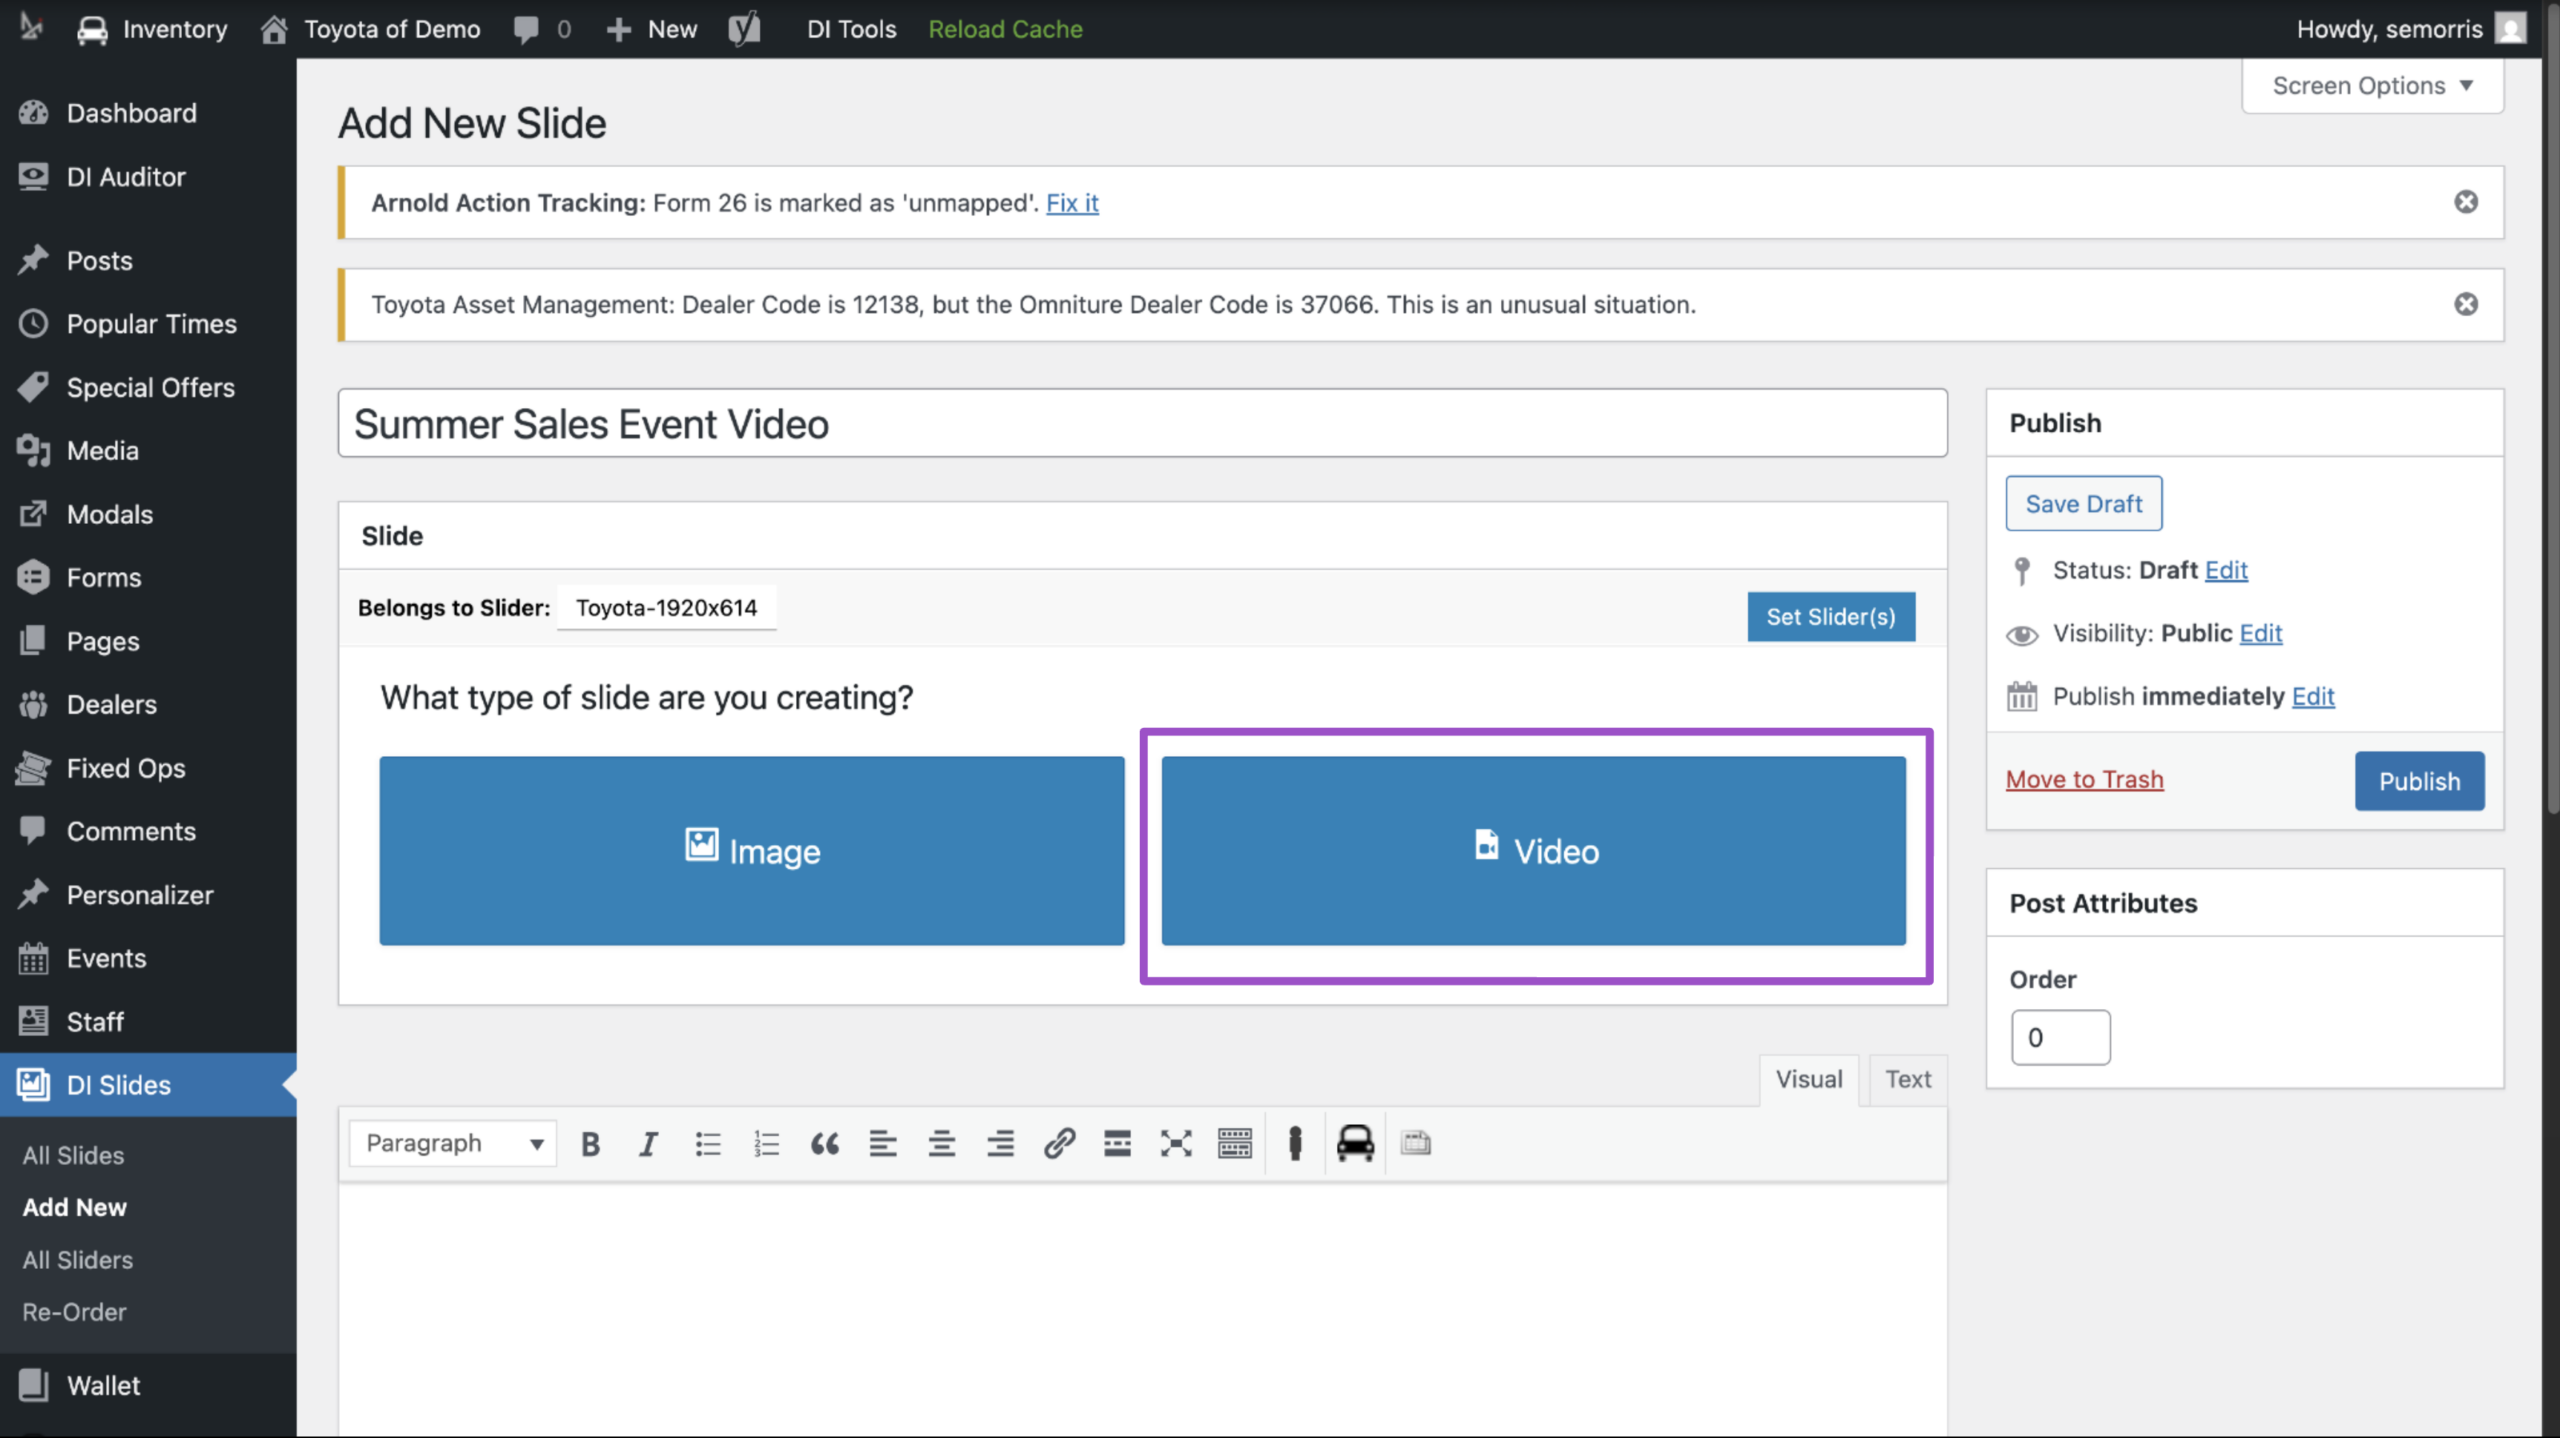
4 Choose slide type
- Select Video as your slide type.
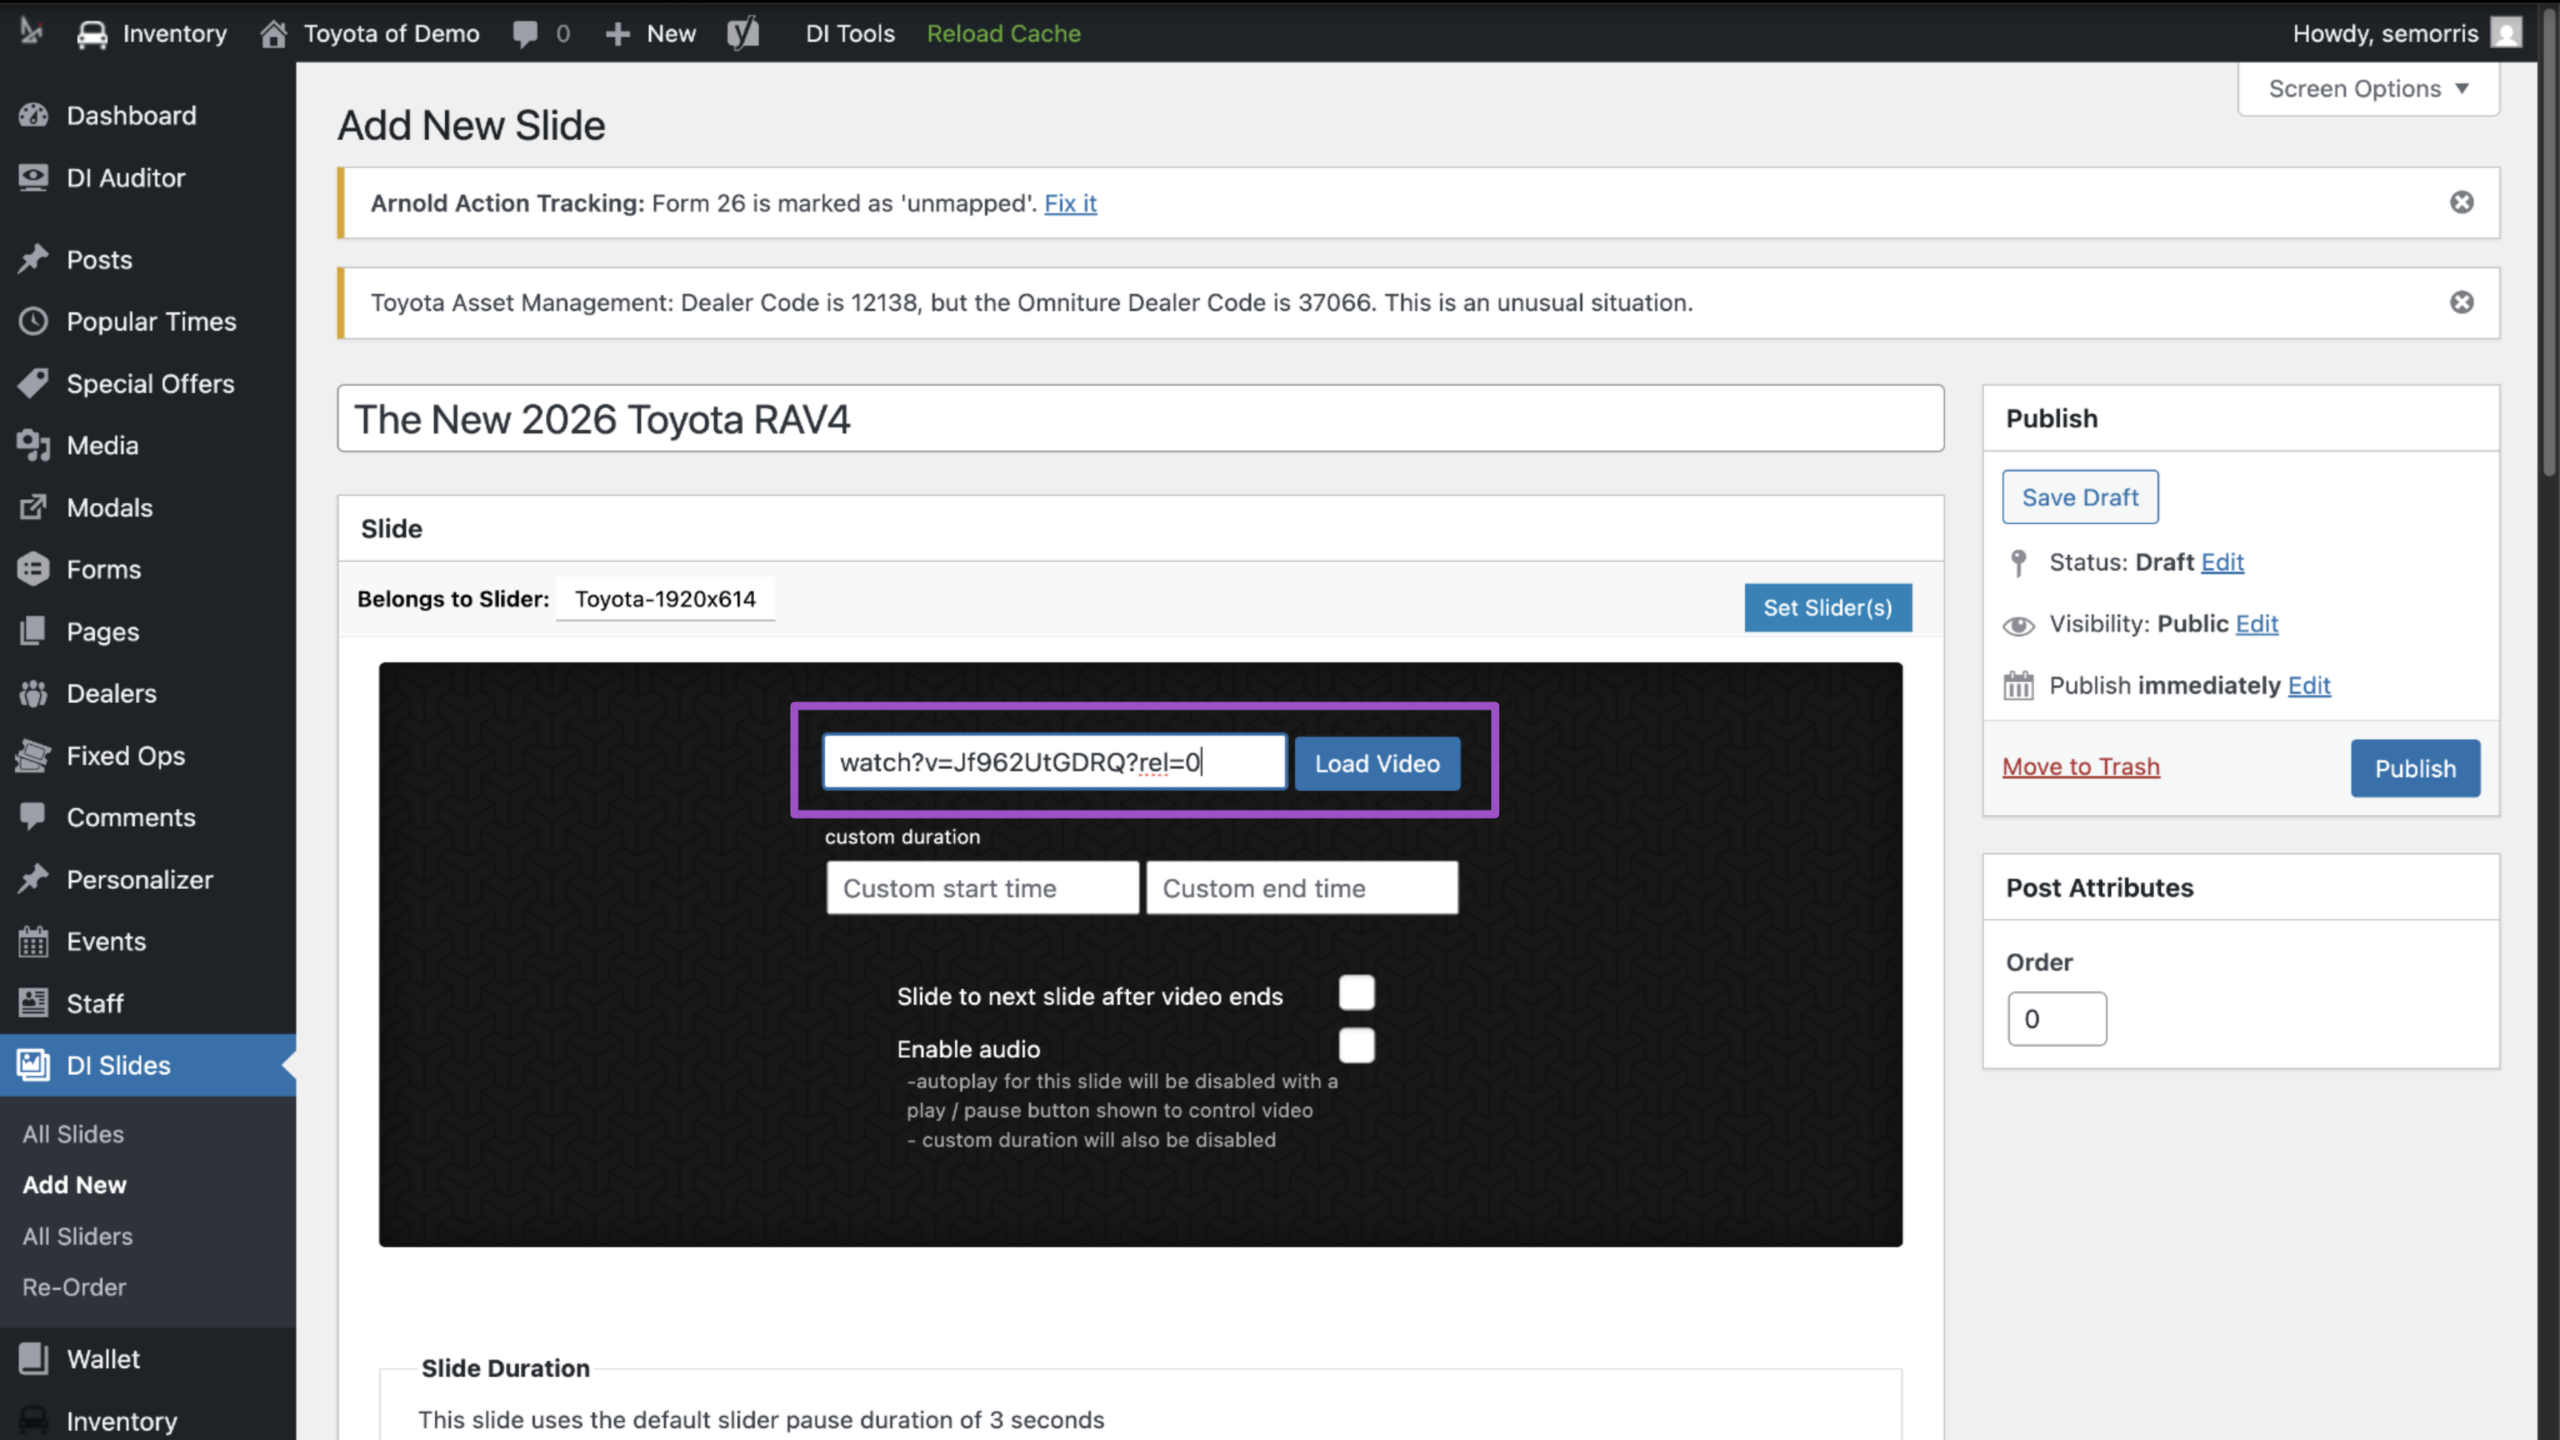
5 Add your YouTube video
Paste either:
- The full YouTube URL, or
- Just the video ID (the string after v= in the YouTube link)
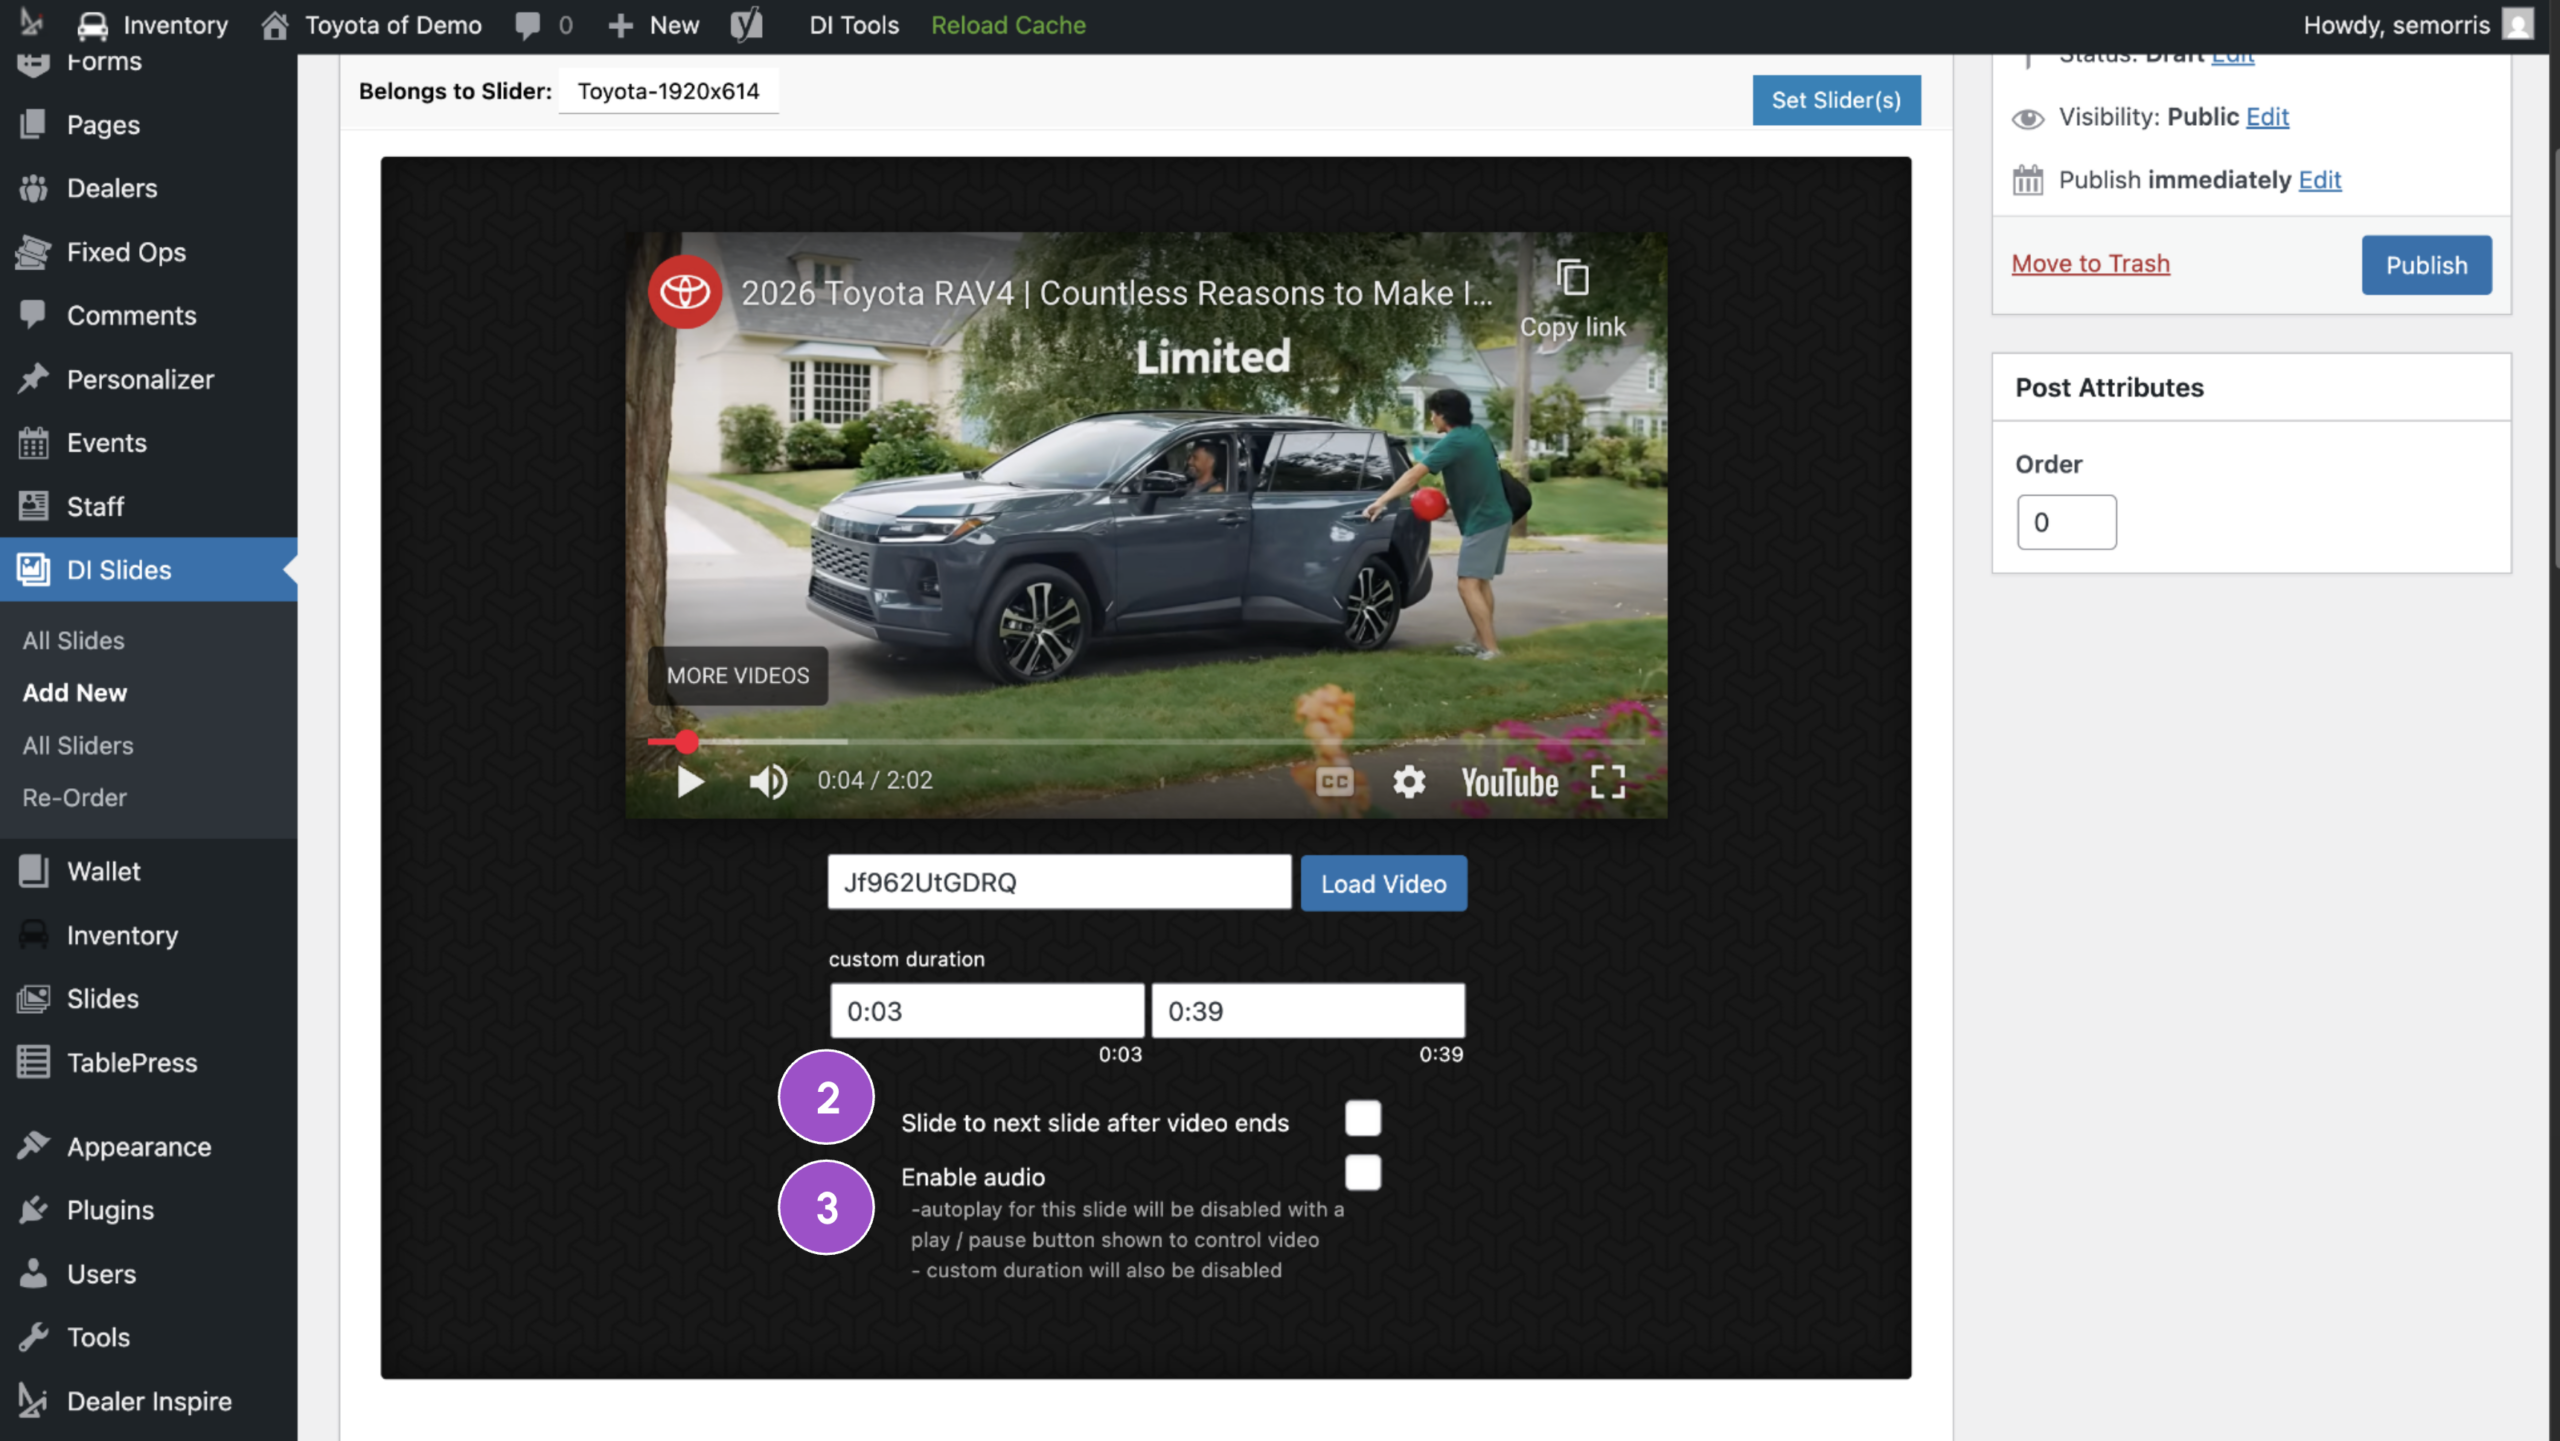
Click Load Video.
Tip: To prevent unrelated or competitor videos from displaying after yours ends, add ?rel=0 or &rel=0 to the end of the YouTube link.
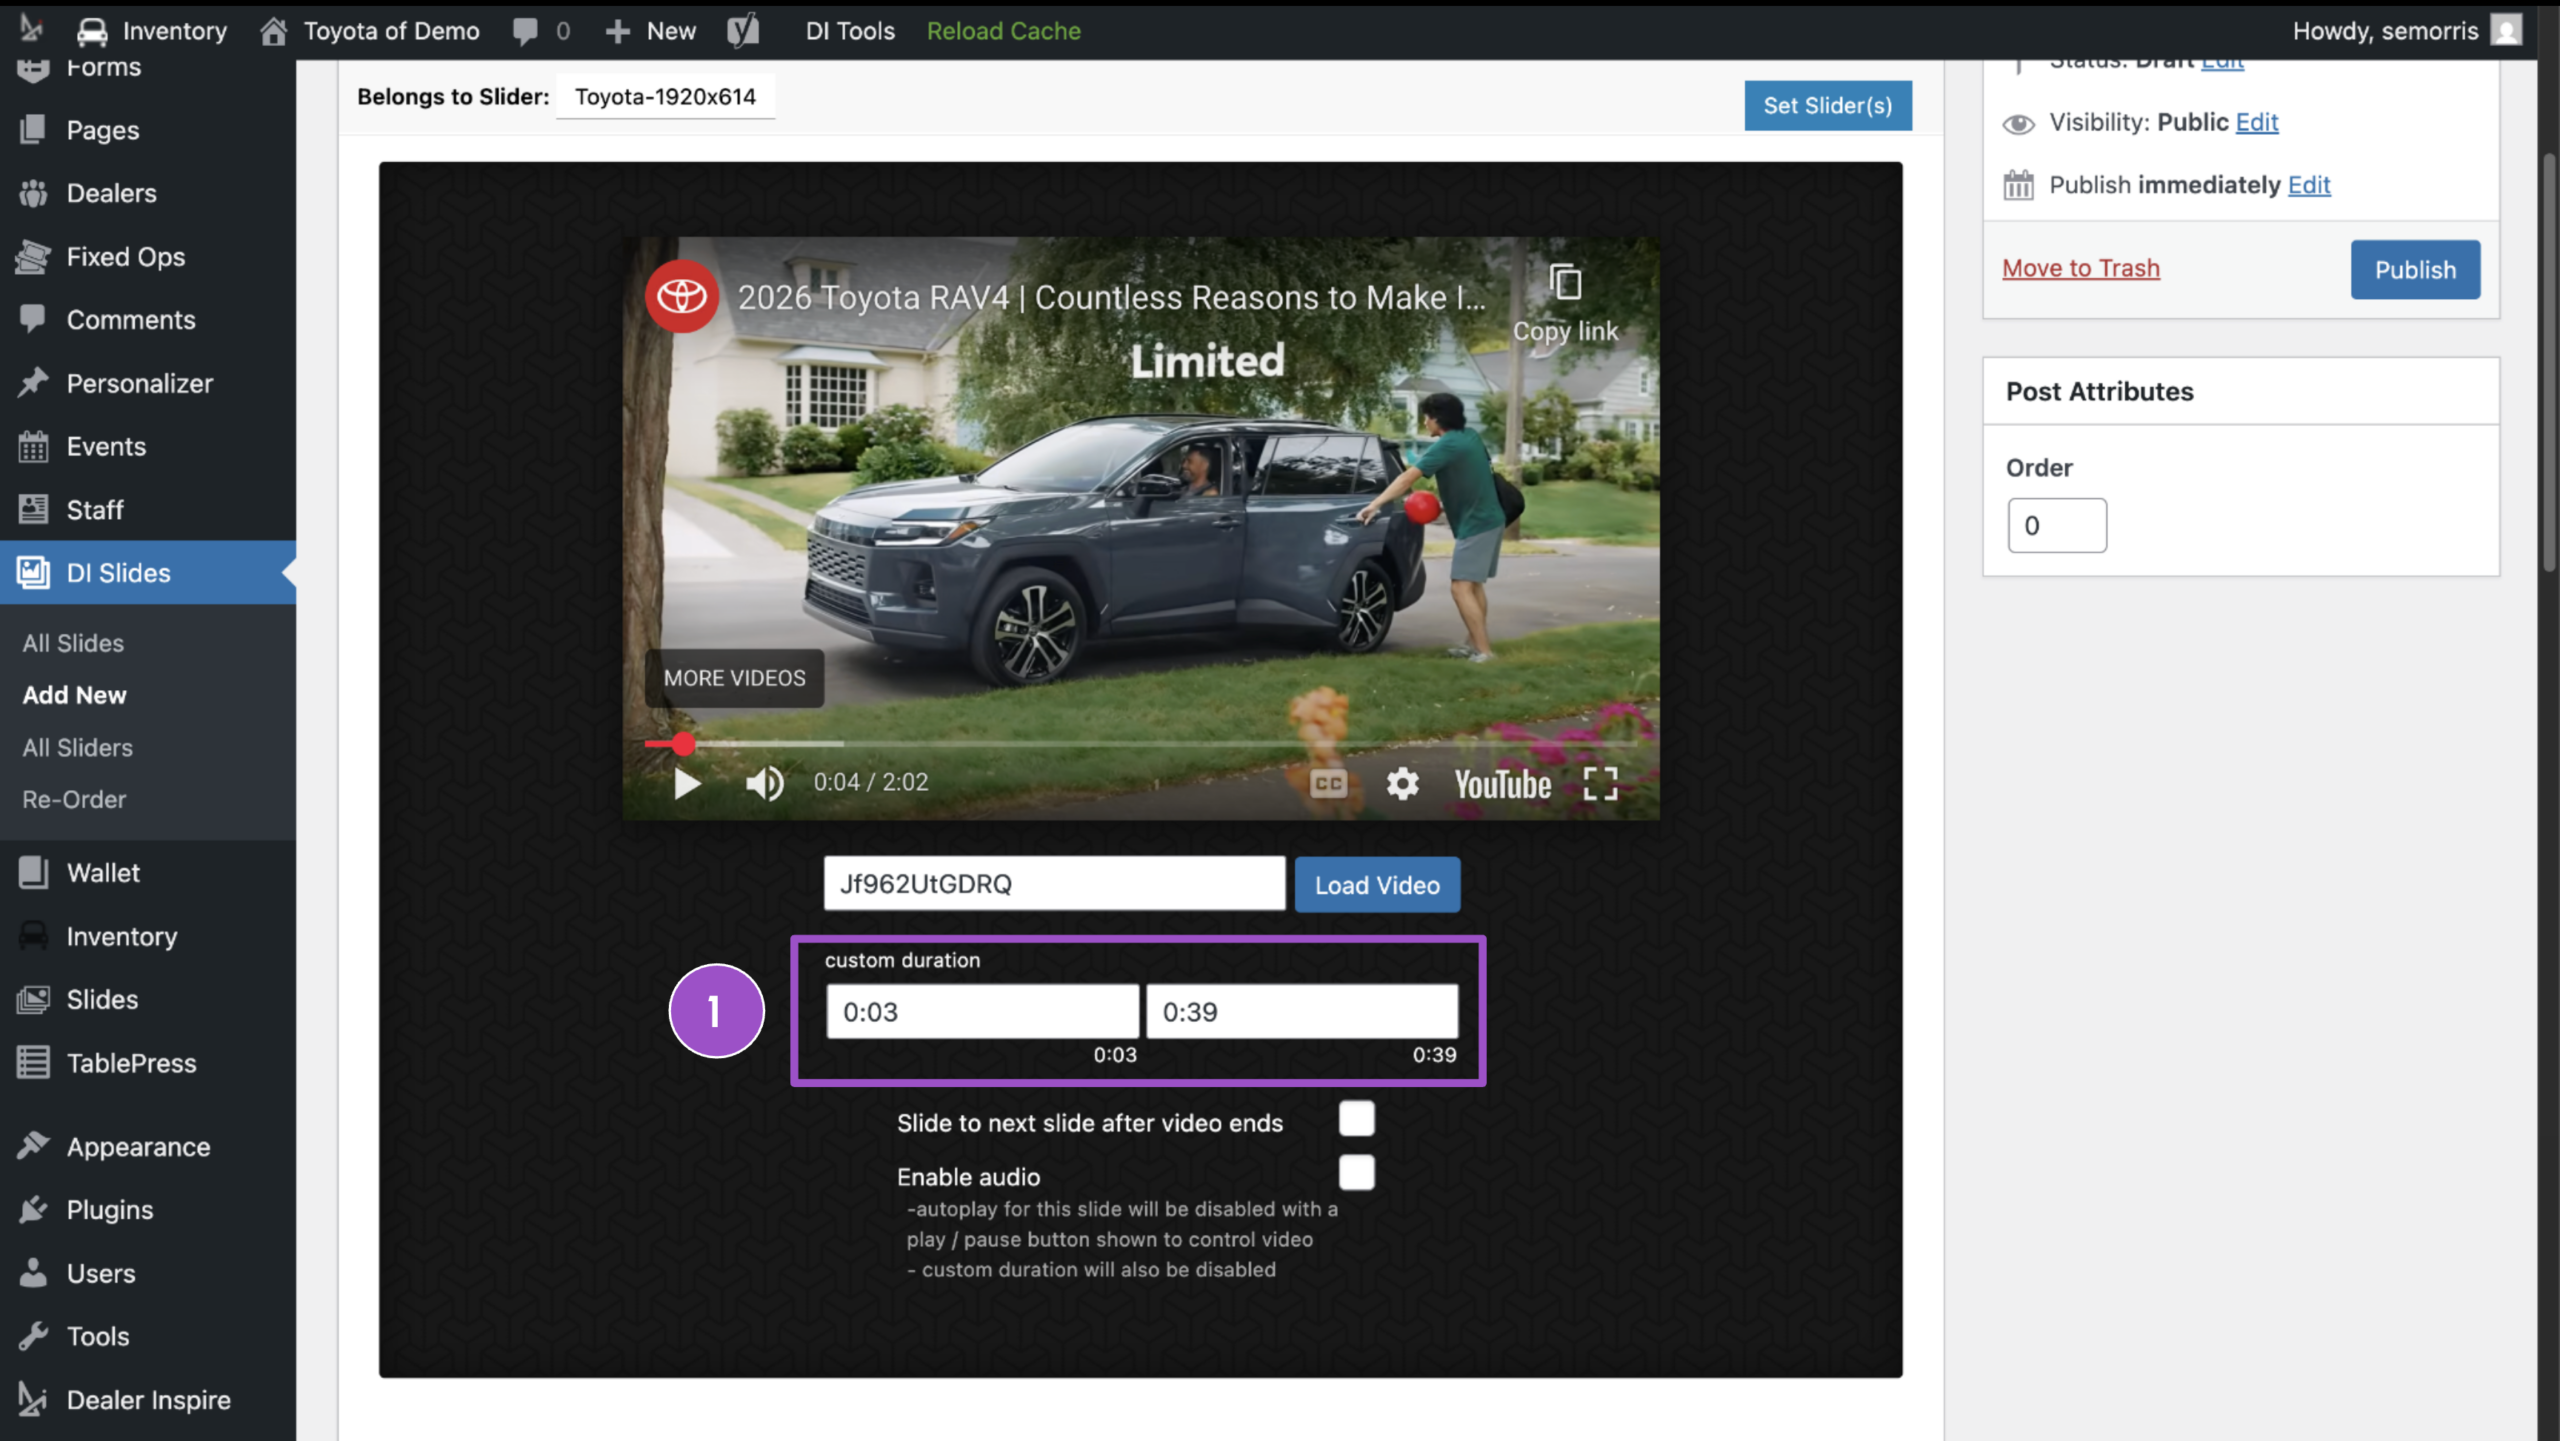
6 Optional video settings
You can further customize how your video slide behaves:
- Custom Video Duration: Show only part of the video by entering a start and end time (in minutes or seconds).
- Slide to Next Slide After Video Ends: Auto-advance to the next slide once the video finishes.
- Enable Audio: Allow audio playback (not supported on homepage sliders).
- Note: Enabling audio disables custom duration and autoplay.
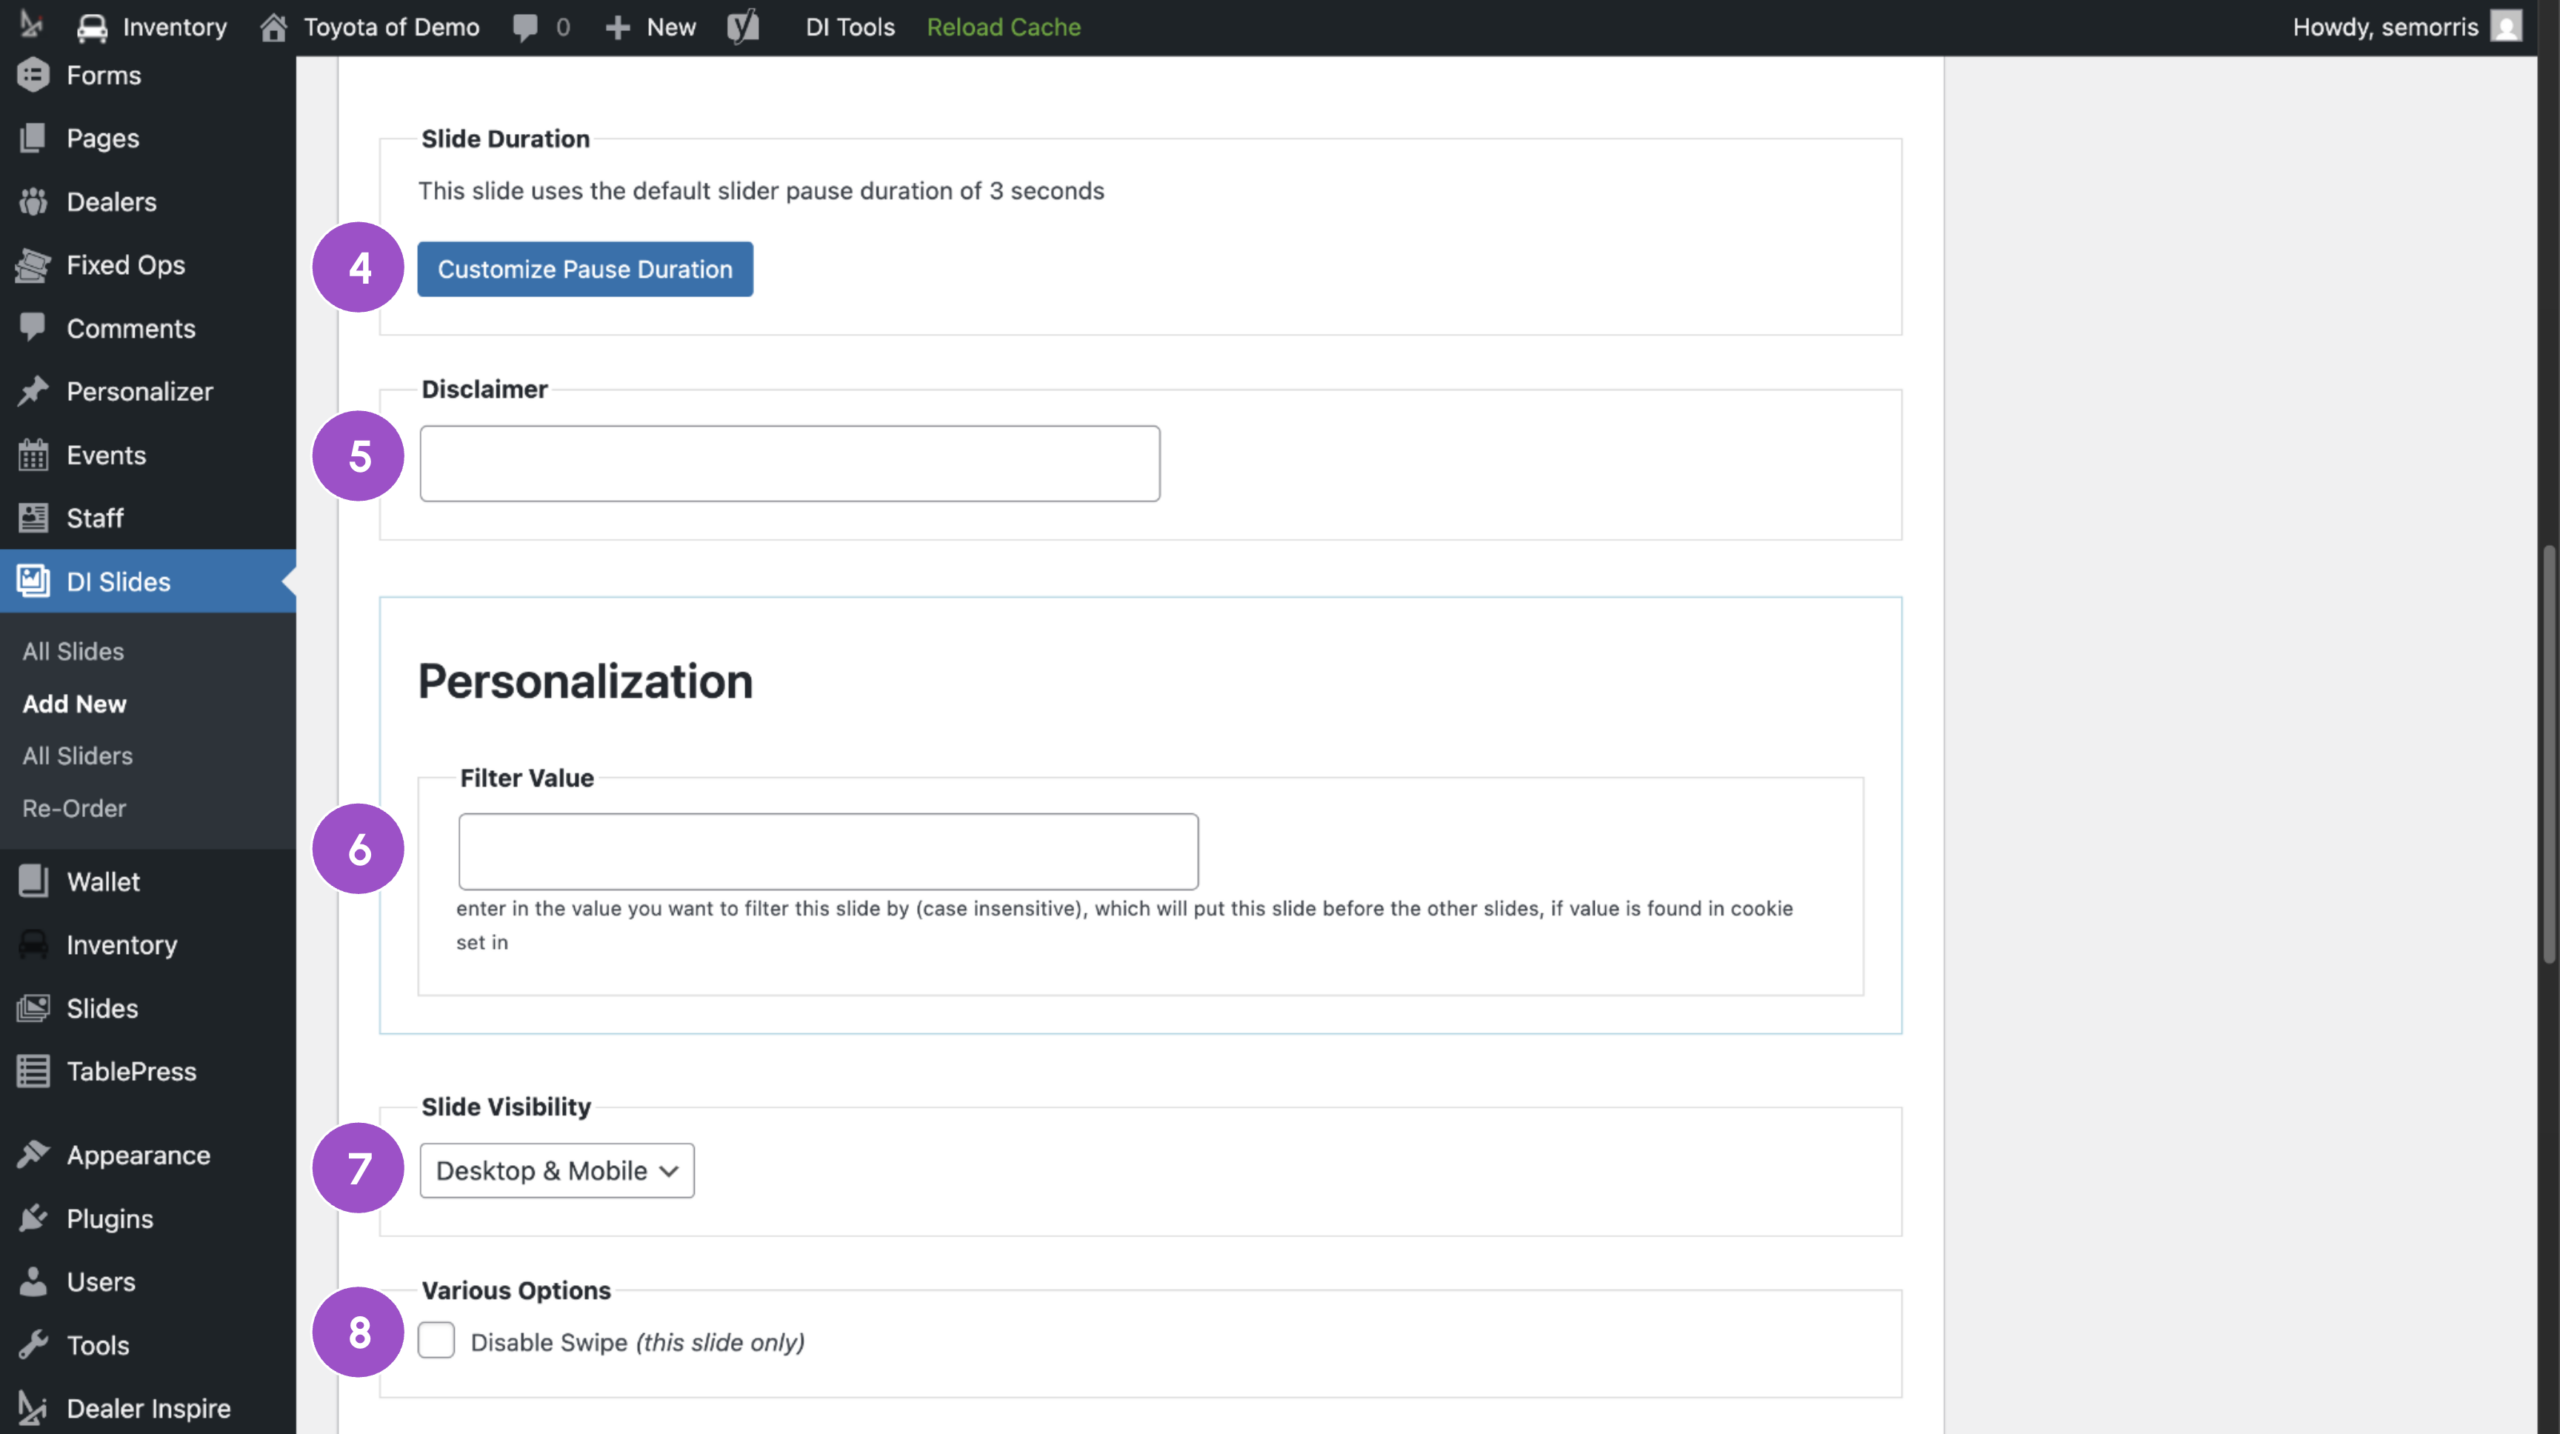
- Pause Duration: Set how long the slide pauses after playing (default is 3 seconds).
- Filter Value: Use to control slide order relative to others.
- Disclaimer: Add legal text for promotions. A “View Disclaimer” tab will appear on the slide.
- Slide Visibility: Choose to display on Desktop, Mobile, or both (default: both).
- Disable Swipe: Prevent touch/swipe interactions on mobile.
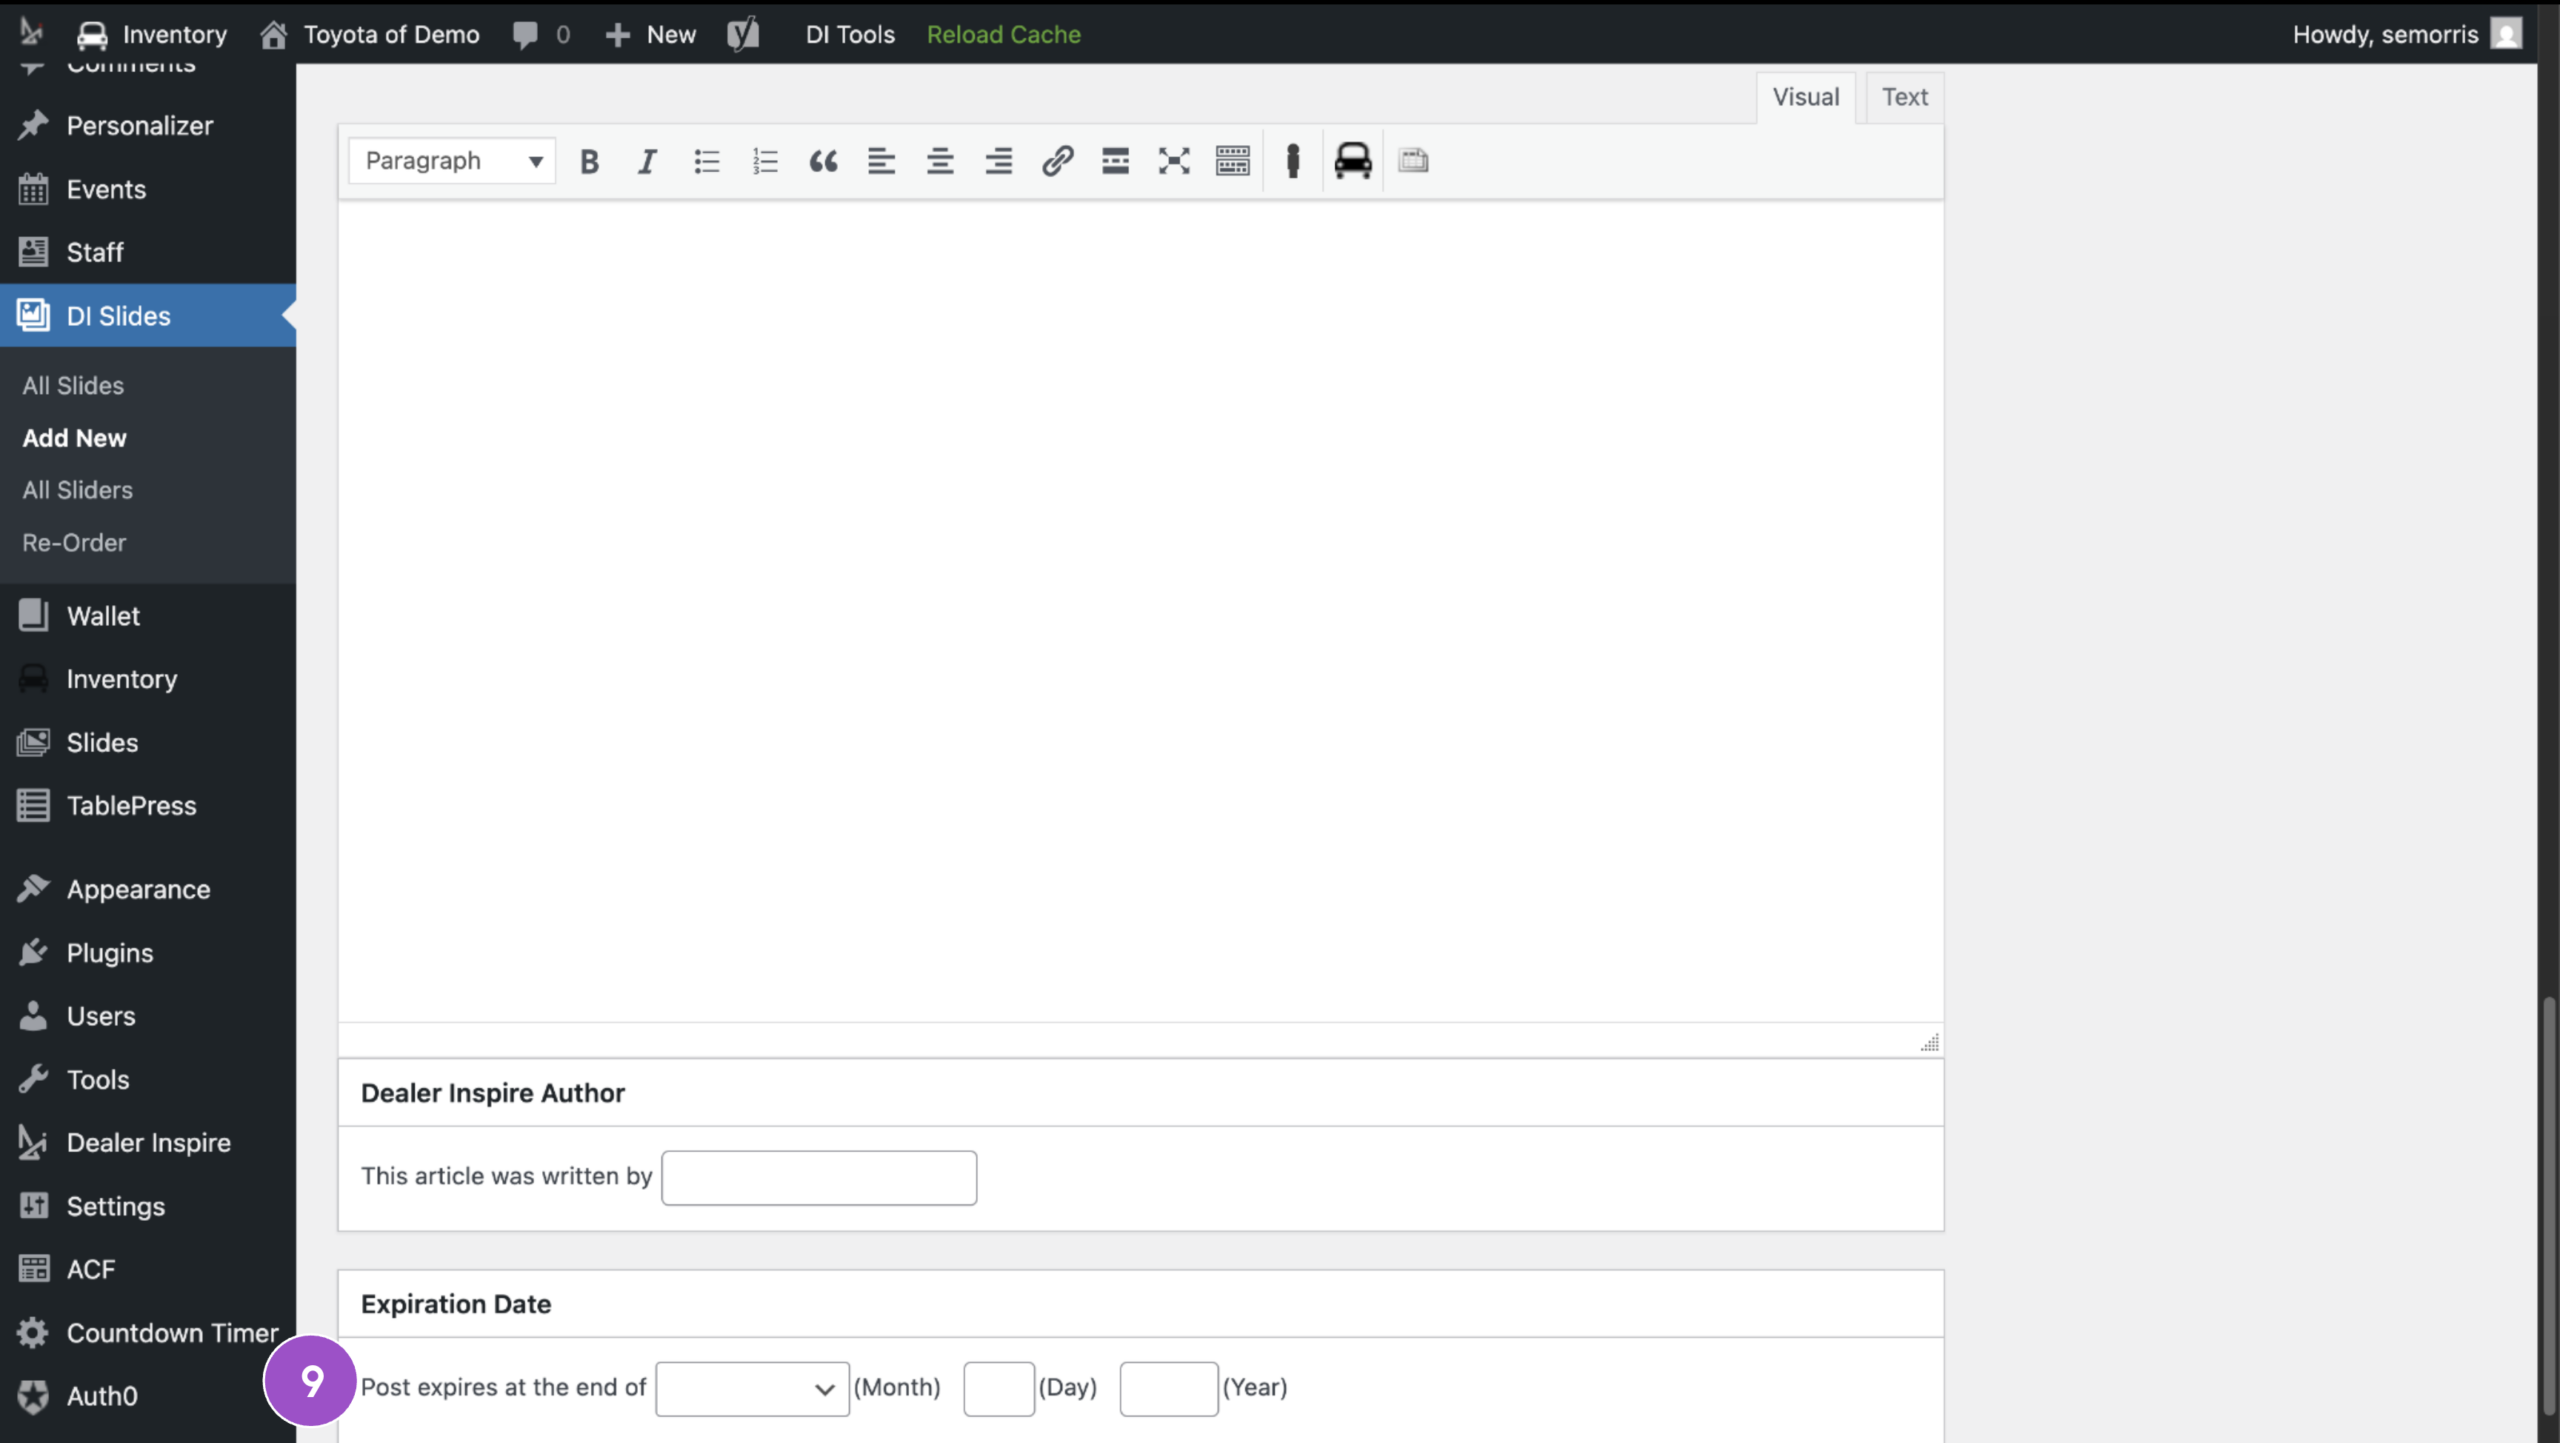
- Expiration Date: Schedule a slide to expire automatically (great for limited-time offers).
7 Publish your slide
When your slide is ready:
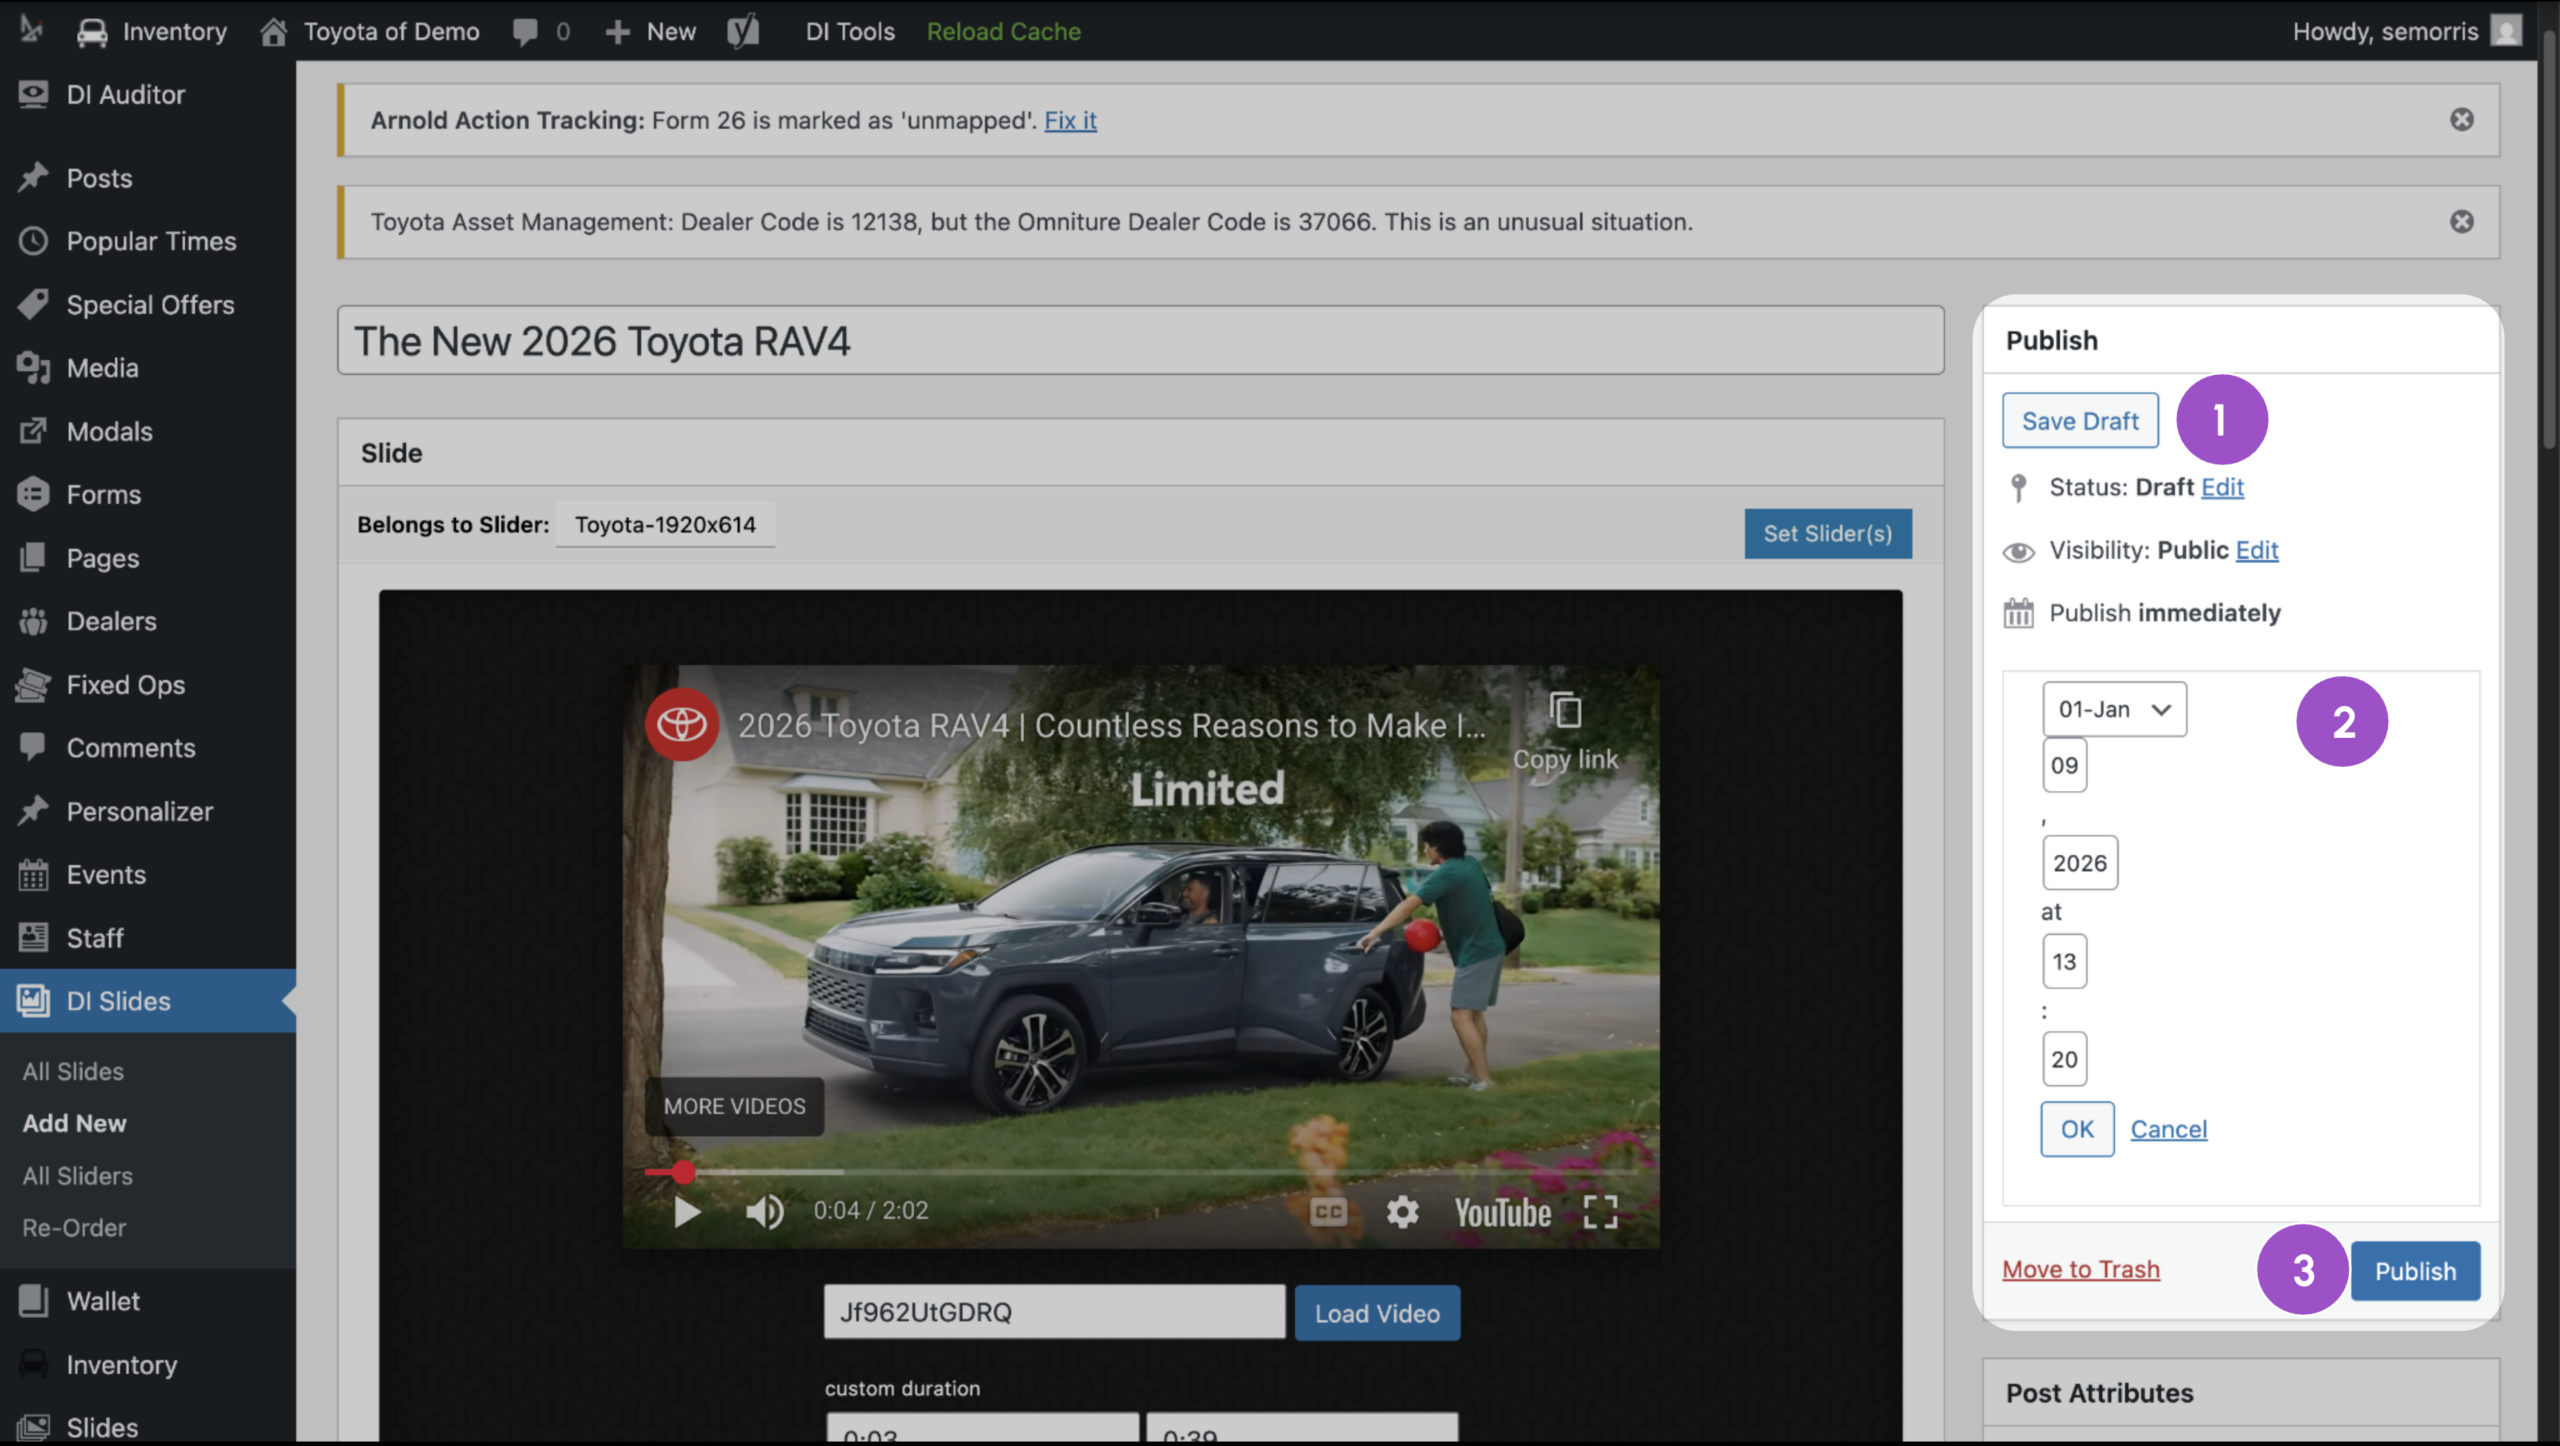
- Click Save Draft to save your progress
- Click Edit next to Publish Immediately to schedule a future publish date
- Click Publish to make it live immediately
After publishing, visit the front end of your website to confirm the video is displaying and playing correctly.
If you don’t see your changes:
- Clear your site cache
- View the page in an incognito/private browser window
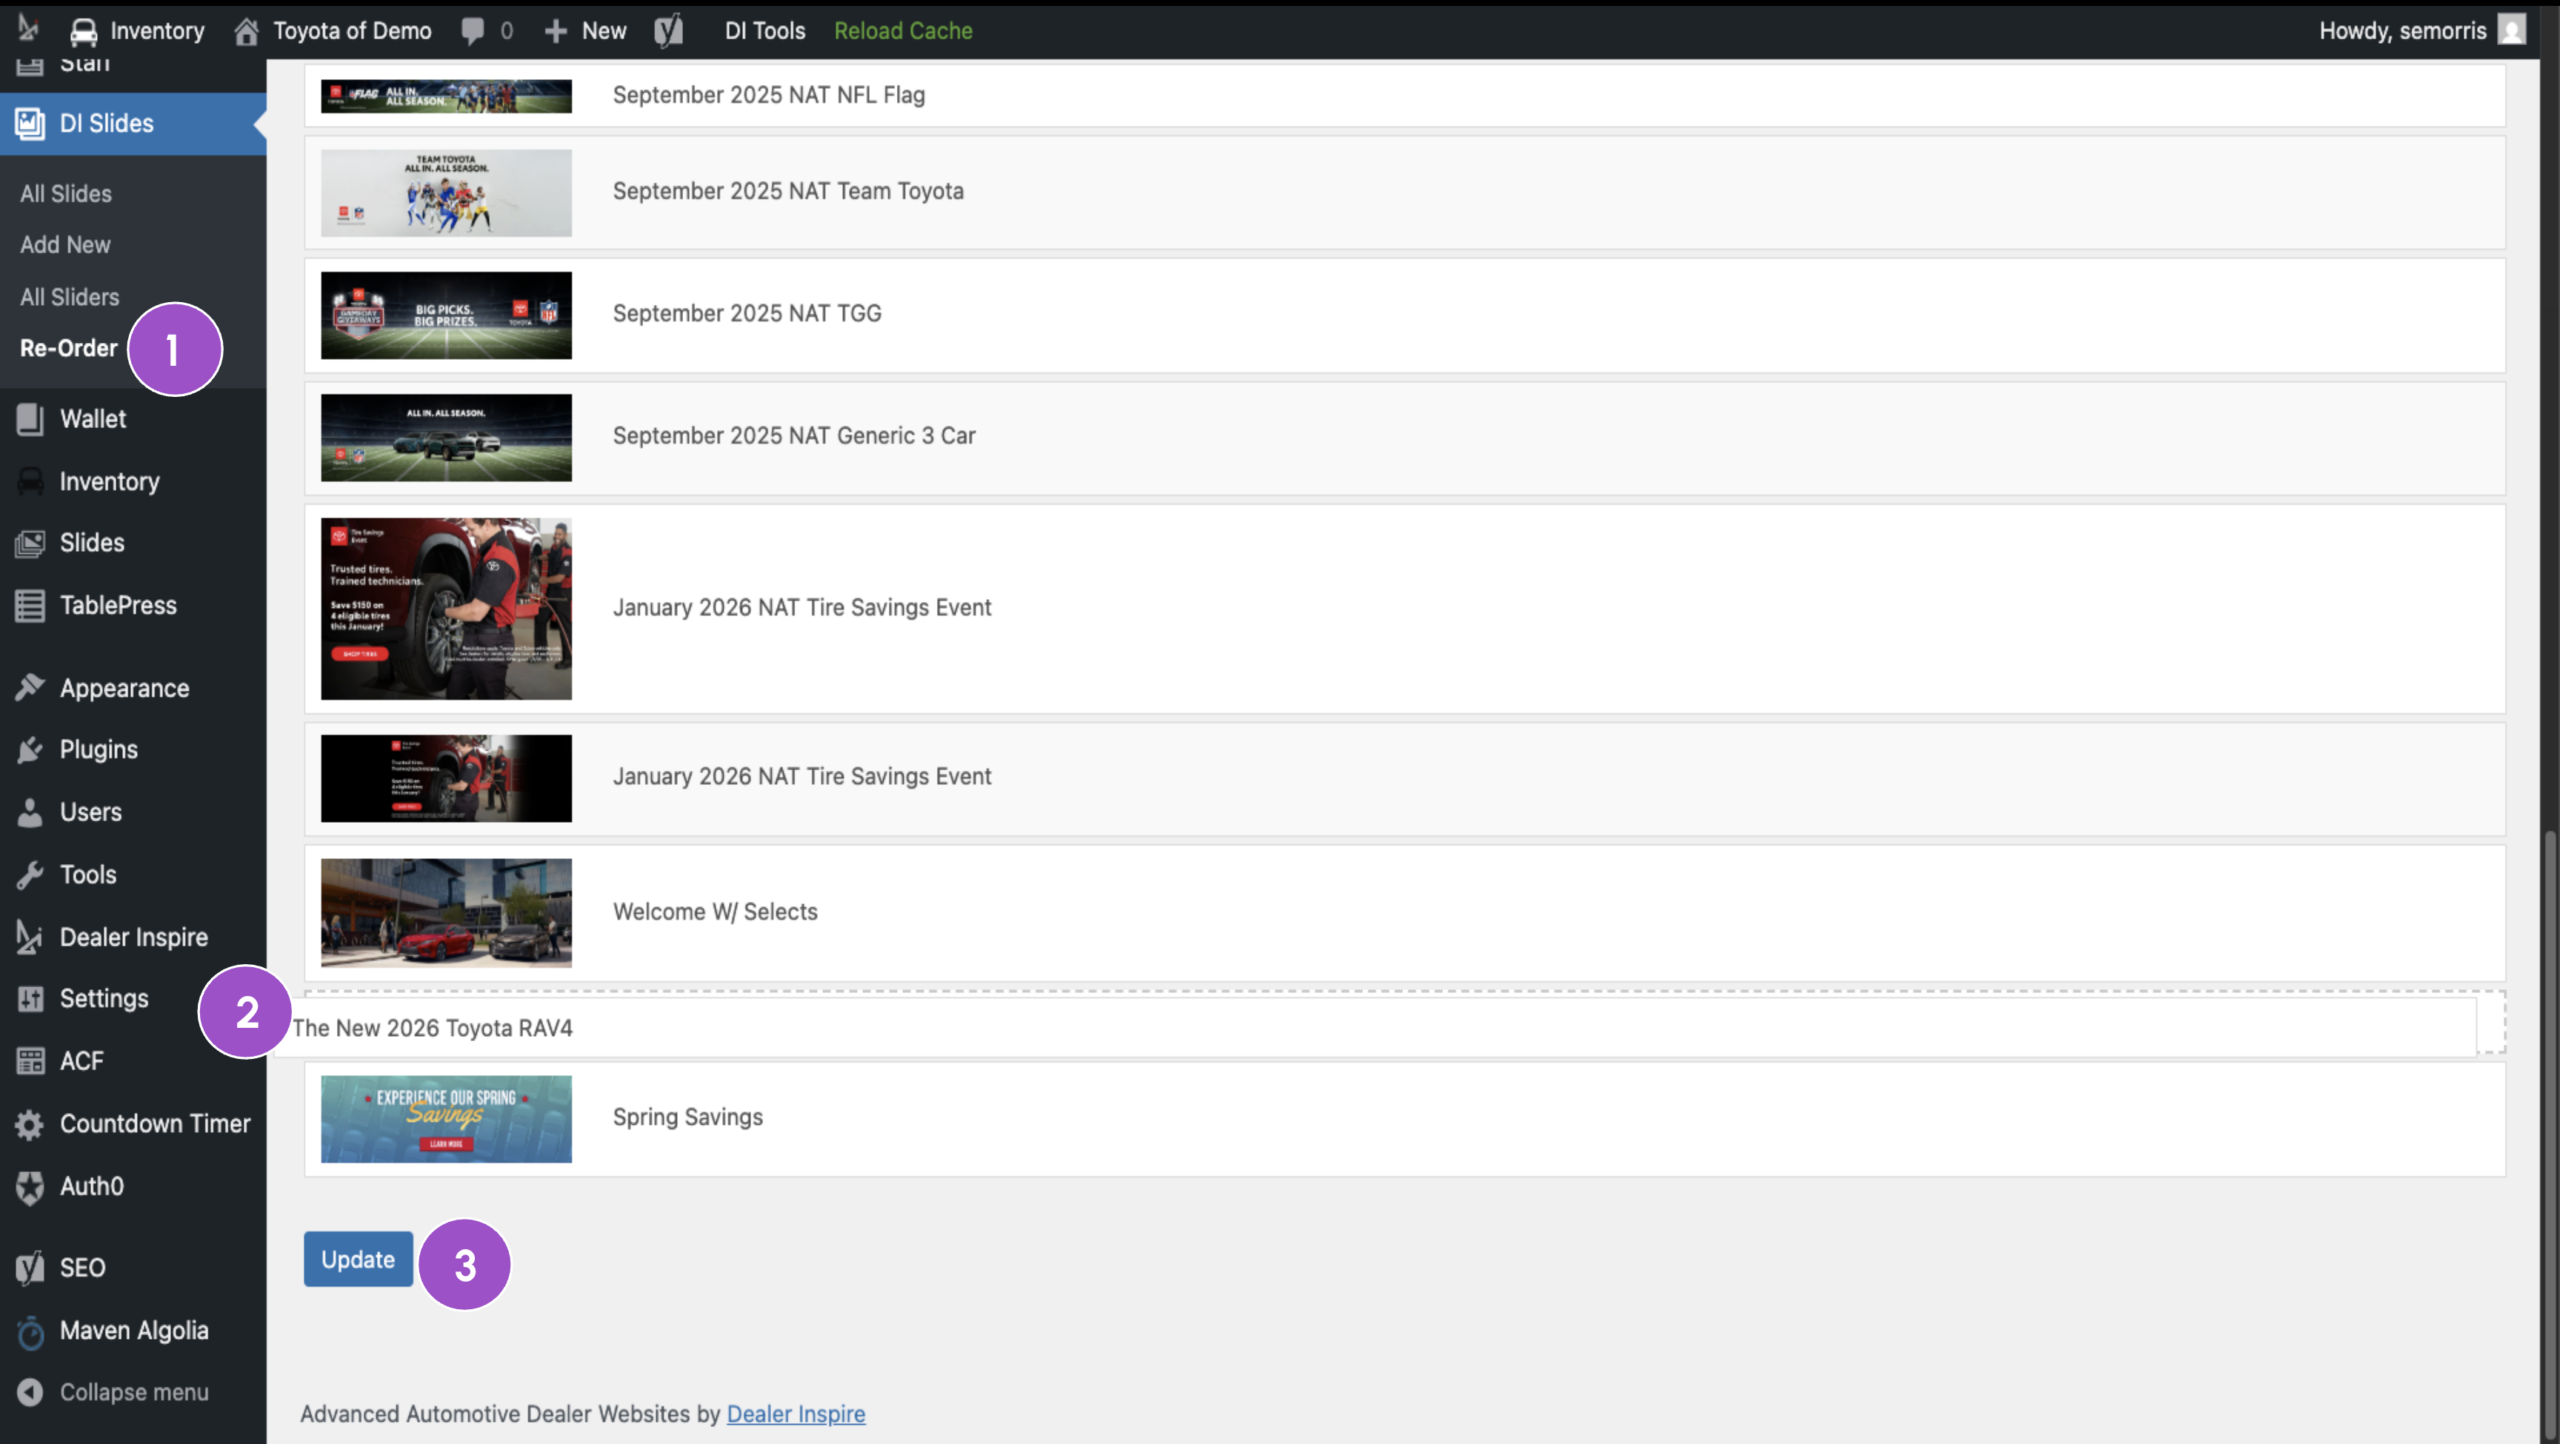
8 Re-order your slides
To ensure the slide appears in the right order:
- Click Re-Order in the DI Slides menu
- Drag and drop slides into the desired order
- Click Update to save changes
Troubleshooting video slides
Video not appearing?
- Confirm the slide is published (not in draft status)
- Verify it’s assigned to the correct slider
- Check that the slider is active on the page where you expect to see it
Video not playing?
- Make sure you’re using a valid YouTube URL or video ID
- Verify the YouTube video is set to “Public” or “Unlisted” (private videos won’t play)
- Check that the video hasn’t been removed from YouTube
Error message about ‘postMessage’?
- This typically means the YouTube embed URL is invalid. Re-check for typos or extra characters.
Video displays poorly on mobile?
- DI Slides automatically resizes content responsively.
- If needed, set the slide visibility to Desktop Only and create a separate mobile-optimized image slide.