How to use inline banner templates
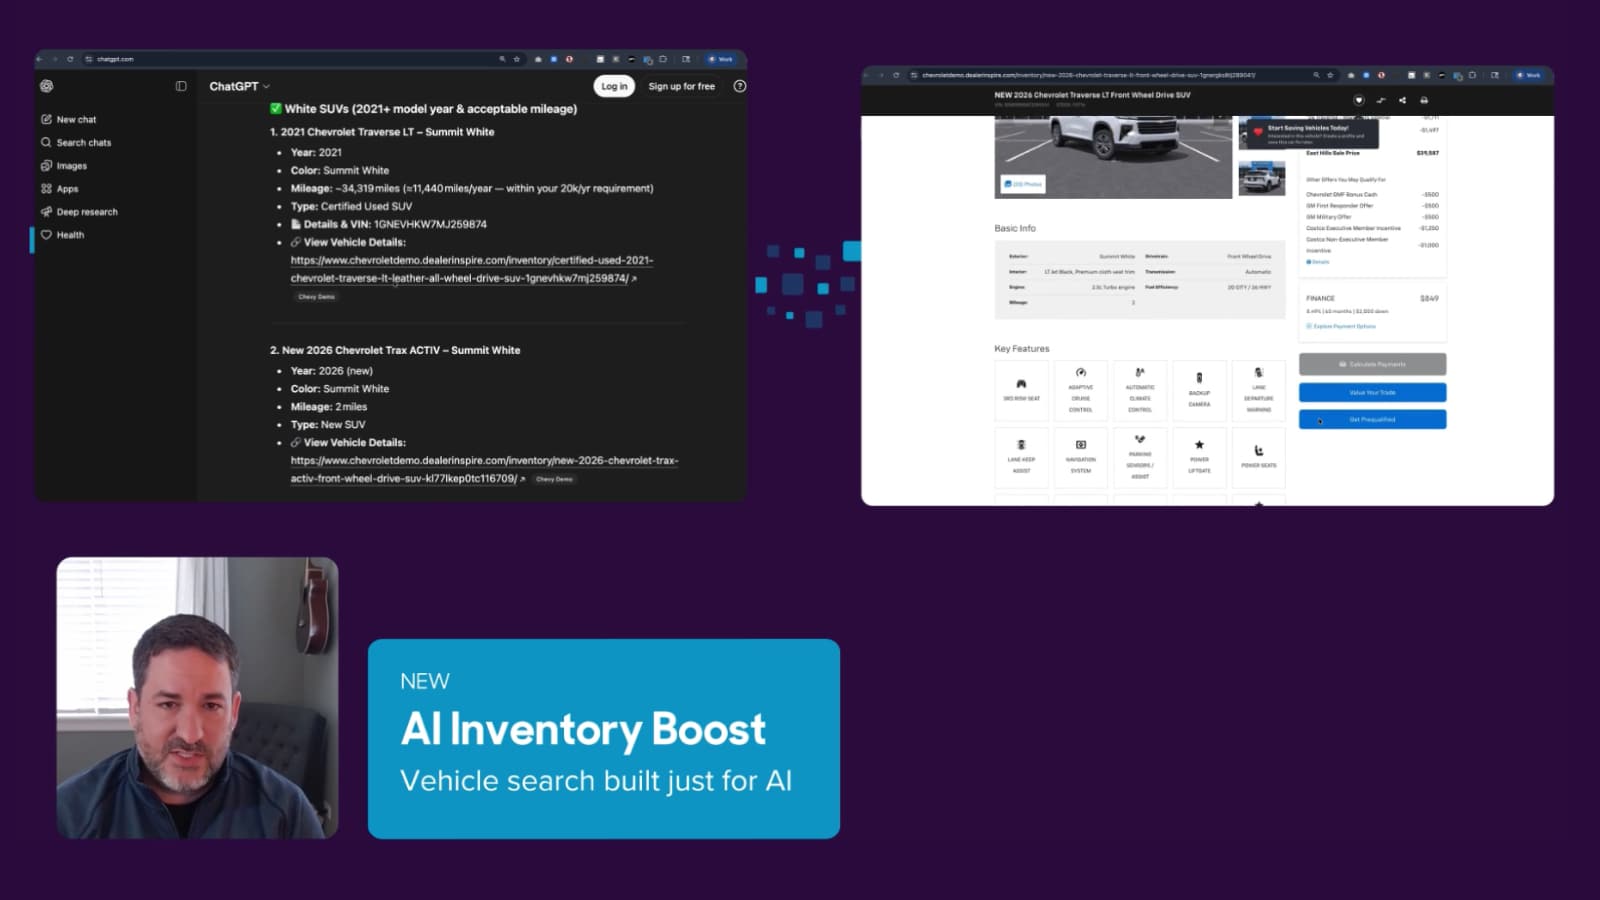
Inline banner templates allow you to place promotional content directly within your Vehicle Results Pages (VRPs), helping you highlight special offers, boost inventory visibility, and guide shoppers toward conversion without interrupting their browsing experience. These banners blend seamlessly into the shopping flow and are designed to be fast-loading, customizable, and easy to manage — making it simple to keep your digital showroom fresh and relevant.
In this article, you’ll learn how to create, customize, schedule, and publish inline banner templates on your Dealer Inspire website
To Get Started
Go to the Cars.com Hub. Click on Dealer Inspire, then Manage Website.
1Access Inline Banners for VRPs
- From the left-hand menu, click Inventory, then select Lightning Settings.

You’ll land on the Inventory Display page where you can make display customizations to your Dealer Inspire website on various pages like VRPs, VDPs, and your homepage.
1. On the Inventory Display page, click the VRP tab.
2. Click Banners.
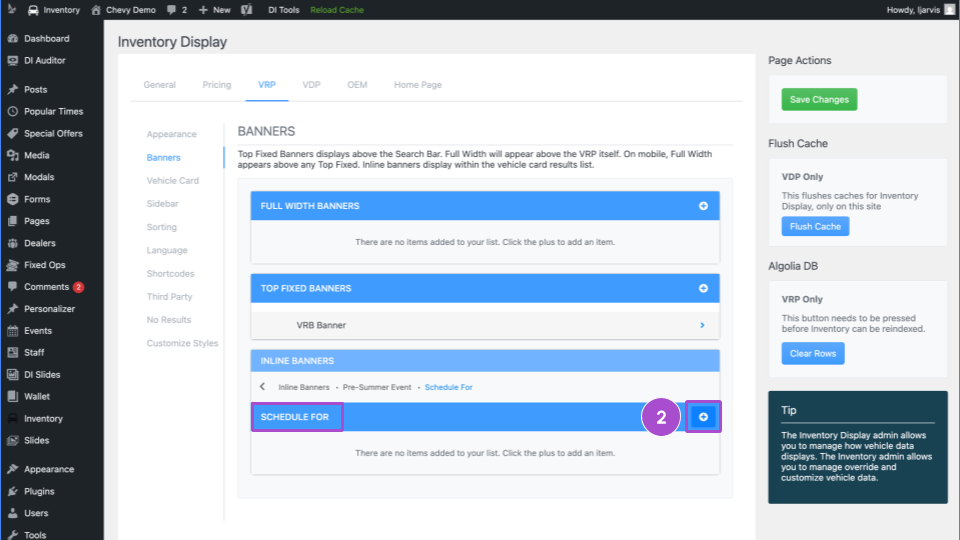
3. Scroll to Inline Banners.
4. Click the blue ( + ) icon to add a new inline banner.

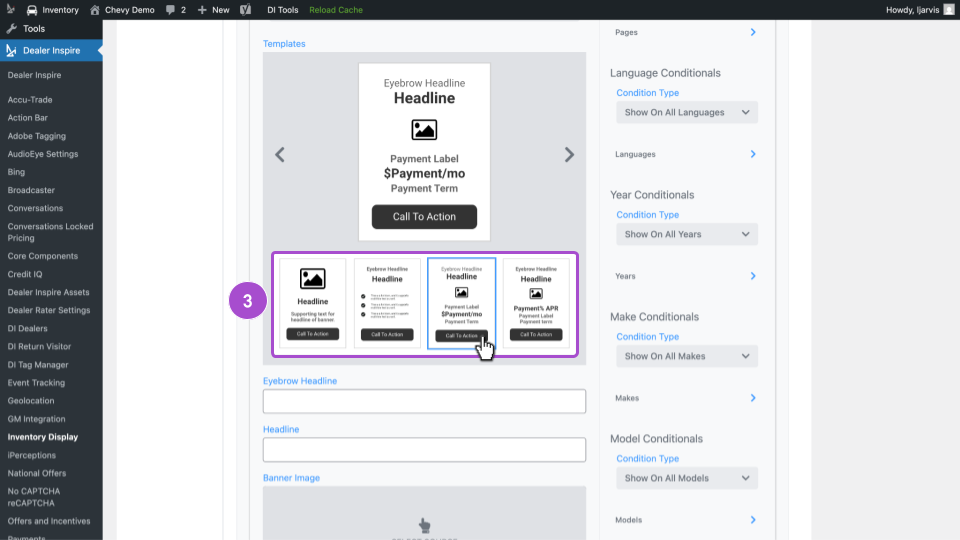
2 Set up your inline banner
1. Title your banner — This is for internal use only and won’t appear on the live site.
2. From the Banner Type dropdown, select Template Banner.

3. Browse available template options. Choose the one that best aligns with your campaign goals.
- For example, if you’re running a “Summer Savings” event for the Chevy Equinox, select a template that supports promotional messaging and imagery.
3Customize banner content
1. Add an Eyebrow Headline: This is a short label that gives context to the promotion (e.g., PRE-SUMMER SAVINGS).
2. Add a Headline: This is the main attention-grabbing message (e.g., Your Summer Road Trip Starts Here).
3. Add an image:
- a. Click Select Source, then choose WordPress.
- b. Upload a new image or select one from your Media Library.
- c. Click Insert Image to embed it in the banner.
- If needed, you can also paste a CDN URL for the image, though WordPress upload is recommended.


4. Choose to add the image as a component or set it as the background.
5. If the image is dark, toggle Light Font ON for better readability.
6. Select where you’d like the text positioned using the dropdown.

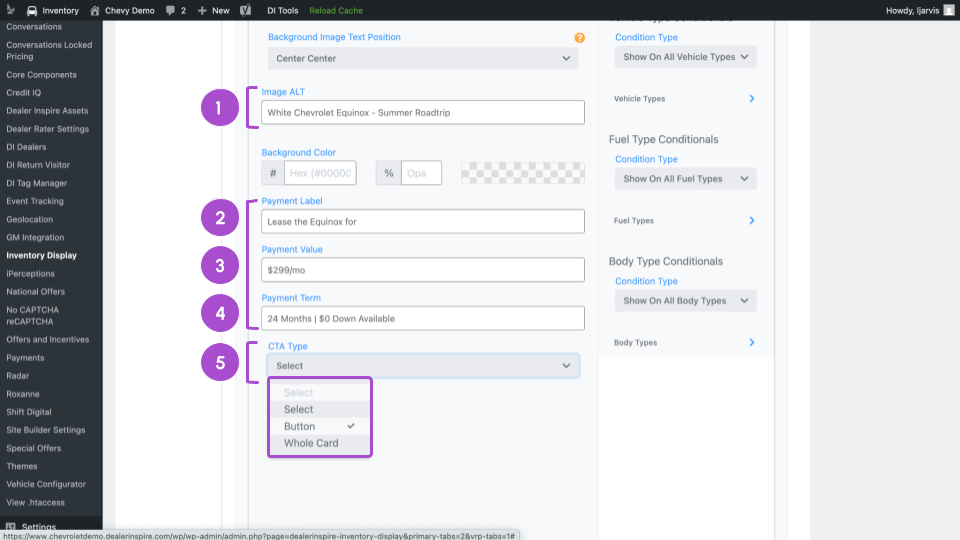
4Finalize banner details
Next refine the details and action triggers that drive shopper conversion.
1. Image ALT — A short image description for screen readers.
2. Payment Label — (e.g., “Lease” or “Starting At”).
3. Payment Value — Add the offer price or amount.
4. Payment Term — Provide term length or other fine print (e.g., “36 mos. / $2,000 down”).
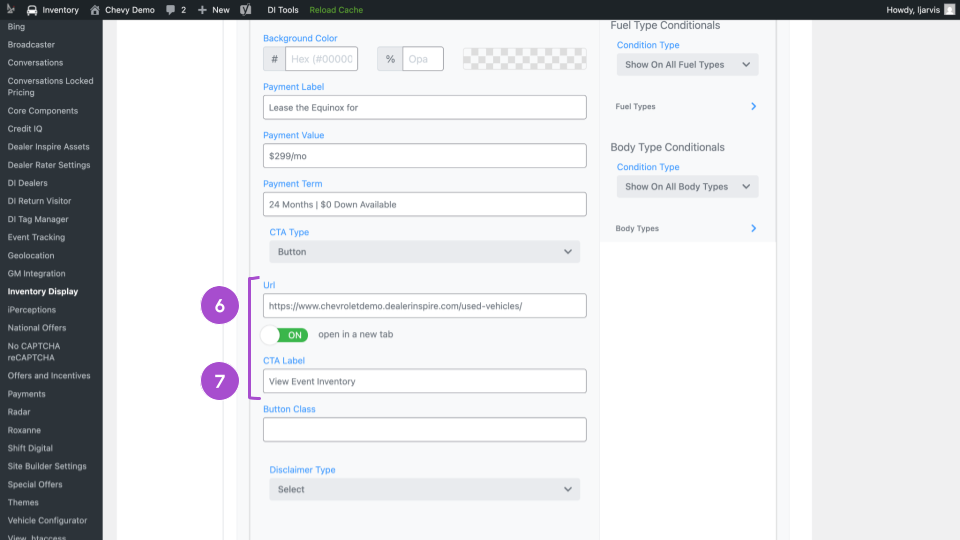
5. CTA Type: Choose between a clickable Button or making the entire banner clickable.
6. Add your destination URL and toggle Open in New Window ON (recommended).
7. If using a Button CTA, enter the button text (e.g., View Event Inventory).
Note: Ignore the “Button Class” and “Disclaimer Type” fields.
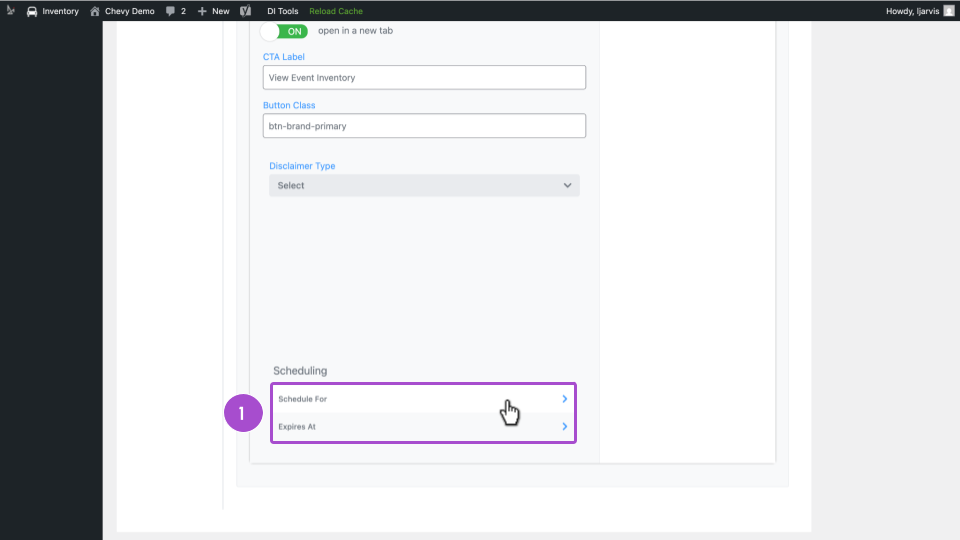
5Schedule your inline banner
Scroll down to the Scheduling section.
1. Click Schedule For
- (Optional) Click Expire At to define an end date.
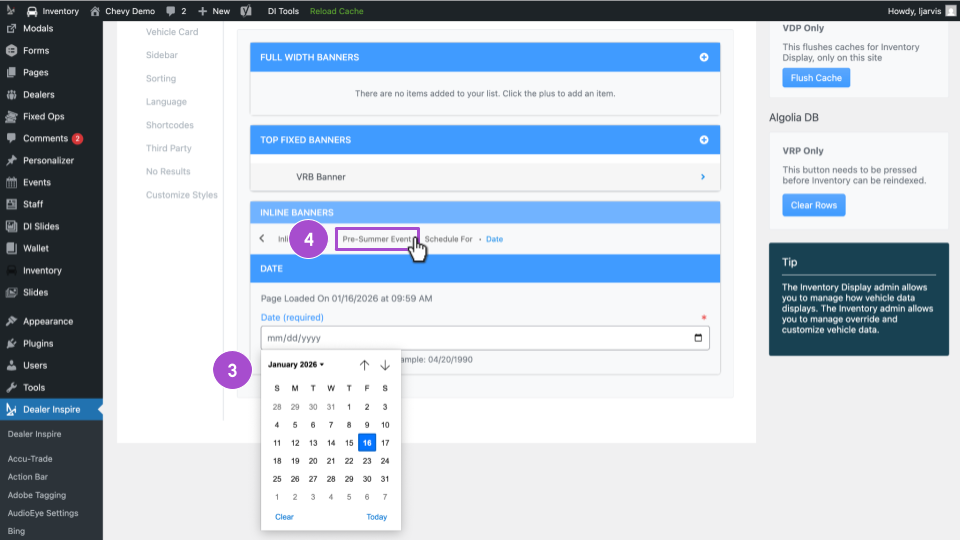
2. On the next screen, click the ( + ) icon
3. Select the date you’d like this banner to appear on your website VRPs.
4. Click the tabs or breadcrumbs to return to the banner editing screen.
6Set display conditionals (optional)
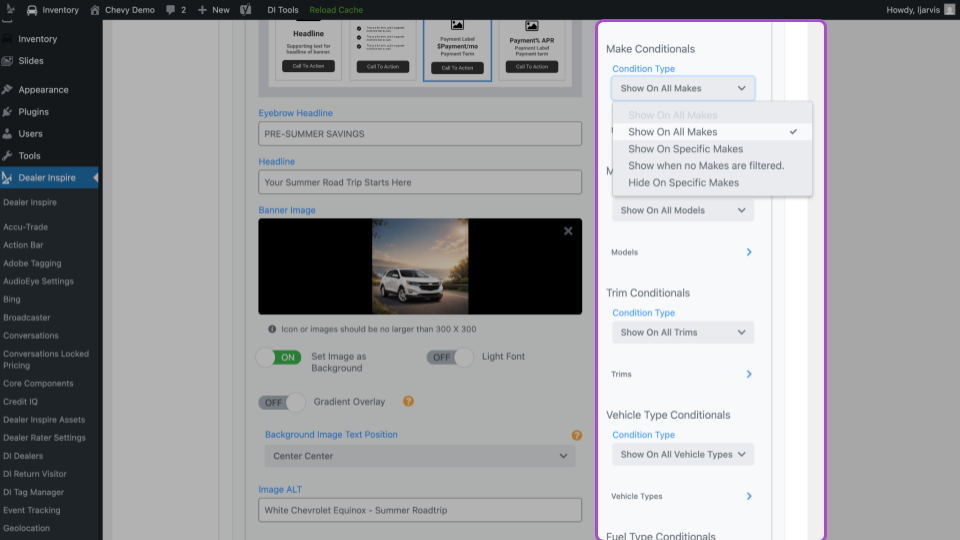
Use conditionals to control exactly where your banner appears.
1. Under Show On, select Show on Select Pages.

2. Click Pages.

3. Click the ( + ) icon.
4. From the list of VRPs, select the specific pages where the banner should display.

5. Use the breadcrumb navigation to return to the editing window.

Other conditionals you can apply include:
- Language
- Vehicle Year, Make, Model, Trim
- Vehicle Type, Fuel Type, Body Type
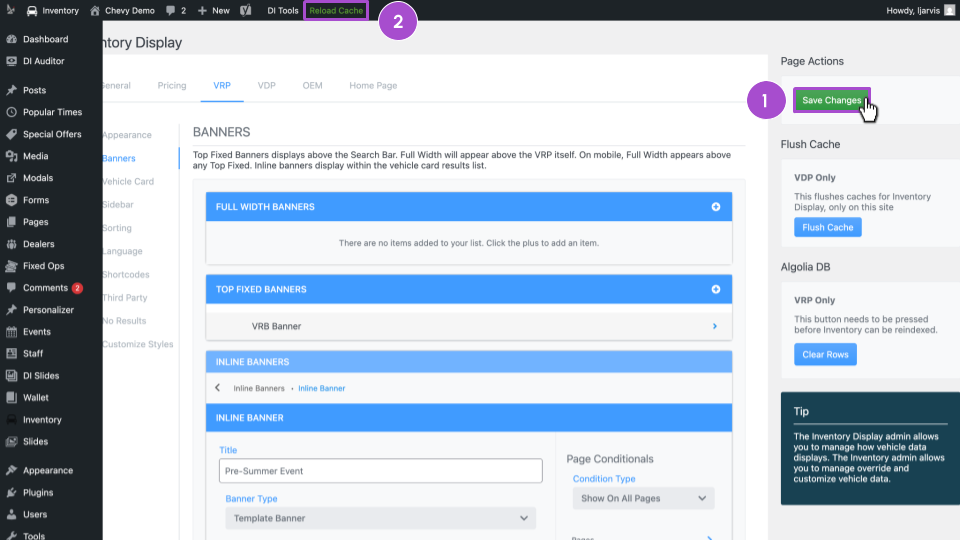
7Publish your banner
1. Scroll to the top of the page and click Save Changes.
2. Click Reload Cache to push your changes live (unless your banner is scheduled for a future date).
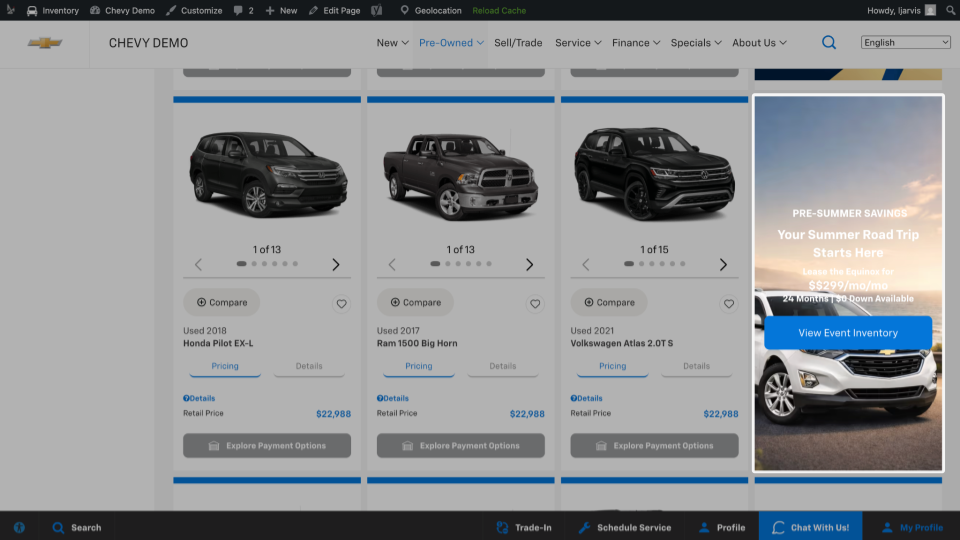
- To confirm, visit the VRP page you targeted — your banner should now appear.
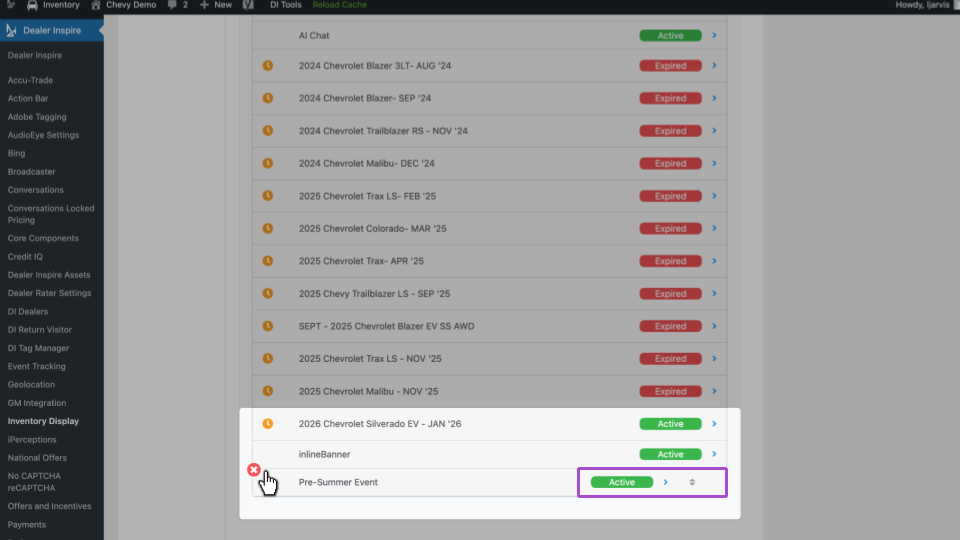
When your changes are saved, you’ll be brought back to the Banner page. Scroll down to see your new banner added to the list.
From this screen, you can:
- Edit, delete, or reorder banners
- See which banners are active or expired
- Manage which banners are visible per VRP
Best practice: Limit to no more than 3 inline banners per VRP to maintain a clean experience.
Follow the same process for any and all template options. We have four templates to choose from to meet your audience, promotion, and conversion goals.
Though some fields may vary, the general principles from this article apply to all templates.