How to create a blog post
A well-maintained blog is a powerful tool for connecting with customers beyond the inventory lot. Whether you’re highlighting local events or breaking down new vehicle tech, consistent blog content builds trust and improves your dealership’s visibility in search engines.
In this article, you’ll learn how to create and publish a blog post on your Dealer Inspire website.
To Get Started
Go to the Cars.com Hub. Click on Dealer Inspire, then Manage Website.
1Add a new blog post
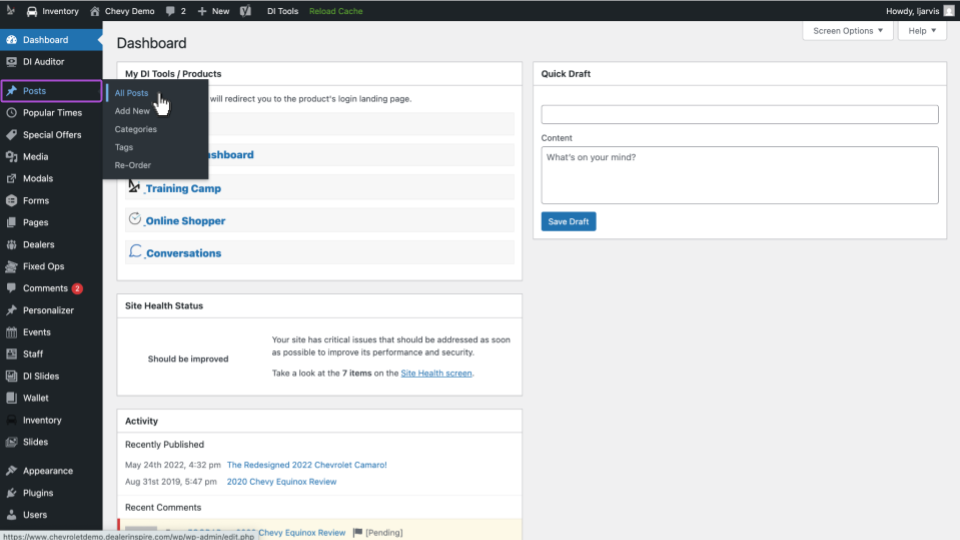
From the backend of your Dealer Inspire website:
- Click Posts
- Then click All Posts
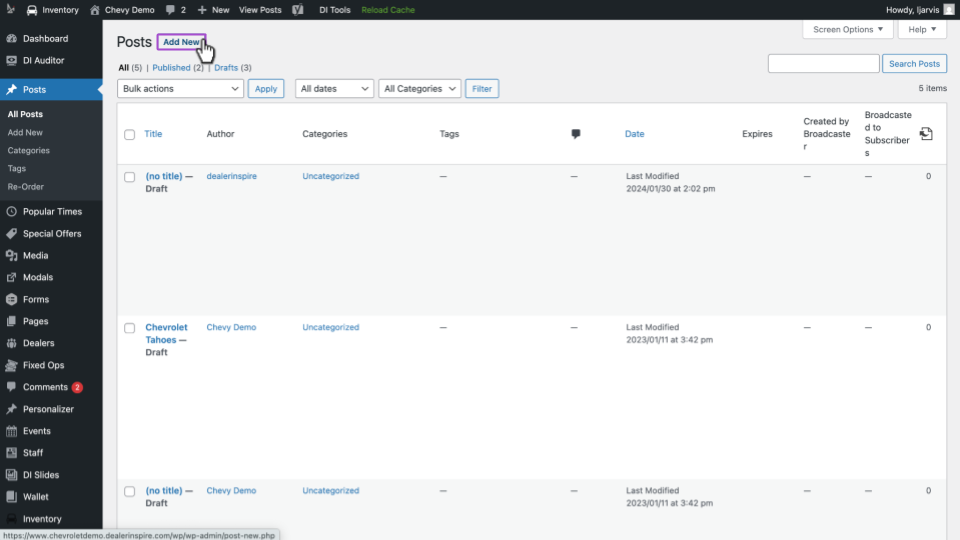
Use this page to audit existing content:
- Filter by Published, Draft, or Category
- Use the search bar to avoid duplicate topics
To create a new blog post, click Add New.
2 Fill in your blog content
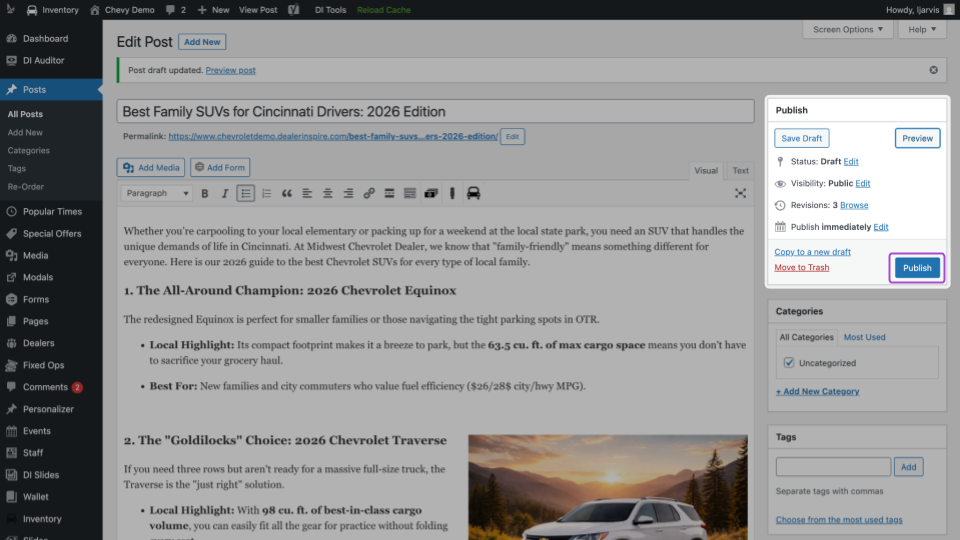
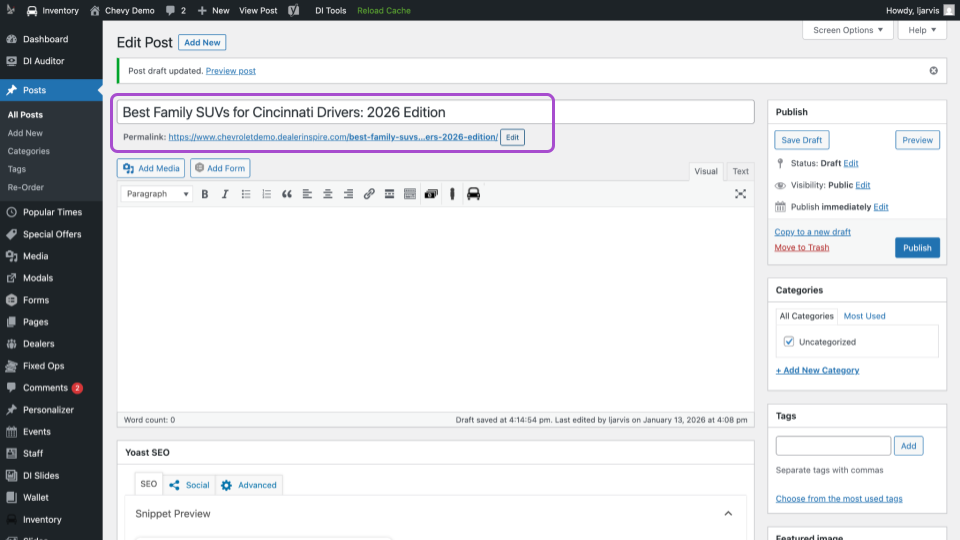
Type your blog title in the top field. This appears at the top of the live blog post.
- A strong title speaks to a customer need or interest
- After you enter it, a permalink (URL) will appear
- Click Edit to simplify the URL slug
Write the Body
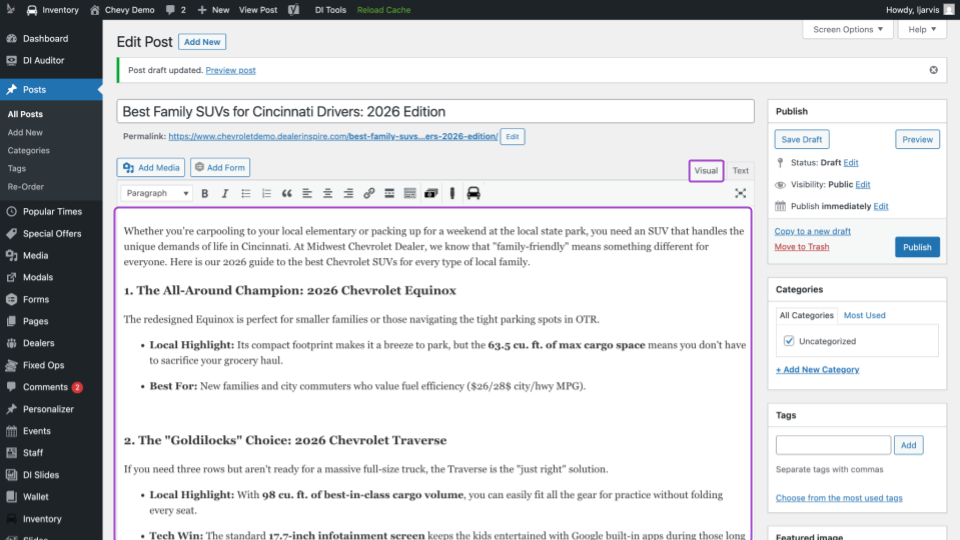
Add your content in the main text editor.
- Use the Visual tab for standard formatting
- Use the Text tab for HTML input
Blog best practices:
- Aim for 400–800 words
- Post 1–4 times per month consistently
Add Images
1. Upload a file or choose from the Media Library
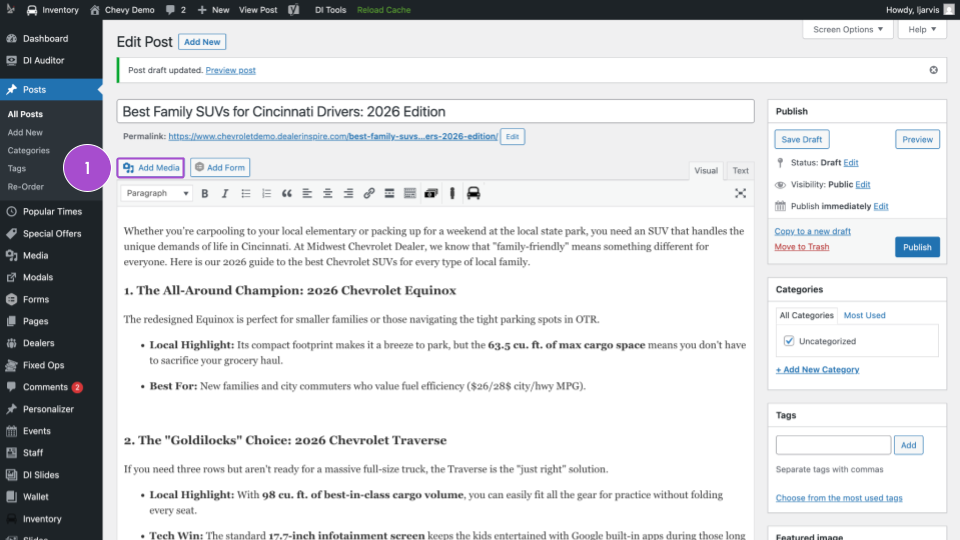
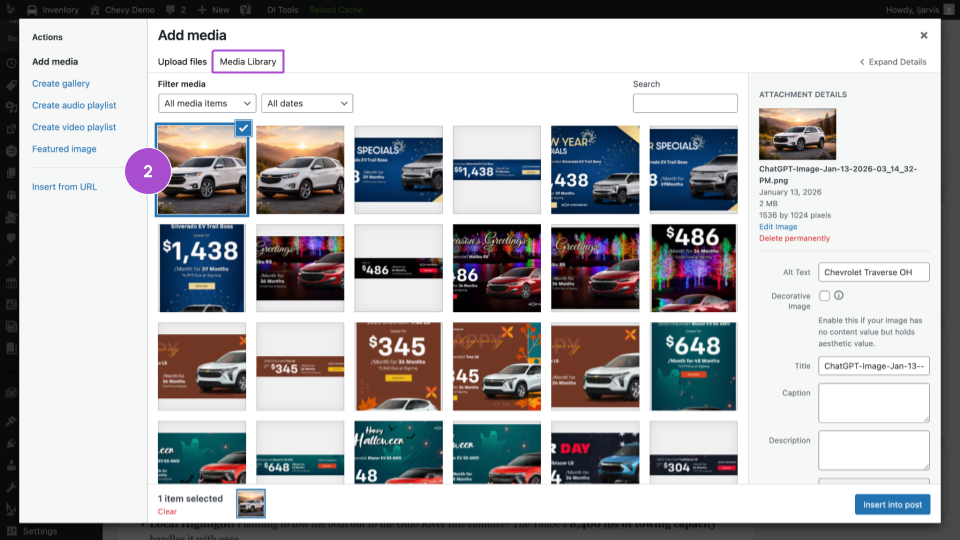
2. Upload a file or choose from the Media Library
- Compress large files before uploading to maintain site speed.
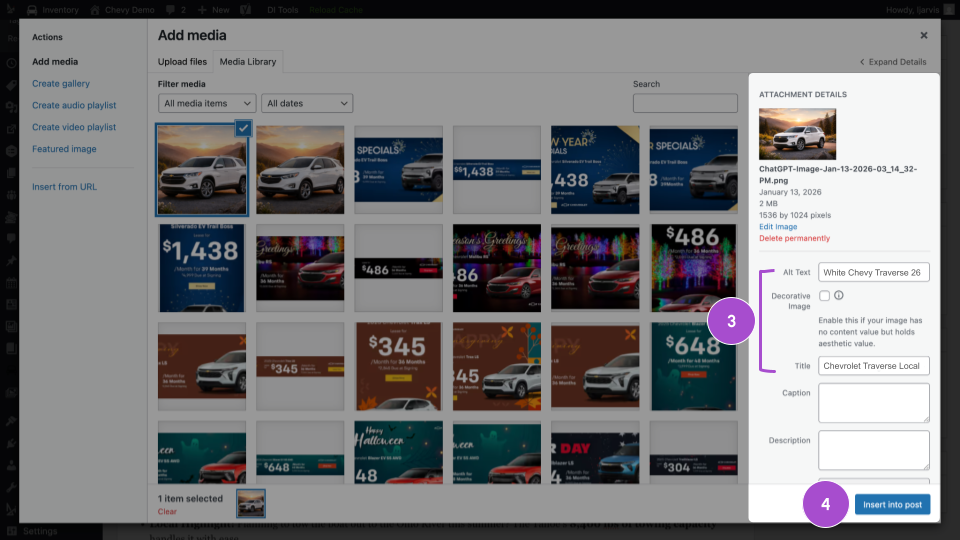
3. Fill in Alt Text for SEO and accessibility
4. Click Insert into post
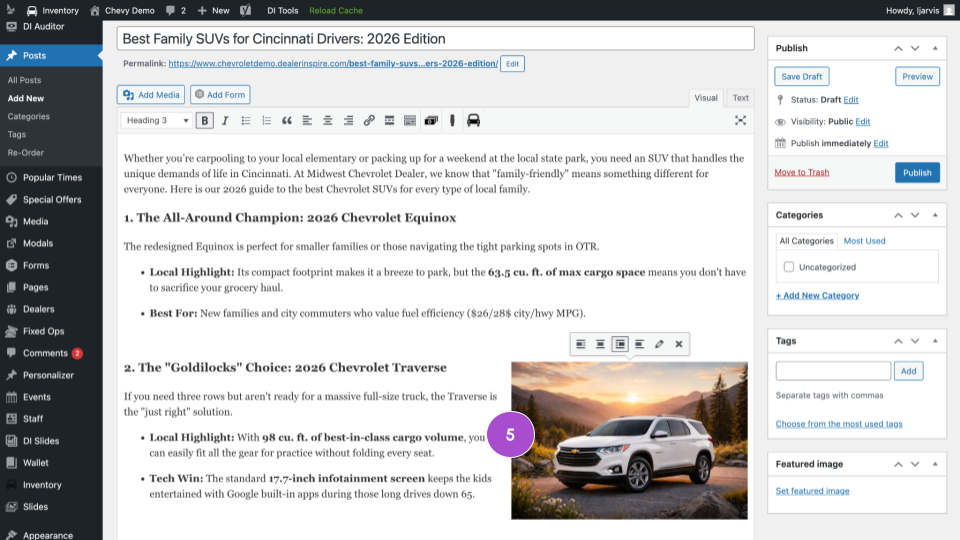
5. You can drag and drop images to reposition them and use the formatting toolbar to align them left, center, or right.
3 Configure your SEO settings
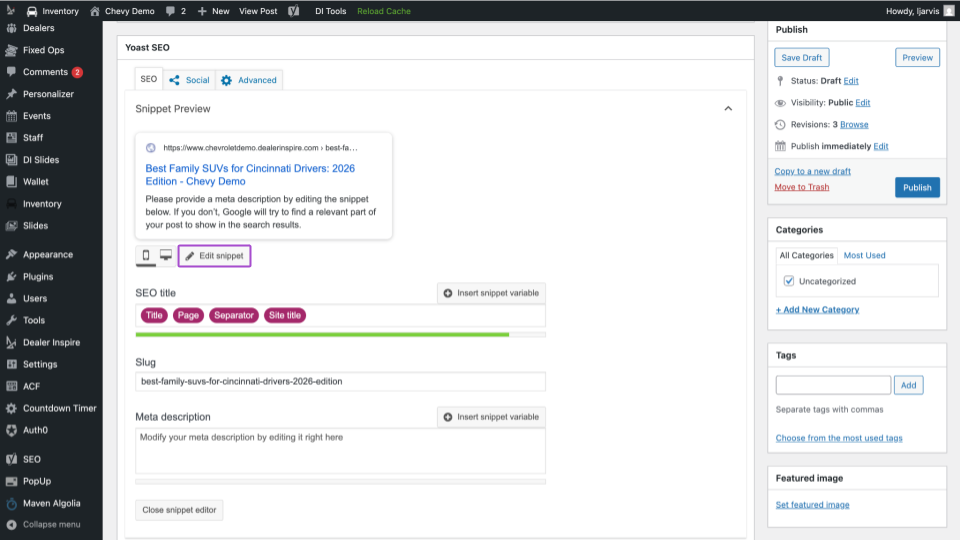
Scroll down to the Yoast SEO section. This controls how your post appears in search engines and social previews.
- Click Edit Snippet
- Update the SEO Title, Slug, and Meta Description
- Click Close snippet editor when finished
Tip: Write a meta description that acts like a call-to-action.
- Example: “Read our 2026 guide to find the perfect Chevy for your family.”
4Add an author and expiration date
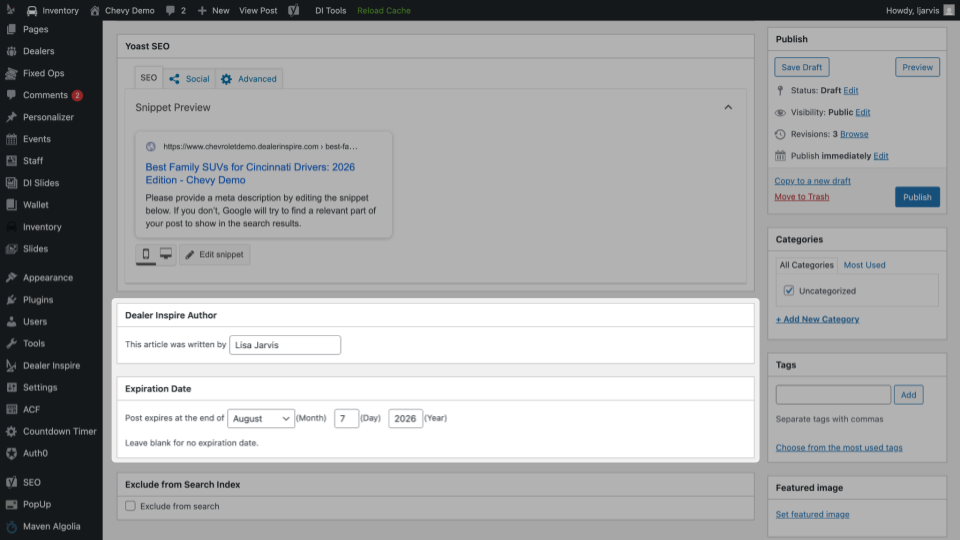
Below the SEO section, complete the following:
- Dealer Inspire Author: Add your name or the content creator’s name
- Expiration Date (optional): Set a future date for the post to revert to Draft (useful for seasonal content)
Leave the expiration field blank if the post is evergreen.
5Preview and publish your blog post
When your content is ready:
- Click Preview to see how it looks live
- If everything checks out, click Publish
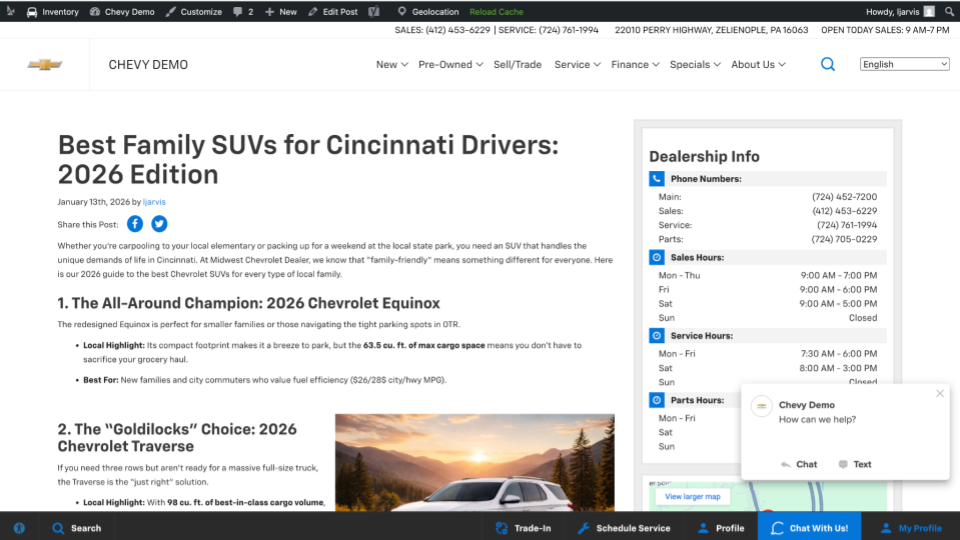
Your post is now live and ready to share using the permalink URL across email, social media, or other channels.