How to manage inventory photos
After stocking a vehicle in AccuTrade’s Inventory tab, you can add photos and overlays to prepare it for syndication.
In this article, you’ll learn how to upload vehicle photos, access stock images, manage your overlay library, and apply overlays to your vehicle listings.
To get started
Go to the Cars.com Hub and click on AccuTrade.
1 Upload vehicle photos
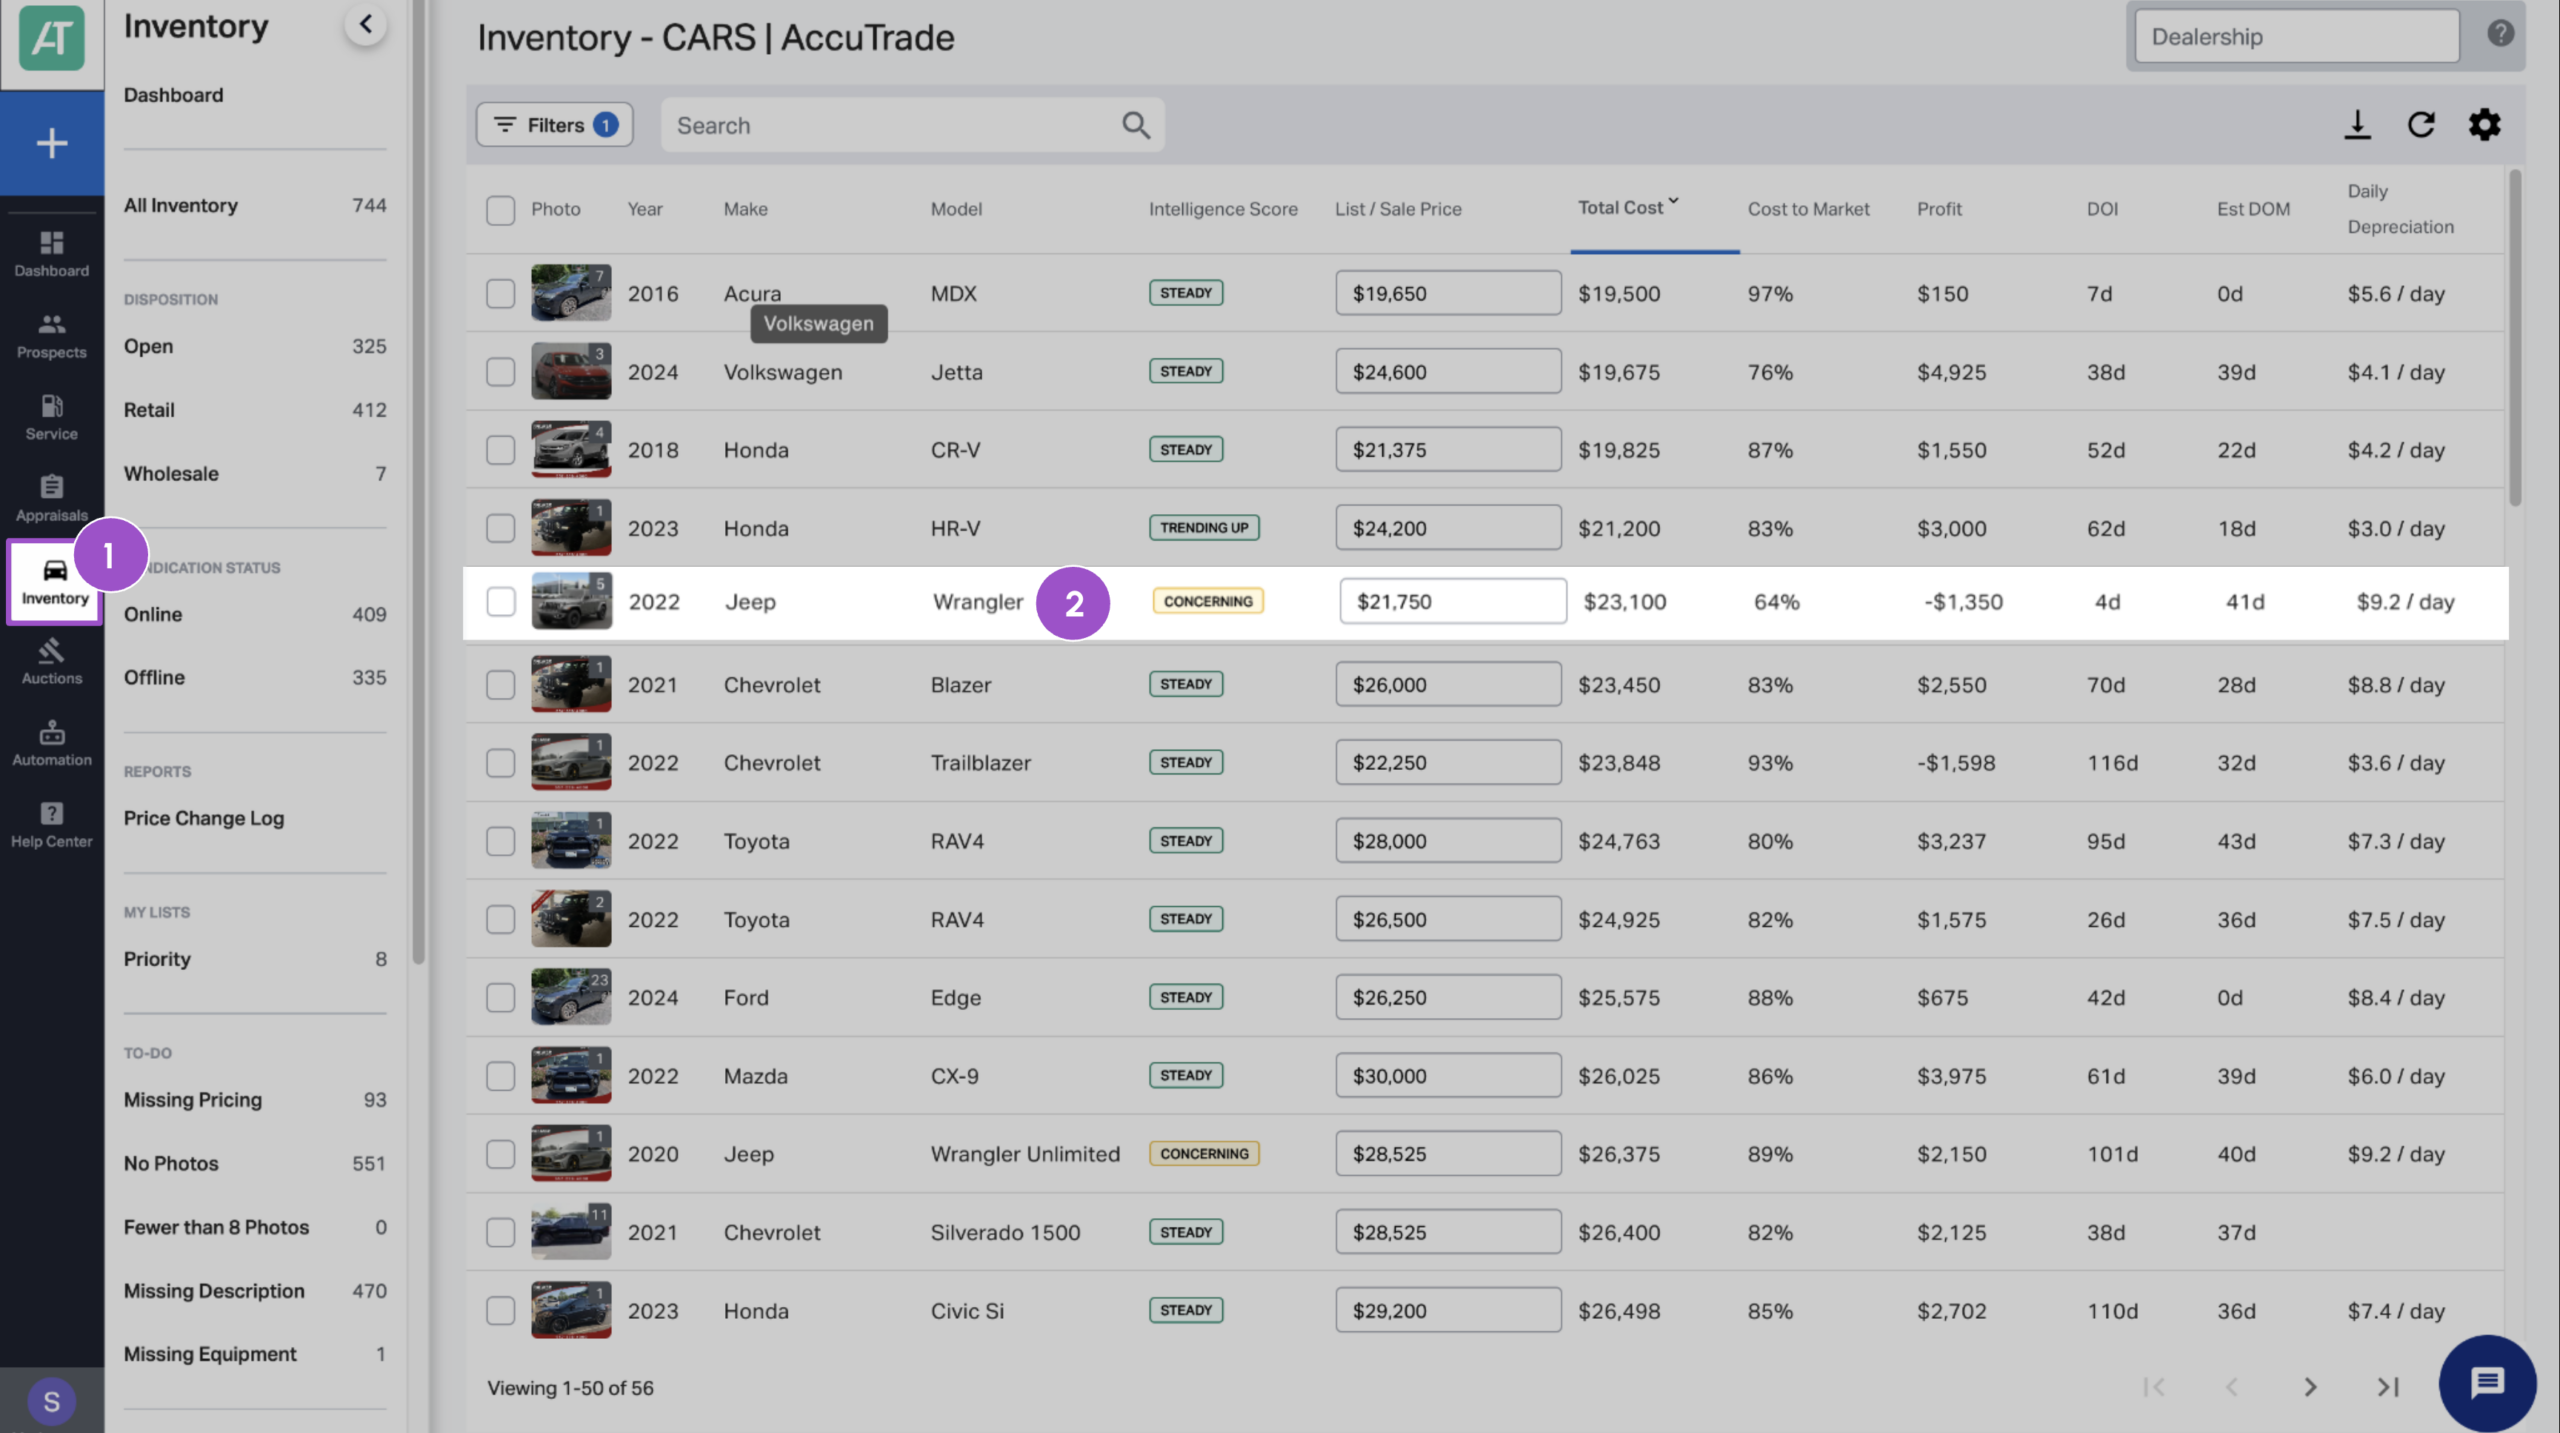
- Click the Inventory tab.
- Click anywhere on a vehicle row to open its details.
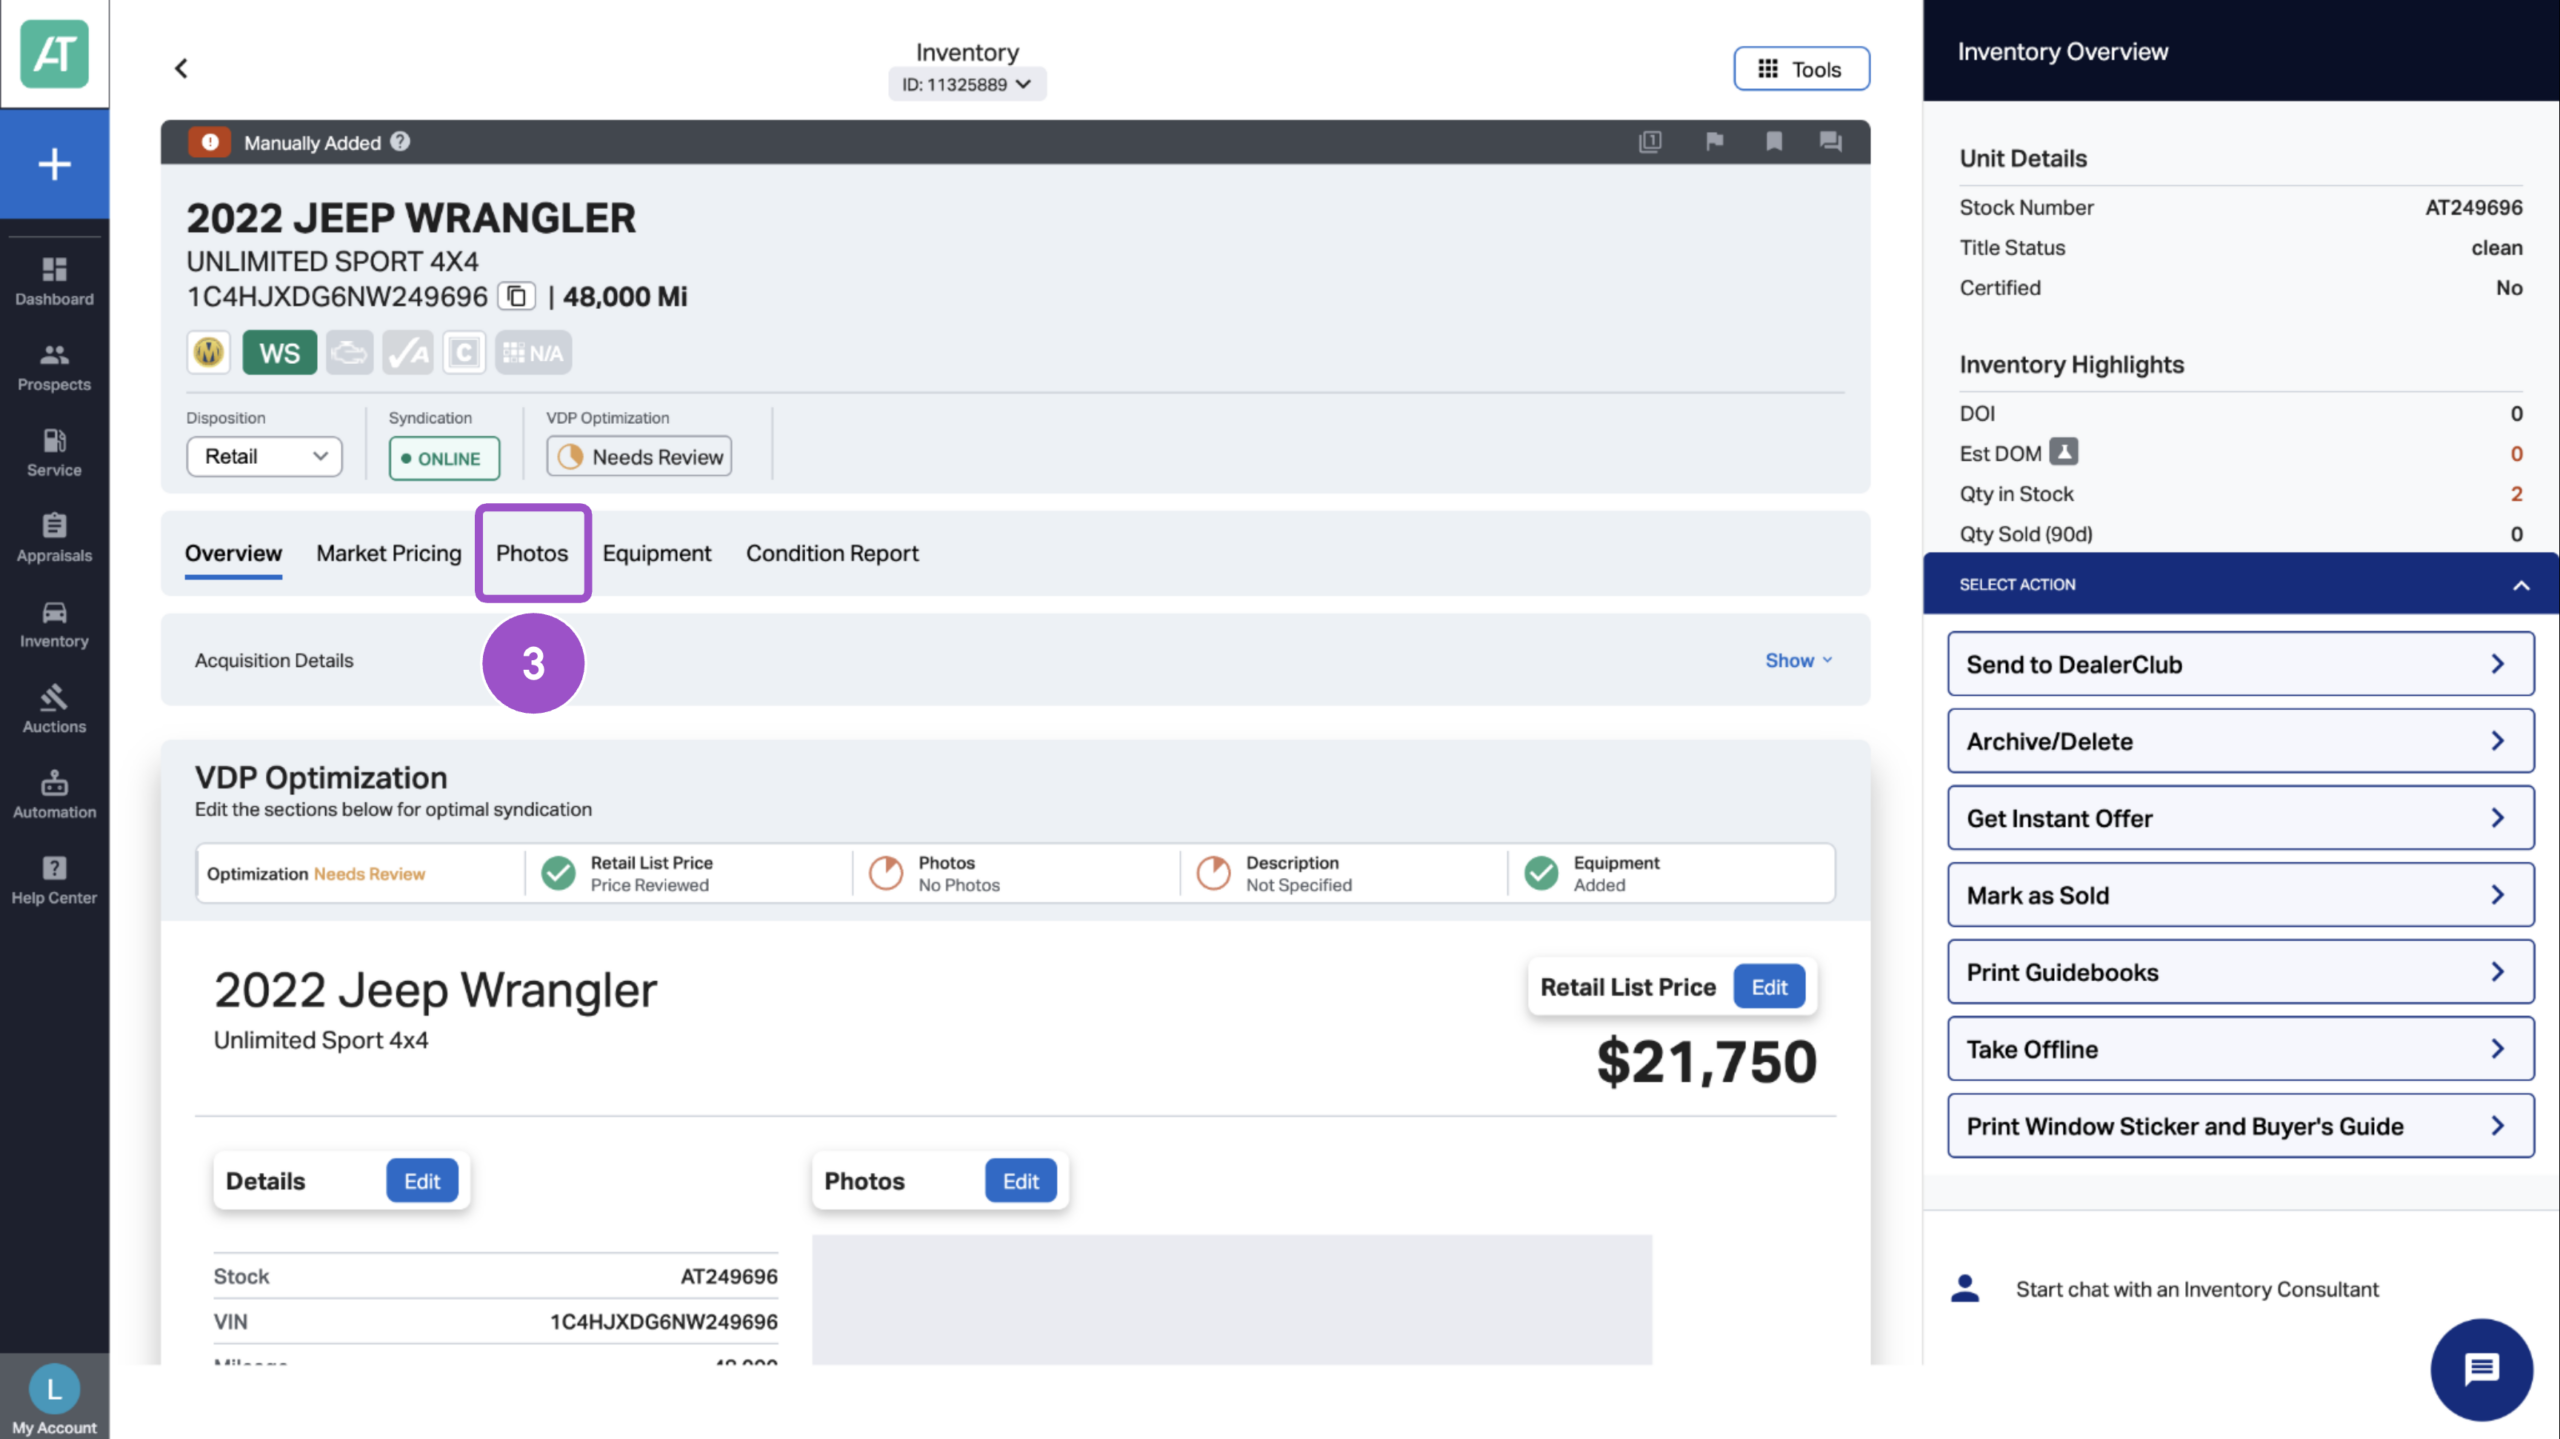
- Select the Photos tab.
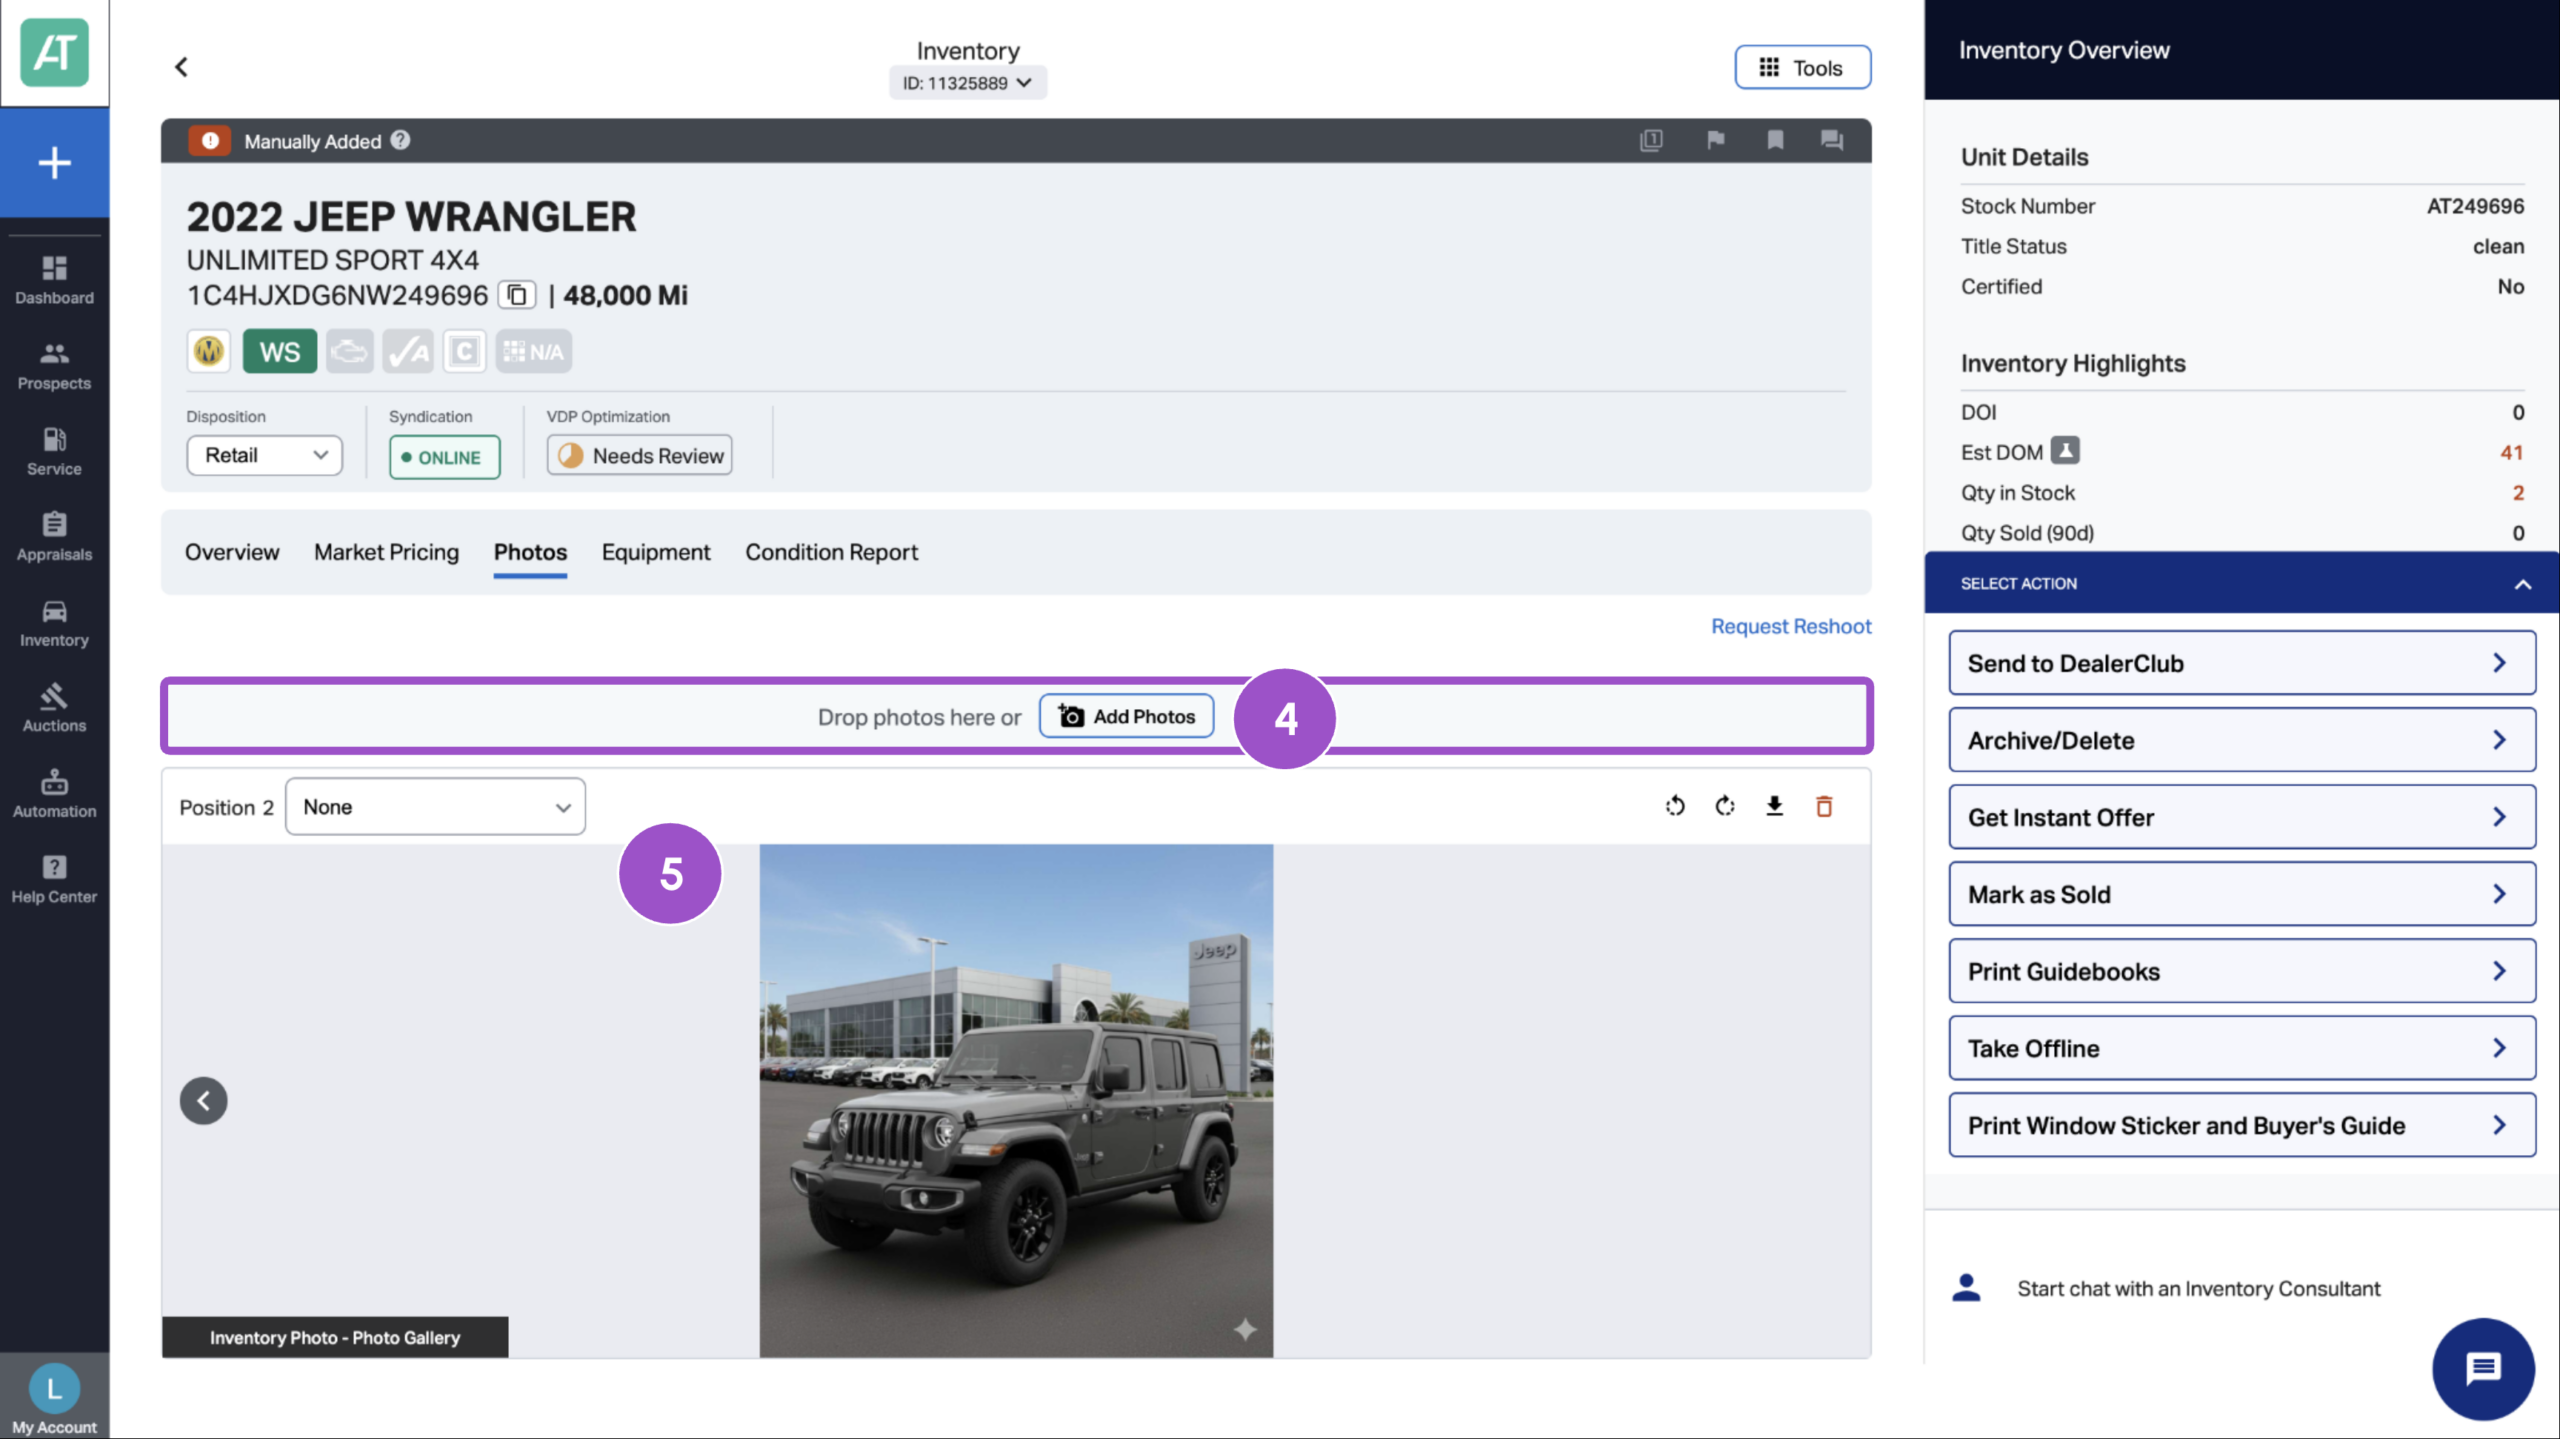
- Drag and drop your image files into the upload box, or click Add Photos to upload from your computer.
- The page will refresh and your images will appear below.
Note: If you use a third-party image provider, photos will automatically populate within 24 hours.
2 Adjust image order
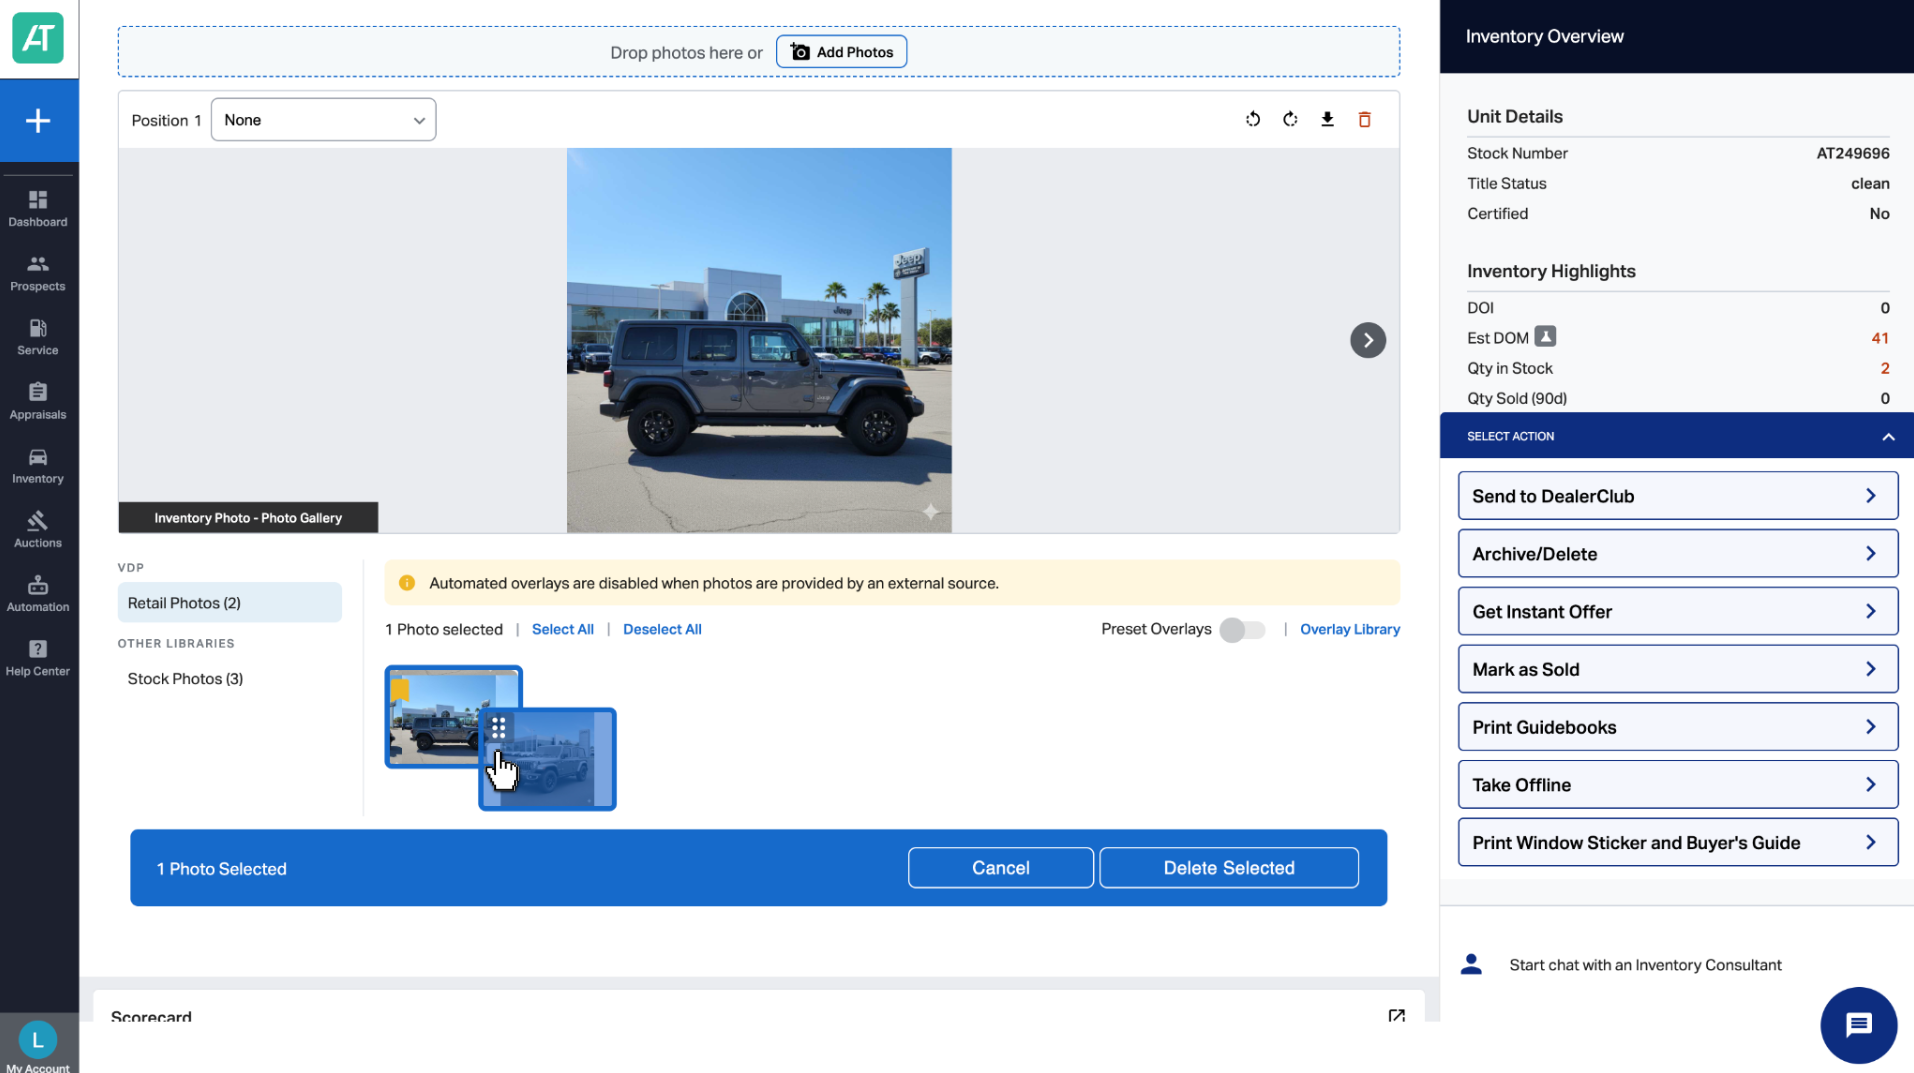
- Click the top-left corner of any image to drag and rearrange.
- The first image is automatically set as the Cover photo (marked with a yellow ribbon).
- To change the Cover, drag a different image to the first position.
- To remove a photo, select it and click Delete Selected.
3Add stock images
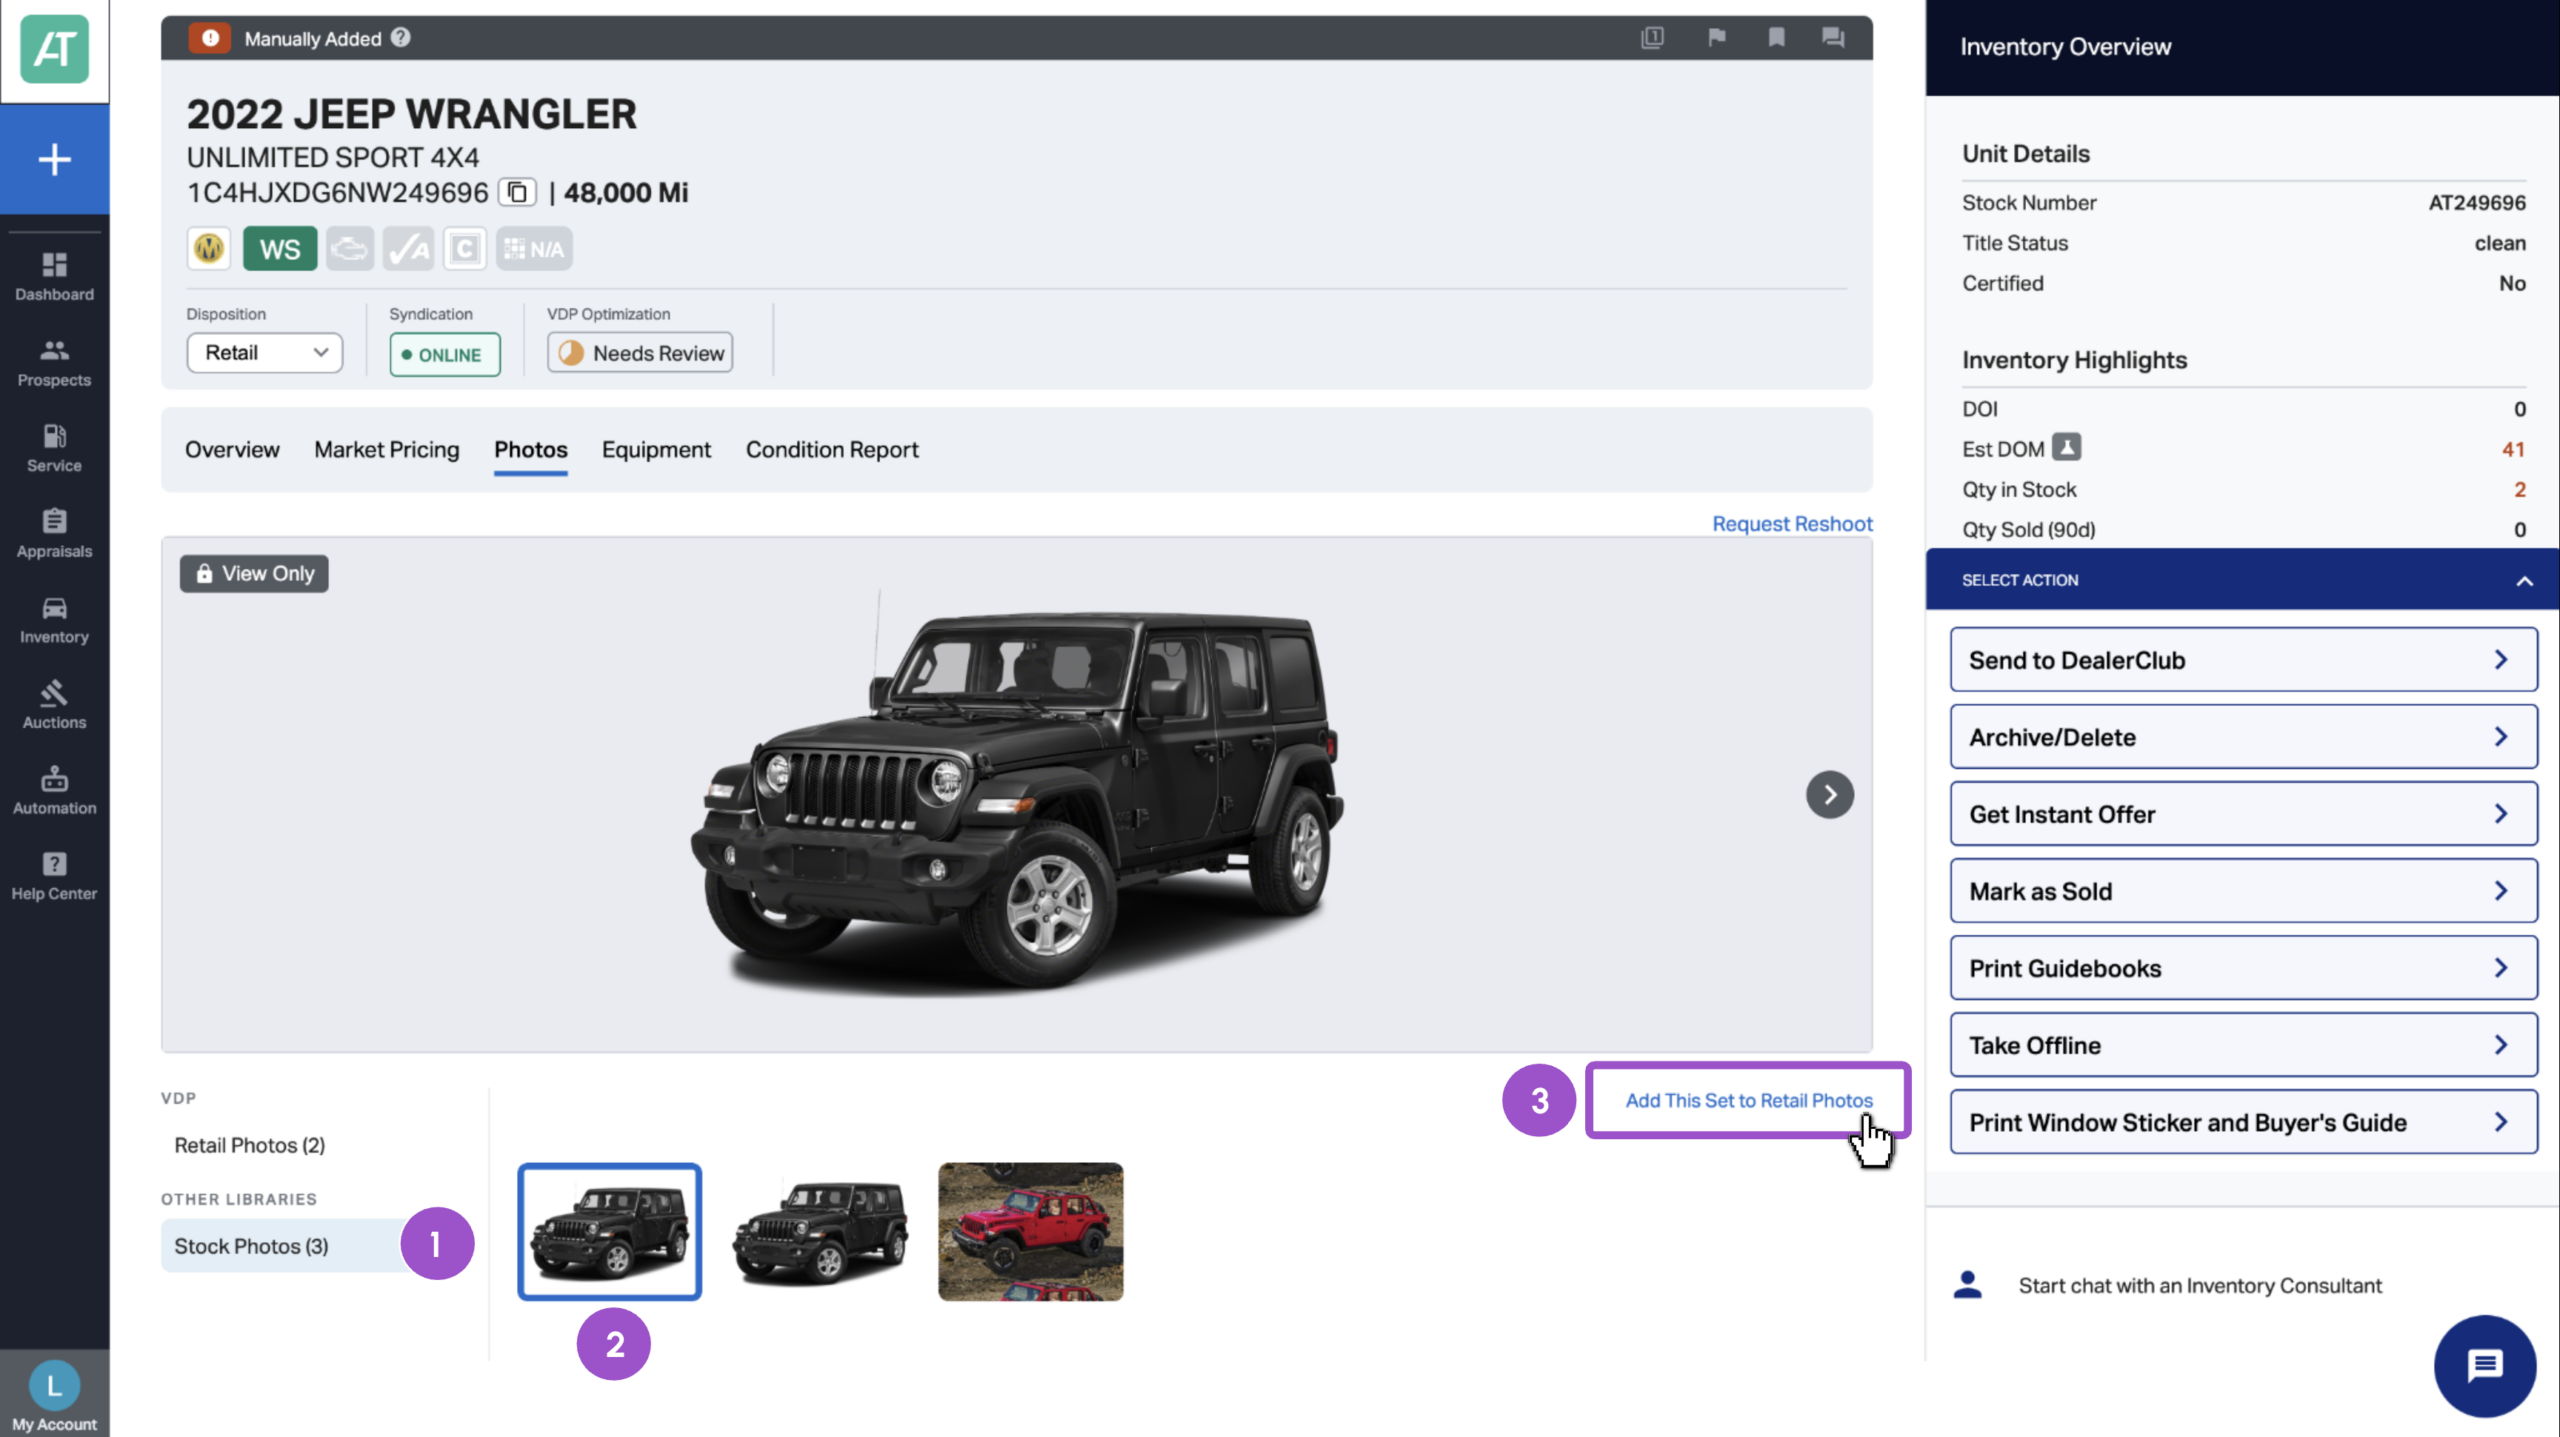
In addition to uploading your own images, you can pull from a library of Stock Photos that are automatically added based on the vehicle year, make, and model.
- In the left sidebar, click Stock Photos under “Other Libraries.”
- Select a matching image set based on vehicle year/make/model.
- Click Add This Set to Retail Photos to apply them to your listing.
4 Open the overlay library
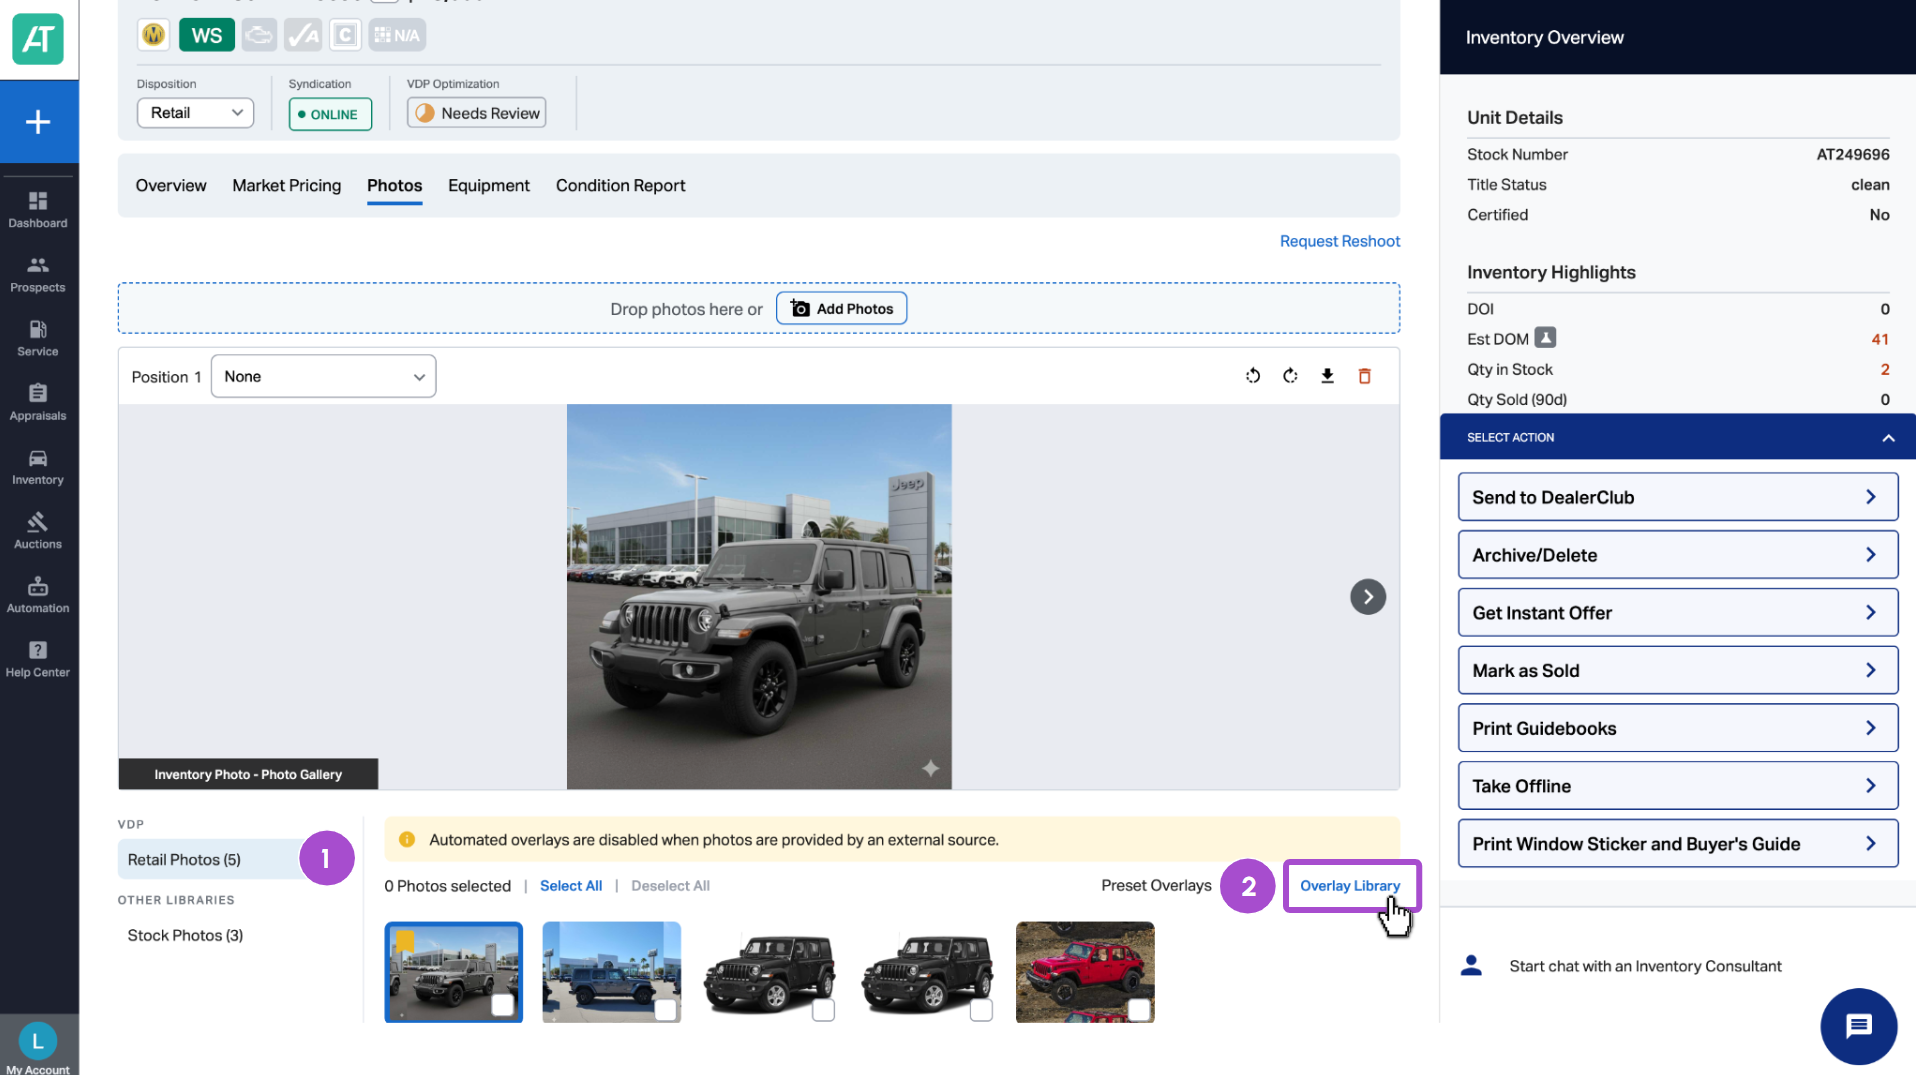
- Return to the Retail Photos tab in the left menu.
- Click Overlay Library.
- From here, you can:
- View or edit existing overlays
- Add a new overlay
Note: Overlays are applied in the vehicle photo view, not from the Overlay Library itself.
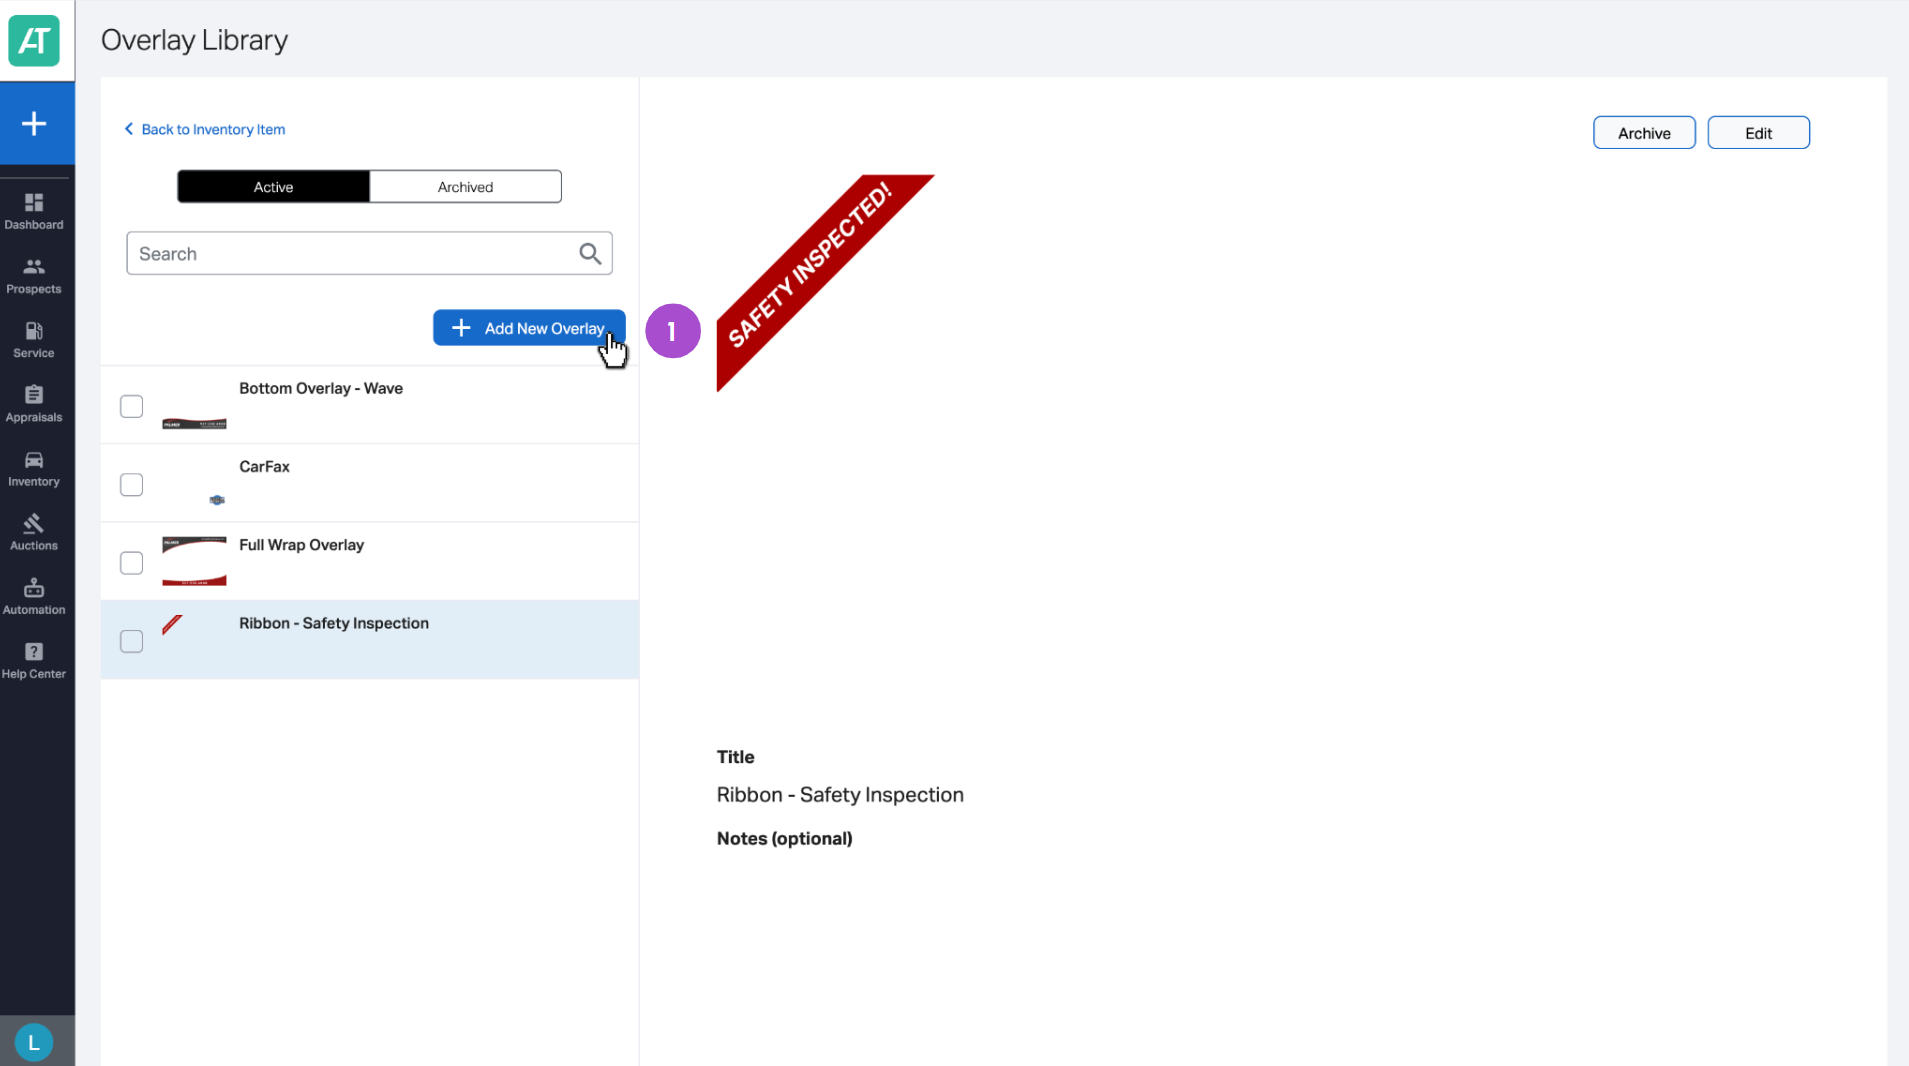
5 Create a new overlay
- In the Overlay Library, click + Add New Overlay.
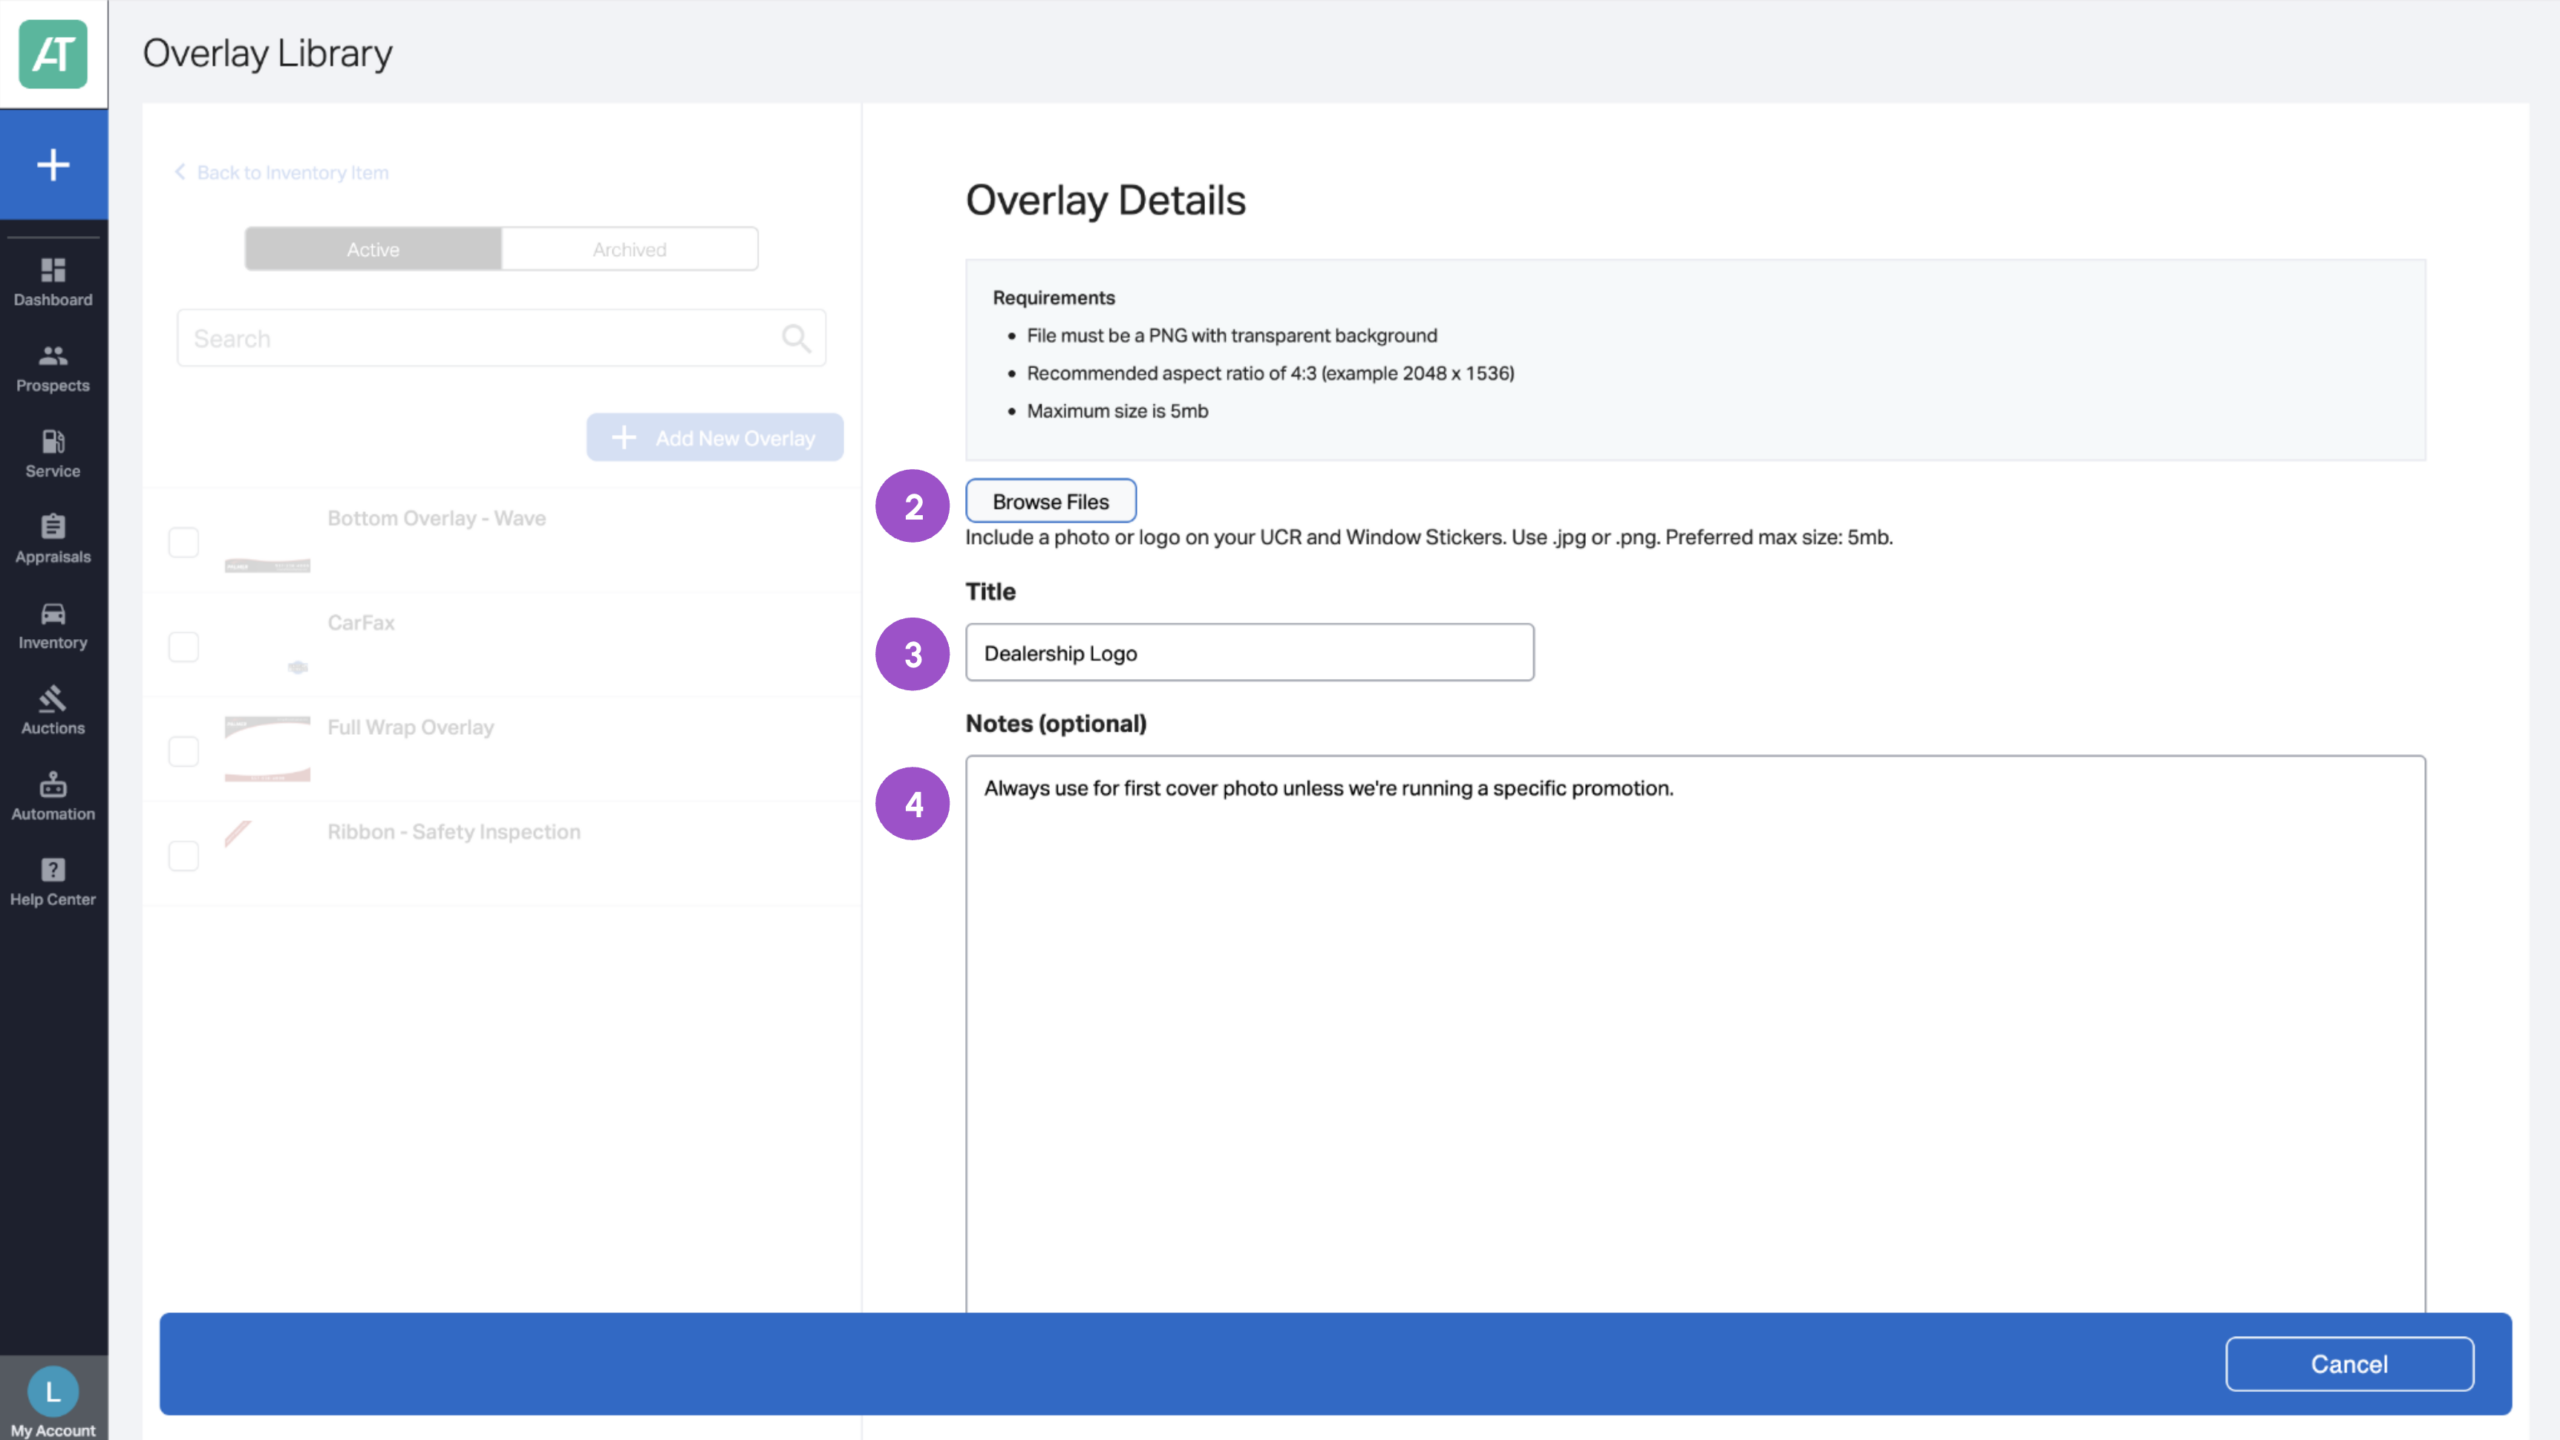
- Click Browse Files to upload your .png file.
- Add a title.
- (Optional) Add internal notes for dealership use.
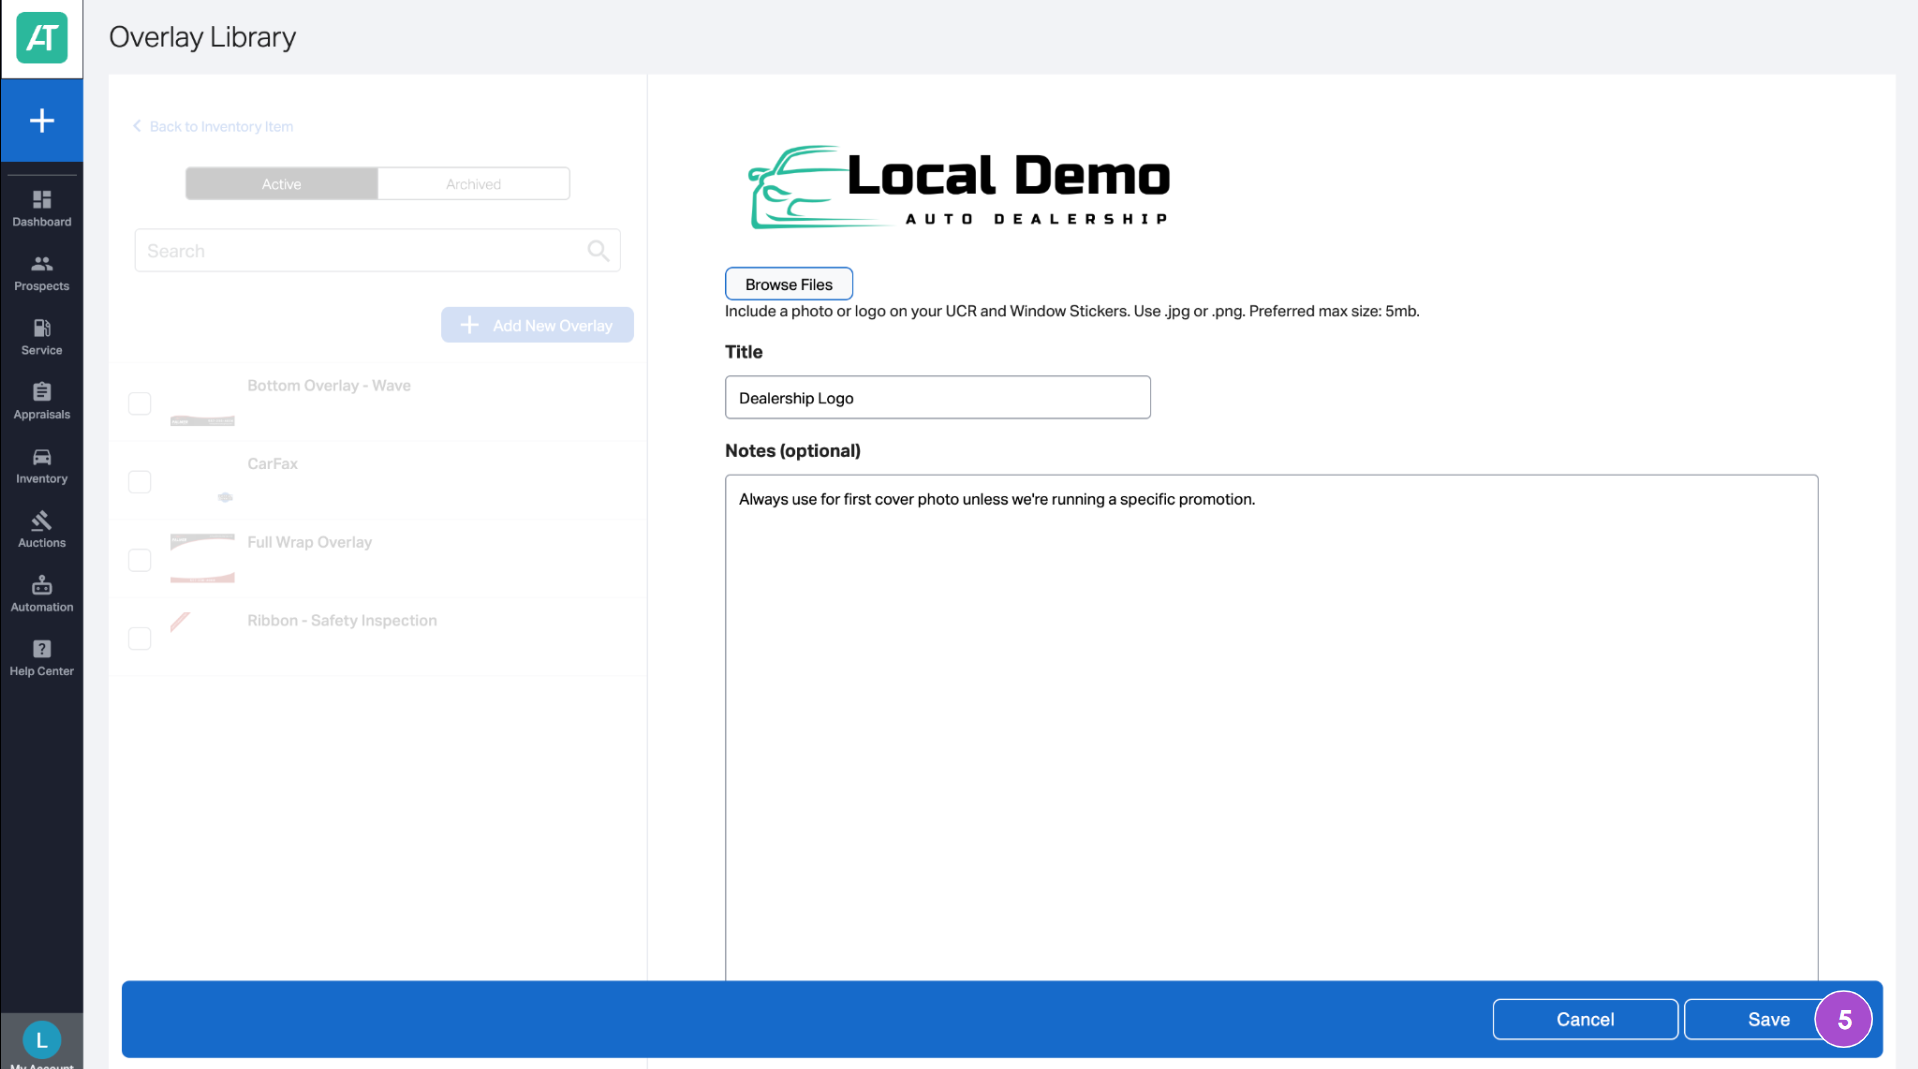
- Click Save, then refresh the page — your new overlay will appear in the list.
6 Apply an overlay to your vehicle photos
- Return to the vehicle in your Inventory tab.
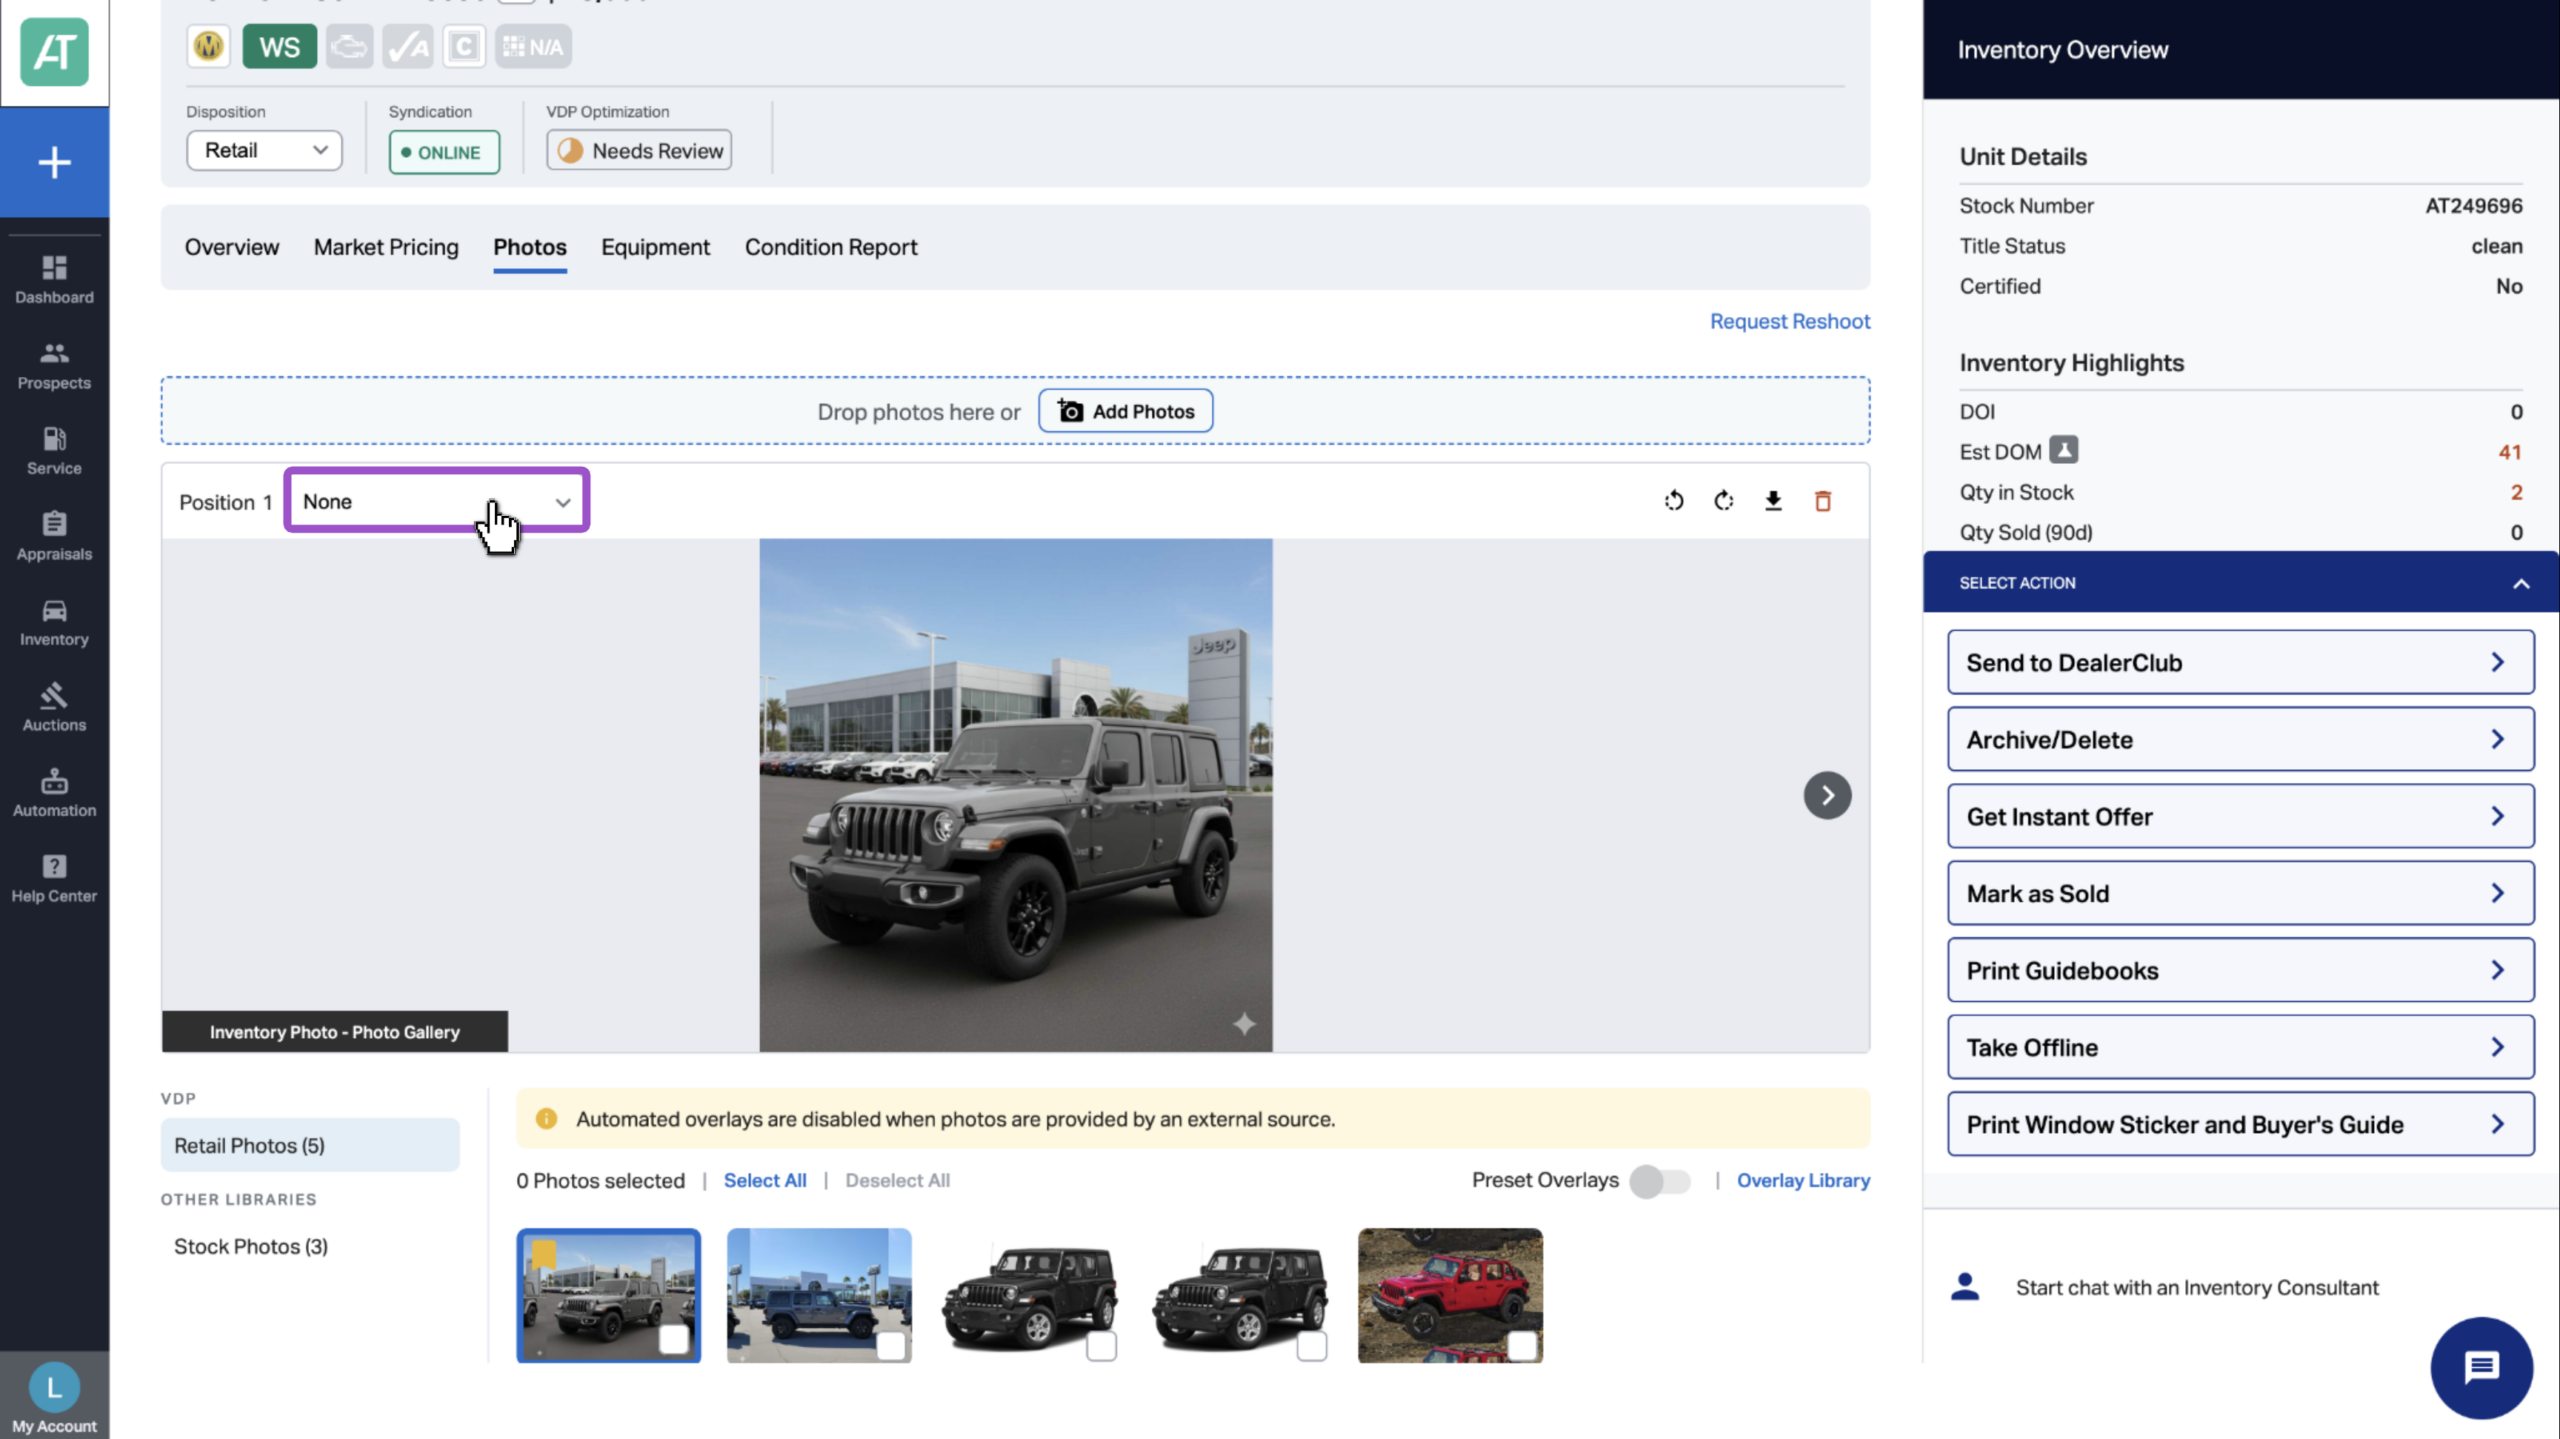
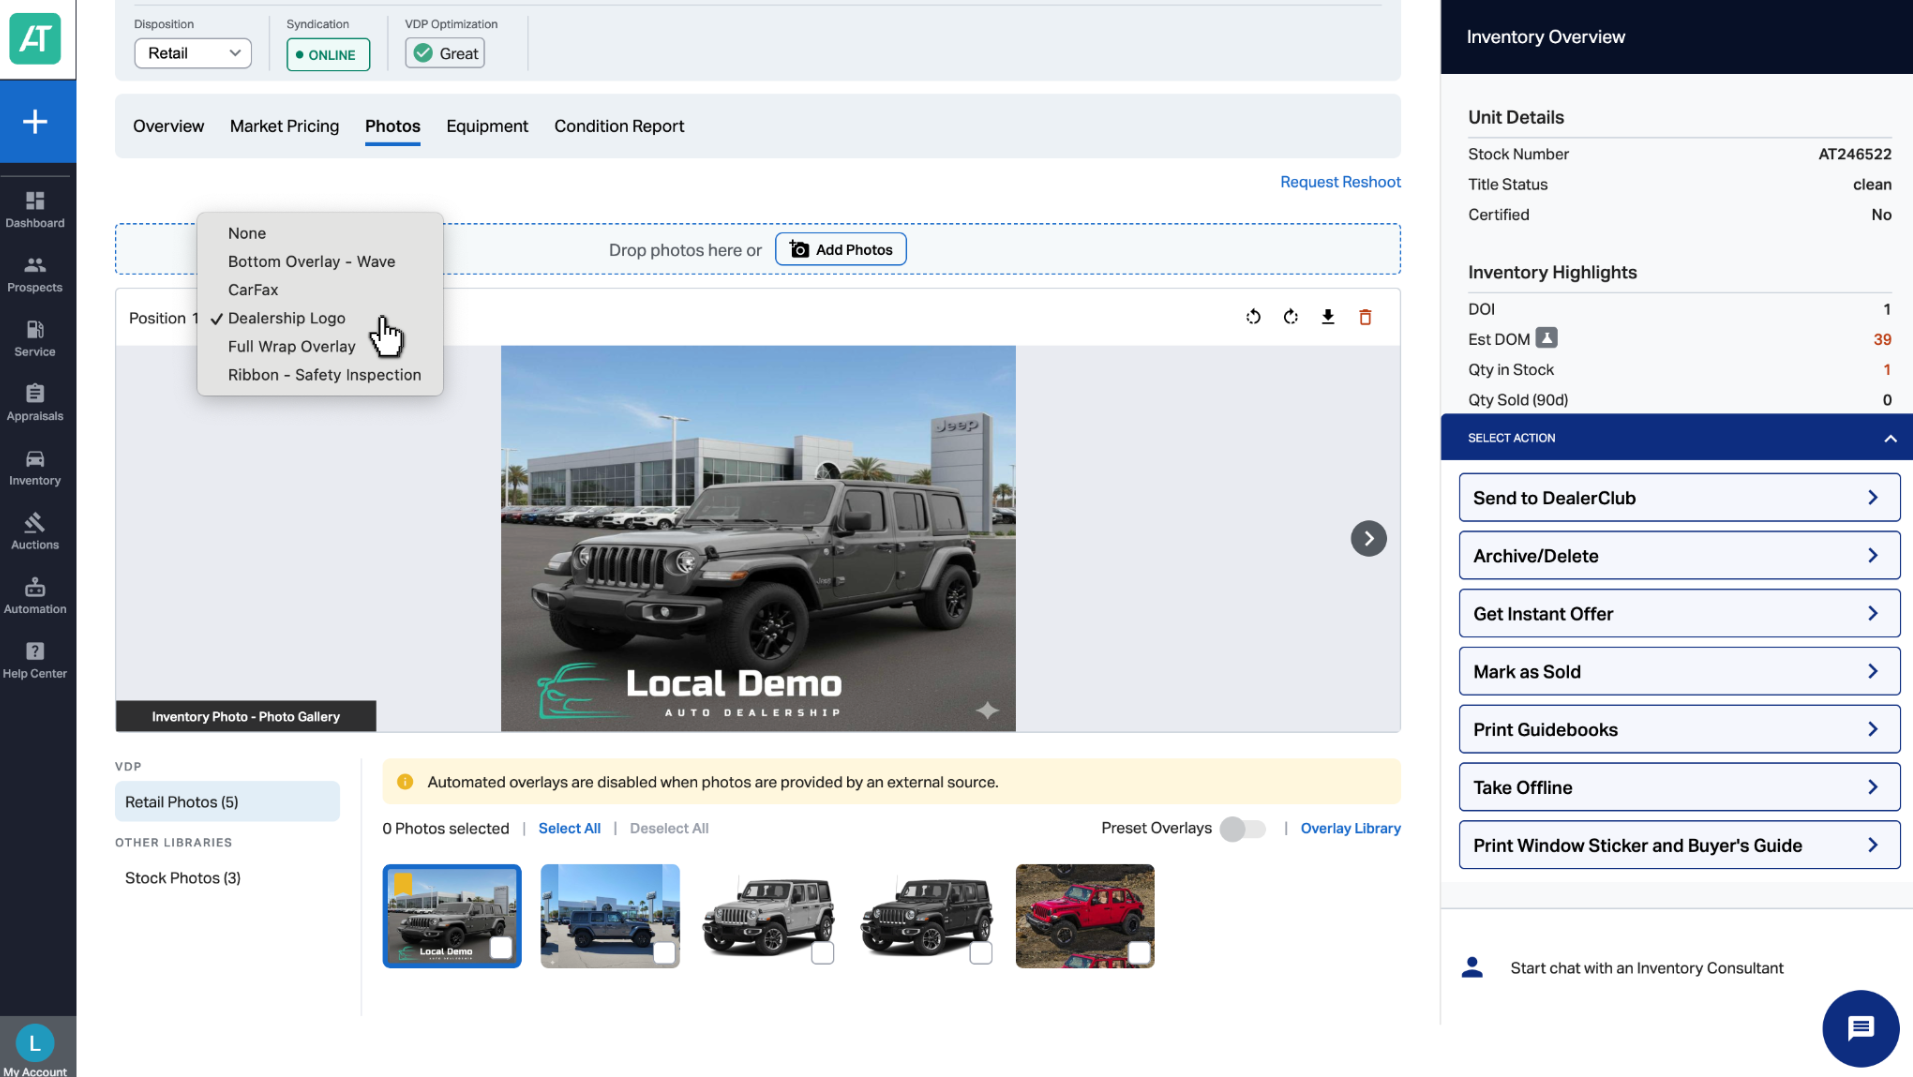
- Under the Photos section, use the overlay dropdown to select from your saved overlays.
- The page will refresh, and your selected overlay will appear on the image.
Note: To remove an overlay, select None from the dropdown.
Best practices and overlay requirements
- File type: .png with transparent background
- Recommended resolution: 2048 x 1536 px (4:3 aspect ratio)
- Max file size: 5 MB
To request new photos for a vehicle, click Request Reshoot in the top right of the Photos section.