How to create a new inline banner
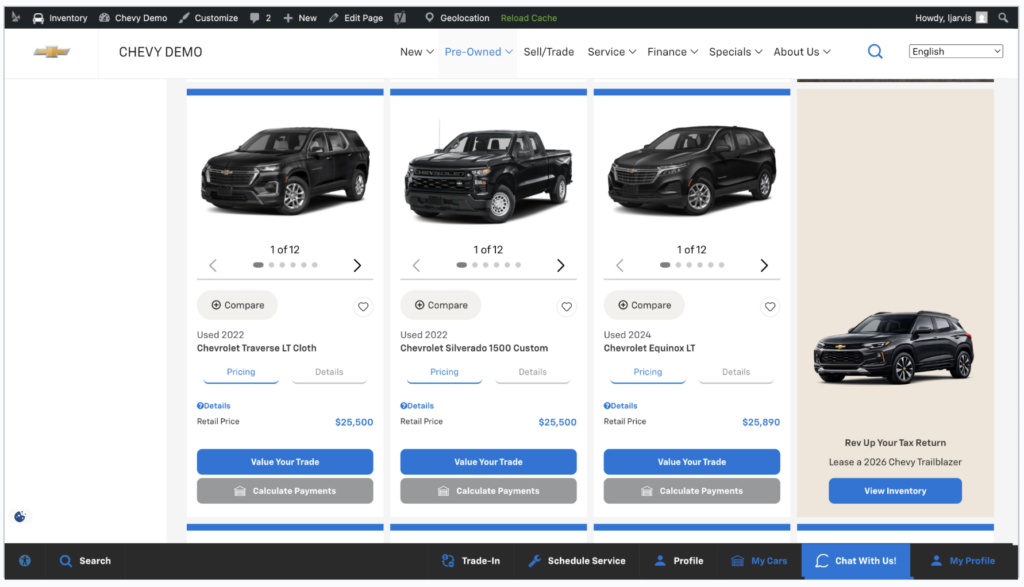
Inline banners are a simple yet powerful way to draw attention to important offers and messaging on your Vehicle Result Pages (VRPs). Whether you’re promoting a seasonal special, highlighting specific inventory, or guiding shoppers toward a call to action, inline banners let you place timely, relevant content directly into the browsing experience.
In this article, you’ll learn how to create and publish a standard inline banner — including how to add images, write compelling messaging, schedule display dates, and set targeting rules.
To get started
Go to the Cars.com Hub. Click on Dealer Inspire, then Manage Website.
1Access Inline Banners for VRPs
From the backend of your Dealer Inspire website:
- Click Inventory
- Select Lightning Settings
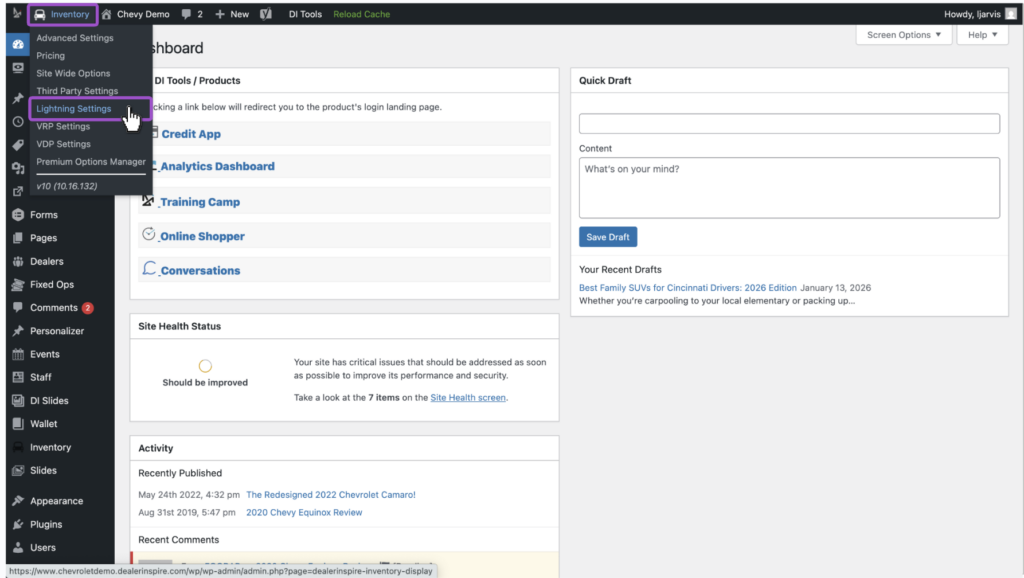
This opens the Inventory Display page, where you can customize how content appears on VRPs, VDPs, and your homepage.
- Select the VRP tab
- Click Banners
- Scroll to Inline Banners
- Click the plus (+) icon to create a new inline banner
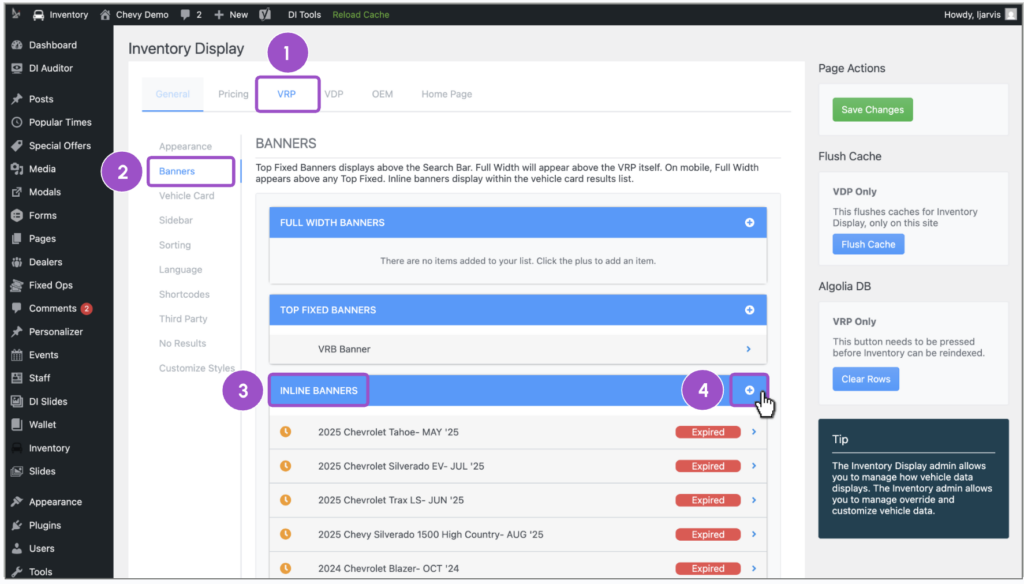
2Set up your standard inline banner
Give your new banner a clear internal name (this won’t appear to customers).
- Title: For internal reference only
- Banner Type: Select Standard Banner from the dropdown
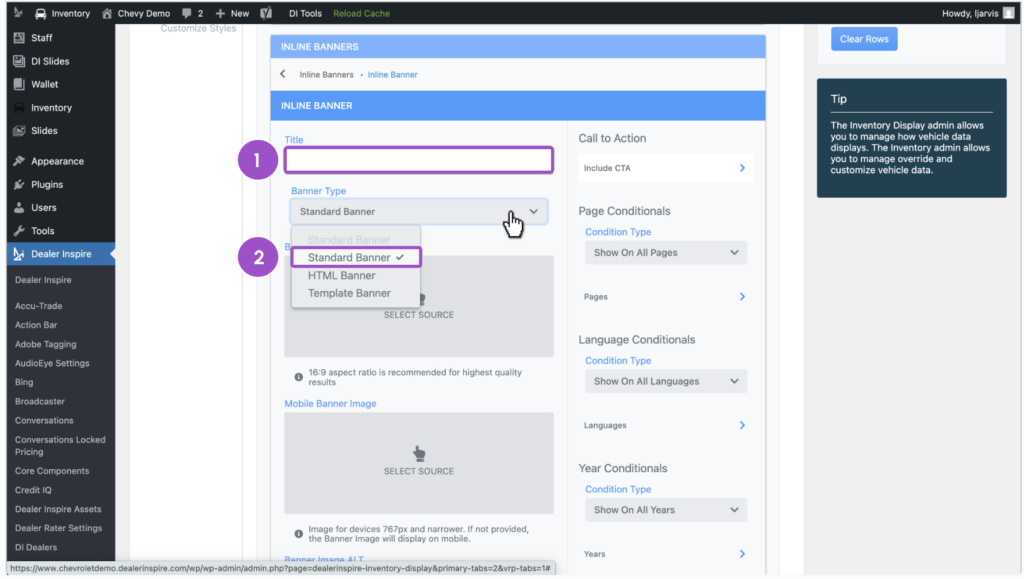
3Add an image to your banner
Give your new banner a clear internal name (this won’t appear to customers).
- Click Select Source under Banner Image
- Choose WordPress as the image source
- Best practice: Use a 9:16 (1080×1920) aspect ratio
- CDN Path: Optional — paste a direct image URL if not using WordPress
- Best practice: Use a 9:16 (1080×1920) aspect ratio
- To support mobile, provide a resized version in the mobile field (optional but recommended)
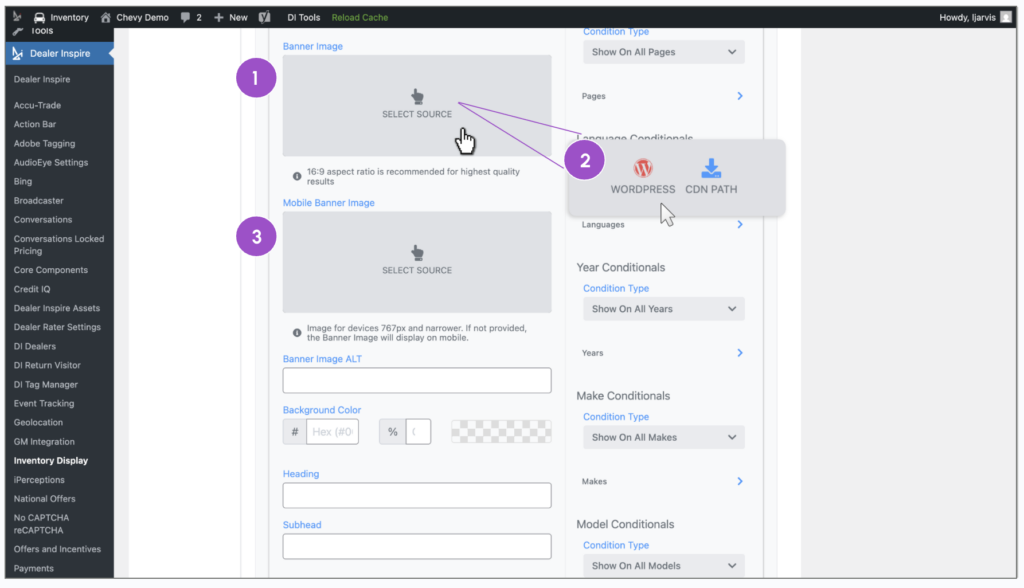
Next:
- Choose an image from your Media Library, or click Upload Files to add a new one
- Fill out the Alt Text field for accessibility and SEO
- Click Insert Image
Your selected image will now populate in the preview box.
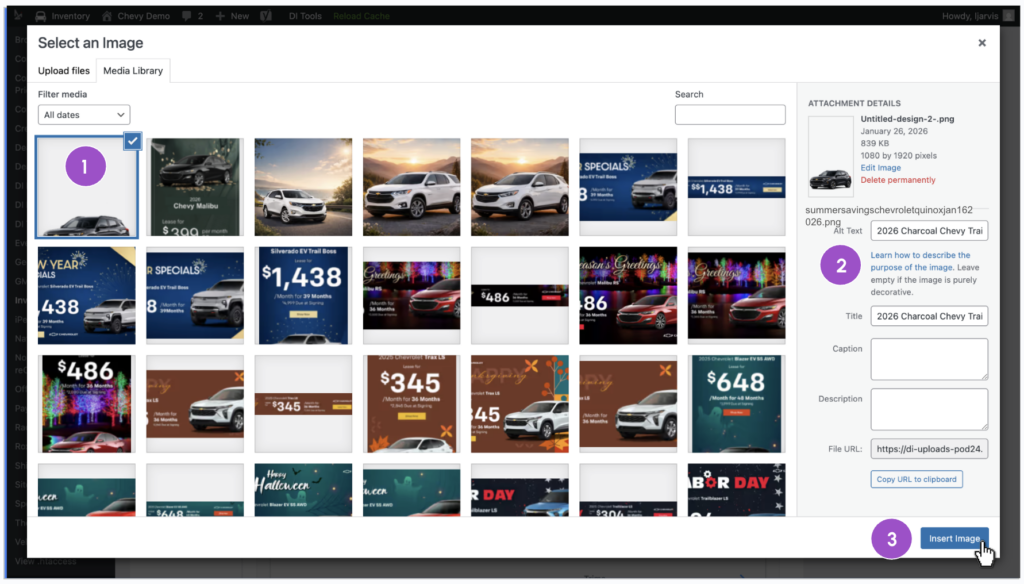
4Customize the banner
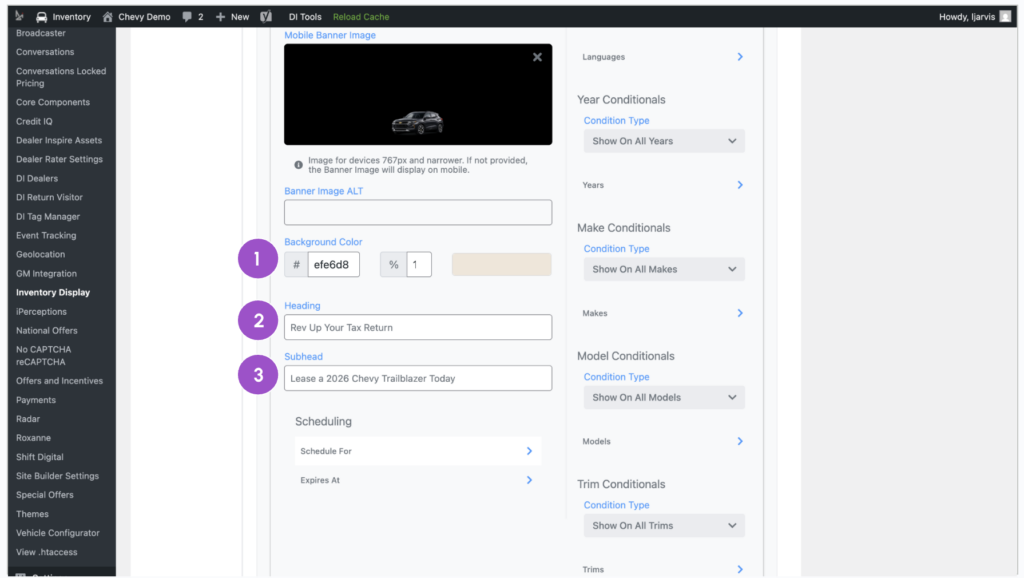
- Adjust the background color
If your image doesn’t fill the full banner space, add a background color to blend or complement the image.- Enter a hex code (e.g., #002244)
- Adjust the opacity to make the color more solid or transparent
- Add your heading
- This is the main hook — bold text that grabs attention and communicates the benefit.
- Example: Rev Up Your Tax Return
- This is the main hook — bold text that grabs attention and communicates the benefit.
- Add your subheading
- This is supporting context — a short line that gives more detail or explains the offer.
- Example: Lease a 2026 Chevy Trailblazer
- This is supporting context — a short line that gives more detail or explains the offer.
5Schedule your inline banner
You can control when the banner appears and expires — ideal for time-sensitive offers.
- Scroll to the Scheduling section
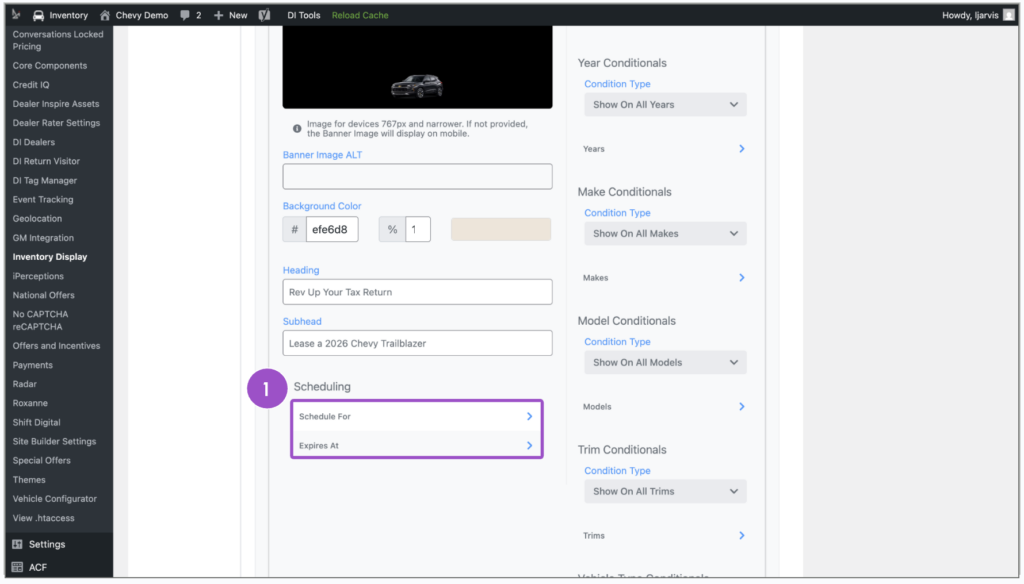
- In Schedule For, click the plus (+) icon
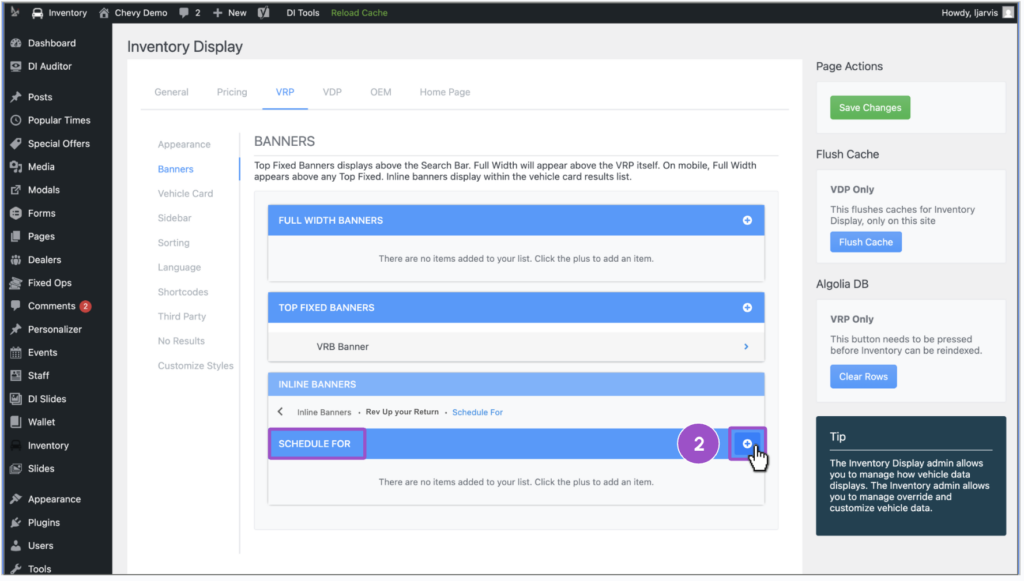
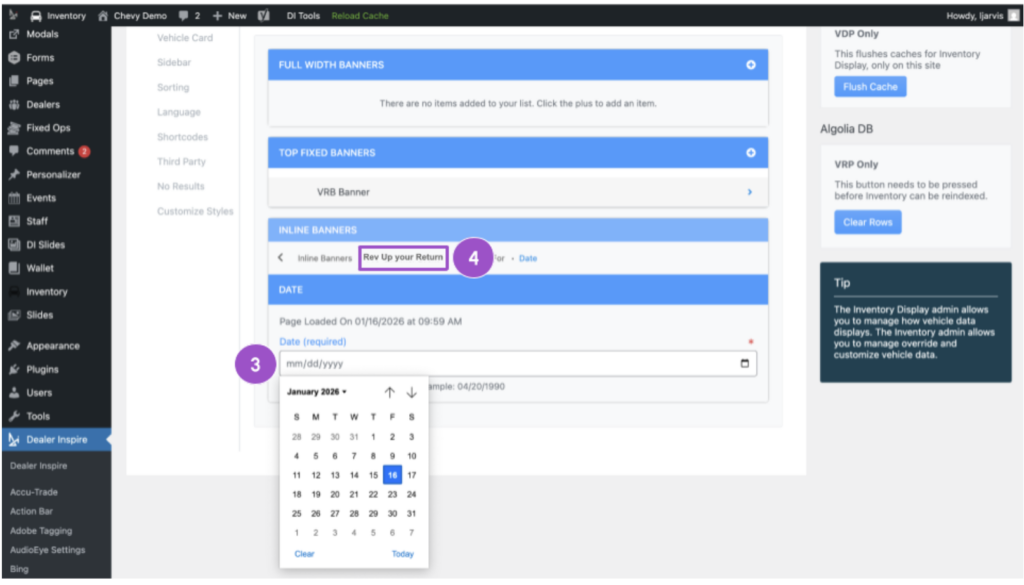
- Choose the date the banner should go live
- (Optional) Set an Expire At date
- After scheduling, click the banner name tab at the top of the page to return to your editing view.
6Add a Call to Action (CTA) button
To guide shoppers to take action (like viewing offers or submitting a lead), add a CTA button
- Click Include CTA
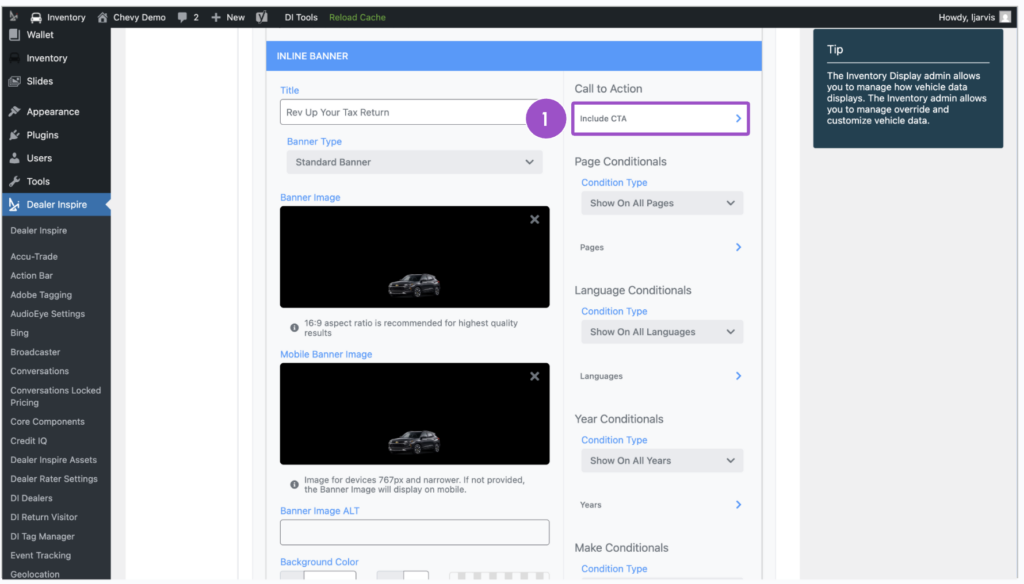
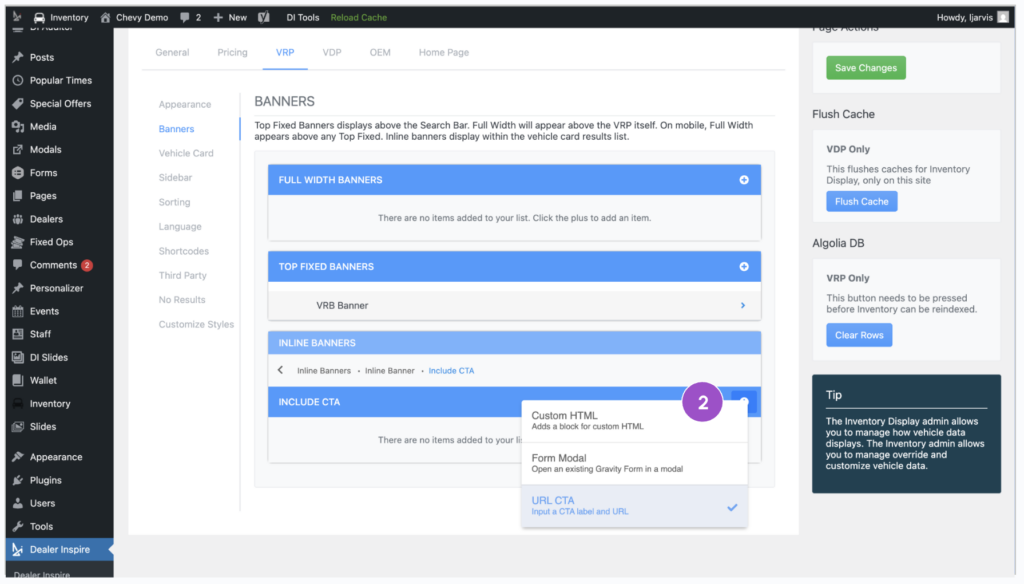
- Click the plus (+) icon to select a CTA type:
- Custom HTML: Use only if you’re comfortable with code
- Form Modal: Opens a lead form already on your site
- URL CTA: Links to another page on your site (e.g., New Inventory)
- Custom HTML: Use only if you’re comfortable with code
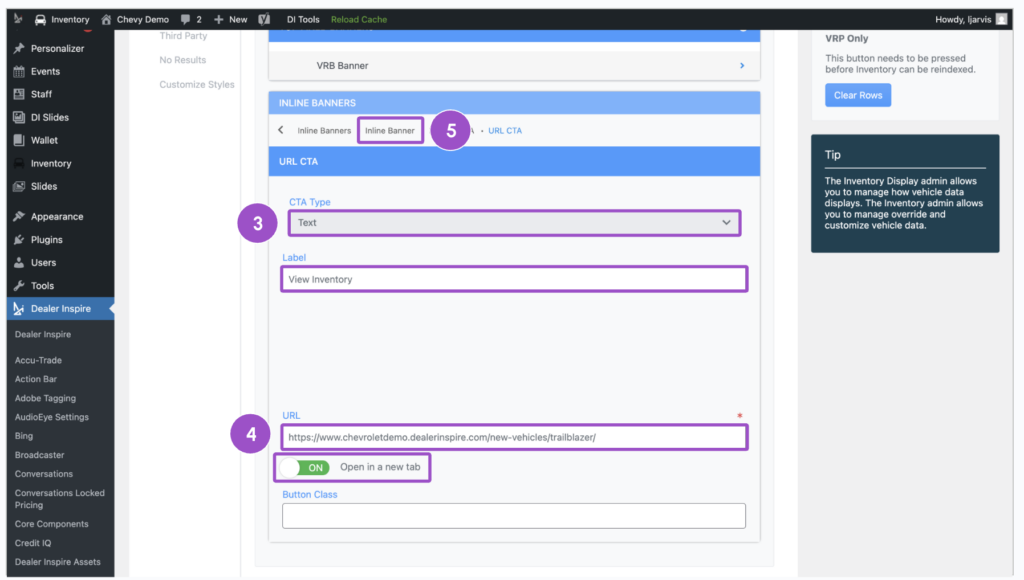
- Choose Text or Image as your button style:
- Text: Add a label (e.g., “View Offer”)
- Image: Upload a graphic to use as the CTA
- Text: Add a label (e.g., “View Offer”)
- Paste in the destination URL and choose whether it opens in a new tab
- When you’re ready, click on the breadcrumbs to get back to your banner editing window.
7Set your conditionals
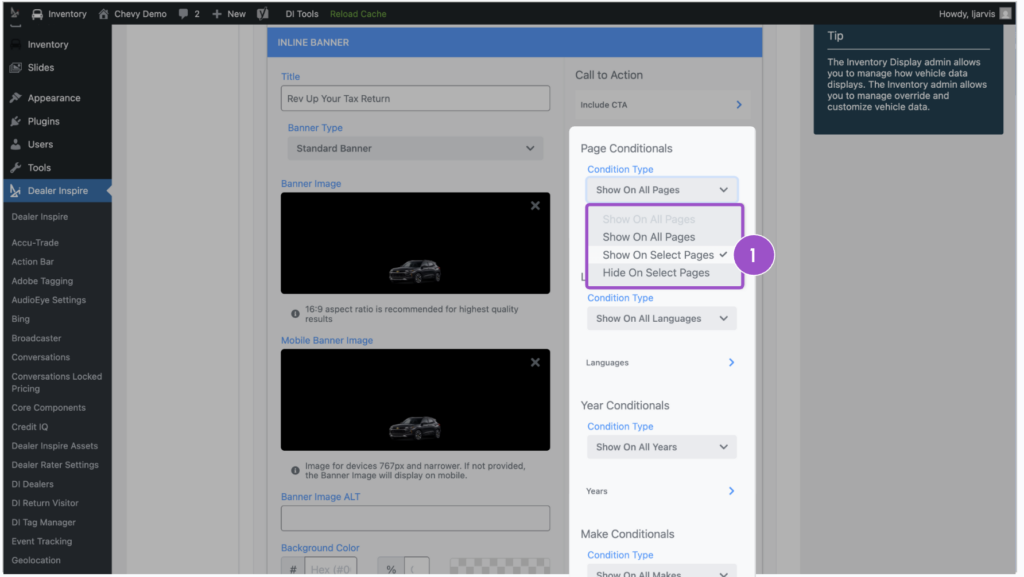
Conditionals act as smart rules to determine where and when your banner appears.
If you want the banner on all VRPs:
- Leave all conditionals set to Show on All [Blank]
If you want to target specific pages or vehicles:
- Change the dropdown to Show On Select Pages
- Click Pages
- Click the plus (+) icon
- Choose which VRPs to display the banner on
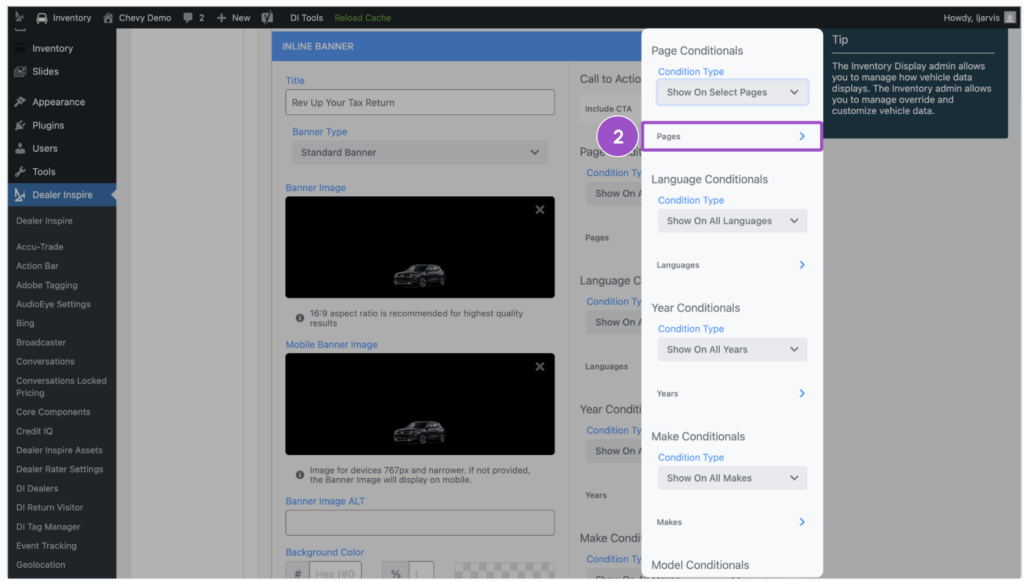
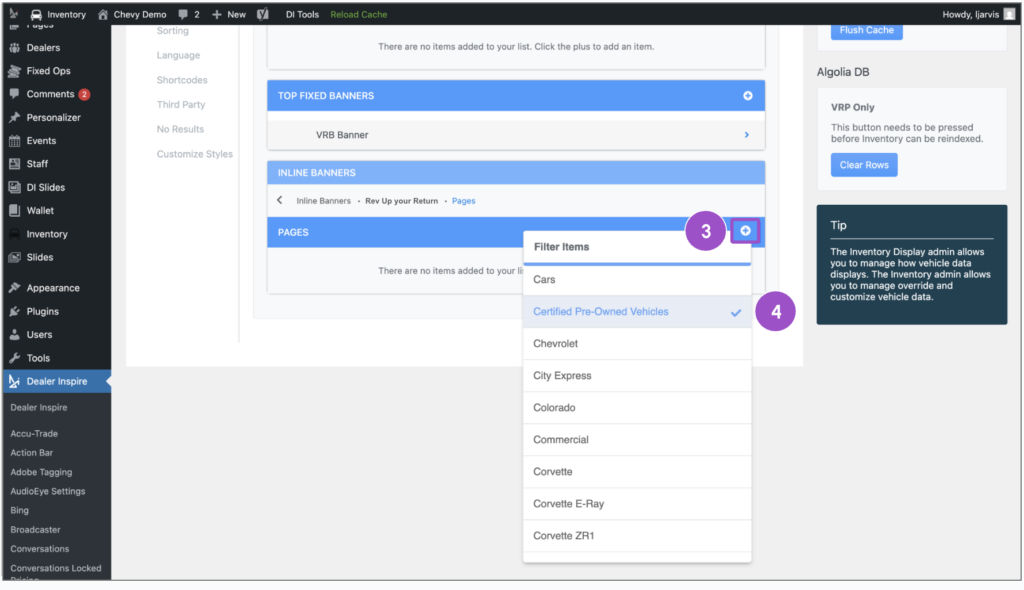
You can continue down the panel to refine targeting by:
- Language
- Vehicle Year
- Make, Model, Trim
- Vehicle Type, Fuel Type, Body Type
8Publish your banner
- Scroll to the top and click Save Changes
- Click Reload Cache to push the changes live (if no future start date is set)
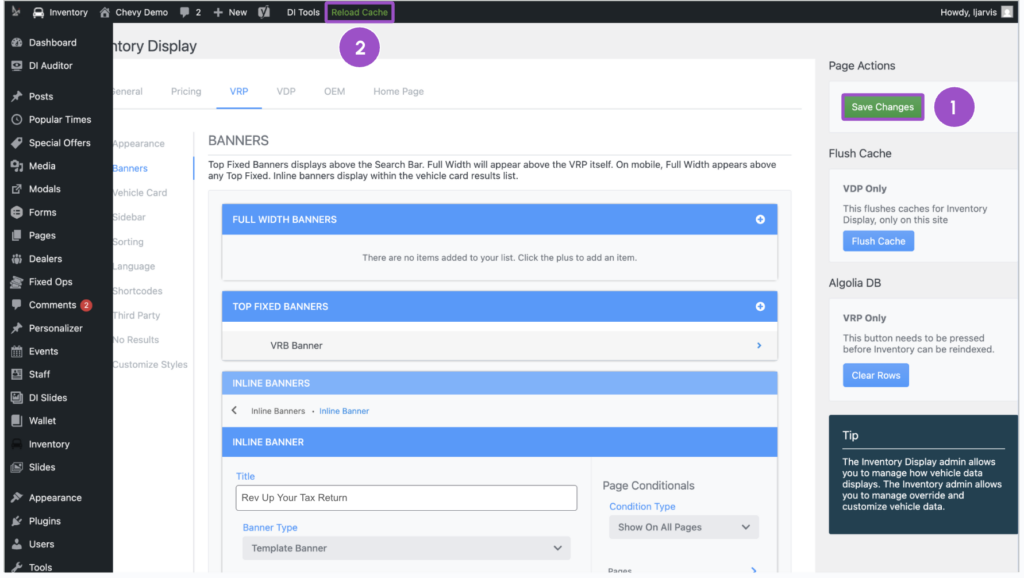
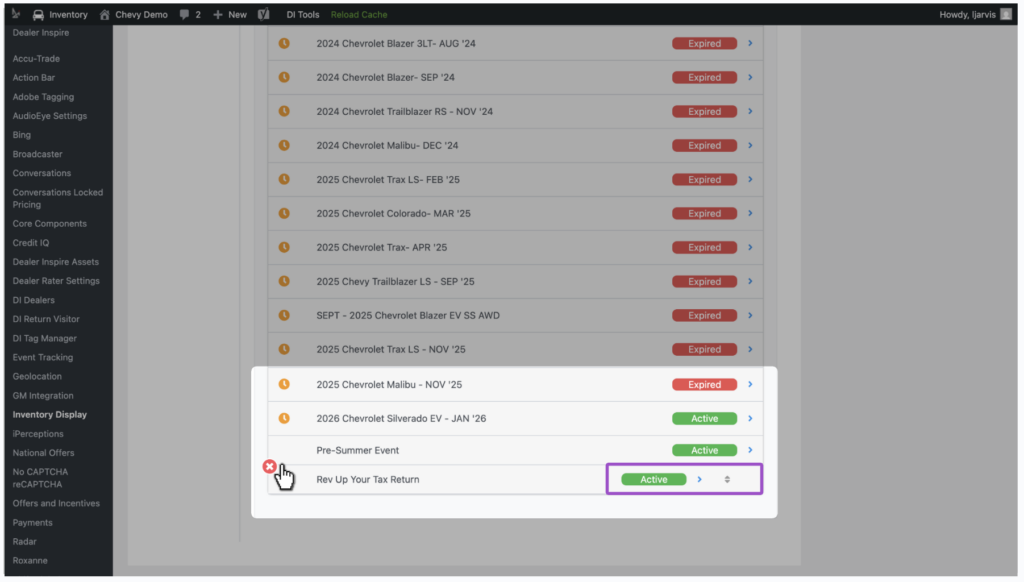
Your new banner will now appear in the list on the Banners screen, where you can:
- Edit, reorder, or delete banners
- Toggle which banners are active or expired
Tip: Limit to no more than 3 inline banners per VRP to avoid clutter and ensure performance.
9Preview on your website
Visit the VRP page(s) where your banner is set to appear.
Check for:
- Proper image display
- Accurate targeting
- CTA functionality
- Mobile responsiveness