How to add service and parts coupons
The Fixed Ops plugin in your Dealer Inspire website allows you to create and manage Service and Parts coupons directly from your website backend. You can customize coupon content, assign coupons to specific pages, add disclaimers, and set expiration dates that automatically remove coupons from your site when they expire.
In this article, you’ll learn how to create a new Service or Parts coupon, configure optional settings such as images and expiration dates, publish the coupon to your website, and manage or reorder existing coupons.
To get started
Go to the Cars.com Hub. Click on Dealer Inspire, then Manage Website.
1 Add a new coupon
From the backend of your Dealer Inspire website:
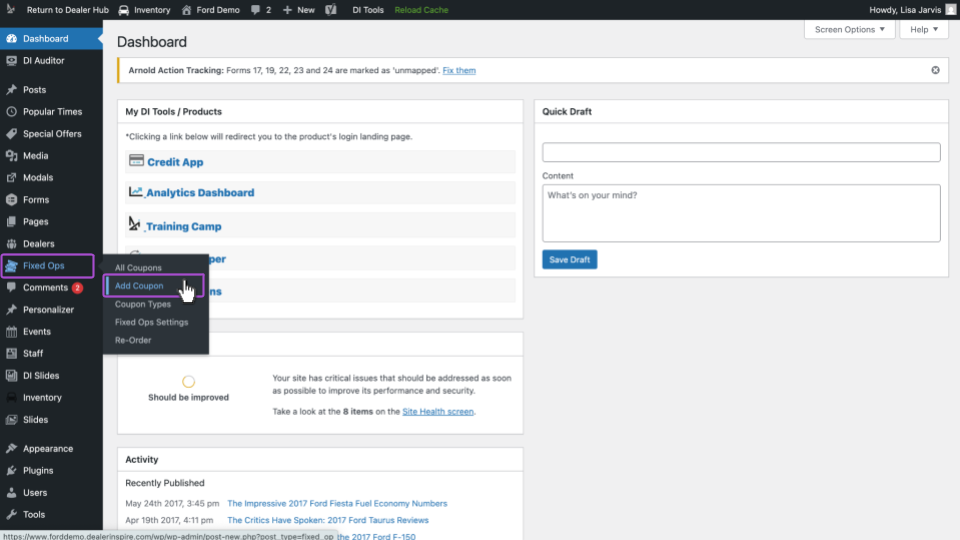
- In the left-hand menu, hover over Fixed Ops.
- Click Add Coupon.
You will be taken to the coupon editor screen.
2 Build your coupon
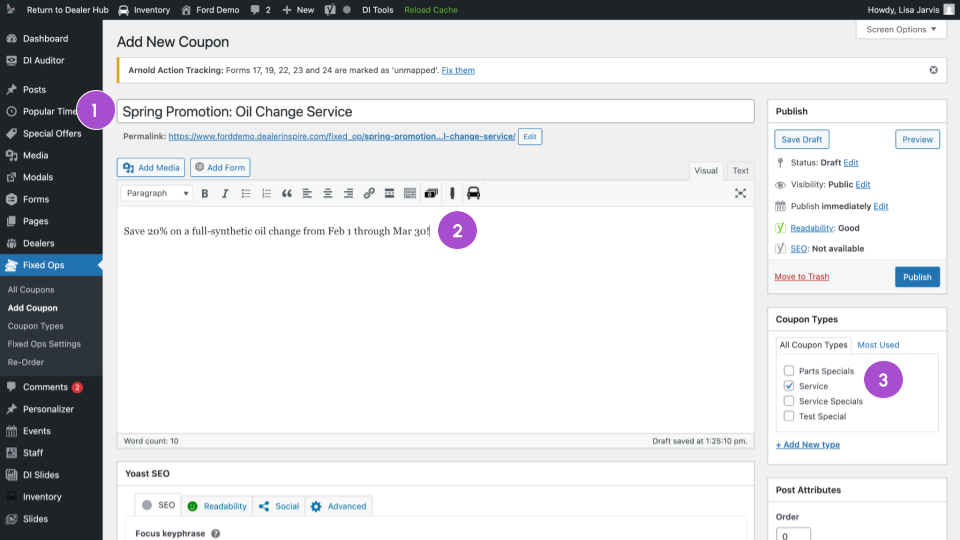
- Enter a Title: This title appears on the coupon as shoppers will see it. Keep it clear and concise.
- Add a Description: Use the main text box to describe the offer details.
- Select a Coupon Type: Check the box that matches the type of coupon you are creating (for example, Oil Change, Service, Parts, etc.).
- You may select multiple categories if needed.
- At least one coupon type must be selected for the coupon to appear on the corresponding page of your website.
- If no type is selected, the coupon will not display on the frontend.
- You may select multiple categories if needed.
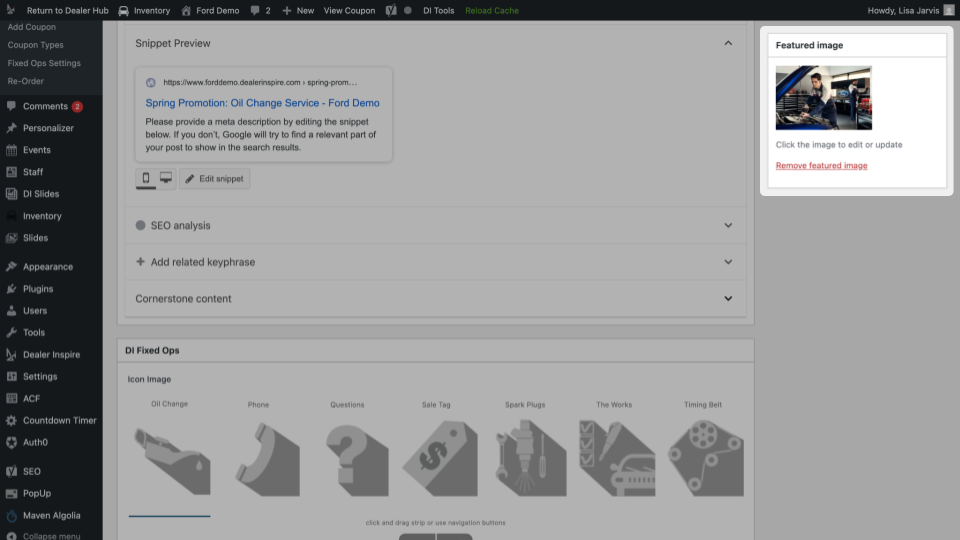
Add a Featured Image (Optional but Recommended)
- Scroll to the Featured Image section.
- Click Set Featured Image.
- Upload a new image or select one from your media library.
This image appears as a banner across the top of the coupon.
Recommended image size: 500px by 315px
Images that do not match this size may appear cropped or distorted depending on layout.
3 Adjust optional settings
Everything we’ve covered so far is all you need to create a complete Service and Parts coupon. The additional settings below are optional features you can adjust, but are likely not needed.
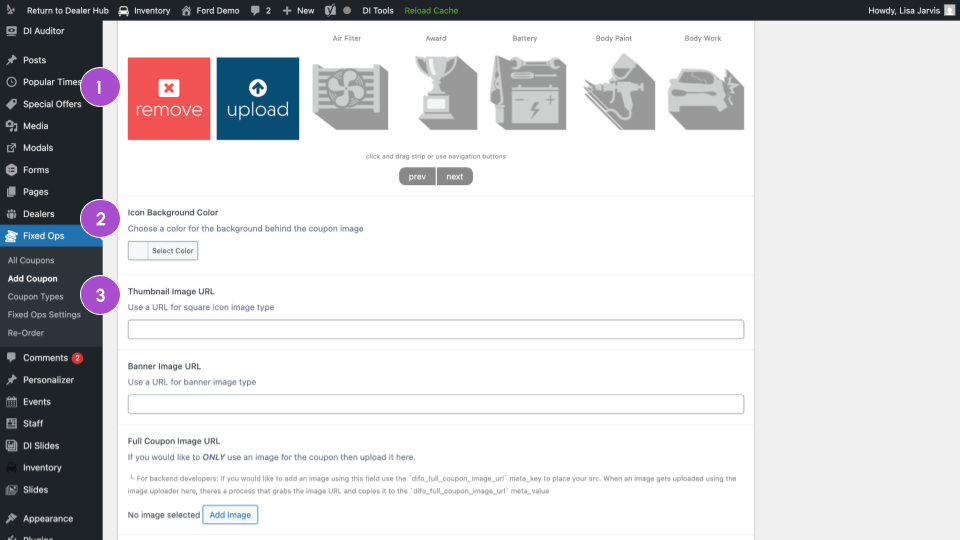
- Add an icon: Instead of using a featured image, you may add an icon that appears to the right of the coupon title.
- Select from the available icon options, or
- Upload your own PNG file with a transparent background.
- Include a background color: You may add a background color behind your icon using:
- The color picker, or
- A hex code.
- Add image URLs: Skip this section or reach out to support@dealerinspire.com about adding image URLs to your Service and Parts coupon.
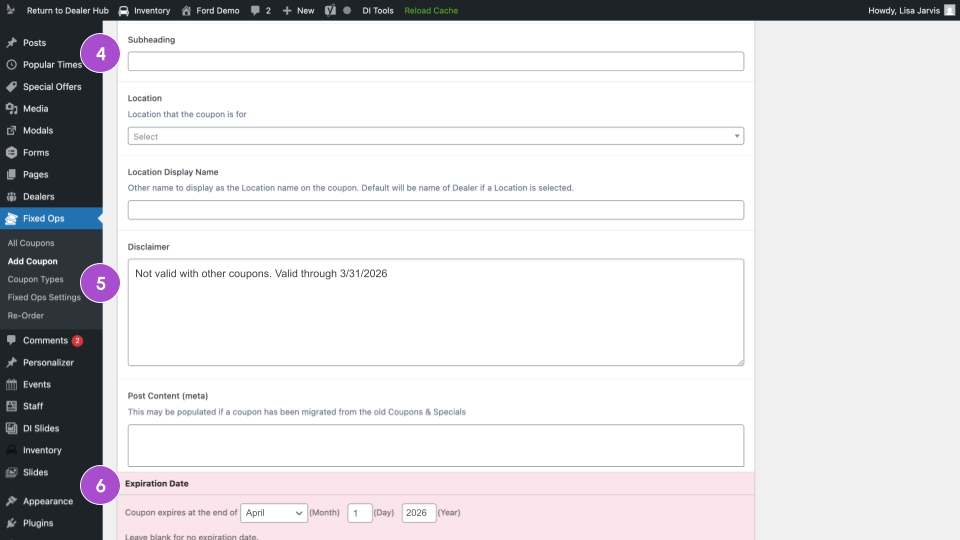
- Include a subheading: Use this field to add additional context about the offer, such as:
- Discount amount
- Promotional highlight
- Limited-time messaging
- Insert a disclaimer: Add any required fine print or terms.
- Disclaimers display in smaller text beneath the coupon heading, description, and subheading.
- Set an expiration date: This helps ensure expired offers do not remain visible to shoppers.
- Use the date picker to select an expiration date.
- When the selected date is reached, the coupon will automatically move to Draft status and be removed from your website.
4 Publish your coupon
- Scroll to the top of the page.
- Click Publish.
If you are editing an existing coupon, click Update instead.
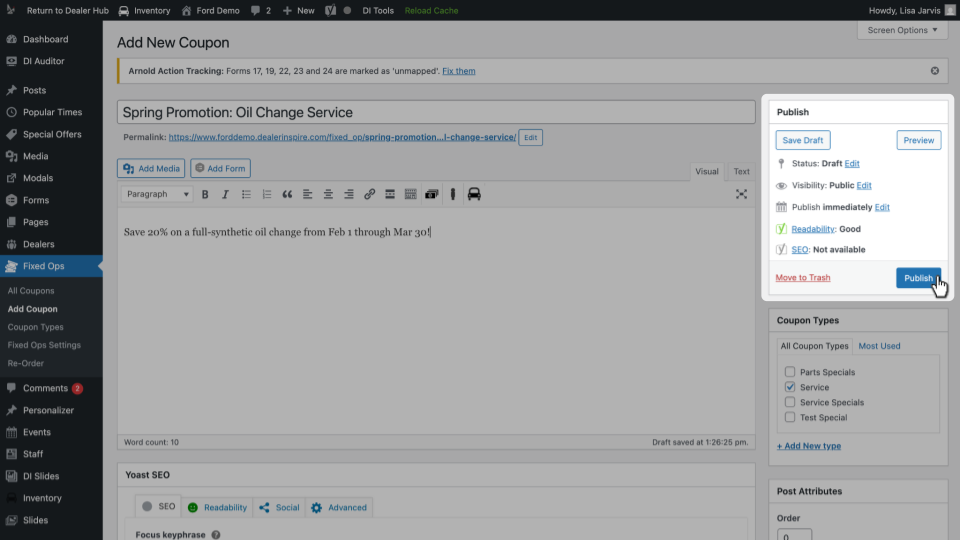
Verify on the Frontend
- Visit the live version of your website.
- Navigate to the page associated with the coupon type you selected (for example, Services page).
- Confirm the coupon appears correctly.
If the coupon does not appear:
- Confirm at least one coupon type was selected.
- Confirm the coupon status is Published.
- Clear your website cache (if applicable) and refresh the page.
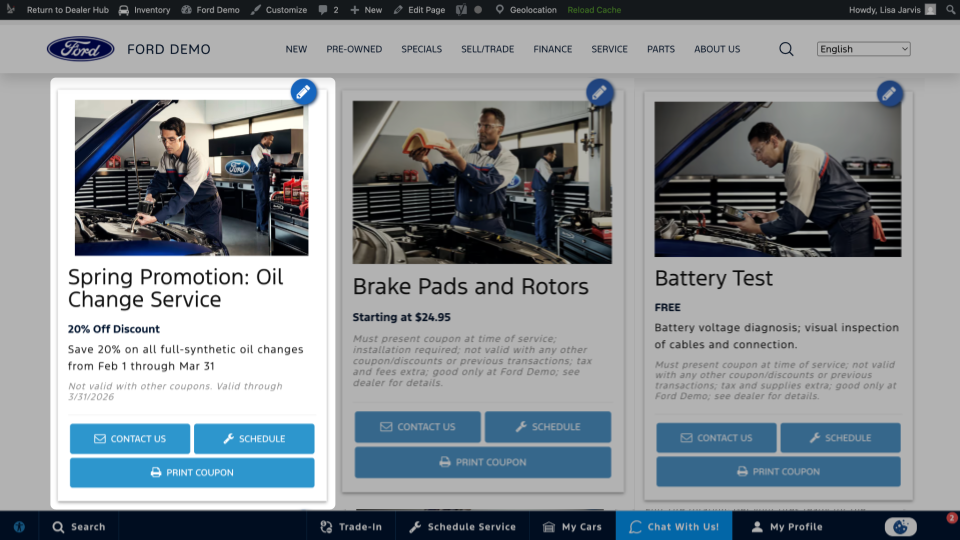
Quick Edit Access
When logged into your Dealer Inspire website:
- A blue pencil icon appears in the top-right corner of each coupon on the frontend.
- Clicking this icon takes you directly back to the Fixed Ops editor for that coupon.
Wallet Pass Integration
If you would like mobile users to download your coupon directly to their Apple Wallet or Google Wallet app, refer to the Wallet Pass article.Note: Wallet pass integration is available only for Plus and Premier packages.
5 Manage your Fixed Ops coupons
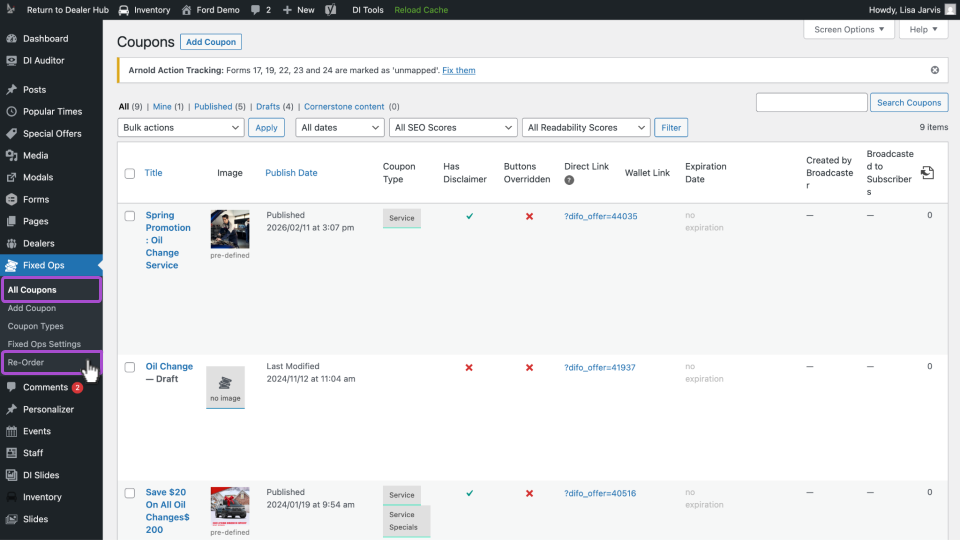
- In the WordPress admin menu, click Fixed Ops.
- Select All Coupons.
Here you can:
- View all coupons
- See which pages they are assigned to
- Check whether they are Published or Draft
- Confirm if expired coupons have automatically moved to Draft status
Reorder Coupons
- Click Re-Order under the Fixed Ops menu.
- Drag and drop your published coupons into the desired order.
Reordering affects how coupons appear on the frontend within their assigned coupon-type pages.