How to set up and respond to chats
This article explains how to configure your user profile, set your availability, receive incoming chats, and respond to shoppers through Cars.com integrated chat system (Conversations). Proper setup helps ensure you receive chat notifications and can manage conversations efficiently.
To get started
Go to the Cars.com Hub. Click on Dealer Inspire, then Conversations.
1 Edit your profile
After logging in:
- Click your name in the top-right corner
- Select Edit Profile

2 Adjust your profile information
On the Edit Profile screen, complete the following setup steps:
- Add timezone and contact information
Ensure your timezone and contact details are accurate so chat routing and availability function correctly. - Add a profile photo (optional)
Drag and drop a headshot into the image box.
Minimum recommended image size: 250 × 250 px. - Install the Conversations Chrome Extension
Install the Conversations Chrome Extension to receive chat notifications.
Note: With the extension installed, chat notifications appear as pop-up alerts, allowing you to work in other browser tabs without missing incoming chats.

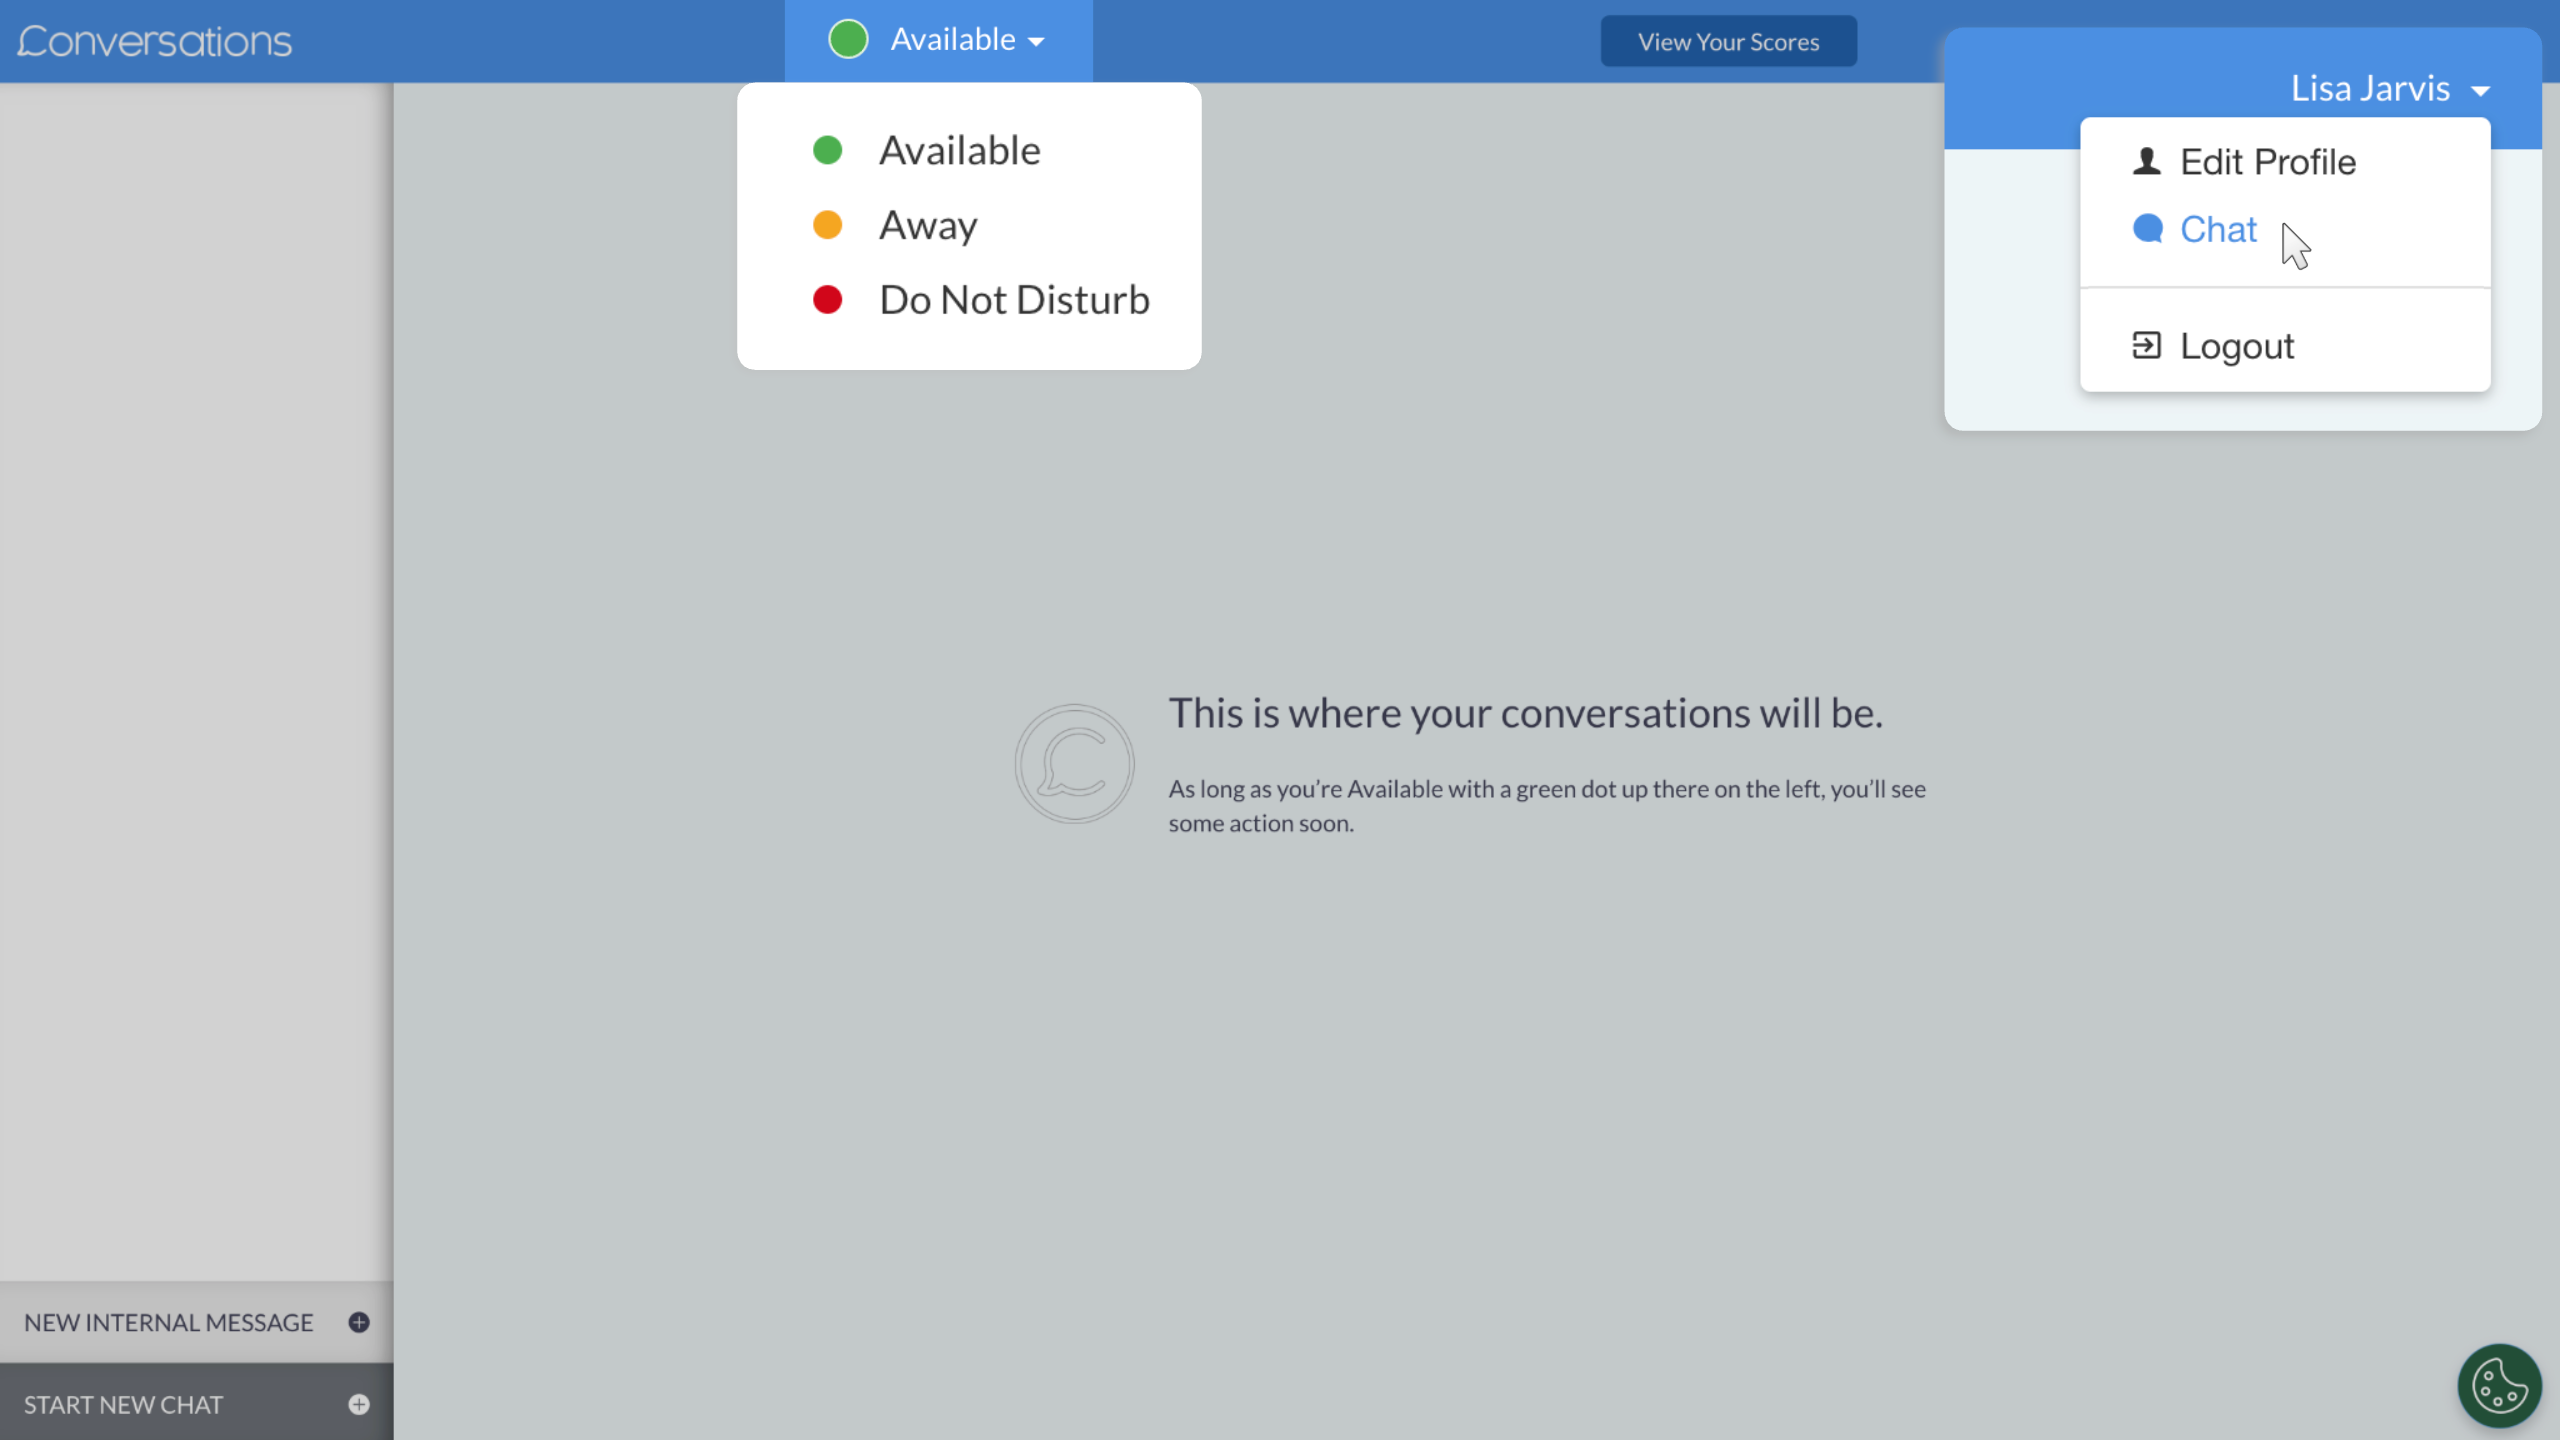
3 Set your chat status
Once your profile is complete, return to the chat screen and set your availability status.
Available statuses include:
- Available: You can receive all incoming customer chats and transfers.
- Away: You will not receive customer chats but may receive internal chats or transfers.
- Do Not Disturb: You will not receive incoming chats or transfer offers.
Set your status appropriately when stepping away to prevent missed conversations.
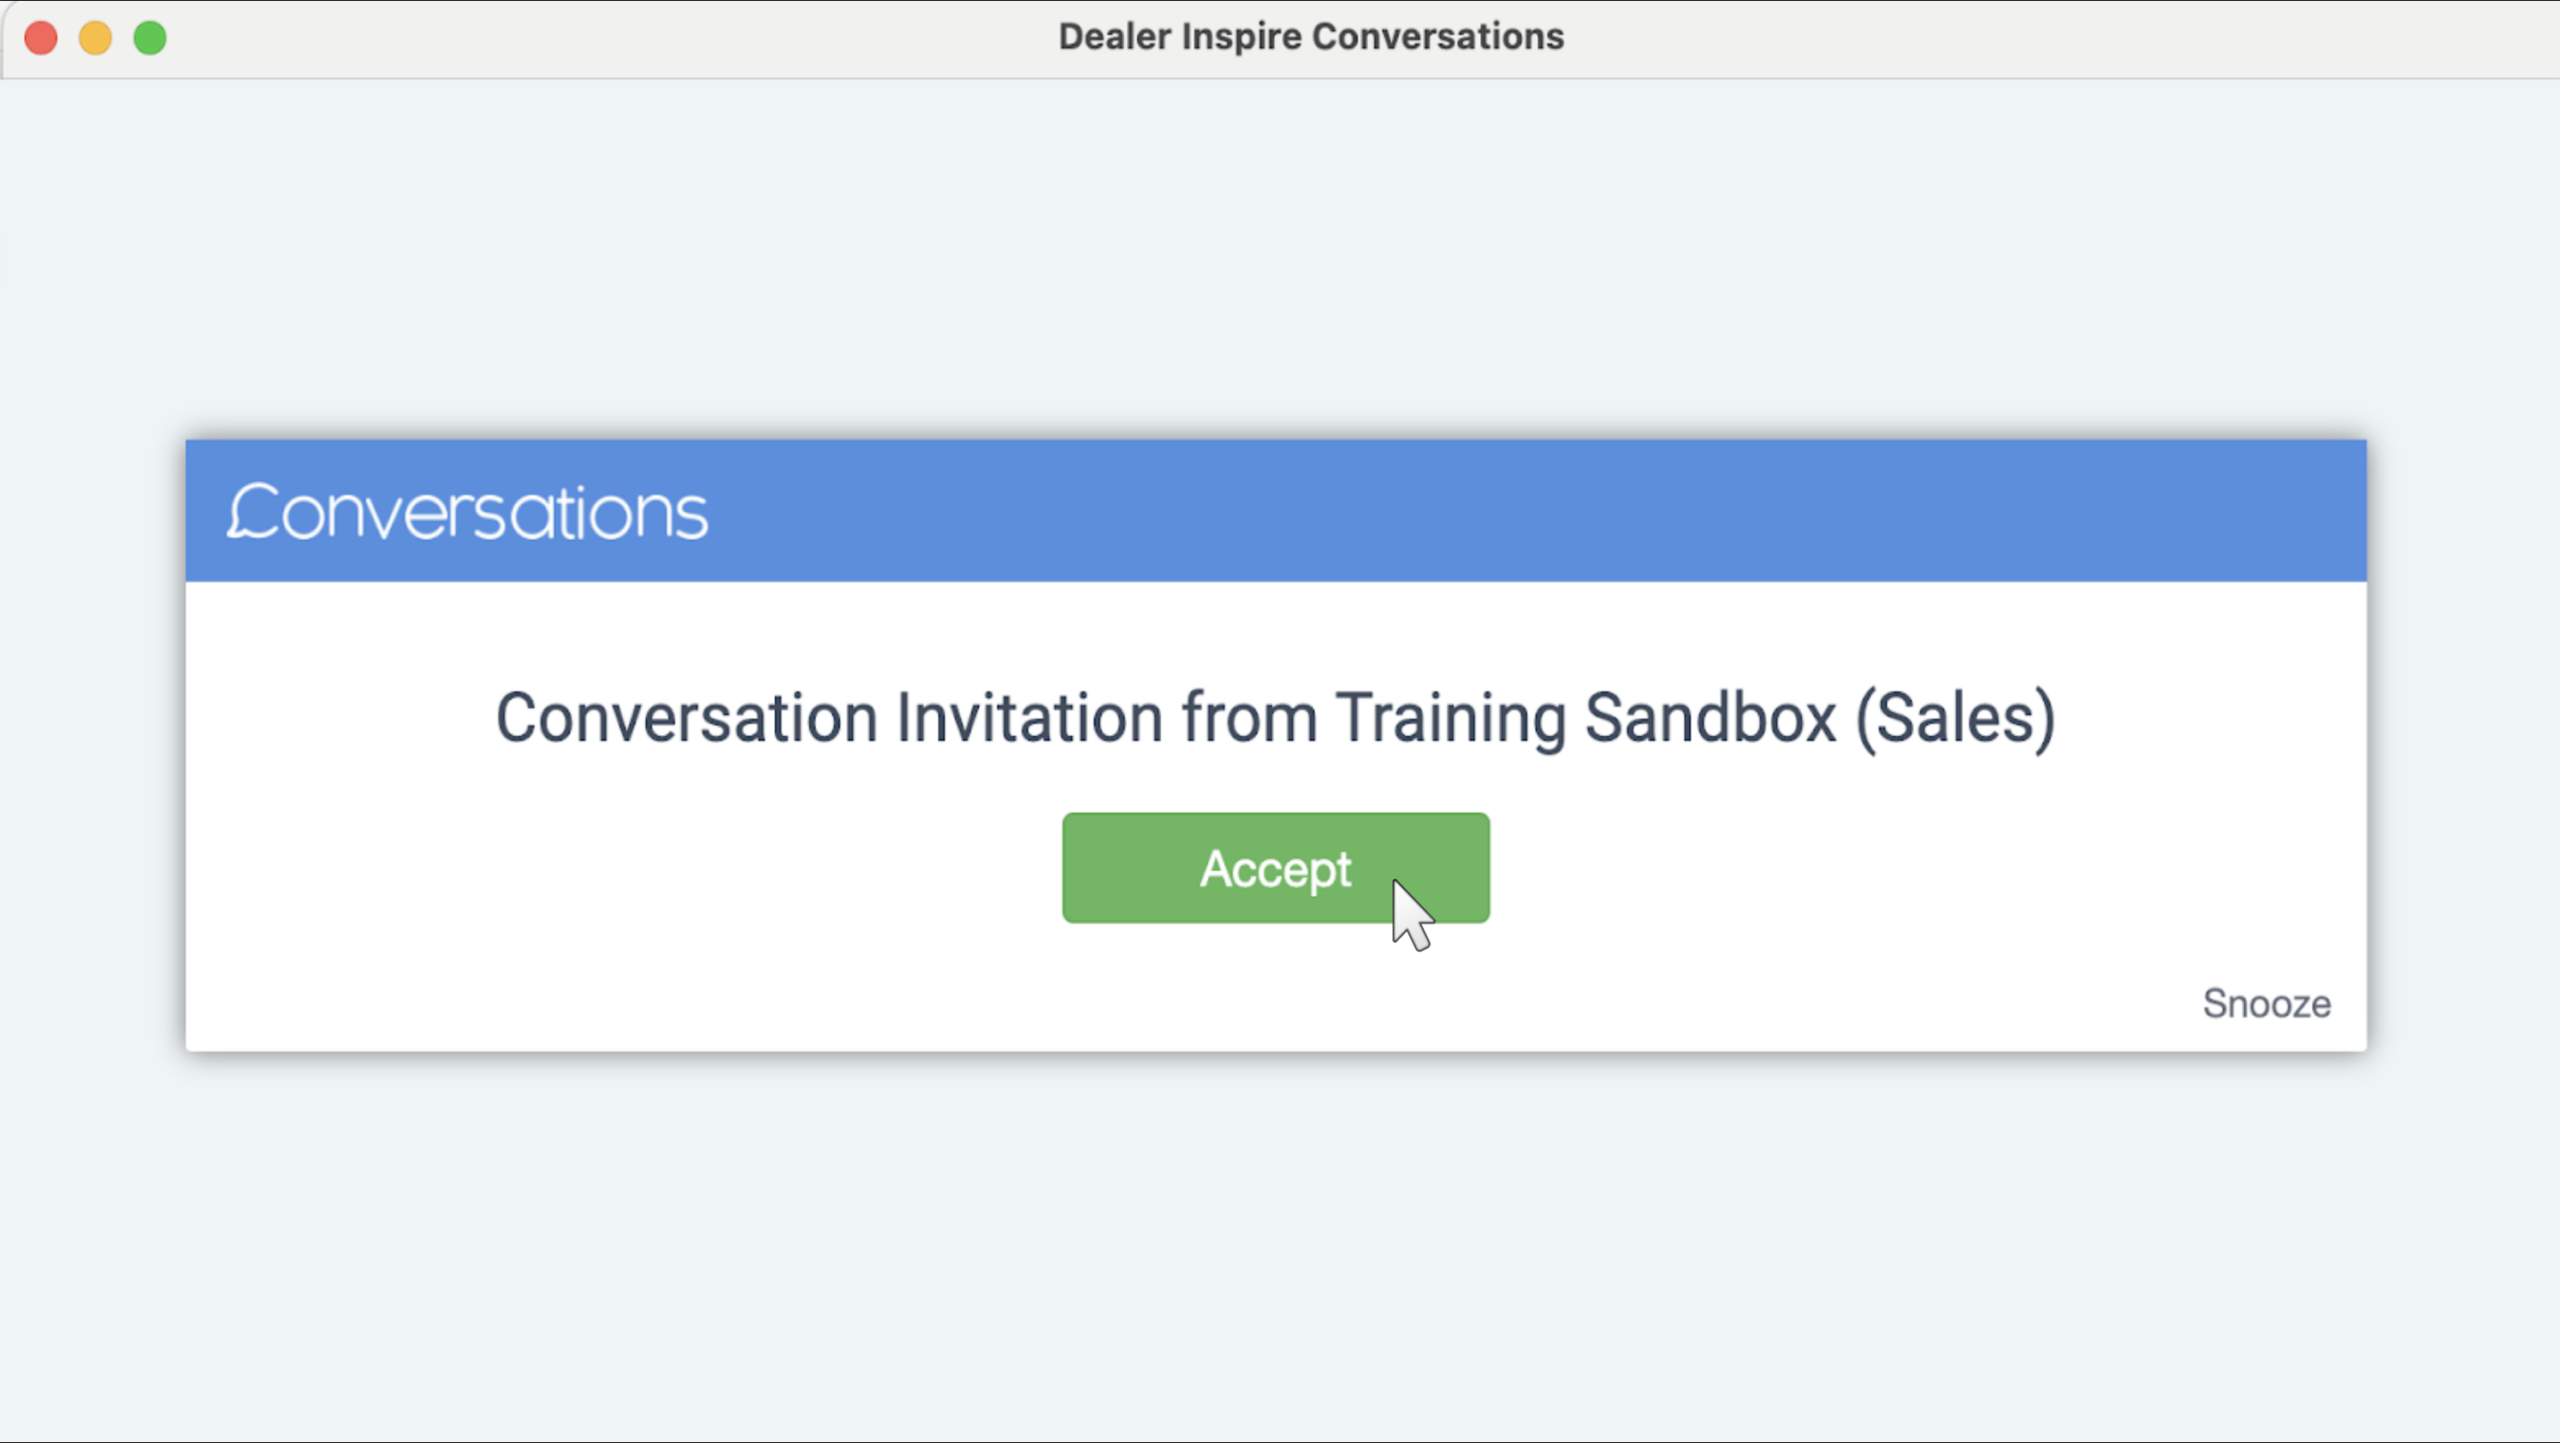
4 Receive incoming chats
When your status is set to Available and the Chrome extension is installed, you will receive a pop-up notification when a new chat comes in.
Chats are routed to all available agents on the assigned team and are accepted on a first-come, first-served basis.
5 Respond to chats
When you accept a chat, the conversation opens in the chat interface.

Agent tools
Use the available tools to manage conversations efficiently:
Chat Toolbar
- Hotkeys: Send pre-templated messages to ensure consistent and error-free responses.
- Explode to Text: quickly assign messages to the CRM fields to ensure an error-free input
- Transfer: Transfer the chat to another team member when specialized help is needed.
- Image and/or video: send images or video chat to show a customer a specific inventory.
- Translate: communicate without missing a beat by instantly translating messages.

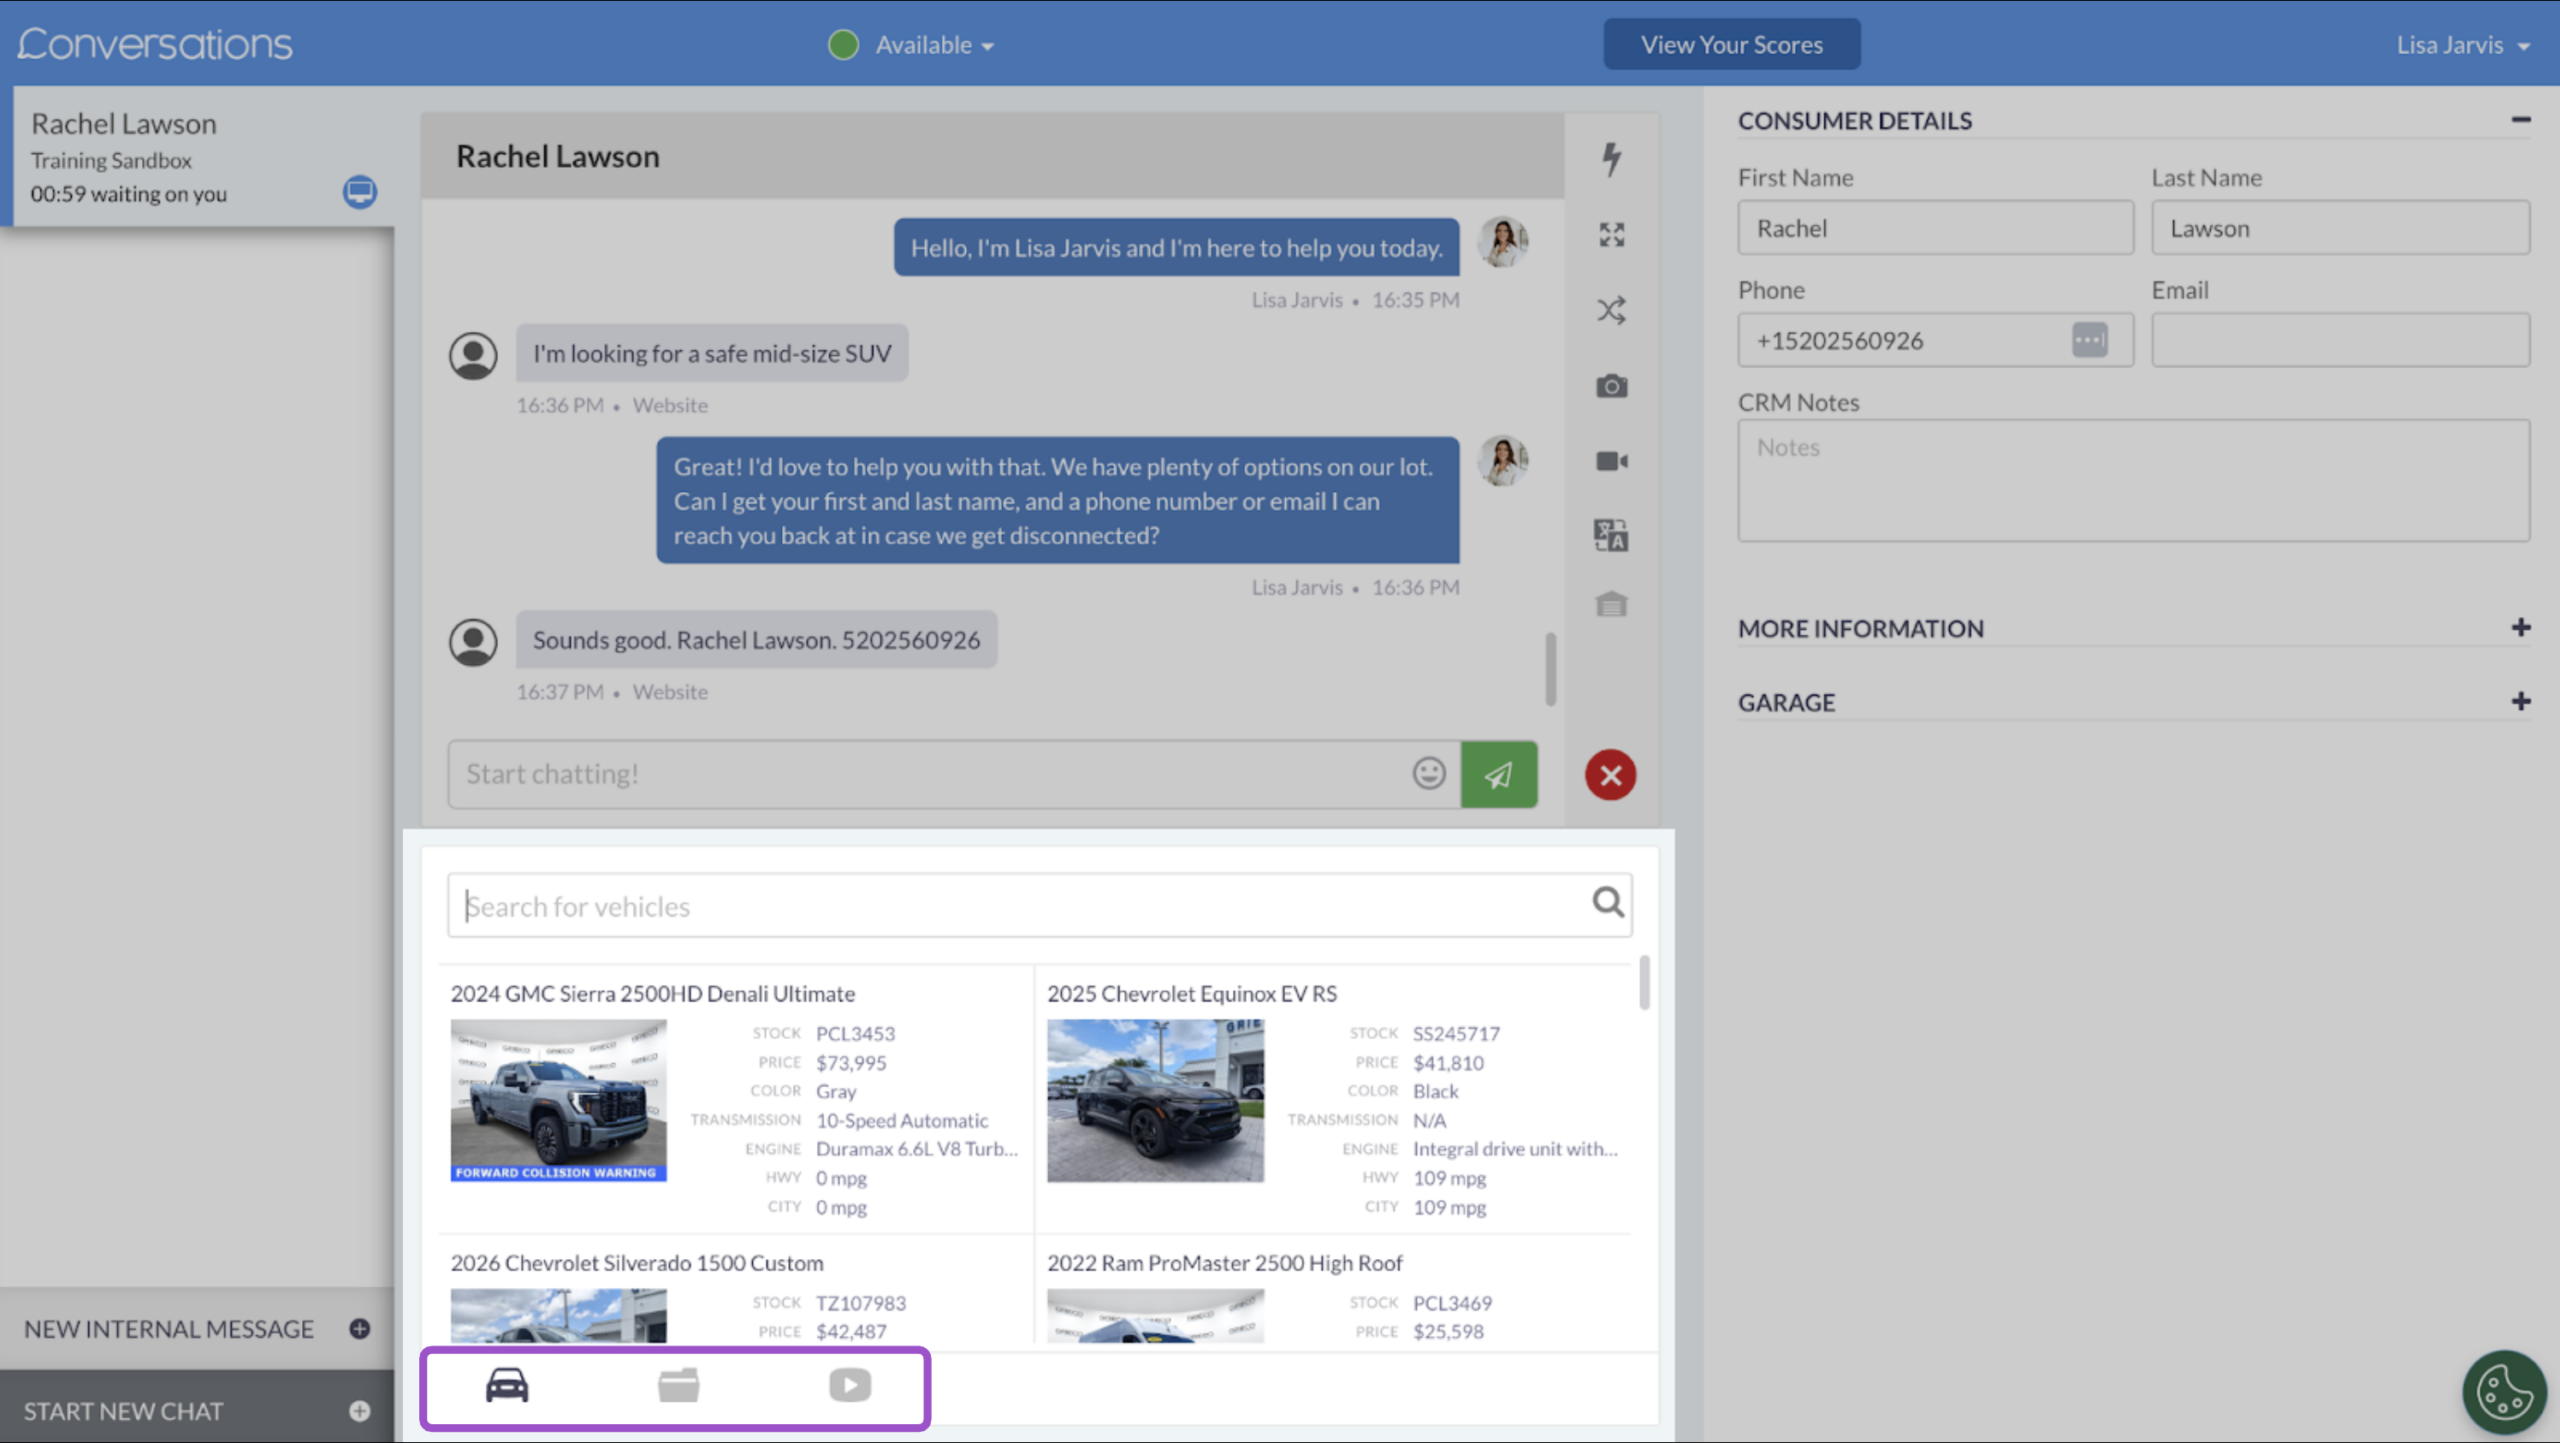
Glove Compartment
Use the Glove Compartment to share inventory-specific information directly with shoppers:
- Send makes, models, or trims with summary details and images
- Share PDF brochures
- Send links to vehicle detail pages (VDPs)
Share videos from your dealership’s YouTube channel
6 Capture lead information
Contact information capture:
- Best practice: Capture at least three pieces of contact information during the conversation.
- New shoppers: Enter lead information manually during the chat.
- Returning shoppers: Previously saved lead data automatically appears when the chat begins.
7Save the chat to CRM
After resolving the chat or if the shopper becomes inactive:
- Click the red X to end the chat.
- Click Save to CRM.
- Review, edit, or add notes as needed.
- Save the record to transfer the lead information to your CRM.

8Manage chat inactivity and closure
- Inactivity notifications: The system notifies you if a shopper becomes inactive during a chat.
- Ending the chat: Once the conversation is complete or the shopper is inactive, end the chat to finalize lead capture and close the session.