How to create a pop-up
Dealer Inspire websites include a built-in PopUp plugin that allows you to create and manage pop-ups directly within the WordPress admin dashboard. Pop-ups can be used for event announcements, promotions, service reminders, or other important messages you want to highlight for visitors.
In this article, you’ll learn how to create a pop-up using the PopUp plugin, add content and media, configure appearance and behavior settings, apply display conditions, and publish the pop-up on your website.
To get started
Go to the Cars.com Hub. Click Dealer Inspire, then Manage Website.
Before You Start
Ensure the PopUp plugin is enabled on your site.
- Log in to the WordPress admin dashboard.
- Check the left-side menu for PopUp.
If the PopUp plugin does not appear in the menu, submit a support request to support@dealerinspire.com to have it enabled.
1 Navigate the All Posts page
From the backend of your website:
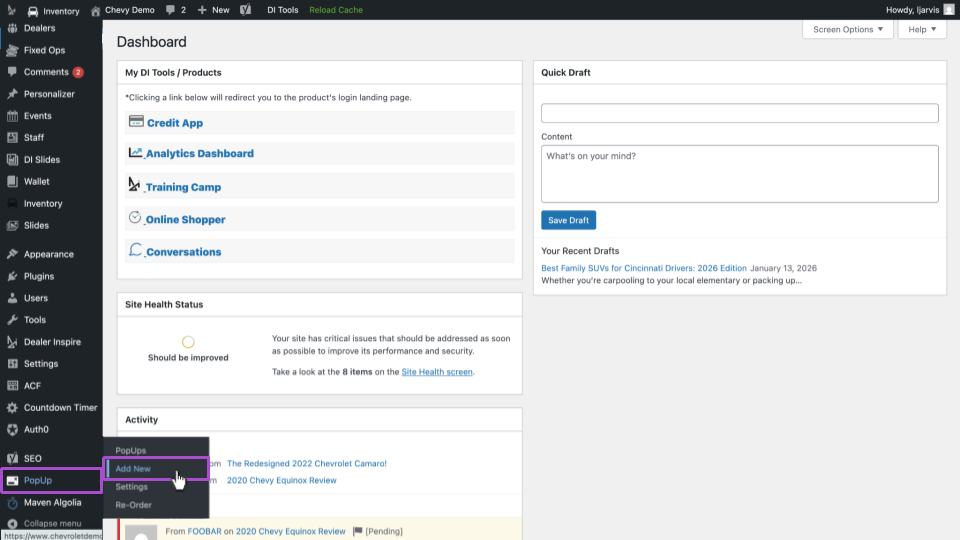
- In the WordPress admin dashboard, select PopUp from the left-side menu.
- Click Add New.
This opens the pop-up editor.
2 Add headings and an image
At the top of the editor
- Name your pop-up: This is an internal title for organization and does not appear on the front end.
- Add a heading and subheading (optional): Add these to capture shopper’s attention if you are relying on a text pop-up.
- Click add image to upload a featured image.
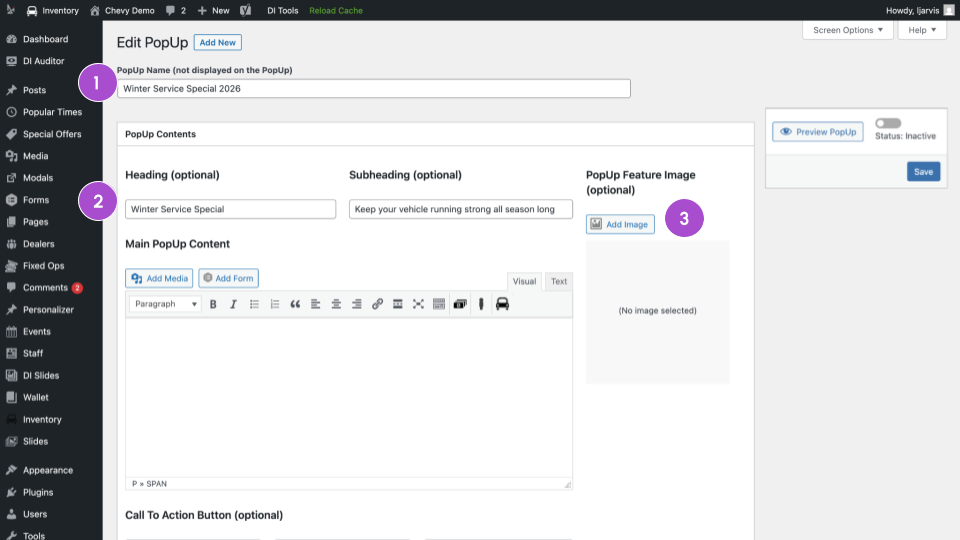
To upload an image:
- Select an existing file from the Media Library or click Upload.
- Add descriptive text in the Alt Text field for accessibility.
- Click Select Image.
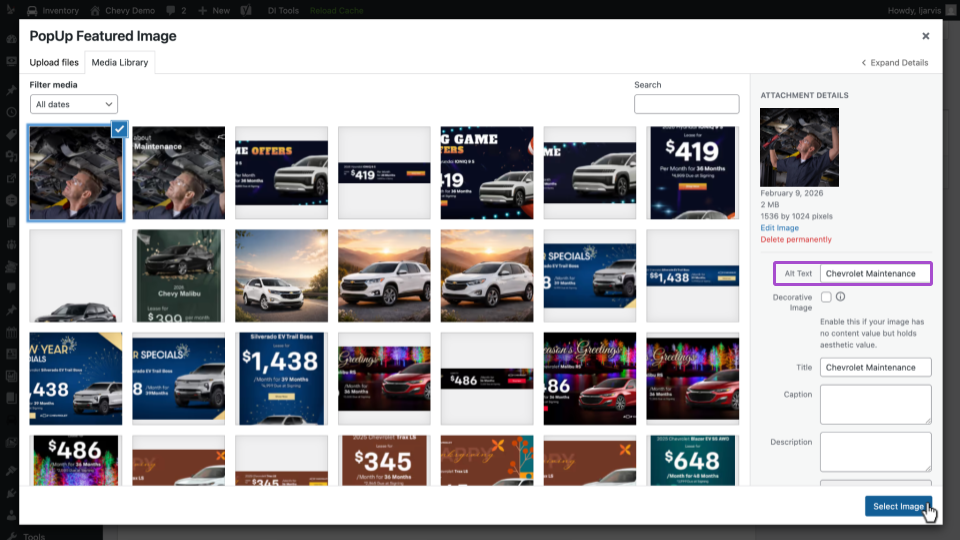
Image Guidelines:
- Use a square (1:1) aspect ratio (e.g., 1080 x 1080 pixels)
- Non-square images may not display as intended.
3 Format and add content
Use the visual editor to add your pop-up message.
- Enter your primary message and any necessary details.
Consider the goal you are trying to achieve, the promotion or service you’re offering, and any fine print or important details to include.
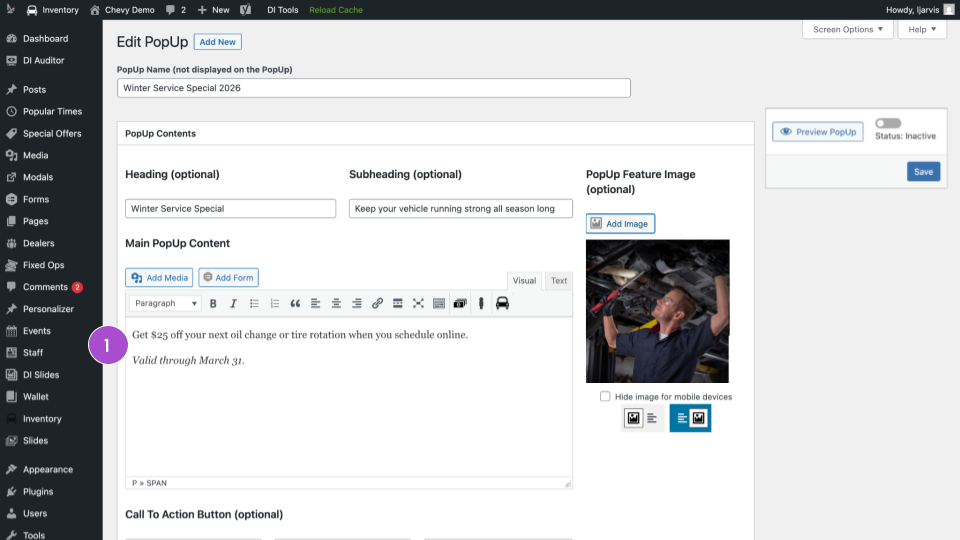
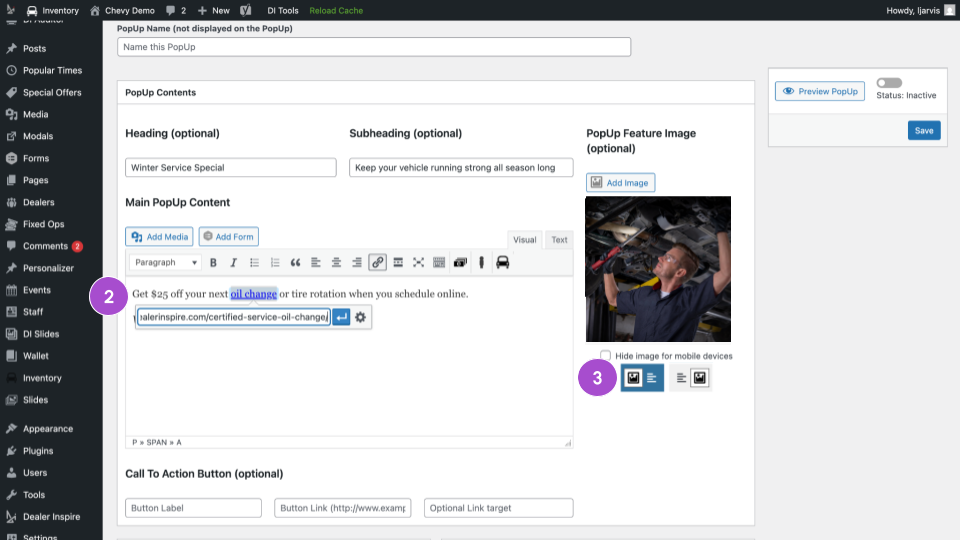
- To add a hyperlink:
- Highlight the text.
- Insert the URL in the link field.
- Click the confirm/apply button to save the link.
- Highlight the text.
- You can choose how the image displays:
- Image left, text right
- Text left, image right
- Image left, text right
The editor also allows you to add:
- Additional images
- Forms (if applicable)
Keep the content focused and avoid overcrowding the pop-up.
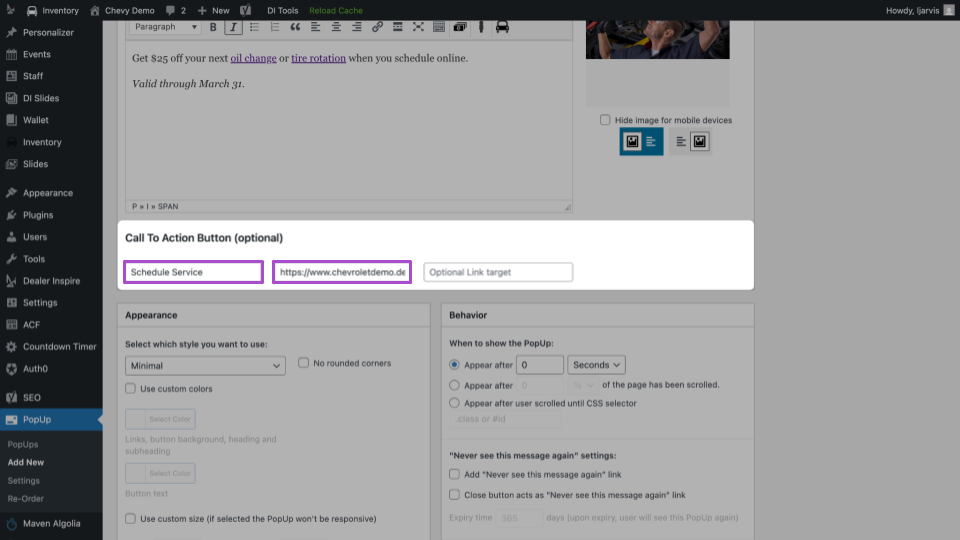
4 Add a Call-to-Action (CTA)
Scroll to the CTA section.
- Enter the button text.
- Enter the destination URL.
Note: If left blank, the pop-up will display without a CTA button.
5 Configure appearance and behavior
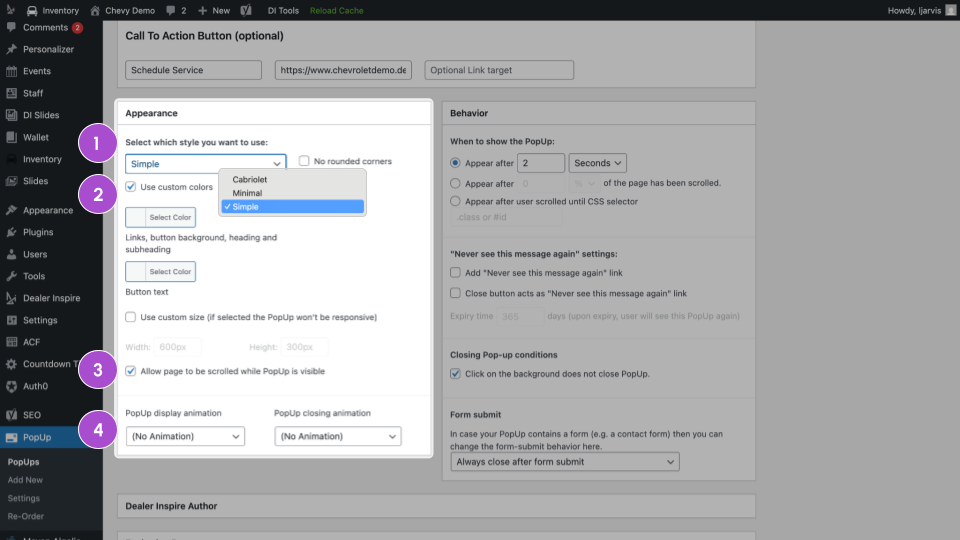
In the Appearance section, you can modify how you’d like your popup to appear.
- Style: Select your preferred layout option.
- In most cases, select Simple as the style.
- Custom Colors: Enable this option to adjust text color, button background, and button text using the color picker. If not enabled, default brand colors apply.
- Allow Page Scroll:
- Enabled: Visitors can scroll the page while the pop-up is visible.
- Disabled: The page remains locked until the pop-up is closed.
- Enabled: Visitors can scroll the page while the pop-up is visible.
- Animation: Select how the pop-up enters and exits the screen.
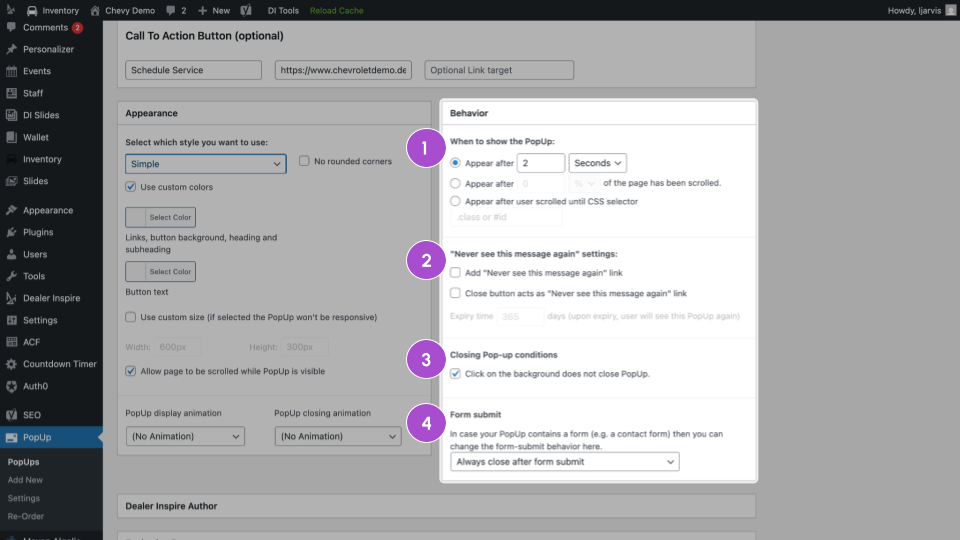
In the Behavior section, you can modify how you’d like your pop-up to function.
- Display Timing: Choose when the pop-up appears (e.g., after a time delay). Set the appropriate delay duration.
- “Don’t Show Again” Option:
- Enabled: Users can prevent the pop-up from appearing on future visits.
- Disabled: The pop-up may appear each time conditions are met.
- Enabled: Users can prevent the pop-up from appearing on future visits.
- Close Behavior:
- Enable closing by clicking outside the pop-up window.
- If disabled, users must click the “X” to close it.
- Enable closing by clicking outside the pop-up window.
- Form Closure Behavior (if a form is included):
- Configure how the pop-up behaves after form submission.
6 Configure expiration and display conditions
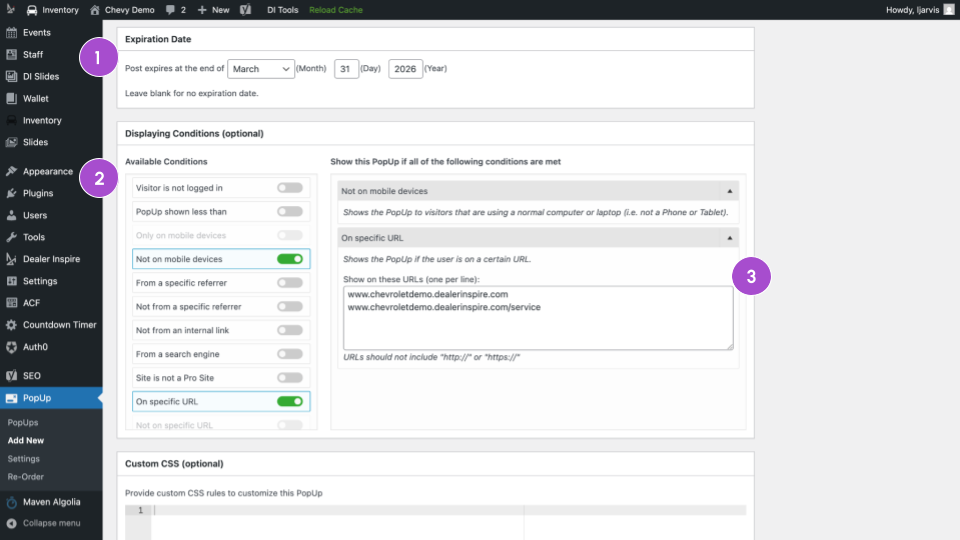
- Set an expiration date if the pop-up should automatically deactivate after a specific date. Once expired, it will no longer display.
- Add conditions to ensure your popup appears when and where you want it to. For example, disable the popup from appearing on mobile devices, or allow it to appear only on specific pages.
- Depending on the conditions you select, you can add additional information, like the specific URLs you’d like the popup to appear.
7 Publish the pop-up
When configuration is complete:
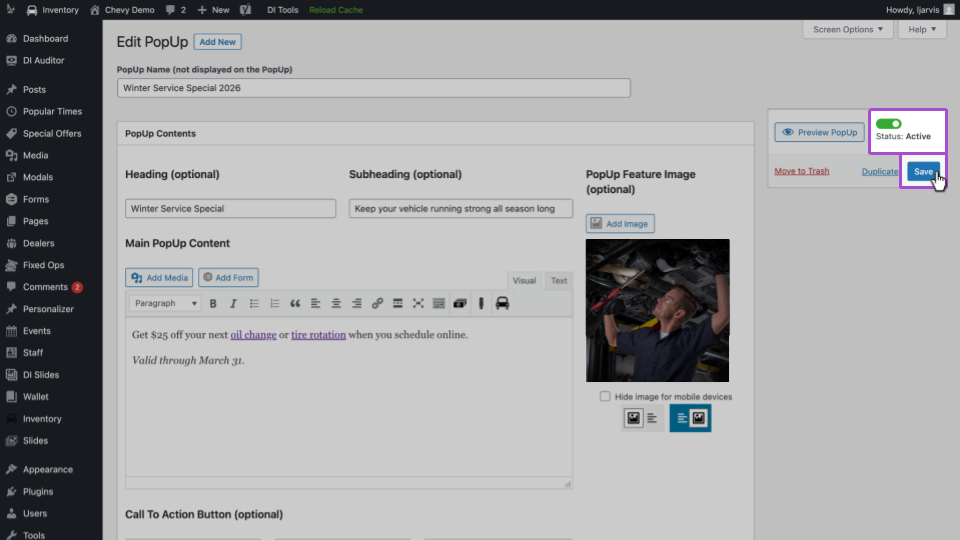
- Scroll to the top of the editor.
- Toggle the pop-up status to Active.
- Click Save.
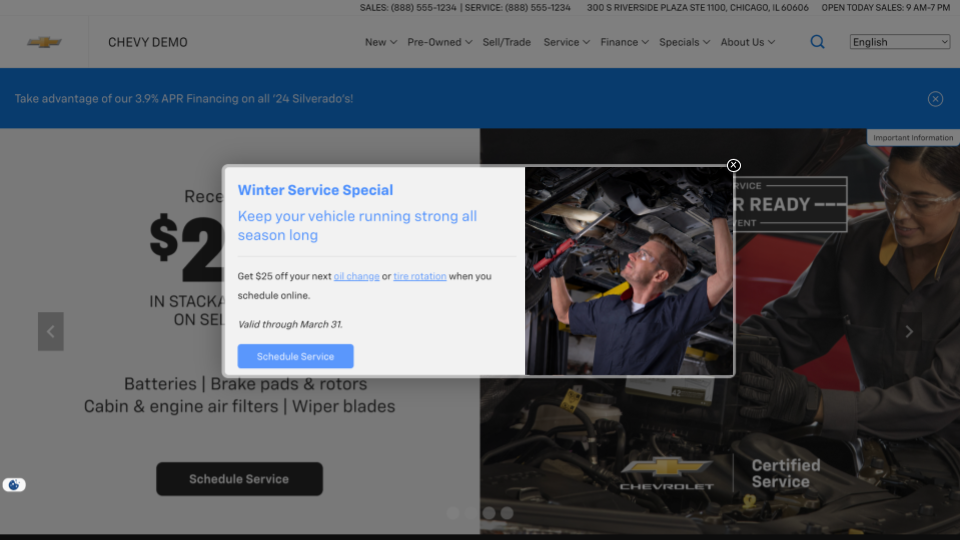
The pop-up will go live immediately once saved as Active.
- Navigate to the applicable page on your website to verify display behavior.
- If testing multiple times, use a private or incognito browser window to ensure behavior rules function as expected.
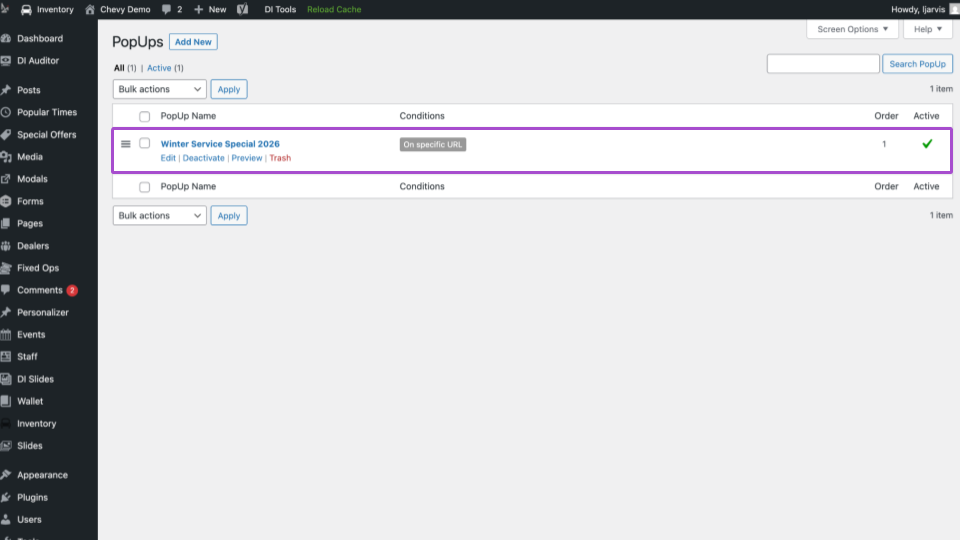
- You can return to the PopUp plugin at any time to edit, deactivate, or update existing pop-ups as needed.