How to add inline banners using HTML
HTML inline banners let you place a fully designed, image-based promotional banner directly within your Vehicle Results Pages (VRPs). If your banner asset already includes a headline, CTA, and design elements, the HTML method gives you full control to display it as-is — no additional text fields or template configuration required.
In this article, you will learn how to upload your banner image to the media library, generate the HTML code, paste it into the inline banner editor, set an expiration date, configure page conditionals, and publish your banner live.
To get started
Go to the Cars.com Hub. Click Dealer Inspire, then Manage Website.
1Access inline banners for VRPs
From the backend of your Dealer Inspire website:
- Select Lightning Settings
- Click Inventory
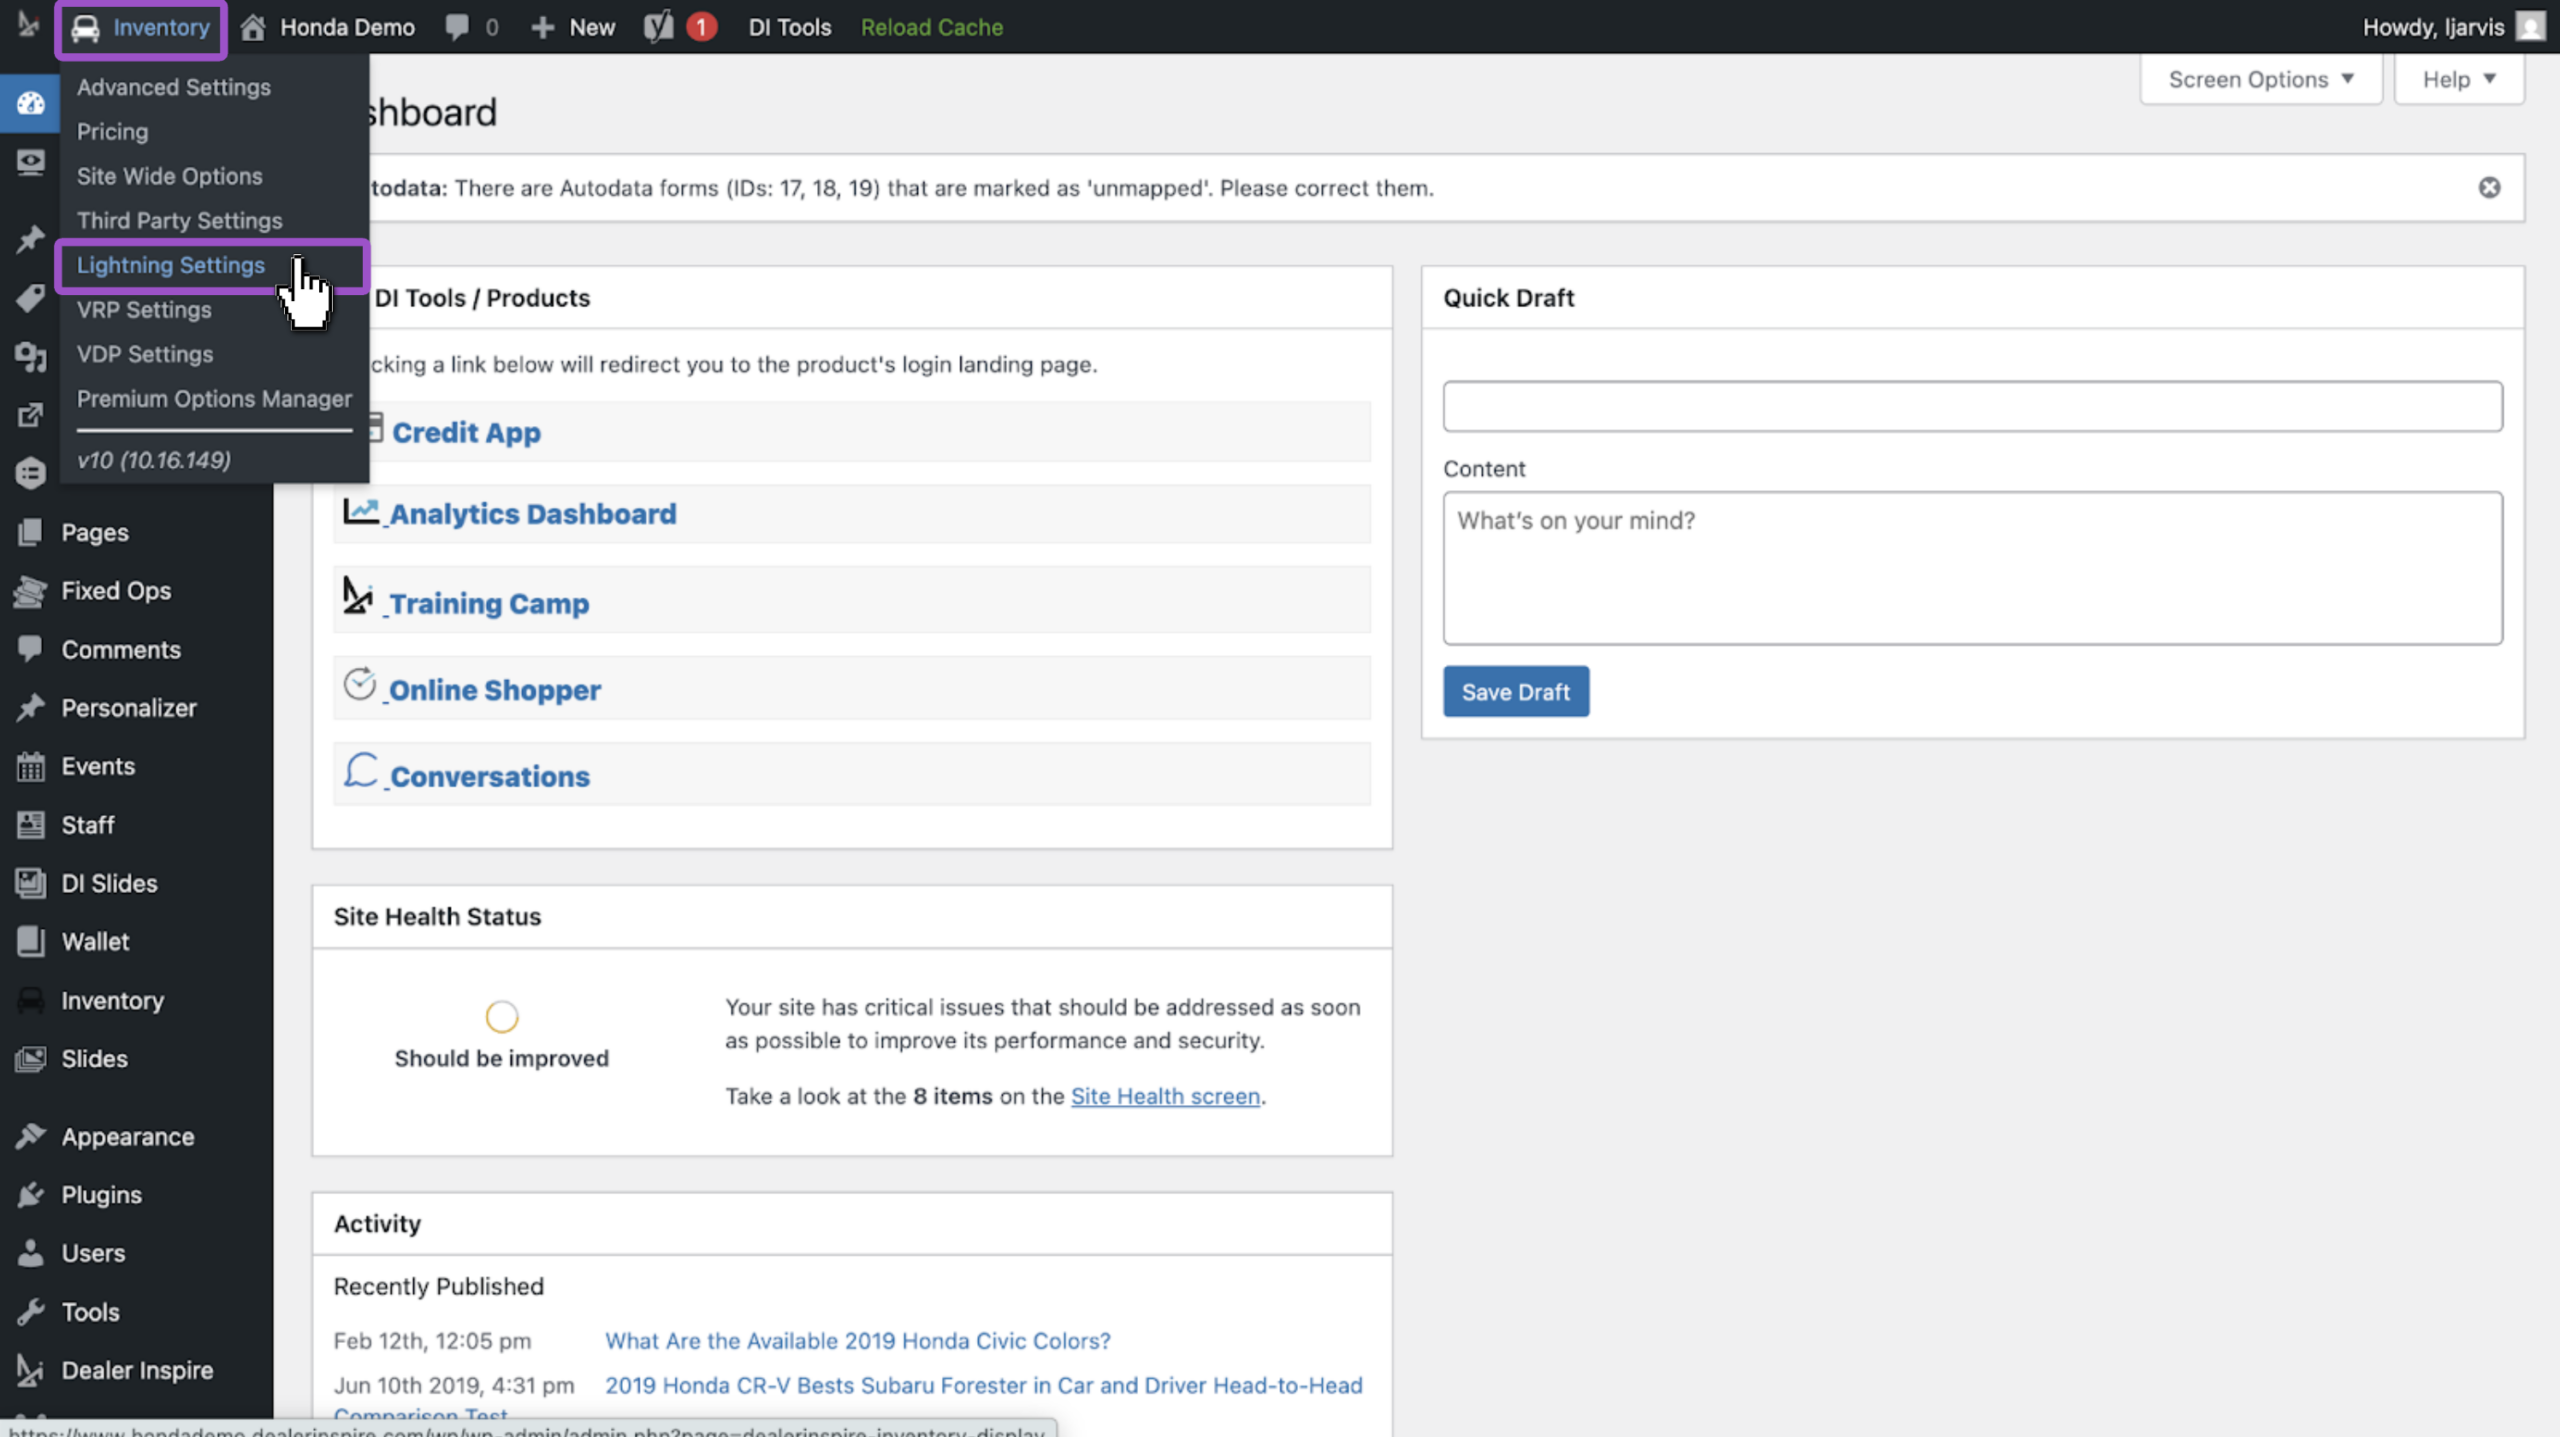
This opens the Inventory Display page.
- Click the plus (+) icon to create a new inline banner
- Select the VRP tab
- Click Banners
- Scroll to Inline Banners
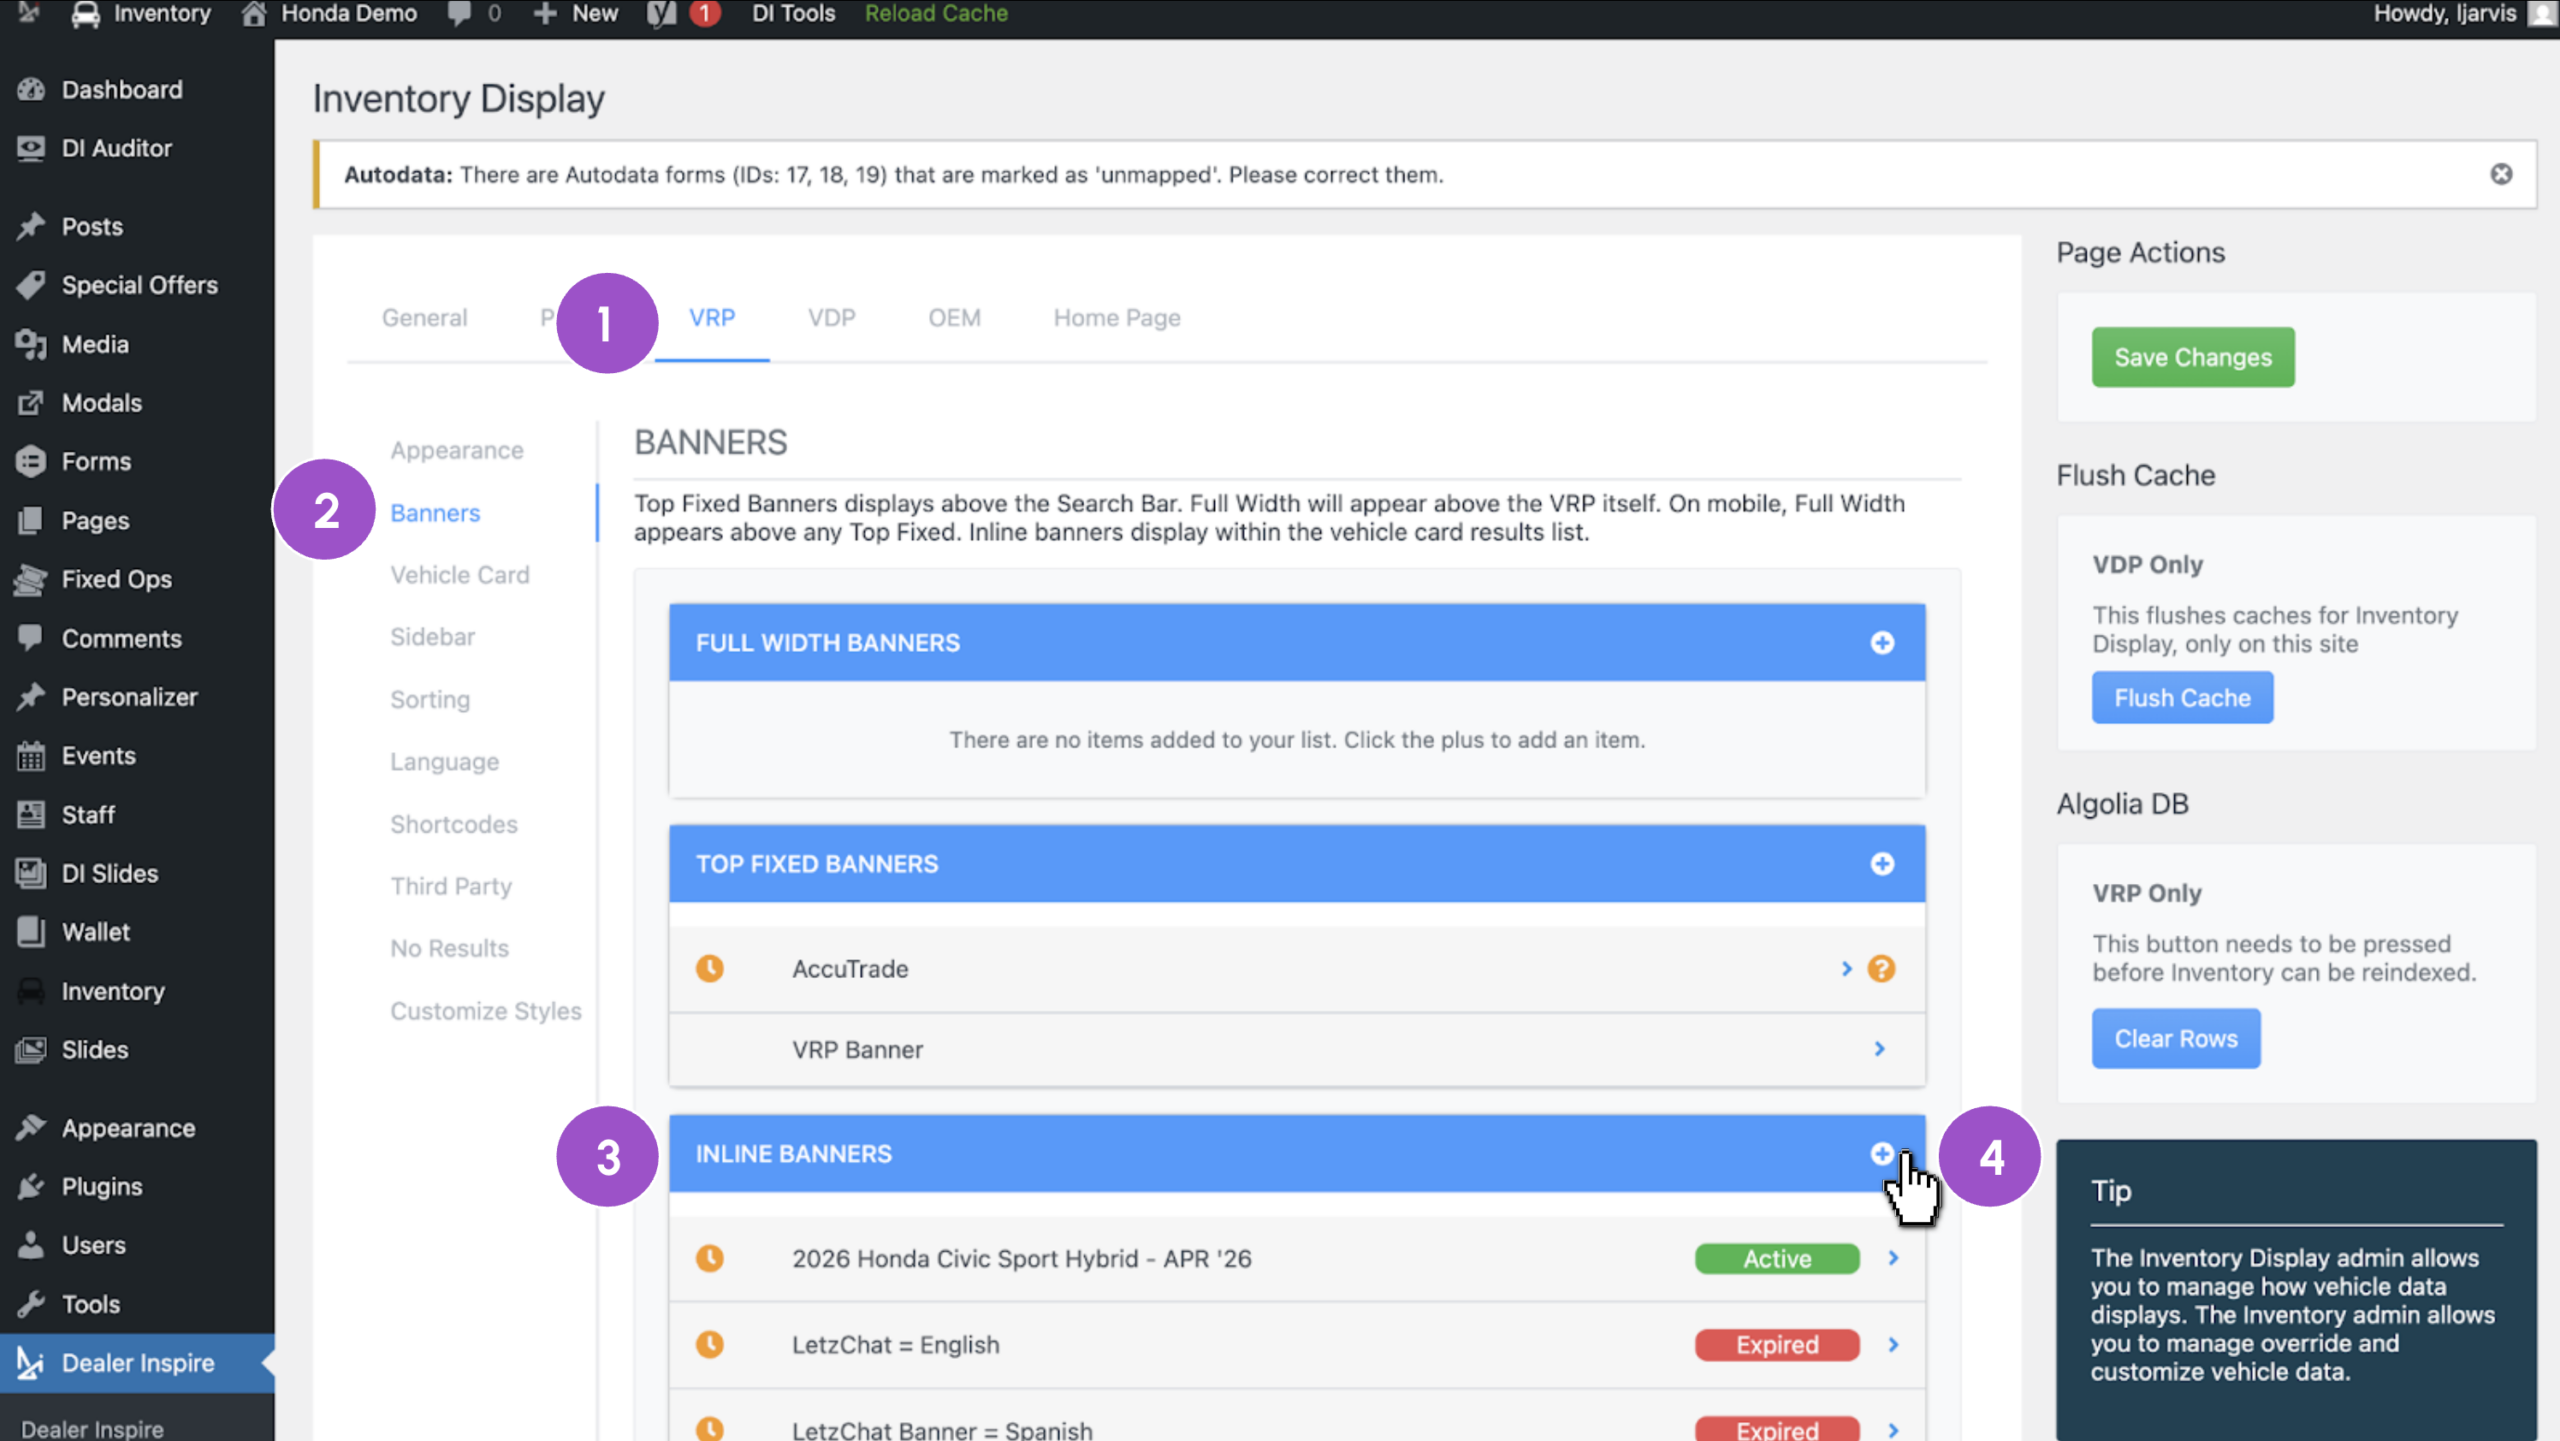
2Open the HTML editor
Give your banner an internal title and select your banner type.
- Title your banner. This name will not appear on the live site and is for your reference only
- Select HTML Banner from the dropdown
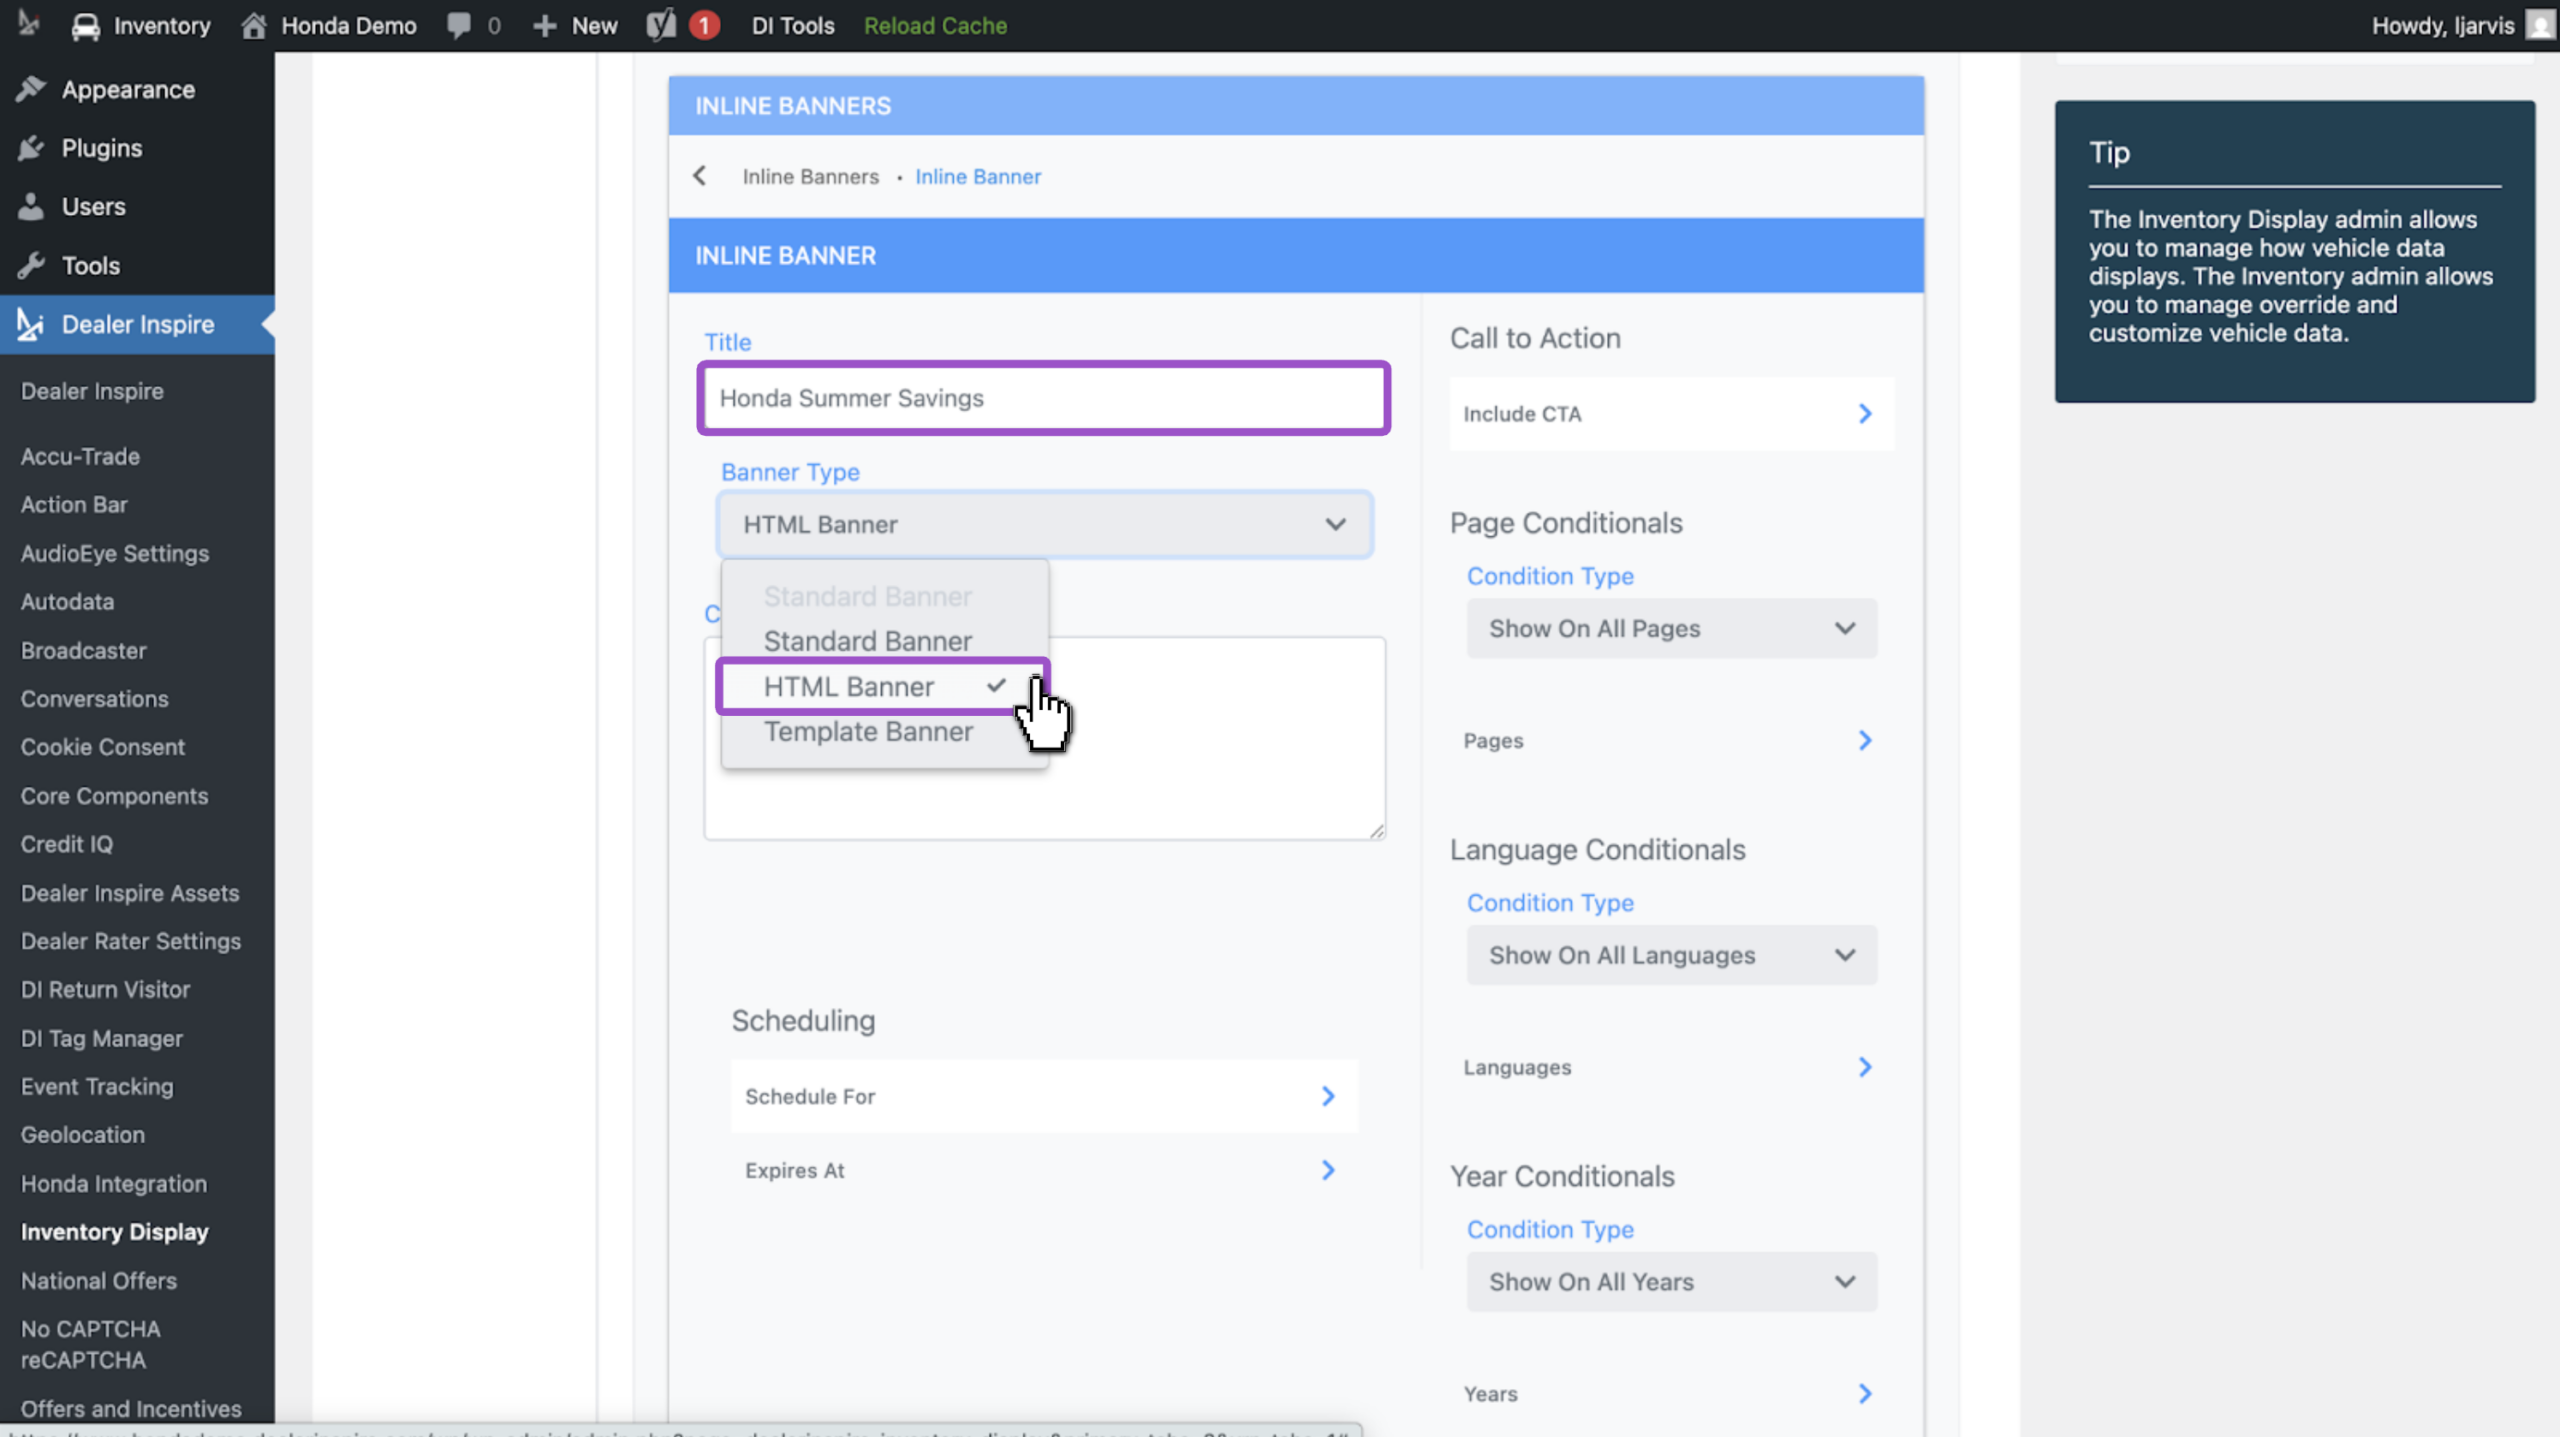
A Custom HTML Content field will appear below.
Best Practice: Click Save Changes in the top-right corner of the page as you go to ensure your title, HTML code, and page conditionals are saved at each stage.
3Upload your image and generate the HTML code
Upload your image to your media library to generate the code.
Best Practice: Do this in a separate tab so you don’t lose your banner setup.
- Hover over + New in the top menu bar
- Right-click on Page and select Open in New Tab
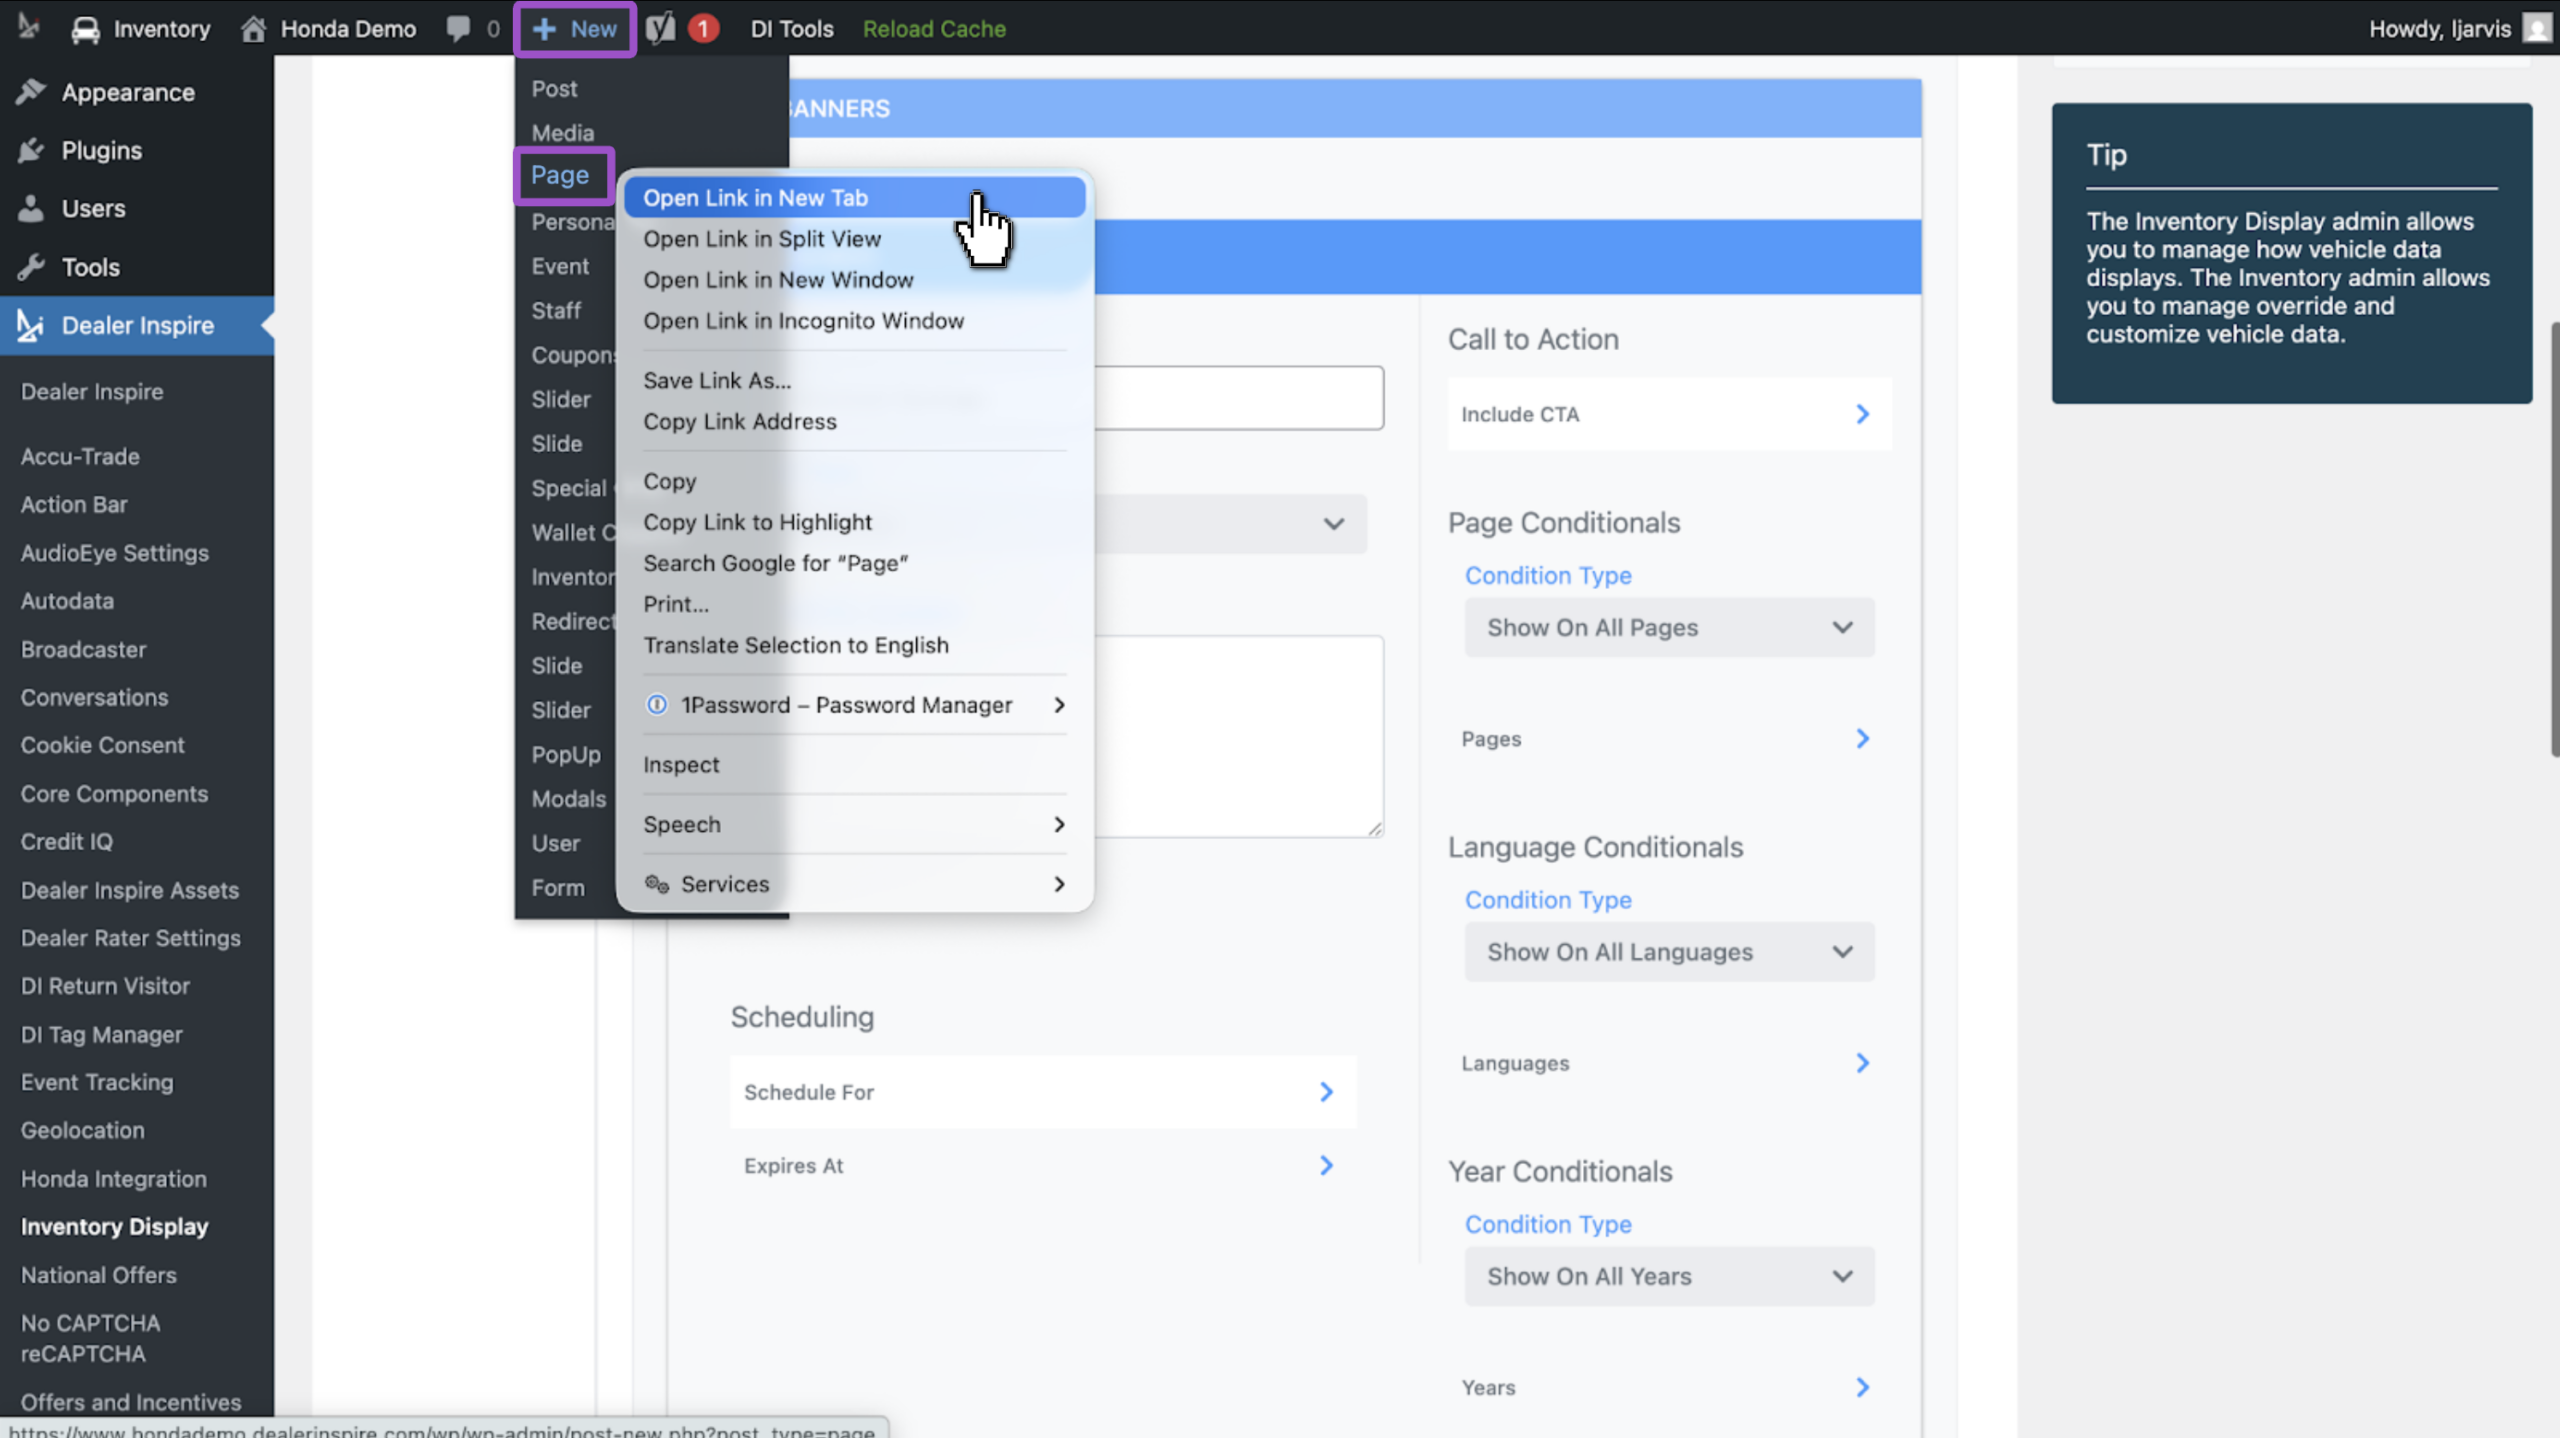
Note: Opening a new page creates a temporary draft in the back end — this is the mechanism we’ll use to generate the HTML code you. You won’t publish or save this page.
- Click Add Media
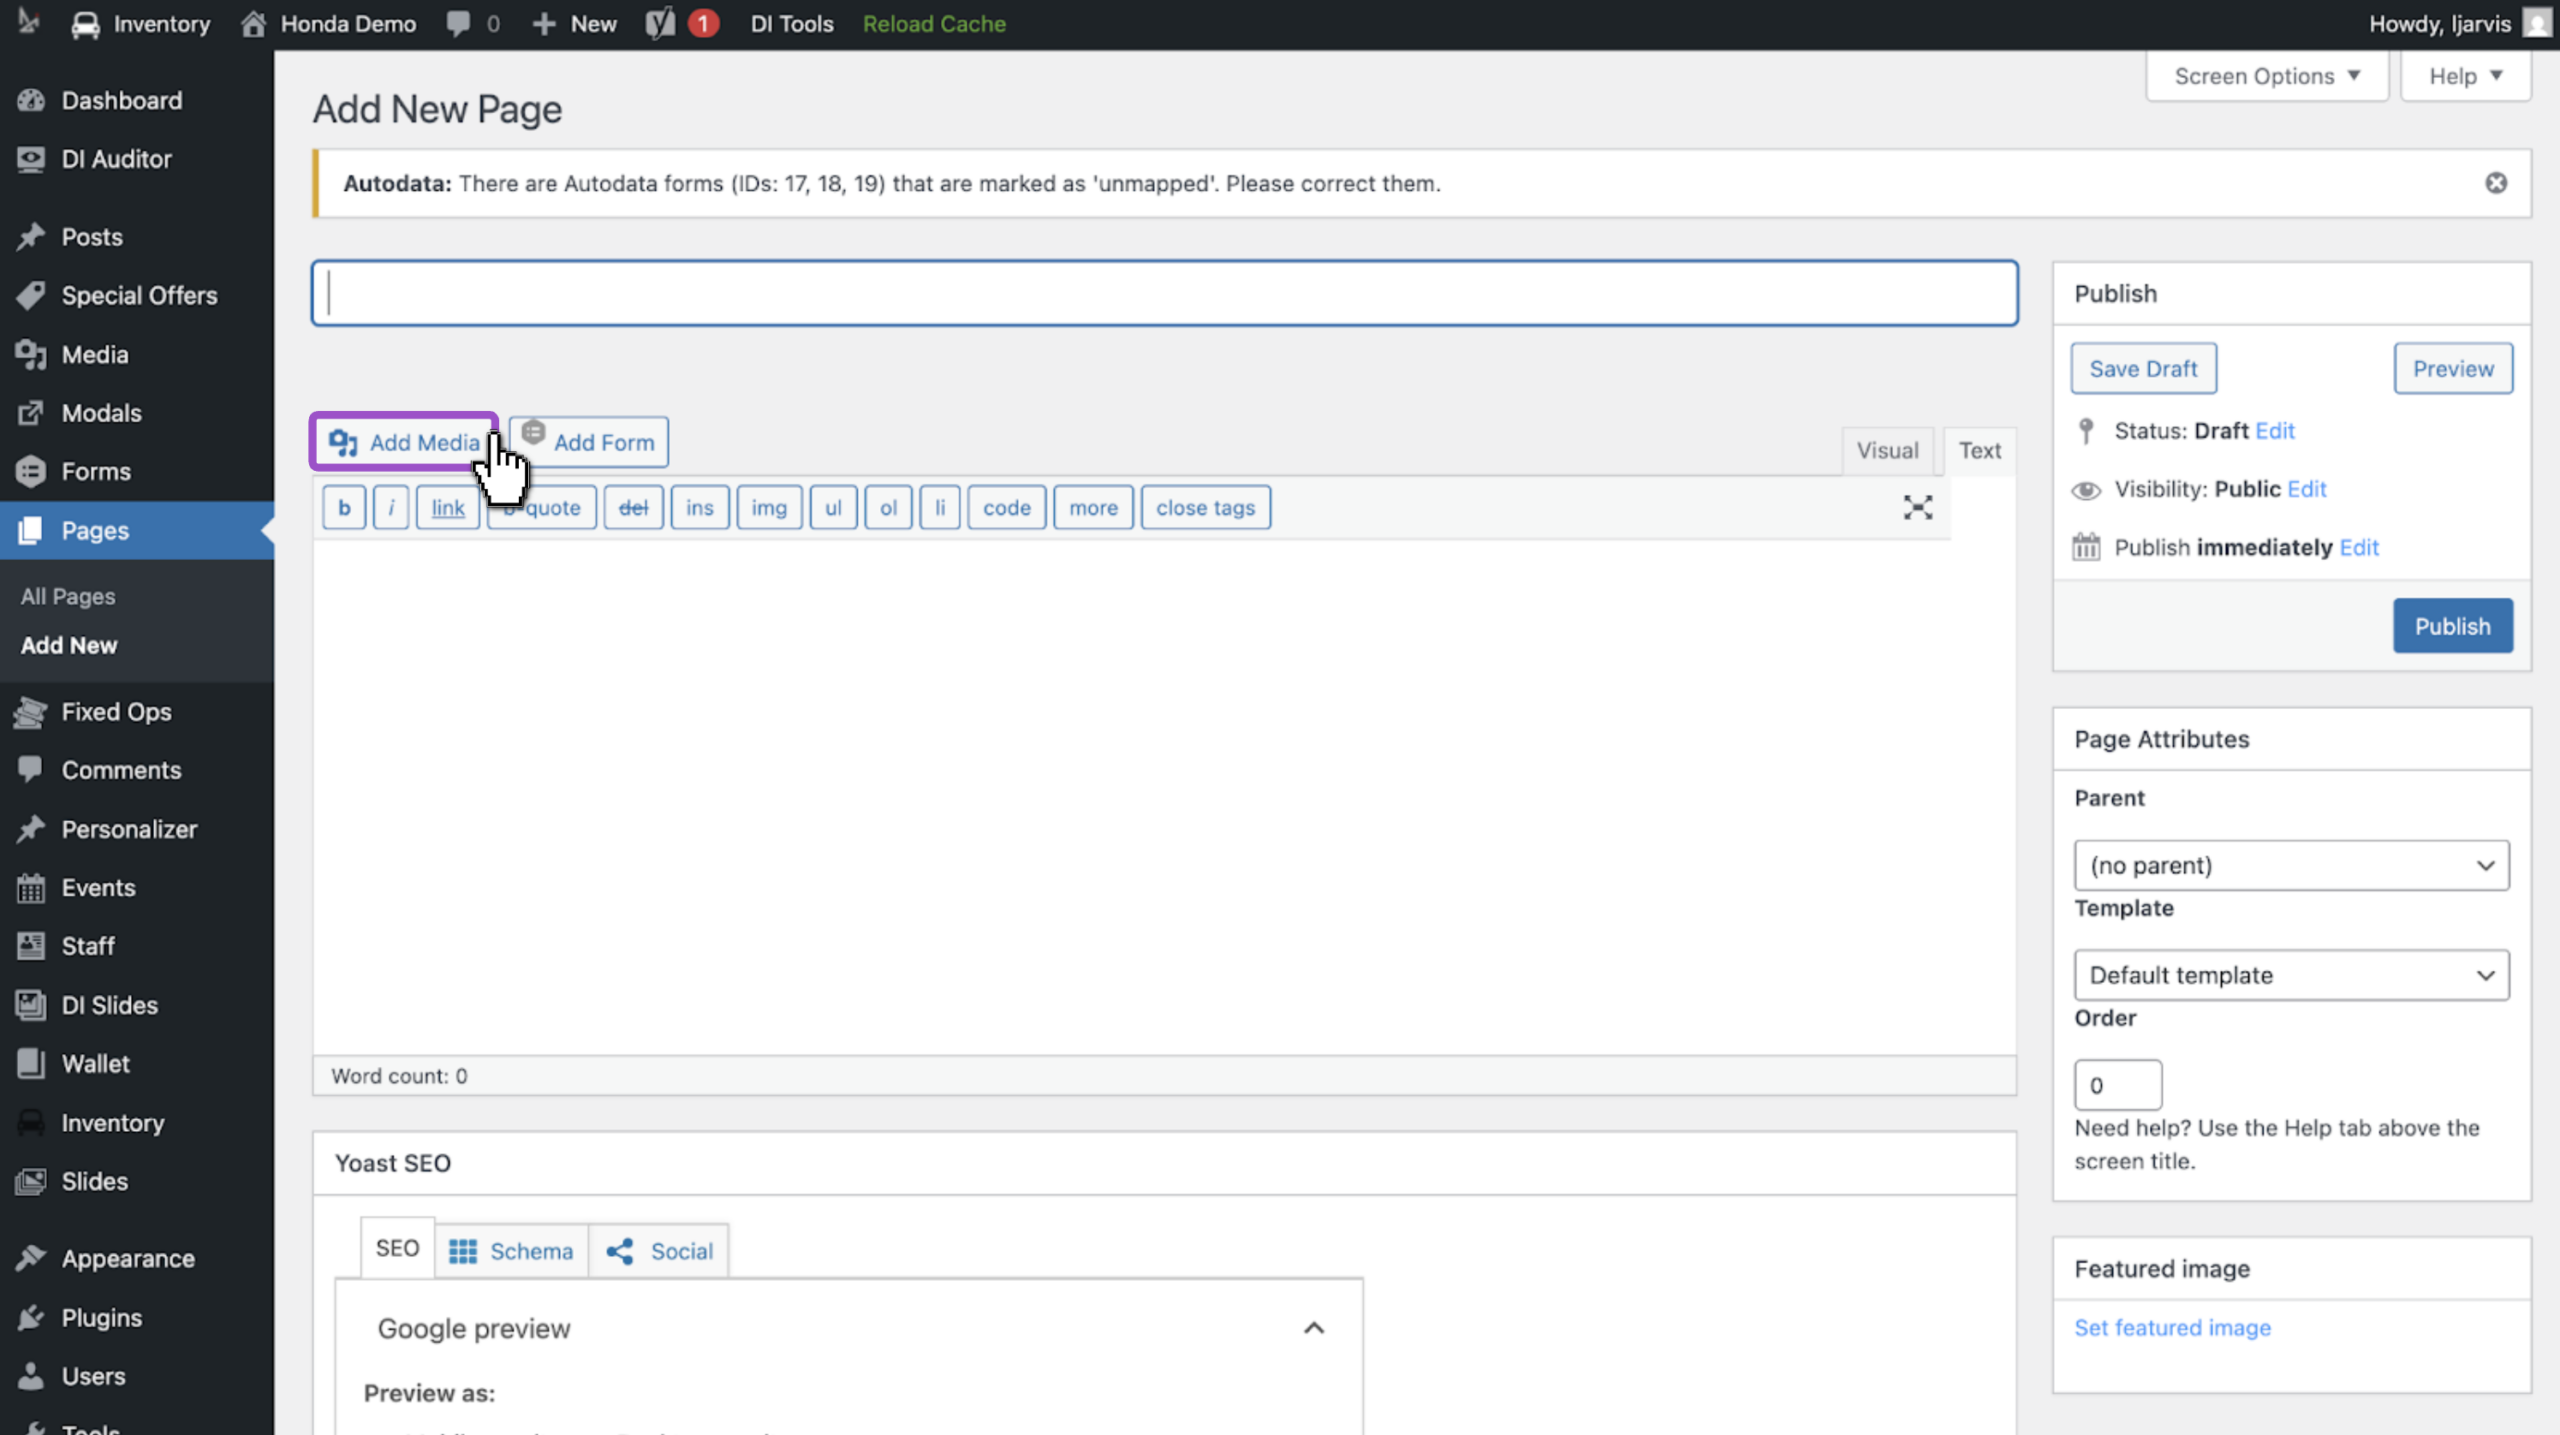
The Media Library will open, showing all previously uploaded images.
- Select a banner image or drag-and-drop a file into the media library to upload
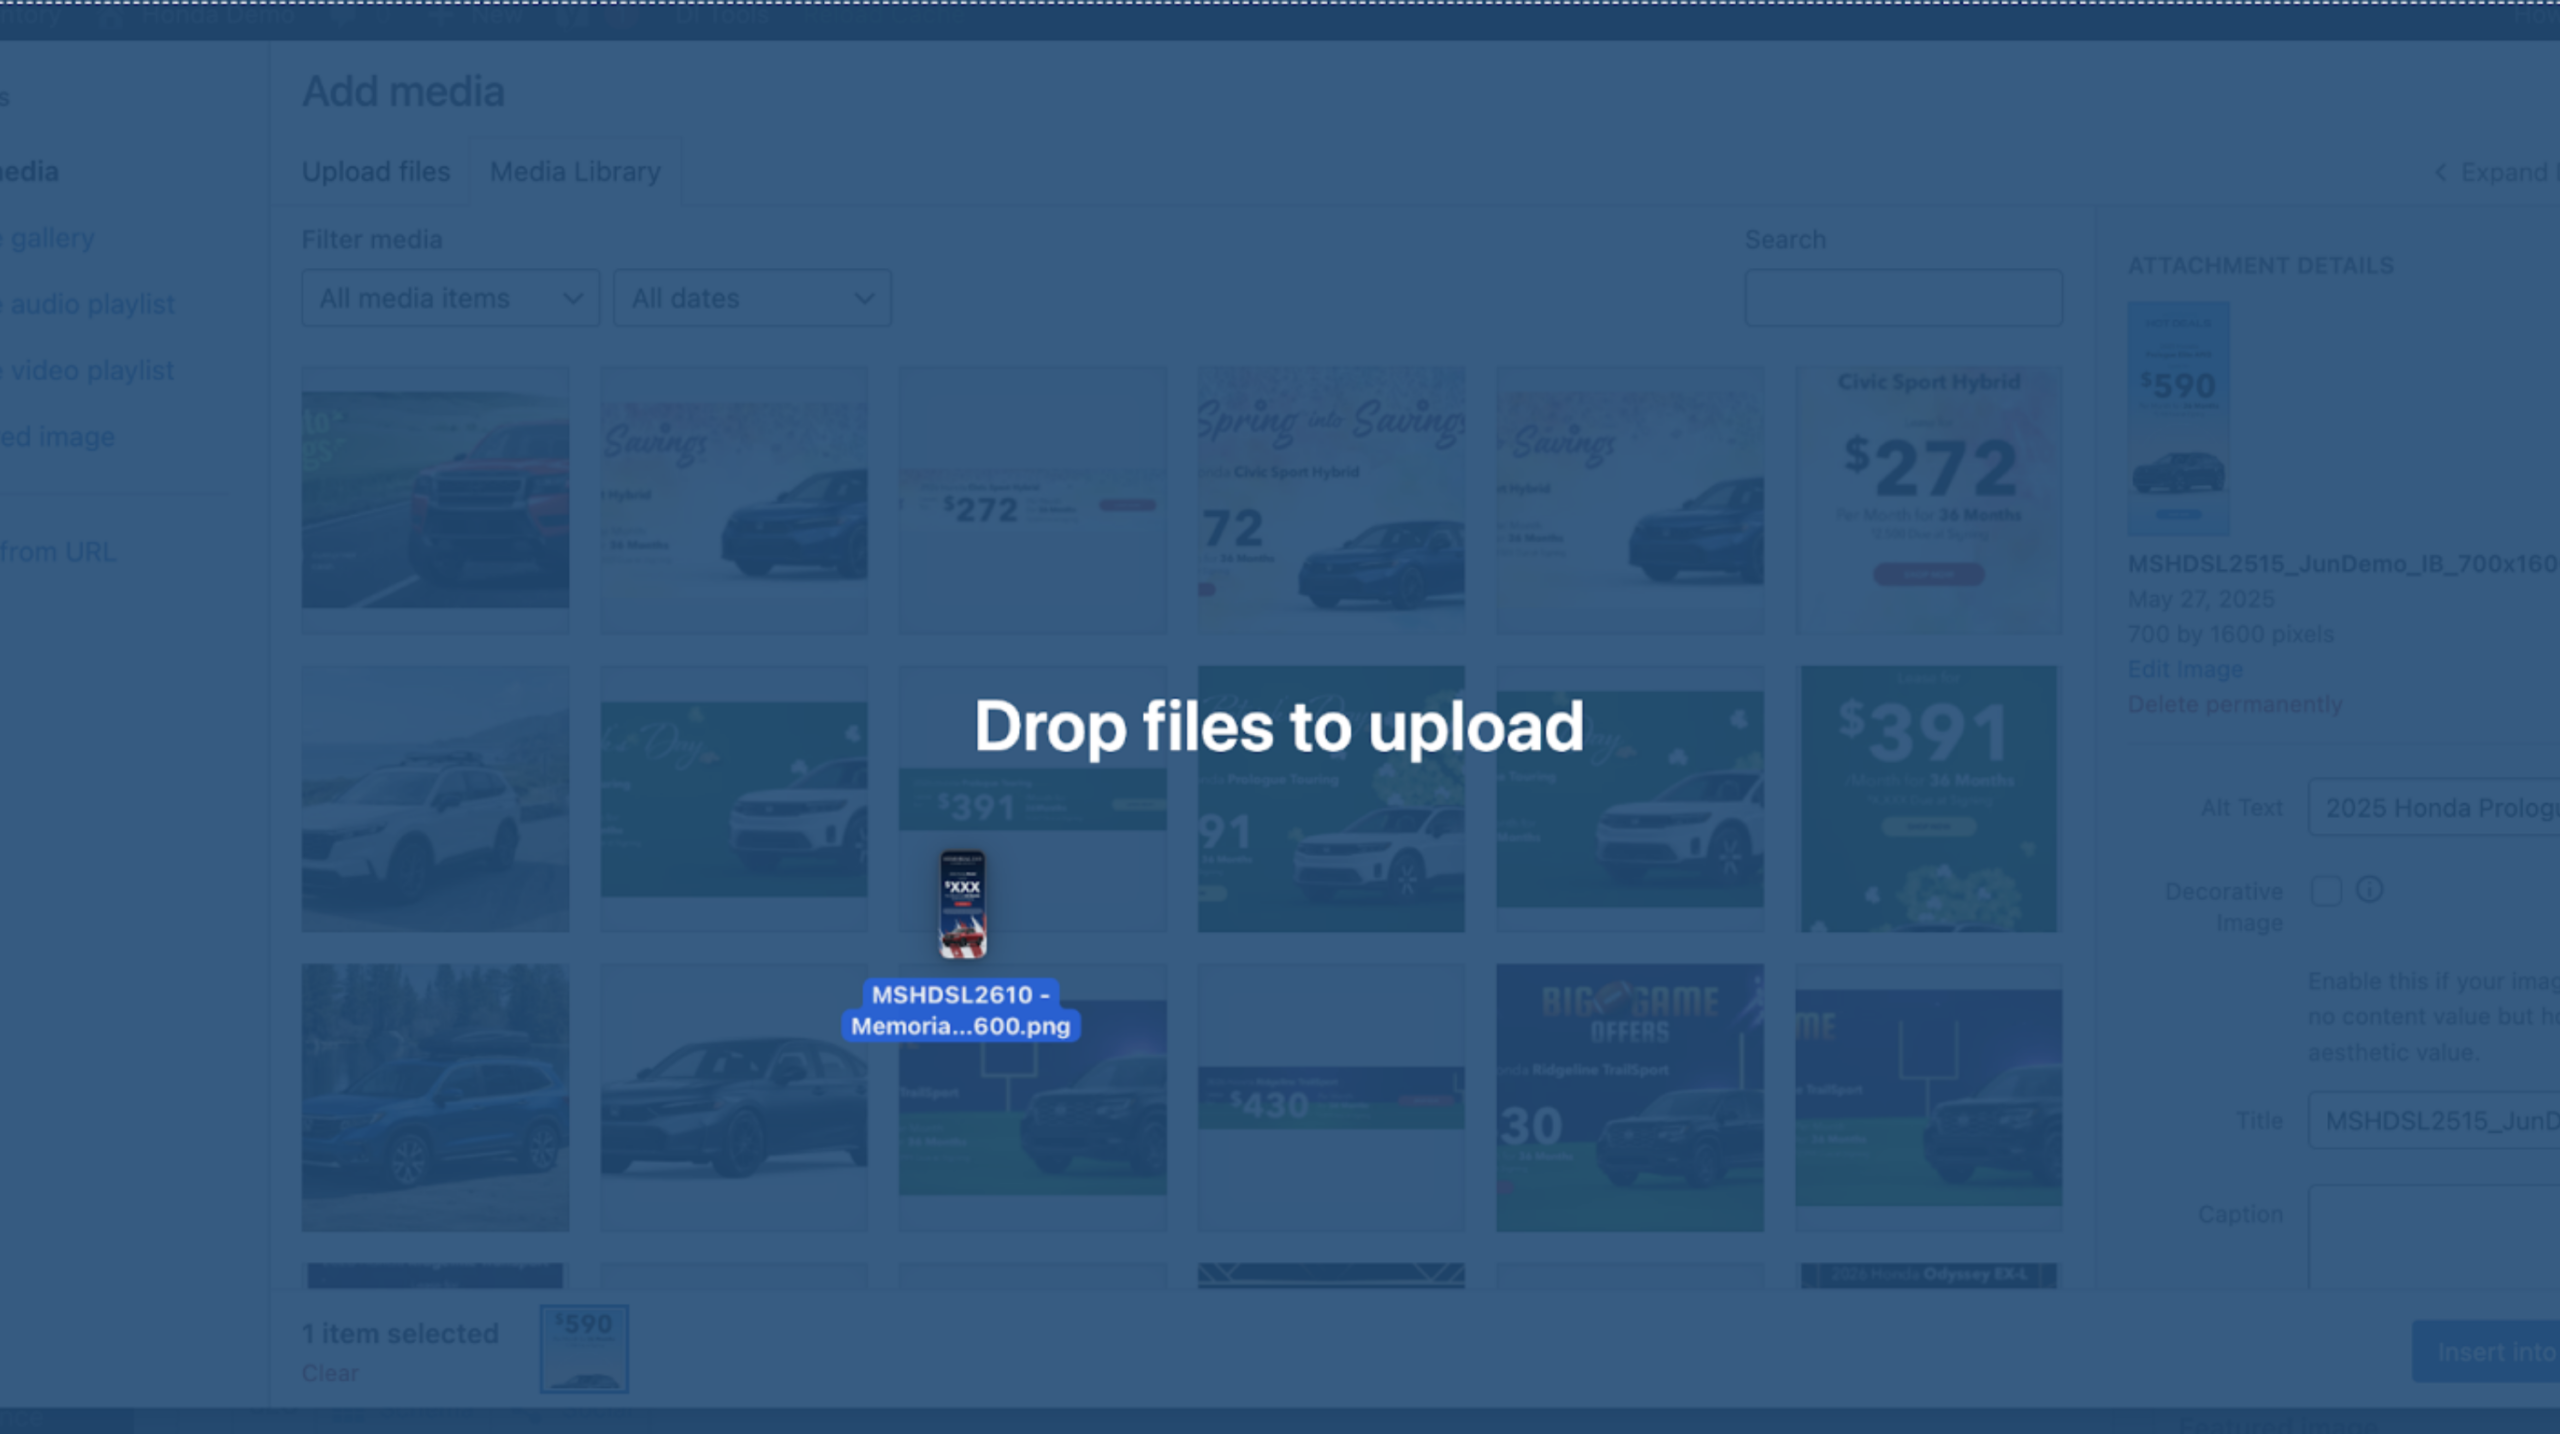
Note: If you edit with the image settings before it finishes loading, your changes will not save. Wait until the image fully appears before proceeding.
- Fill in the Alt Text field: paste your banner headline here for accessibility and SEO
- Change the Link To field to Custom URL
- Paste the destination URL: the page you want shoppers land on when they click the banner
- Example: the VDP page for a specific Honda Ridgeline trim
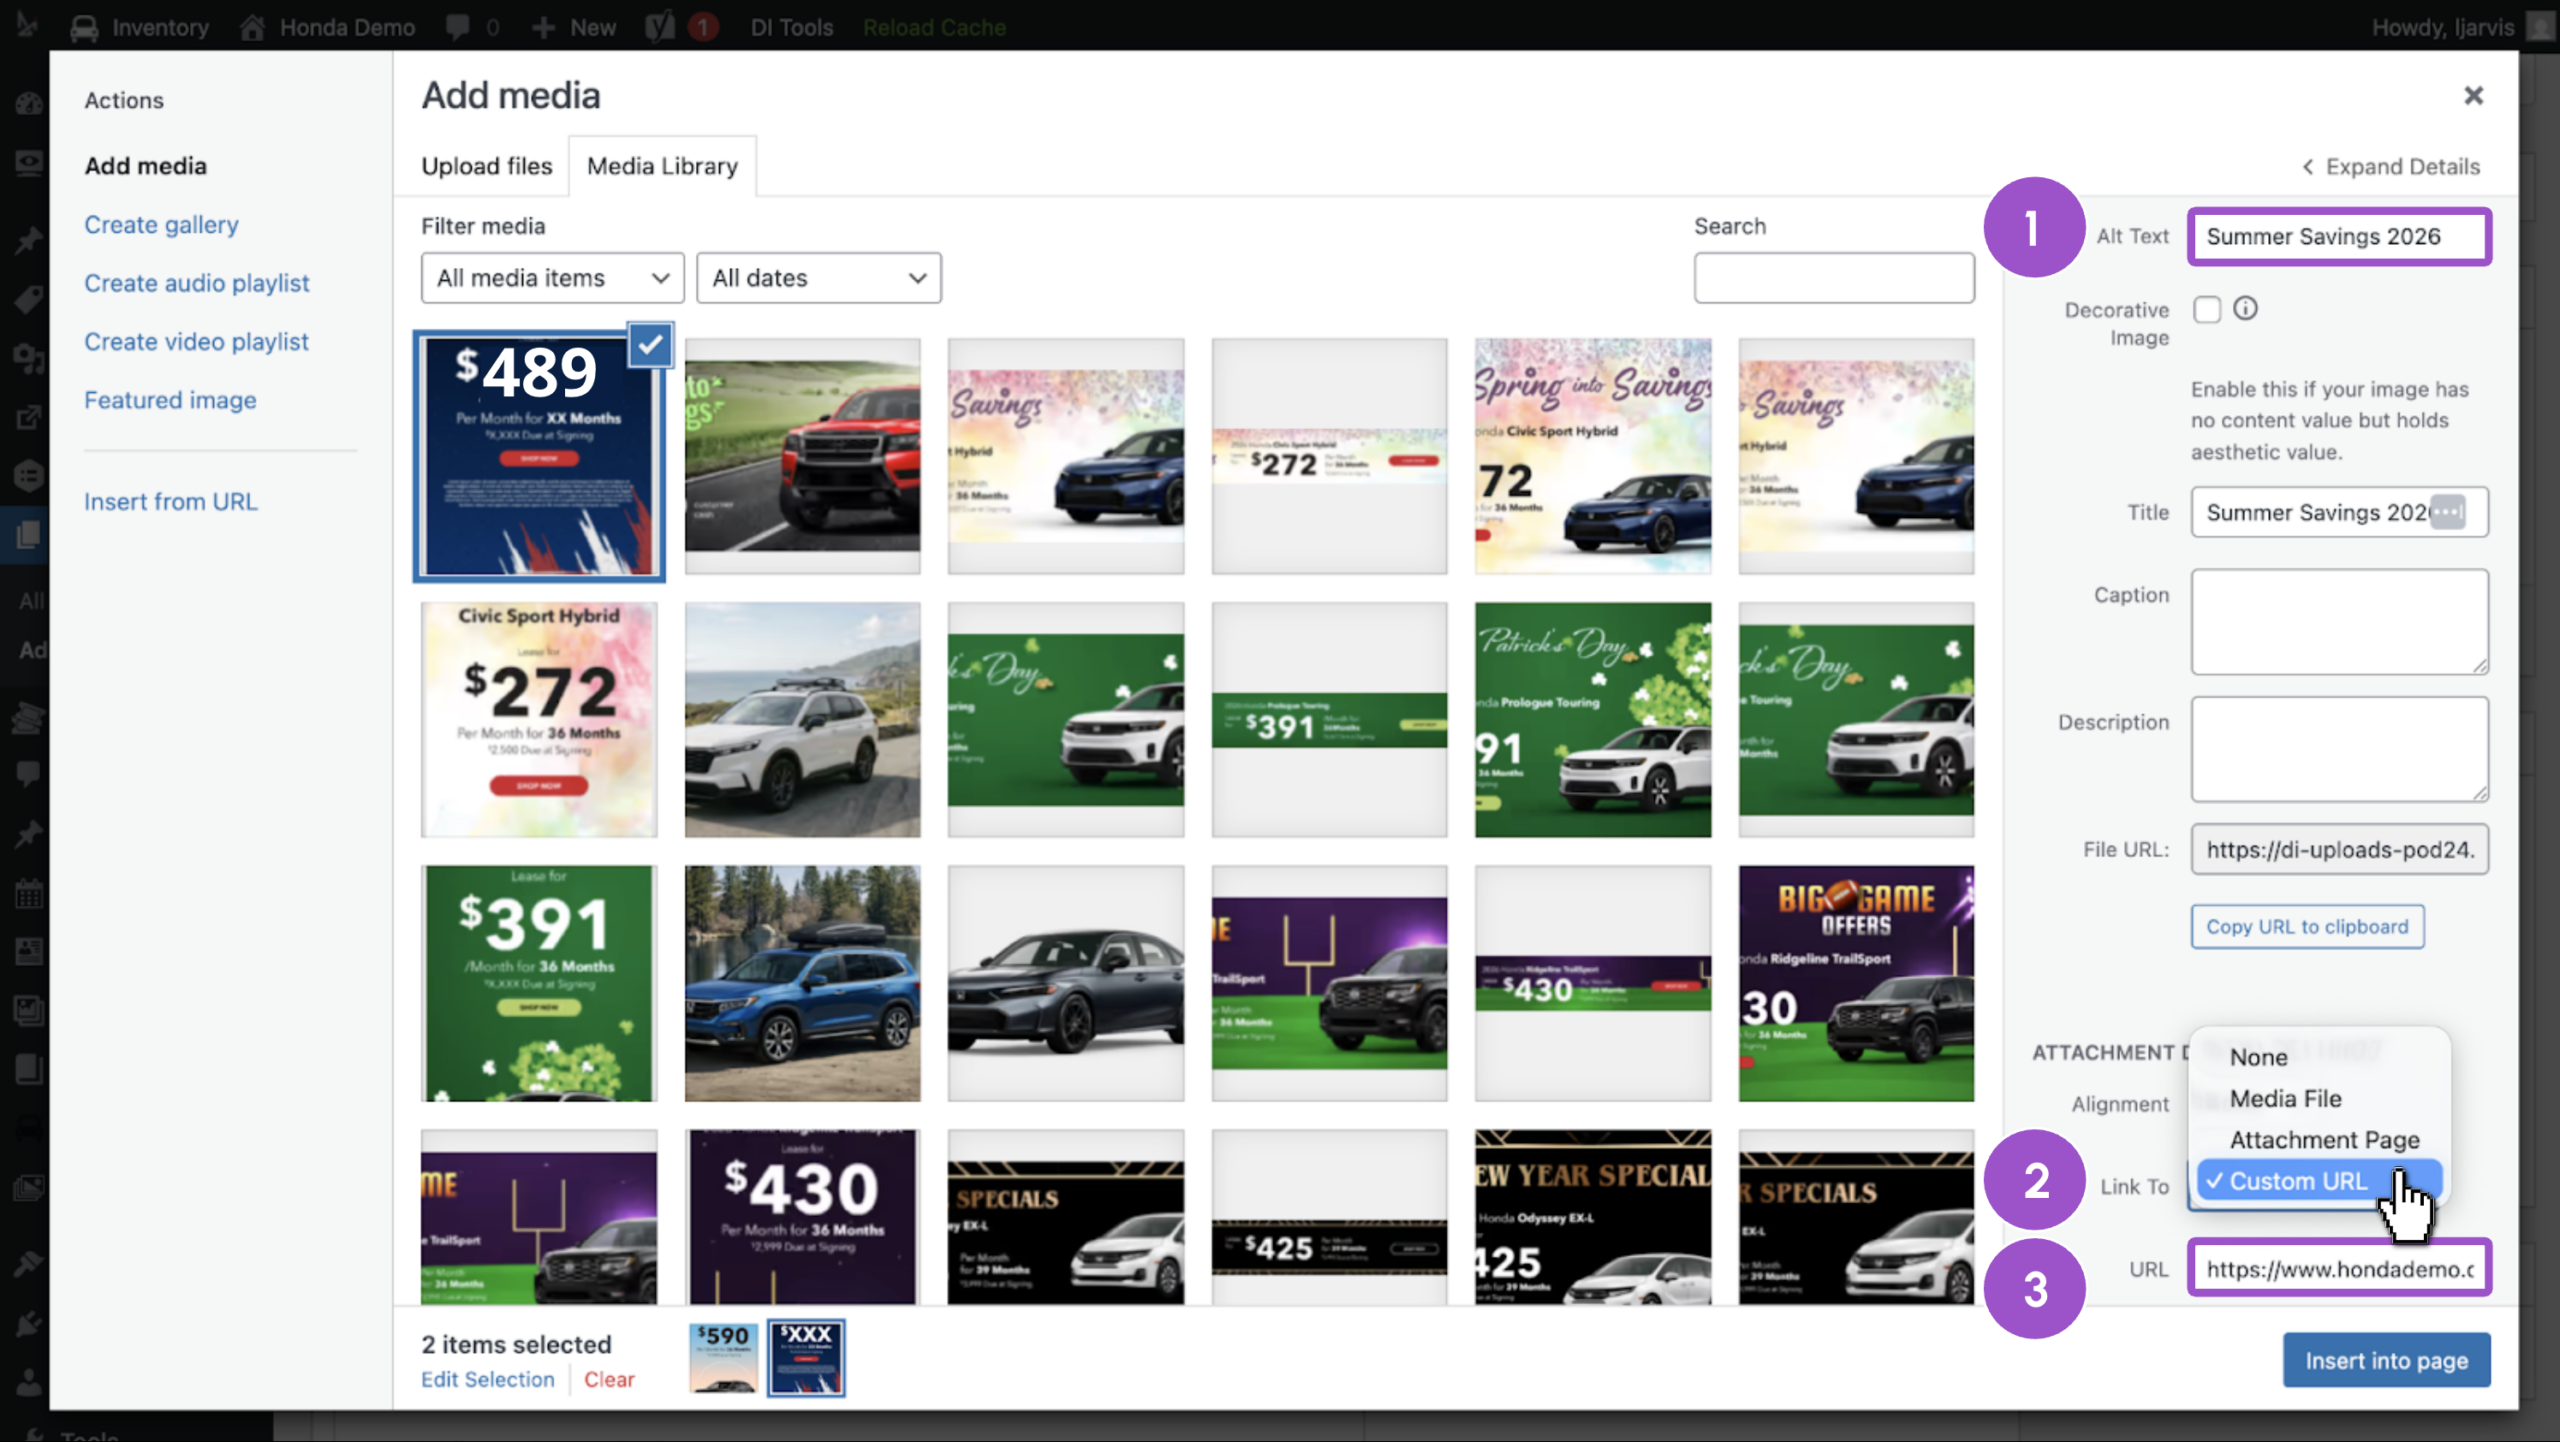
Note: Setting a custom URL makes the entire banner clickable — this replaces the need for a separate CTA button.
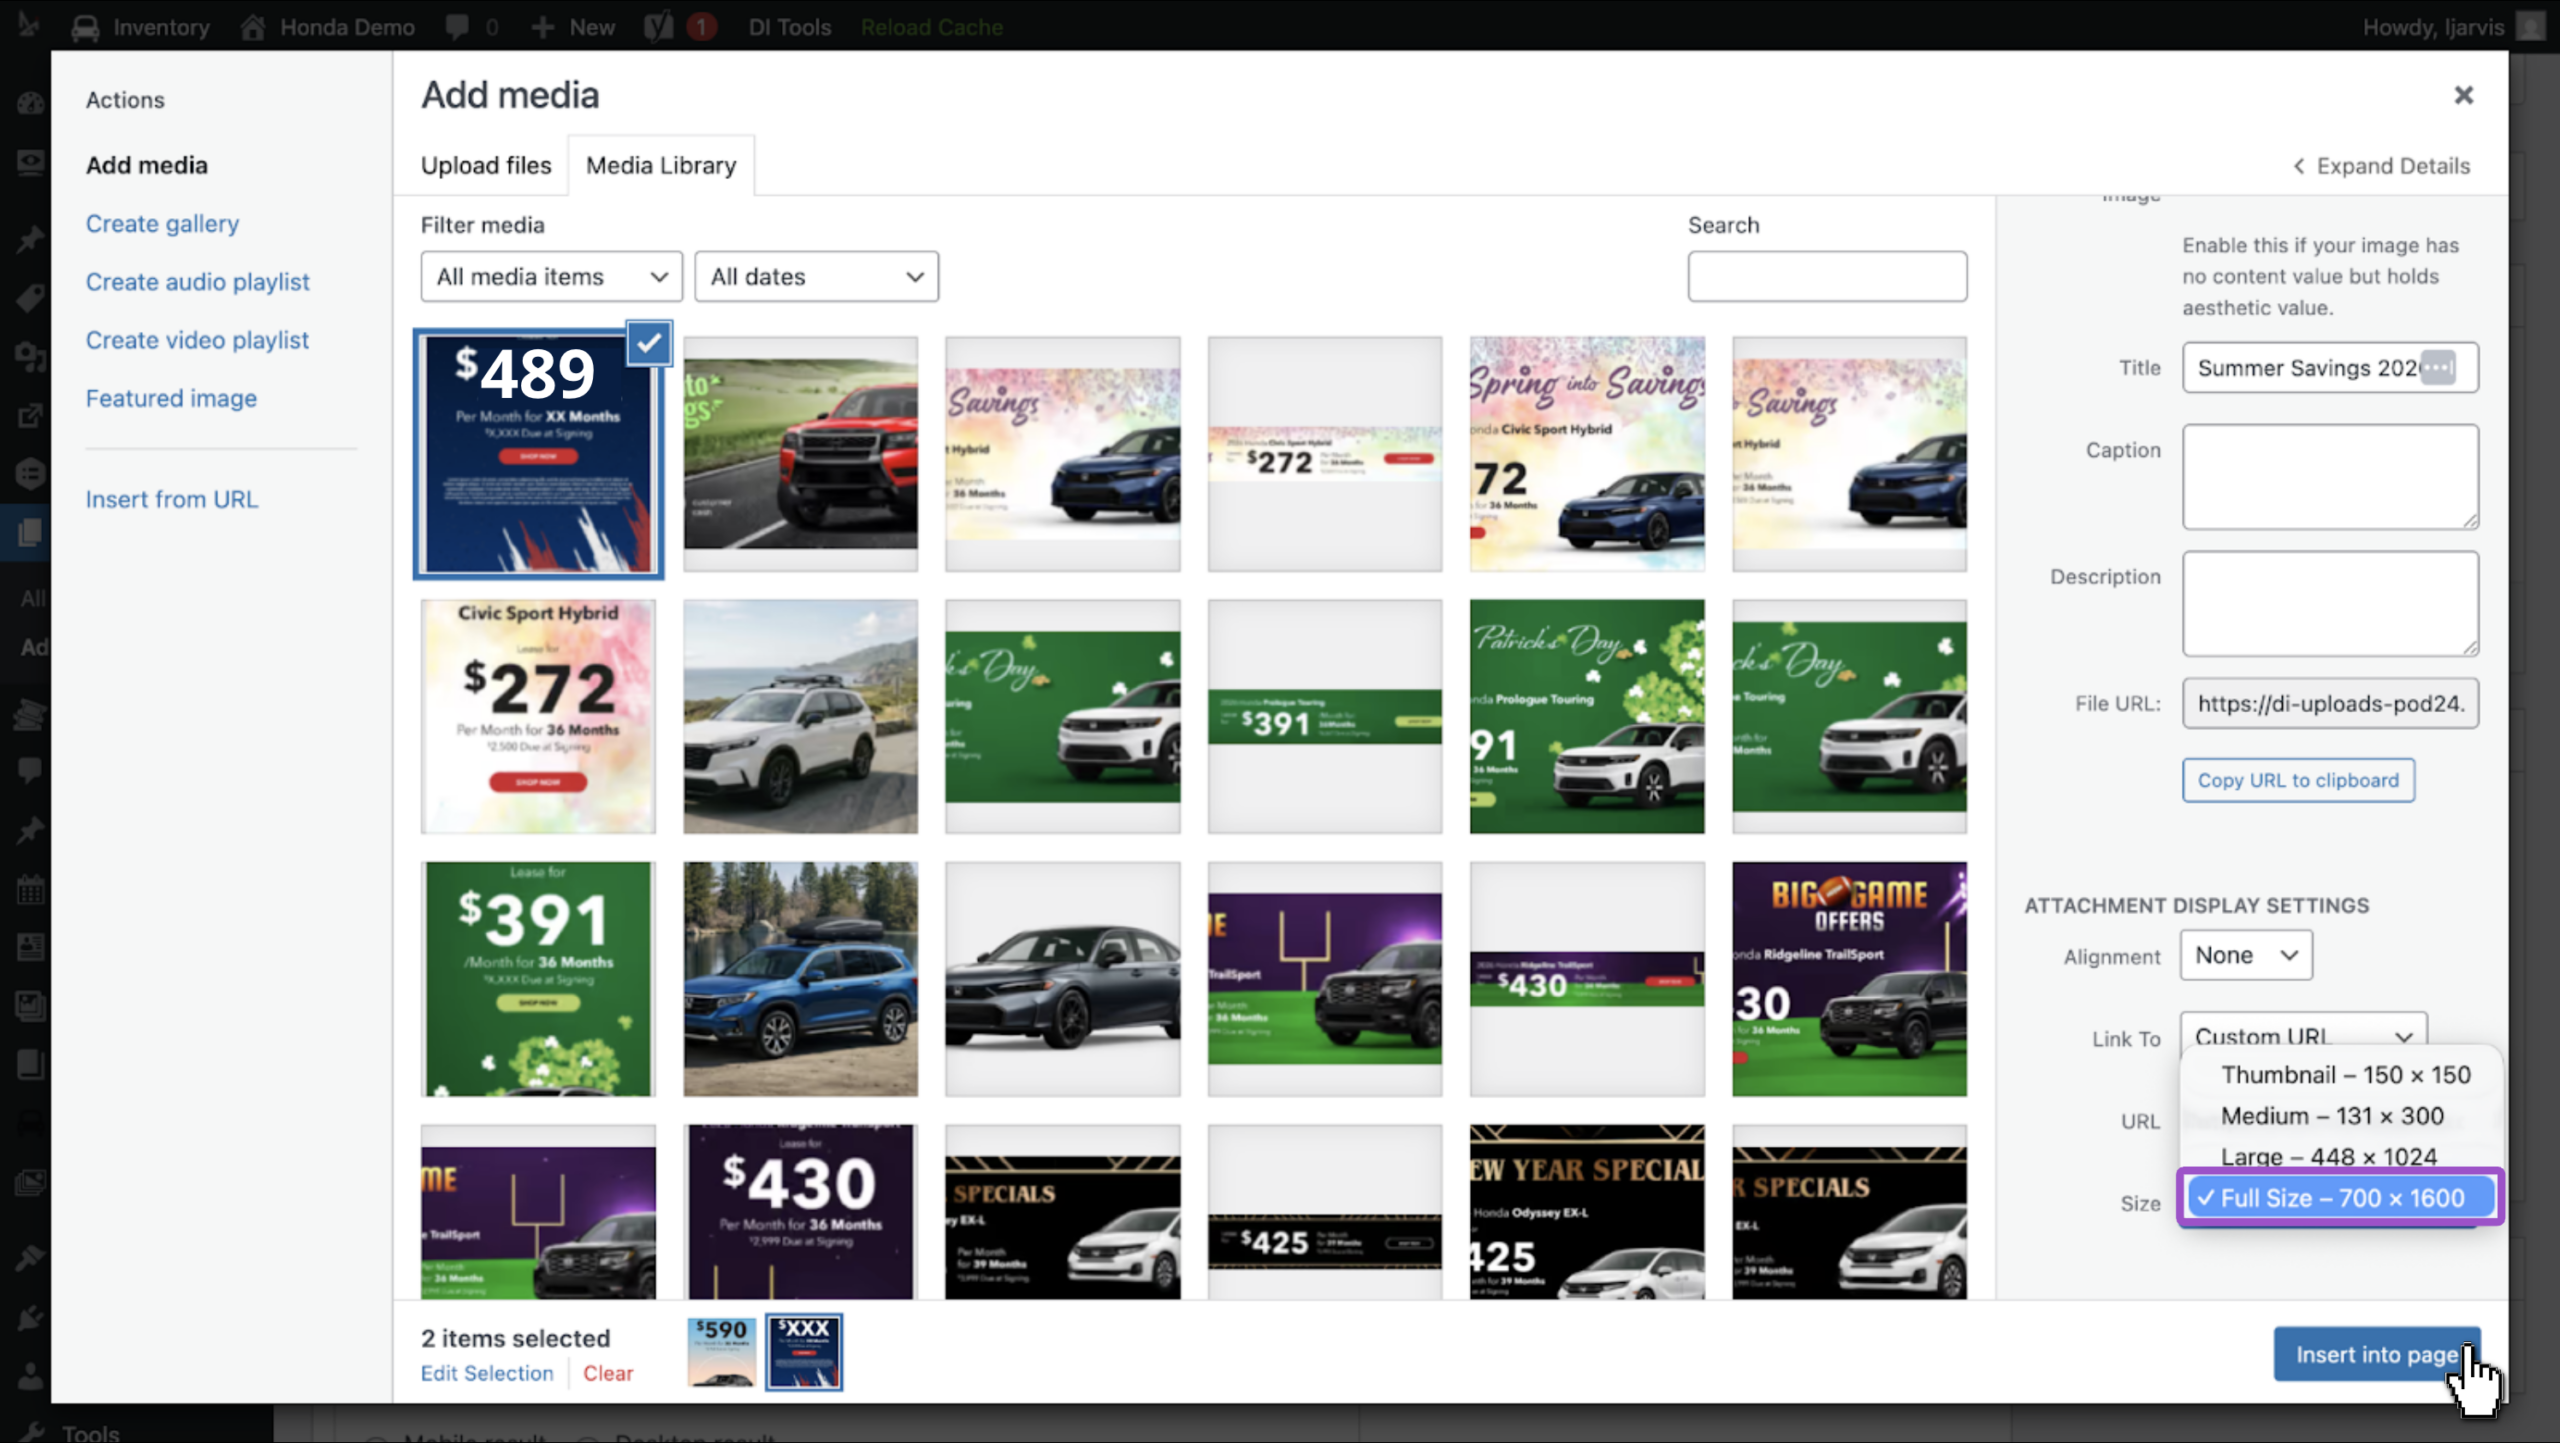
Set the image size:
- Scroll to the Size dropdown
- Select Full Size: inline banners are typically 700 x 1600px
- Click Insert into Page
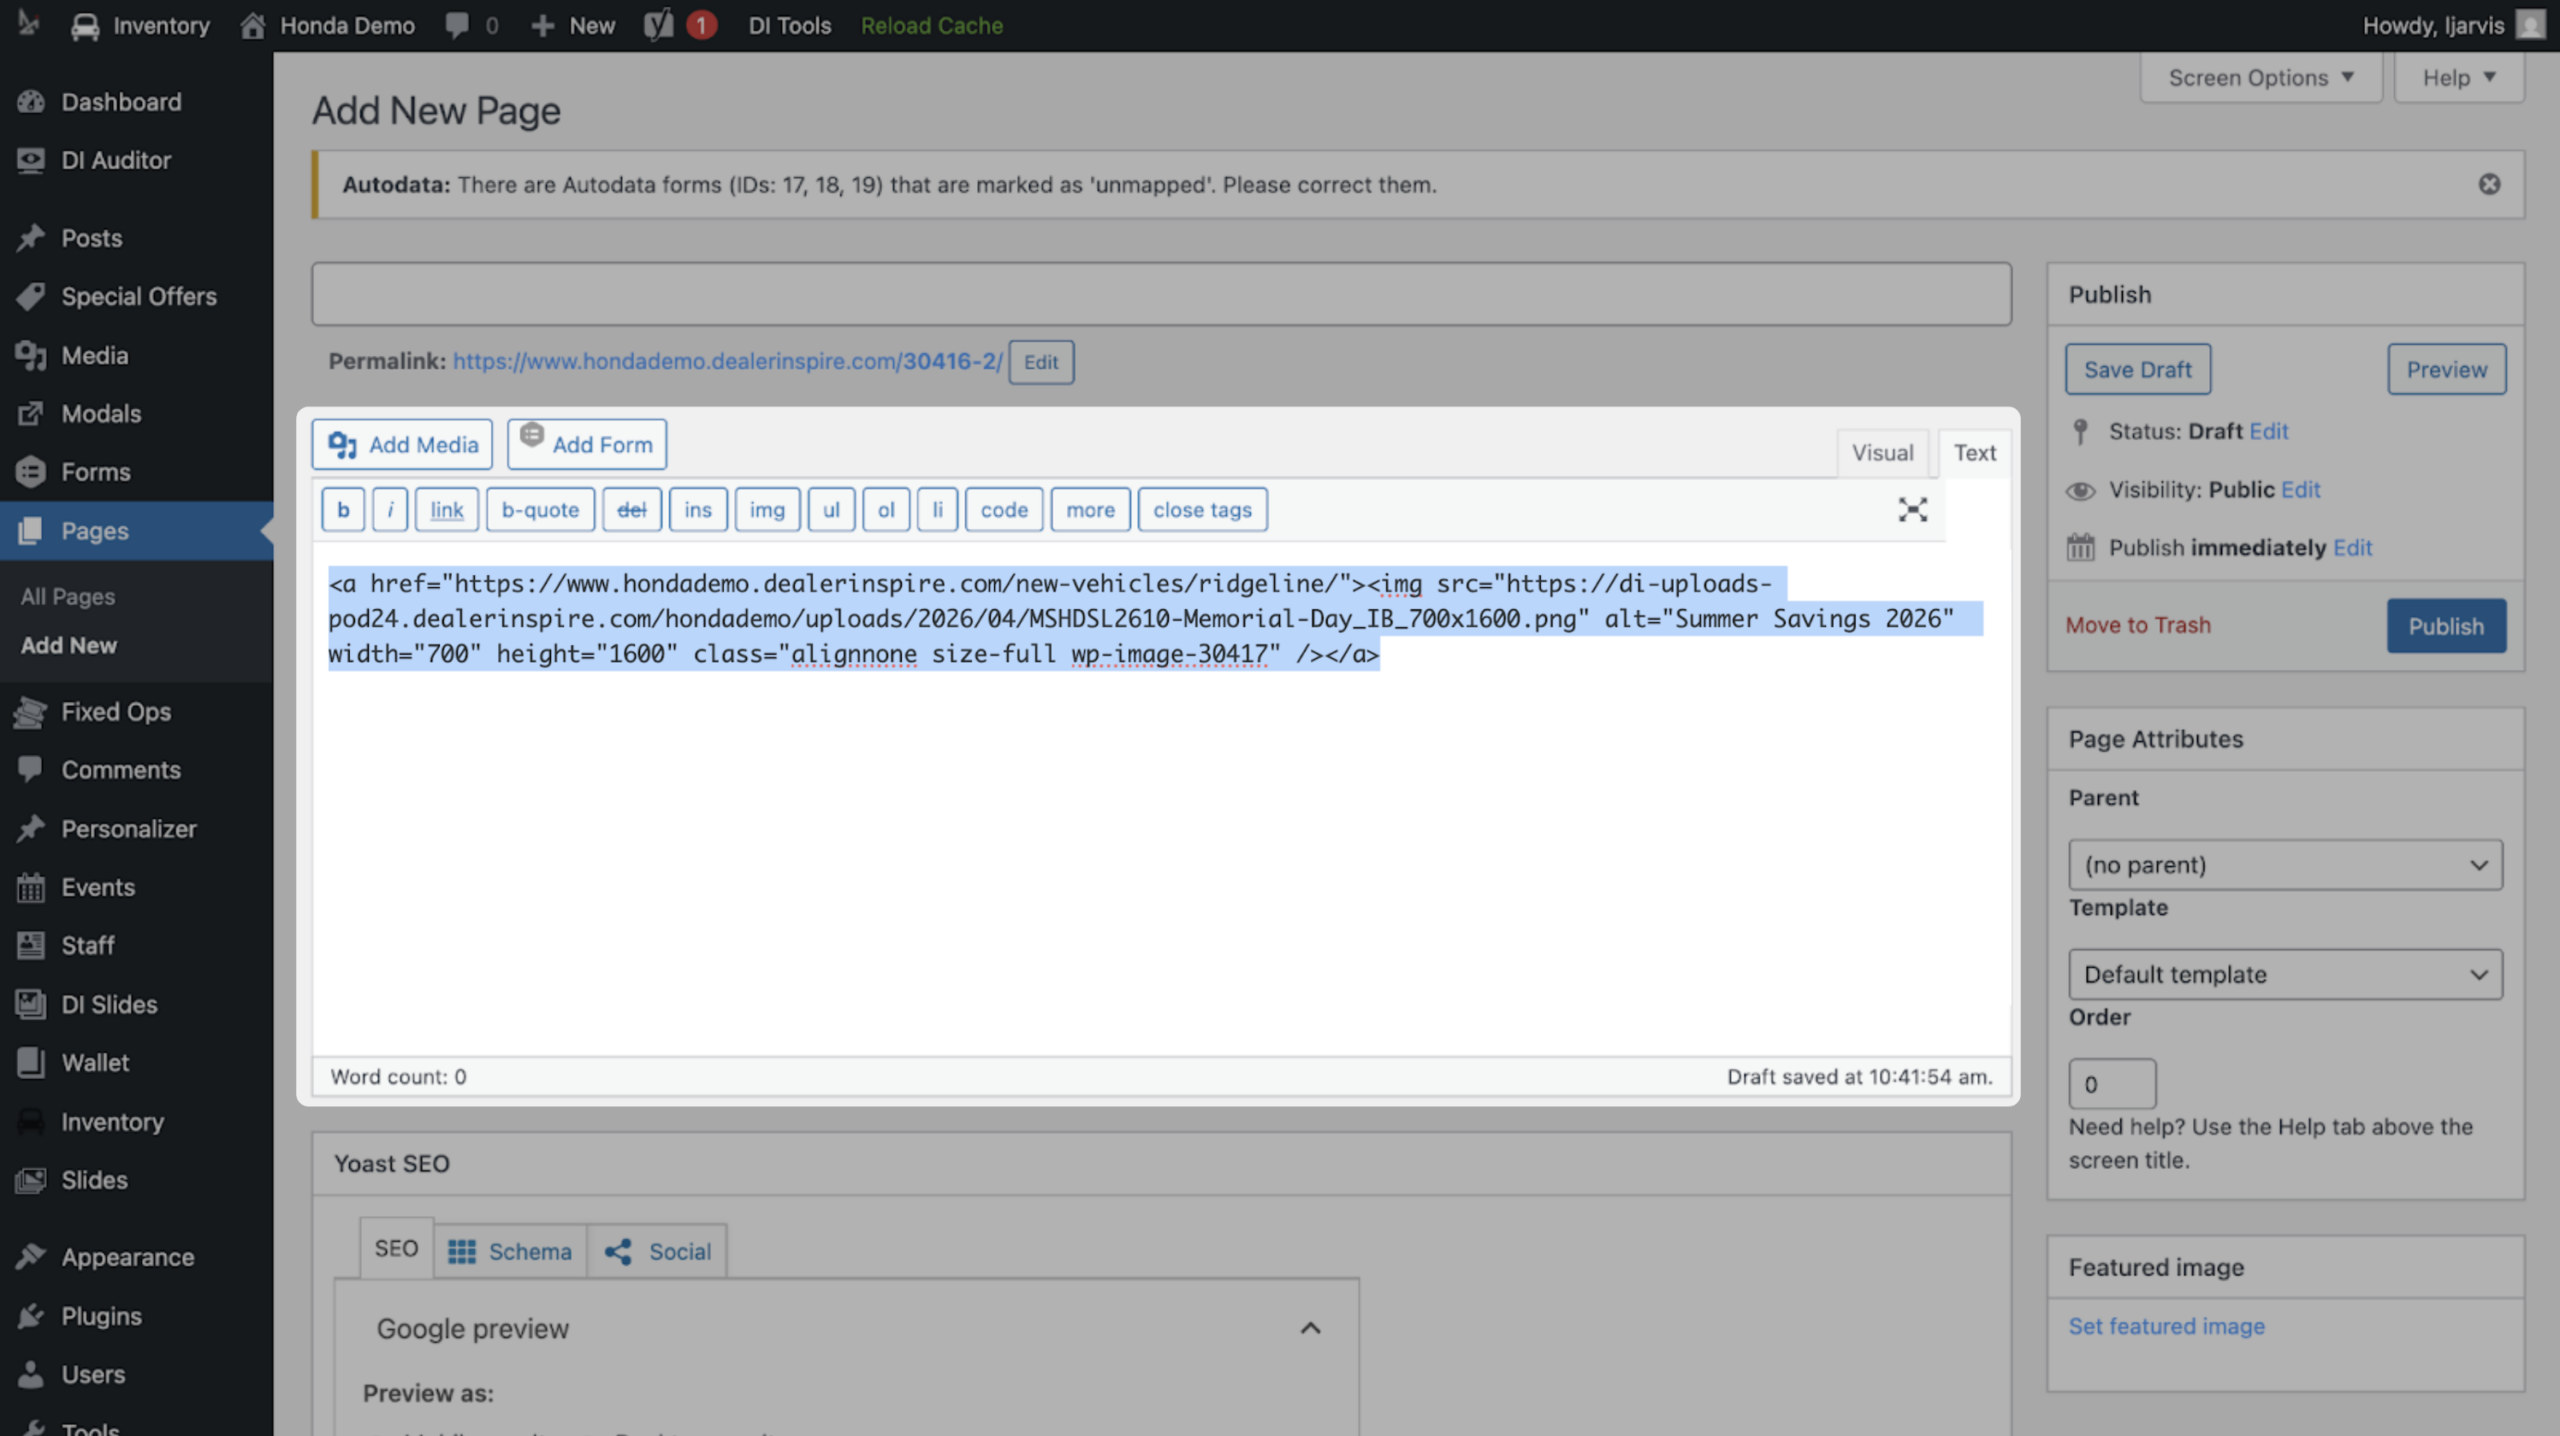
The HTML code will appear in the page editor.
- Select all the code in the content box, then Copy.
4Paste the HTML code into the banner
Return to your original tab where your inline banner setup is open.
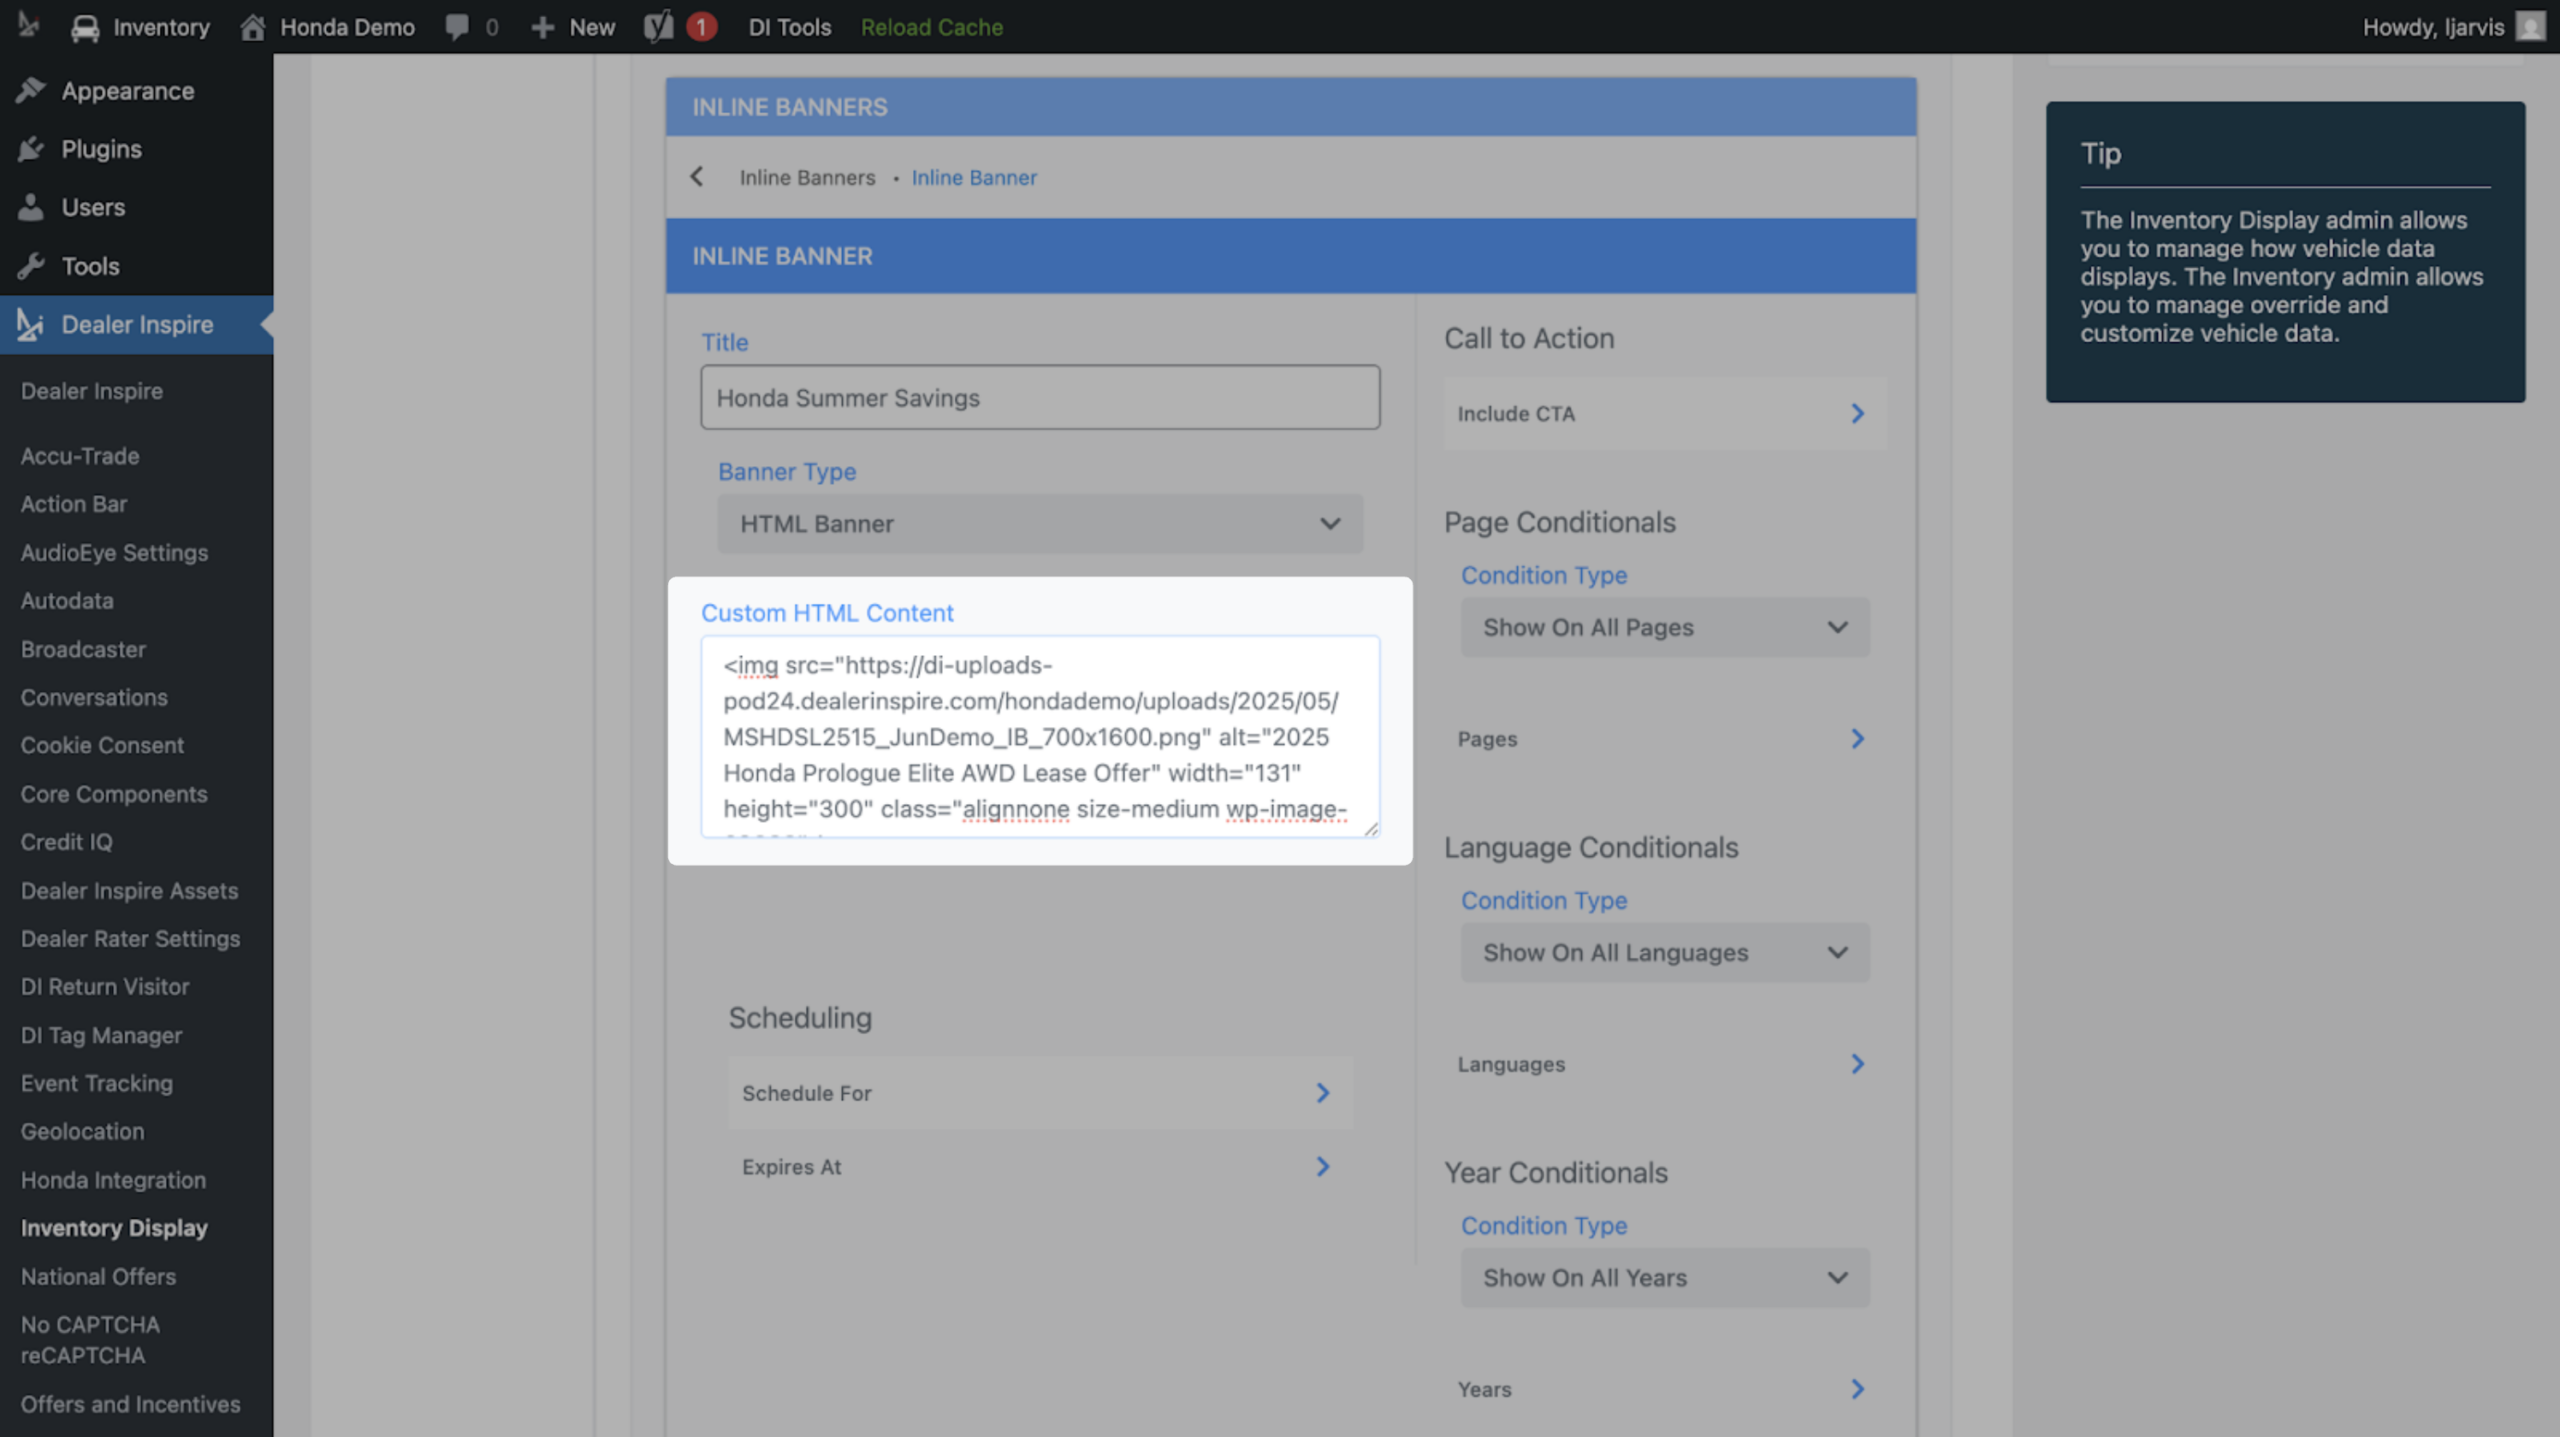
- Click into the Custom HTML Content field
- Paste your copied HTML code
Optional: add a disclaimer CTA to your banner
Add the following HTML to your content box below the image HTML:
<!DOCTYPE html>
<html>
<head>
<style>
.button.primary-button, .button:visited.primary-button {
   background: #3698DC
;
   color: #fff;
   border: none;
   text-transform: none;
}
.button, .button:visited {
    border-radius: 0px;
}
</style>
</head>
<body>

<div class="text-center"><a class="button primary-button" data-toggle="modal" data-target="#DIModal" data-modal-content="#hidden-div" data-modal-title="Disclaimer" data-modal-footer="hide">Disclaimer</a></div>

<div id="hidden-div" style="display:none;">
Disclaimer verbiage here
</div>

</body>
</html>
Note: Replace the highlighted sections with your brand or OEM hex code color and your disclaimer text.
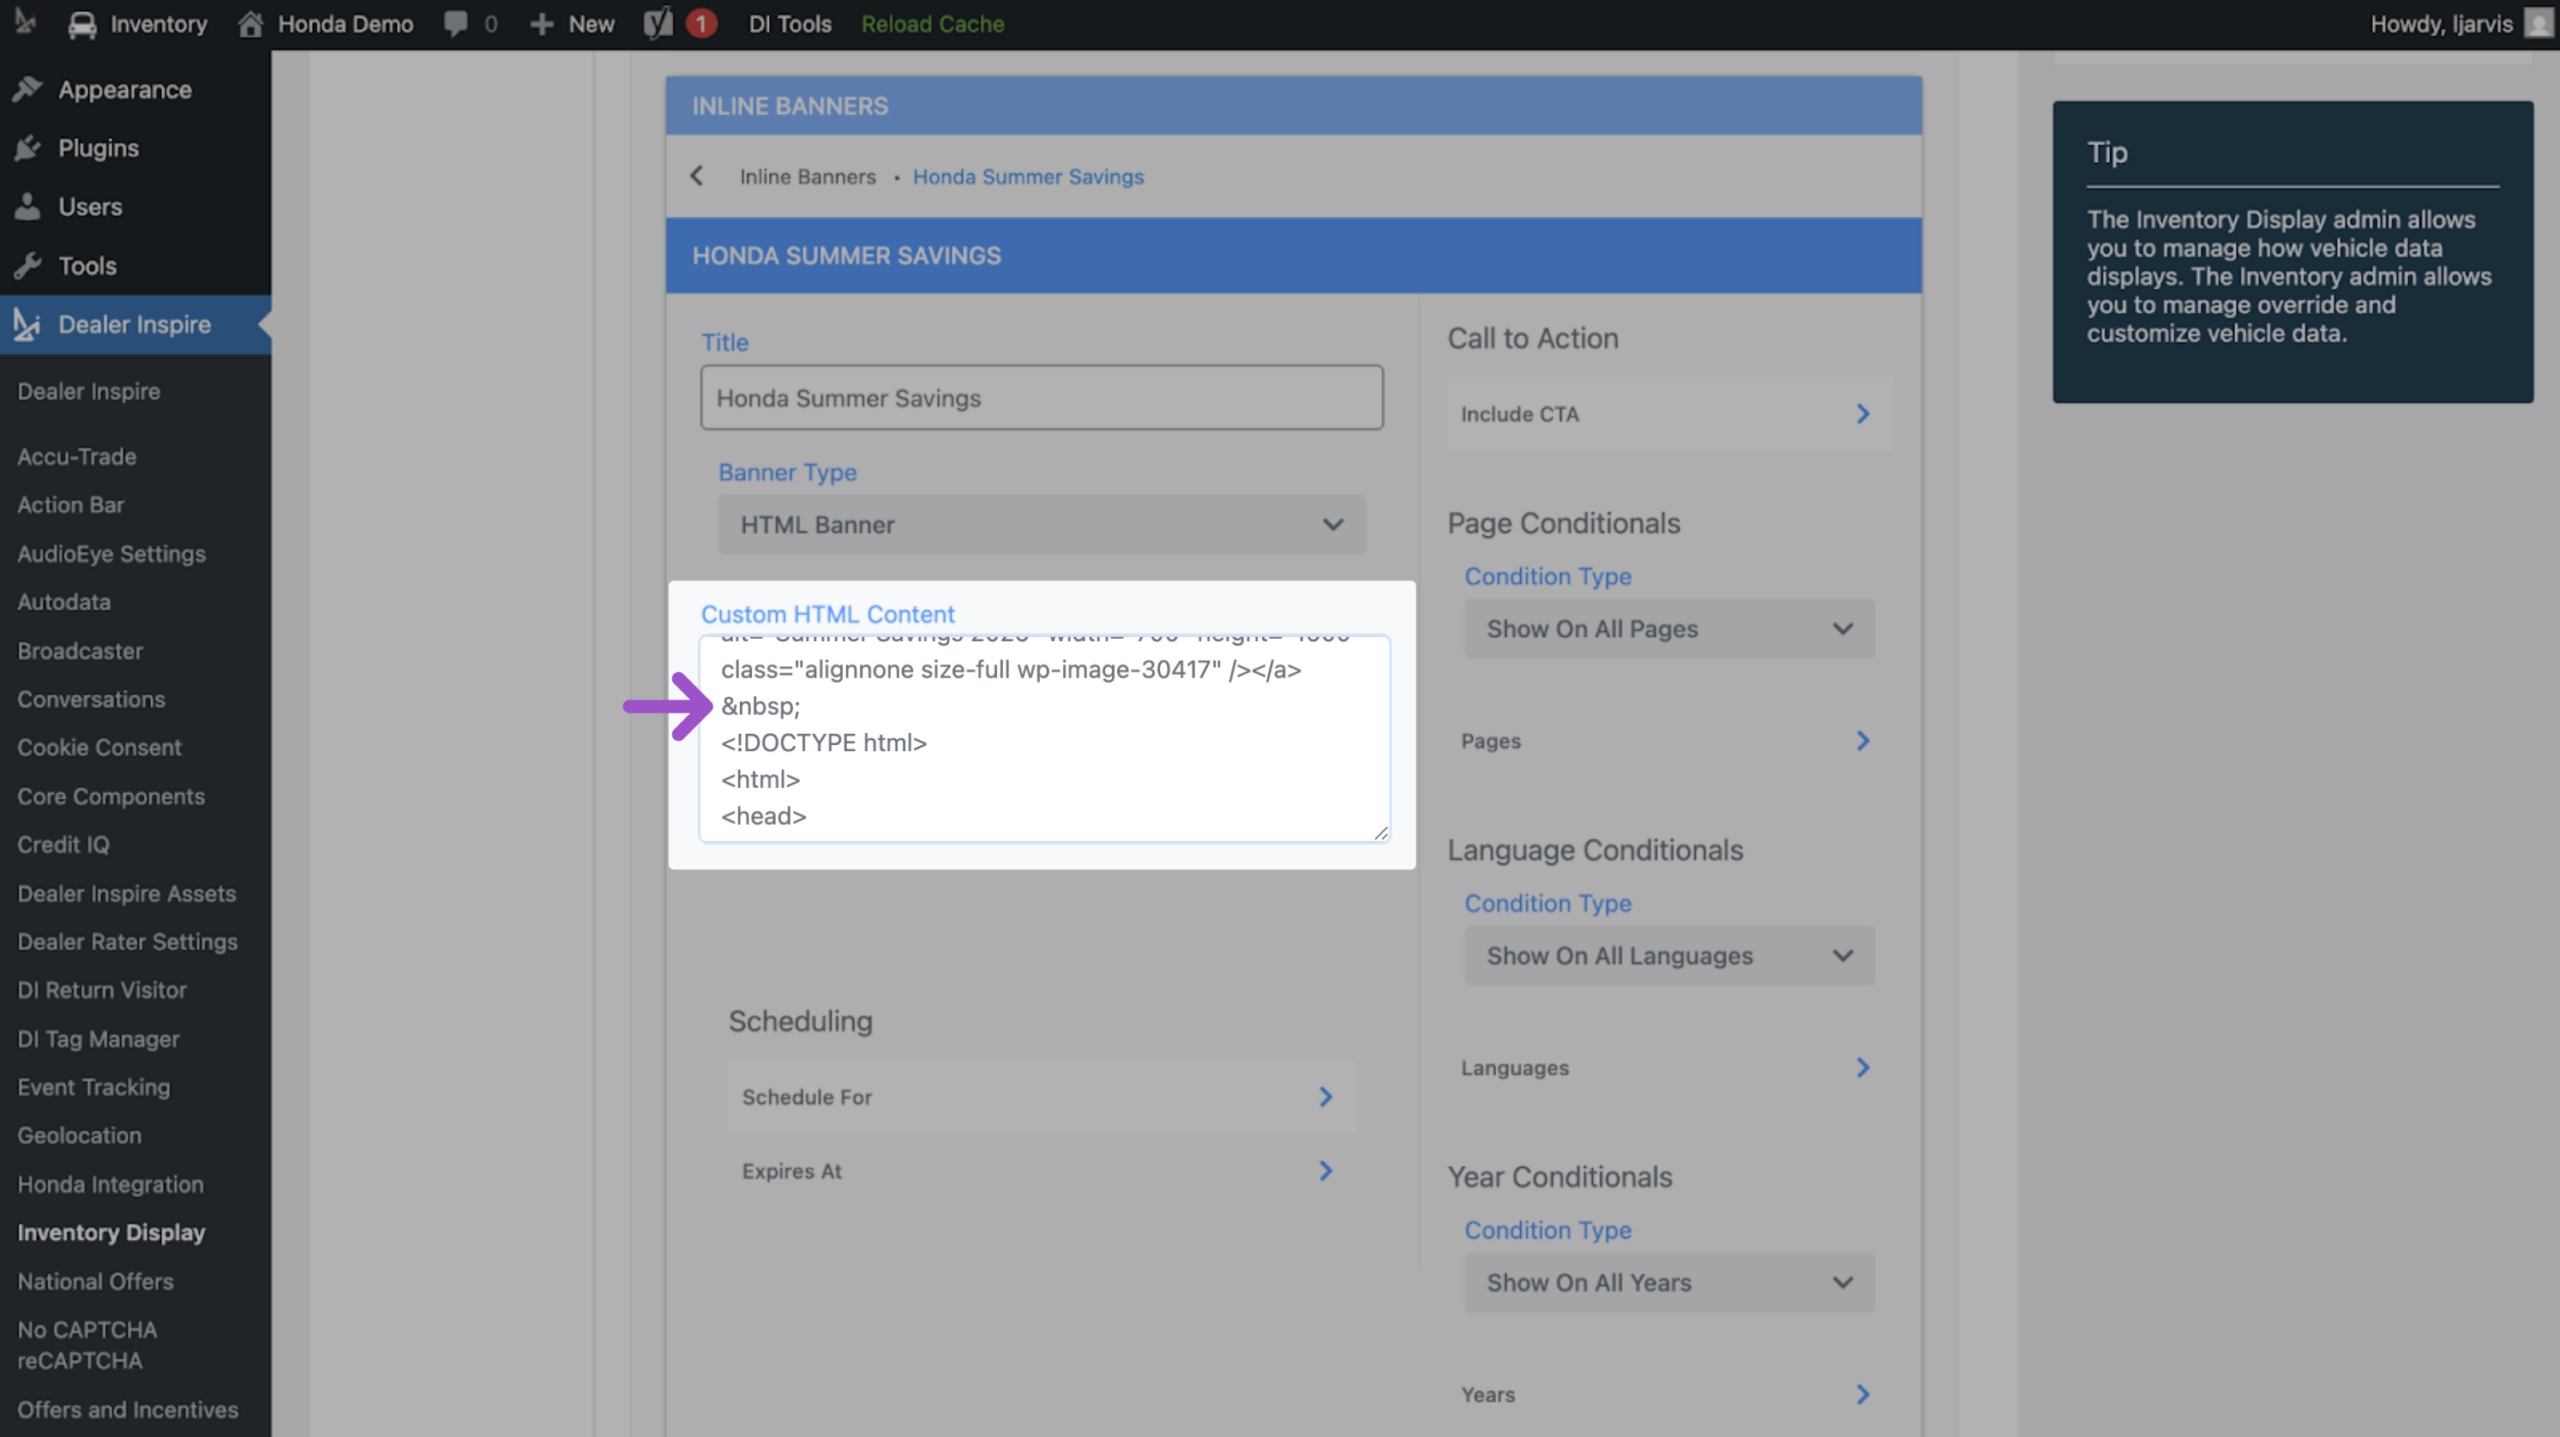
⚠️ Action required:
- Update the Hex Code according to your site or OEM requirements
- Replace Disclaimer verbiage here with your disclaimer text
5Set an expiration date (if applicable)
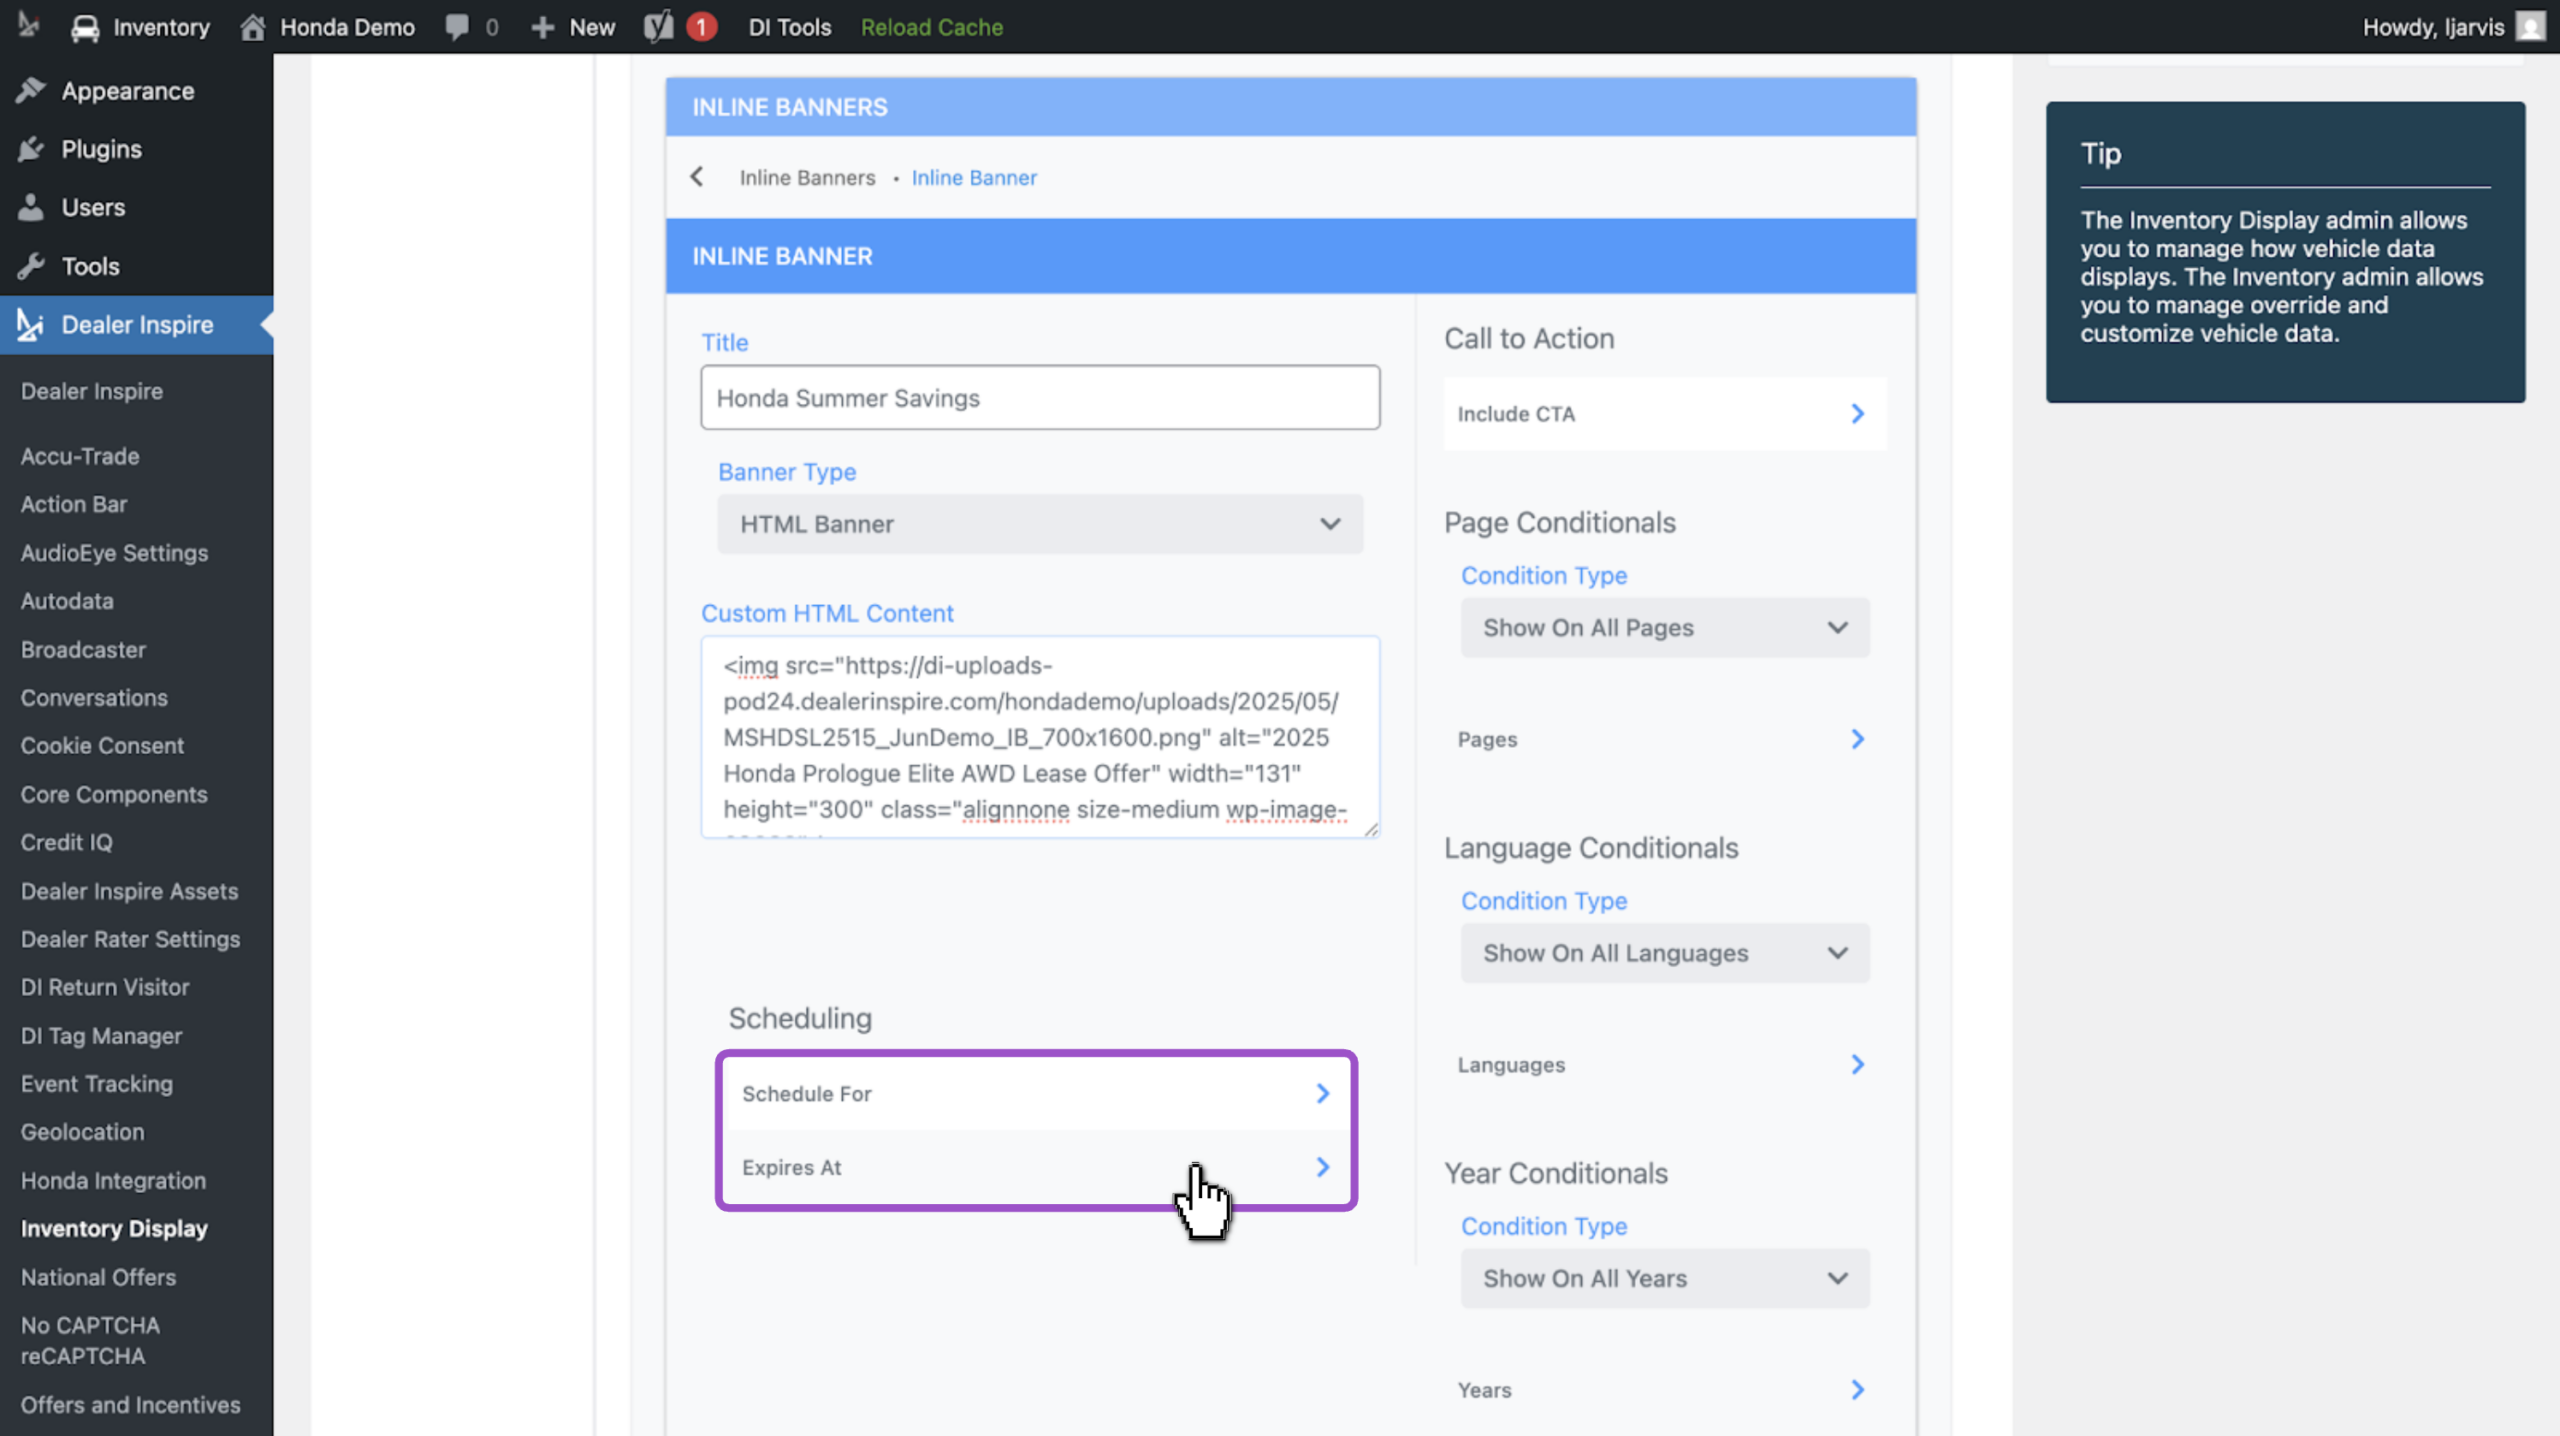
If your banner is tied to a time-limited promotion, set an expiration date so it stops displaying automatically or schedule it ahead of time so you can set it and forget it.
Scroll to the Scheduling section
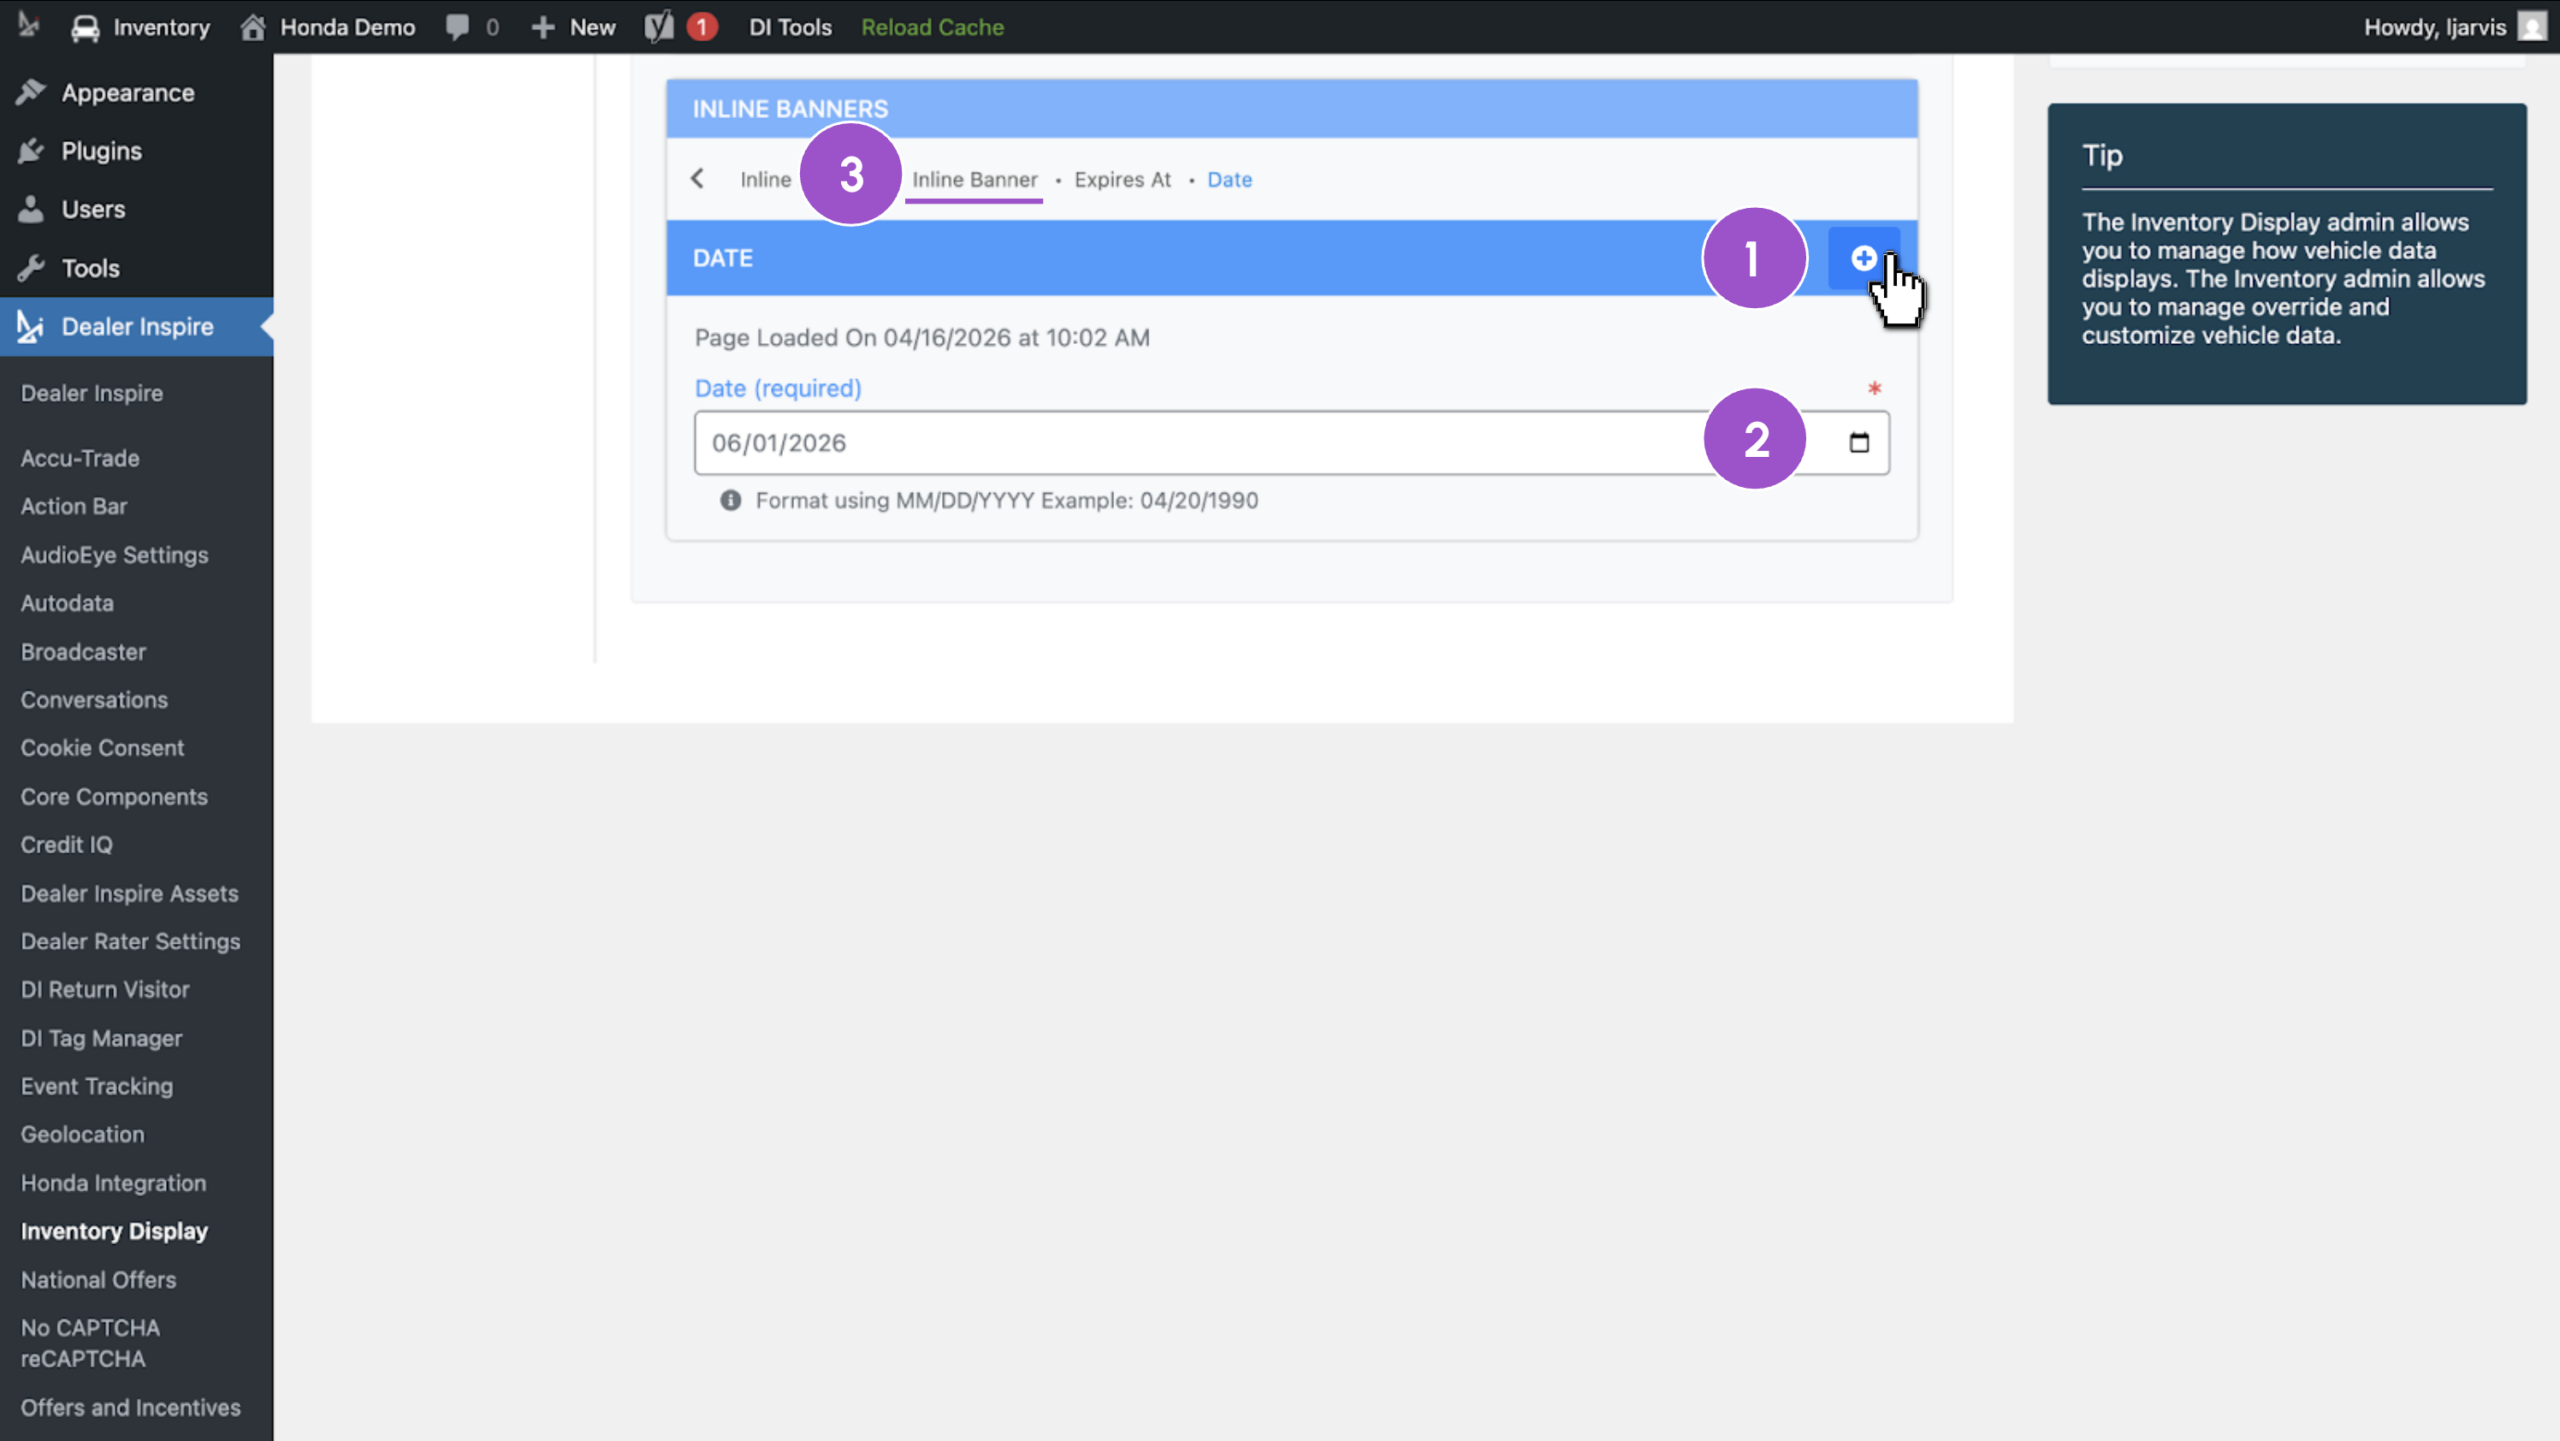
- Click Expires At or Schedule For
- Click the plus (+) icon
- Enter the date
- Click the Inline Banner breadcrumb to return to the banner editor
6Set page conditionals (optional)
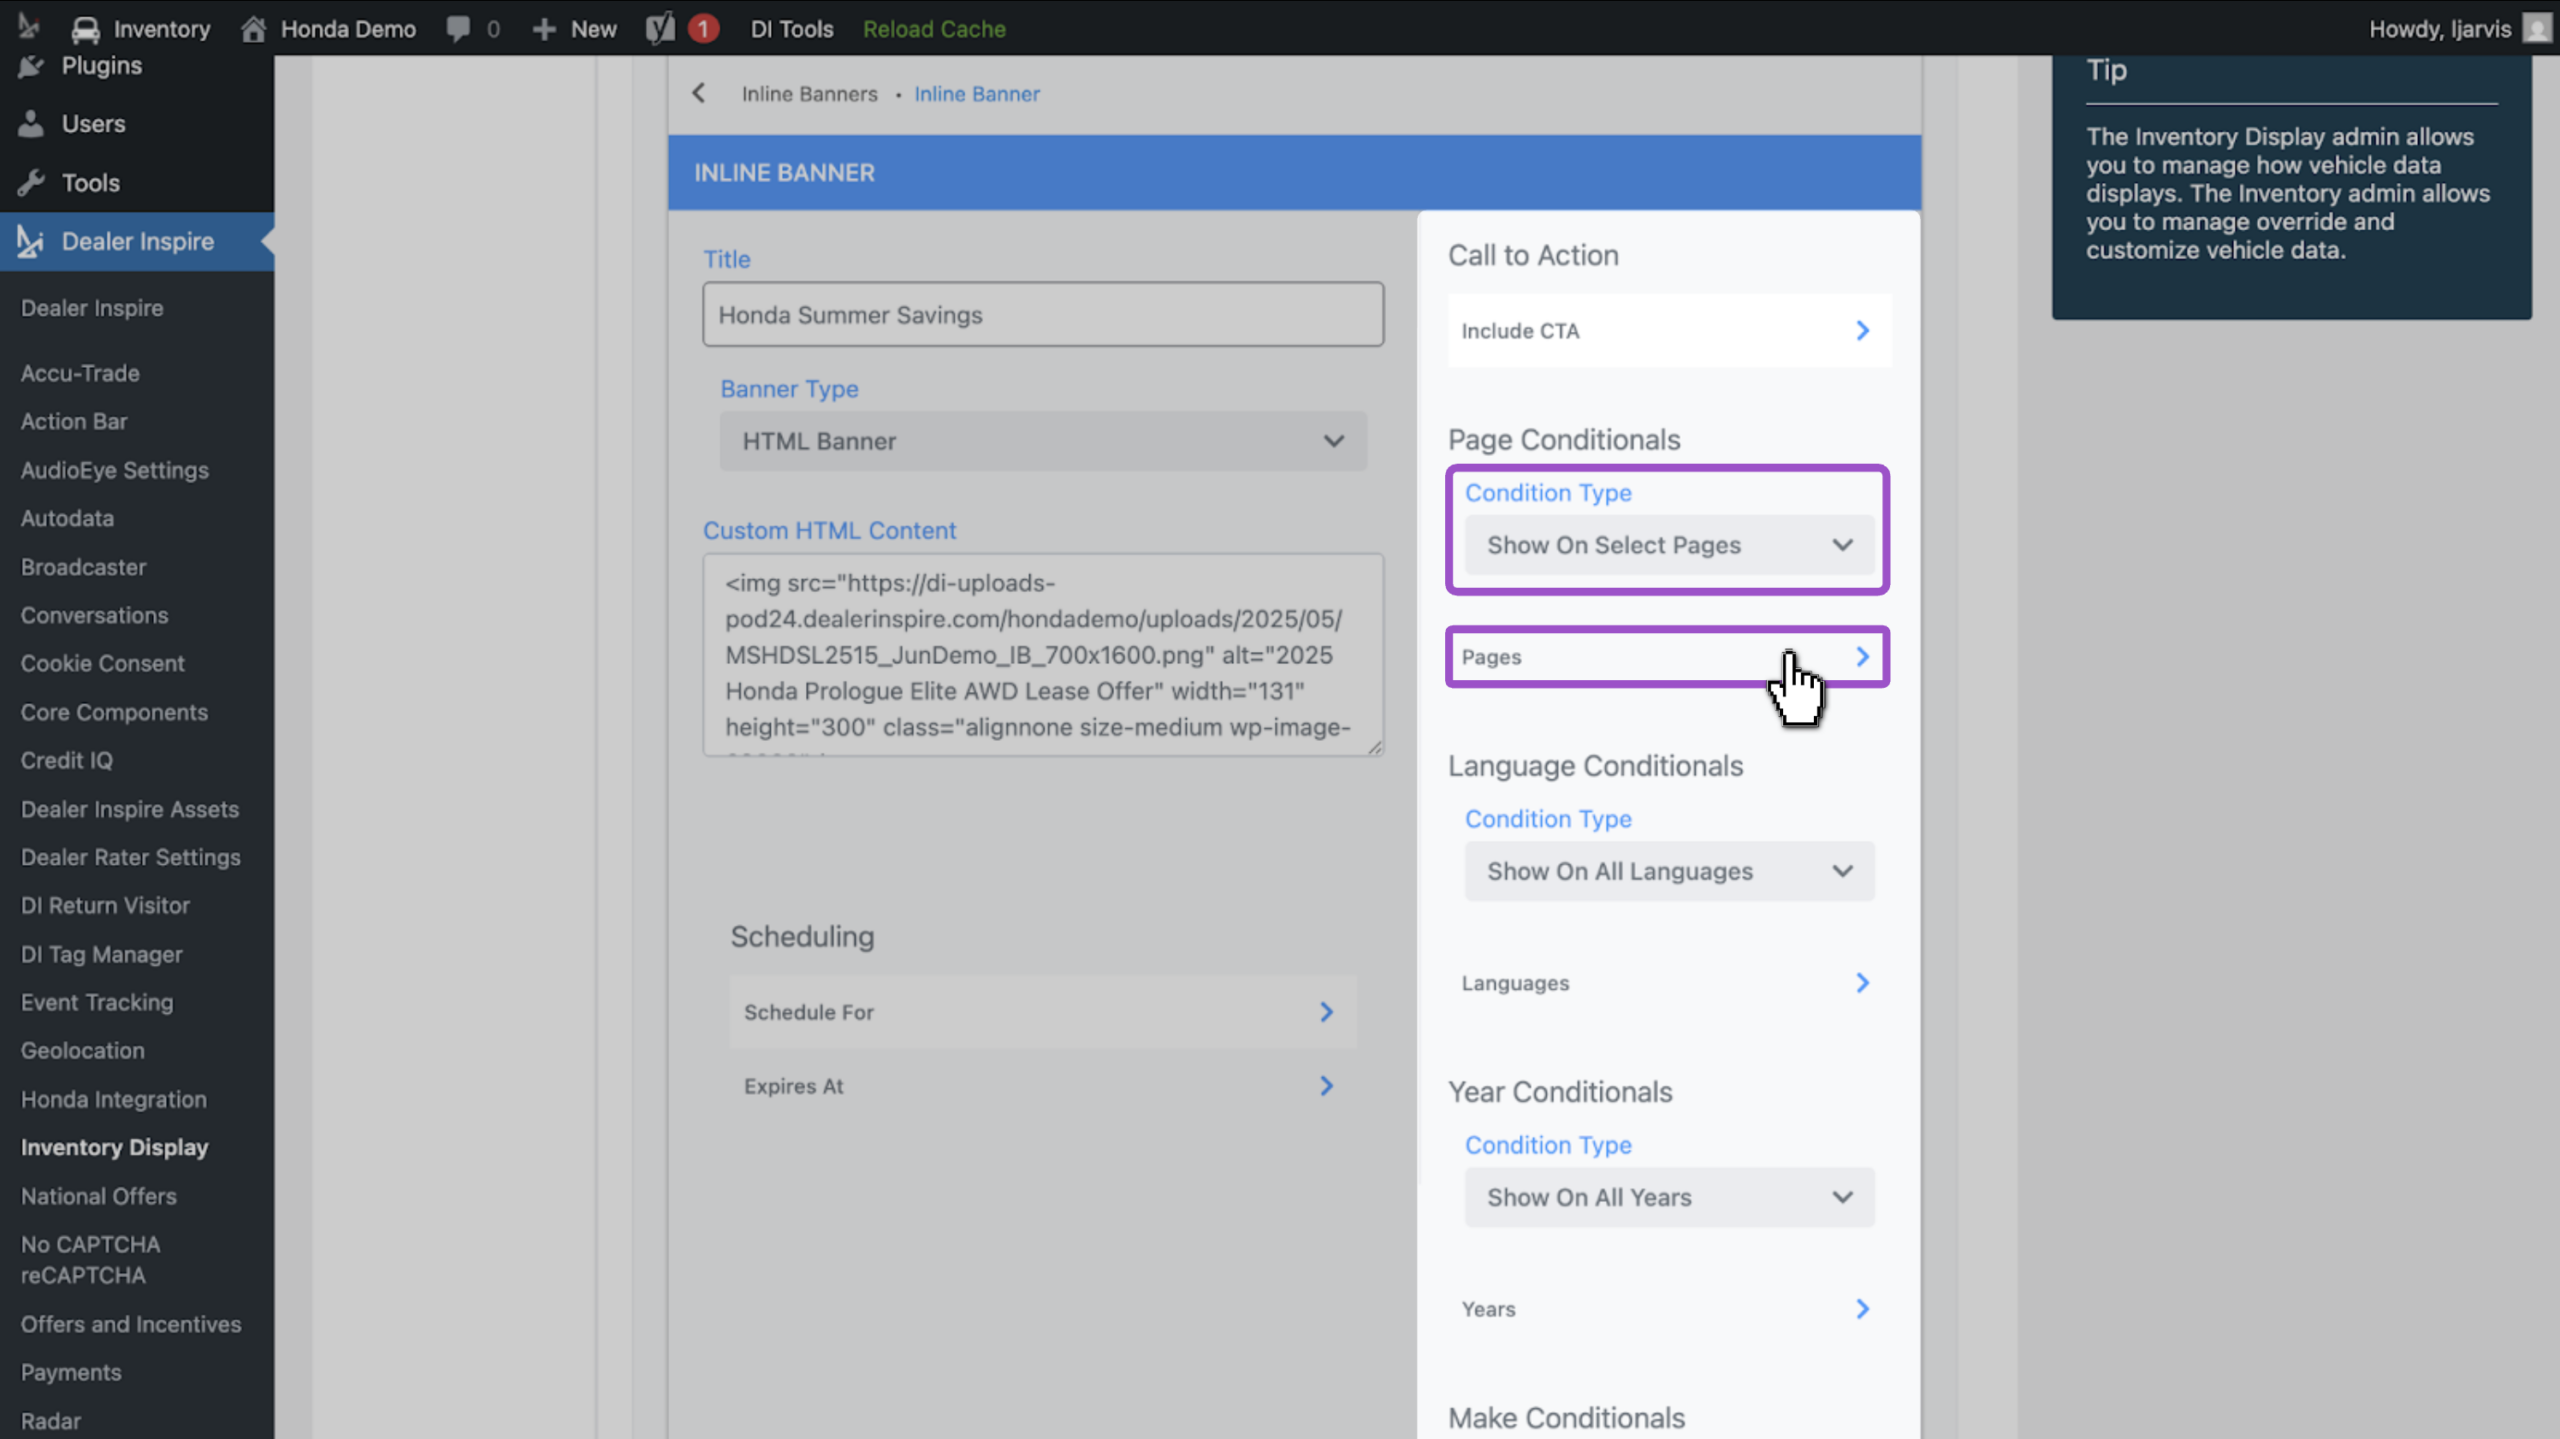
By default, your banner will display on all VRPs. If you want to target specific pages, use the page conditionals on the right side of the screen.
- Change the Condition Type dropdown to Show On Select Pages
- Click Pages
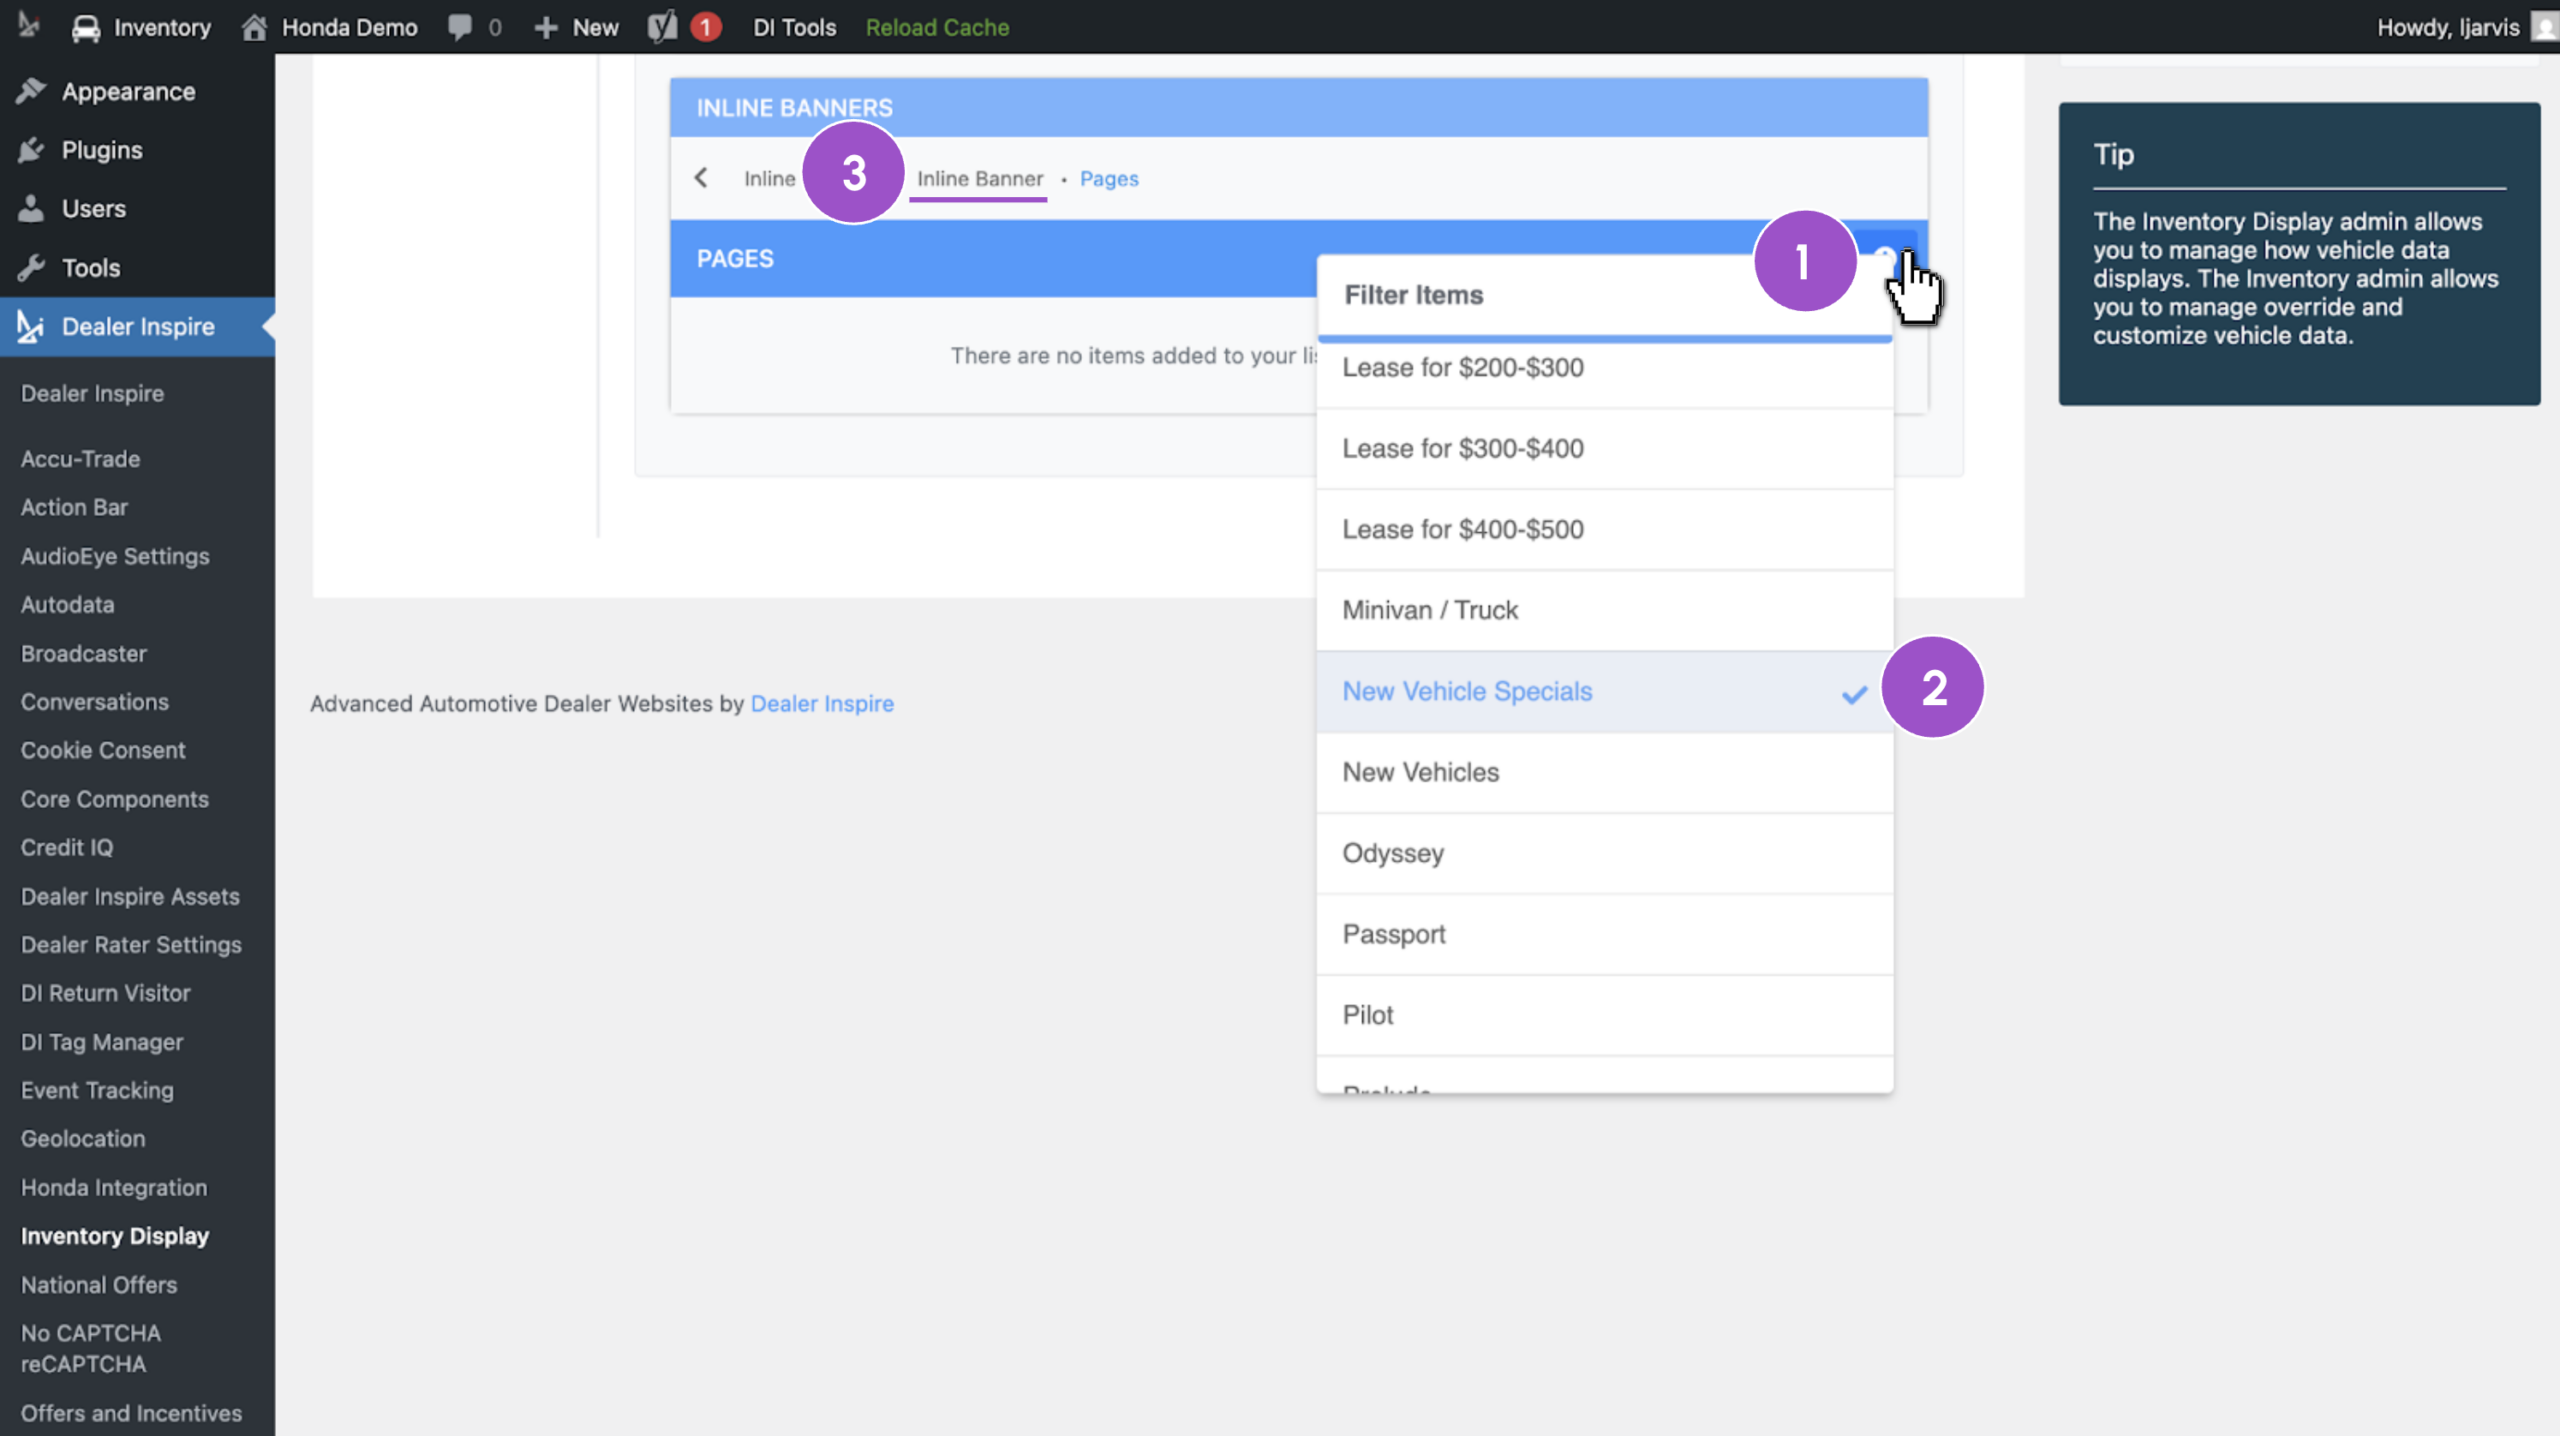
- Click the plus (+) icon
- Select the specific VRP pages where the banner should appear
- Use the breadcrumb navigation to return to the banner editing screen
Other conditionals you can apply include:
- Language
- Vehicle Year, Make, Model, Trim
- Vehicle Type, Fuel Type, Body Type
Note: Skip the Call to Action section. The custom URL you added to your image in the media library already makes the banner clickable, so a separate CTA isn’t required.
If you do want to add a CTA button to your banner:
- Click Include CTA
- Click the + icon and select URL CTA
- Choose Text as your button style
- Enter your button label (e.g., “View Inventory”) and paste in the destination URL
- Toggle Open in a new tab ON
7Save and publish your banner
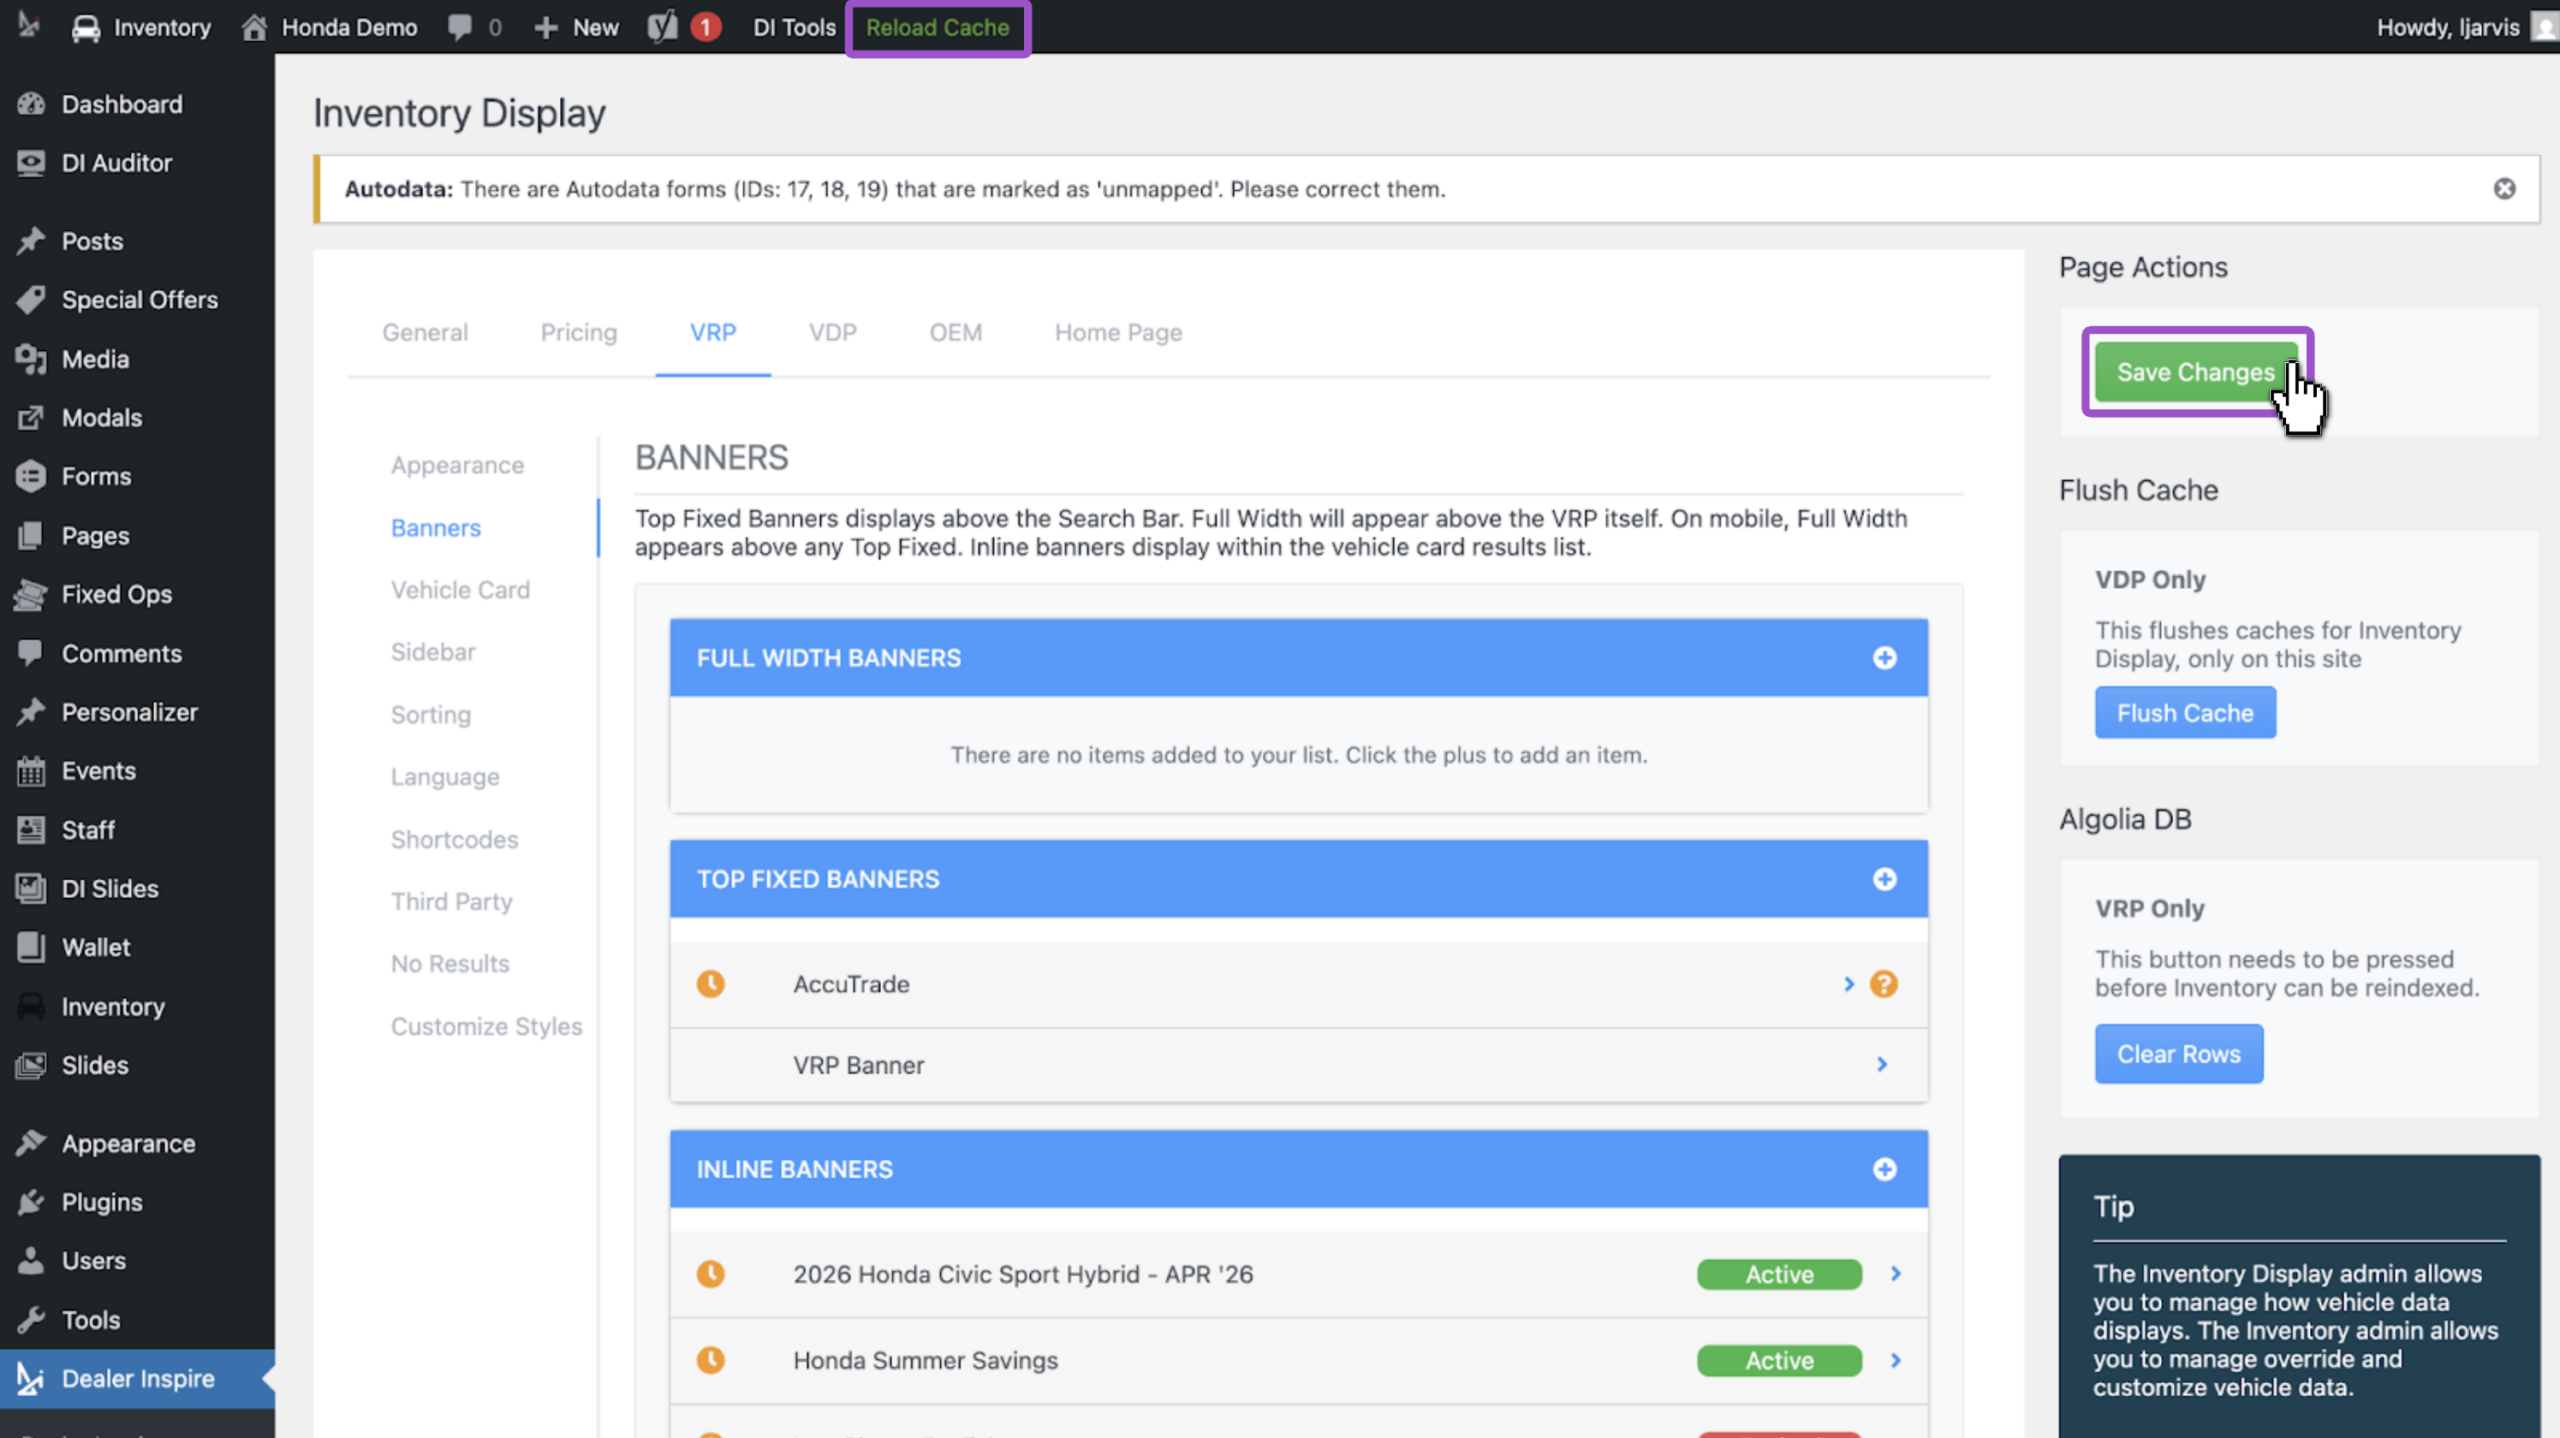
- Scroll to the top of the page and click Save Changes
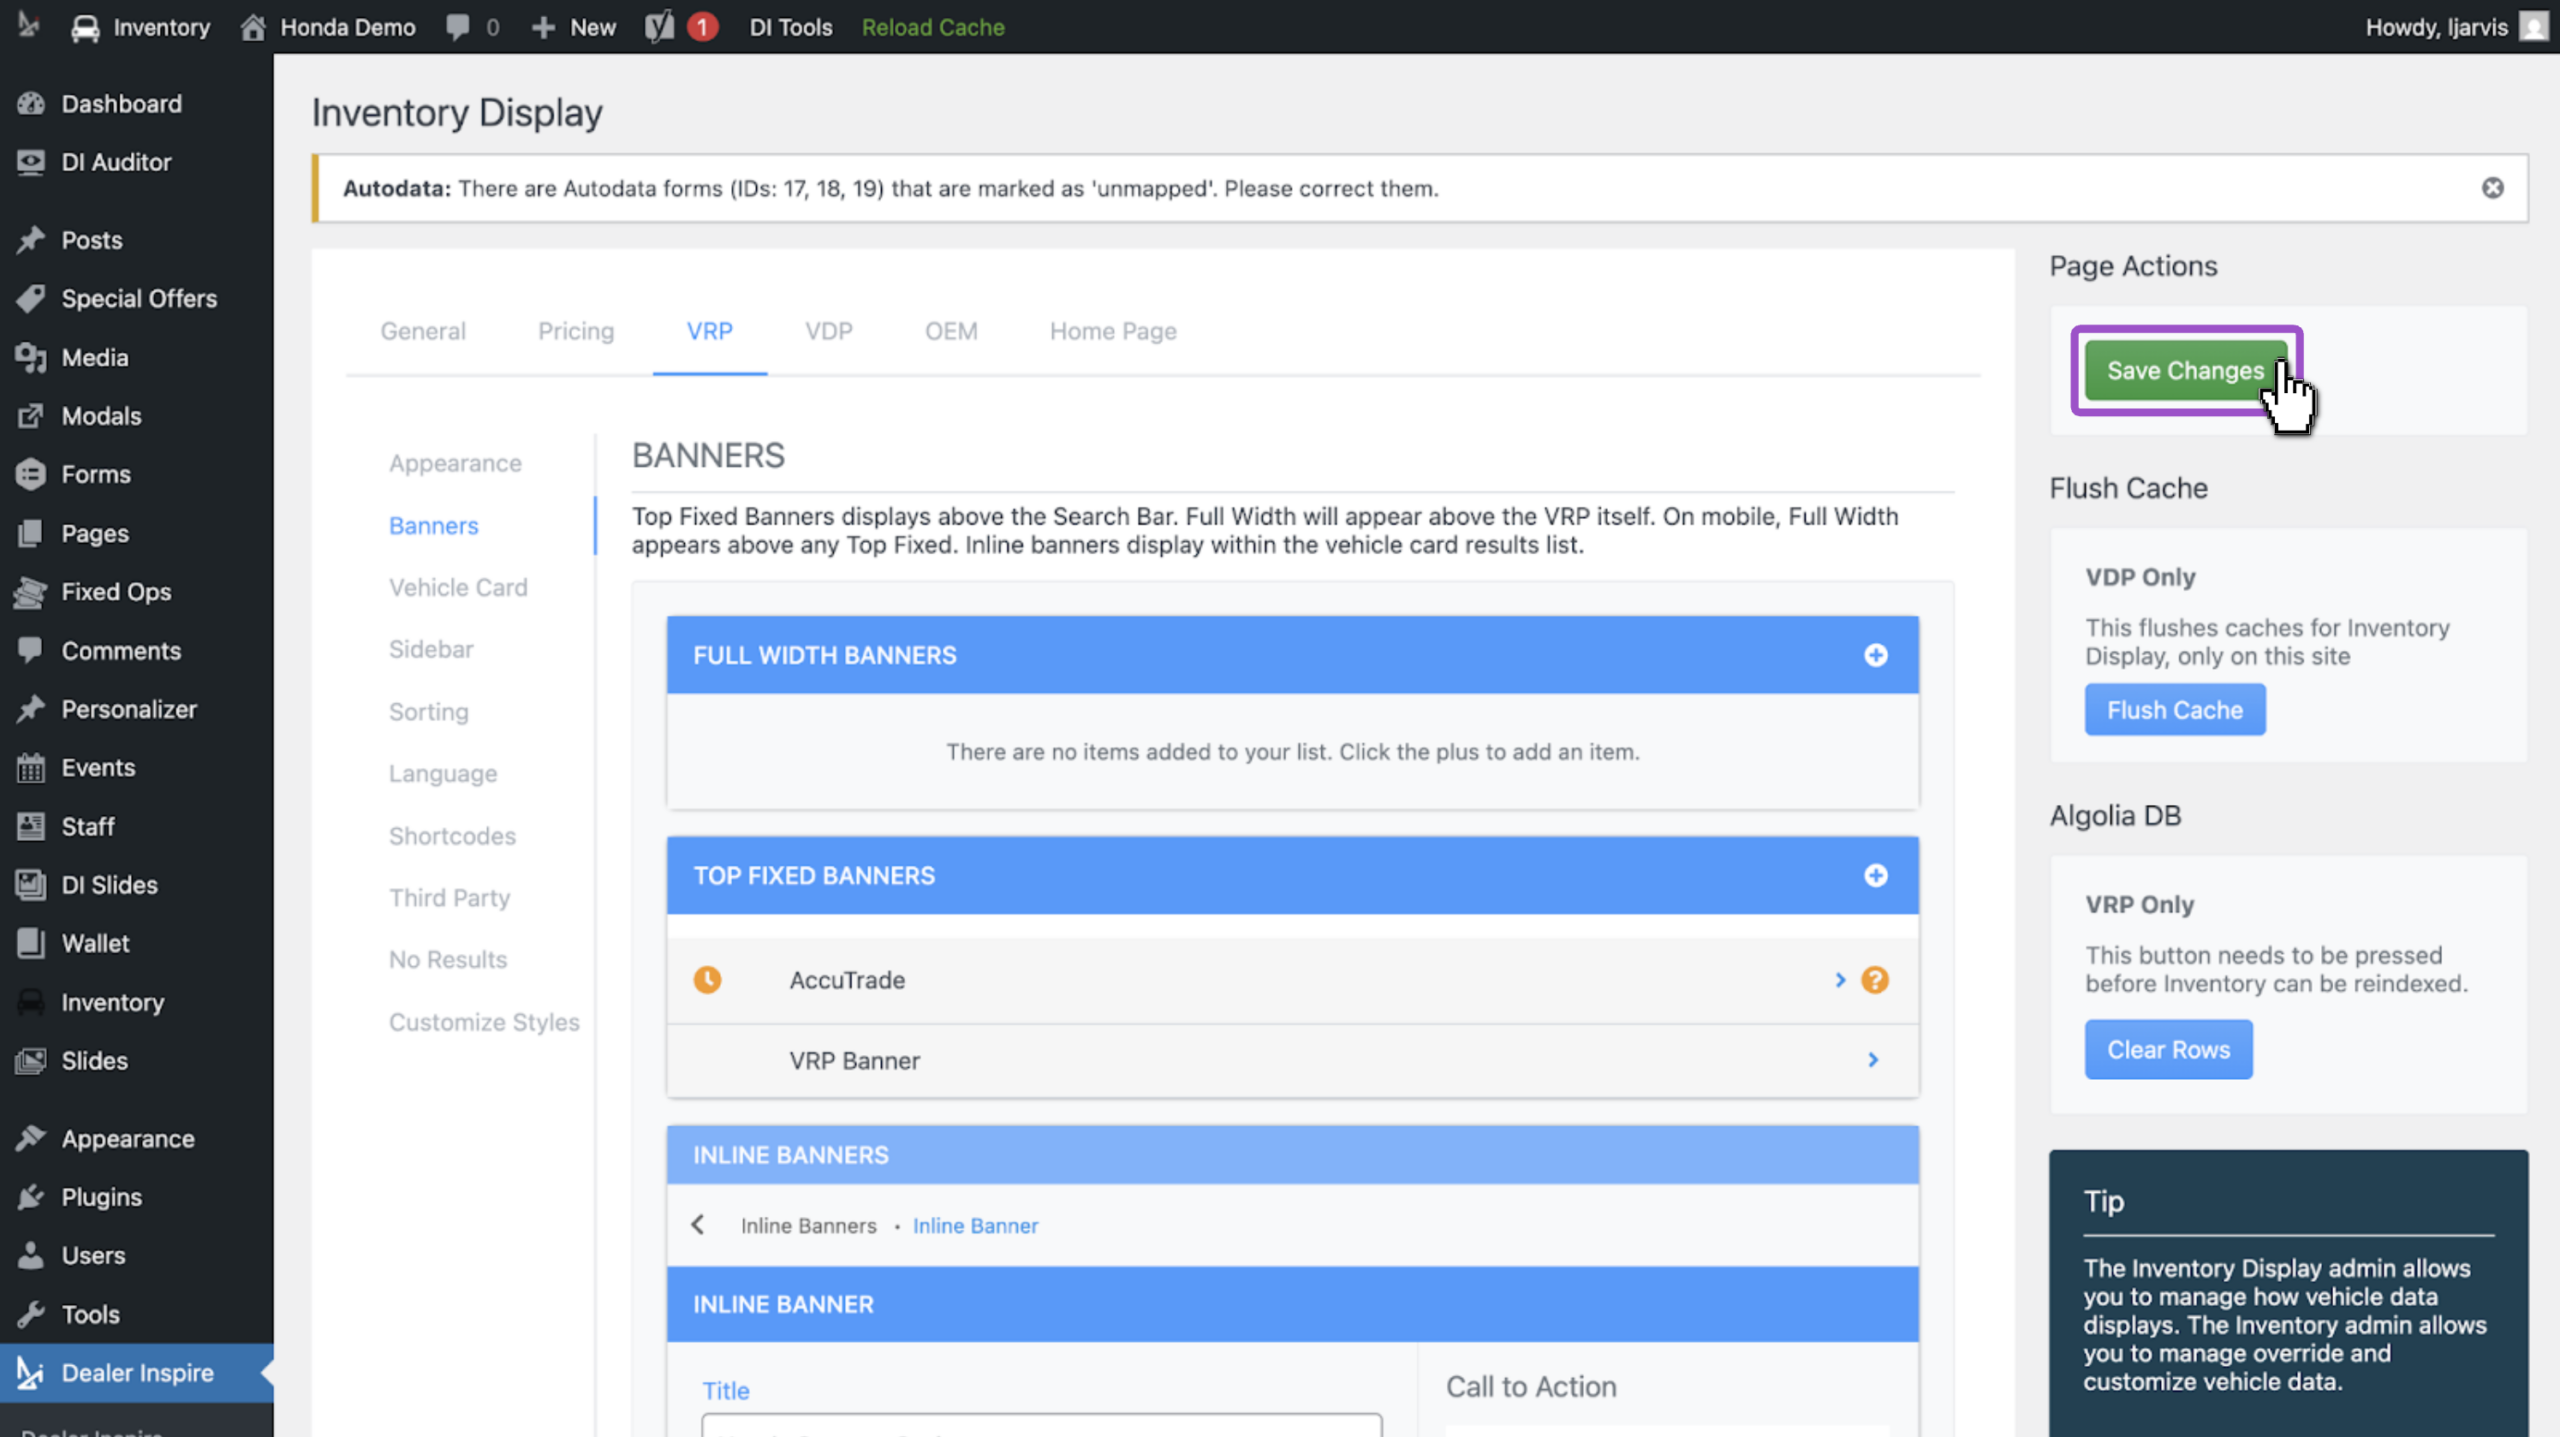
- Check the banner list to confirm your new banner appears at the bottom
- If other active banners exist, reorder so your active banner(s) appear in the top three
- Each VRP can display a maximum of 3 inline banners at a time
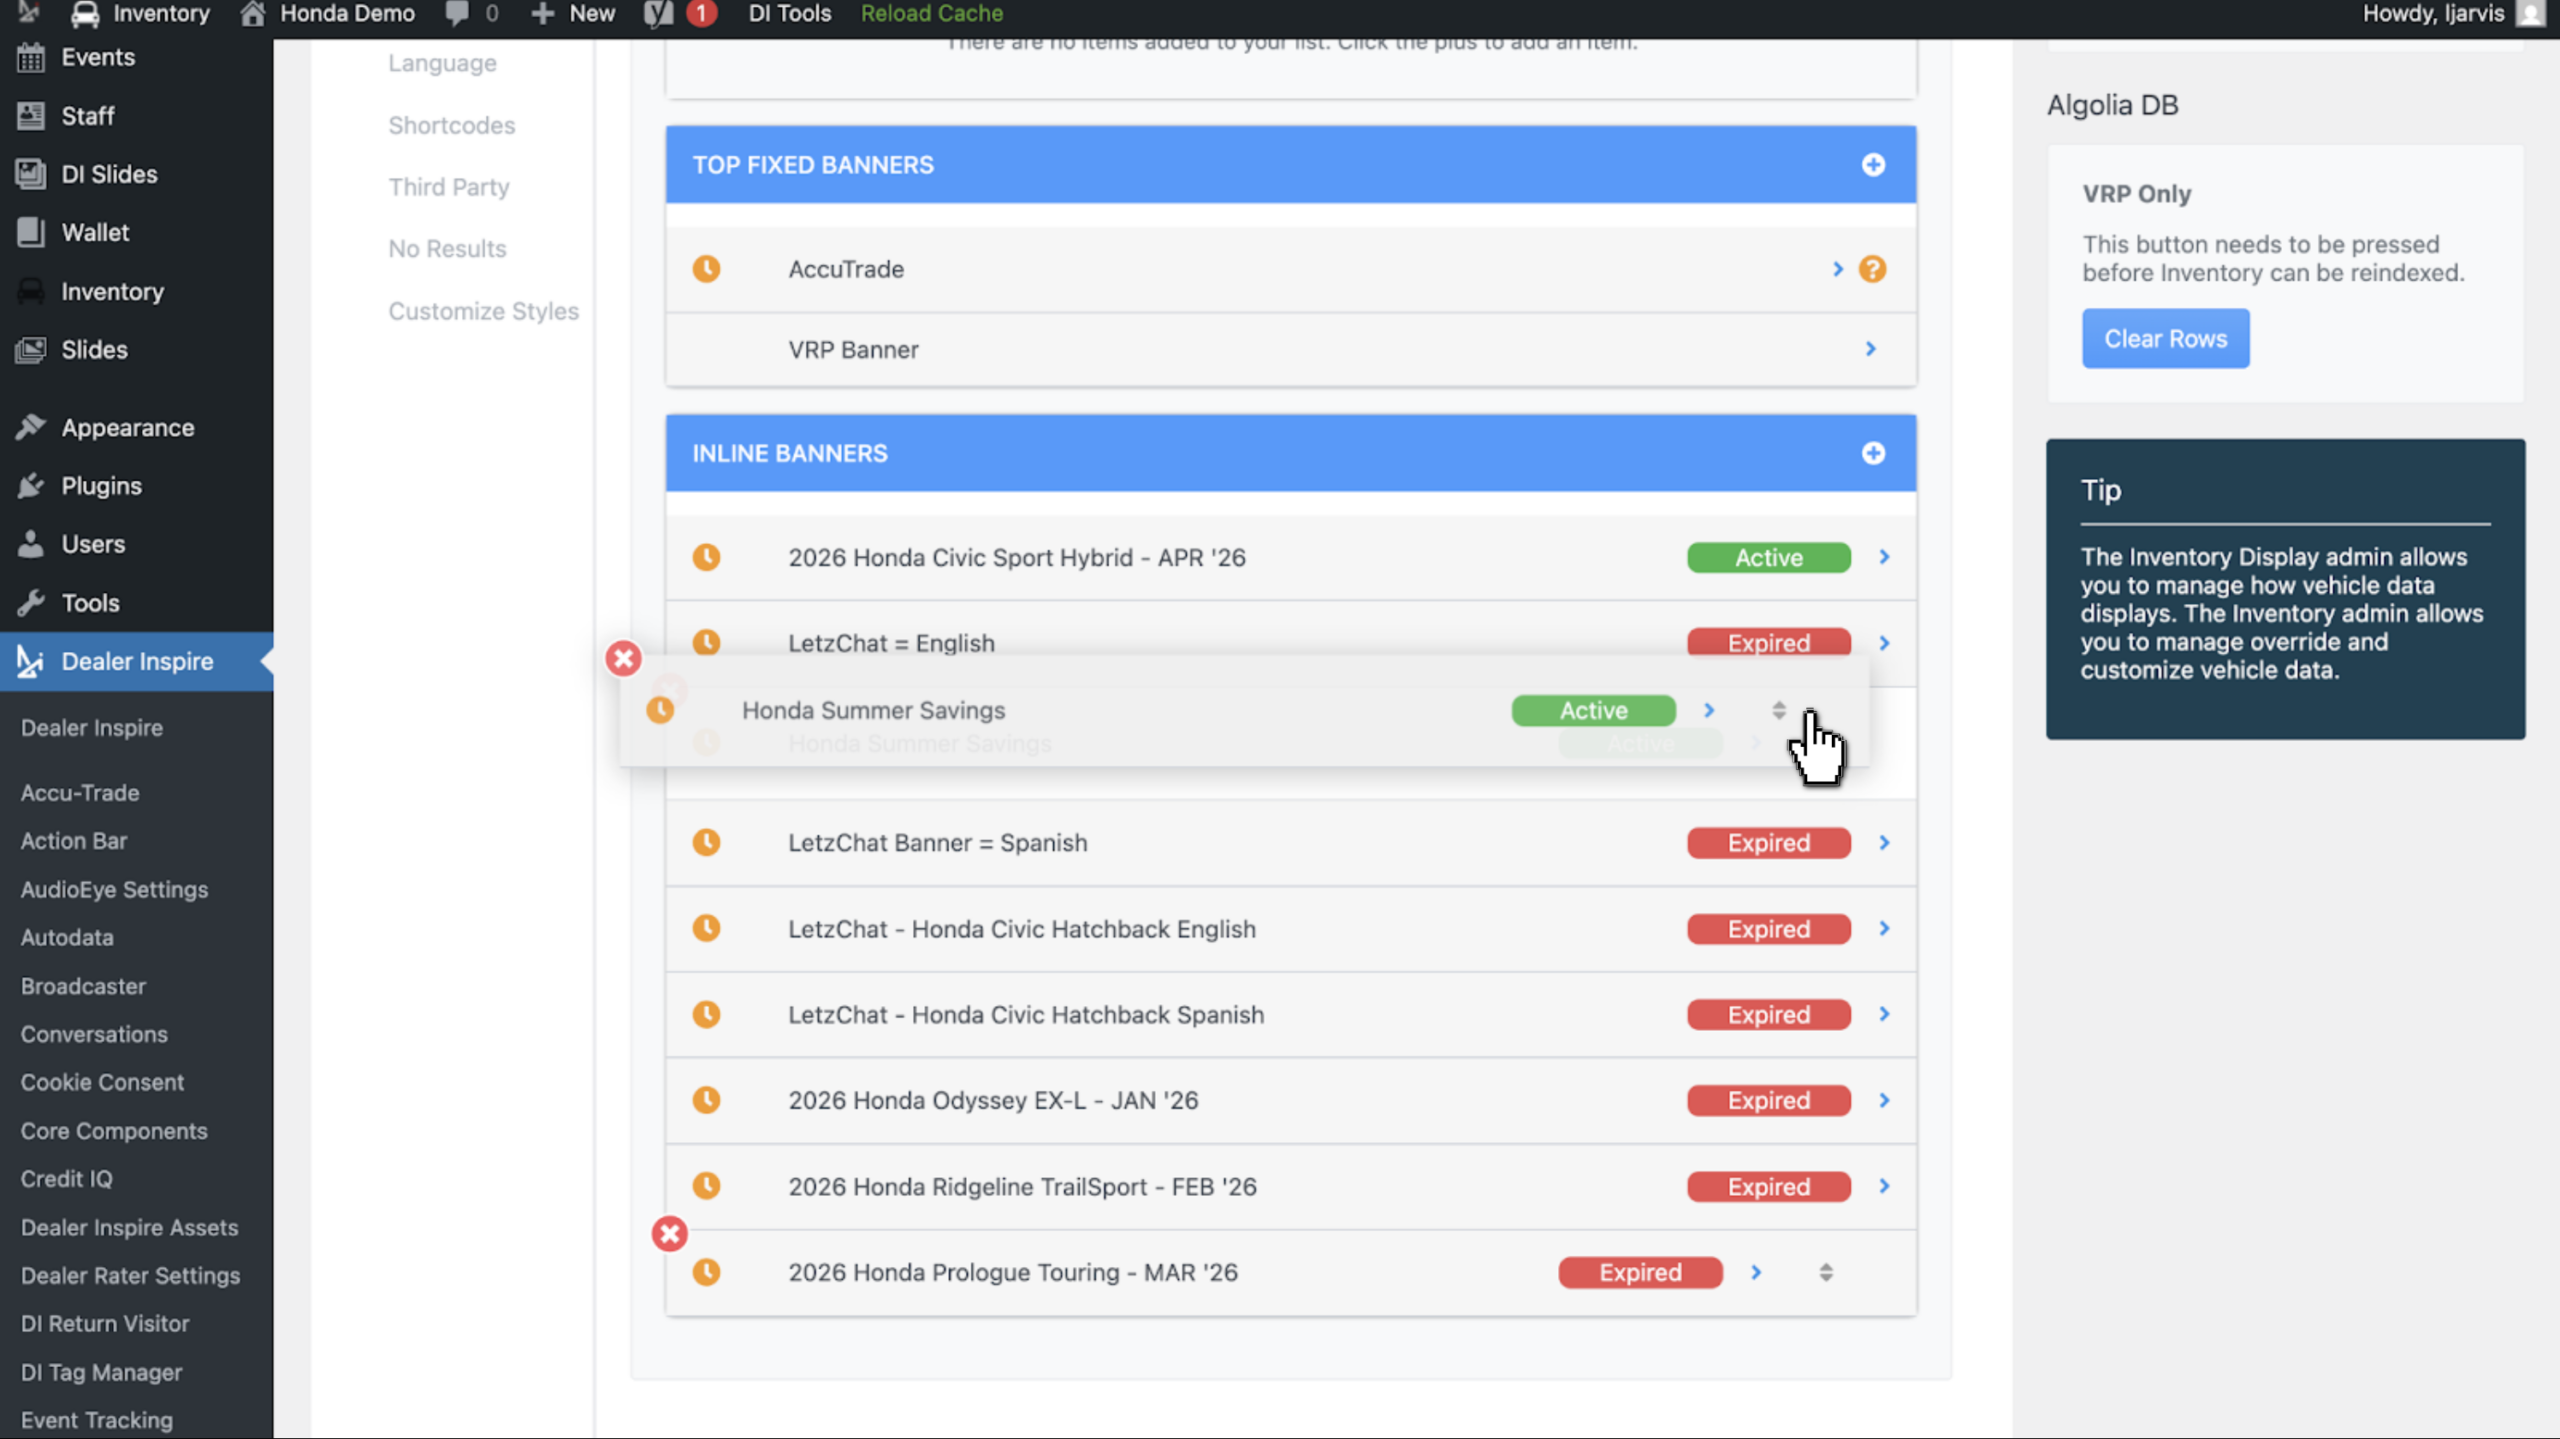
- Click Save Changes again to lock in the banner order
- Click Reload Cache to push your banner live on the front end
8 Verify on the front end
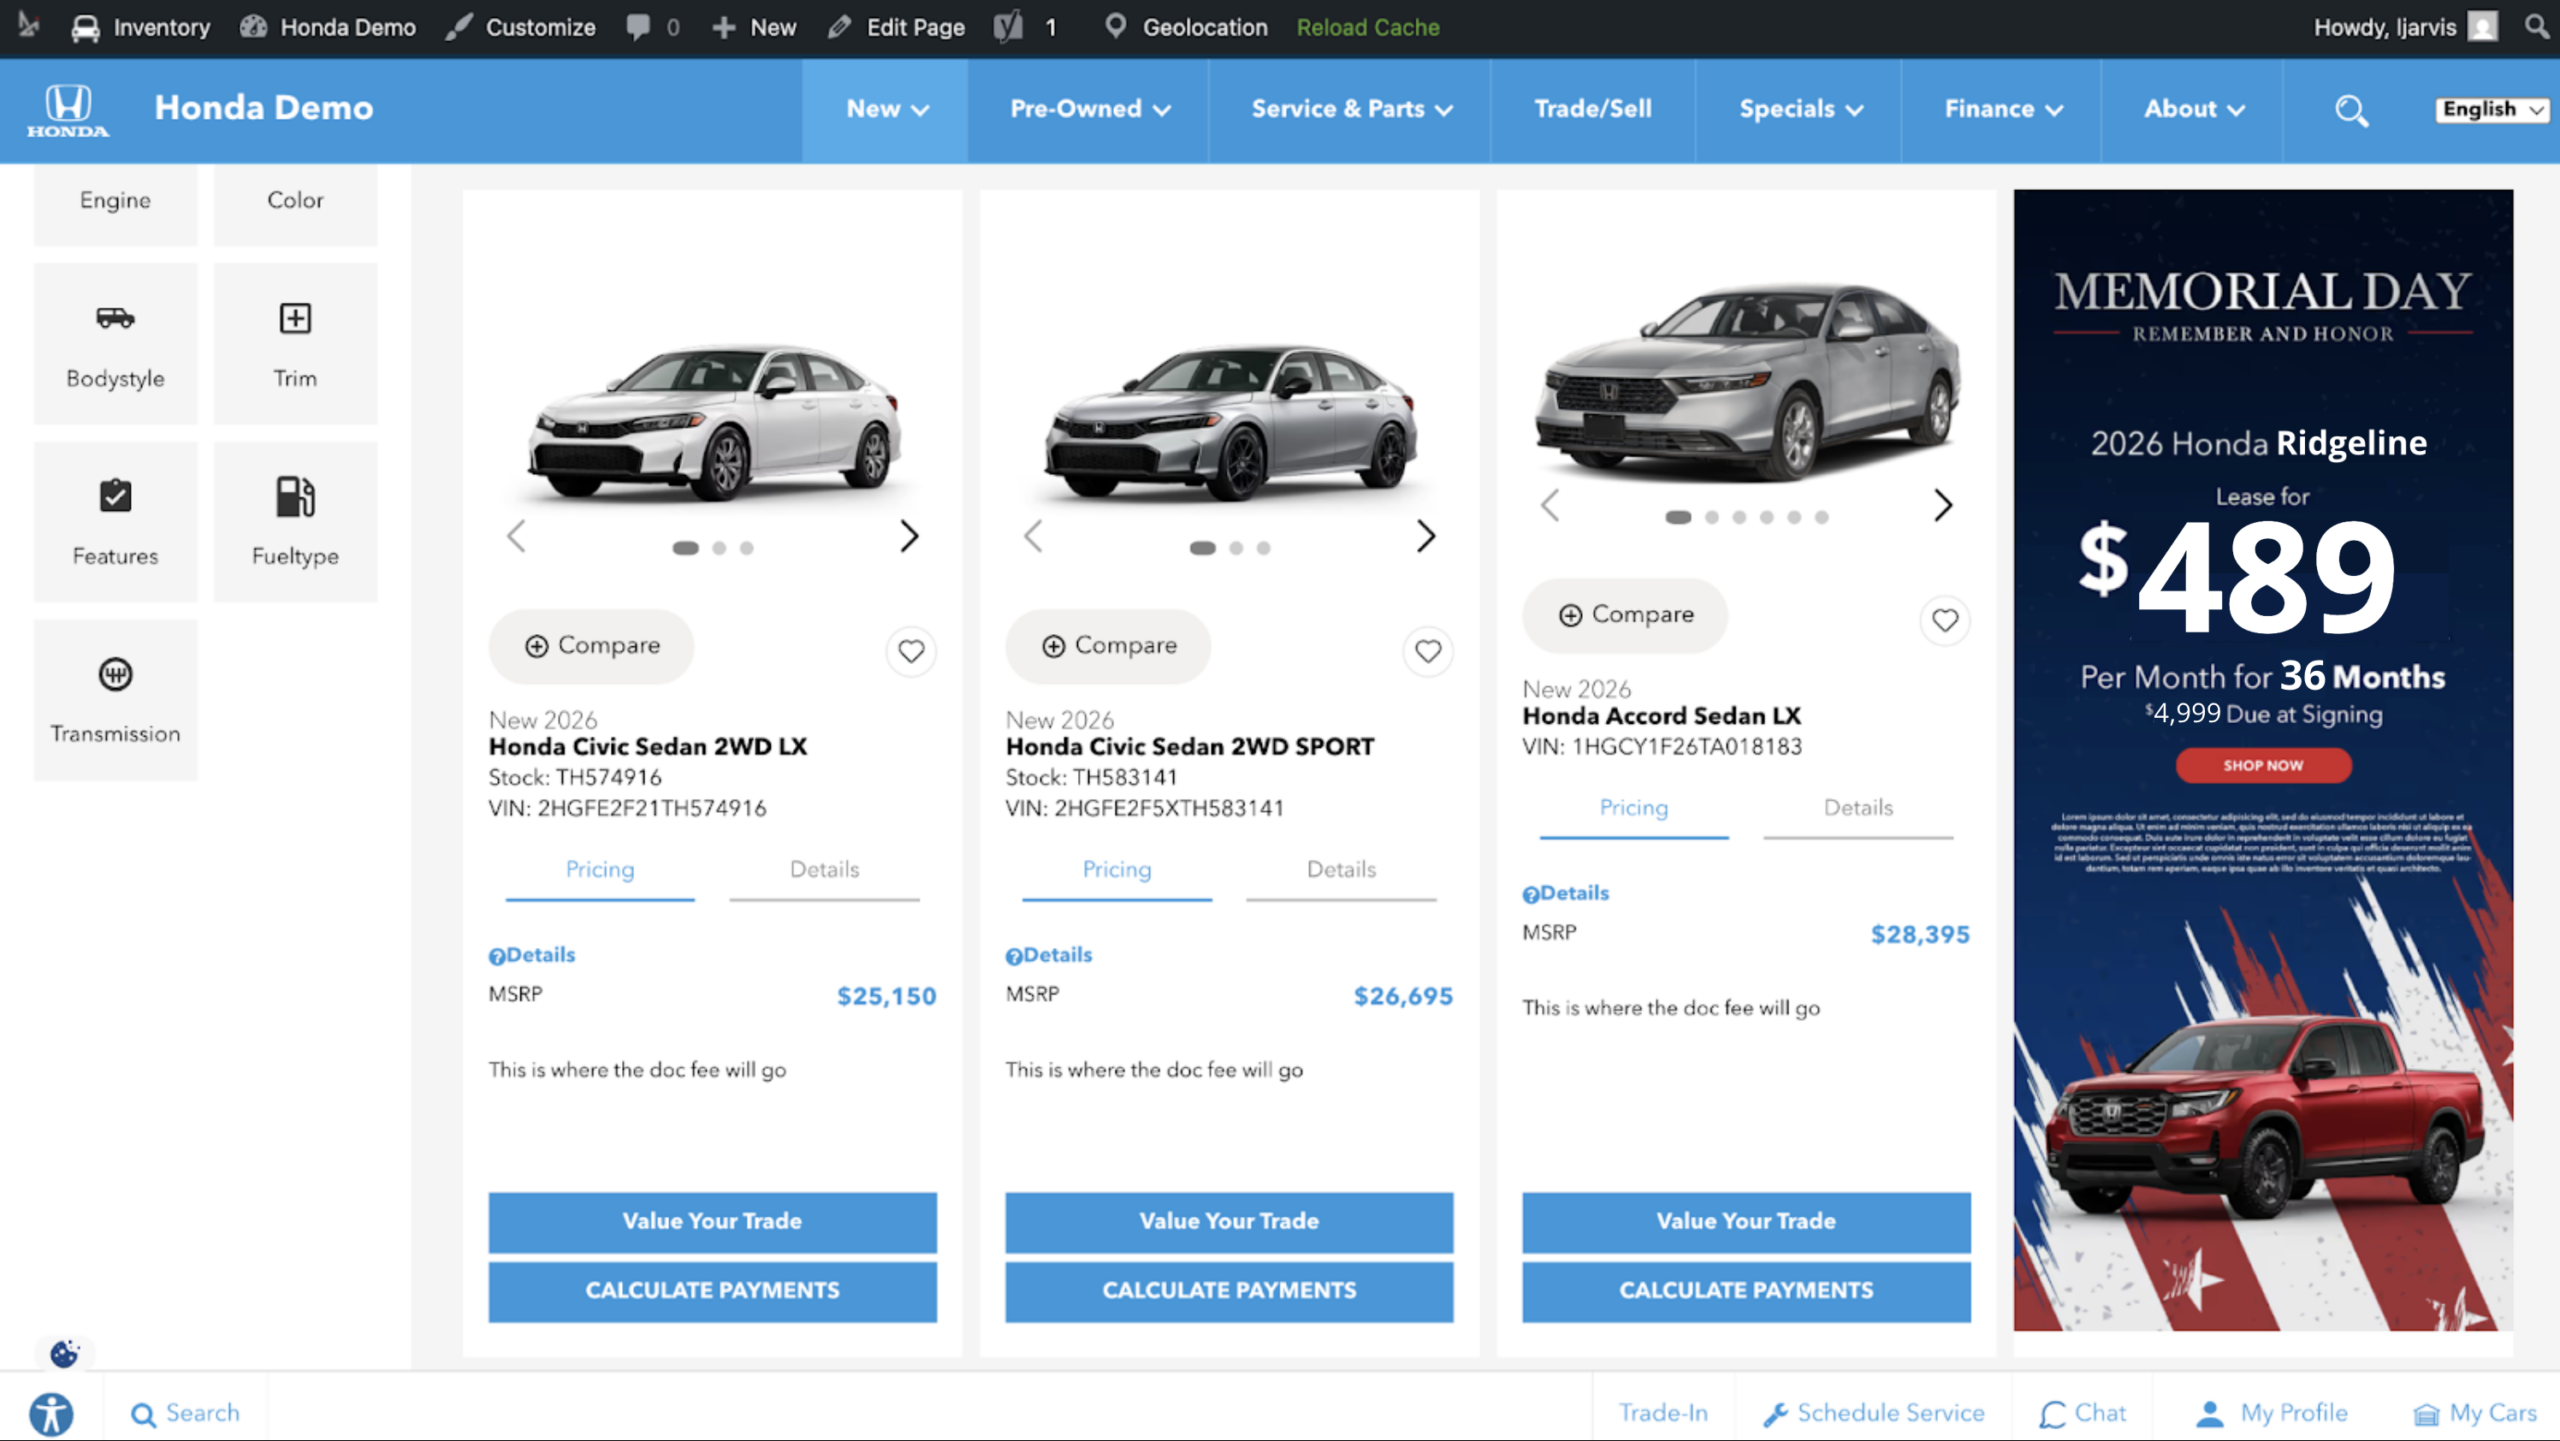
Confirm the banner displays correctly on your site.
- Navigate to the VRP where the banner is set to appear
- Tip: Hit reload cache at the top of your screen or open an incognito window to ensure your changes display immediately
- Tip: Hit reload cache at the top of your screen or open an incognito window to ensure your changes display immediately
- Check that the image renders at the correct size and in the correct position
- Verify the link works: click the banner to confirm it routes to the correct page
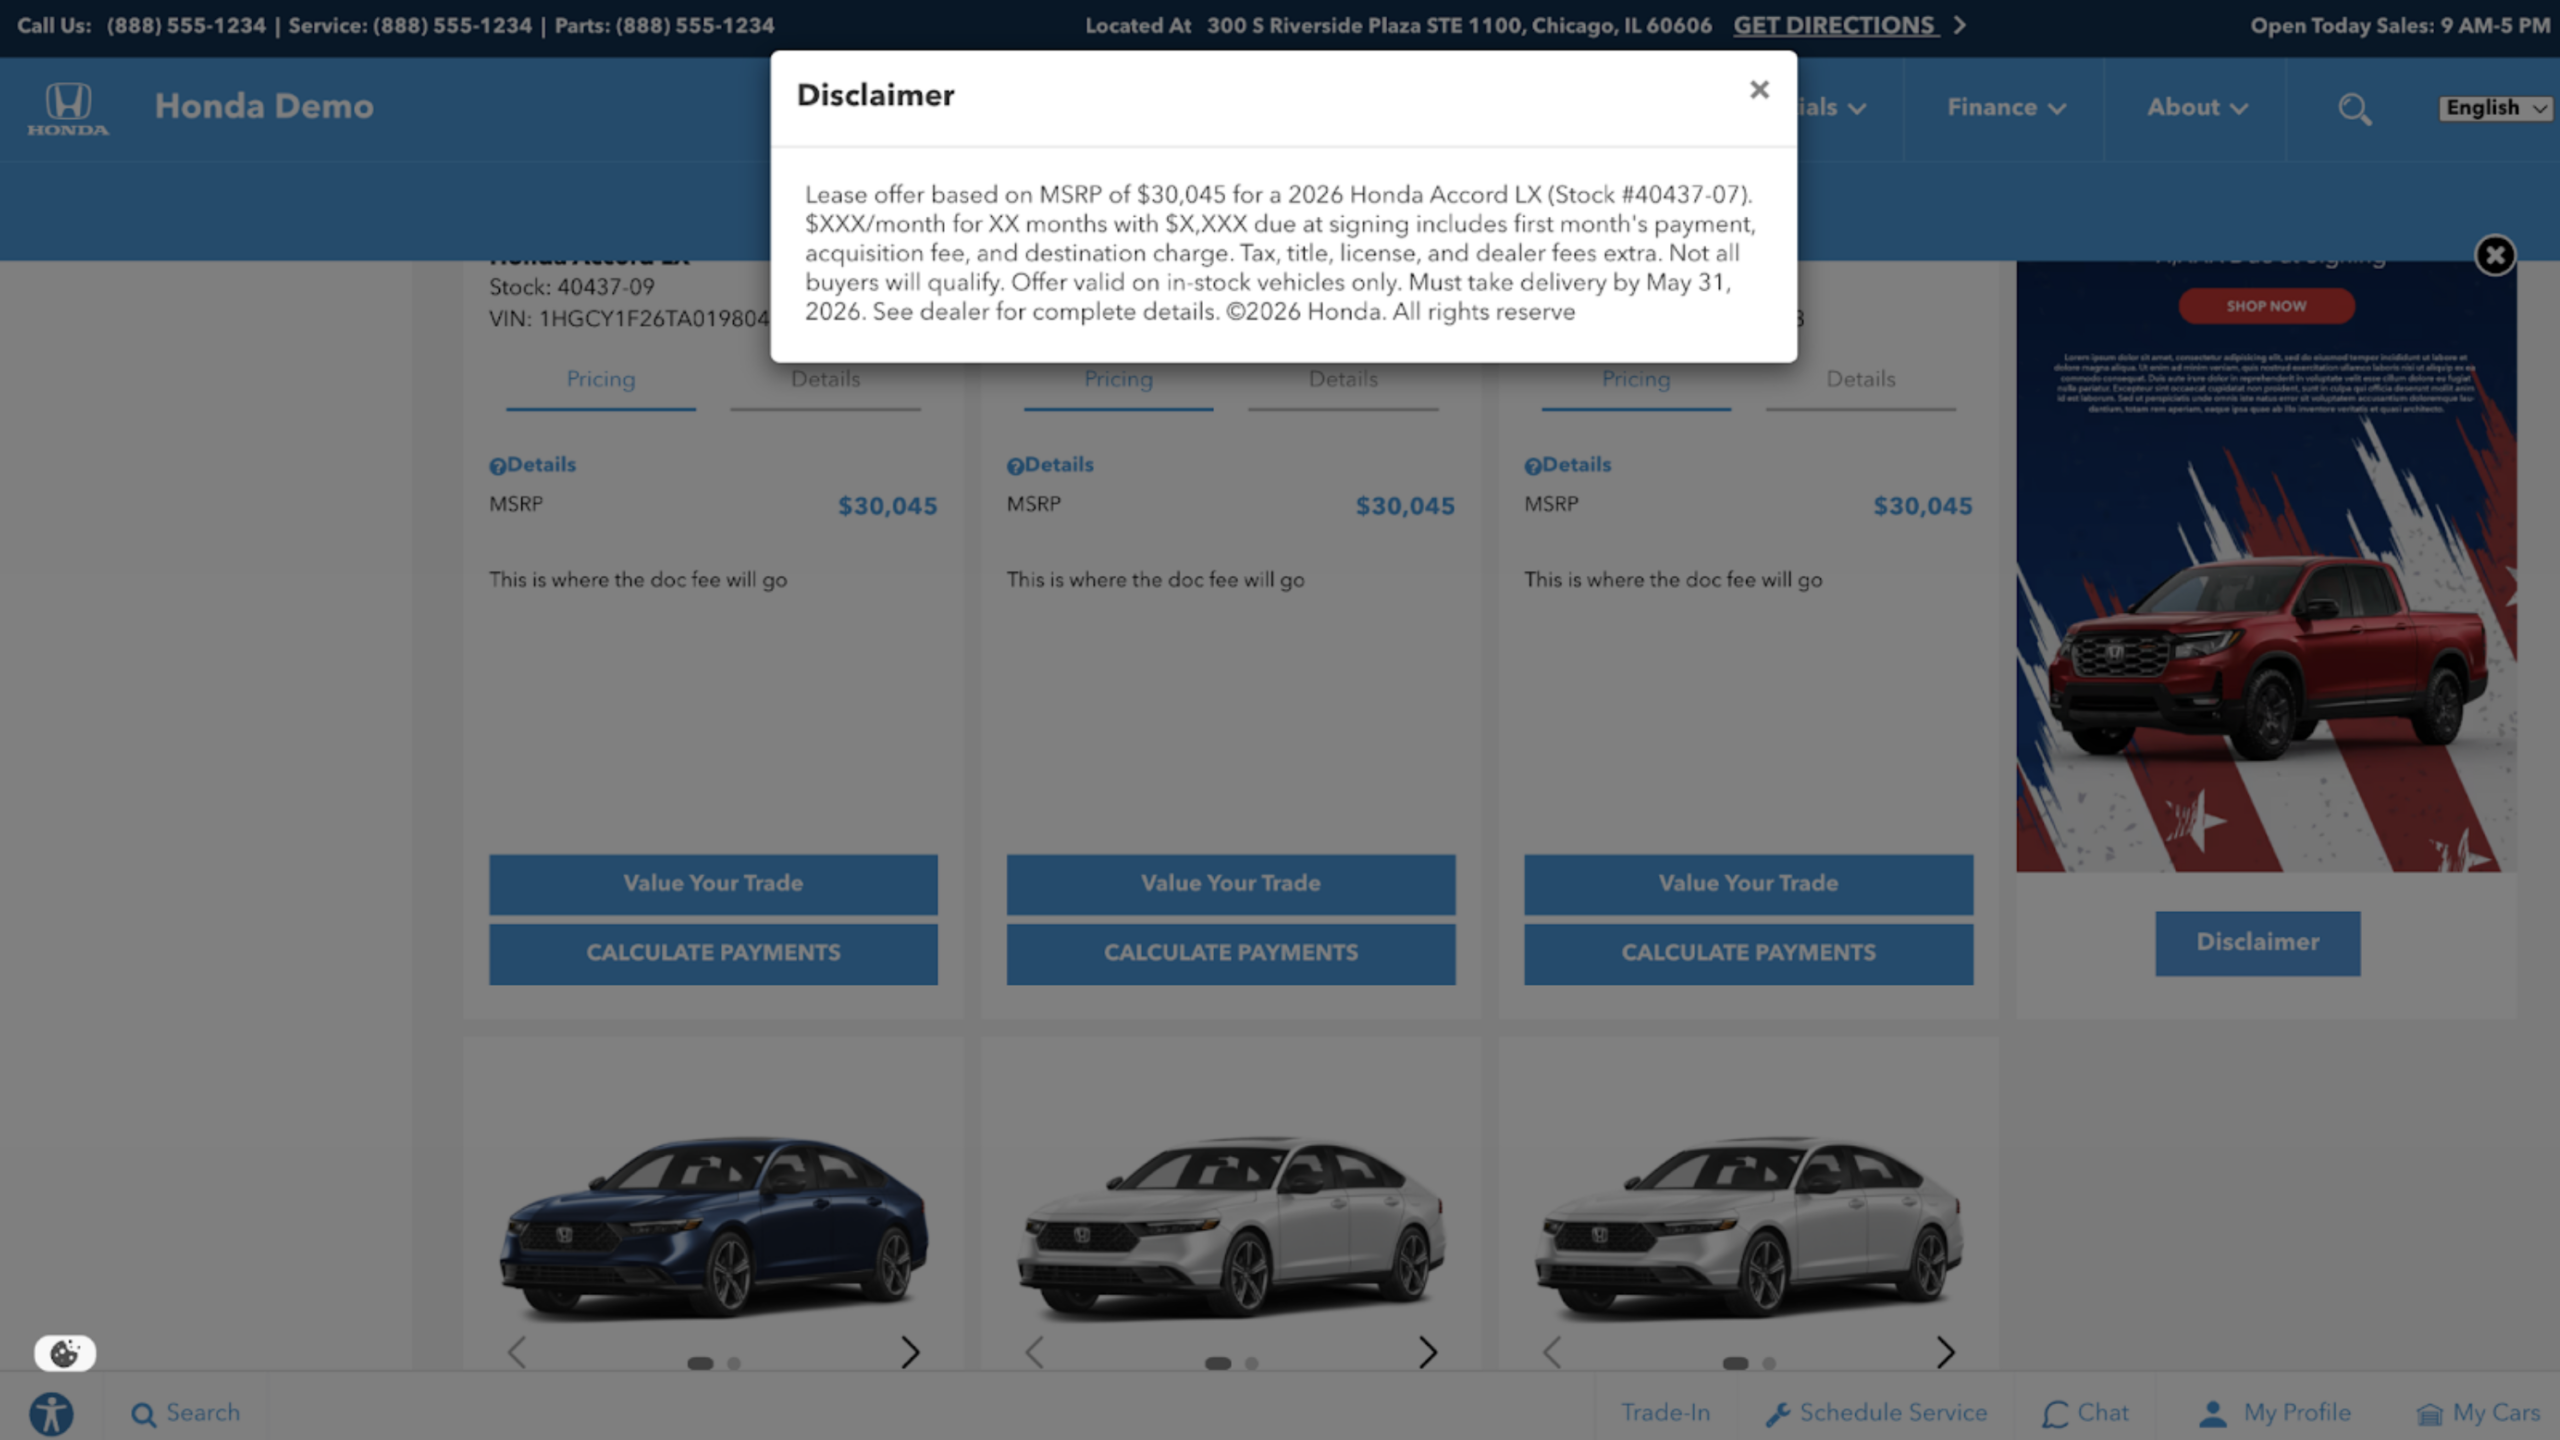
How it looks without a disclaimer
How it looks with a disclaimer
- The disclaimer button will appear at the bottom of the banner
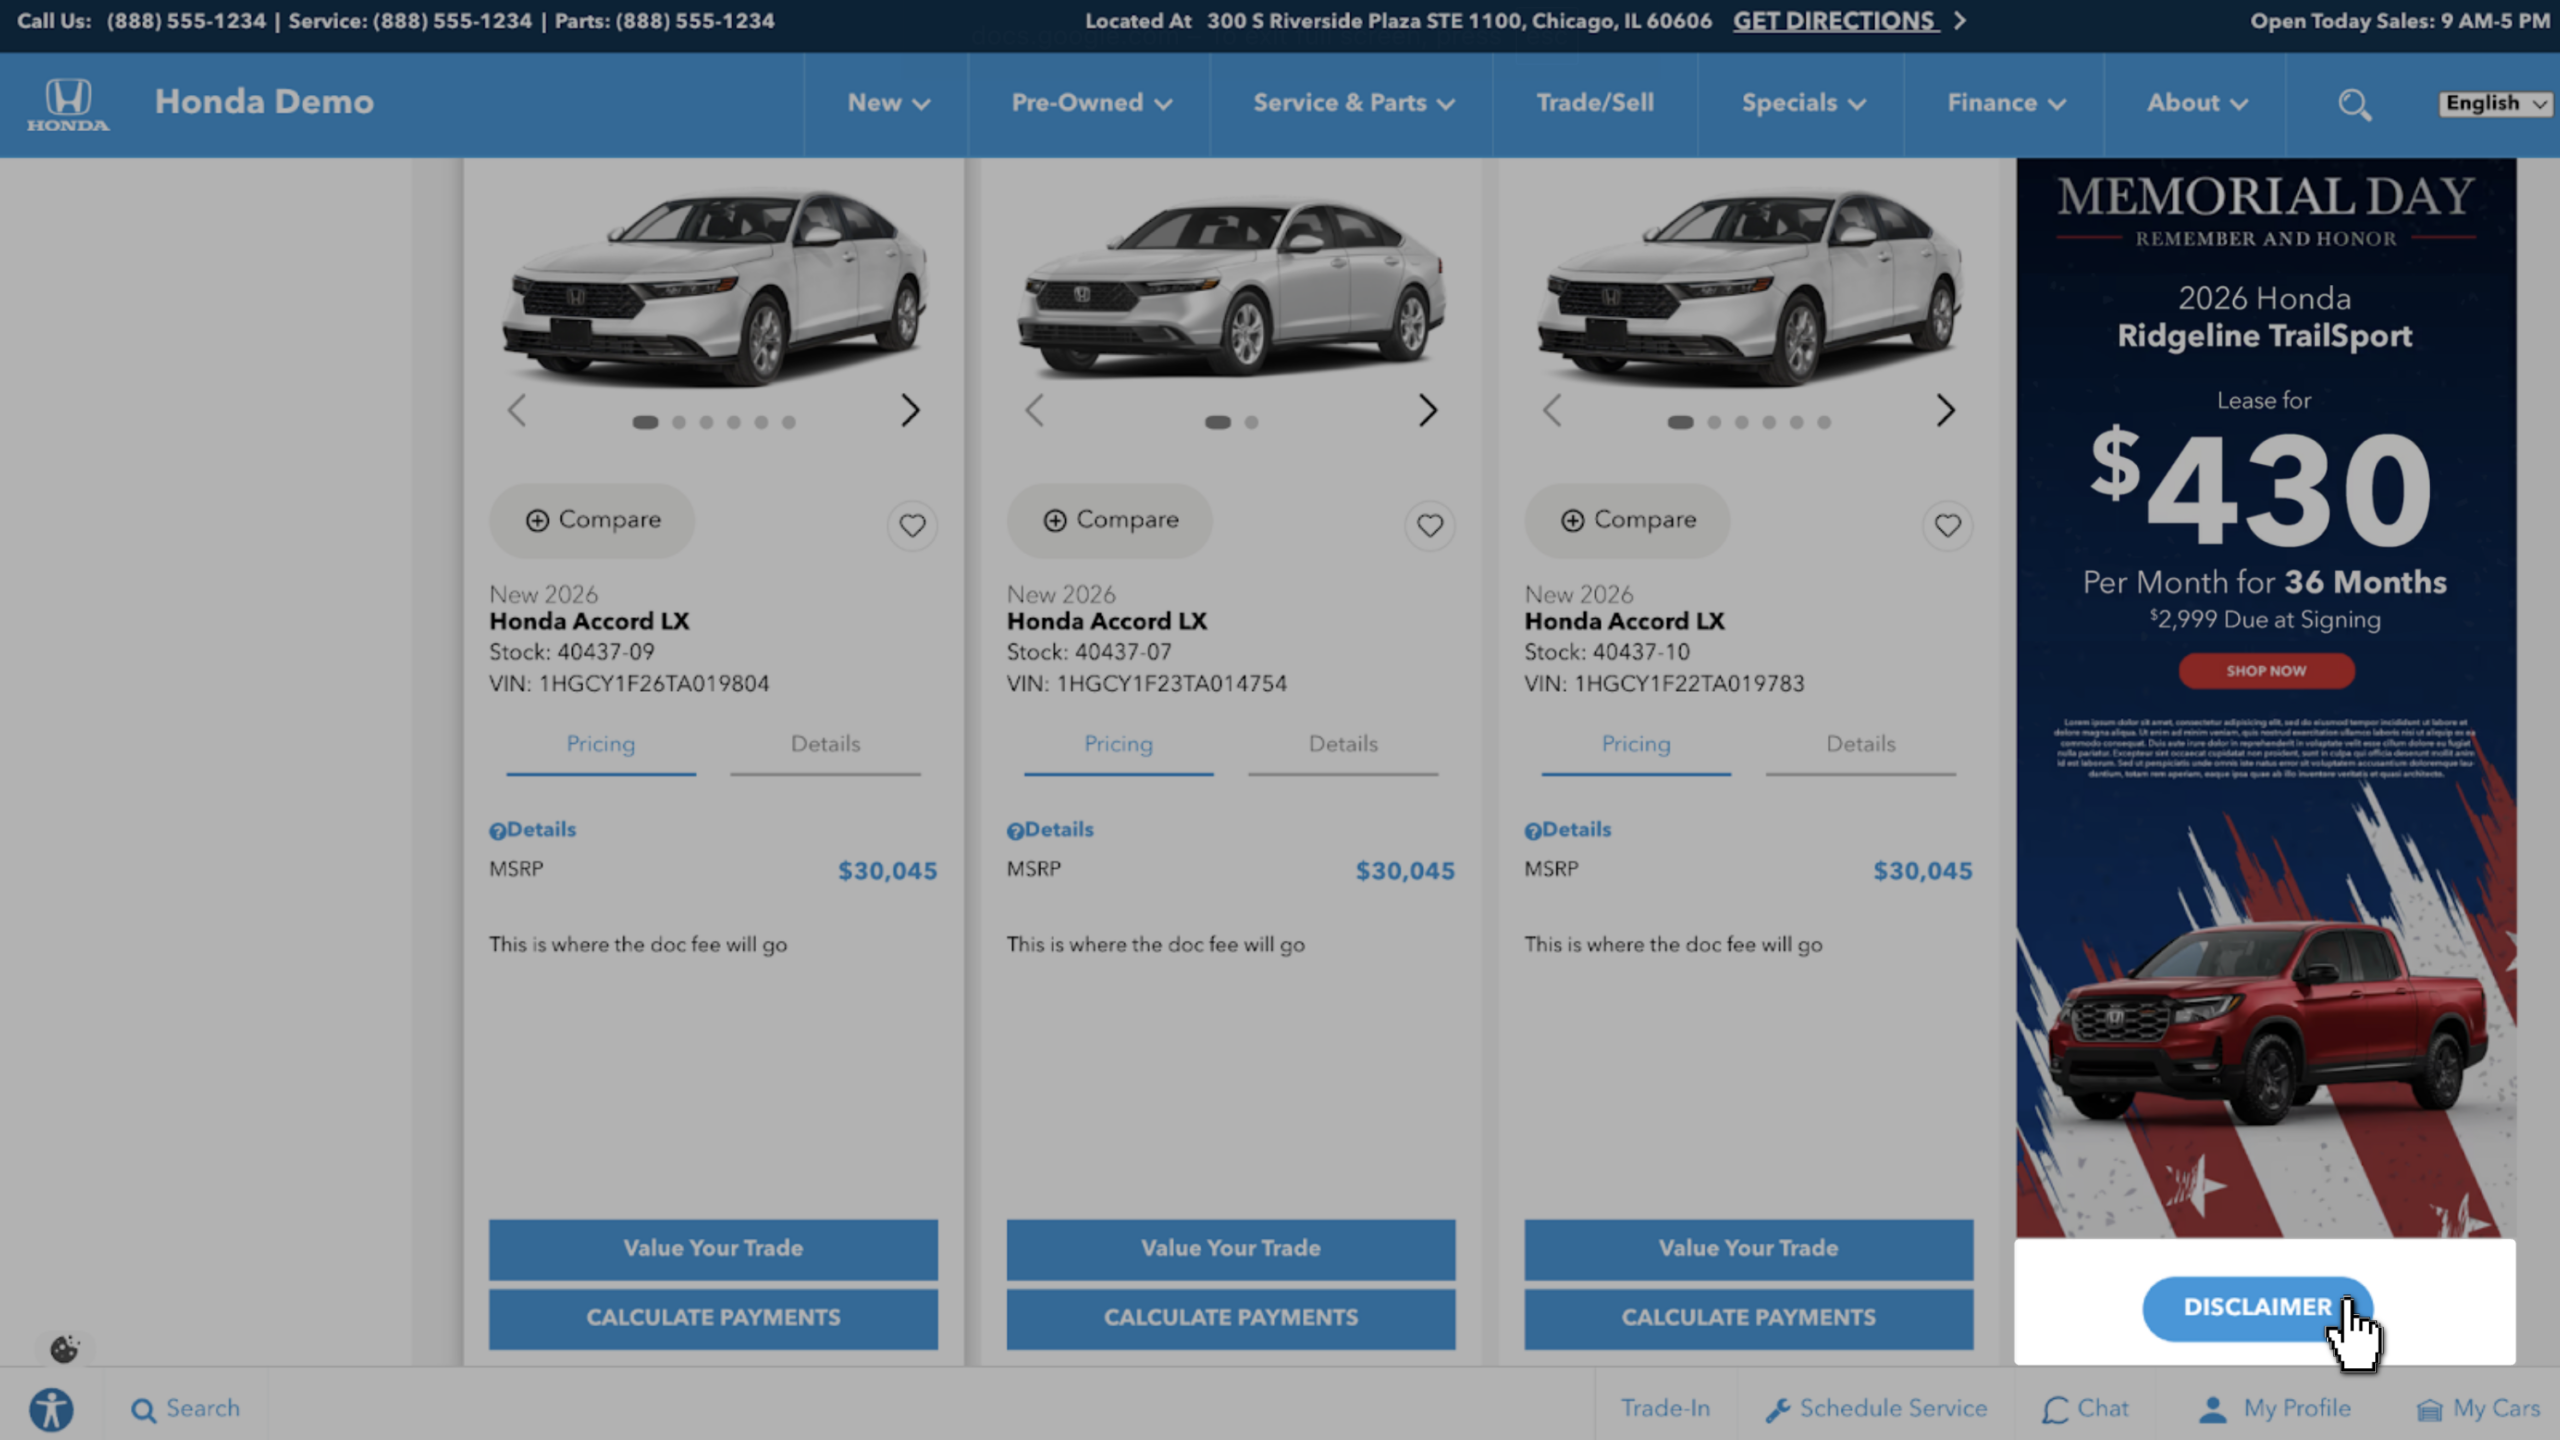
- Click it to verify your disclaimer text displays as expected