Photo best practices for your Cars.com listings
Photos are the first thing shoppers see, and they often decide whether someone opens your listing or keeps scrolling. A complete, consistent photo set builds trust before a shopper ever contacts you.
In this article, you will learn how to prepare your vehicle, capture the 32 photos that give shoppers the full picture, add extra photos to used listings, choose a strong lead photo, and size your photos so they display cleanly.
Before you shoot
- Wash the exterior and clean the interior
- Remove personal items, price stickers, and loose papers from the cabin
- Park in open shade or on an overcast day to avoid harsh glare
- Hold your camera horizontally for every photo to keep sizing consistent
Note: New vehicle listings hold up to 32 photos. Used vehicle listings hold up to 99.
1Capture your must-have photos
Start with these 12 photos that show shoppers the full exterior and the interior areas they check first. Shoot the exterior first, then move inside.
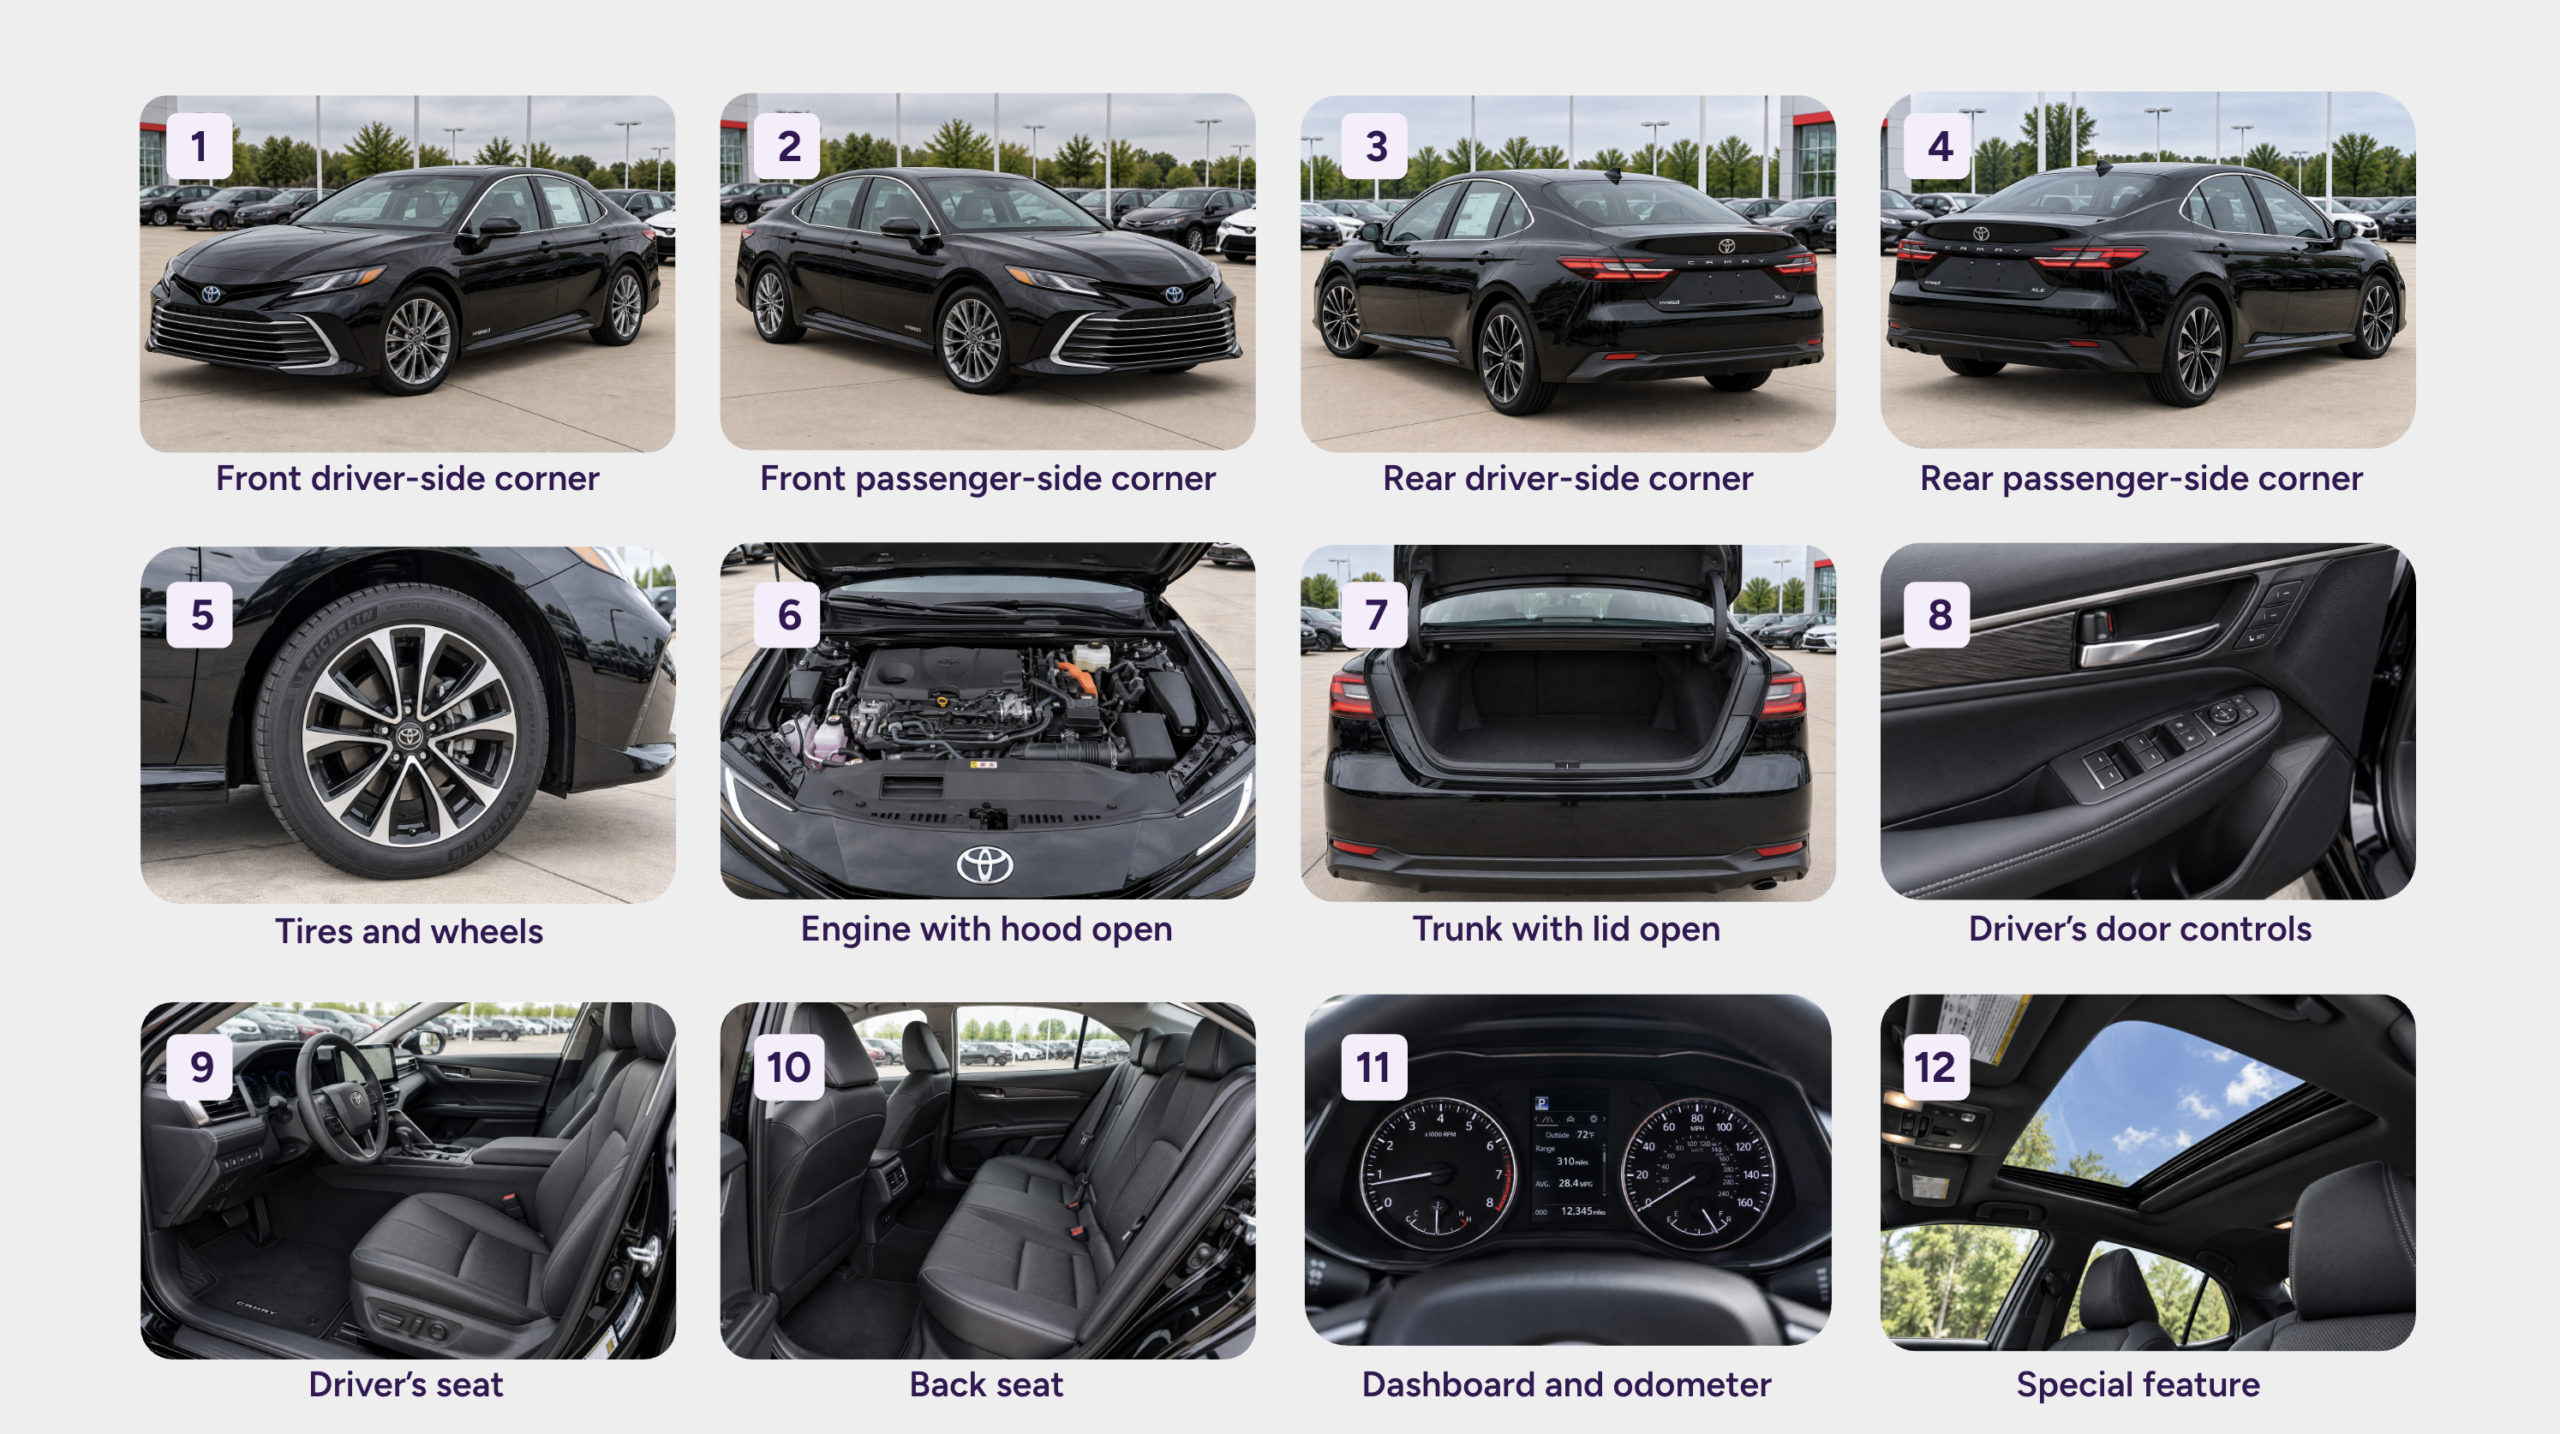
Best practice: Use one of your front corner photos as your lead photo. A front corner shows the front and side of the vehicle at once, which gives shoppers a clear first look.
2Add detail photos
Add these 12 photos to cover the angles, controls, and condition details shoppers want to see before they contact you.
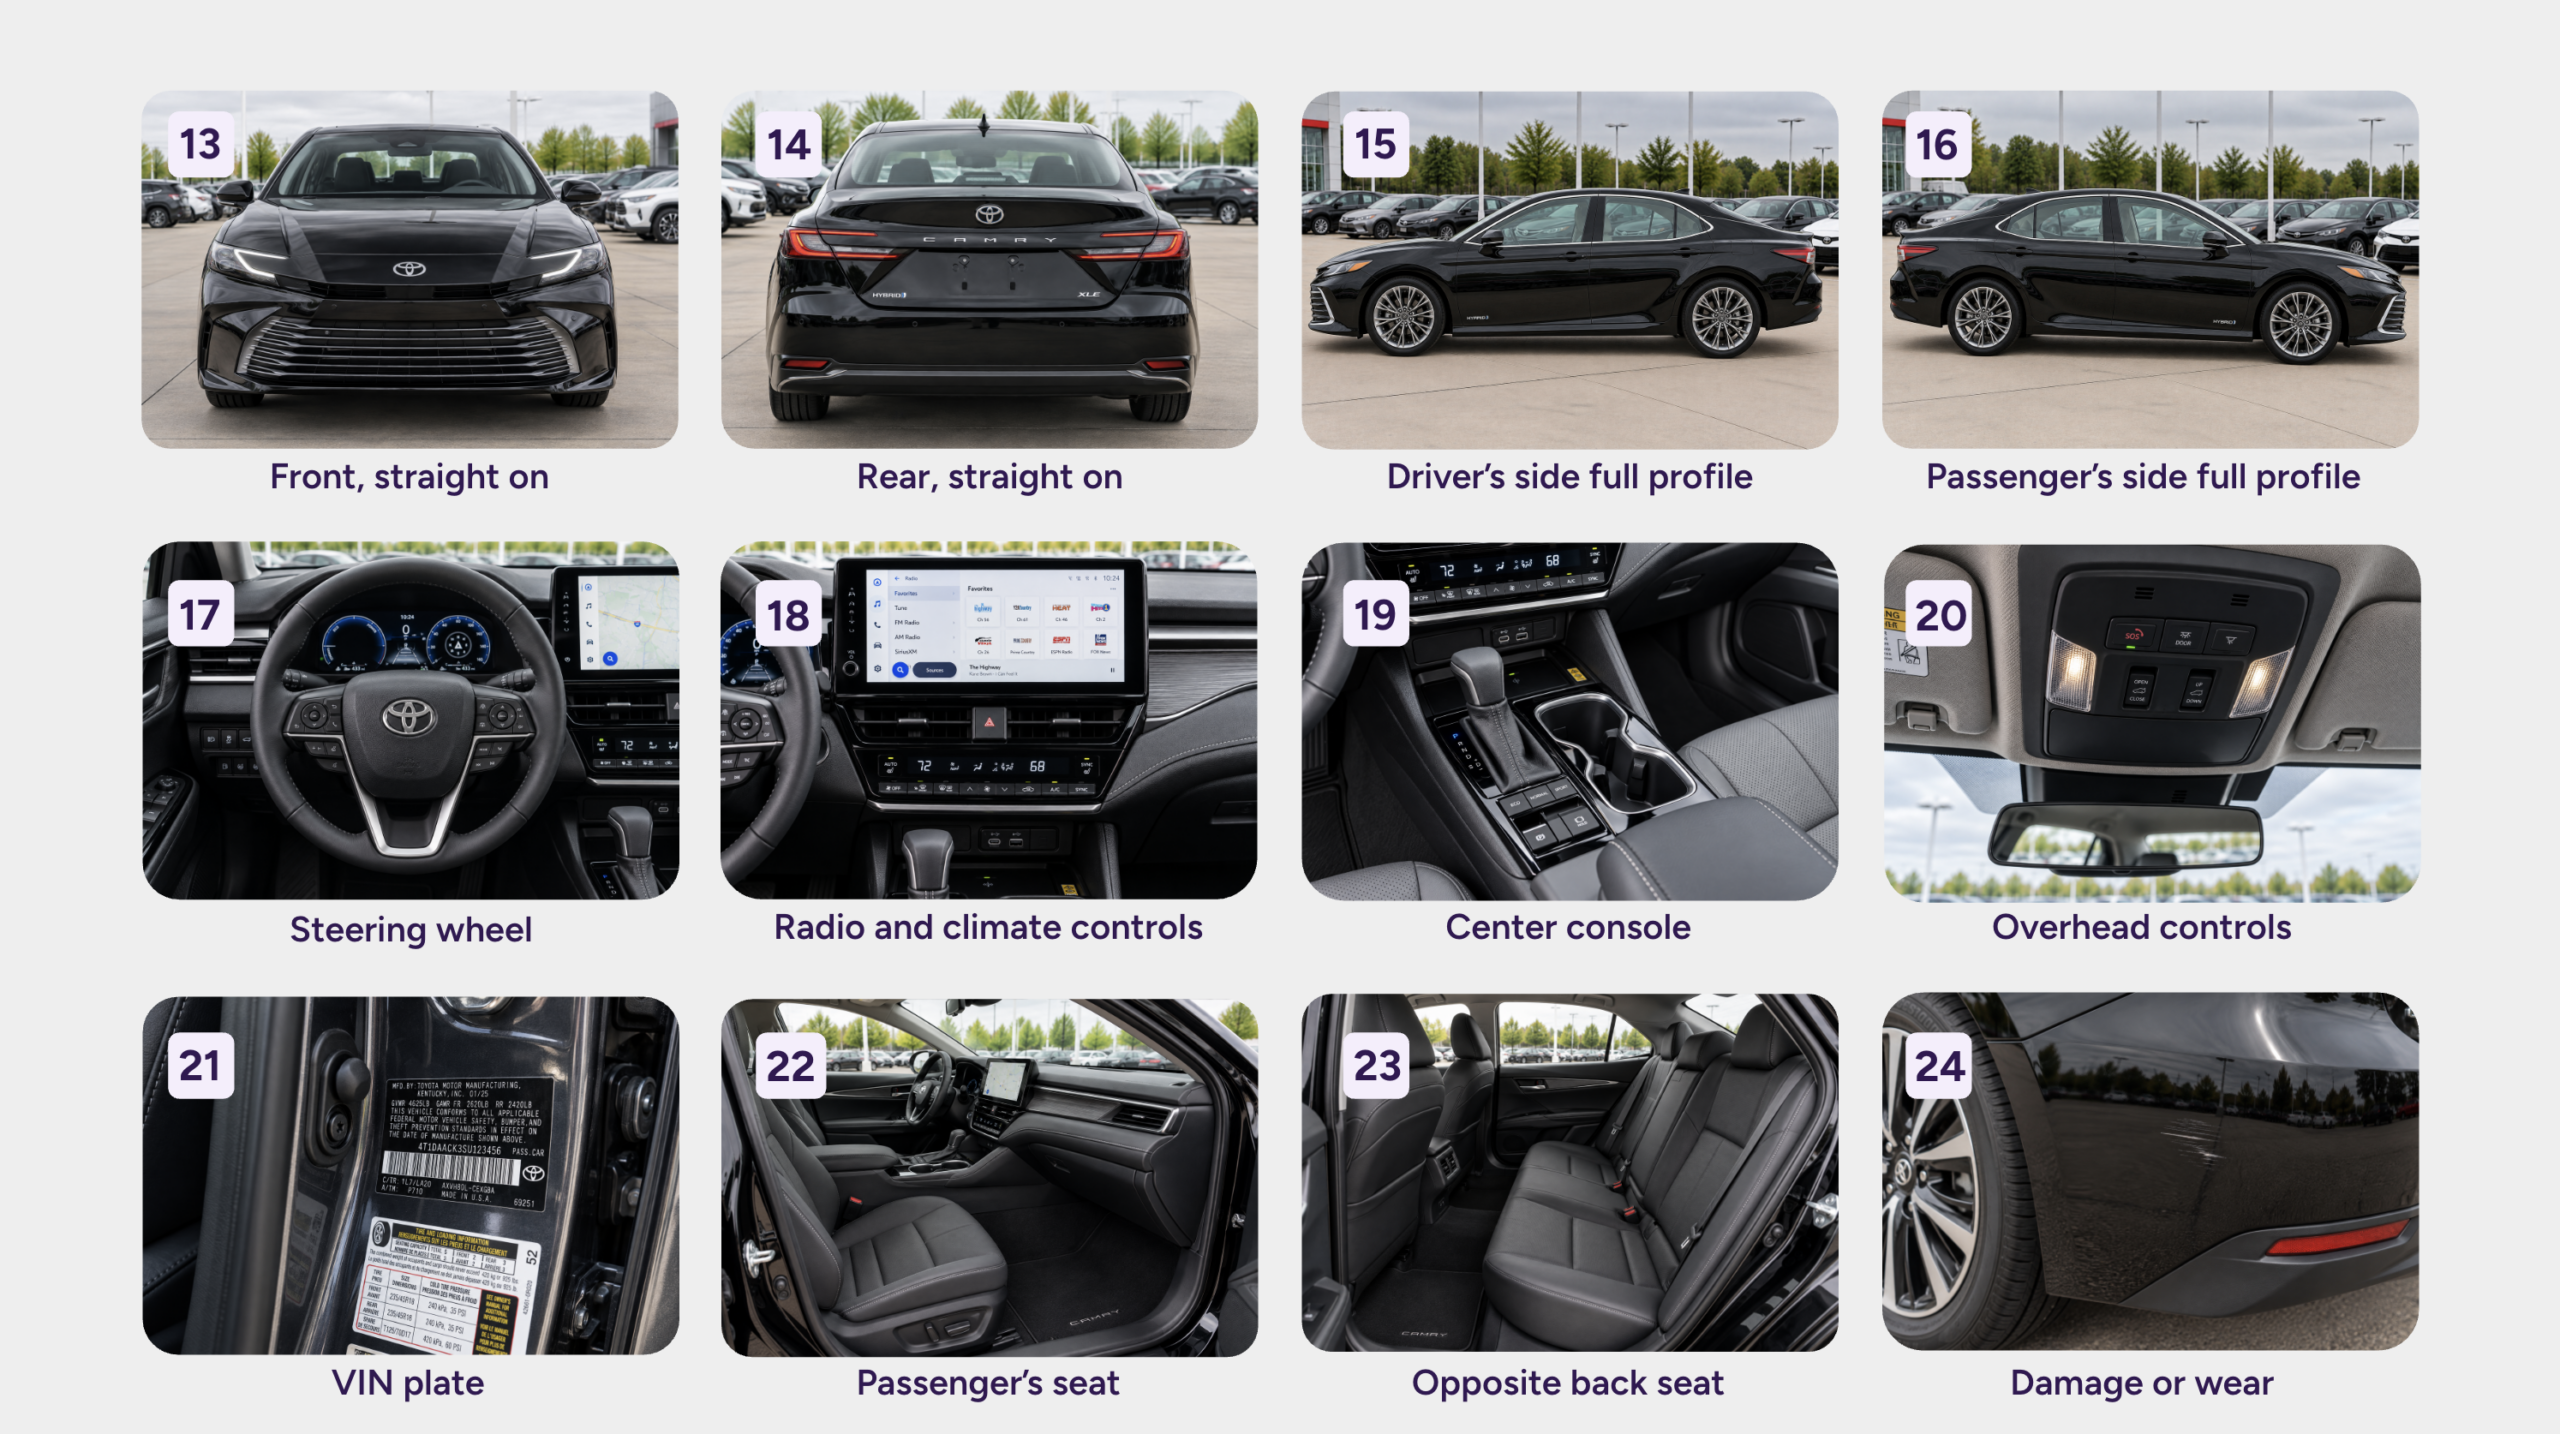
Note: Photograph every scratch, dent, or stain that a shopper would notice in person. Accurate photos set the right expectations and lead to better conversations.
3Complete your photo set
Add these 8 photos to highlight your vehicle’s finer details and back them up with paperwork and proof that build trust.
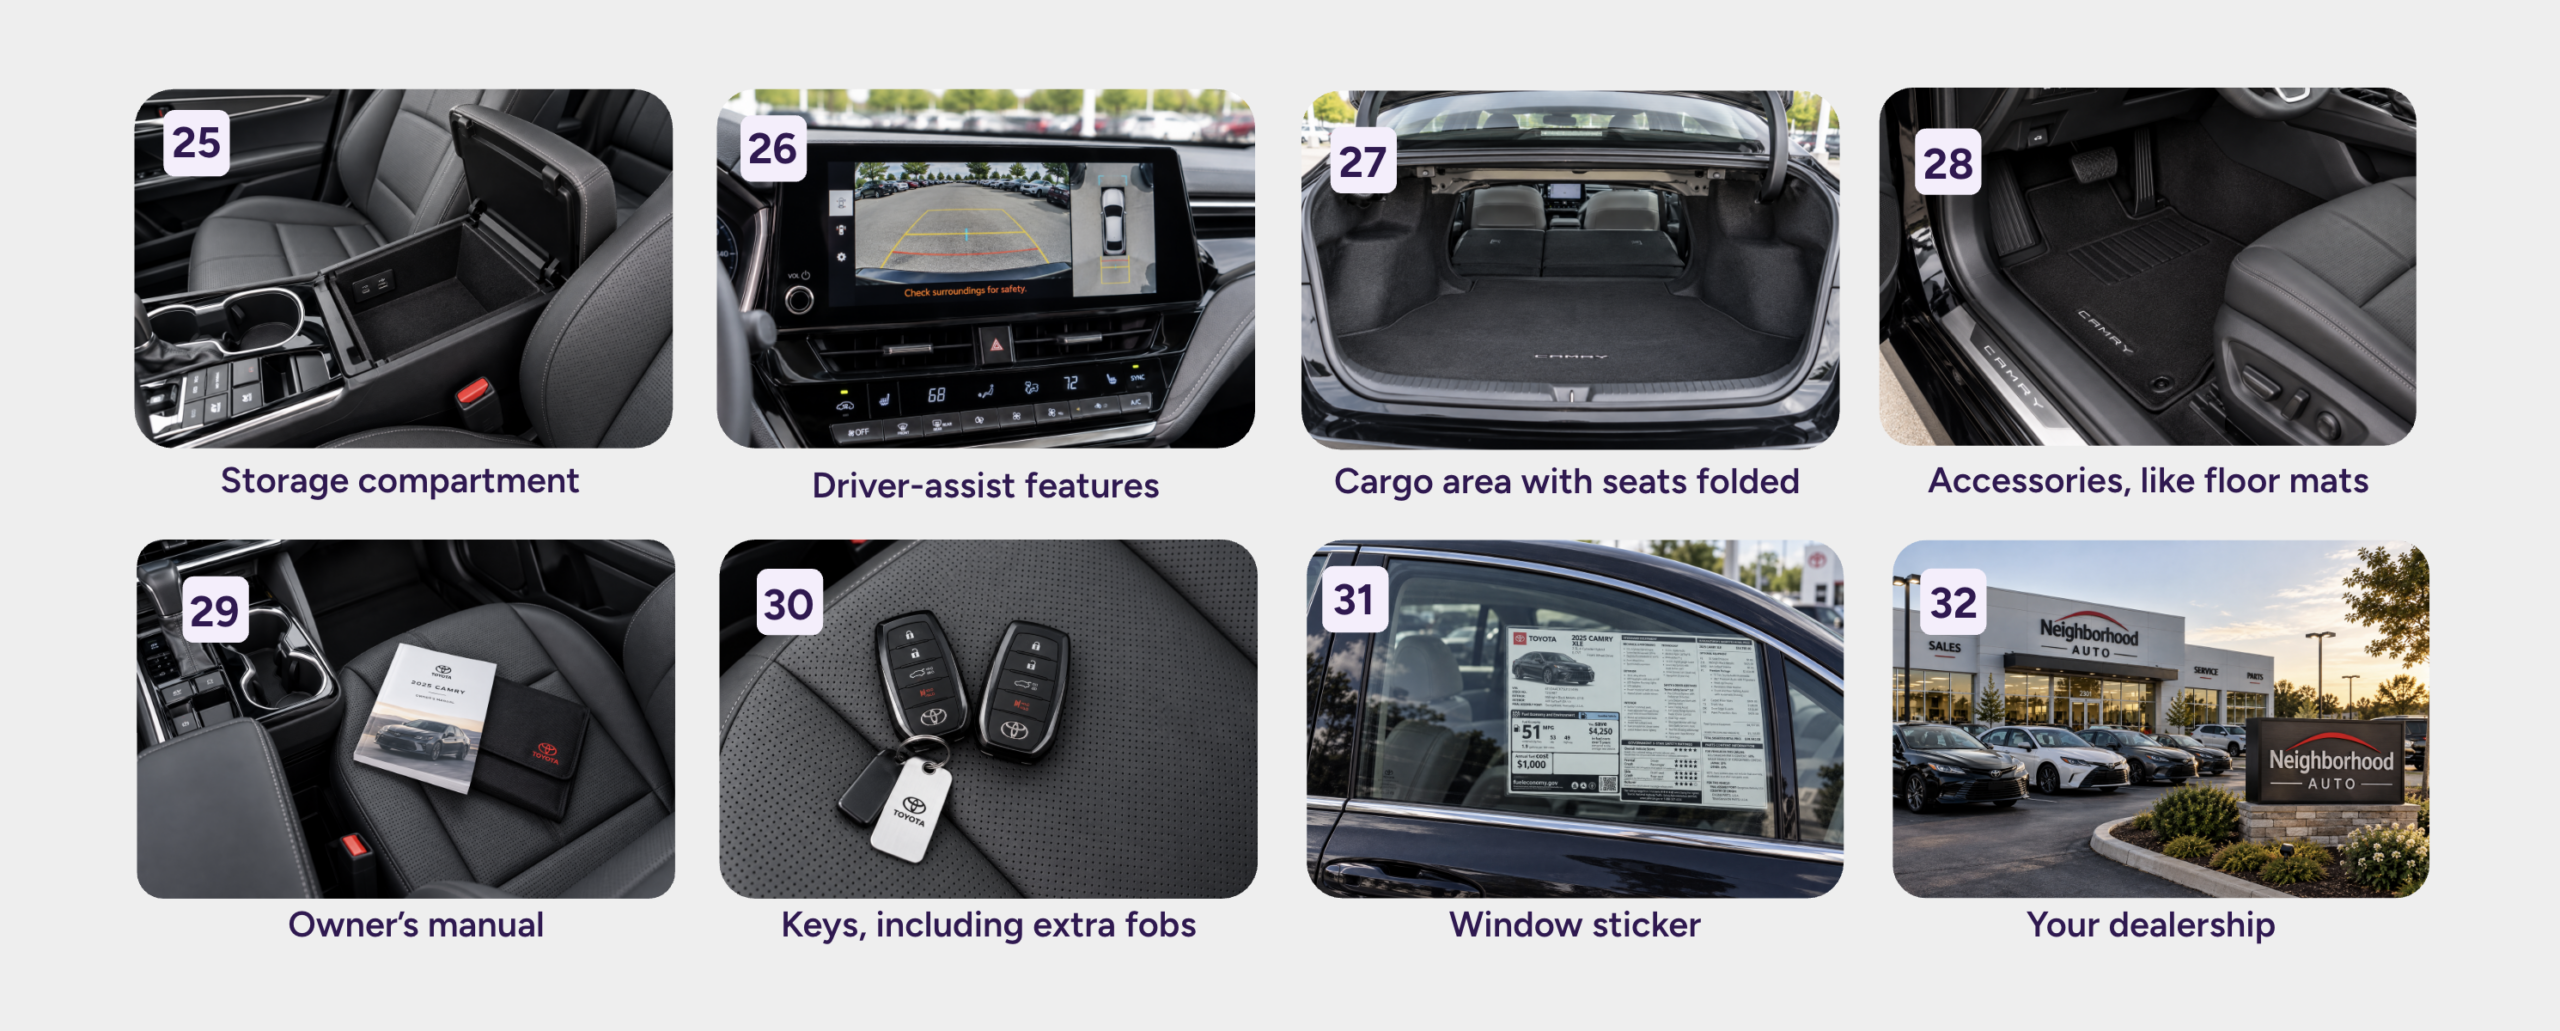
Add more photos to used listings
Used vehicle listings hold more photos. If you’ve captured the 32 above, add more from this list:
- Vehicle history report
- Service records
- Make and model badge
- Grille or hood emblem
- Third-row seats, if the vehicle has them
- Infotainment screen, with a phone connected
- Spare tire and tools
- Inspection or certification report
- Your staff
Best practice: Don’t add a blurry or repeated photo only to fill your available slots. Upload a great photo or skip it, because a weak photo can hurt your listing.
4Size your photos before you upload
Check each photo against the recommended specs before you upload.
- Use a 4:3 aspect ratio
- Resize photos to 640 × 480 (maximum 1024 × 768)
- Hold your camera horizontally for every photo
- Avoid Panorama mode, which can crop your photo
- Review each photo for cropping or distortion
Tip: Use a free online photo resizer if you need to shrink a photo. Most IMS platforms resize photos for you, and a photo provider can deliver the right size if you work with one.