How to create coupons for digital wallets
The Wallet integration transforms traditional Fixed Ops service coupons into dynamic, mobile-friendly passes for iOS and Android devices. Customers can save coupons directly to their phones and access them during their service visit. The Wallet plugin also includes advanced features such as geofencing, which can trigger push notifications when a customer is near your dealership.
Note: Wallet functionality is available exclusively to partners on Plus and Premier packages. To upgrade your current plan, contact your Performance Manager.
In this article, you’ll learn how to create a Wallet pass, configure expiration and geofence settings, generate a sharing link, and connect the Wallet pass to a Fixed Ops coupon so customers can download and redeem it on their mobile device.
To get started
Go to the Cars.com Hub. Click Dealer Inspire, then Manage Website.
Part 1: How to create a Wallet pass coupon
The Wallet integration works in tandem with Fixed Ops coupons. In order to add a coupon to Wallet you must first have a Fixed Ops coupon to attach the integration to.
To learn more about how to add Service and Parts coupons with Fixed Ops, check out our other article.
1 Create a Wallet pass
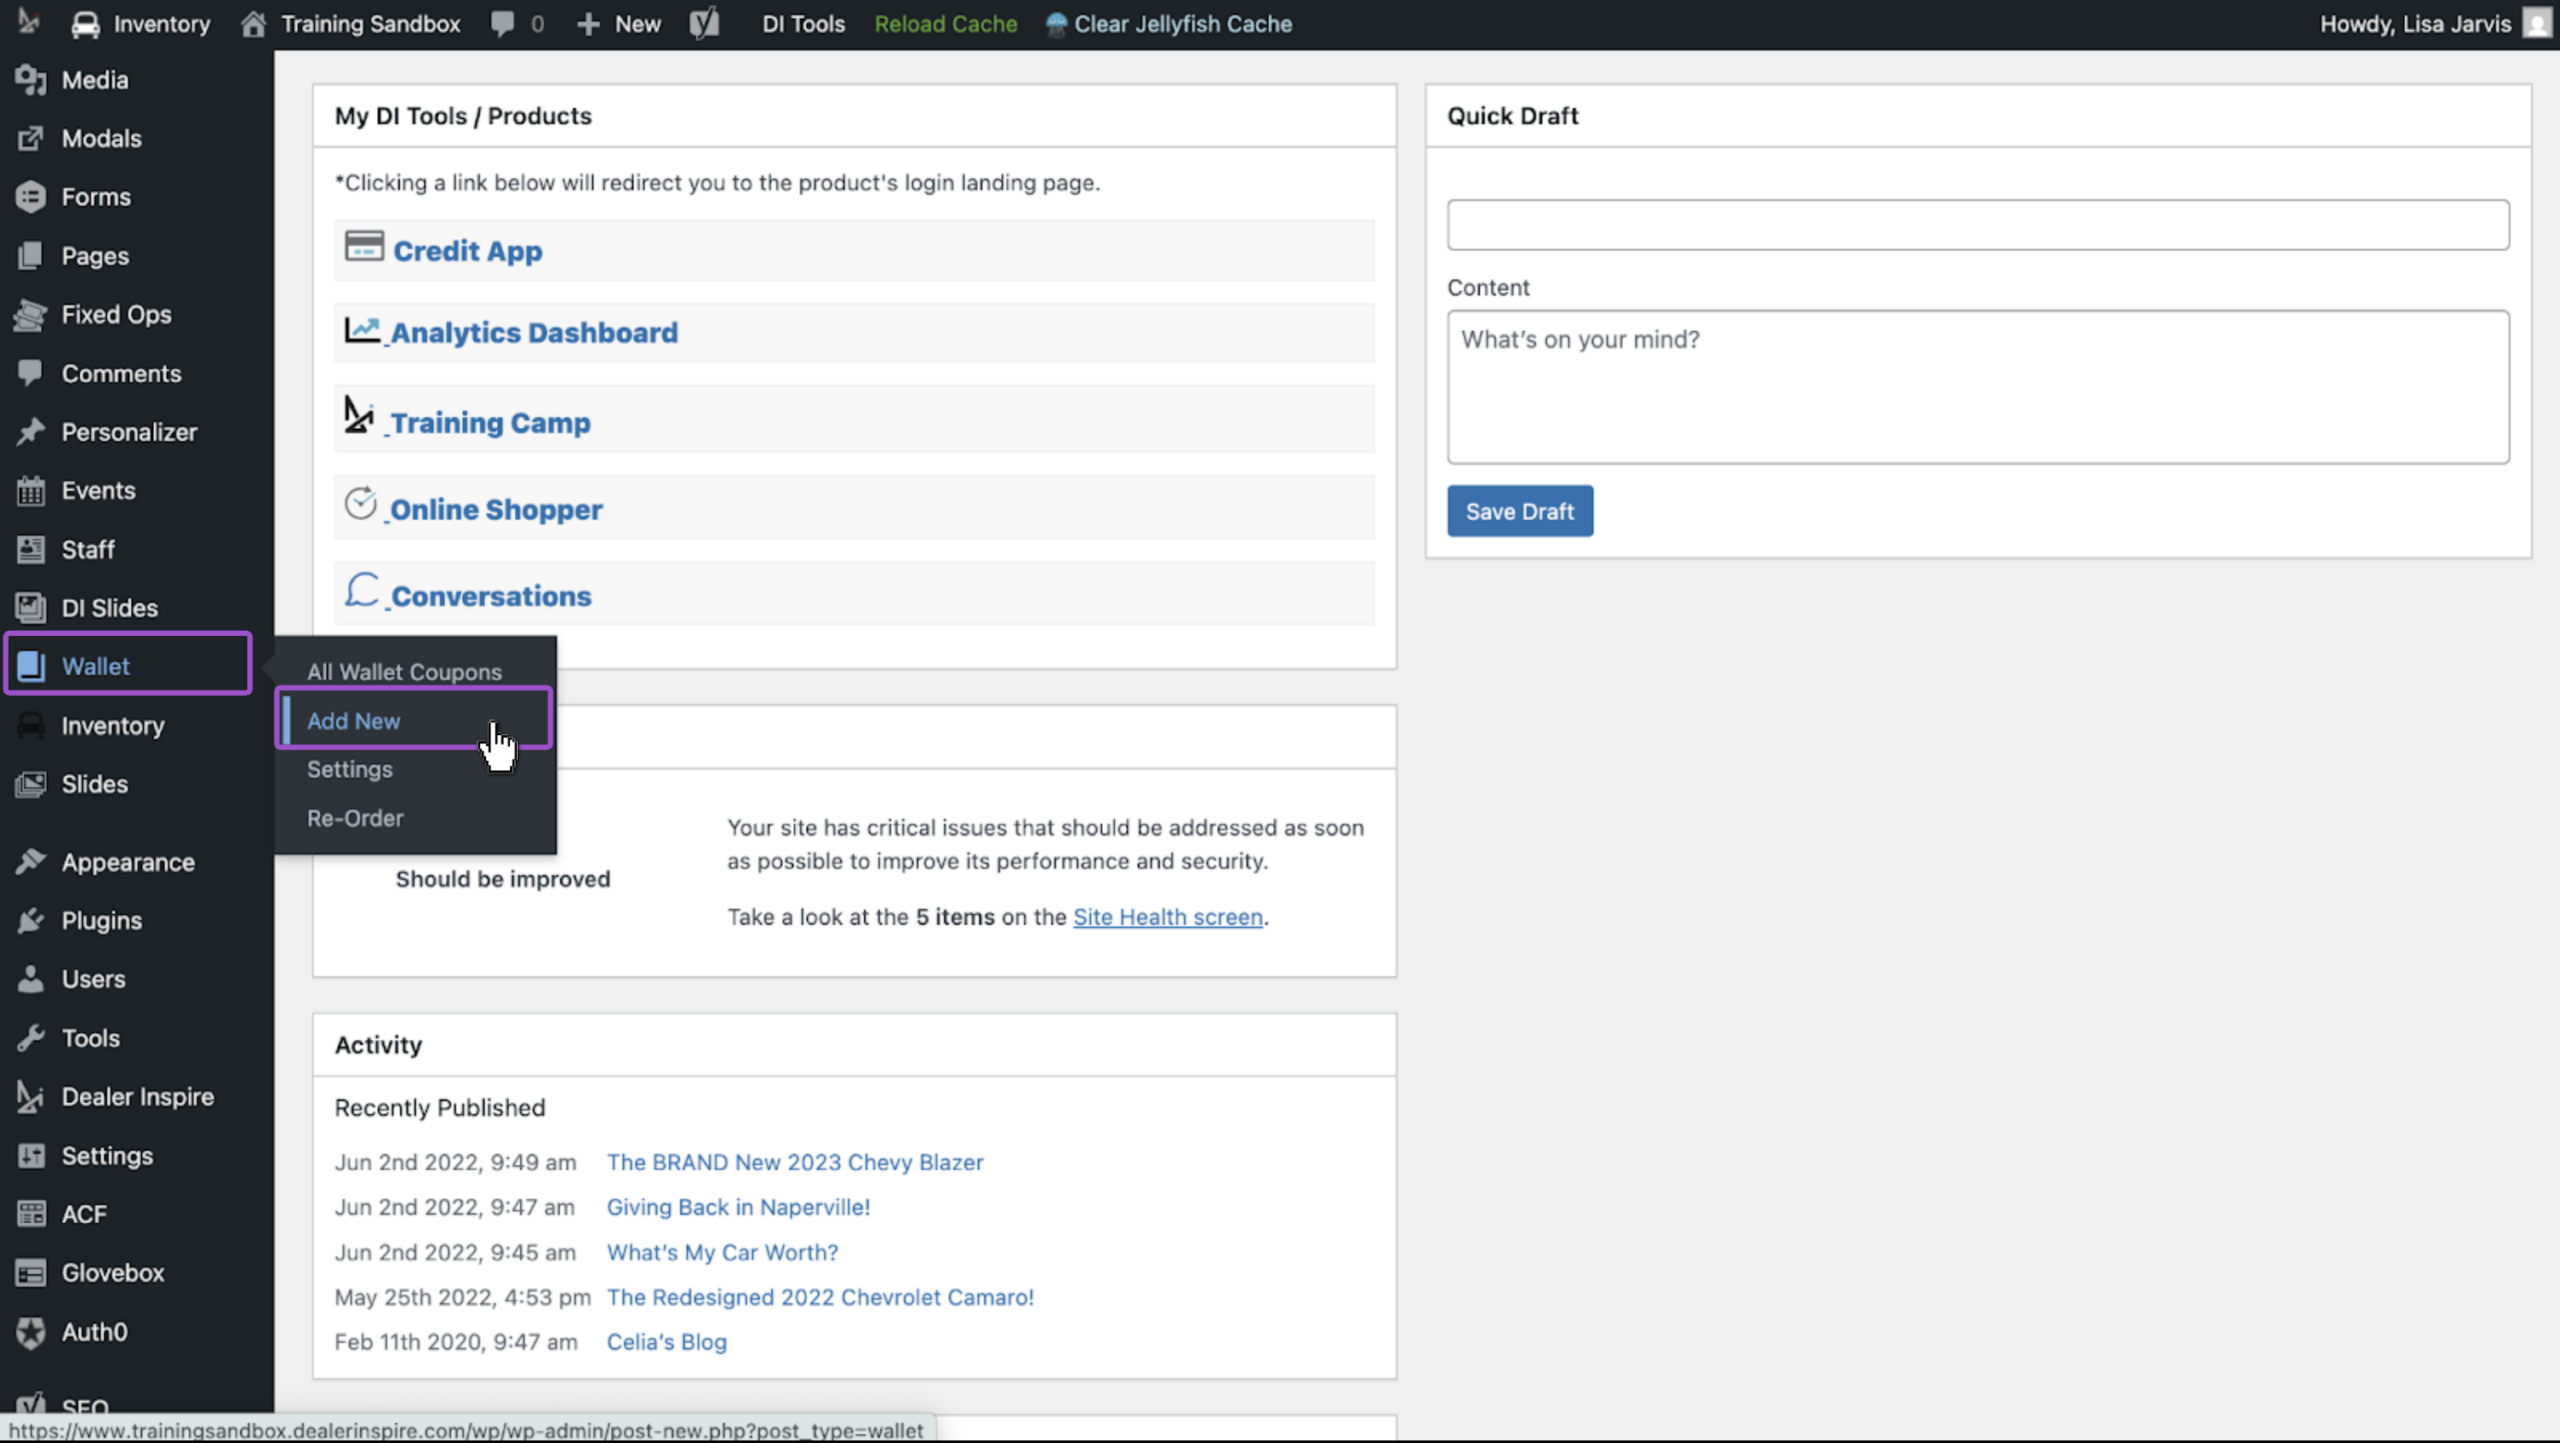
- In the left-side menu, select the Wallet plugin.
- Click Add New.
You must create and publish the Wallet pass before it can be attached to a Fixed Ops coupon.
2 Configure initial settings
At the top of the Wallet pass editor, complete the required setup fields:
- Title: This label is for internal reference only and does not appear on the customer-facing coupon.
- Author: Enter your name to track backend changes.
- Expiration Date: Set an expiration date if the pass should expire automatically.
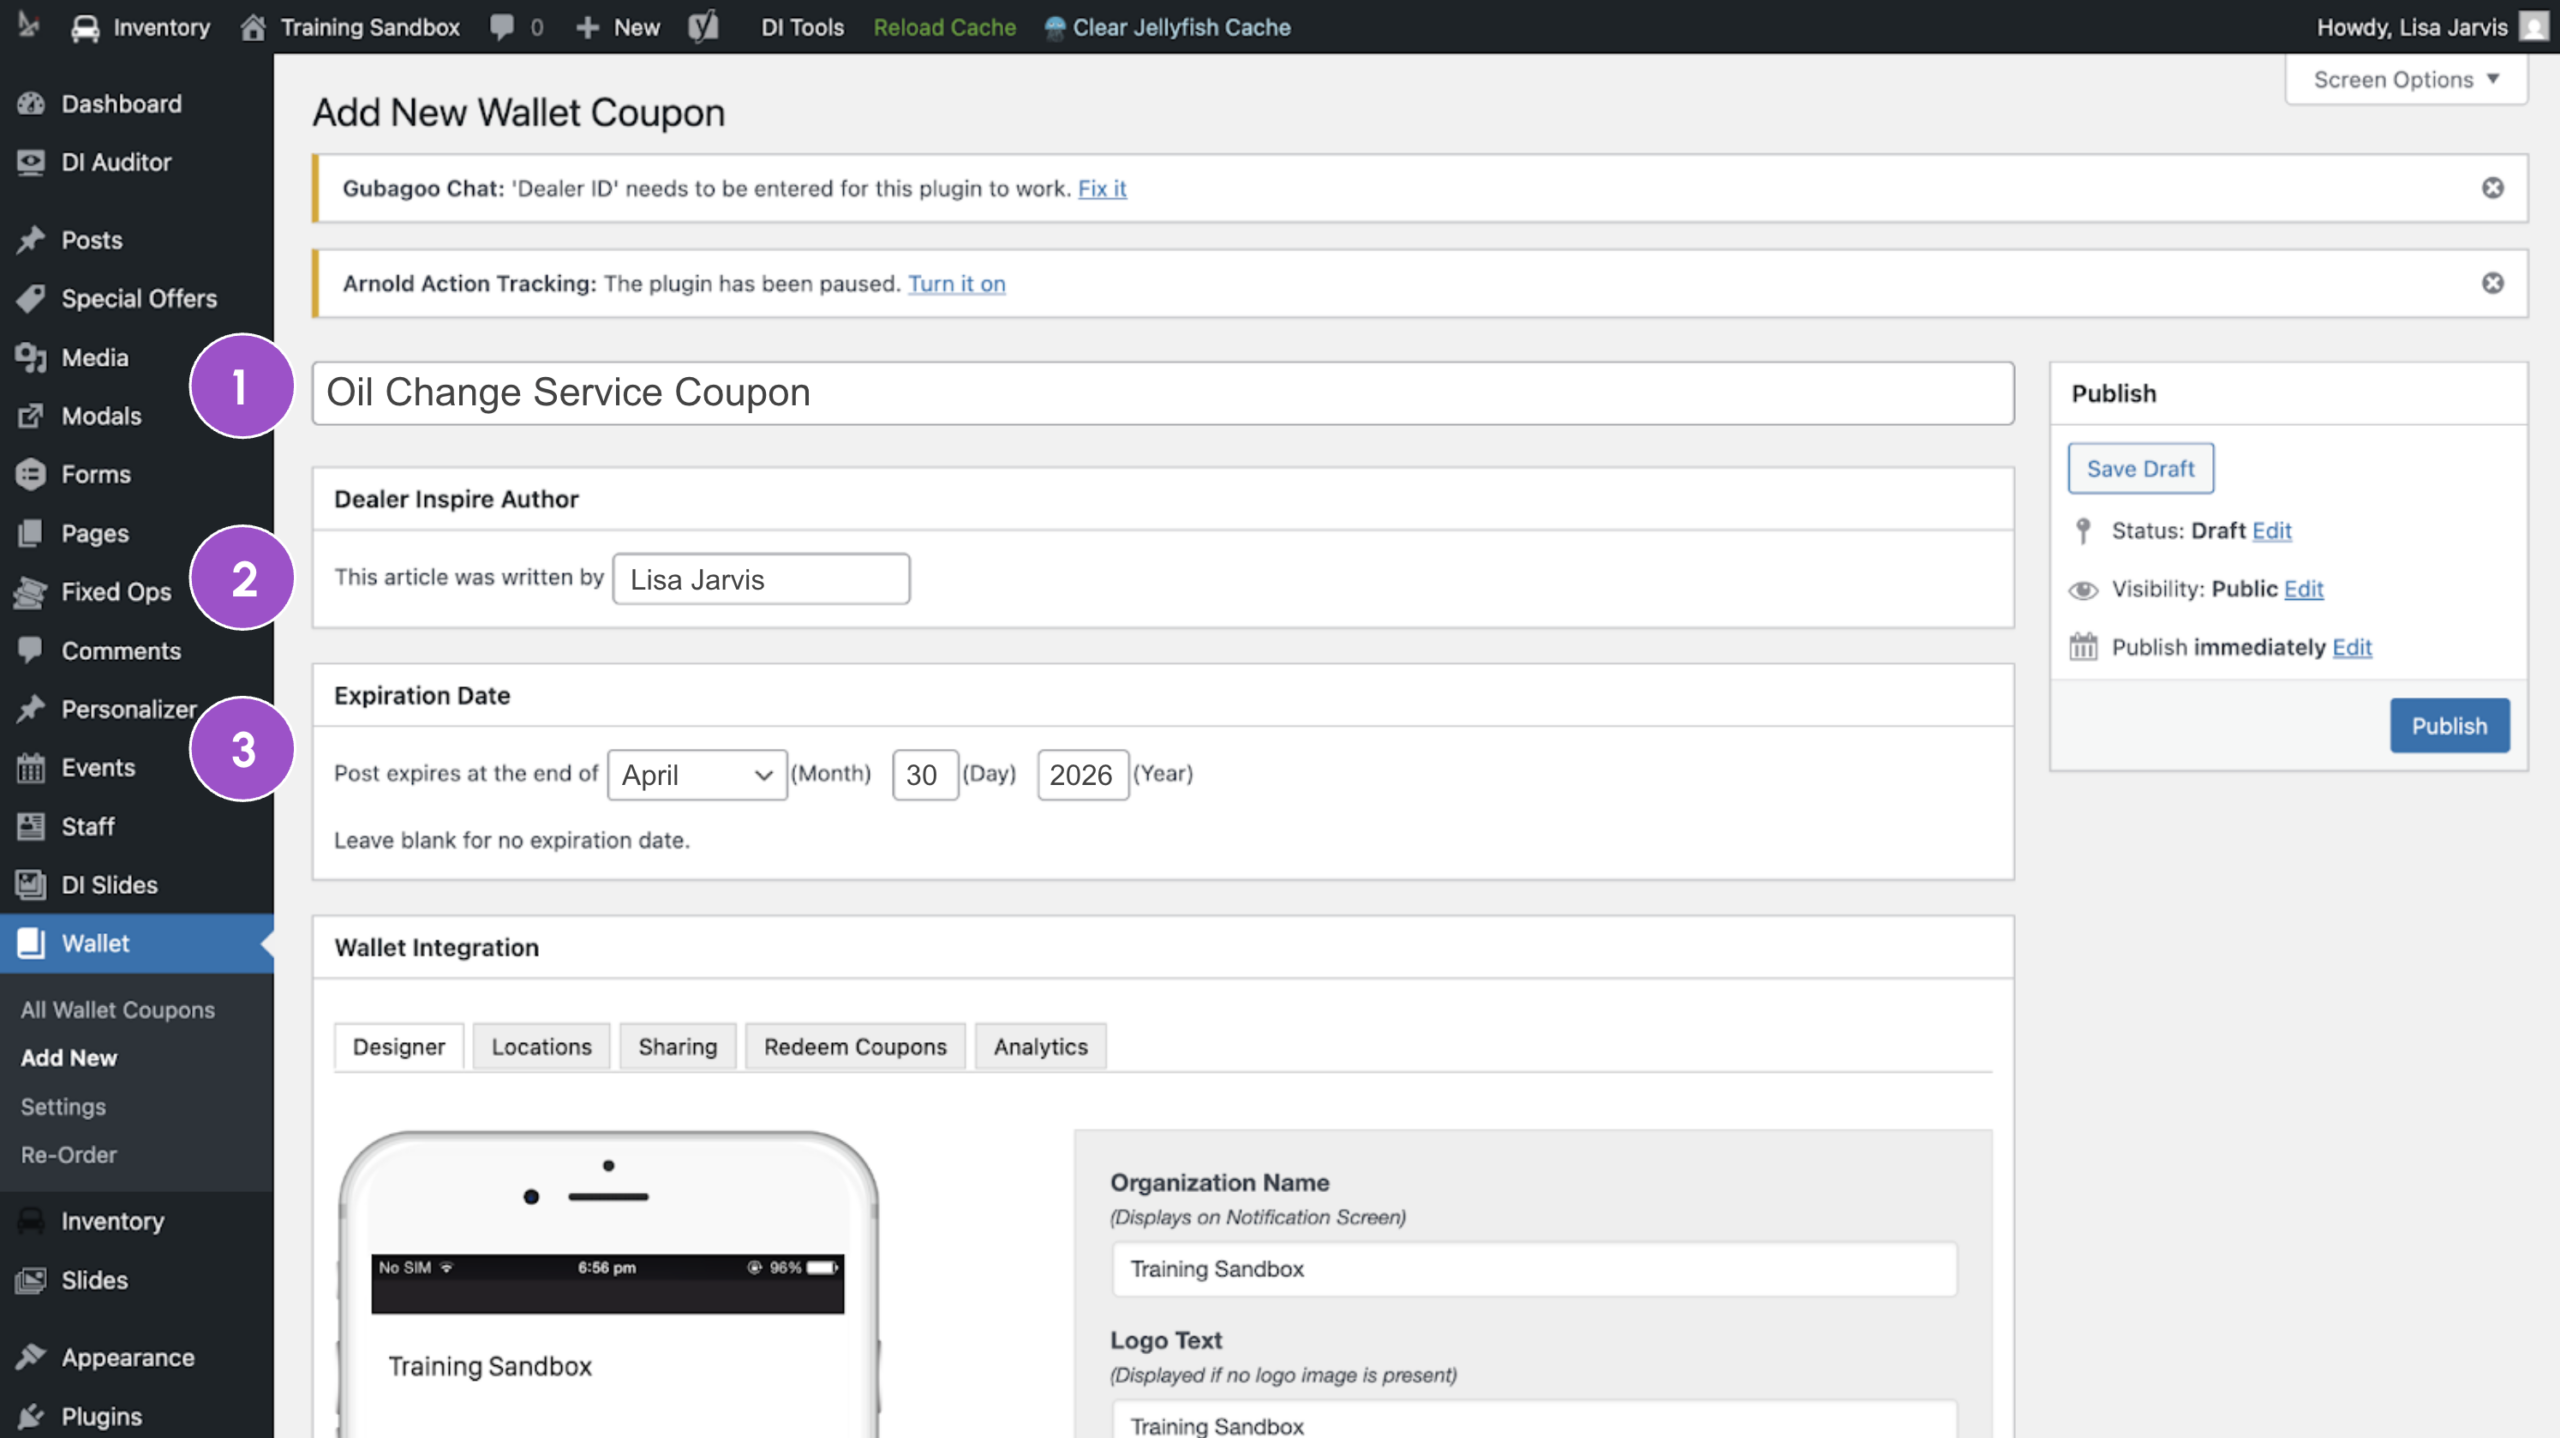
3 Build the Wallet pass design
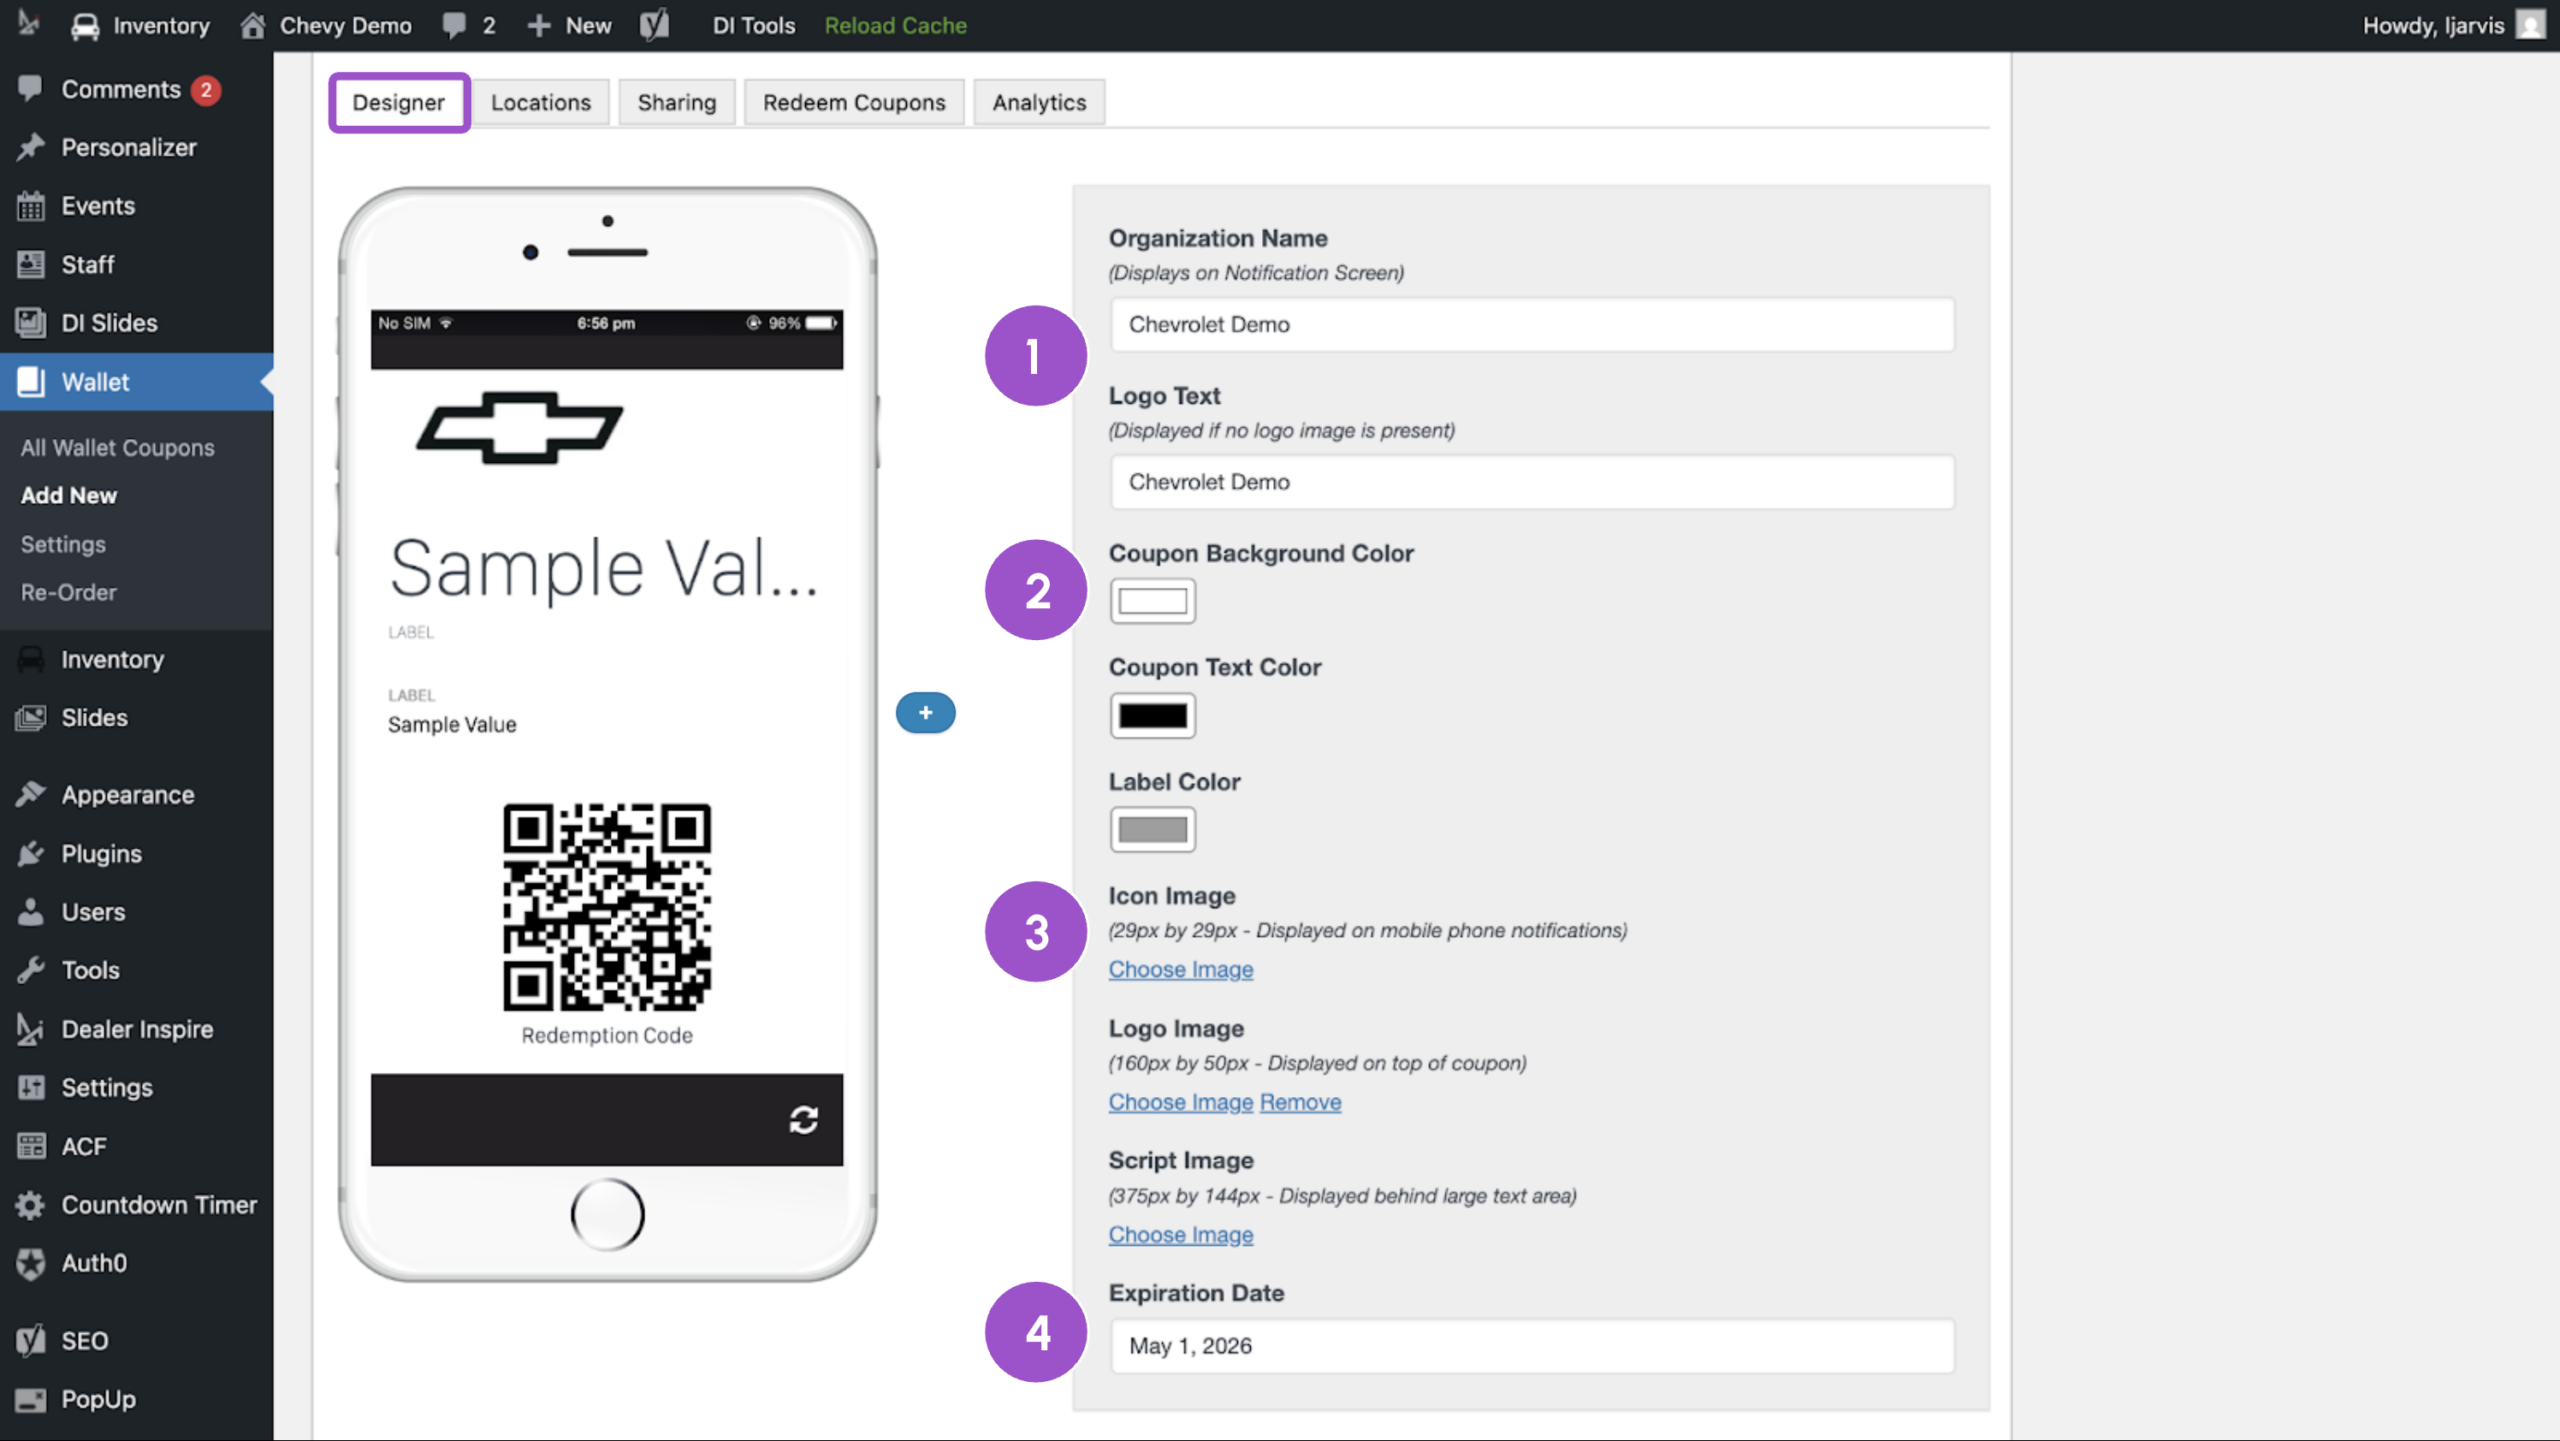
Scroll to the customization and preview section. This area allows you to build the coupon and preview how it will appear on a mobile device.
Complete the following fields:
- Organization Name and Logo Text: Enter your dealership or service department name.
- Color Pickers: Adjust background, title text, and label text colors.
- Images:
- Upload an icon for push notifications (not visible on the coupon itself).
- Upload a logo, which appears in the top-left corner of the coupon.
- Upload an icon for push notifications (not visible on the coupon itself).
Expiration Date: This controls when the Wallet pass becomes inactive. Once expired, customers will see a “Pass Has Expired” message on their downloaded pass.
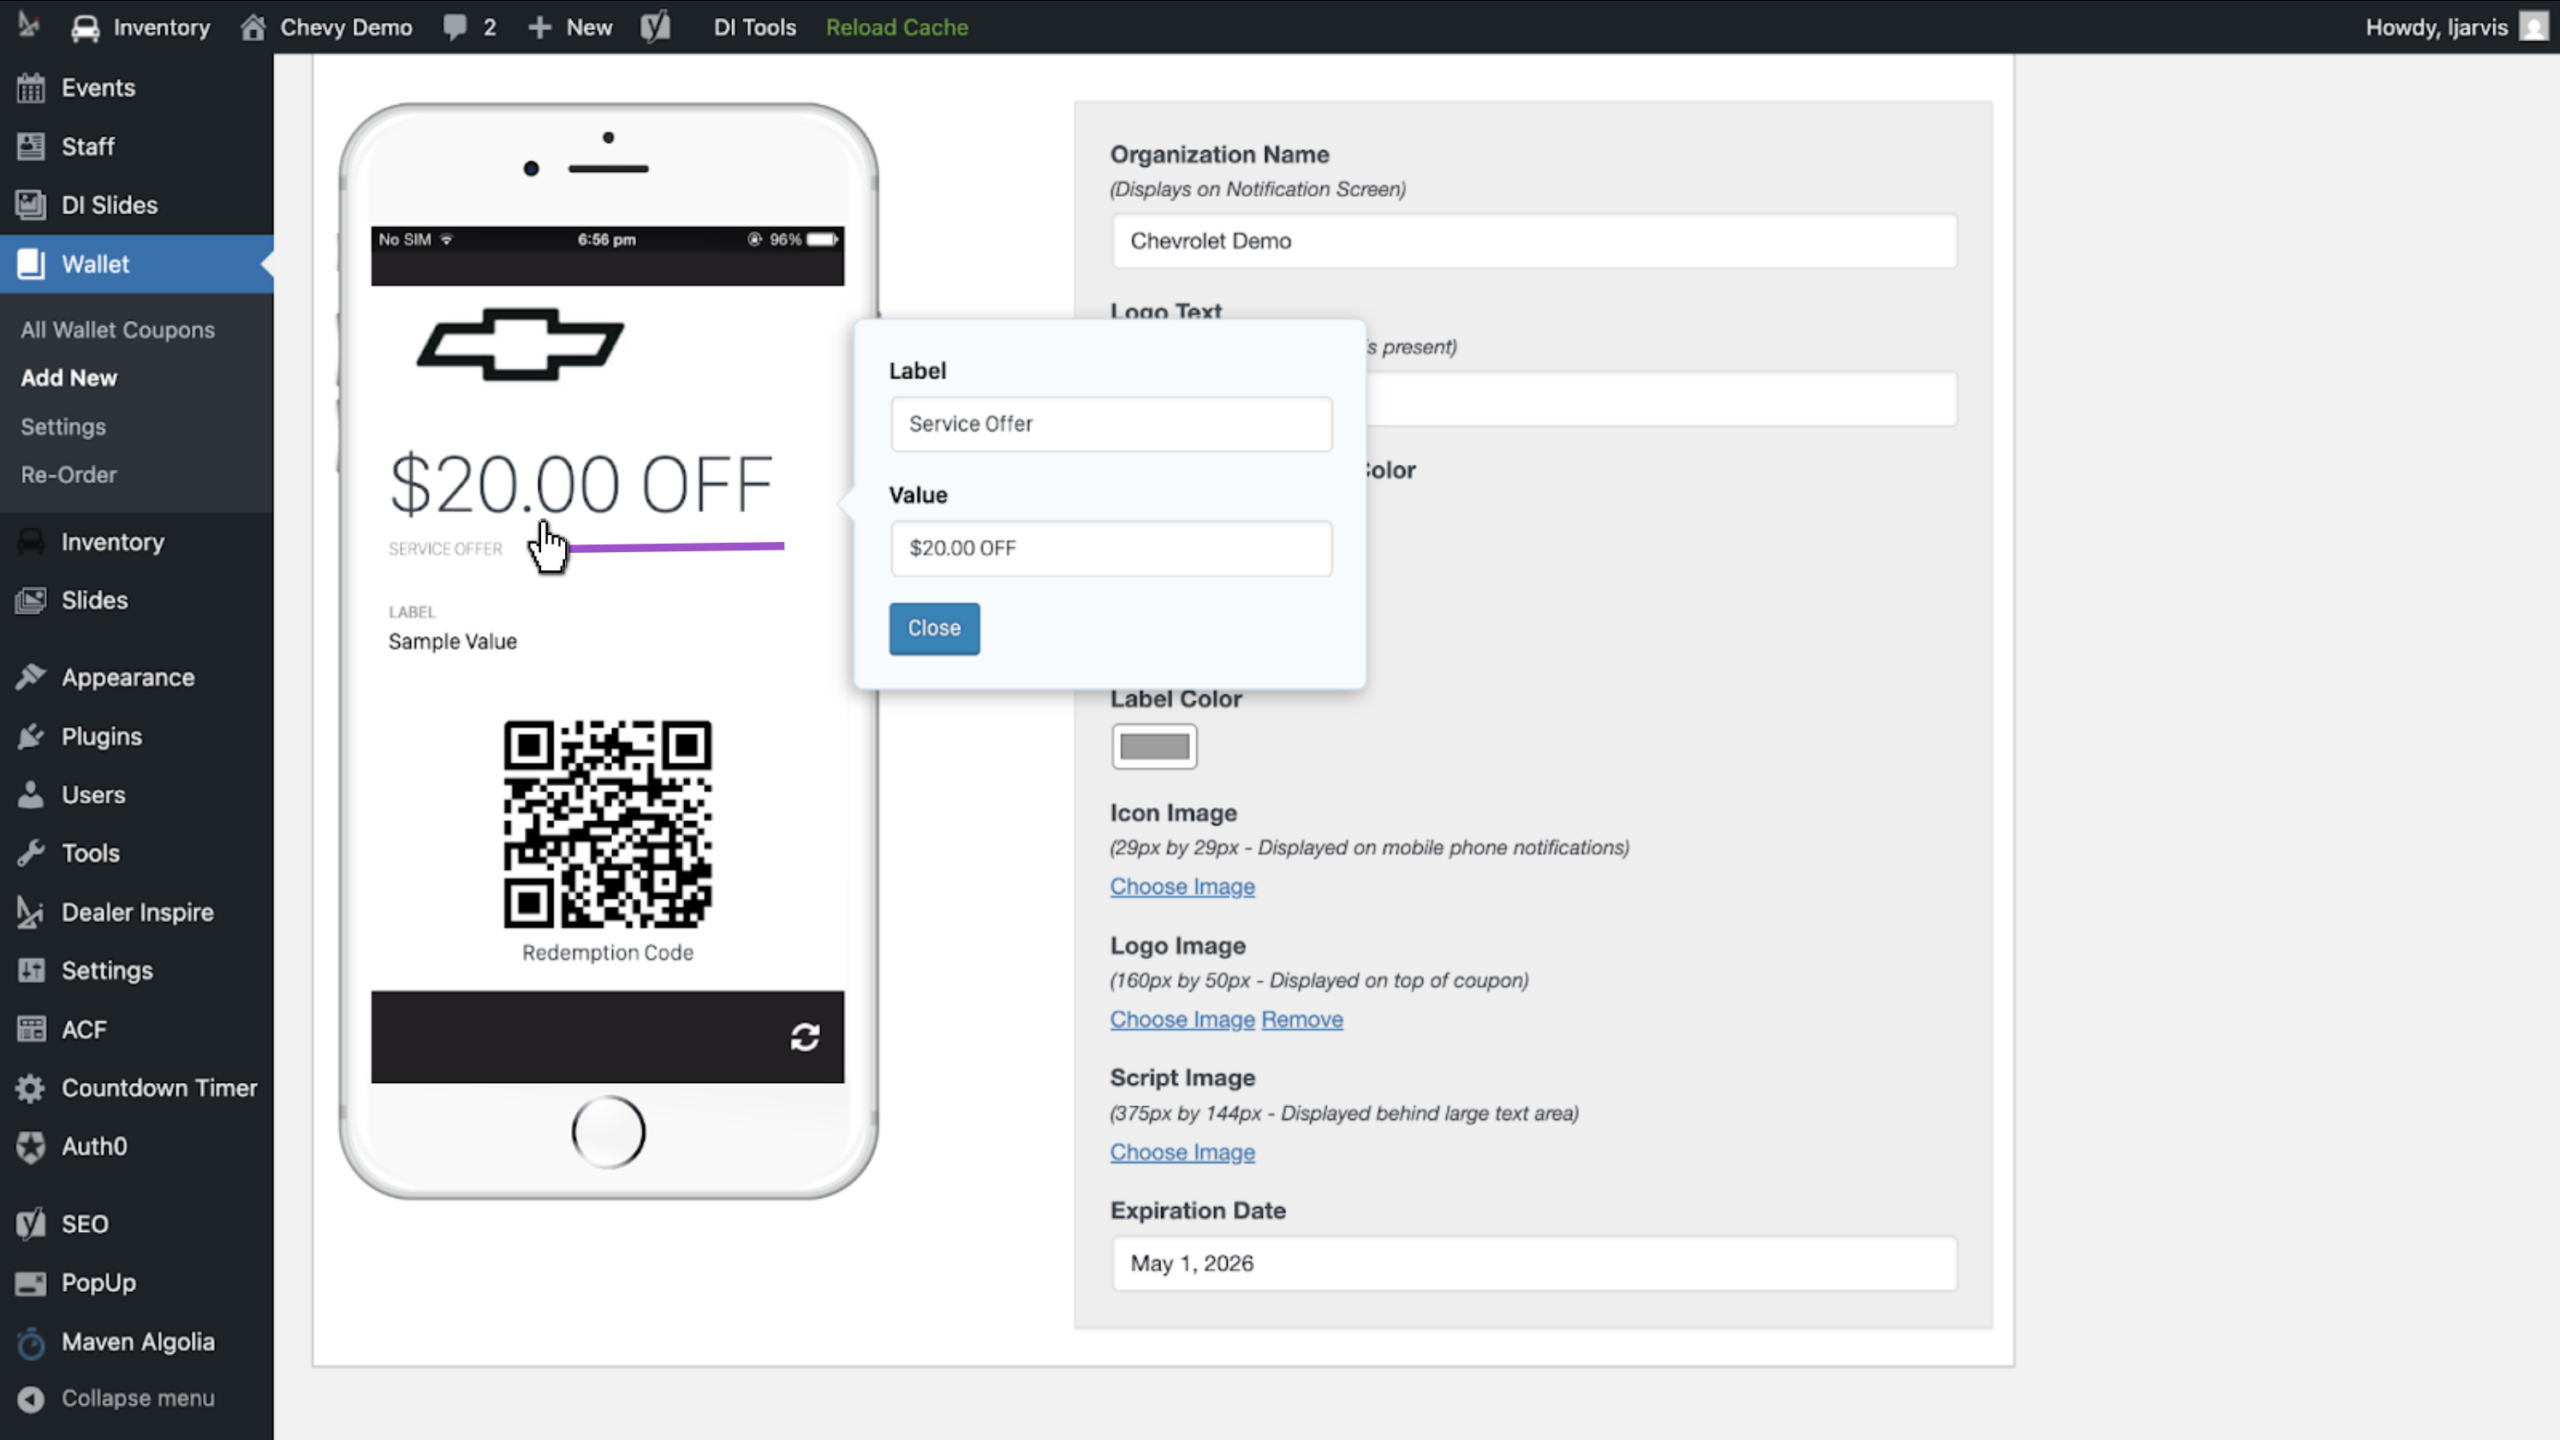
To edit text content:
- Click directly on the sample text in the preview window.
- Replace the template content in the pop-up editor.
- Repeat until all template text reflects your offer details.
To add additional text fields:
- Click the plus (+) icon next to the preview window.
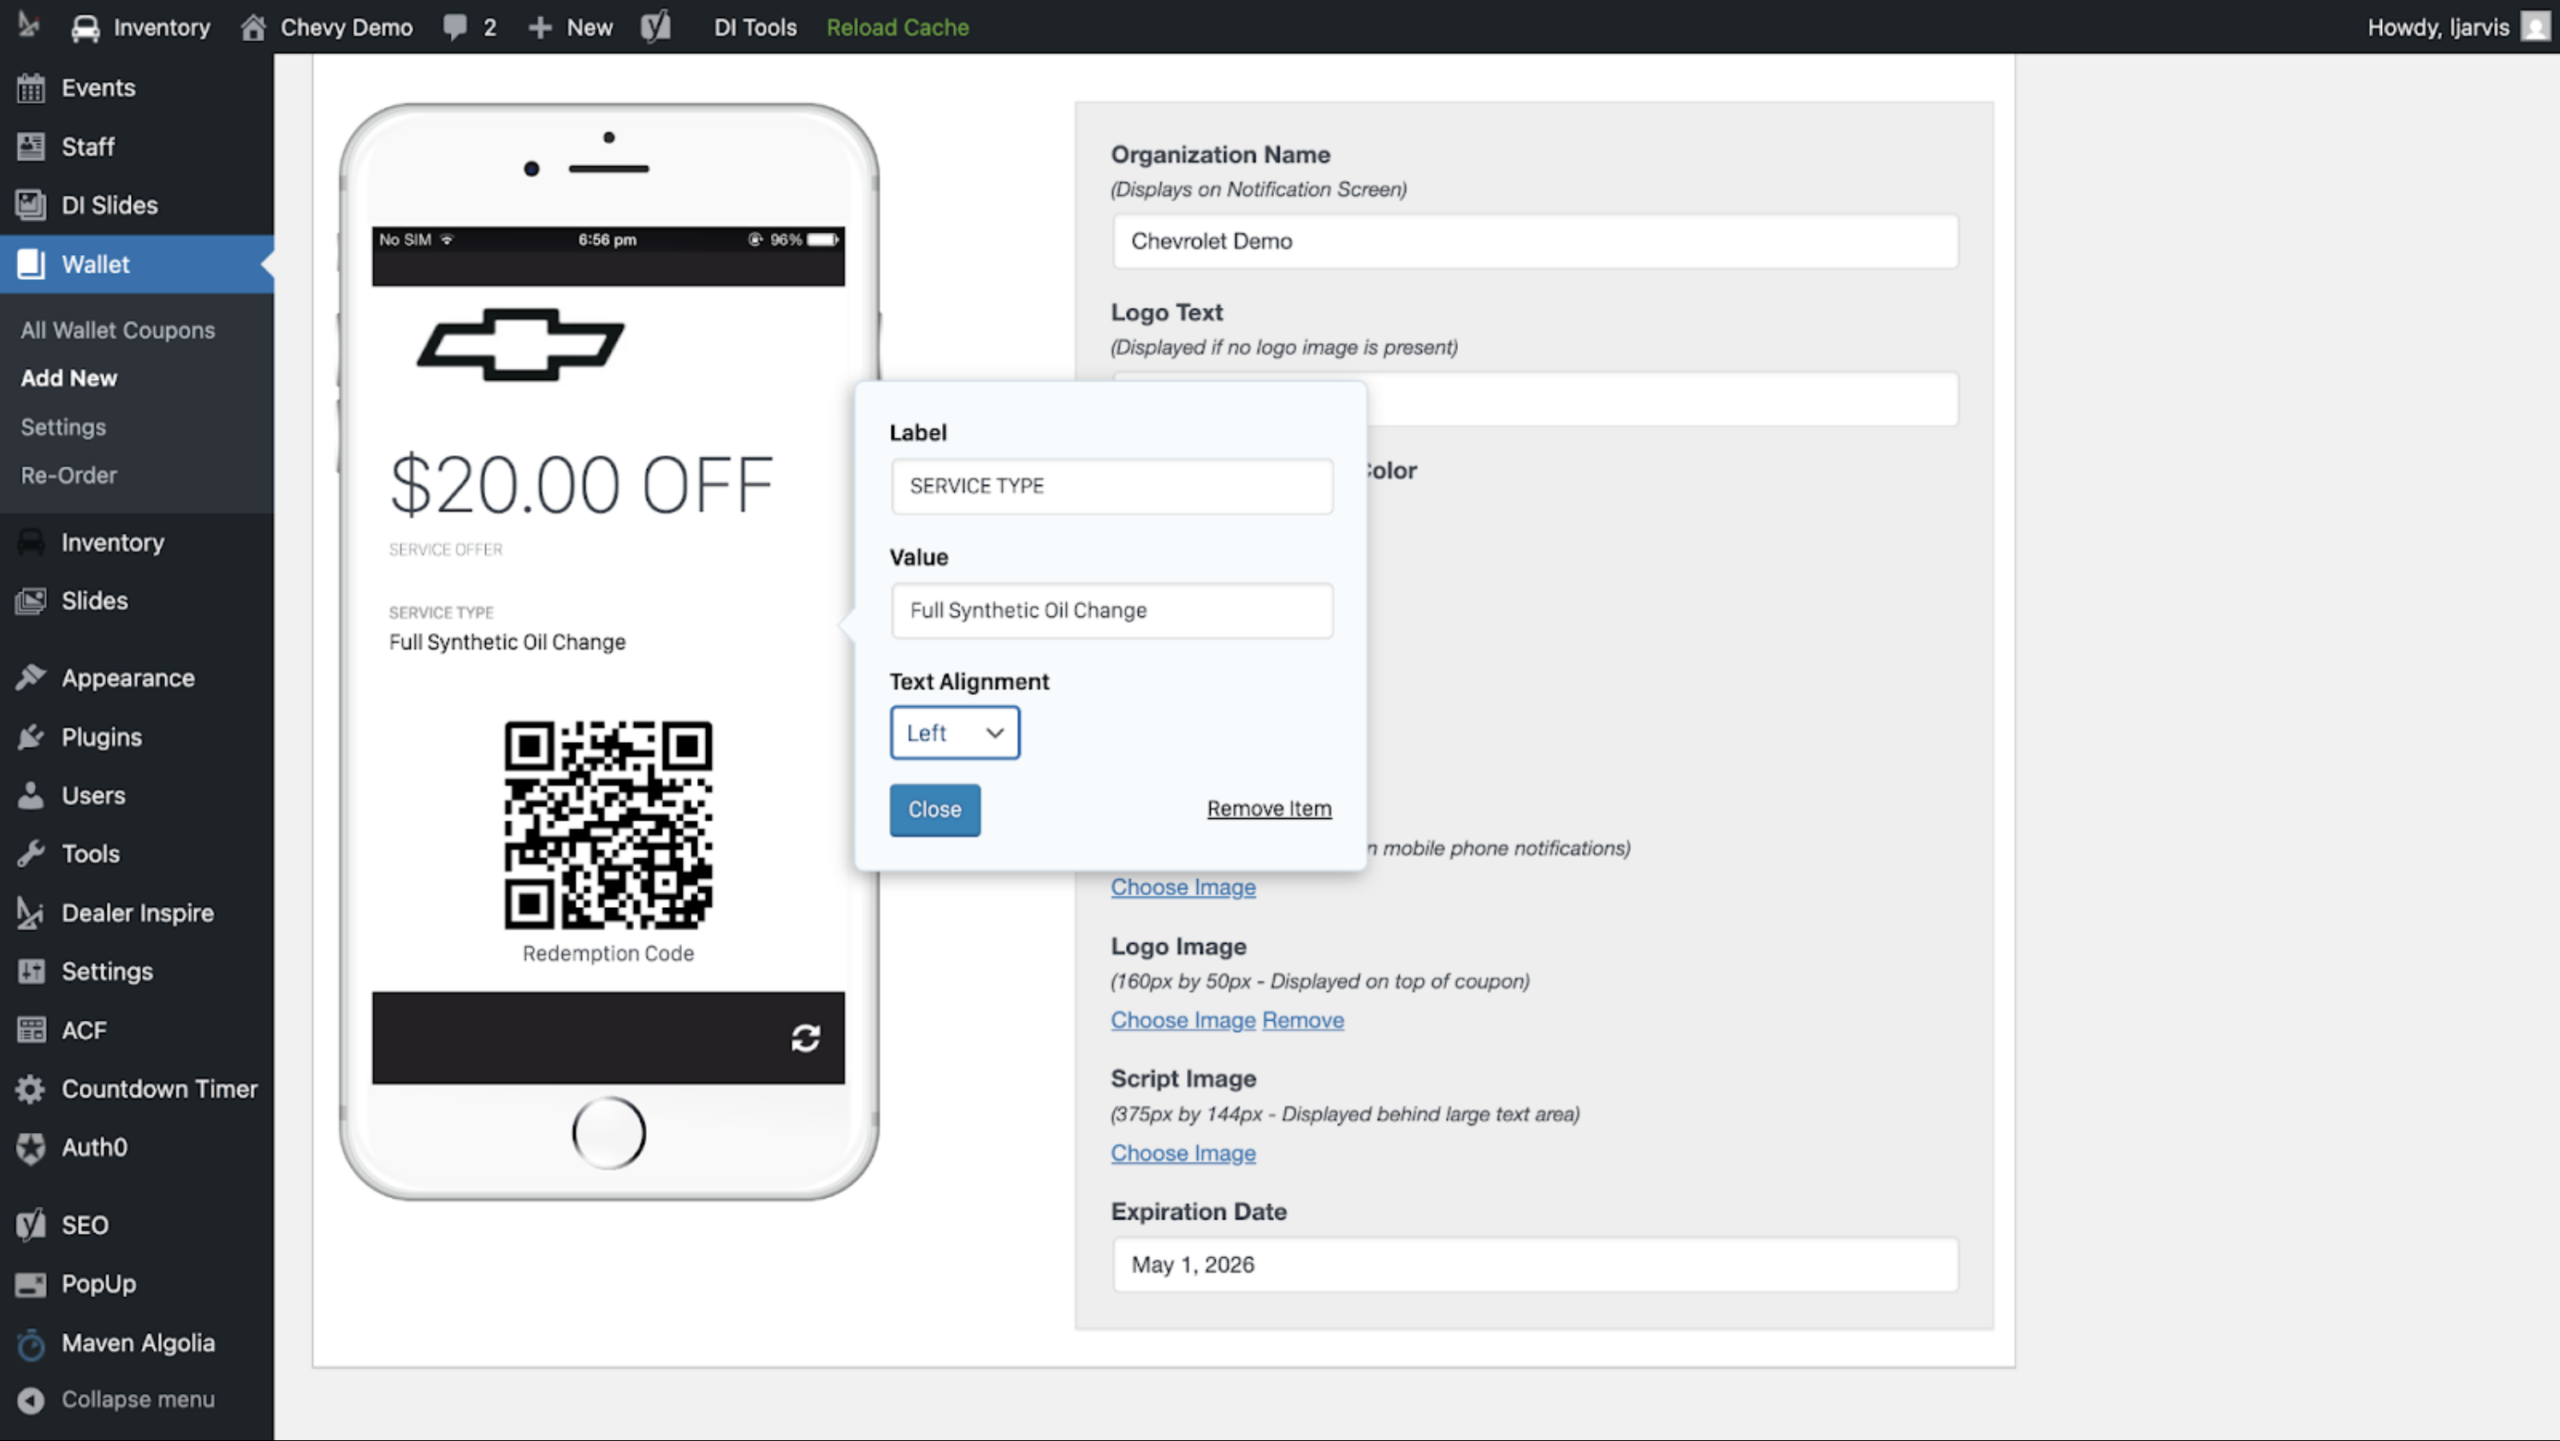
To remove a text field:
- Click into the field and select Remove Item in the pop-up editor.
4Configure geofence push notifications (optional)
To enable location-based notifications:
- Click the Locations tab.
- Enter a ZIP code or specific address.
- Click Add Location.
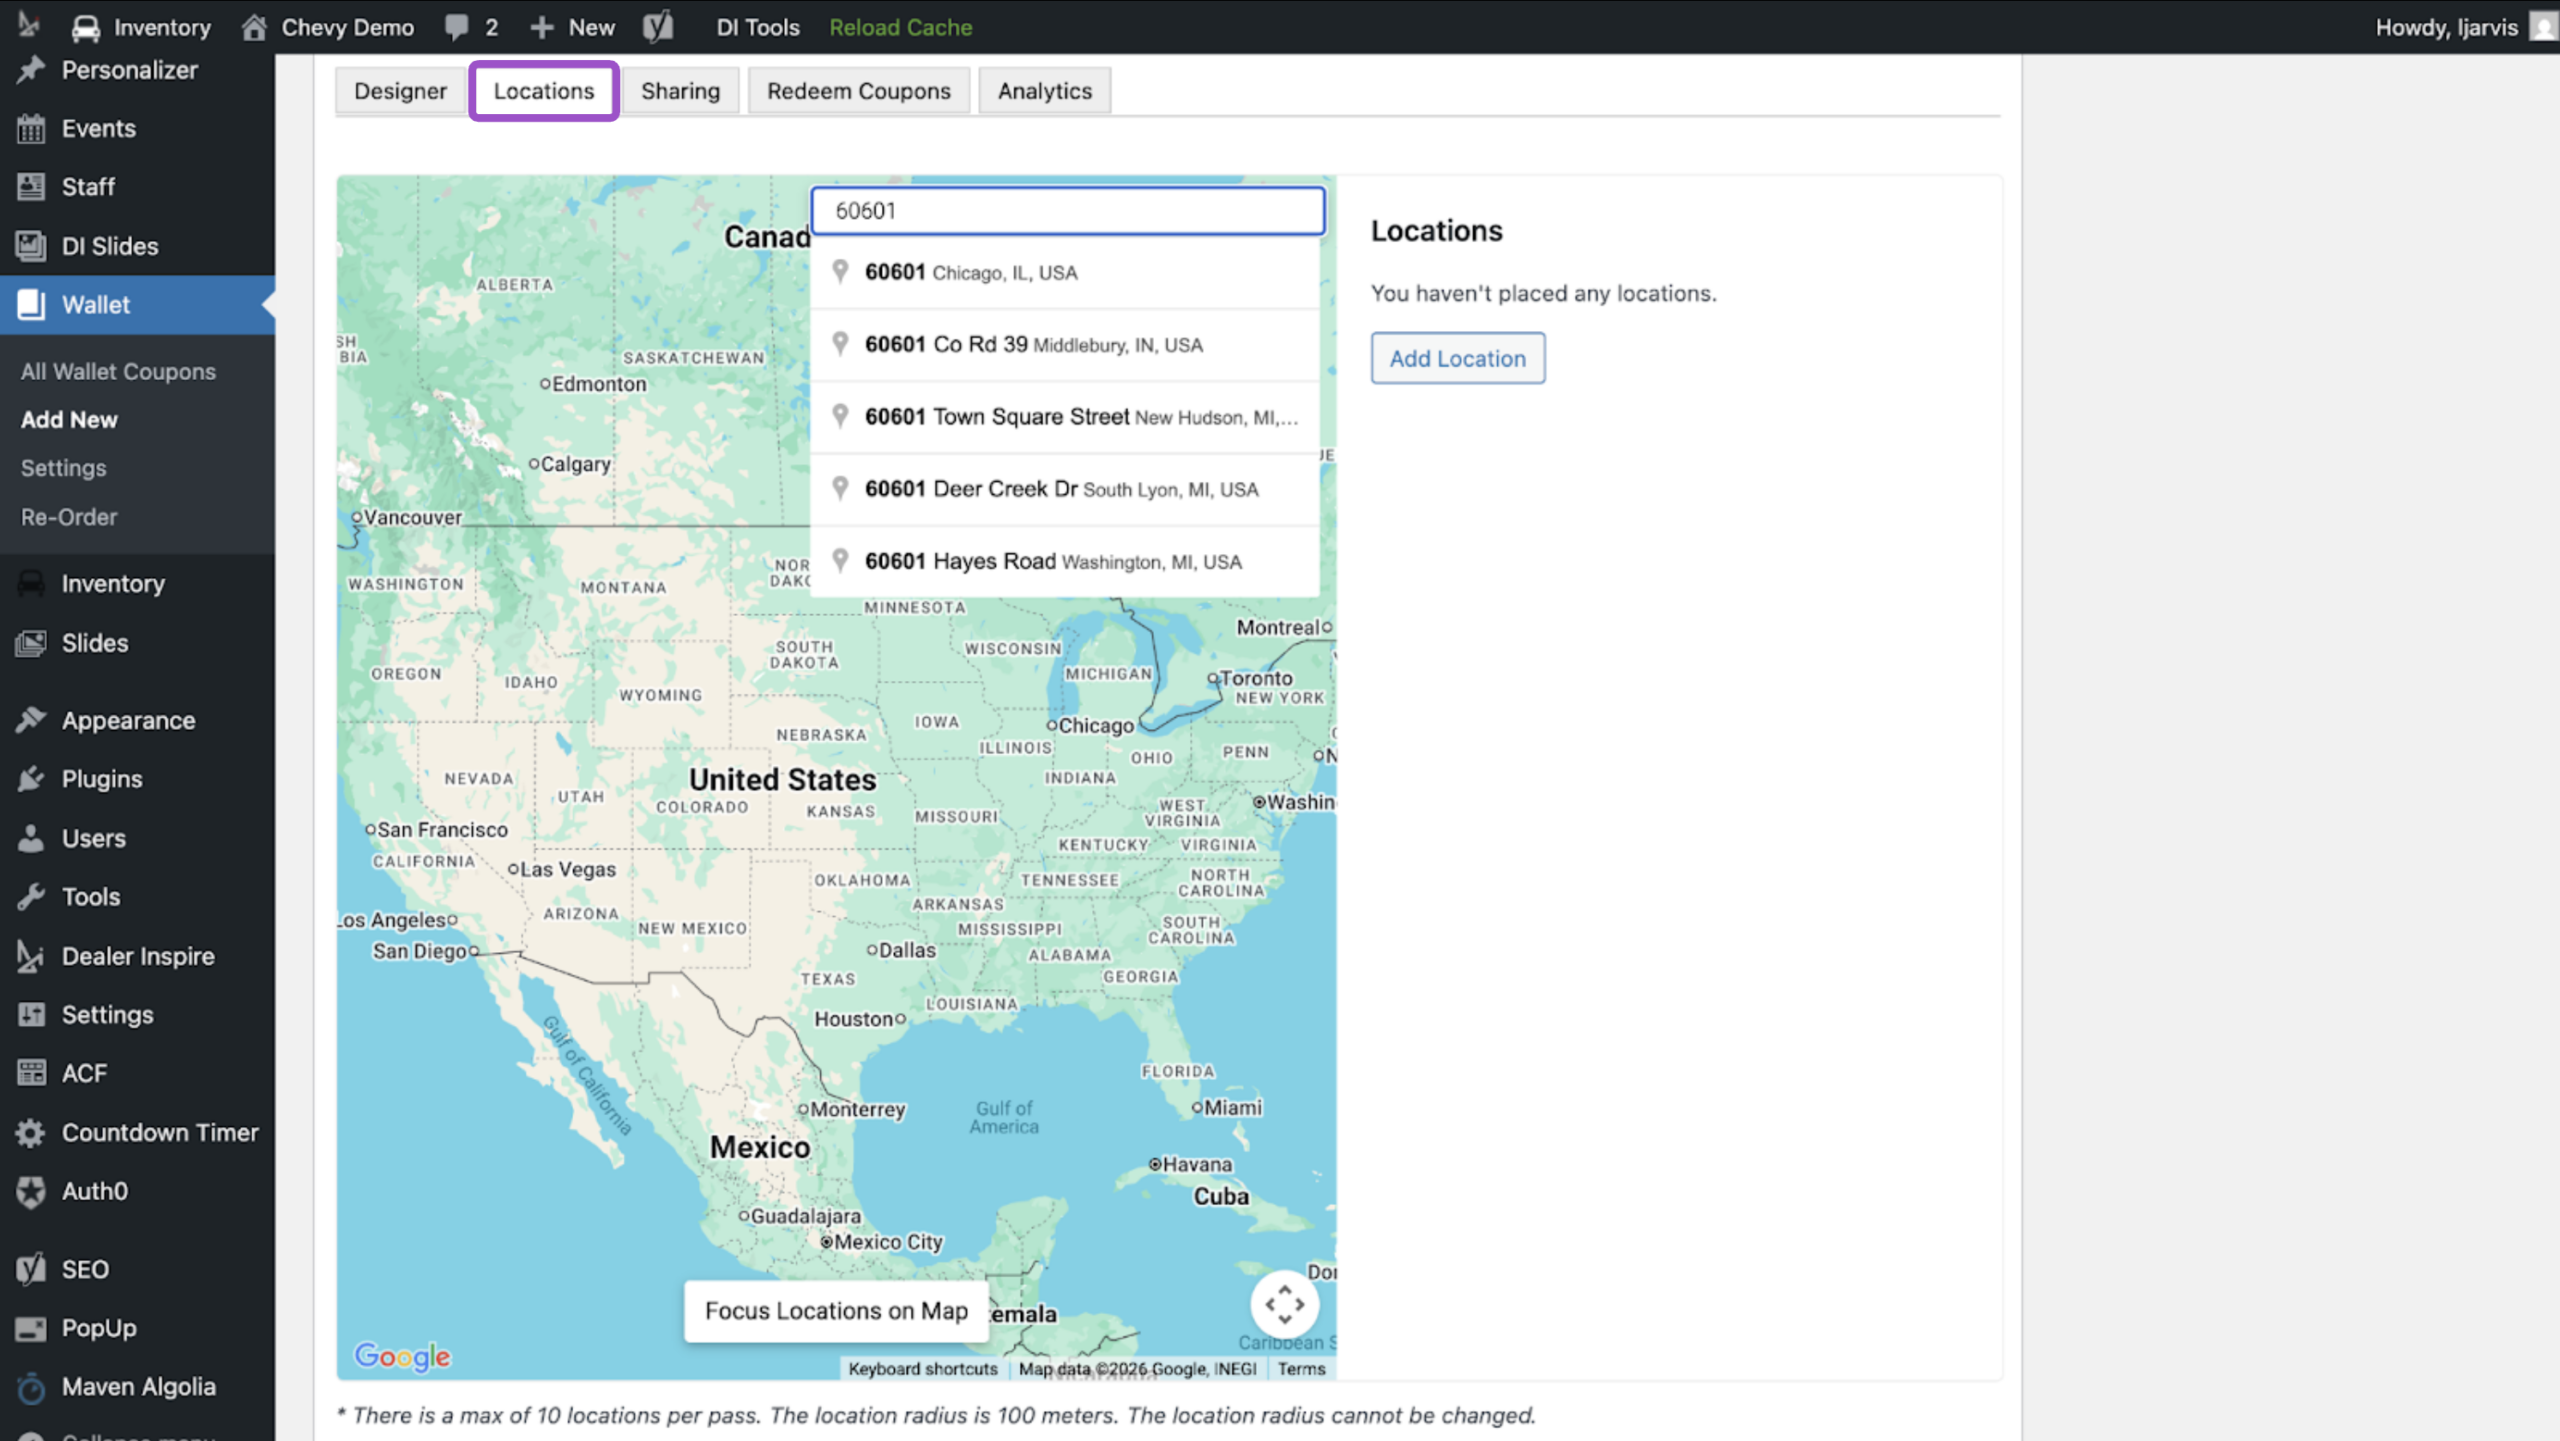
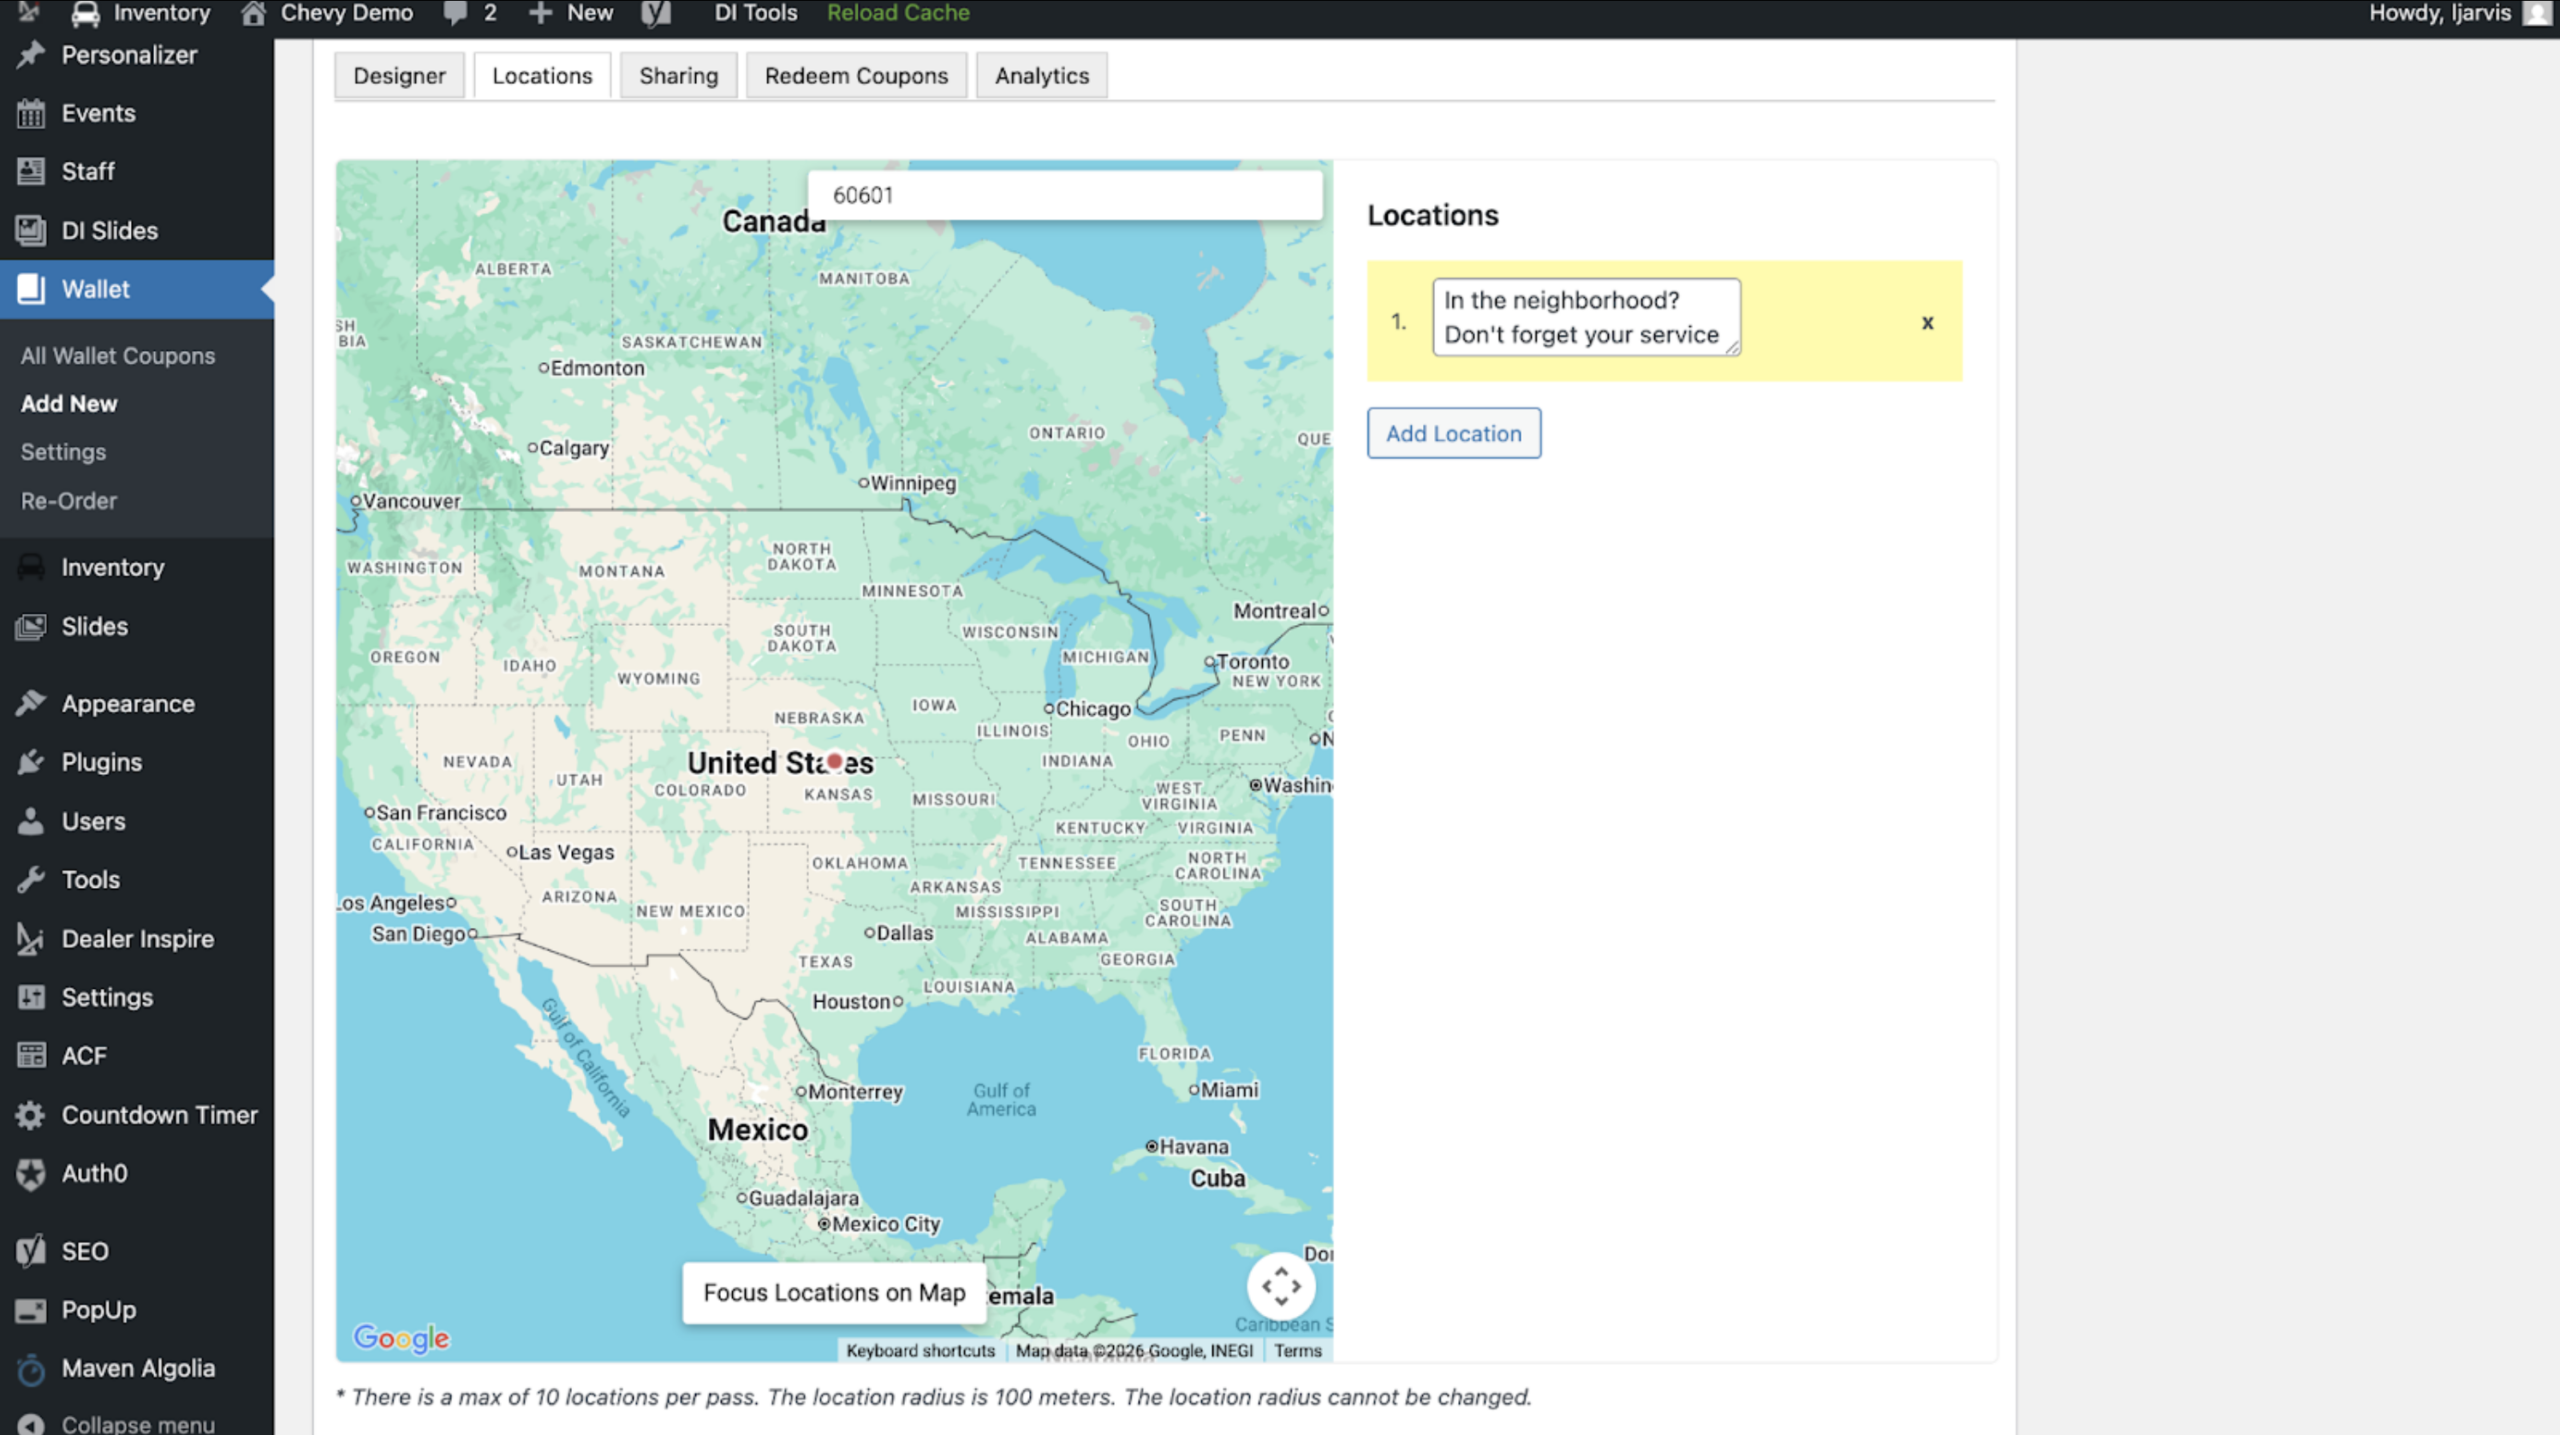
A red pin will appear on the map. Drag the pin to fine-tune placement if needed.
- The default geofence radius is 100 meters.
- A maximum of 10 locations can be added per pass.
Enter the push notification message in the text field beside the map.
Important:
- The customer must download the Wallet pass.
- Push notifications must be enabled on the customer’s device.
- The device must enter the defined geofence radius for the notification to trigger.
5 Access the sharing link
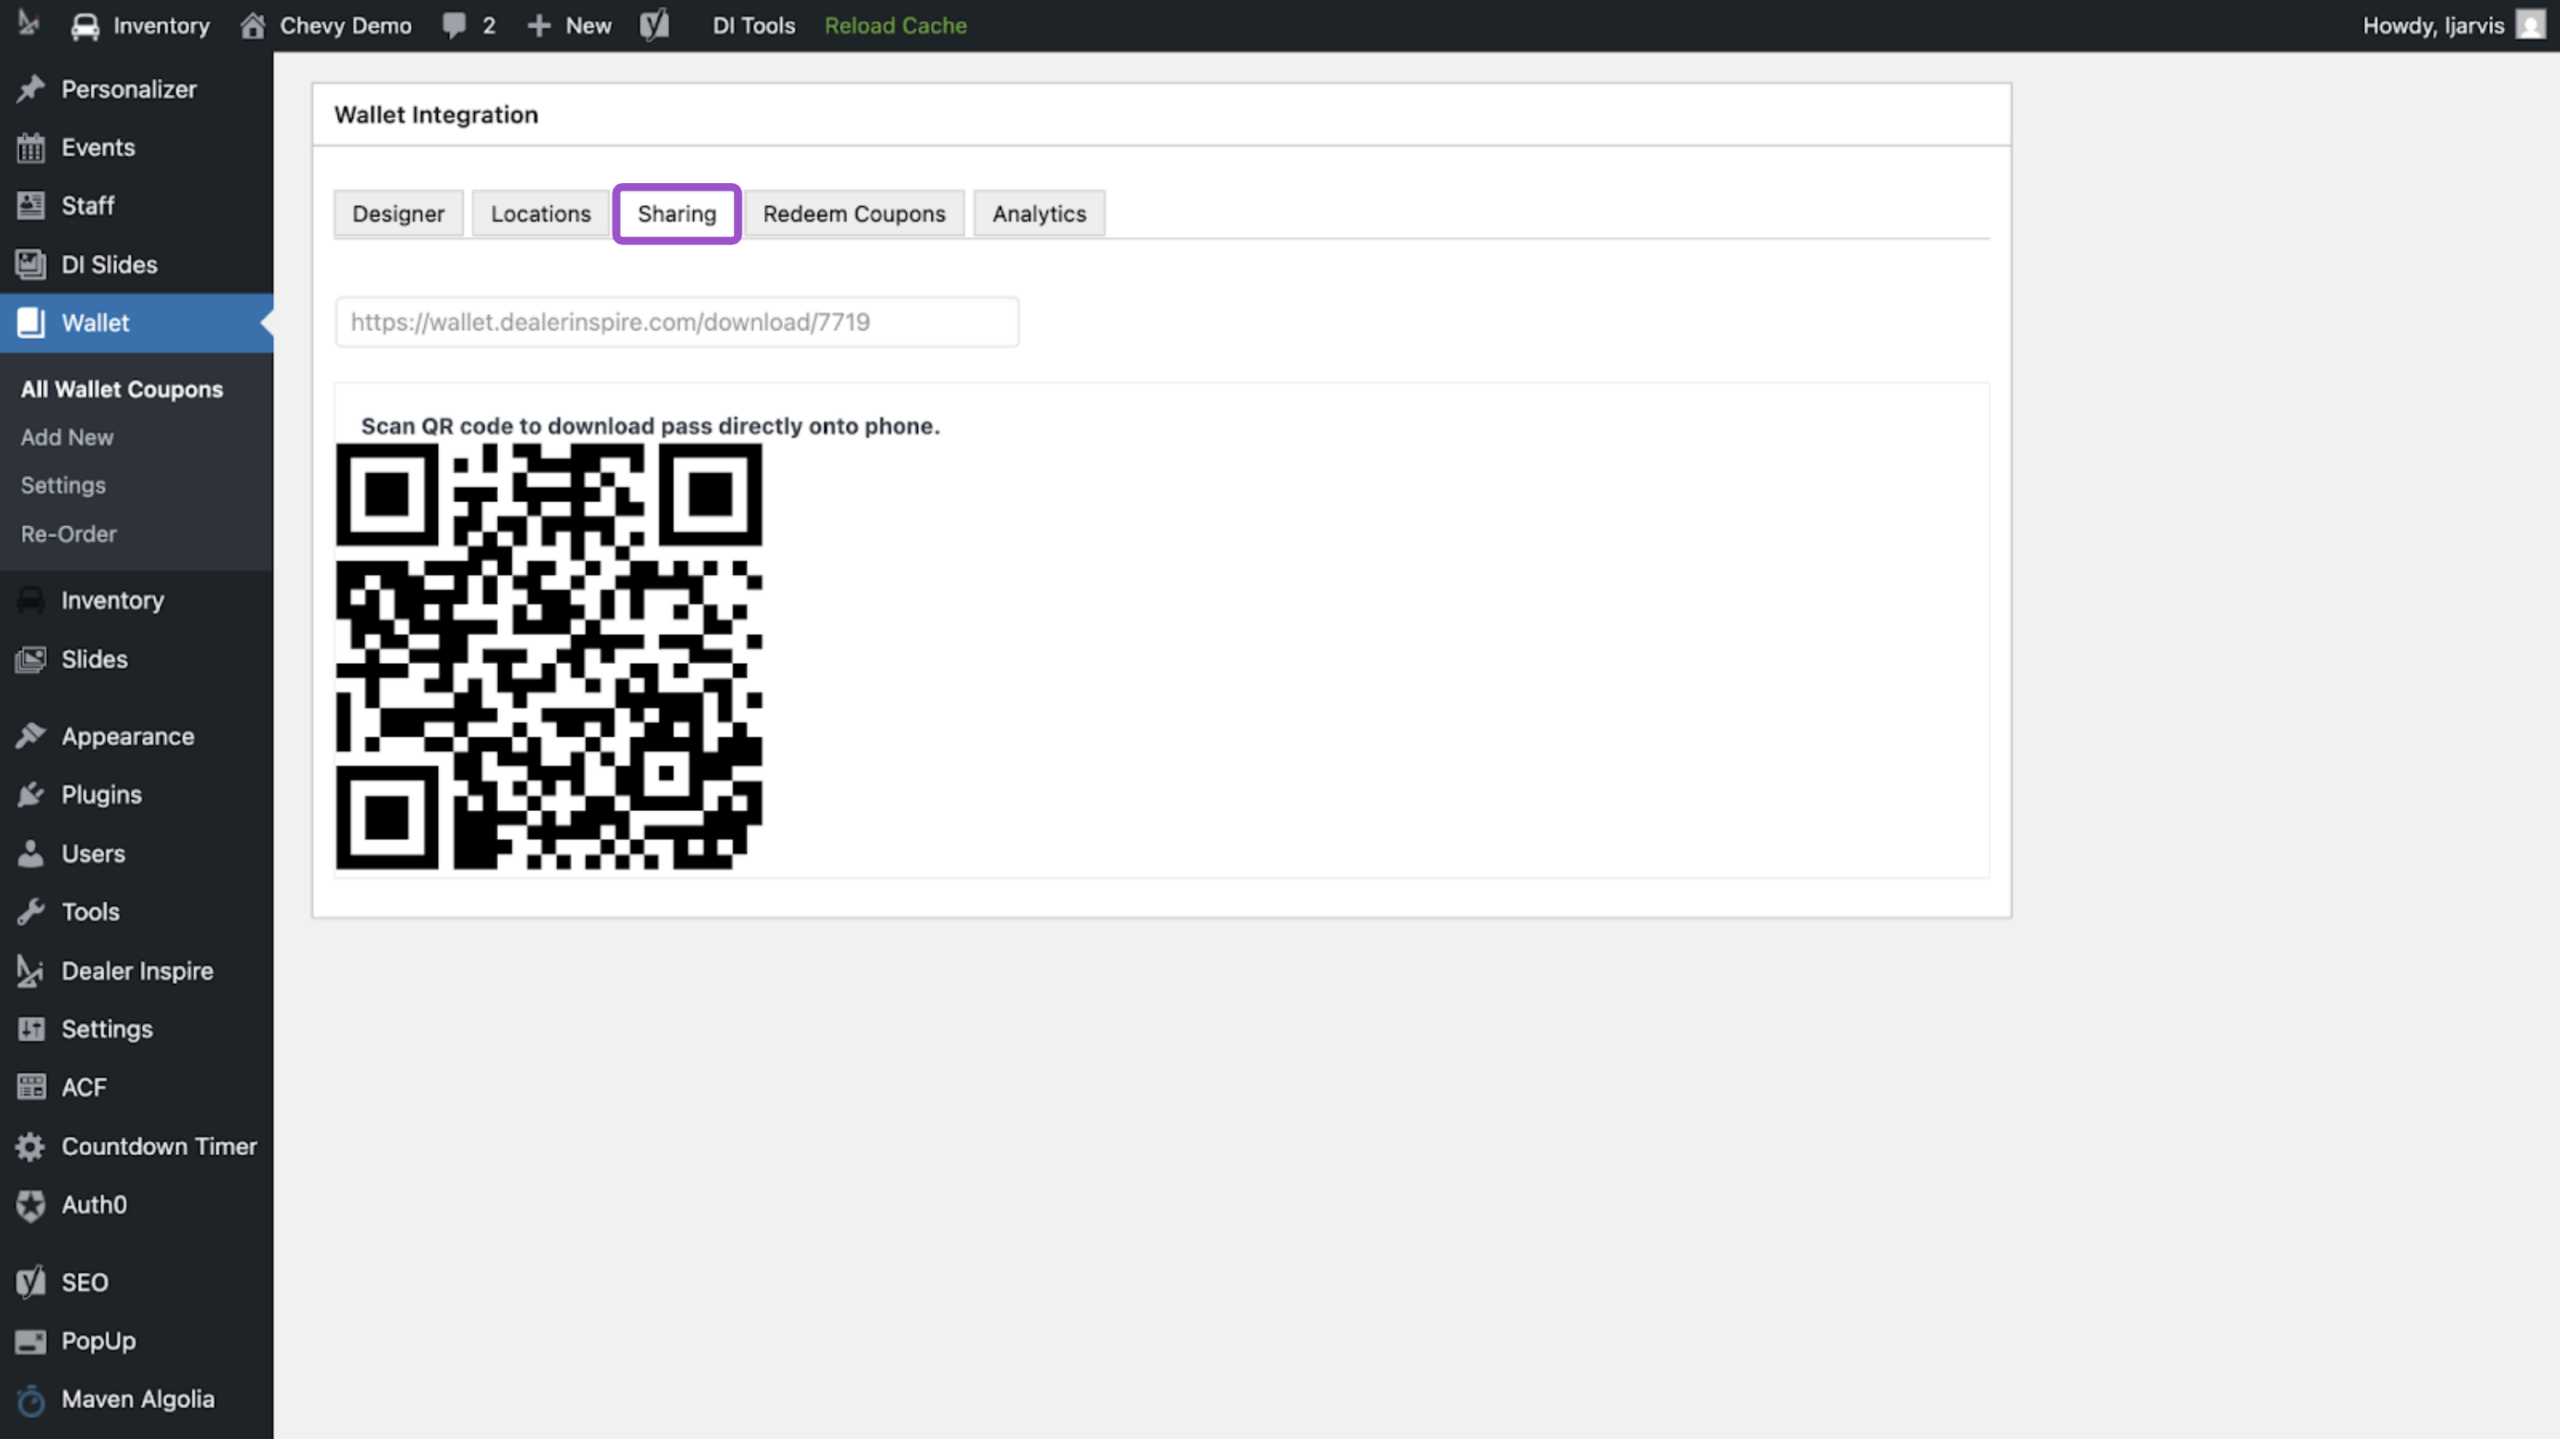
Click the Sharing tab.
This section provides:
- A direct download link to the Wallet pass.
- A QR code for the pass.
You can use this link or QR code in:
- Website pages
- Email campaigns
- Business cards
- Email signatures
- Social media posts
If the Wallet pass is edited and republished, the link and QR code remain valid and reflect the updated version.
6Add a redemption code (optional)
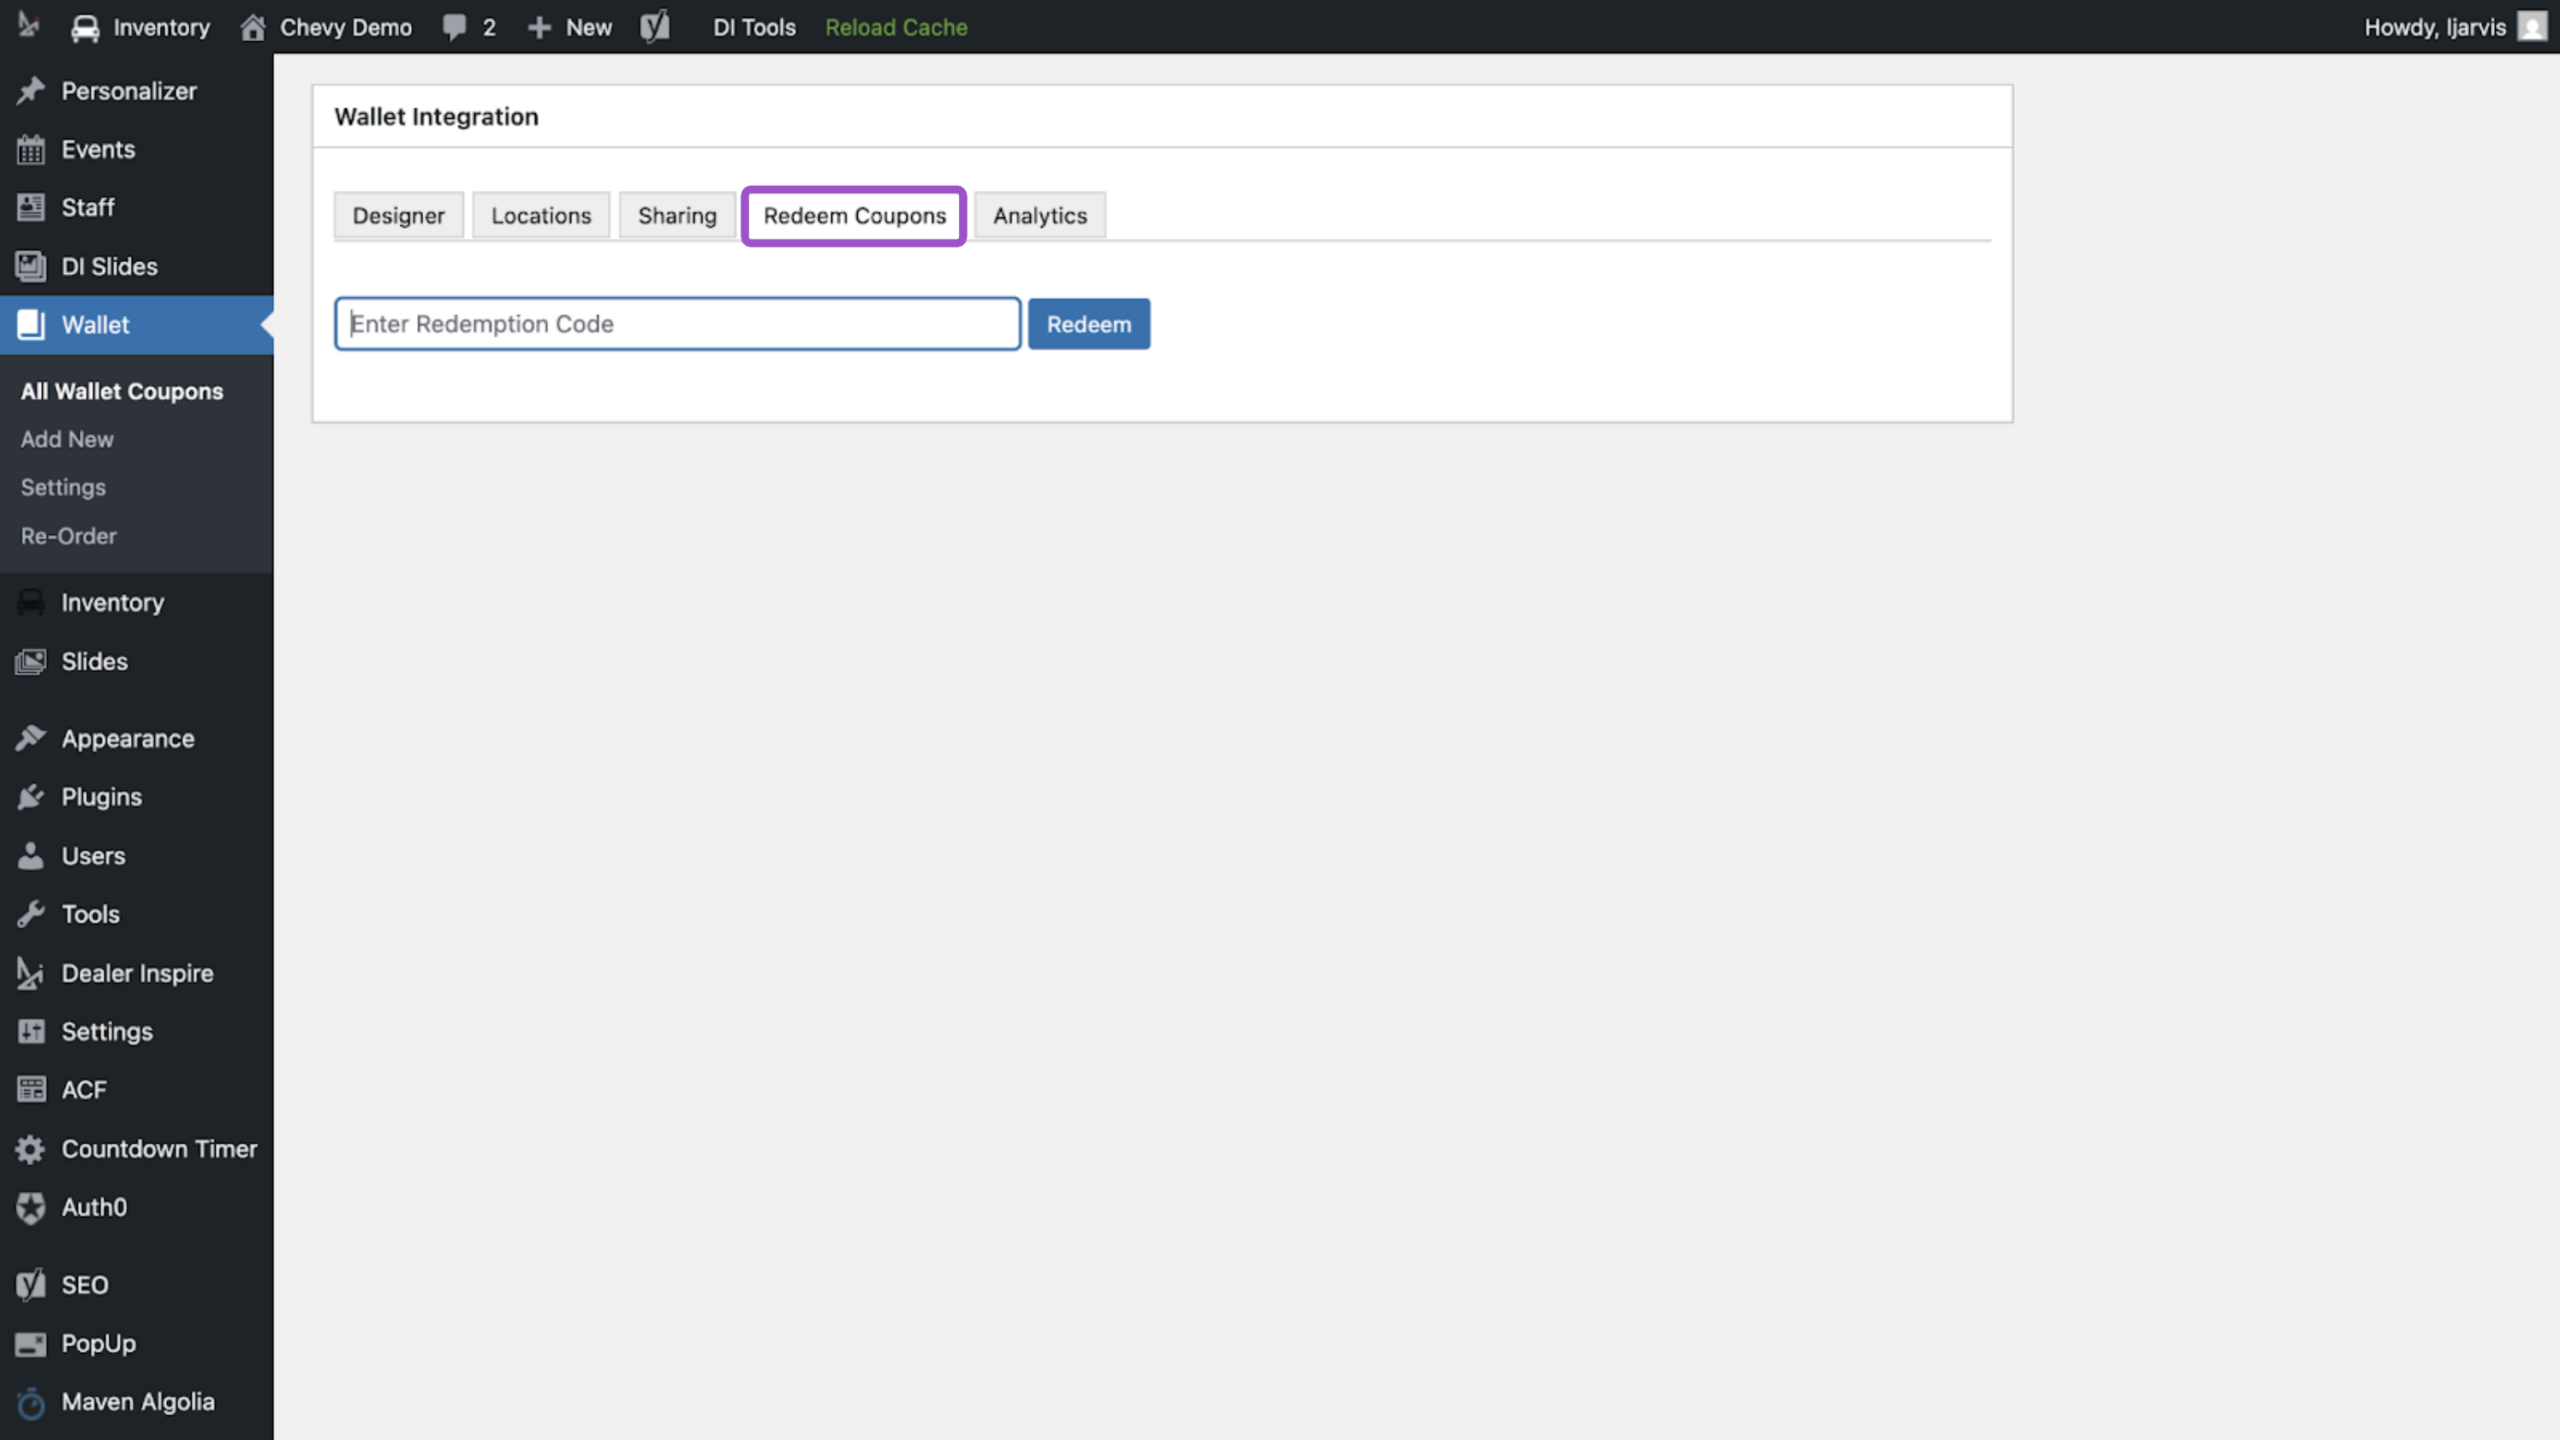
Click the Redeem Coupon tab.
You may add a unique redemption code as a backup method in case the QR code cannot be scanned. This allows your team to manually mark the pass as redeemed.
Redemptions tracked this way will be reflected in the Wallet Analytics tab.
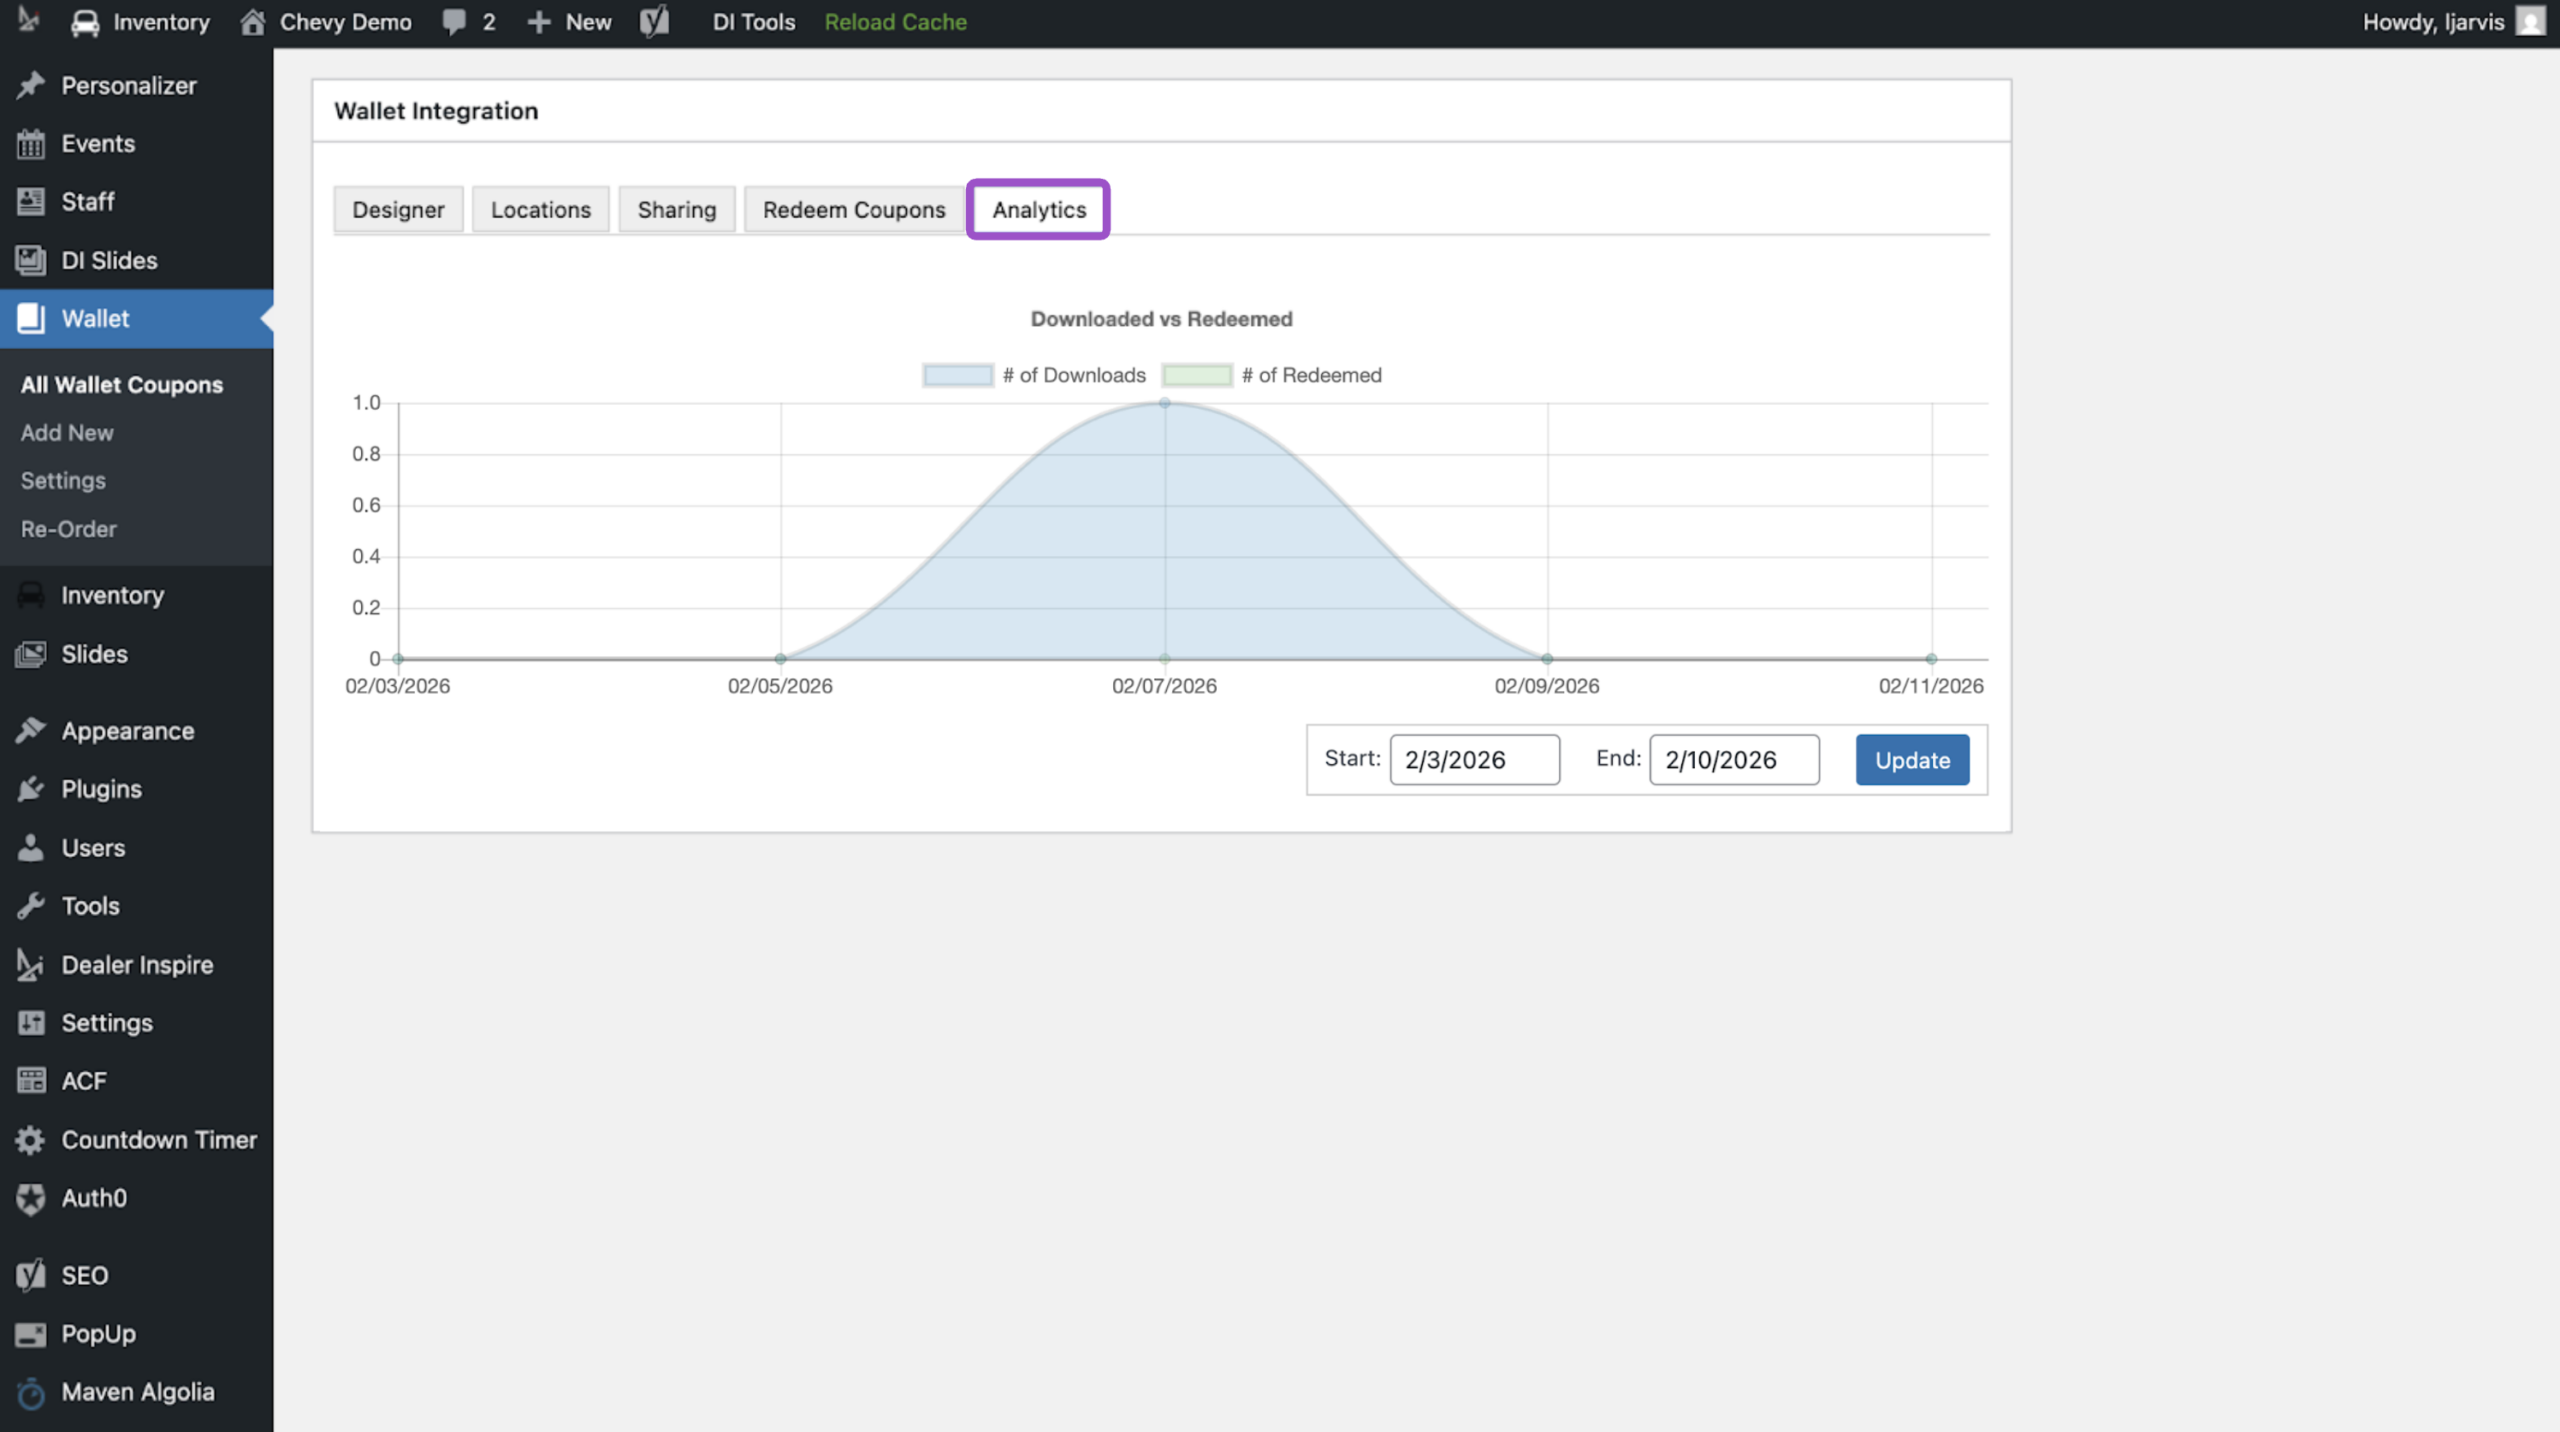
7Review engagement and analytics
Click the Analytics tab to view engagement data for the pass, including:
- Number of downloads
- Number of redemptions
- Activity within a selected time period
Use this data to measure performance and customer engagement.
8Save your coupon
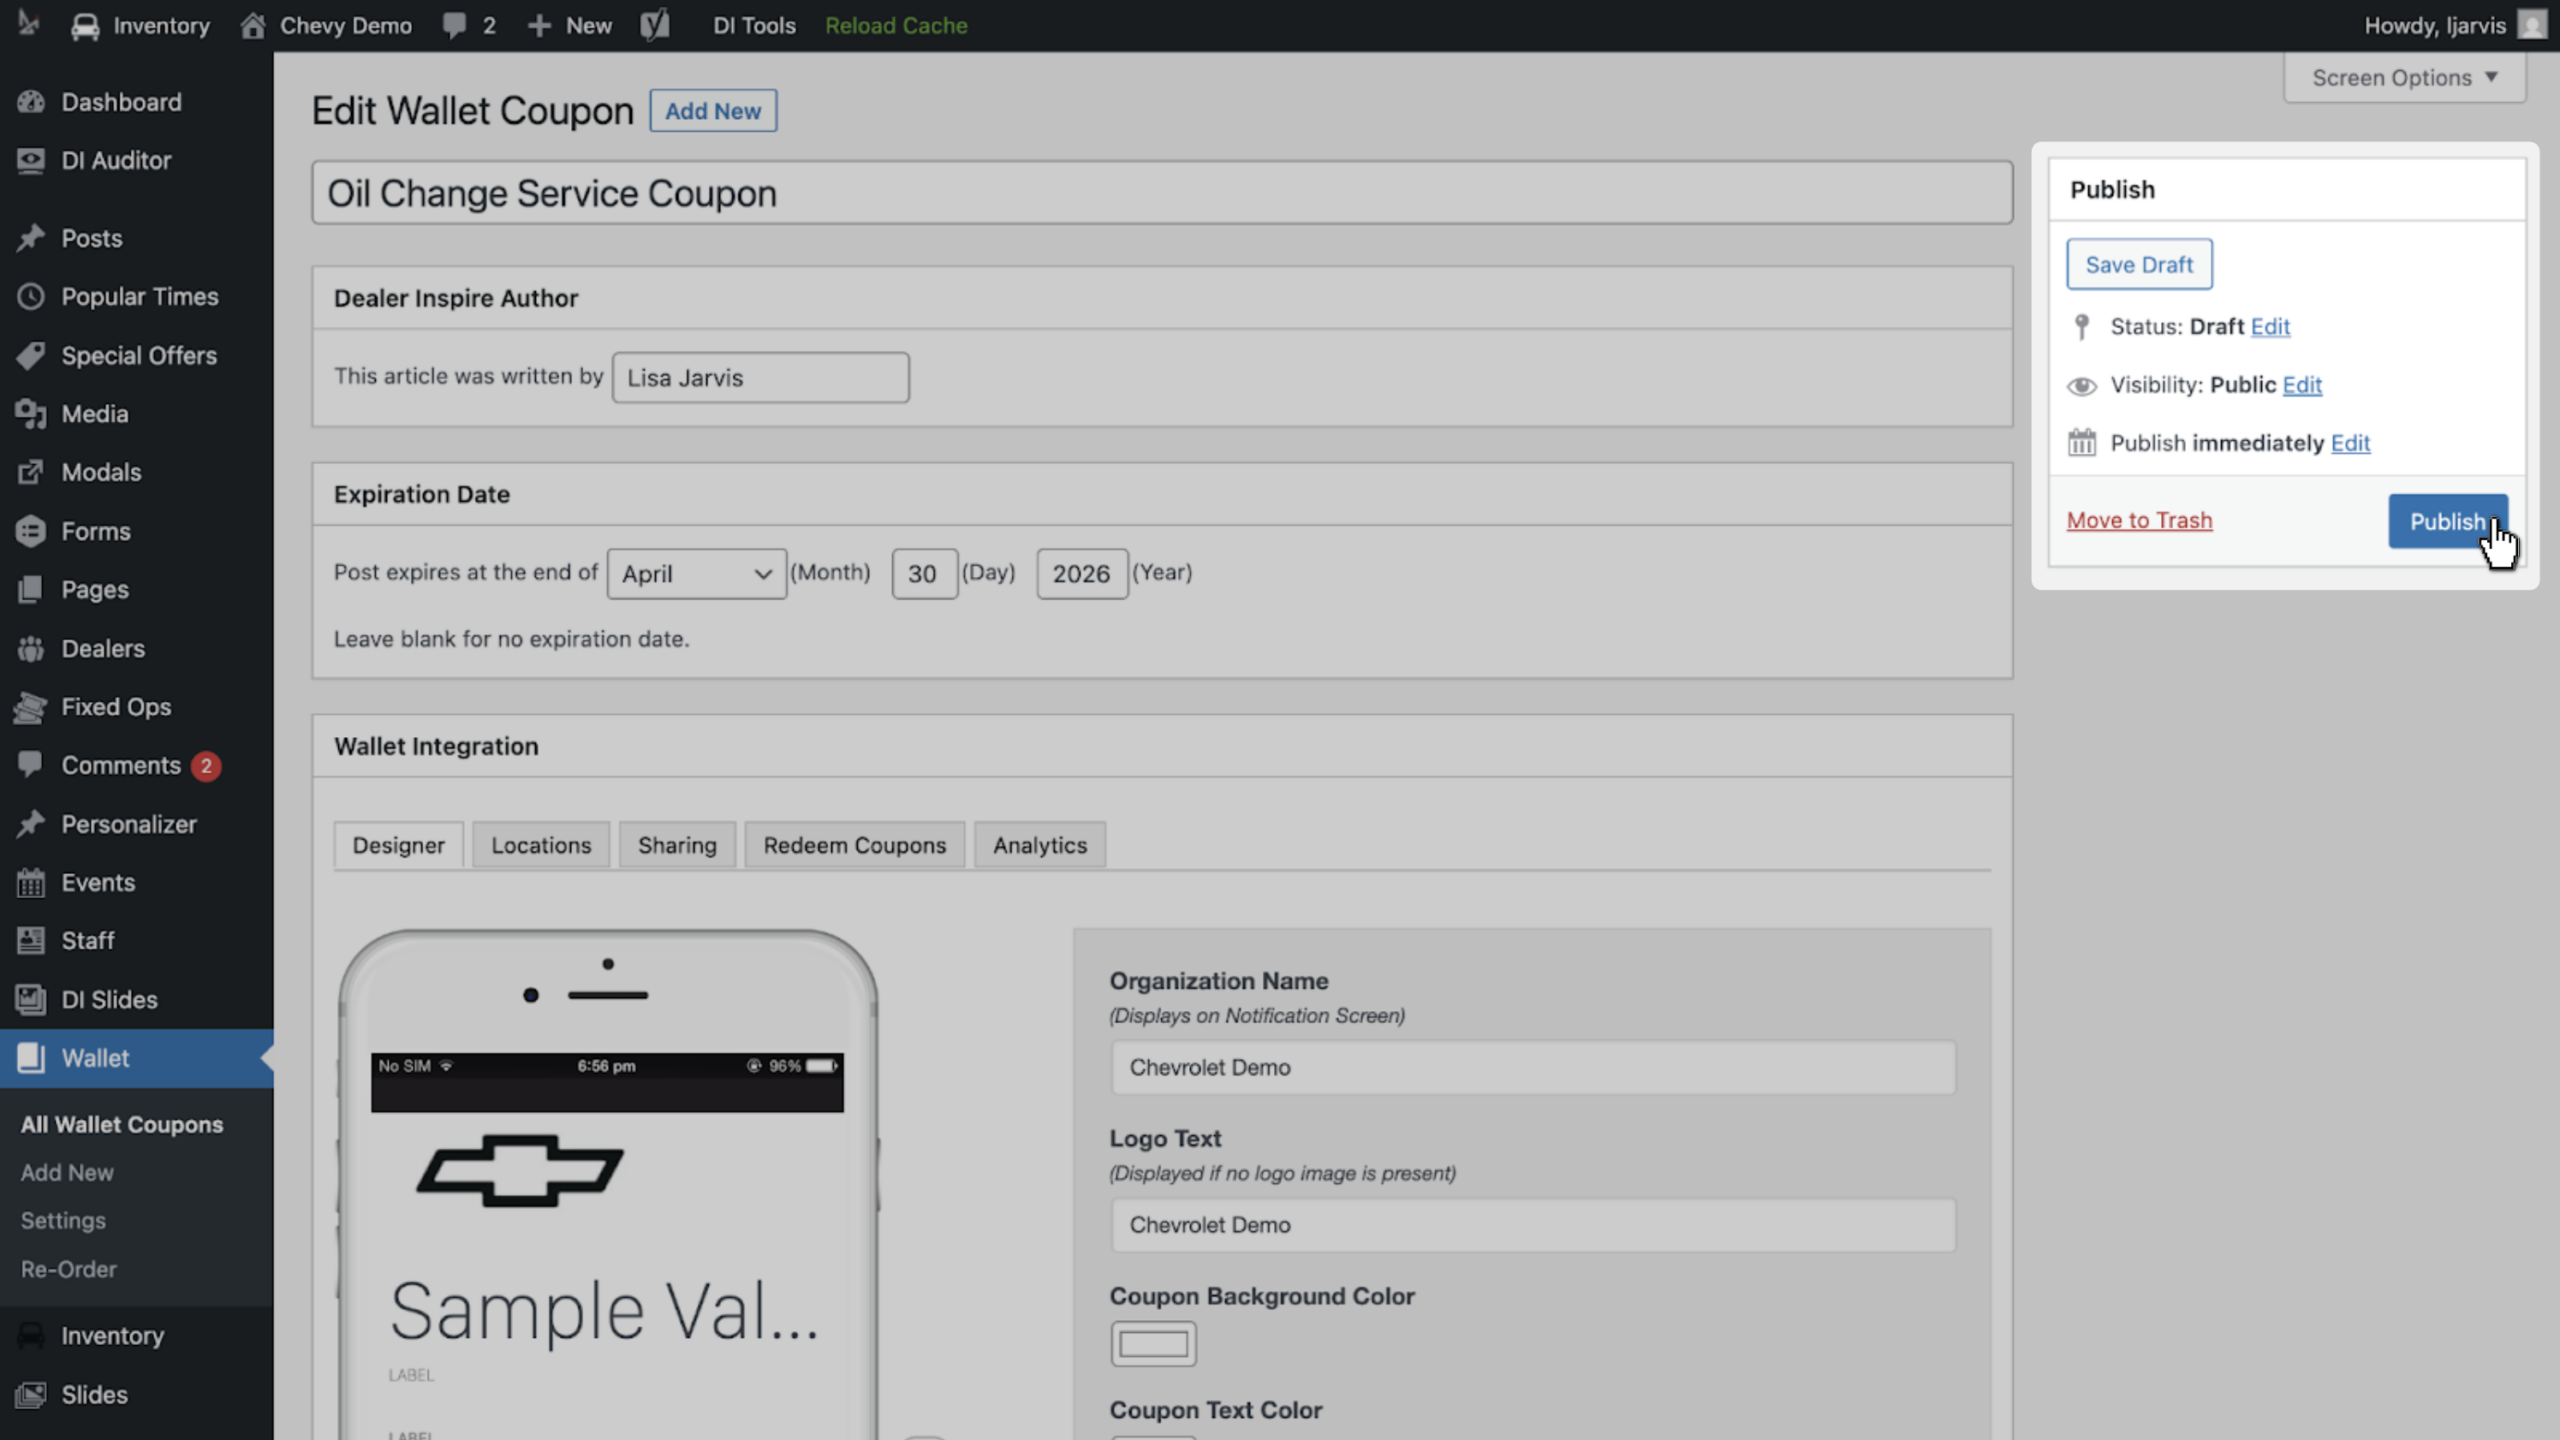
- Scroll to the top of the page and click Publish.
- Only published Wallet passes will be available to attach to Fixed Ops coupons.
Part 2: Attach the Wallet pass to a fixed ops coupon
Now that your Wallet pass is created, you can find an existing coupon in the Fixed Ops plugin to assign the Wallet integration to.
1Access the Fixed Ops plugin
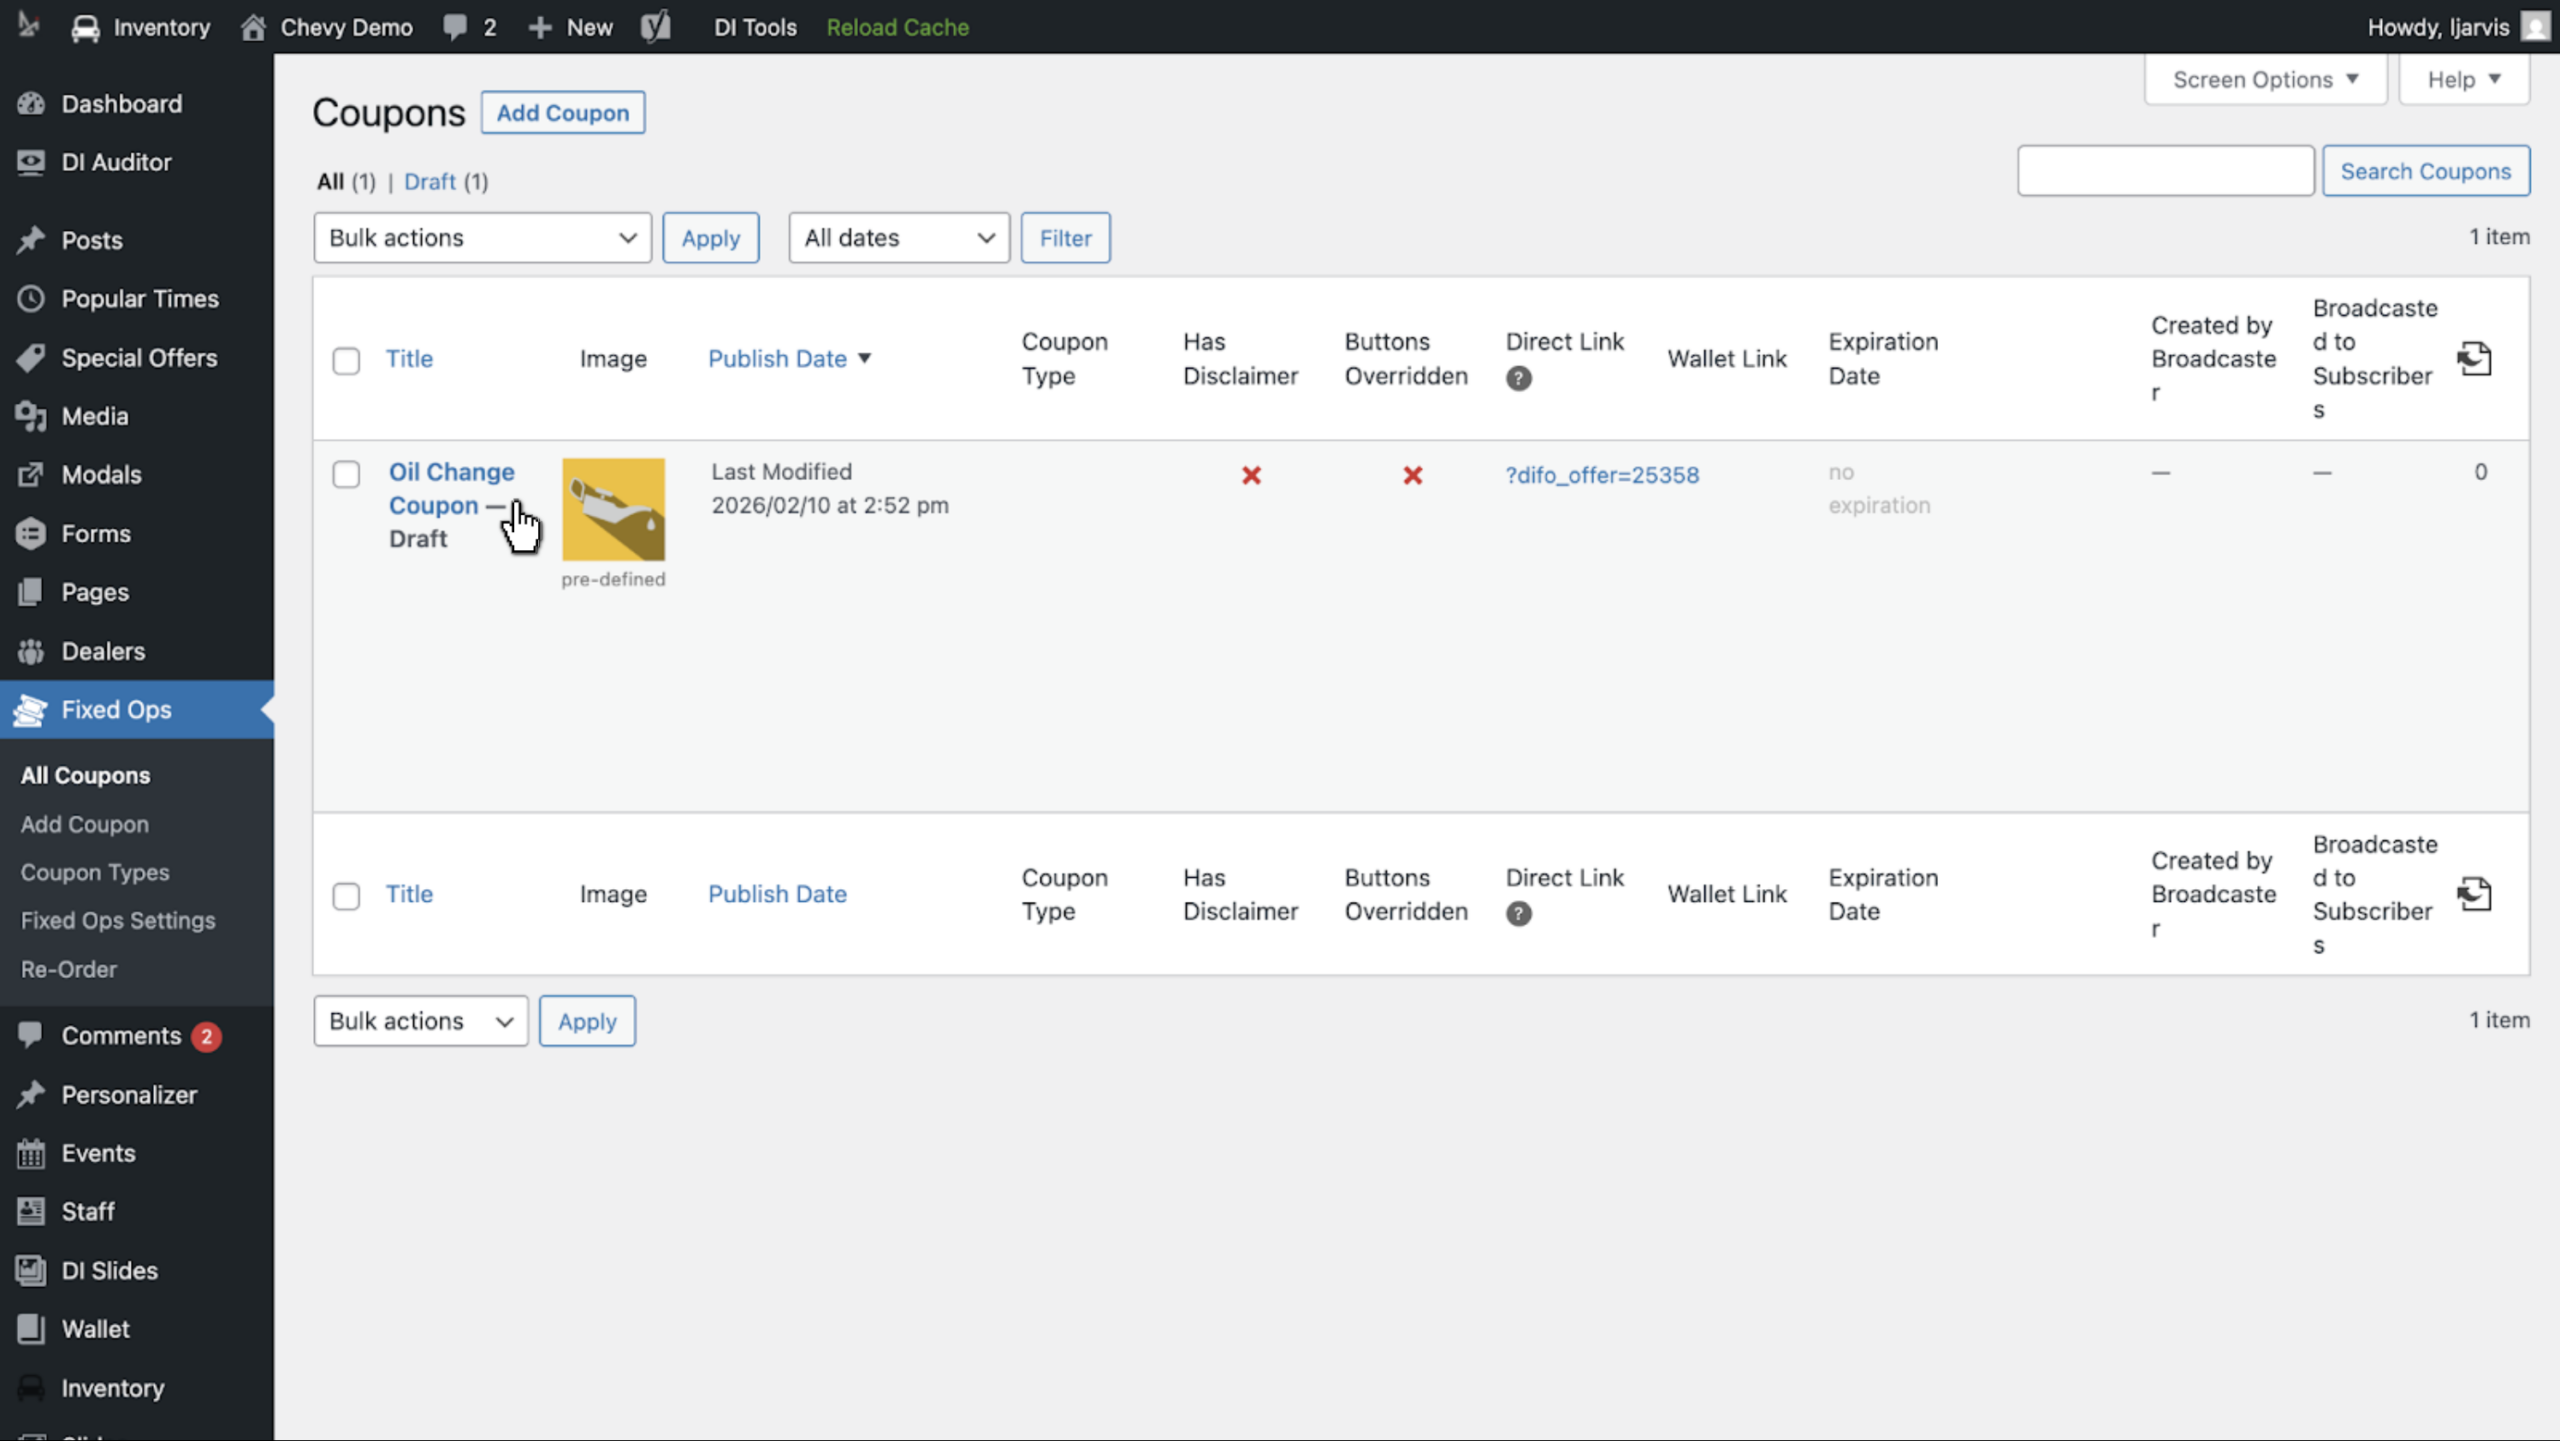
- In the left-side menu, select the Fixed Ops plugin.
- Click All Coupons.
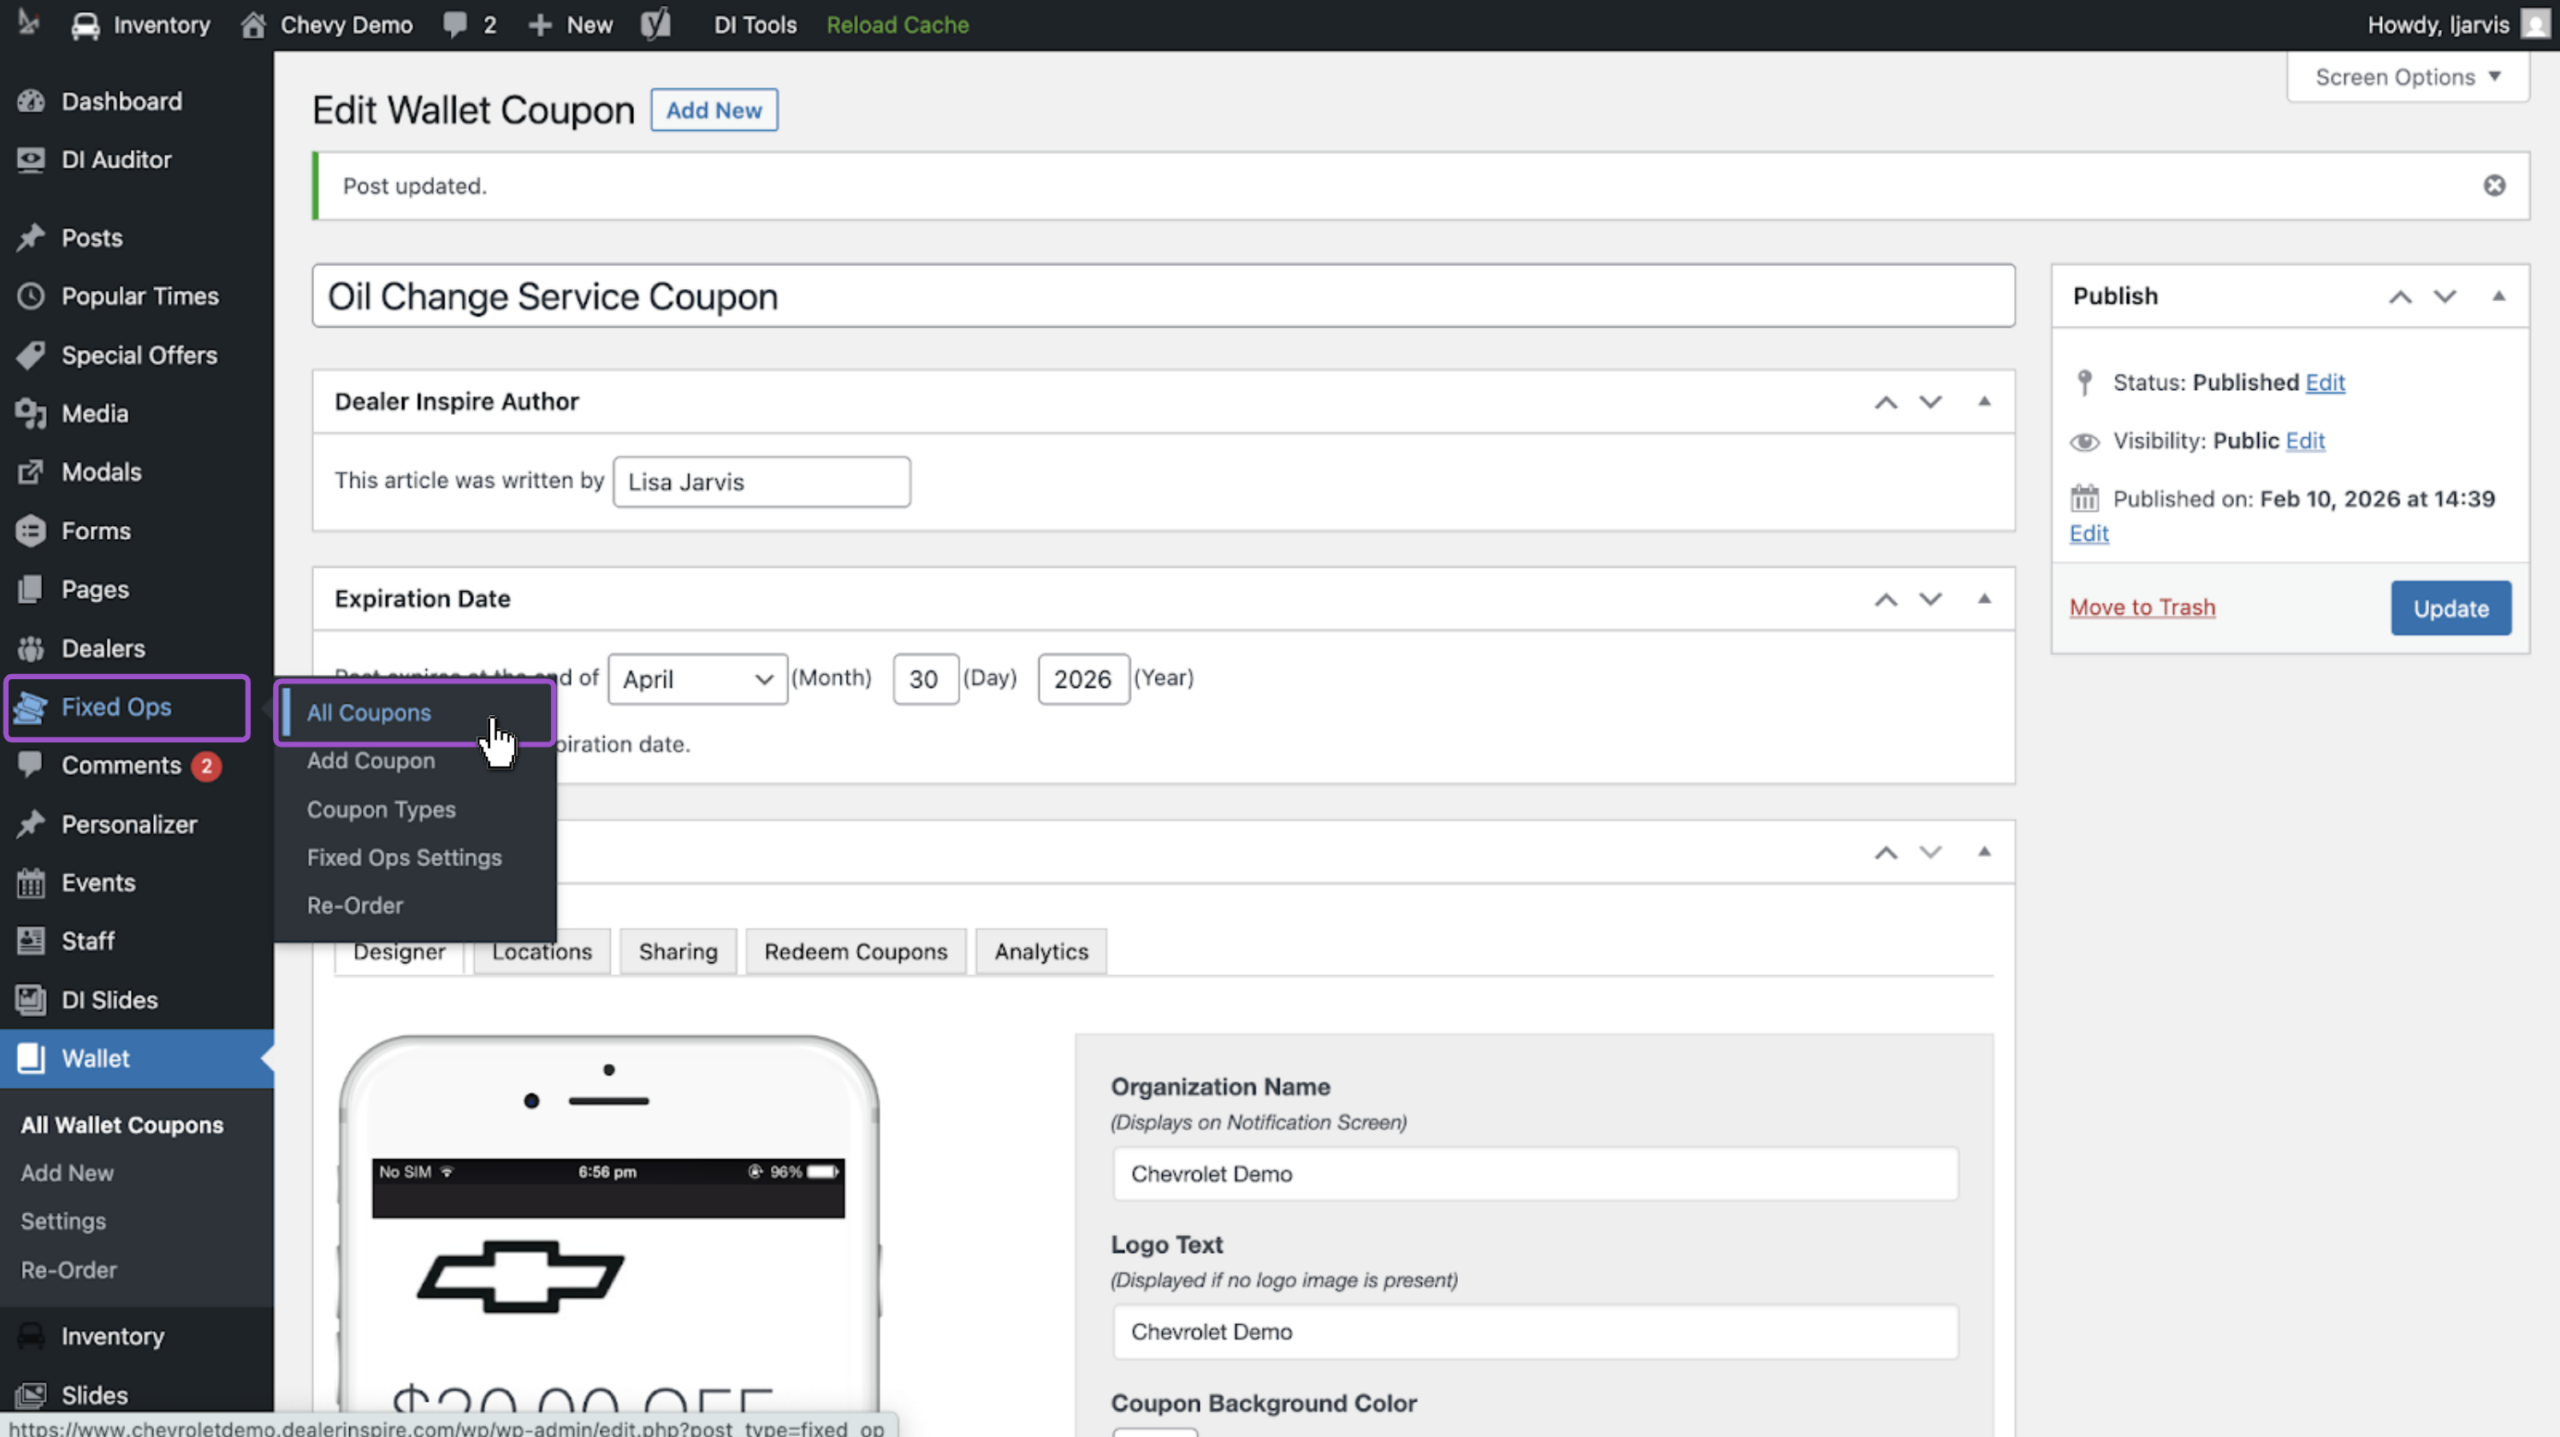
- Select the coupon you want to edit.
If no coupon exists, create one using the Fixed Ops coupon editor before proceeding.
2Assign the Wallet pass
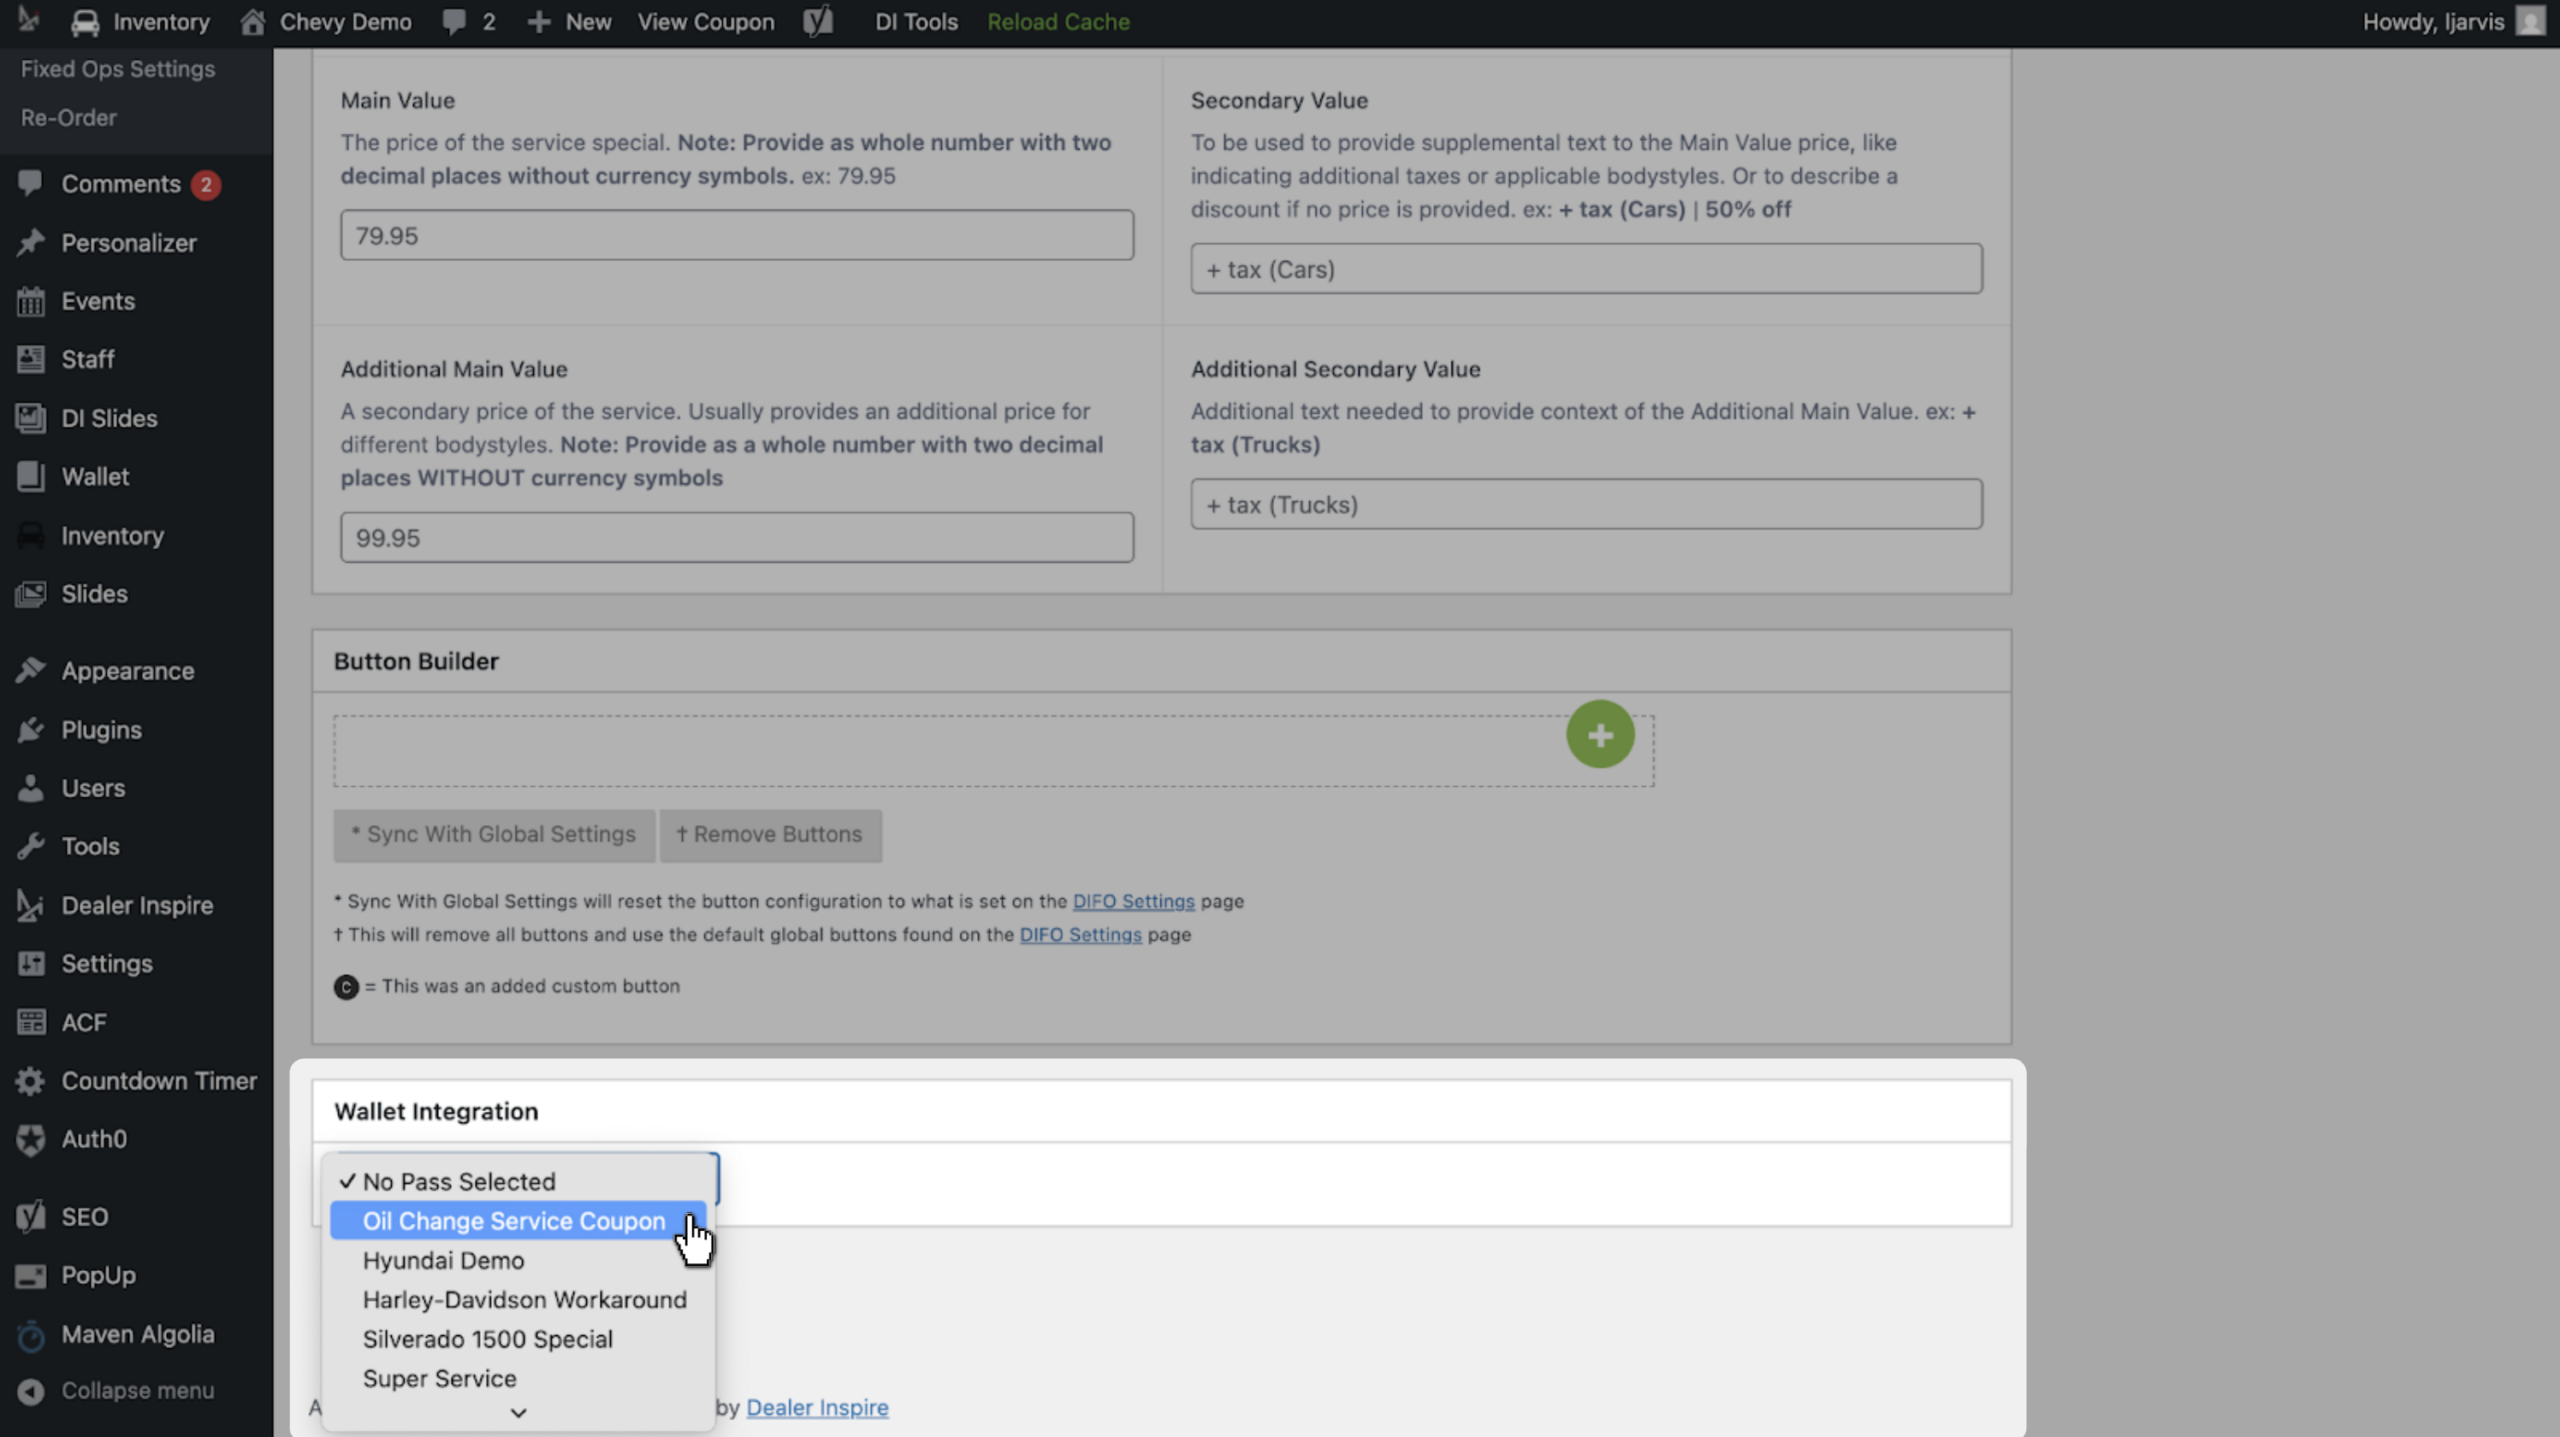
- Scroll to the bottom of the coupon editor.
- Locate the Wallet Integration section.
- Select your published Wallet pass from the dropdown menu.
Only published Wallet passes will appear in this list.
3Update the service coupon
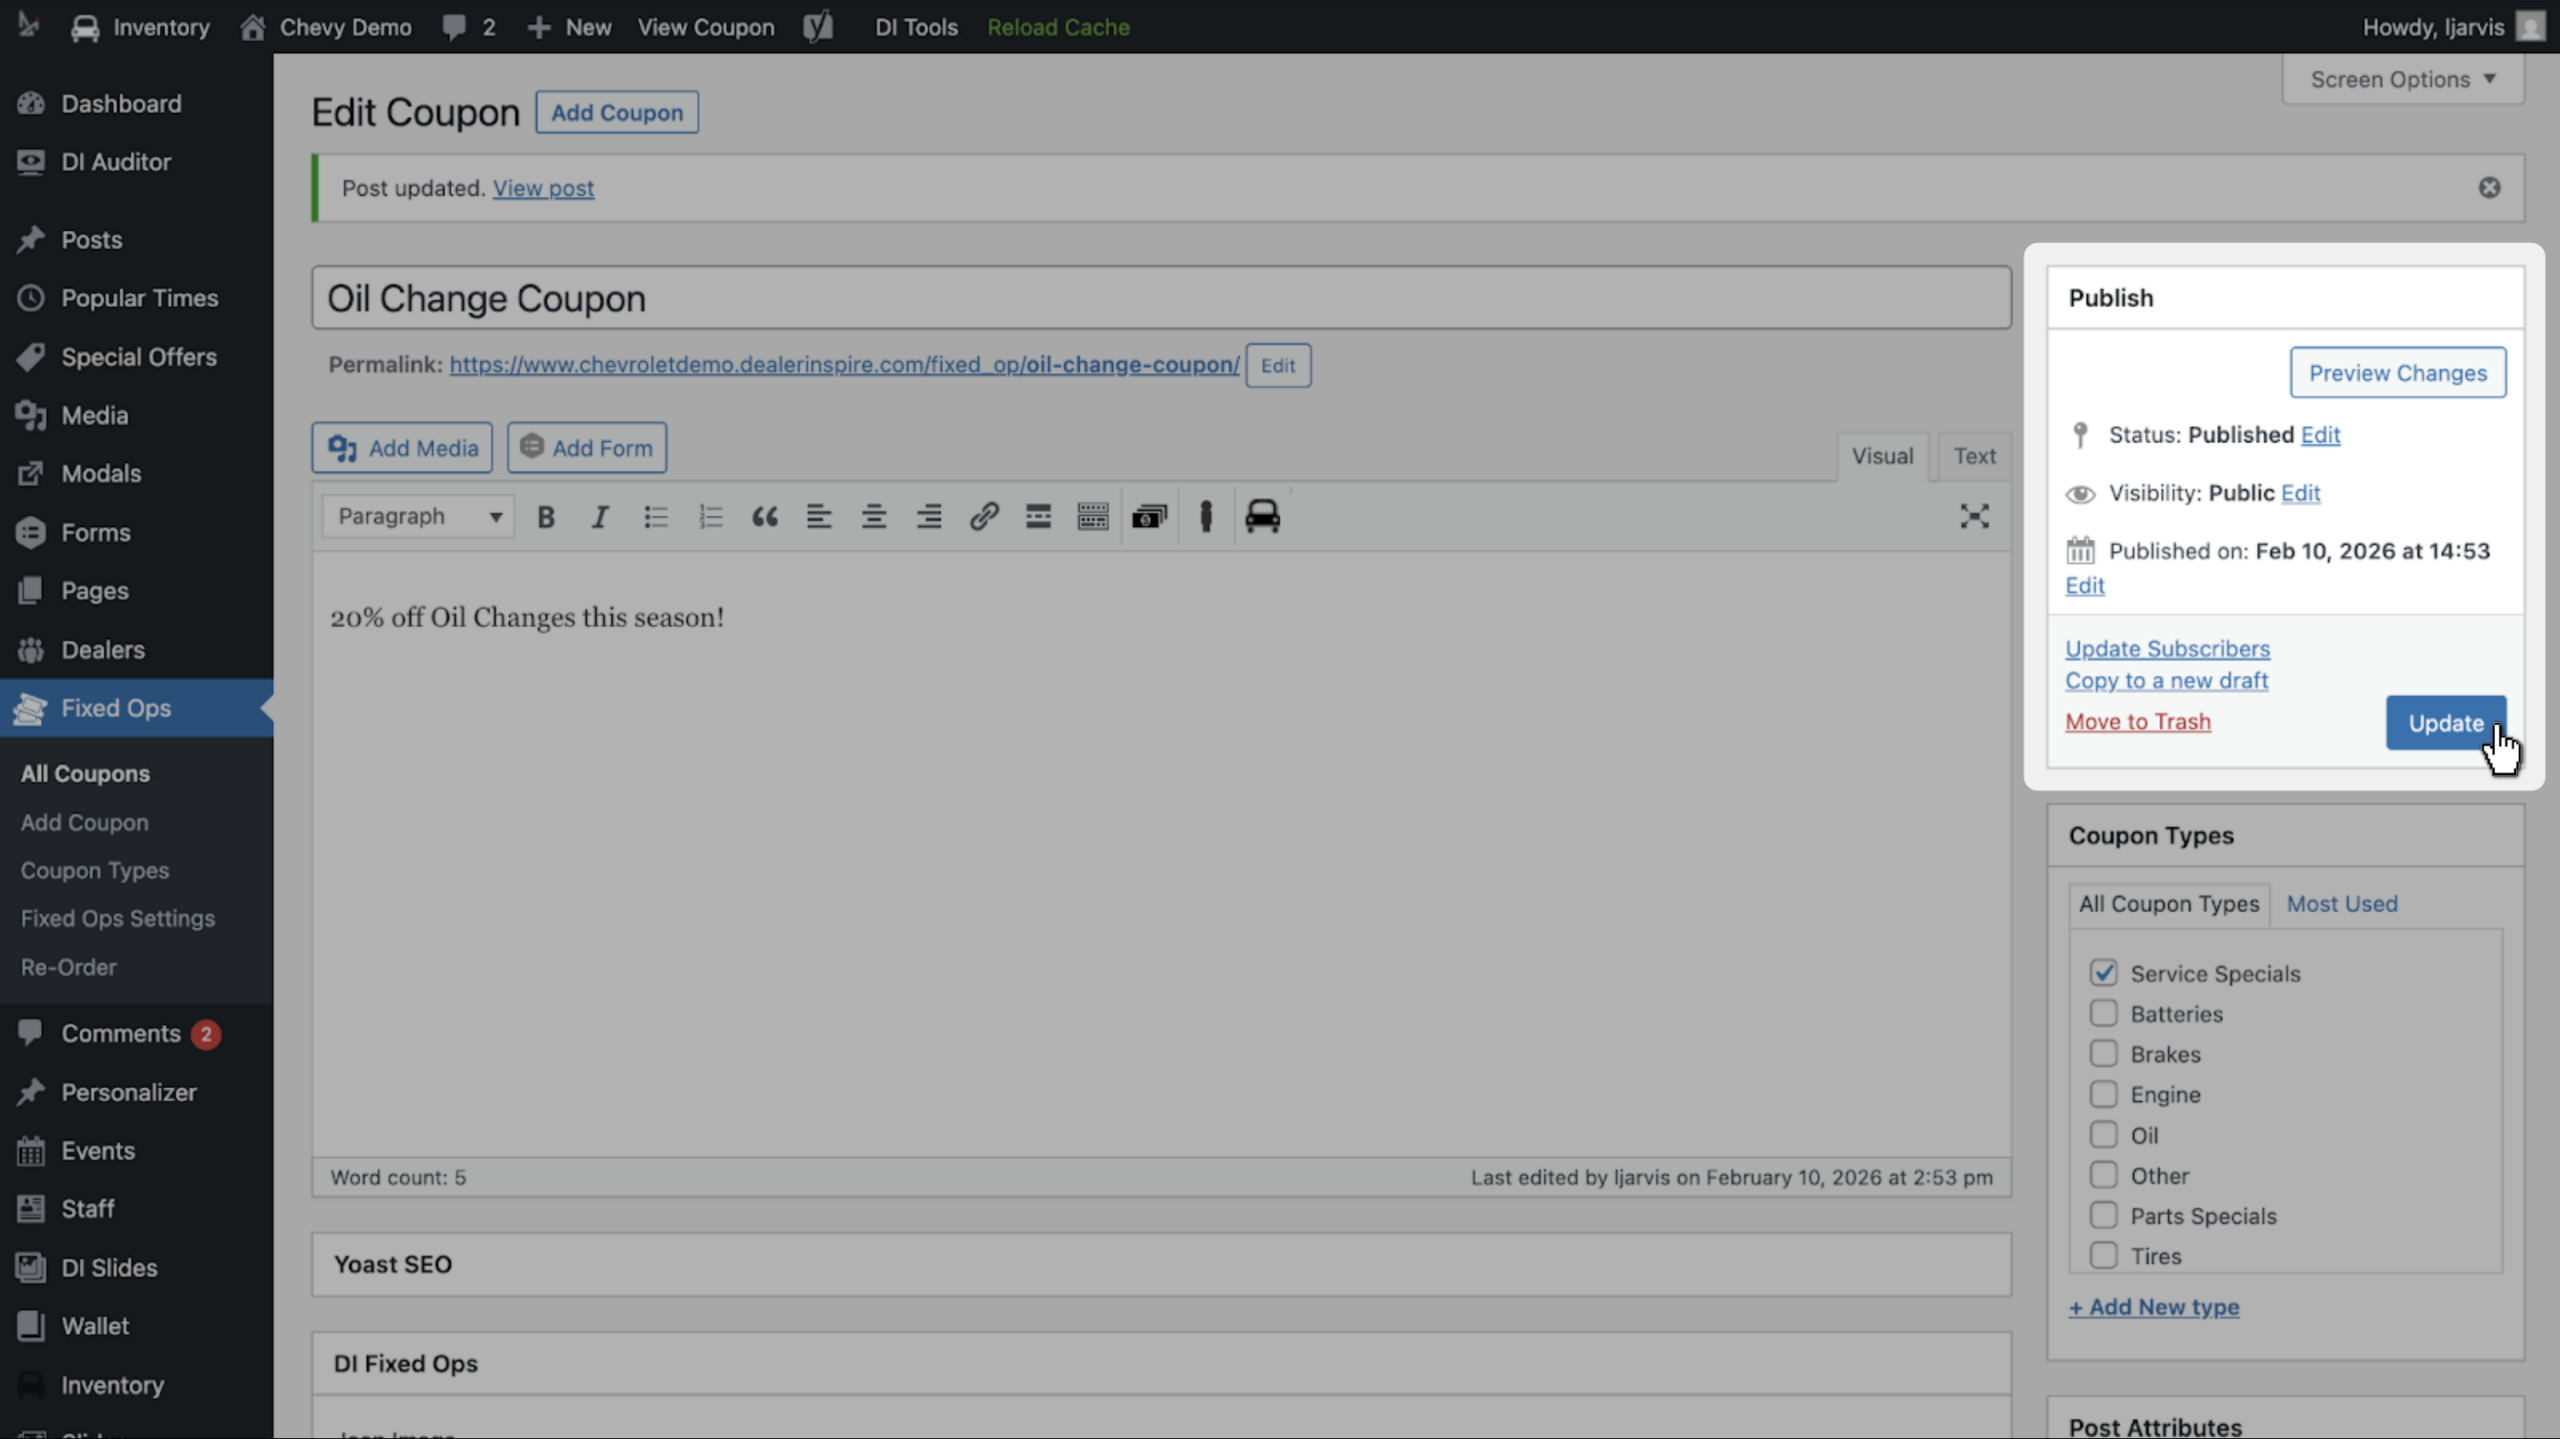
- Scroll to the top of the page and click Update.
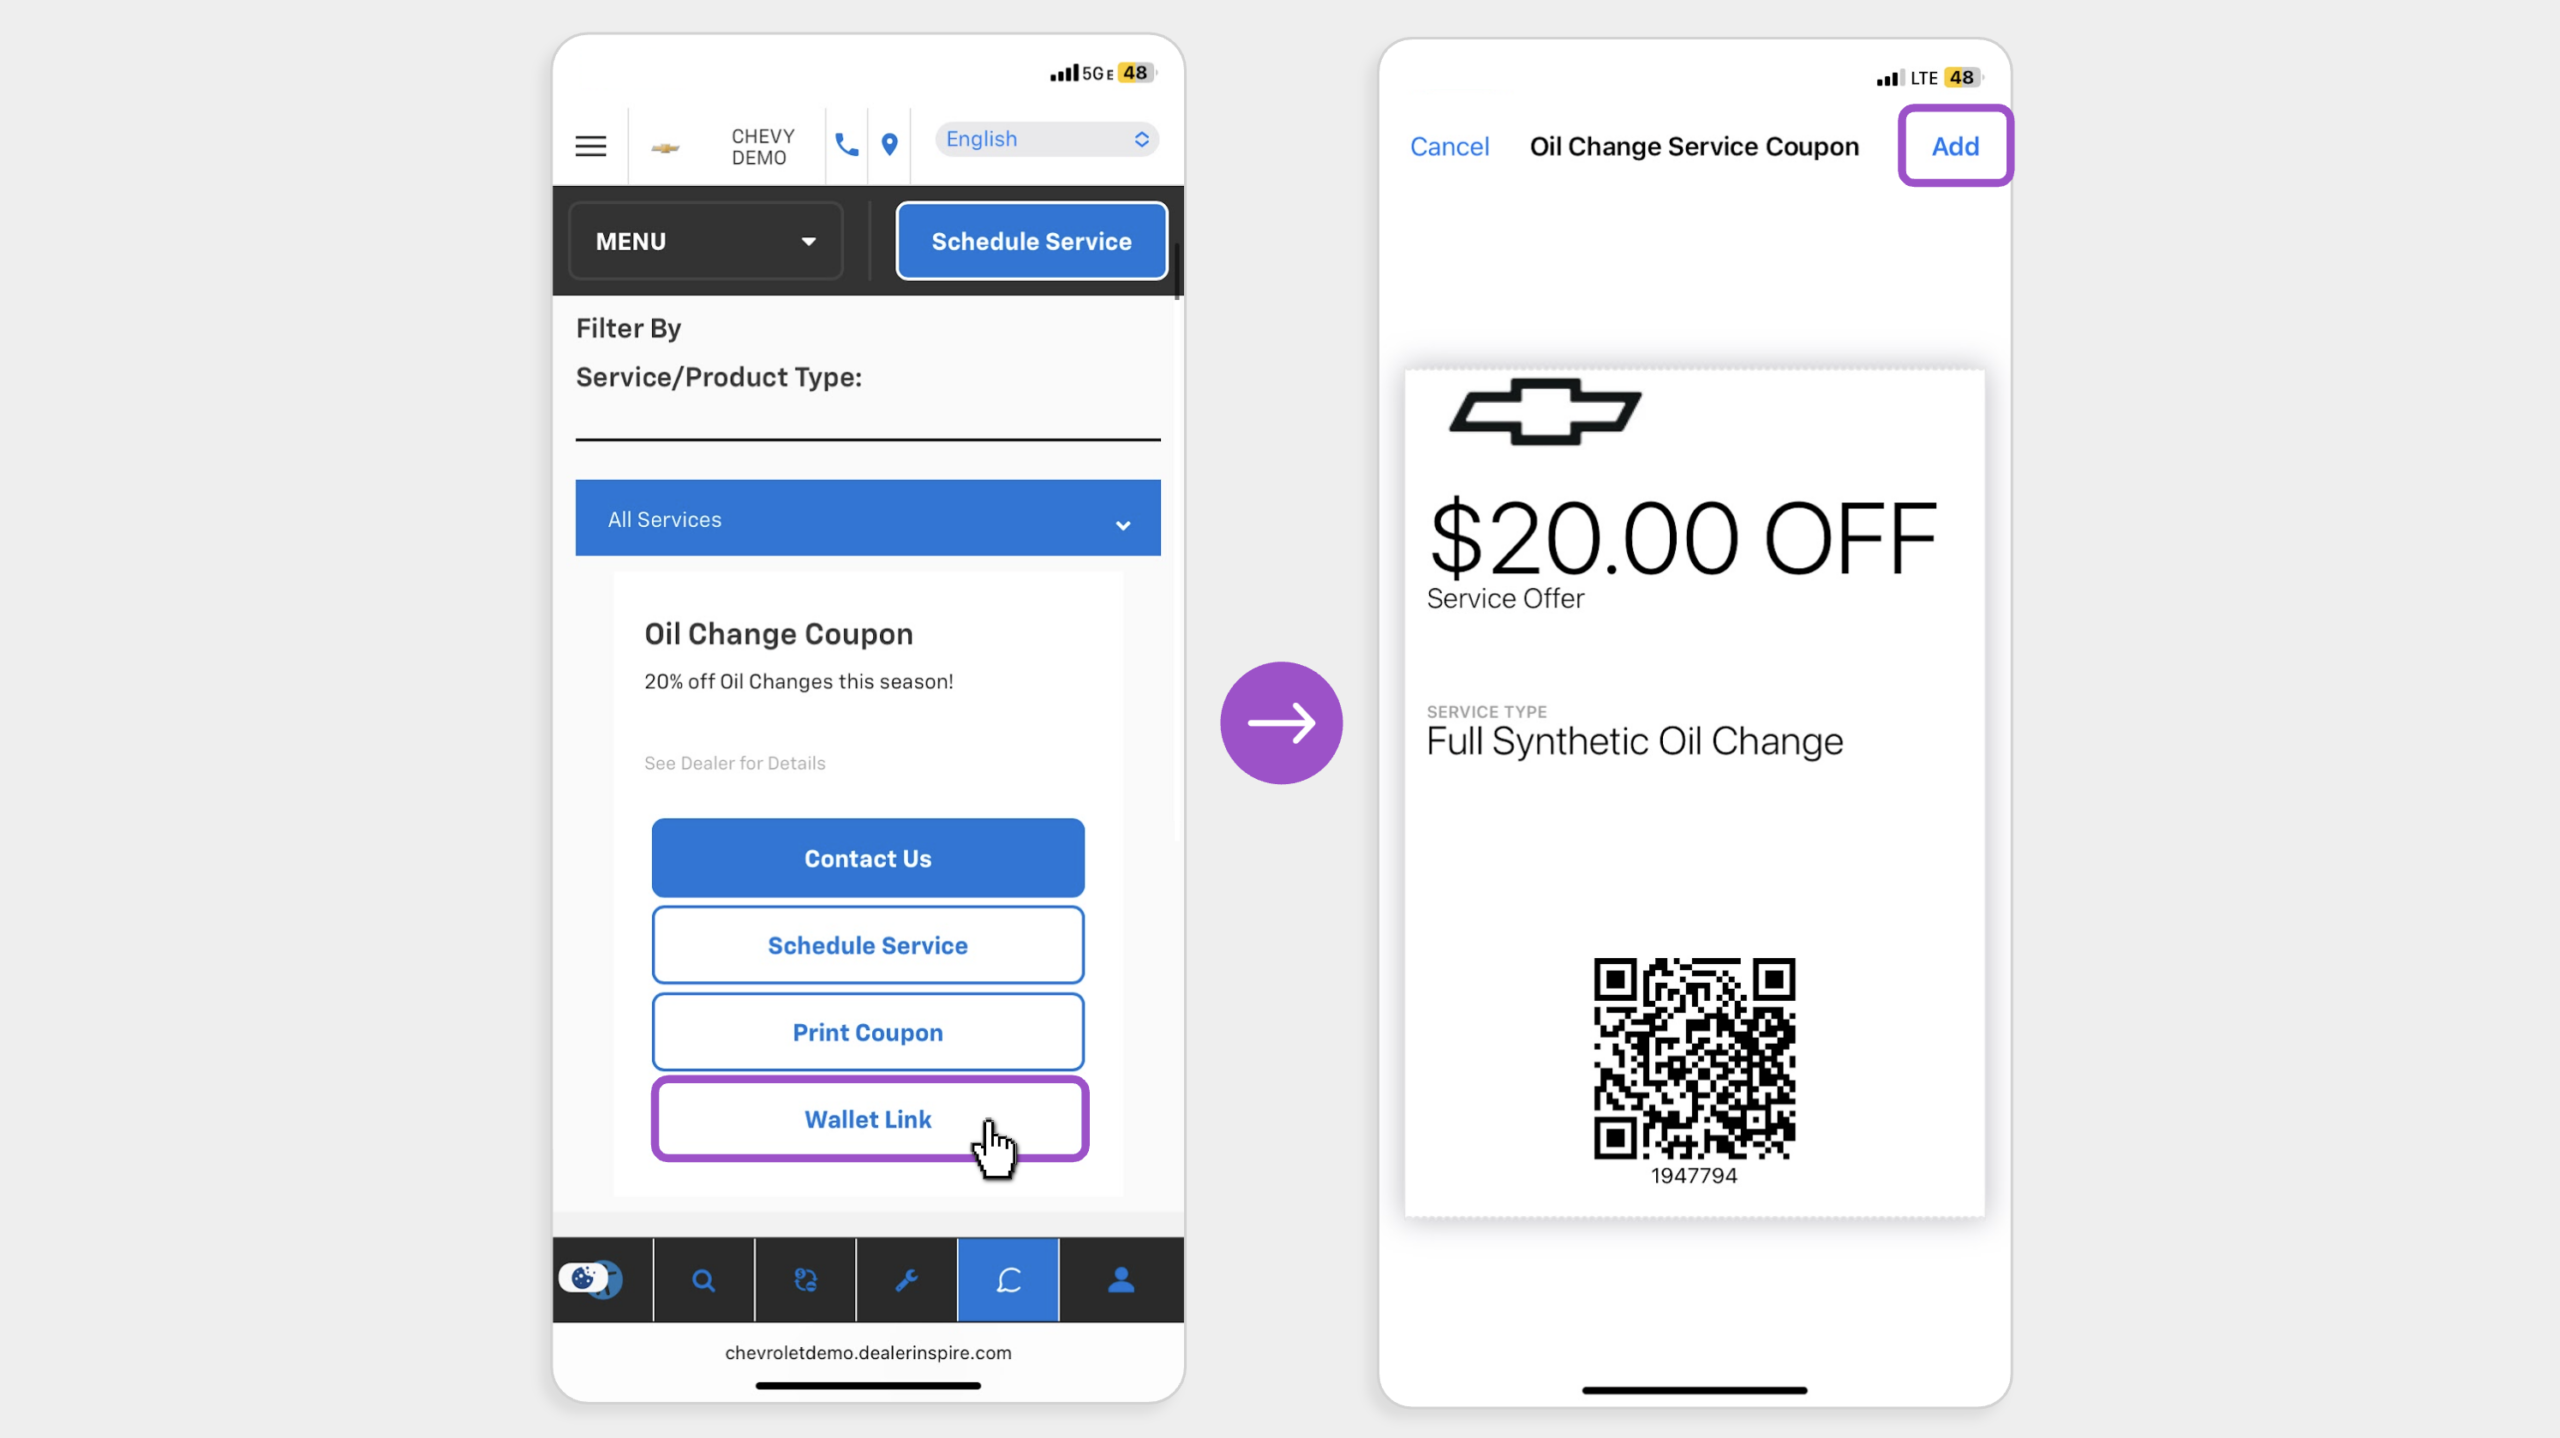
- Your Fixed Ops coupon will now display a Wallet download link on mobile devices.
When a shopper accesses the coupon on a supported device:
- They can view the QR code.
- Select Add to Wallet.
- Follow device prompts to save the pass to Apple Wallet or Google Wallet.
Once saved, the pass will remain accessible on their device until it expires or is manually removed.