How to set up ReviewBuilder
ReviewBuilder gives you precise control over how review requests reach your customers. Set rules to block specific transactions, direct customers to the right Google or Facebook page by make and transaction type, and adjust how requests are distributed across platforms.
In this article, you will learn how to navigate to ReviewBuilder, add suppression rules to block specific transaction review requests, add routing rules to direct requests to Google or Facebook pages, adjust your platform distribution settings, and customize your outreach settings.
To get started
Go to the Cars.com Hub. Click Cars.com, then click Reputation.
What you’ll need
- You must have Administrator access in Dealer Panel to access ReviewBuilder settings
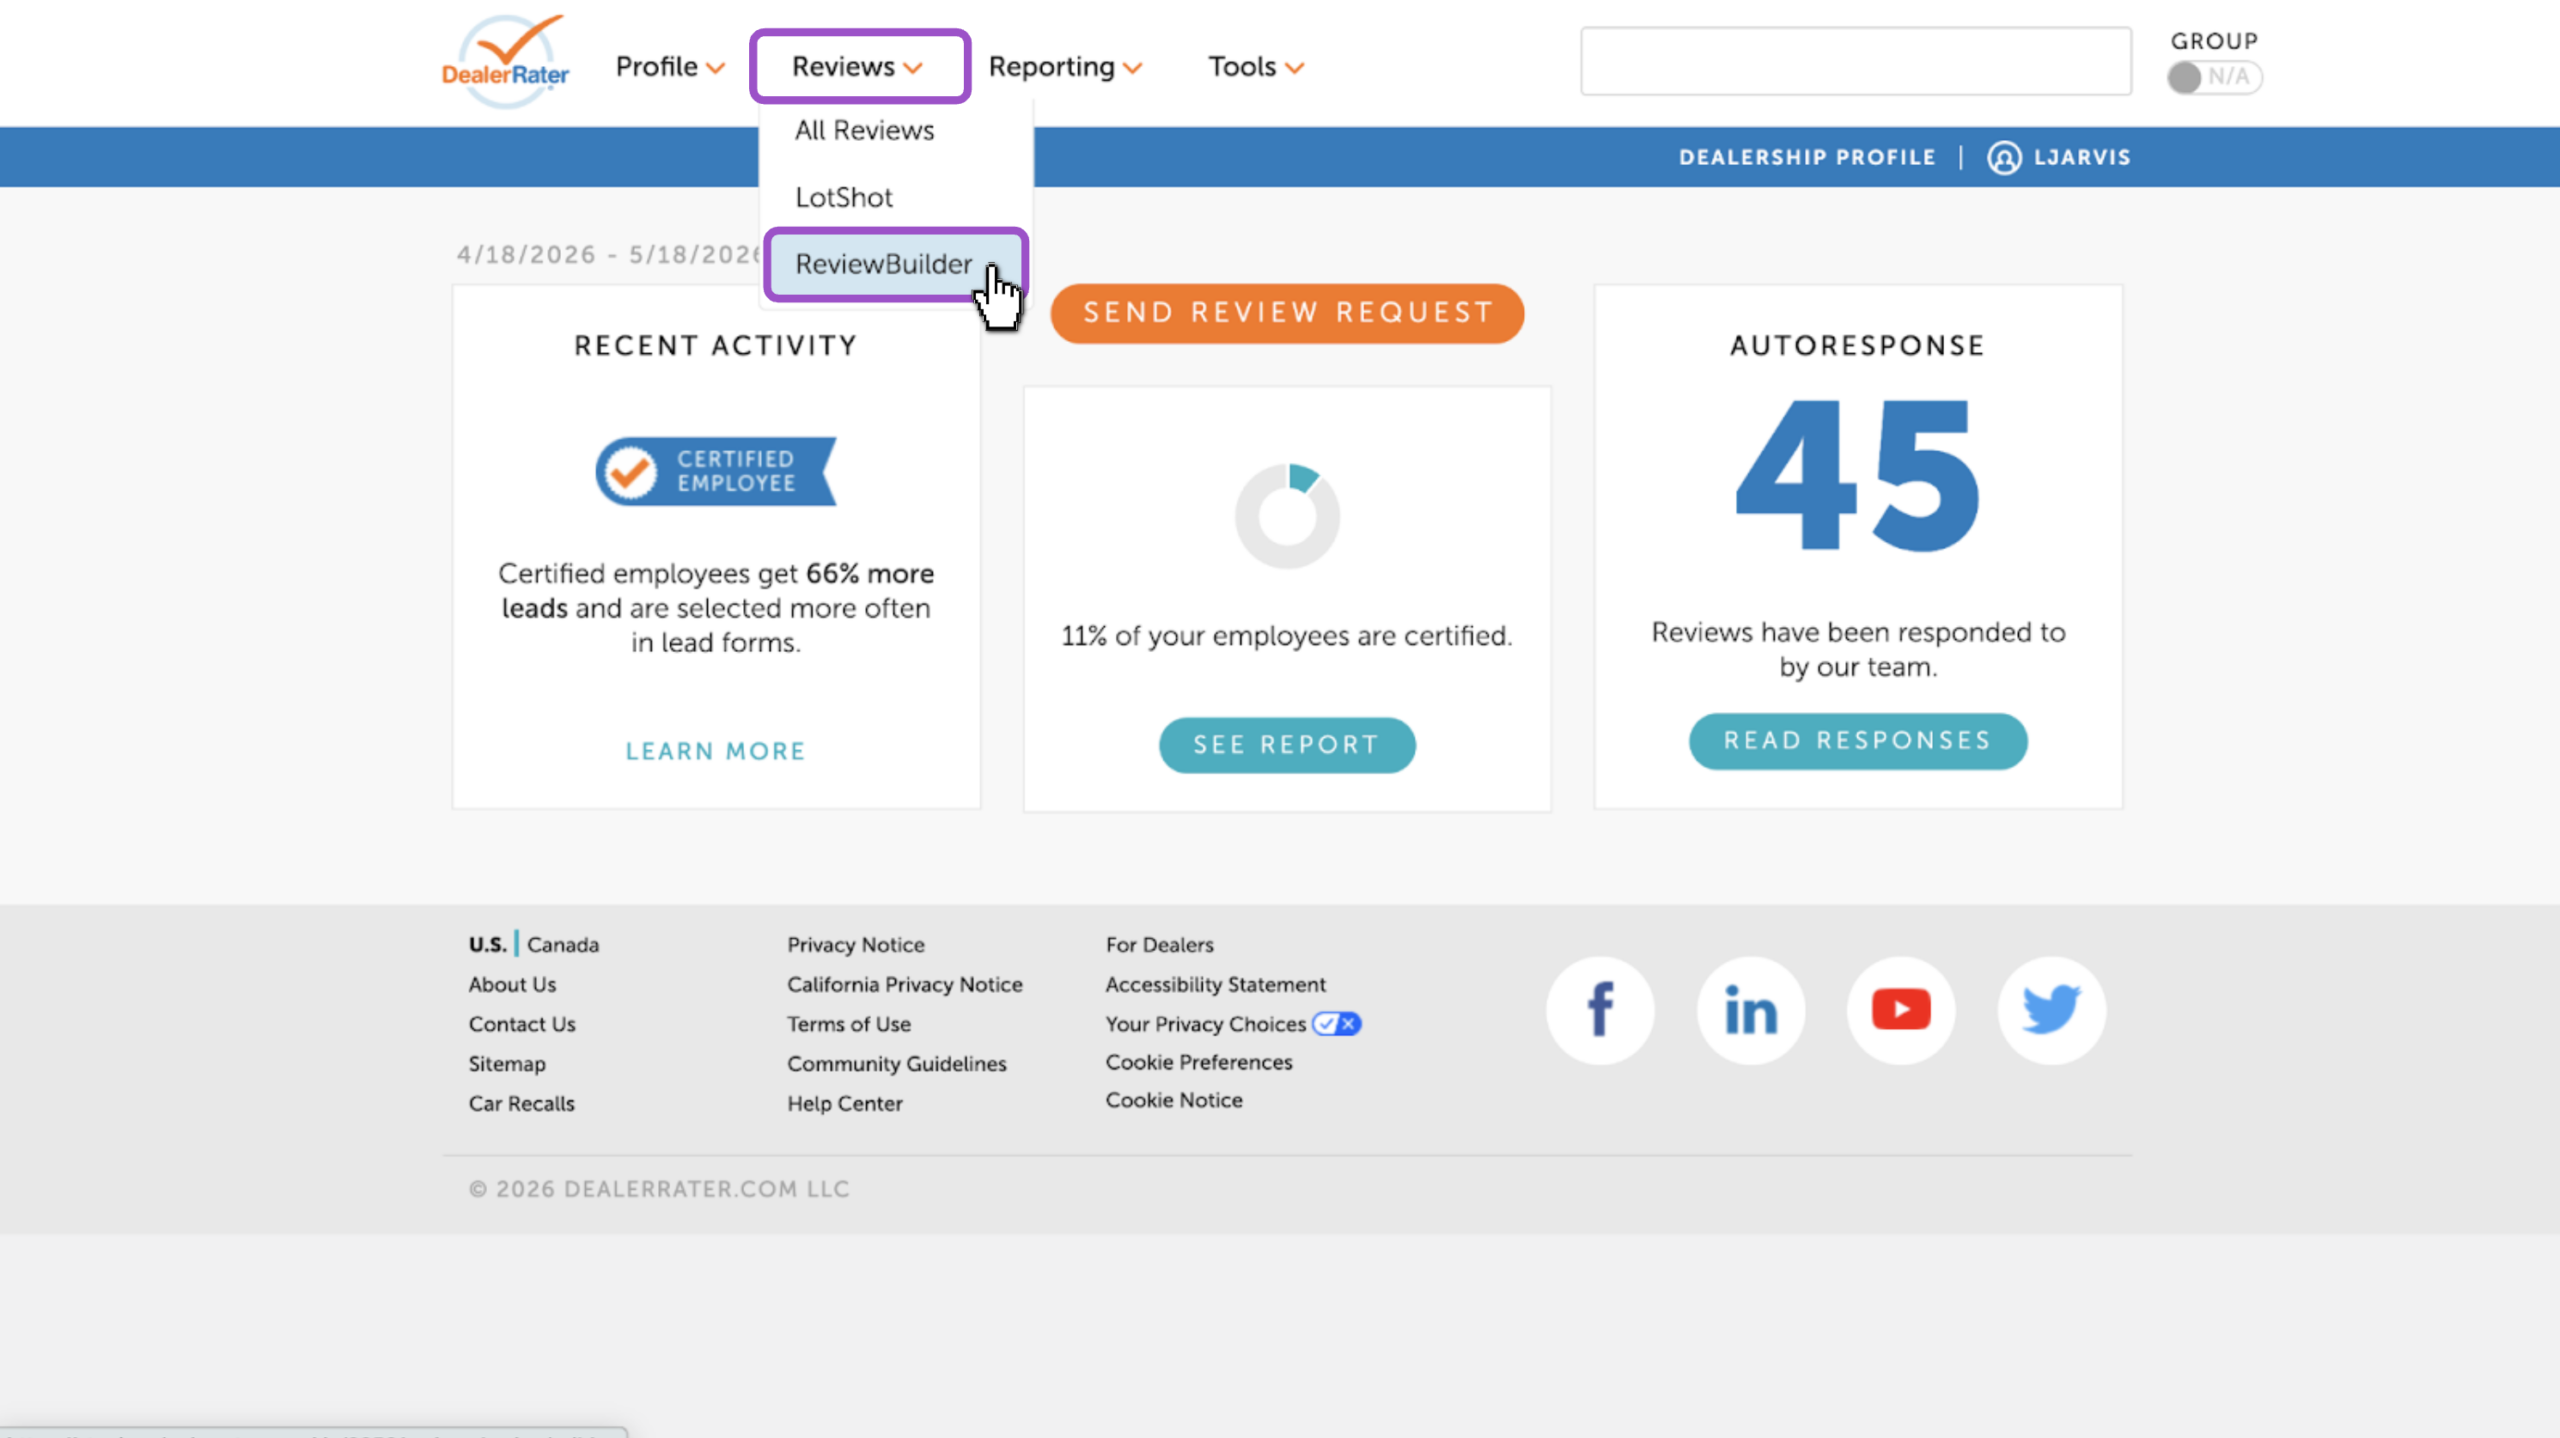
1Navigate to ReviewBuilder
- Hover over the Reviews tab
- Select ReviewBuilder
You’ll see Suppression Rules, Routing Rules, the Activity Dashboard, and Settings to set up.
2Add a suppression rule
Suppression rules block specific transactions from generating review requests. When a transaction is imported from your DMS, the system checks it against your active rules. If it matches, no review request is sent.
- Click + Add Rule in the Suppression Rules section
- Select a Make from the dropdown, or choose All
- Select a Transaction Type: Sales, Service, Used, or All
- Click Save
The rule takes effect immediately for all new transactions.

Note: Each Make + Transaction Type combination can only have one rule. Adding a duplicate will trigger an error. Using “All” for both Make and Transaction Type suppresses every incoming transaction — no review requests will be sent until you remove that rule.
To remove a suppression rule
- Click the X icon on the right side of the rule
The rule is deleted immediately. Future transactions will resume generating review requests.
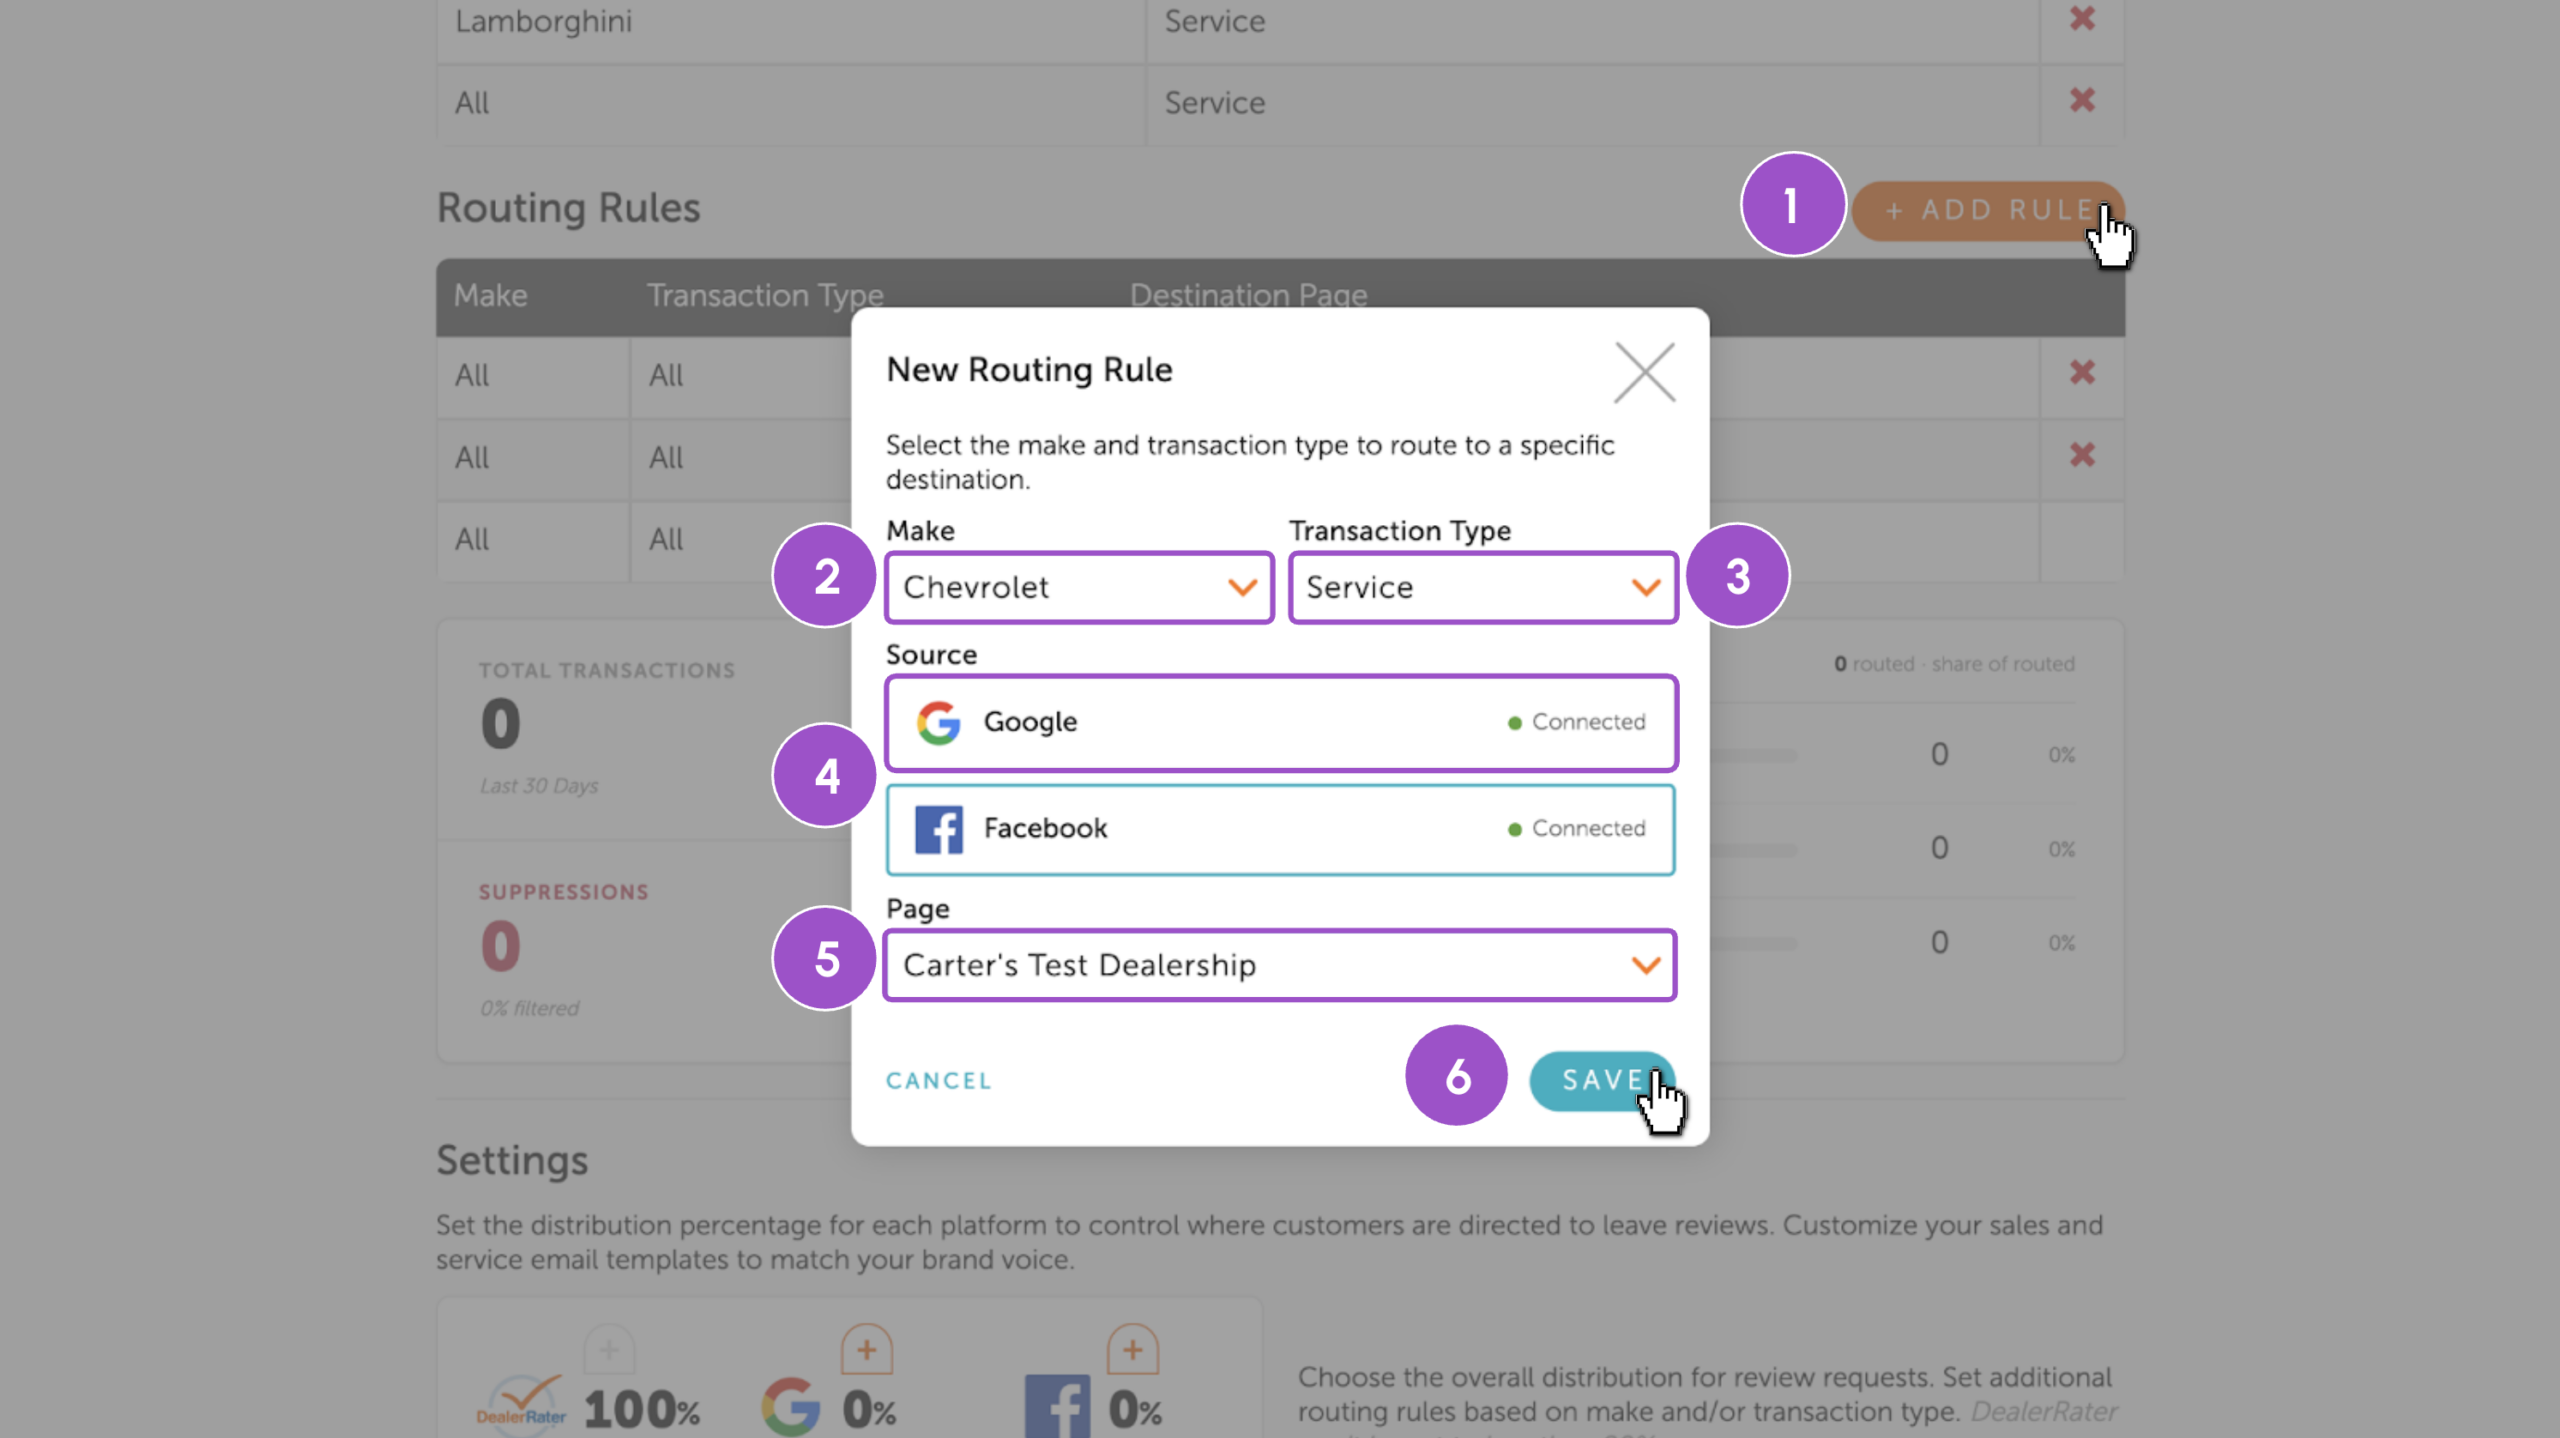
3Add a routing rule
Routing rules direct review requests to specific Google or Facebook pages based on vehicle make and transaction type. This is useful if your dealership has separate pages for different brands or departments. If no routing rule matches, requests will default to your DealerRater profile.
- Click + Add Rule in the Routing Rules section
- Select a Make from the dropdown, or choose All
- Select a Transaction Type: Sales, Service, Used, or All
- Select the Destination:
- Choose Google or Facebook
- Pick the specific connected page from the list
- Click Save
Note: in order to add a routing rule, your social pages must be connected. Learn how to connect your external review sources.
Note: Specific rules take priority over broader ones. For example, Ford + Sales takes priority over All + All.
To remove a routing rule
- Click the X on the rule
If no other rule matches that transaction, requests fall back to the next broadest rule or to DealerRater.
Activity Dashboard
See how ReviewBuilder performs with your current suppression and routing rules in place with this snapshot report.
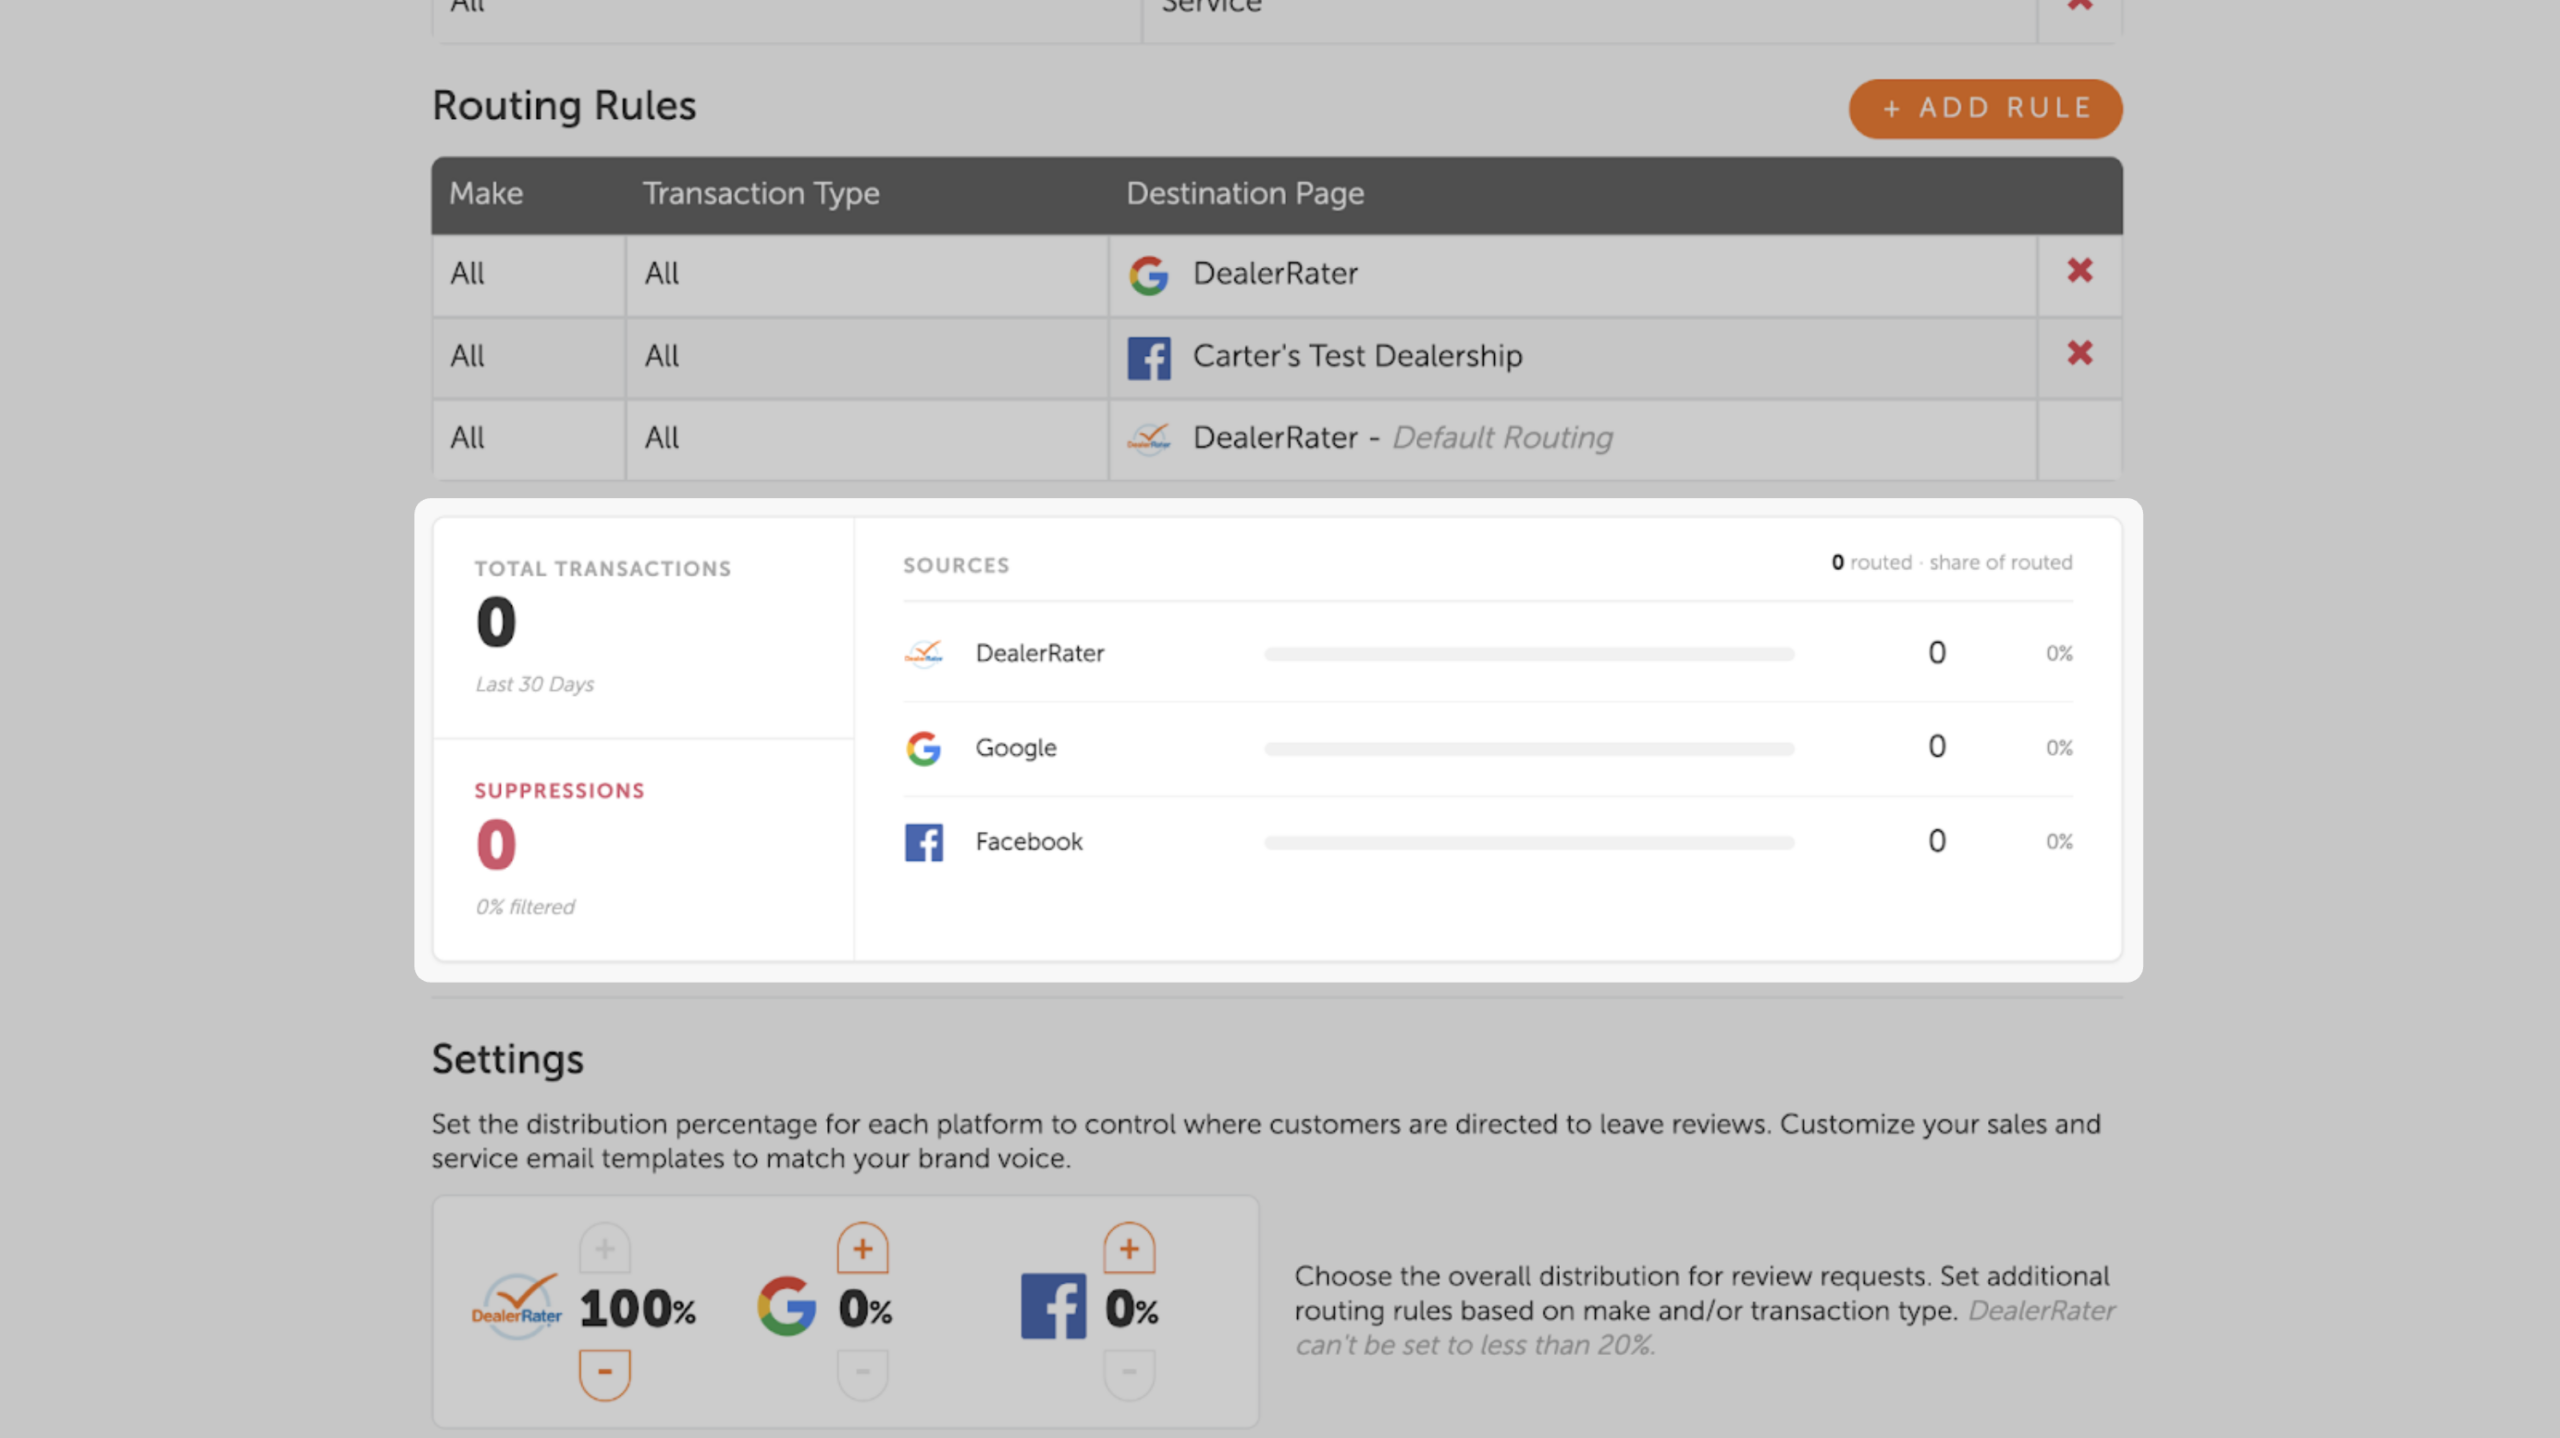
- Total Transactions: the number of transactions imported from your DMS in the last 30 days.
- Suppressions: how many of those transactions were blocked by your suppression rules.
- Sources: the number of non-suppressed transactions that were routed, broken down by platform: DealerRater, Google, and Facebook.
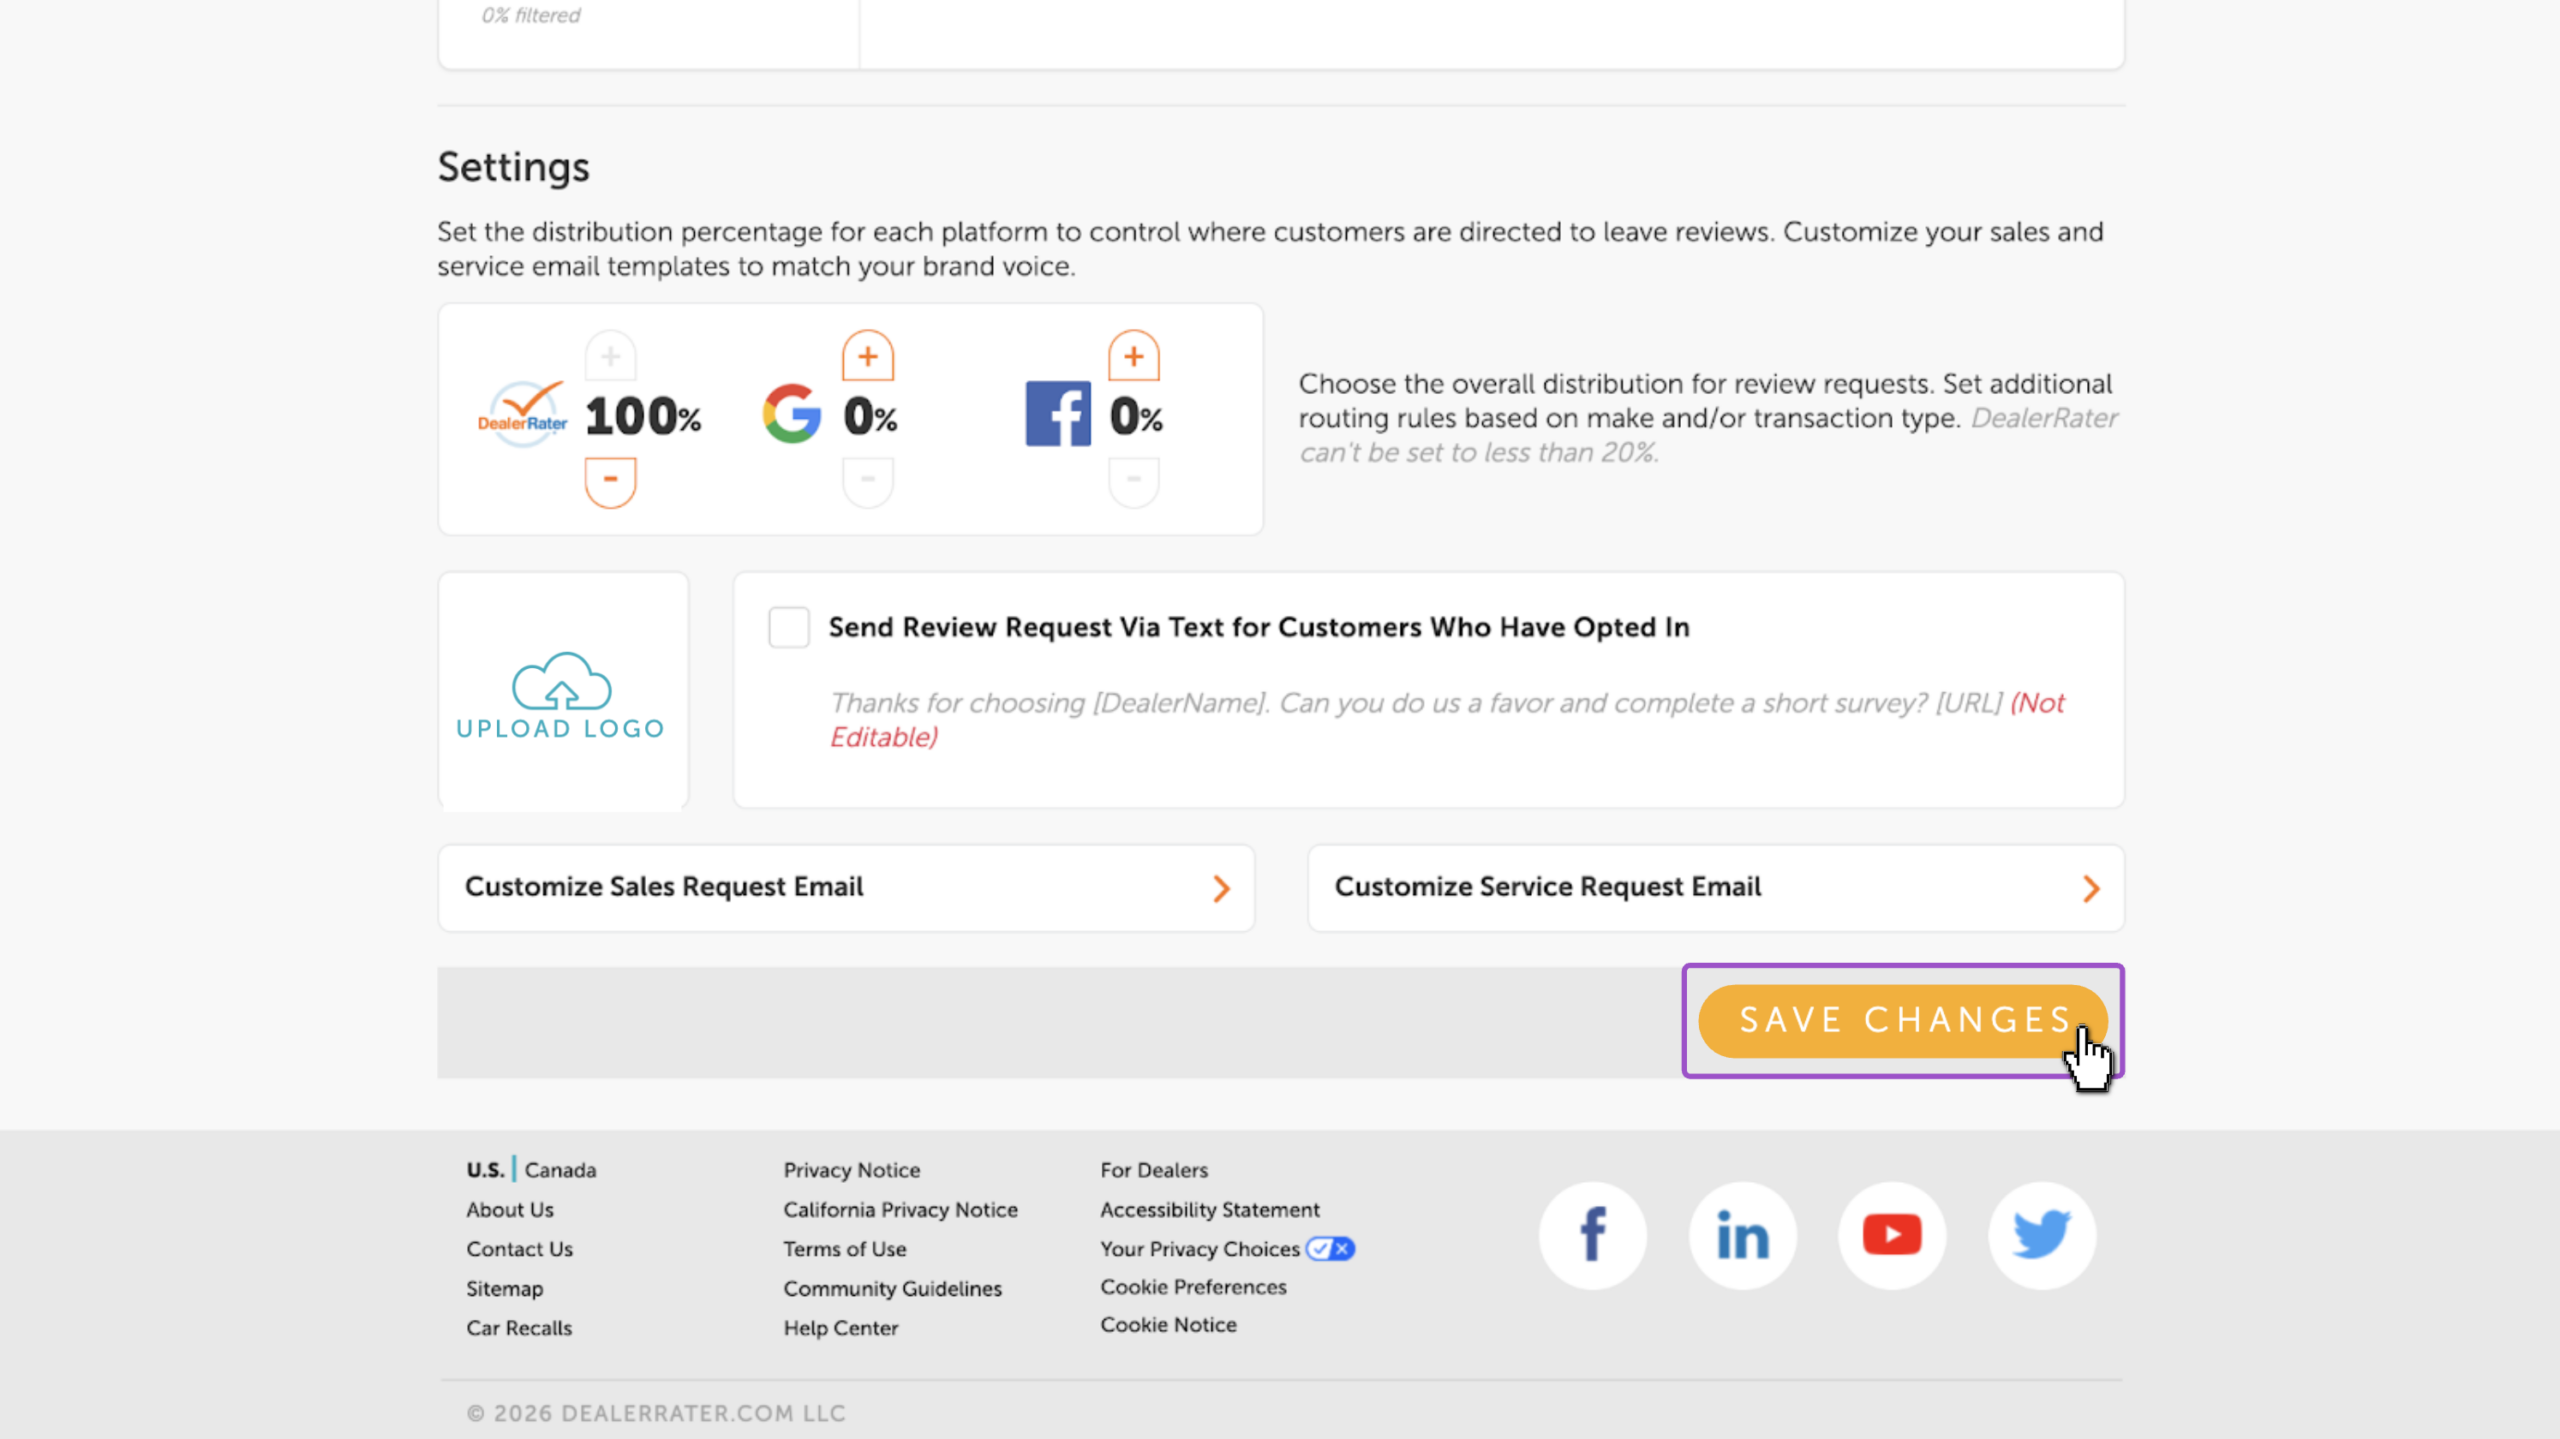
4Set your distribution settings
Distribution settings control what percentage of review requests are directed to each platform. The system applies a weighted random draw per transaction at send time — not in batches.
- Scroll to the Settings section
- Use the + and – buttons to adjust each platform in 10% increments
- Percentages must total 100%
- DealerRater has a minimum of 20%

Note: Changing your distribution does not affect requests already sent. The destination is locked at the time the invitation goes out.
5Customize your email templates and settings
Tailor your review request emails and enable additional outreach options.
- Upload your dealer logo to brand all outgoing review request emails
- Check the box next to Send Review Request Via Text for Customers Who Have Opted In to enable SMS-based review requests
- Customize your sales and service email templates
- Click into each to open the template editor
- Adjust the subject line, body text with tags, and timeframe

6Save your settings
- Click Save Changes to set and forget your ReviewBuilder settings.
Frequently asked questions
How often do I need to manage my ReviewBuilder settings?
Once you’ve set your suppression rules, routing rules, and distribution, ReviewBuilder handles the rest. You only need to revisit settings if your strategy changes — like adding a new make or connecting a new Google page.
What happens if I suppress everything?
If you create a rule with Make = All and Transaction Type = All, no review requests will be sent. Remove the rule to resume sending.
I don’t see Google or Facebook as routing options. What should I do?
Connect your Google Business Profile and Facebook pages through Review Sources first. Once connected, they’ll appear as destination options in the routing rules. Learn how to connect your external review sources.
Can I create a routing rule for DealerRater?
DealerRater is always the default destination and doesn’t need a routing rule. Any request that can’t be resolved to a Google or Facebook page automatically goes to your DealerRater profile.